 Notch
NotchUse your browser's Print (Ctrl/Cmd + P) and choose Save as PDF. This page works offline once you've opened it with a signal.
18 Drawer Apothecary Cabinet
Loads of storage and high on style, this 18 drawer apothecary cabinet can be used for craft or work spaces, home office, kitchen islands, living room .
- Difficulty
- Intermediate
- Time
- 5.8–11.3 hours
- Cost
- $$$$
Cut list
| Part | Qty | T × W × L | Material | ✓ |
|---|---|---|---|---|
| Back Piece | 1 | 3/4" × 38" × 93 3/4" | — | ☐ |
| Sides | 7 | 3/4" × 24" × 38" | — | ☐ |
| Cabinet top pieces | 3 | 3/4" × 8" × 96" | — | ☐ |
| Front long pieces | 4 | 3/4" × 1" × 96" | — | ☐ |
| Front short pieces | 21 | 3/4" × 3/4" × 10 3/4" | — | ☐ |
| Drawer front pieces | 18 | 3/4" × 11 1/4" × 15 1/4" | — | ☐ |
| Drawer sides | 36 | 3/8" × 9" × 22" | — | ☐ |
| Drawer back piece | 18 | 3/8" × 9" × 13" | — | ☐ |
| Drawer bottom pieces | 18 | 3/8" × 13 1/2" × 21 3/4" | — | ☐ |
| Corner Pieces | 4 | 3/4" × 4" × 4" | — | ☐ |
| Top Brackets | 3 | 3/4" × 4" × 14 3/4" | — | ☐ |
Materials
| Item | Qty | ✓ |
|---|---|---|
| Plywood, 3/4" Thick Full Sheet | 3 board | ☐ |
| Board, 1x12 96" | 3 board | ☐ |
| Plywood, 3/8" thick Full Sheet | 4 board | ☐ |
| Board, 1x8 96" | 2 board | ☐ |
| Board, 1x10 96" | 3 board | ☐ |
| Round wooden legs 4" long | 4 each | ☐ |
| T-nut 3/8" | 4 each | ☐ |
| 1" Kreg Jig screws | 130 each | ☐ |
| Bottle of wood glue | 1 each | ☐ |
| Box of 1" brad nails for nail gun | 1 each | ☐ |
| Drawer slides 22" long | 18 each | ☐ |
| Drawer handles | 18 each | ☐ |
| 1" wood screws | 12 each | ☐ |
Overall cost: $$$$. Lumber varies by region, species, and season, so we give a band rather than a figure.
Tools
- Brad Nailer
- Circular Saw
- Drill / Driver
- Impact Driver
- Miter Saw
- Pocket Hole Jig
- Random Orbit Sander
- Router
- Table Saw
- Bar / Pipe Clamps — optional
- Combination Square — optional
- Tape Measure — optional
Instructions
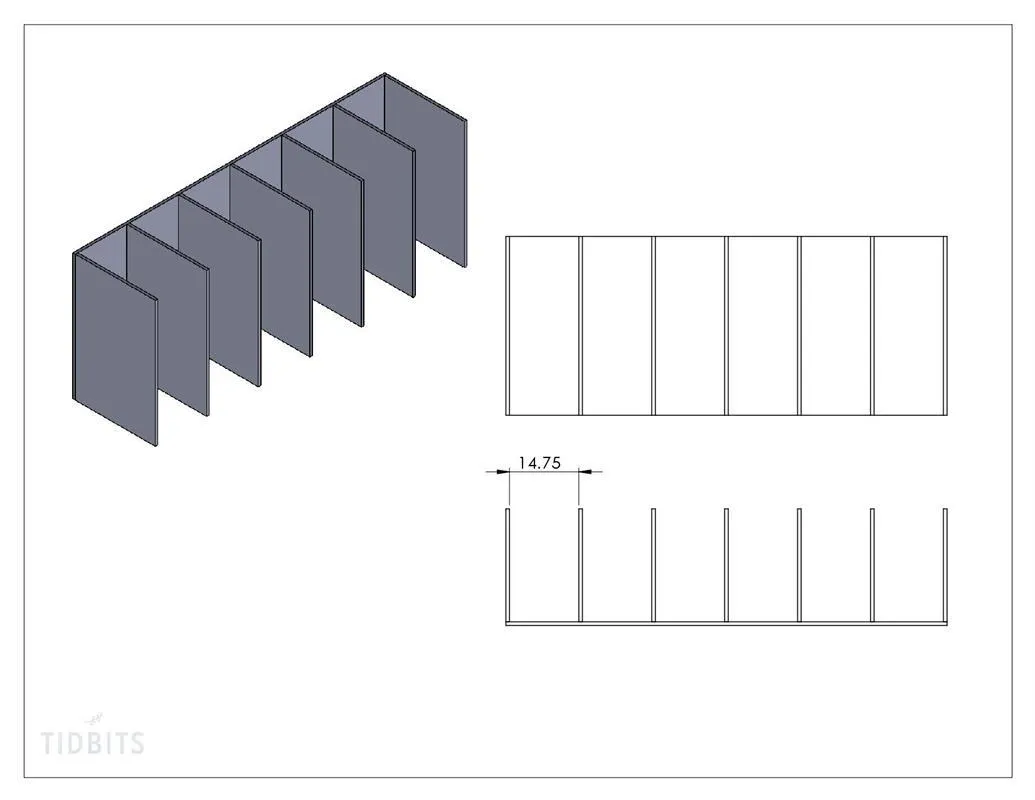
1. Attaching back to sides
Attach the seven sides to the back piece using glue and nails. Each piece should have 14 3/4" space between them.
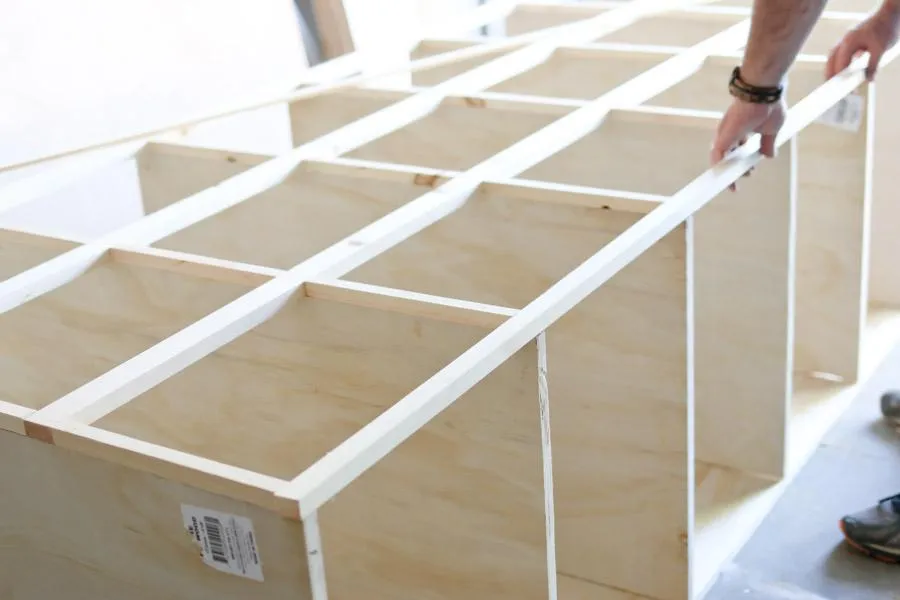
2. Attach front pieces
- Starting at the top or bottom and with one of the long front piece, glue and nail it to the front of the cabinet. Be sure to keep 14 3/4" spacing between the sides. The piece should be flush on both ends and on the top or bottom depending on where you started. I found it easier to lay the cabinet on its back to do this step.
- Then attach the short front pieces perpendicular to the long piece along the front of the sides.
- Repeat until the front is complete.
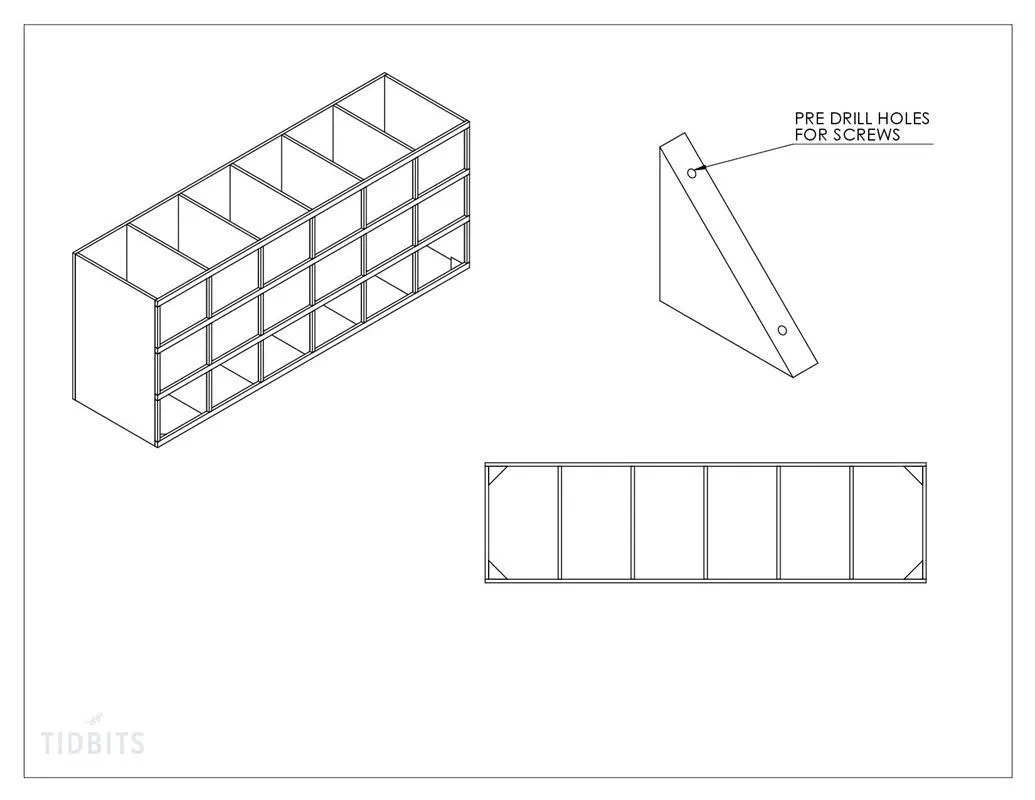
3. Attach corner pieces
On the bottom of the cabinet glue and screw the corner pieces to each of the 4 corners. These will be for the feet and added stability for the cabinet. It is best to pre drill the holes so you don't split the corner pieces when installing.
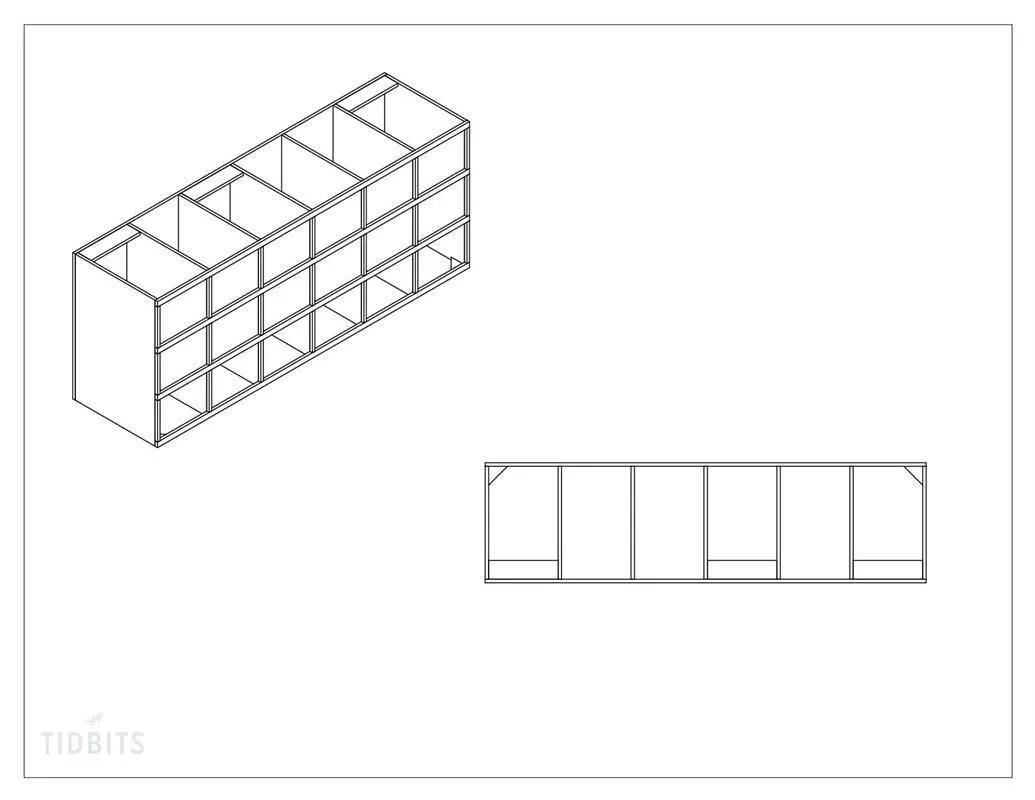
4. Install top brackets
In order to have somewhere to securely attach the top pieces, you will need to install the top brackets flush with the top, on the two ends and somewhere in the middle between the side pieces.
5. Build top
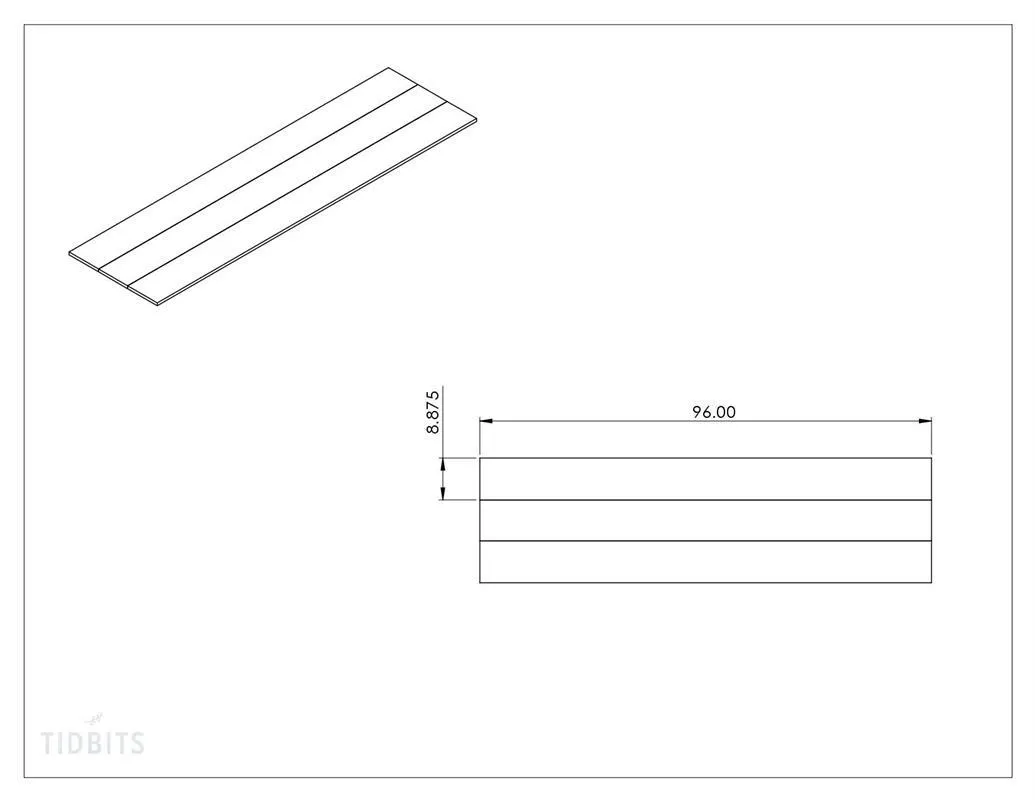
Take the three top pieces that have been edged and trimmed down to 8 7/8" x 96" and glue them together lengthwise. Use wood clamps to press them together and let sit for at least 4 hours or until set per glue instructions.
6. Install top
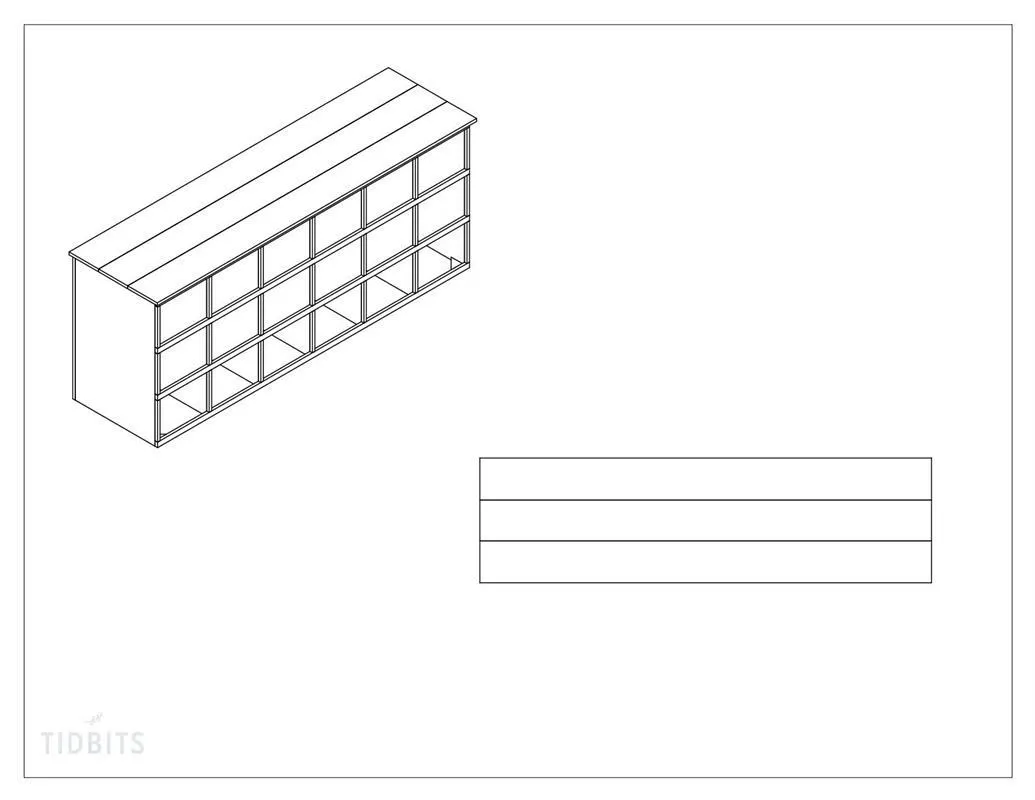
Take the cabinet top you built in step one and align it on the top of the cabinet with the back flush and 1 1/8" overhang on front and sides. Use glue and screws to secure the top in place. This is where the top brackets will come in handy, use them to secure the top in the back. Pre drill holes along the front piece and secure the top with screws along the front as well.
7. Cut out and notch drawer pieces
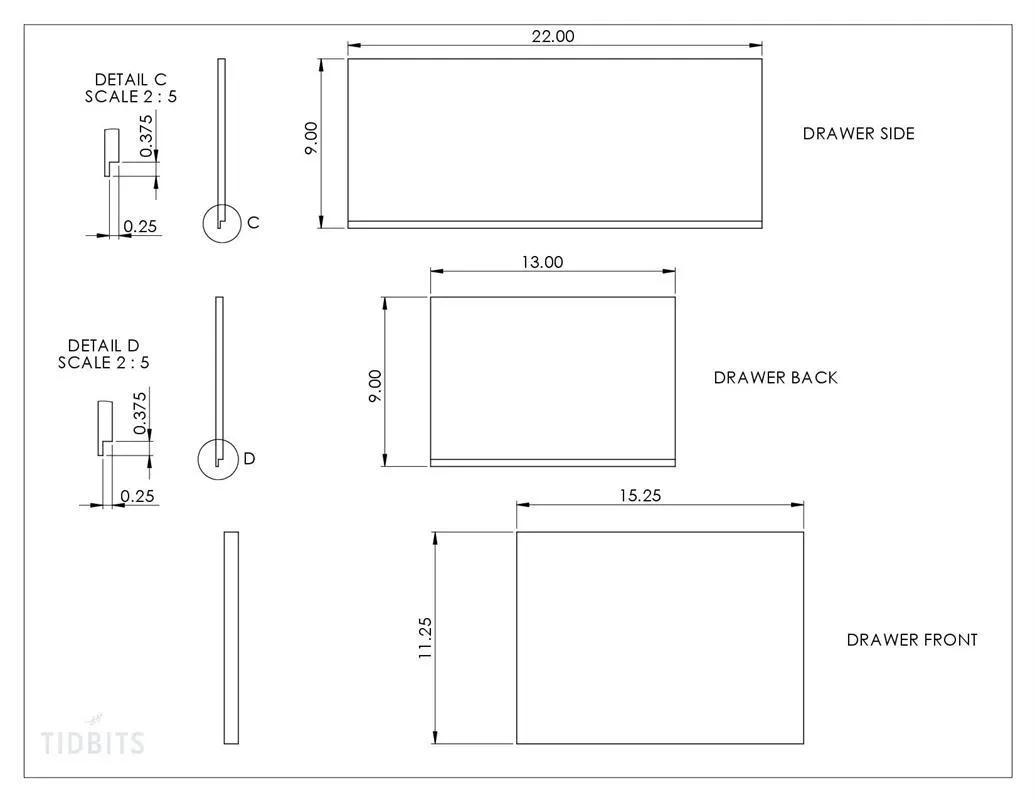
- Cut the drawer front 15 1/4" long and 11 1/4" tall.
- Cut the side pieces 9" tall and 22" long, you will need two.
- Cut the back piece 9" tall and 13" long.
- Take the two sides and the back piece and cut a notch 3/8" tall and 1/4" wide along one of the long sides of the pieces.
8. Pocket jig the back drawer piece
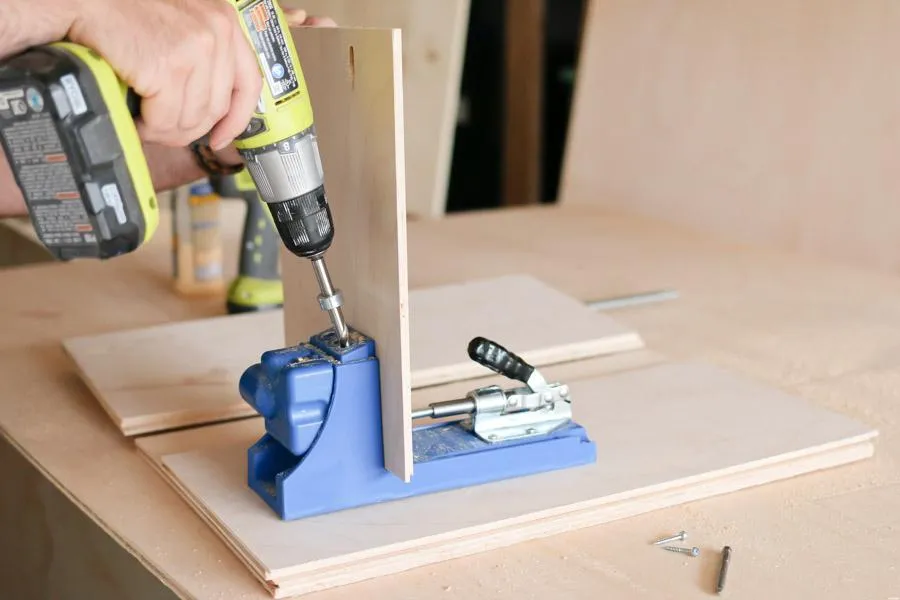
Using the Kreg Pocket Jig, drill two pocket holes in each end of the back piece opposite the side with the notch. These will be used to attach the two side pieces to the back and will be hidden on the back side of the drawer.
9. Pocket jig the bottom drawer piece
Use the Kreg Pocket jig to drill a hole in the bottom piece on one of the ends. This will be used to attach the front piece to the bottom piece and be hidden under the drawer.
10. Pocket jig the side pieces
Use the Kreg Pocket Jig to drill two holes on the end of each side piece on the same side as the notch. Be sure they are on opposite sides of each other in pairs so that when assembled they are inside the drawer and attach the front piece to the sides.
11. Assemble the drawers
- Lay the bottom piece with the pocket hole on the end away from you and under the board. Put the two sides and back with the bottom piece in the notch and screw the back piece to the sides. Be sure to use glue on all joints.
- Also be sure the pocket holes on the side pieces are facing in and on the opposite end as the back piece.
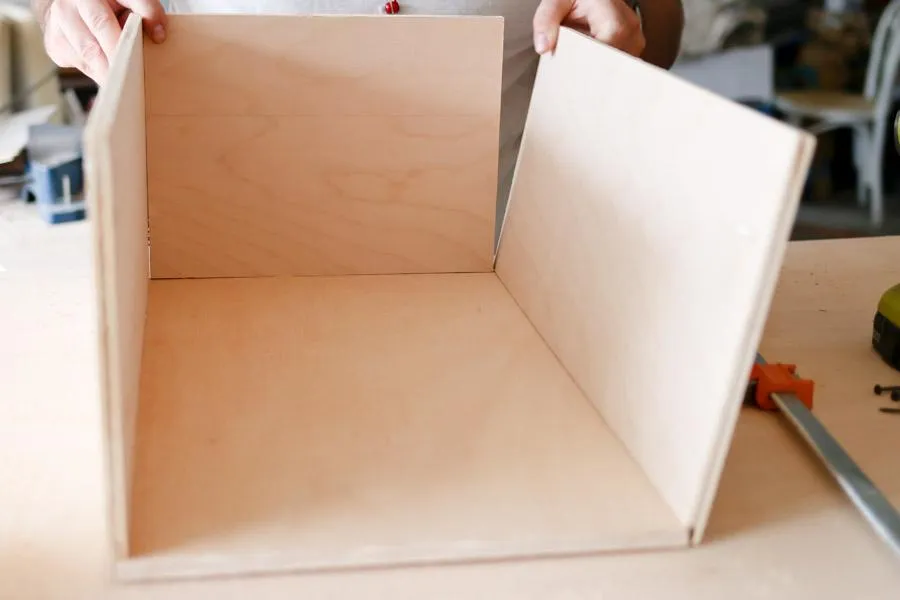
12. Assemble the drawer - bottom
Flip the drawer over and nail the bottom to the side and back pieces. Be sure the overall width of the drawer is 13 3/4" during assembly.
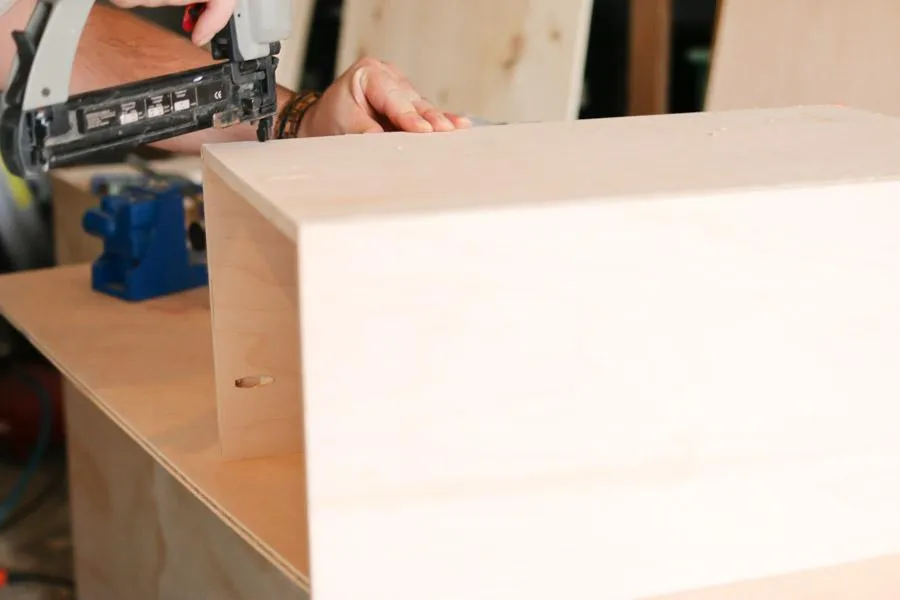
13. Assemble the drawer - Front Piece
The front piece can be tricky as it really depends on your choice of drawer slides. Read the instructions carefully to decide how to line up the top to the bottom. The sides will not change but depending on the slides and how much space they need, you may have to adjust the front down. For example, if the slides you choose require a 1/4" space then you will have an overhang 1/4" greater on the bottom side of the drawer. Use glue and screws to attach the front. Repeat the drawer assembly steps 17 times for a total of 18 drawers!
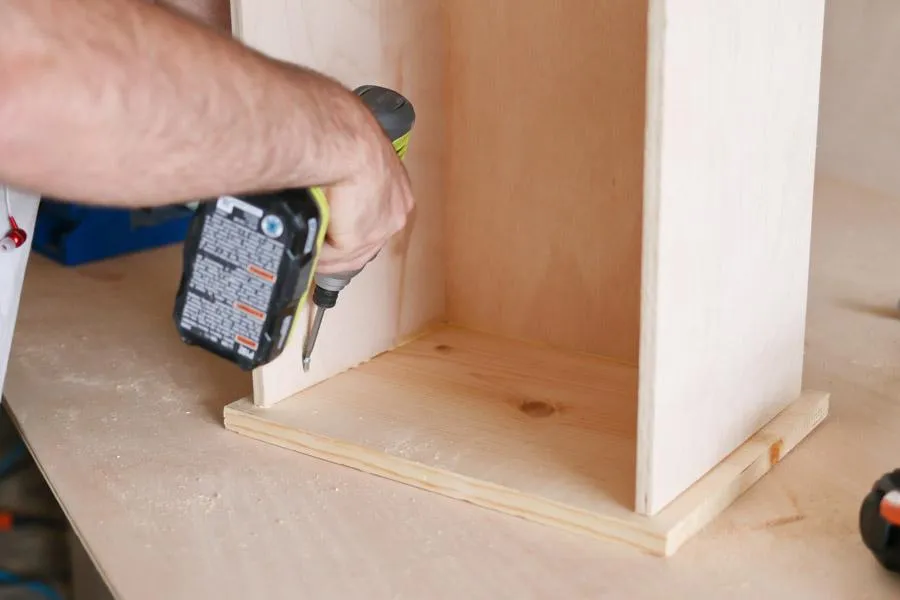
14. Install the legs
Use T-nuts to install the legs in the four corner pieces on the bottom of the dresser. I put the leg in the inside corner of the dresser above the corner piece and marked my hole to drill that way. I had to countersink the t-nuts a little bit to get the leg bolts to reach the nut.
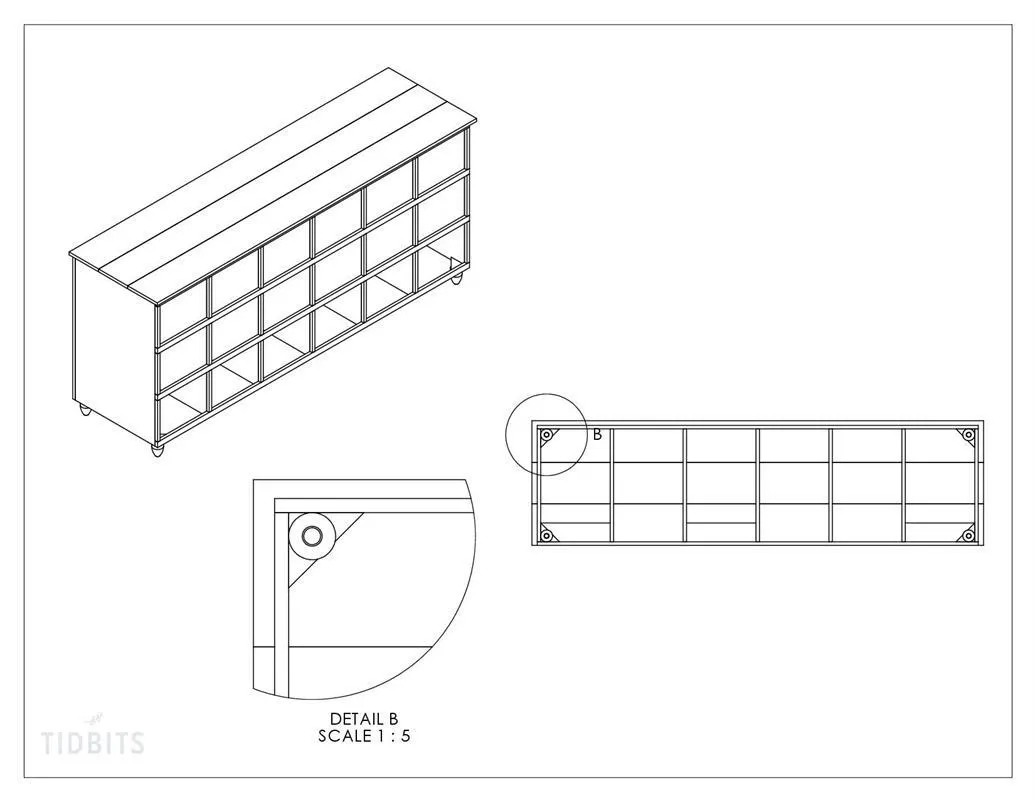
15. Install Drawer slides and hardware
Using the Kreg Drawer Slide Jig and cabinet hardware jig, install the 18 drawer slides and hardware per manufacturer instructions.