Notch
NotchWorkshop Table Saw Storage Cabinet
Step-by-step build — 16 steps. Also available as a print sheet.
1Introduction
Please be sure to read through complete instructions before you begin any work on this project. Keep in mind that plywood may be slightly thinner than its stated thickness. 3/4" plywood may actually be 23/32". So some minor adjustments to plans may be required. A good practice is, after the original carcass is assembled, cut all additional pieces to fit. While every effort was made to make the cut dimensions listed as accurate as possible, cutting to fit will adjust for any slight discrepancies in your assembly. These plans use plywood for all parts except the drawer glides. If you want to make it fancier you can use edge banding...but you will have to make some size adjustments. As I had poplar on hand I used it for drawer fronts.
2Cut Plywood Carcass
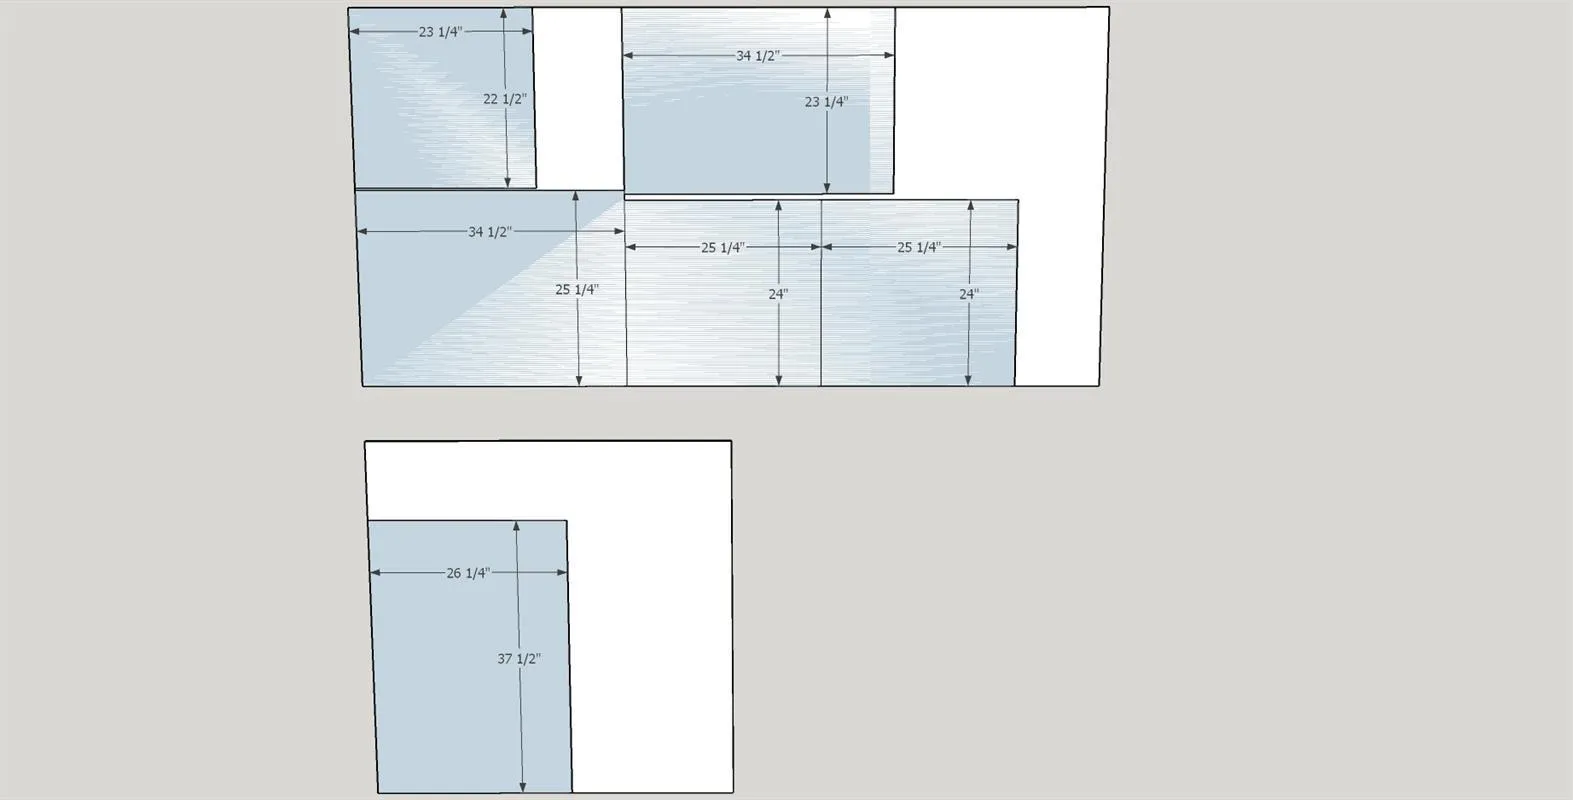
Cut the back, bottom, top, sides and middle divider as shown.
3Add pocket holes to bottom
Use Kreg pocket hole jig (set to 3/4" for all pockets on this project) to drill pocket holes in both ends and the back edge of the 3/4" plywood bottom cut in step two. It is a good idea to mark where you are putting the holes to prevent mistakes.
4Add pocket holes to sides
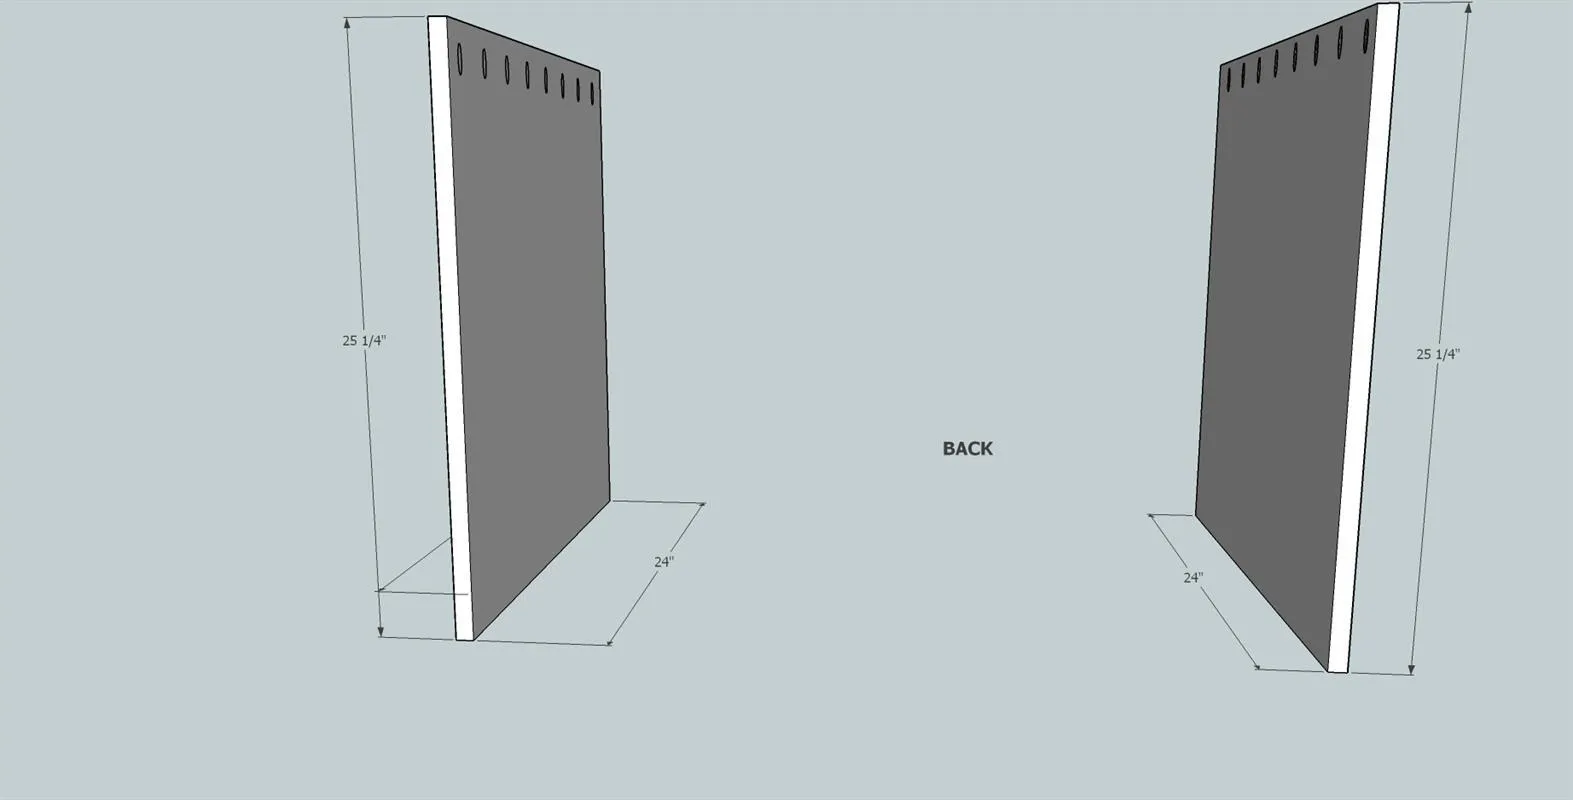
Using Kreg pocket hole jig , drill pocket holes in the tops of both of the 3/4" plywood sides cut in step two. It is a good idea to mark where you are putting the holes to prevent mistakes.
5Add pocket holes to back
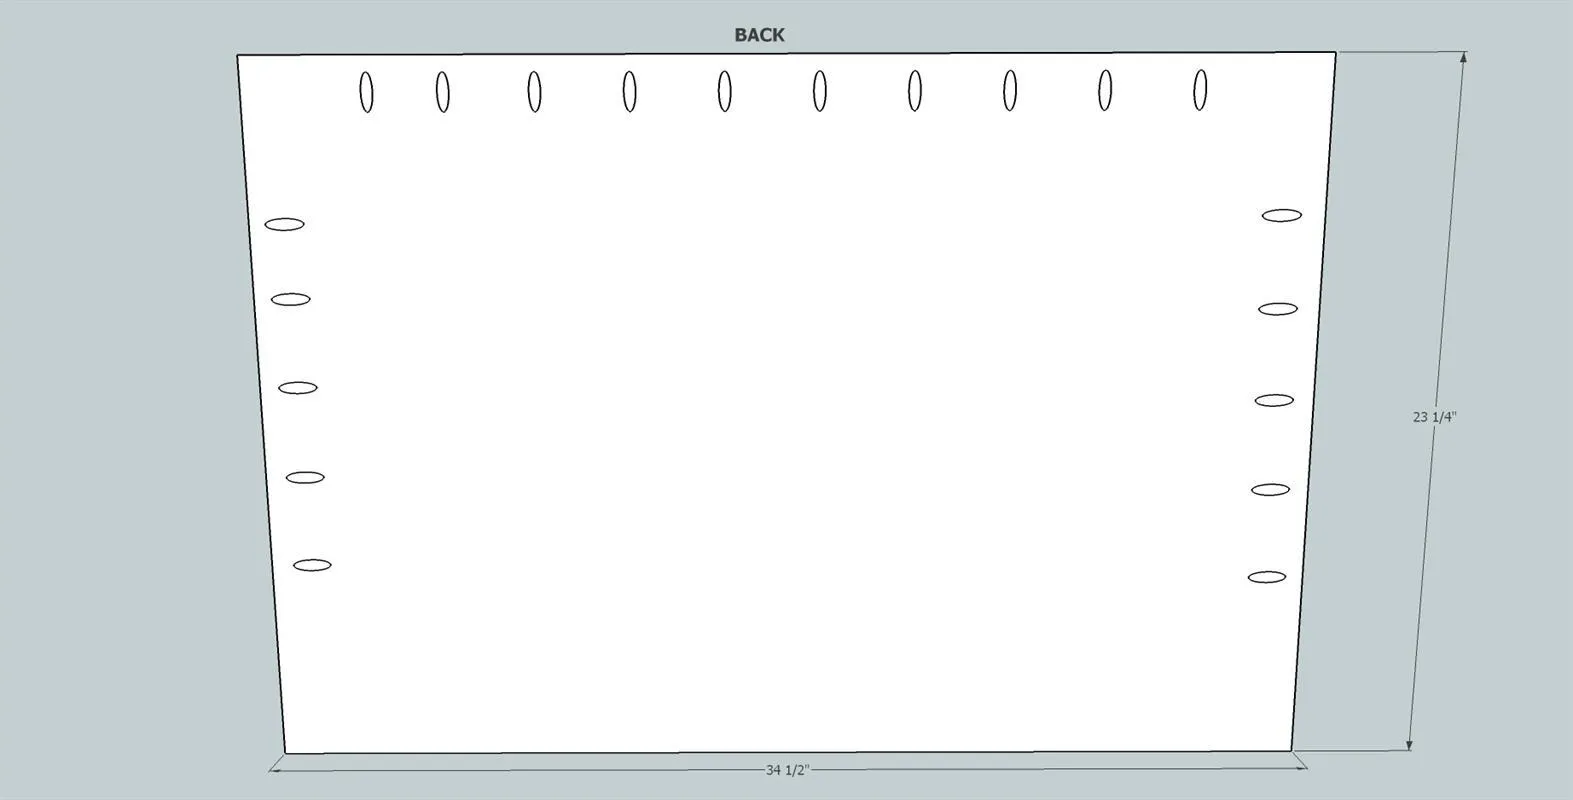
Using Kreg pocket hole jig , drill pocket holes in the top and both sides of the 3/4" plywood back cut in step two. It is a good idea to mark where you are putting the holes to prevent mistakes.
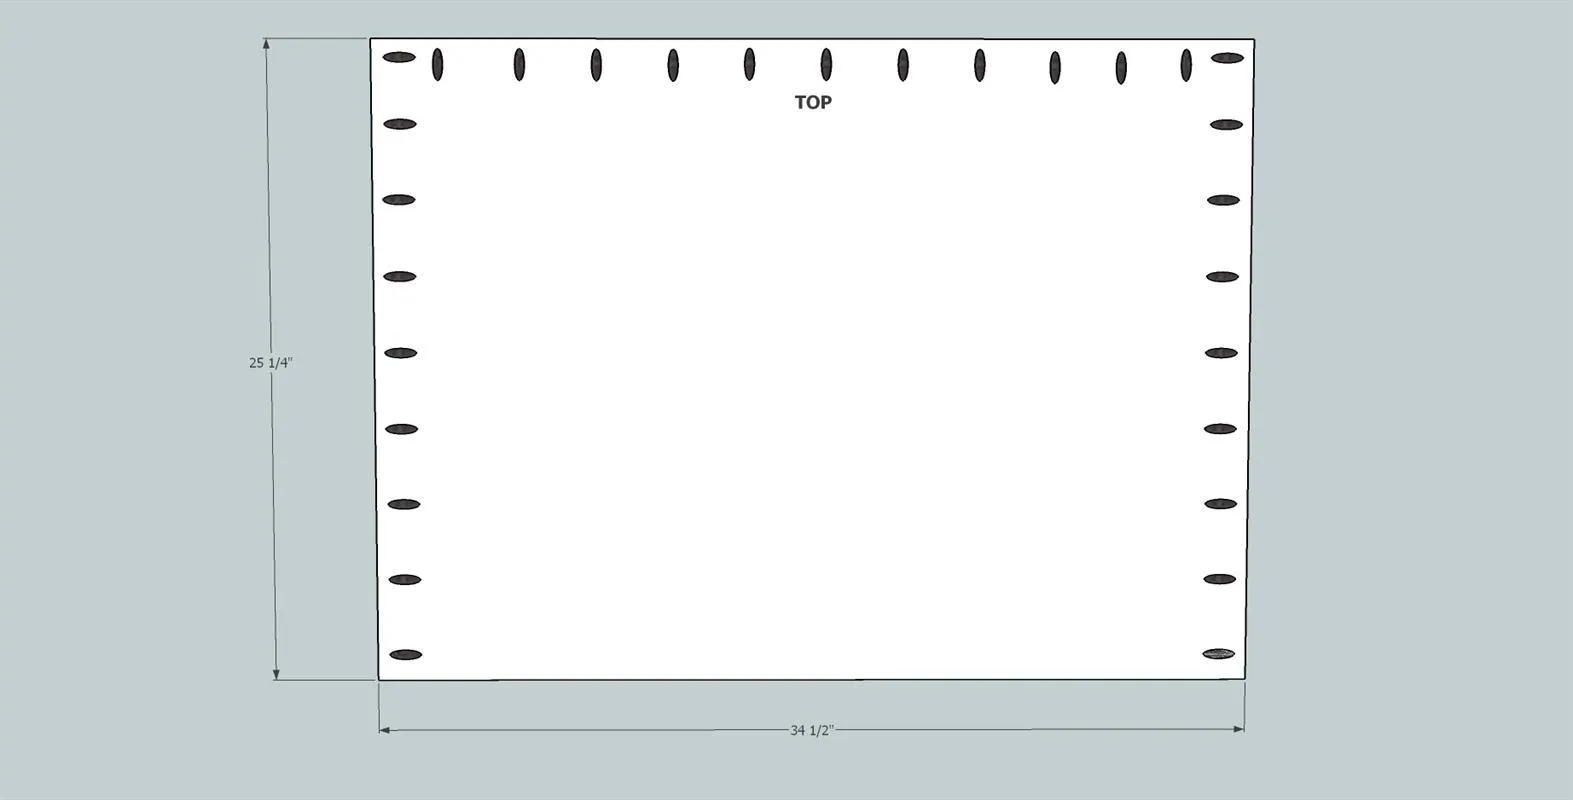
6Add pocket holes to center divider
Using Kreg pocket hole jig , drill pocket holes in the top, bottom and back side of the 3/4" plywood center divider cut in step two. It is a good idea to mark where you are putting the holes to prevent mistakes.
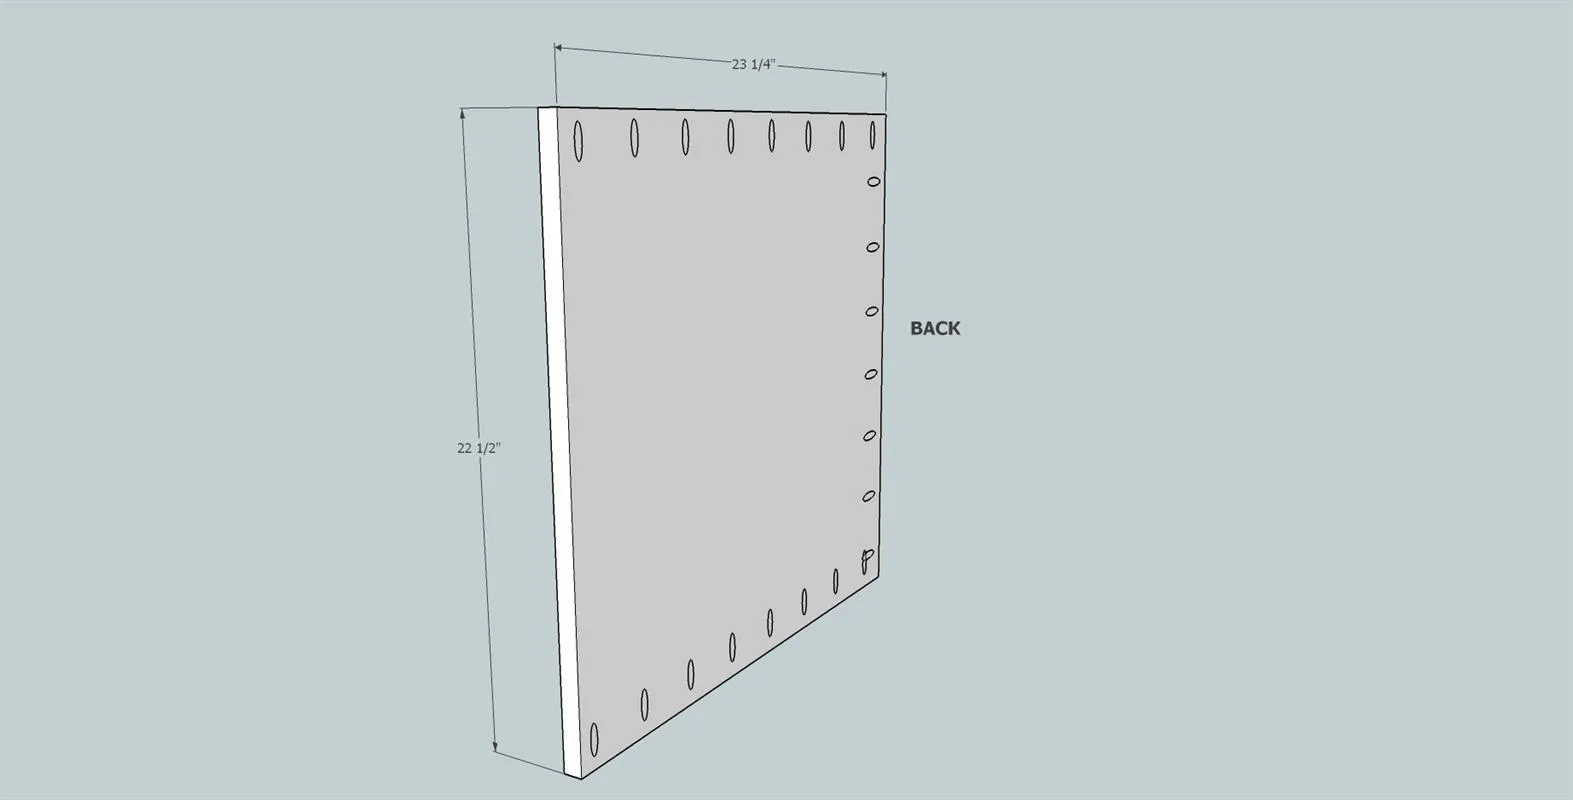
7Assemble the carcass
Sand all of the pieces that you have prepared so far. I normally use 100 grit to begin with and finish up with 150 grit. It is much easier to complete this phase of sanding before you begin assembly. I will use 220 grit for a final hand sanding after assembly is complete. Using Kreg 1 1/4" coarse pocket screws and Titebond I wood glue assemble the carcass. The top should overlap the back and sides by about 3/4" and have about 1 1/2" overlap at the front of the carcass.
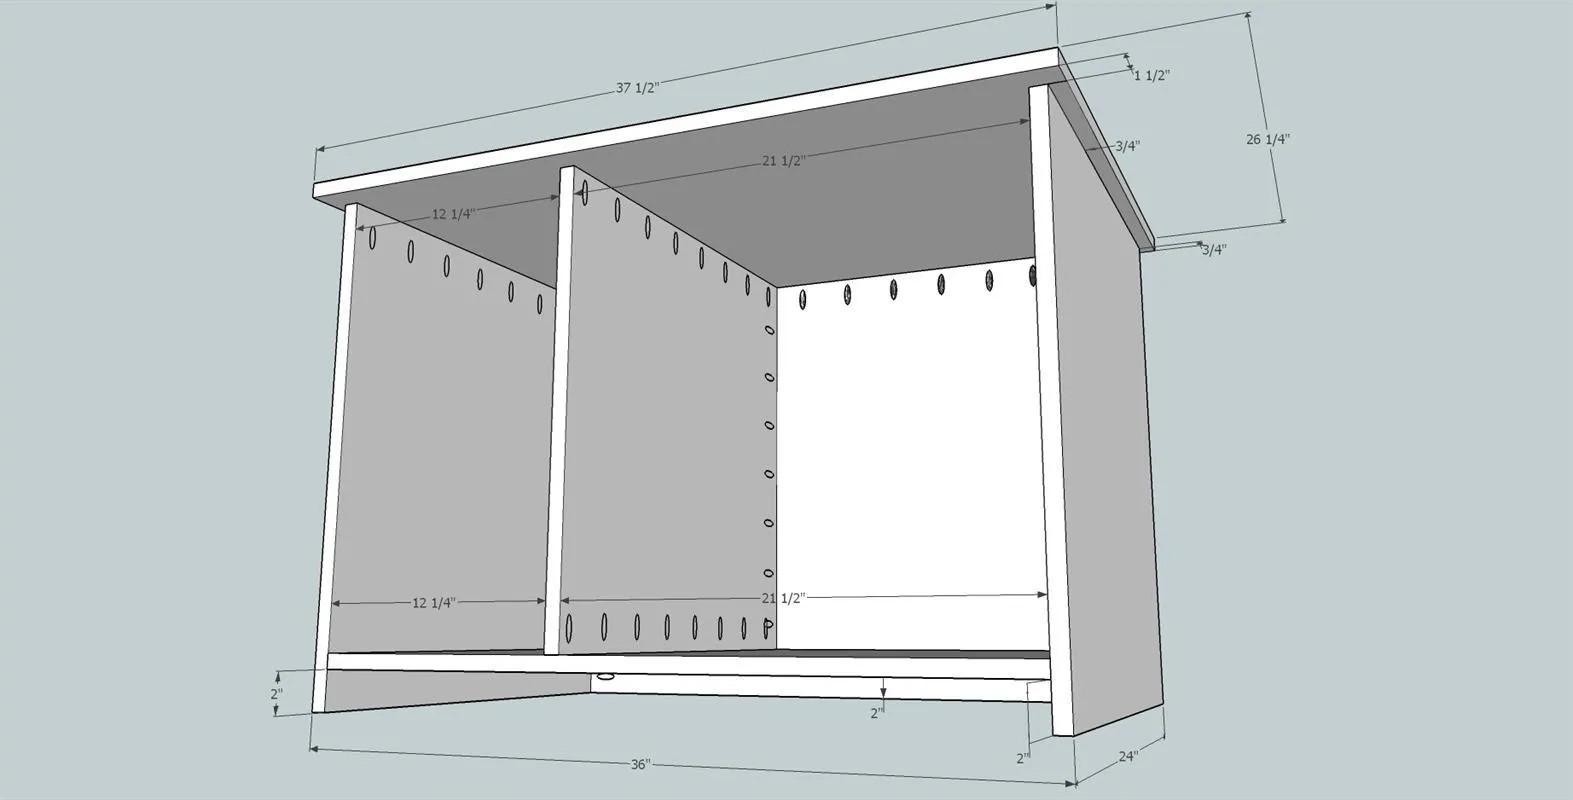
8Cut and add the drawer glides
Cut 6 each 3/4" X 23 1/4" X 3/4" drawer glides from the oak board. Using 1 1/4" brad nails and wood glue attach the glides as shown.
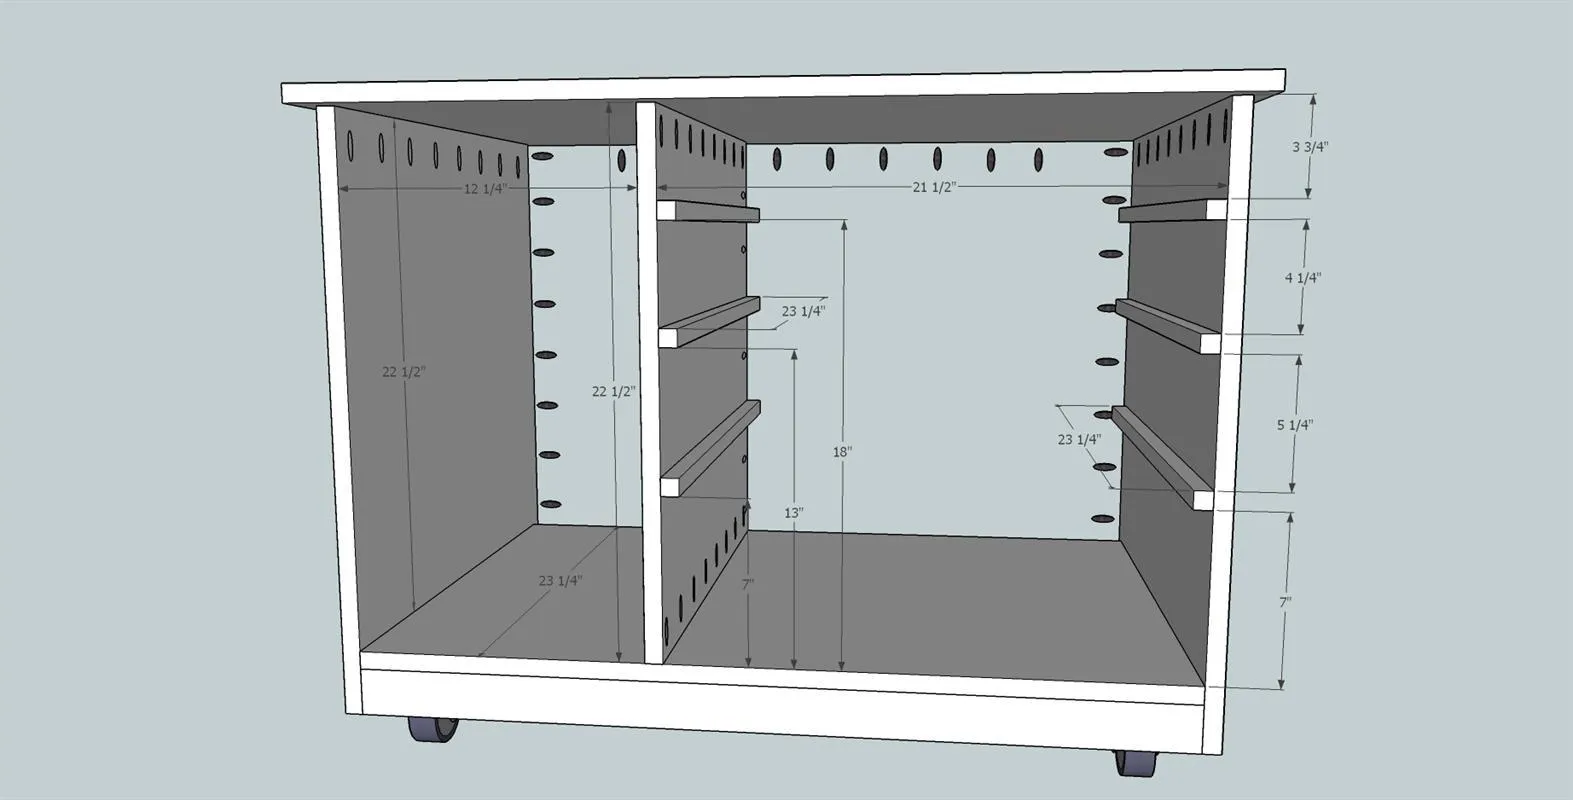
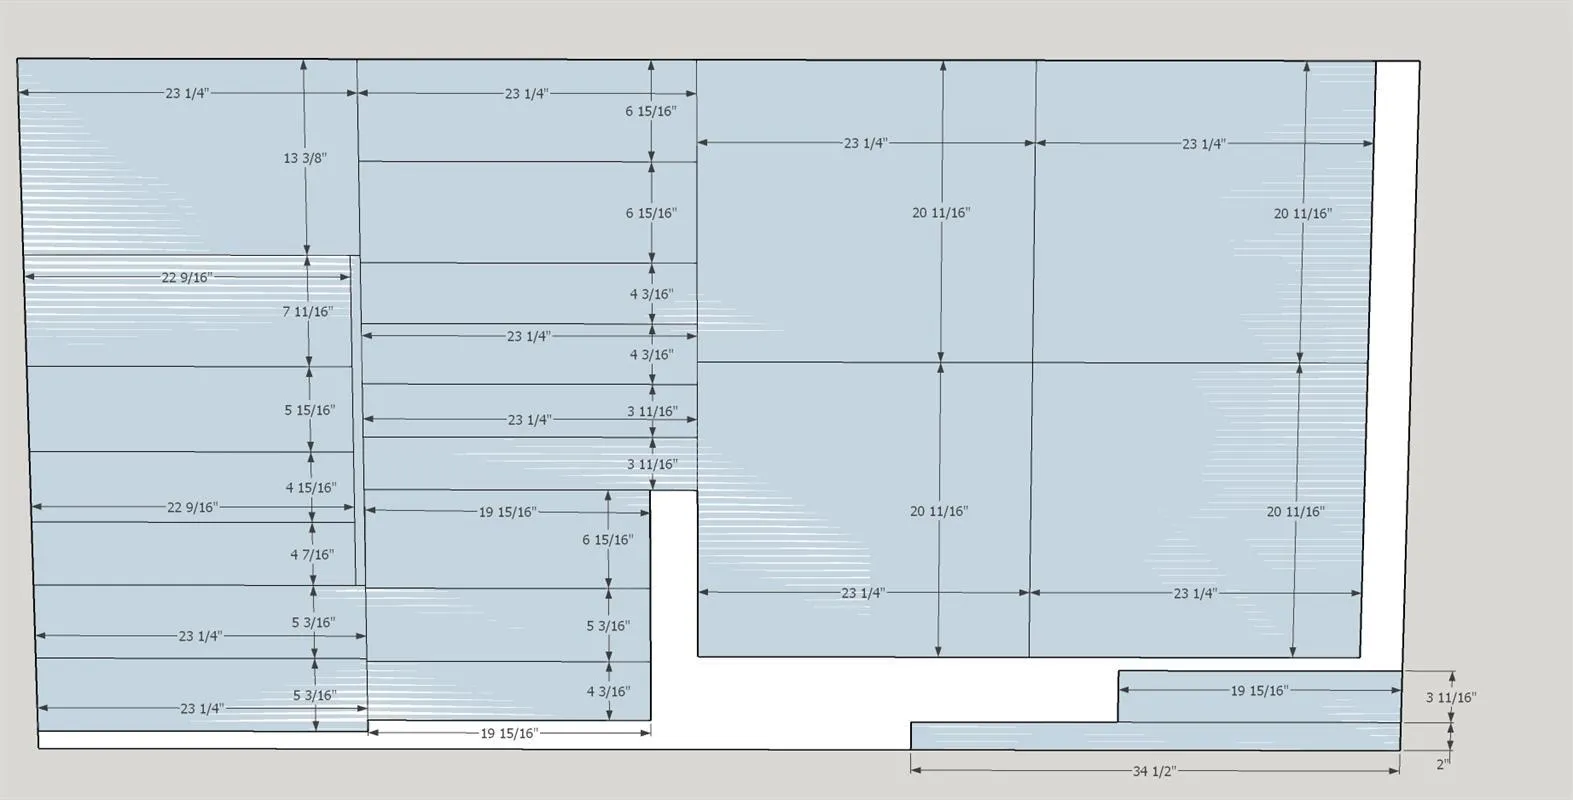
9Cut remaining plywood parts
Before you begin cutting, remeasure the dimensions of the parts you will be needing and adjust the measurements accordingly. (CUT TO FIT) Now cut the remaining parts.
10Add pockets and attach front apron
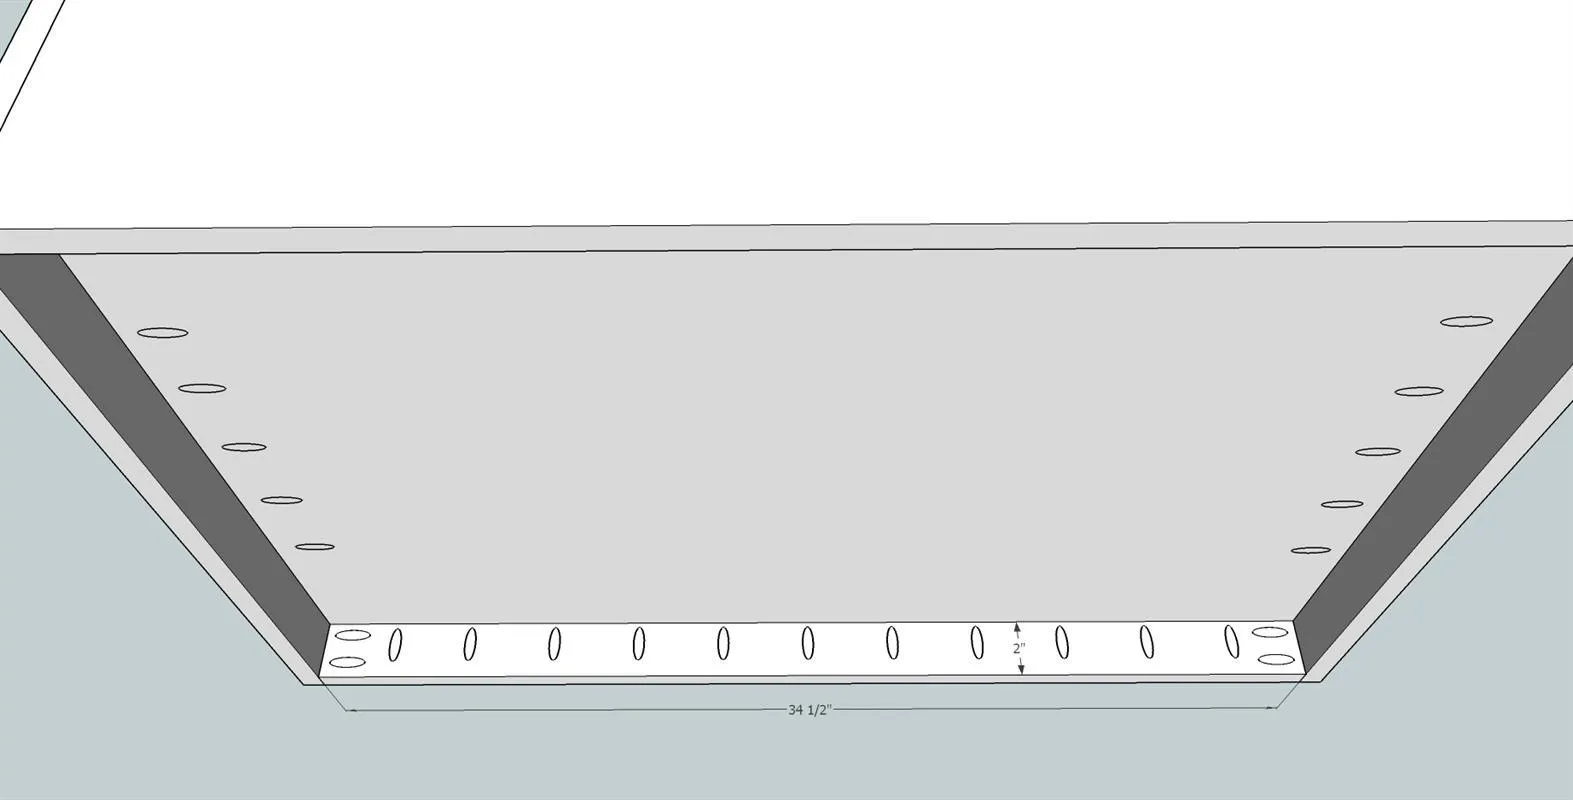
Using Kreg pocket hole jig , drill pocket holes in the top and both ends of the 3/4" plywood front apron cut in step nine. It is a good idea to mark where you are putting the holes to prevent mistakes. Sand with 100 - 150 grit sandpaper. Using wood glue and 1 1/4" coarse pocket screws attach the front apron.
11Cutting the drawers bottom dados
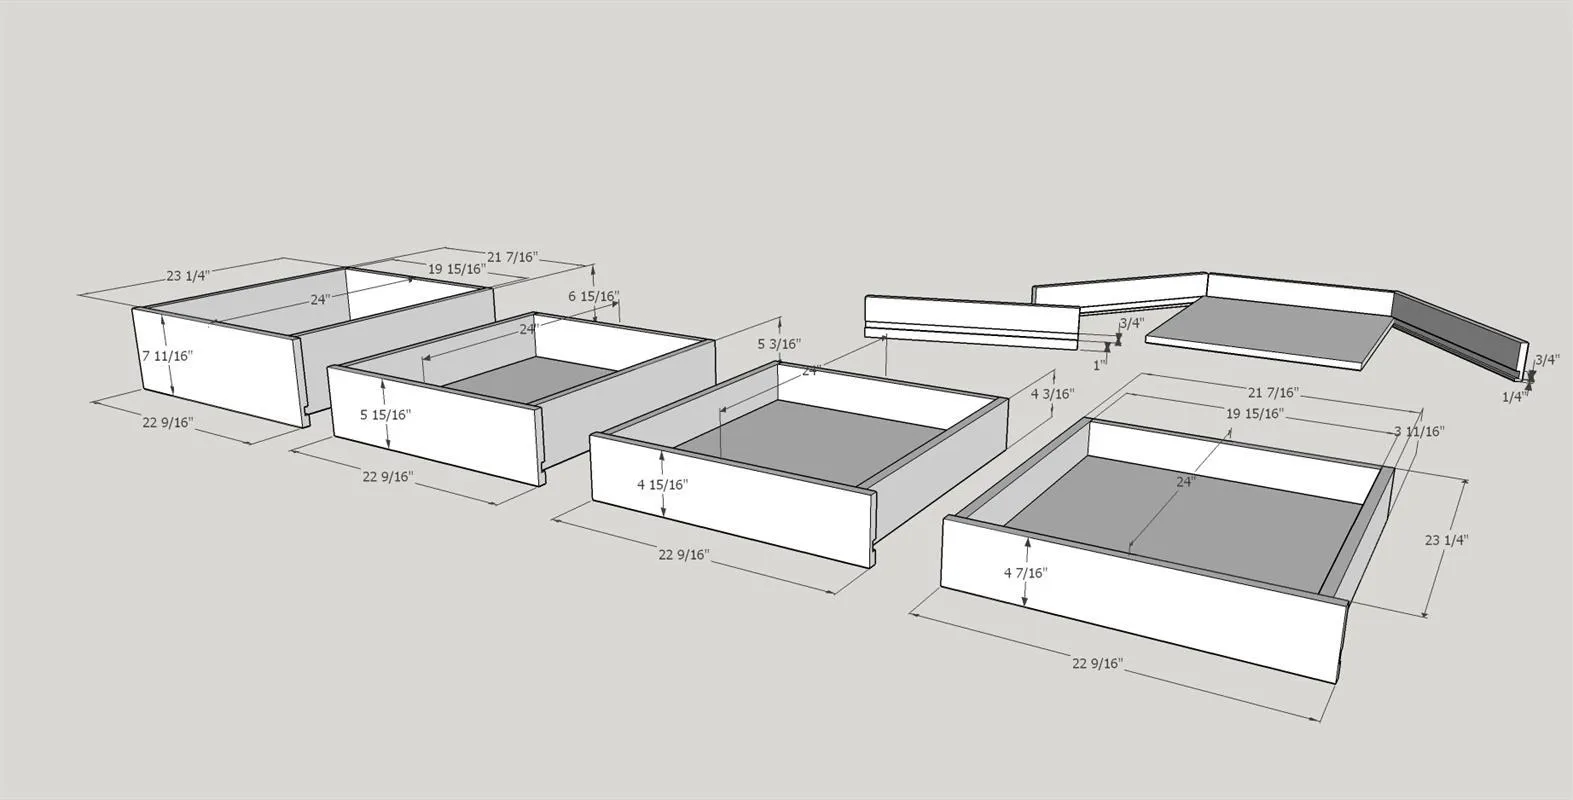
For each set of drawer materials use a table saw to cut a 3/8" deep X 3/4 inch wide dado 1" from the bottom of the drawer fronts and 1/4" from the bottom of the sides and backs.
12Add pockets to drawers and assemble
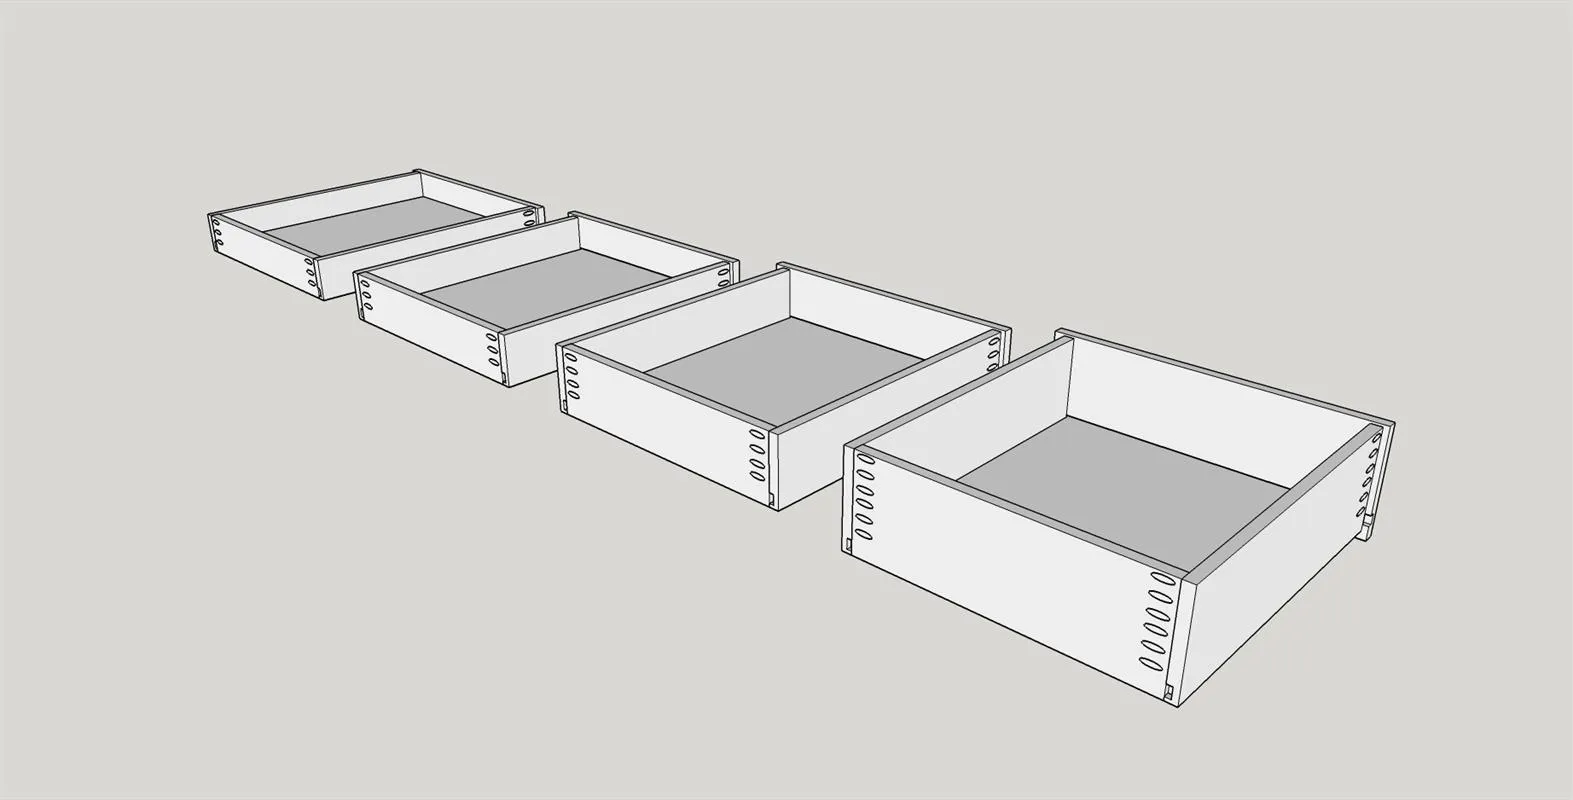
- Drill pocket holes at the front outside edge of each set of drawer sides and both ends of the drawer backs. Keep in mind that each set of sides has a left and right...they are mirror images so make sure you are cutting the pocket holes in the correct locations.
- Sand with 100 - 150 grit sandpaper. Using wood glue and 1 1/4" pocket screws assemble the four drawers. Make sure the drawers are square and adjust if necessary.
13Installing door hinge cups
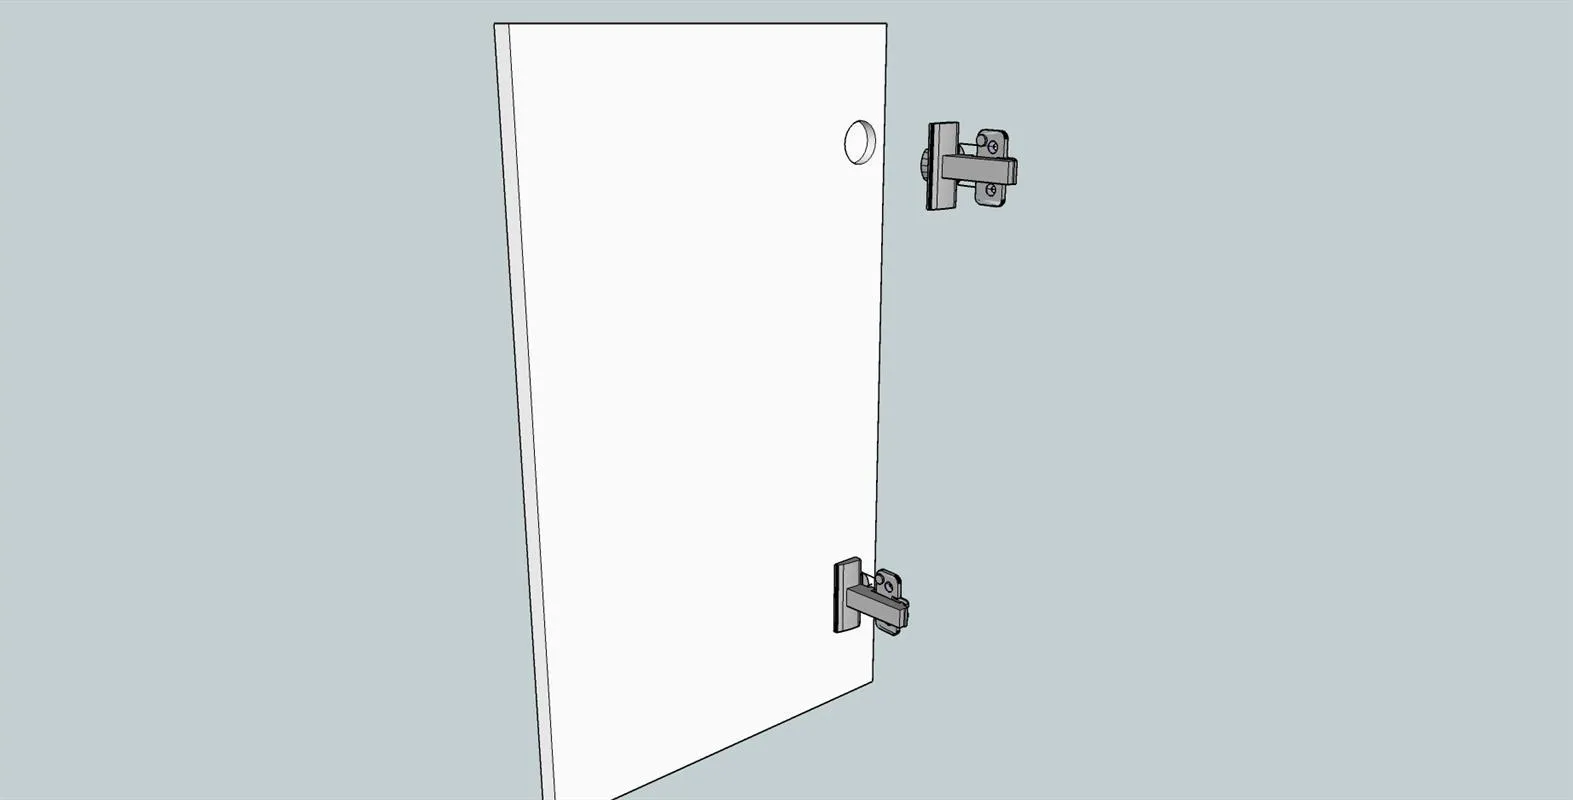
Use a drill press with a 1 3/8" forstner bit to drill the 2 hinge holes in the door using the dimensions recommended by the manufacturer of the hinges. Then fasten the hinge cups in place.
14Attaching door
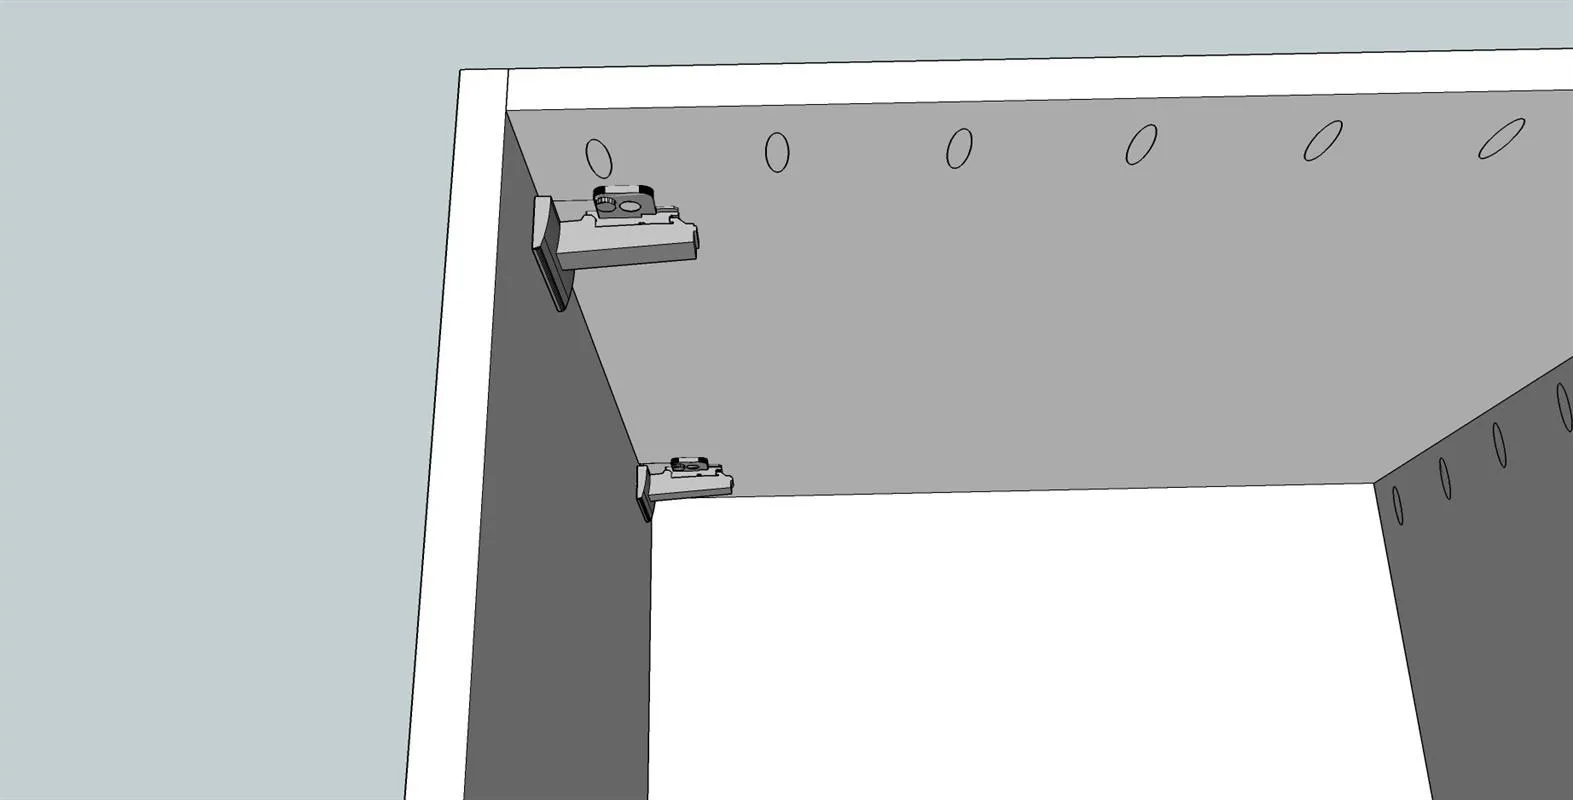
On the inside of the cabinet mark the position of the hinge mounting plates. Pre drill small holes for the screws that hold the mounting plates. Attach mounting plates as per the hinge manufacturers instructions. After the door is mounted use the various hinge adjustments to properly set the side to side and top to bottom distances.
15Finish
- Now that the build is complete use 220 sandpaper to do a once over on all surfaces in preparation for the finish.
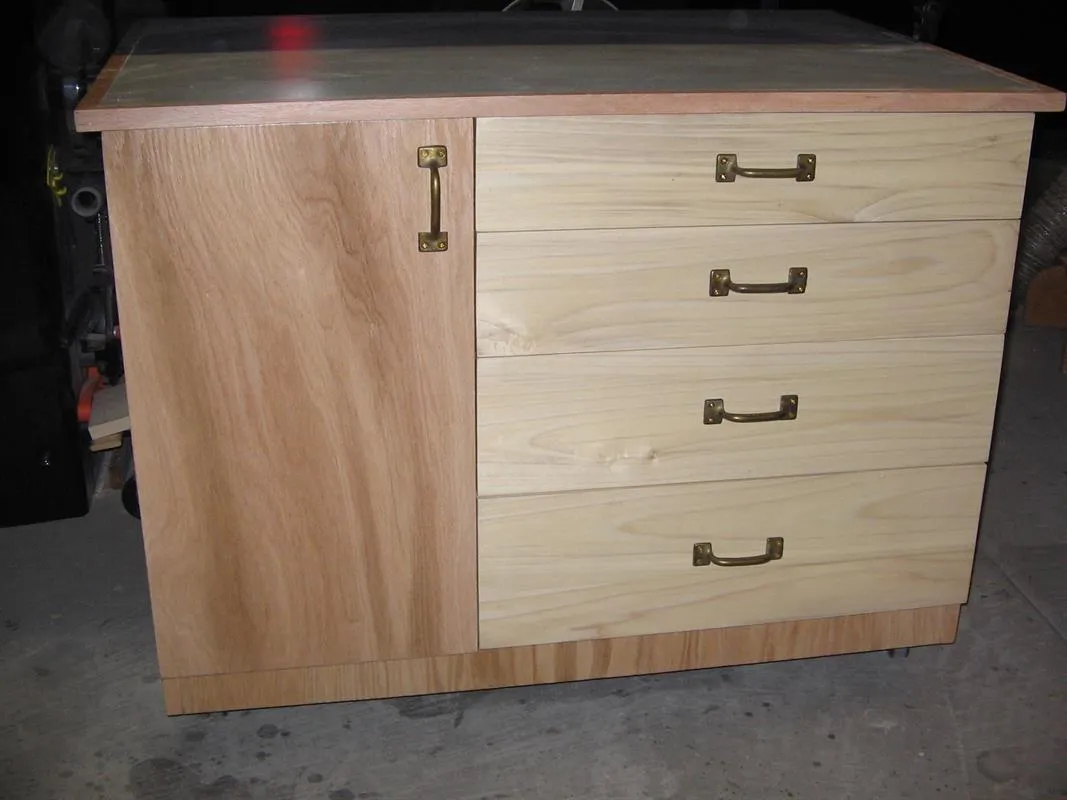
- Clean well to remove all dust. (I use compressed air and clean dry rags) I did not use a stain, just finished with Minwax Polycrylic Satin finish. I gave the cabinet and drawer assemblies three coats following manufacturers instructions. After the finish has dried add door/drawer pulls.
16Attach casters
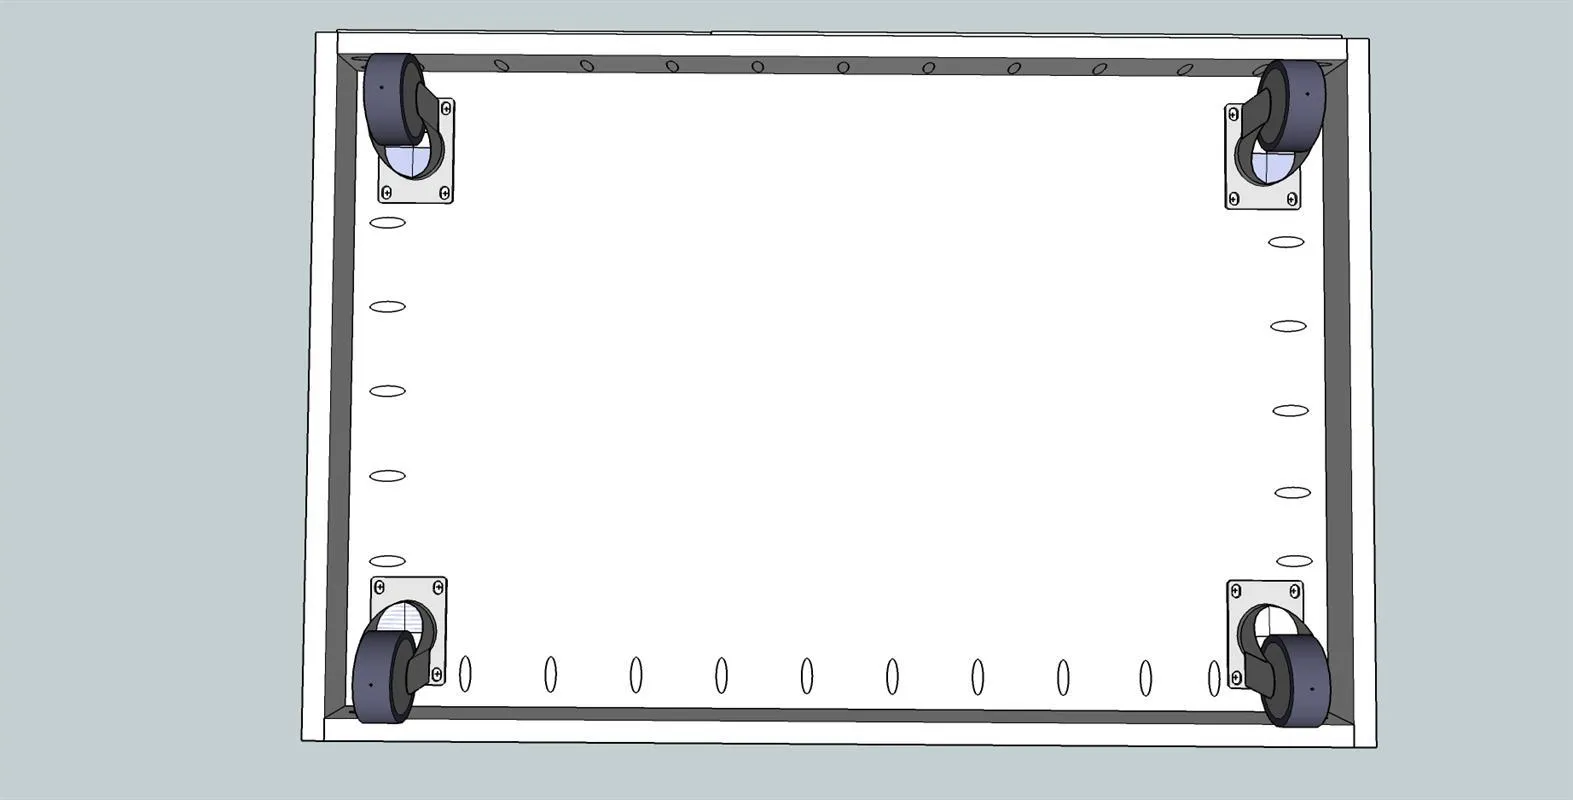
Attach casters to the bottom of the cabinet