 Notch
- Difficulty
- Easy
- Time
- 3–5.8 hours
- Cost
- $$
About this build
Create handy enclosed storage for your Kreg Universal Bench with this simple plywood cabinet. This one is sized to fit a 28″x44″ Universal Bench but could be modified to fit a smaller or larger bench. The simple construction remains the same.
Tools
Essential
- Circular Saw
- Drill / Driver
- Pocket Hole Jig
- Random Orbit Sander
Optional / nice to have
- Bar / Pipe Clamps
- Combination Square
- Tape Measure
Materials
| Item | Qty |
|---|---|
| Plywood, 3/4" Thick Full Sheet | 1 board |
| Kreg Universal Bench Standard-Height Legs | 1 each |
| 28" Kreg Universal Bench Rails | 1 each |
| 44" Kreg Universal Bench Rails | 1 each |
| Kreg Dual-Locking Caster Set | 1 each |
| 1 1/4" coarse-thread Kreg pocket-hole screws | 13 each |
| 5/8" x #8 pan-head wood screws | 18 each |
| #8 Flat Washer | 2 each |
| Pairs full-inset concealed hinges | 2 each |
| 4" wire cabinet pull | 2 each |
Overall cost: $$. Lumber prices vary by region, species, and season, so we give a band rather than a figure we would only be pretending to know.
Cut list
| Part | Qty | T × W × L |
|---|---|---|
| Side Panel | 2 | 3/4" × 15" × 27" |
| Back Panel | 1 | 3/4" × 15" × 42" |
| Bottom Panel | 1 | 3/4" × 25" × 42" |
| Door Spacers | 2 | 3/4" × 1" × 15" |
| Door Stop | 1 | 3/4" × 2" × 42" |
| Door | 2 | 3/4" × 15" × 19" |
What to buy
Buy 5 boards at 8 ft.
3/4" × 25"
1 board
3/4" × 15"
2 boards
3/4" × 2"
1 board
3/4" × 1"
1 board
Assumes 8 ft stock, a 1/8" saw kerf, and buying each part at its own width. Change the board size or kerf on the full board plan →
Instructions
1Assemble the Bench
Begin by assembling your Universal Bench according to the manufacturer’s instructions. Make sure the assembly is square. This plan is sized to fit the 28"x44" Kreg Universal Bench with Standard-Height Legs that are adjustable from 31" to 39". The benchtop shown here is made using a Kreg Universal Clamp Trak Kit. This kit comes with instructions for building the top if you’d like to add one. See the links in Extras tab for more information on these products.
2Make and Attach Side Panels
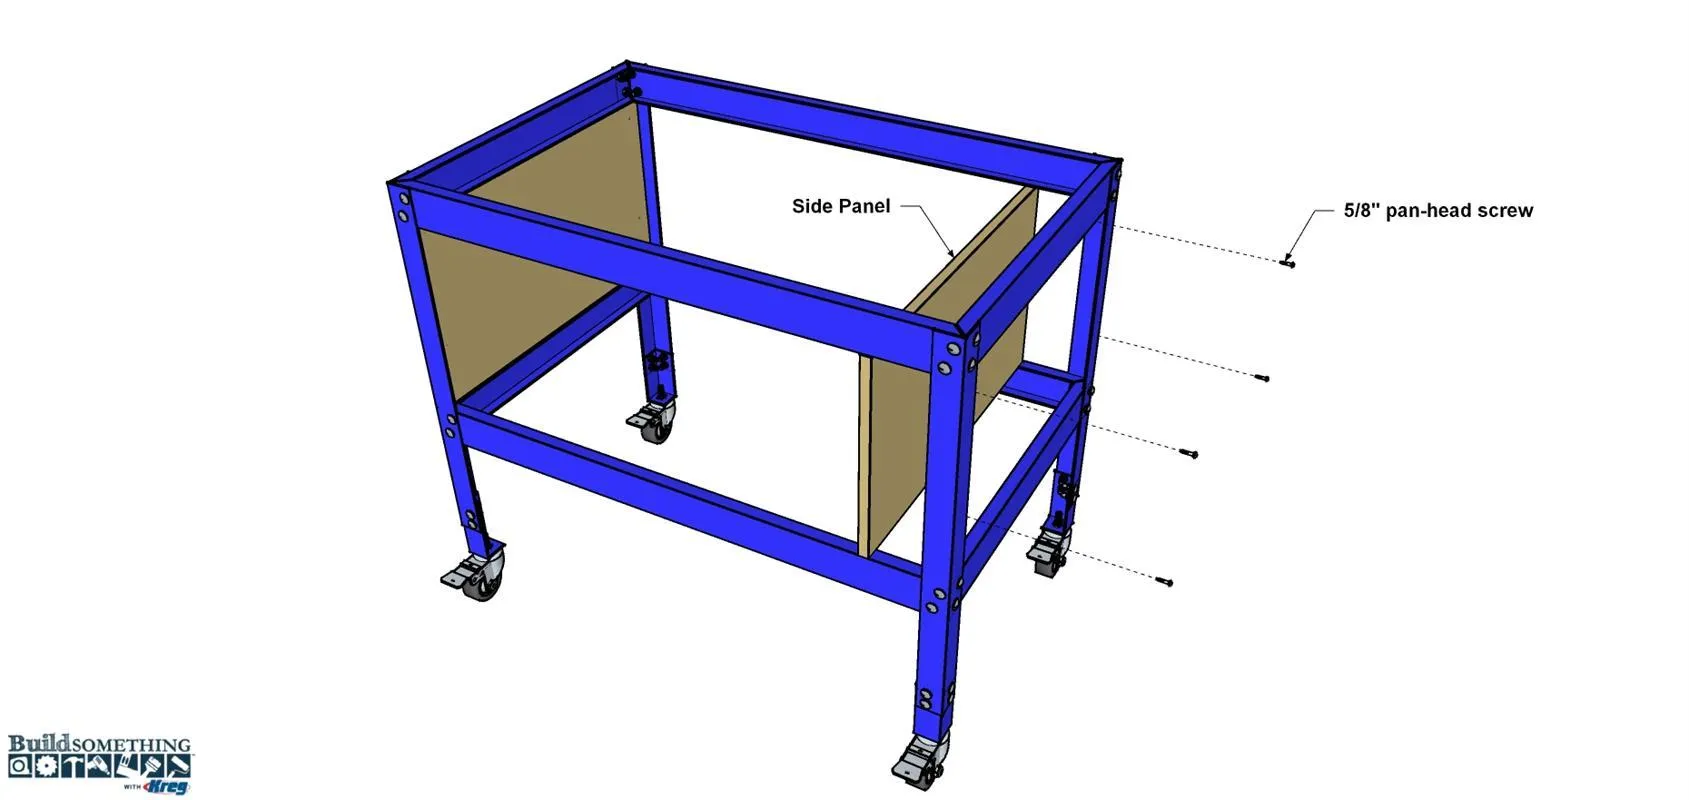
- Cut two Side Panels to size from 3/4" plywood, as shown in the cut diagram.
- Set each Side Panel in against the bench legs, as shown. Secure each Side Panel by driving 5/8" pan-head screws through the holes in the bench legs and into the panel.
3Add the Back Panel
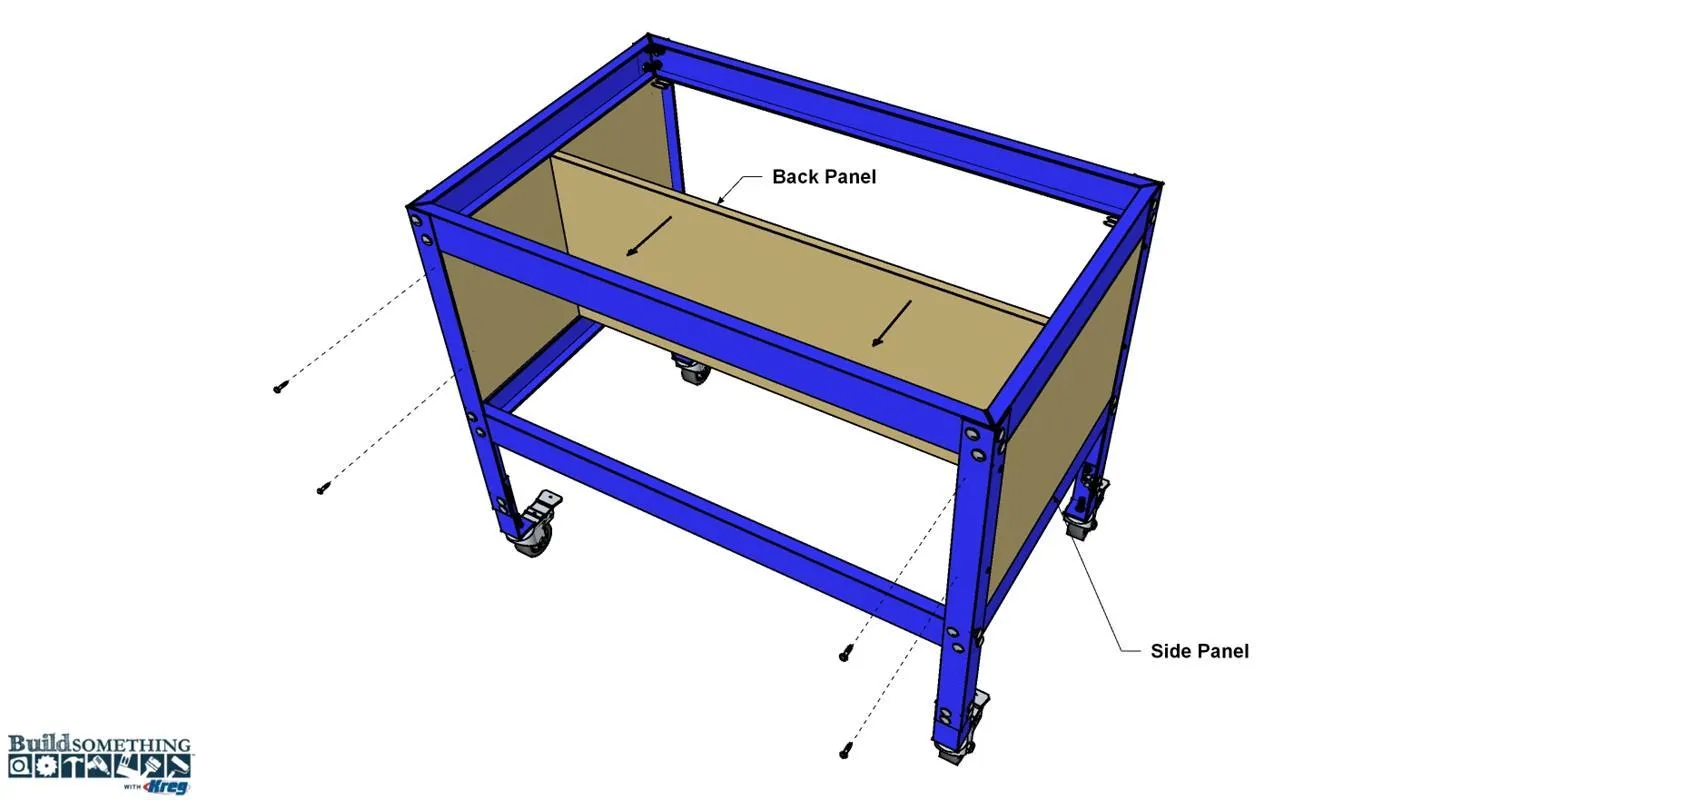
Cut the Back Panel to size from 3/4" plywood as shown in the cut diagram. Position the Back Panel and secure it to the legs in the same manner as the Side Panels.
4Make the Bottom Panel
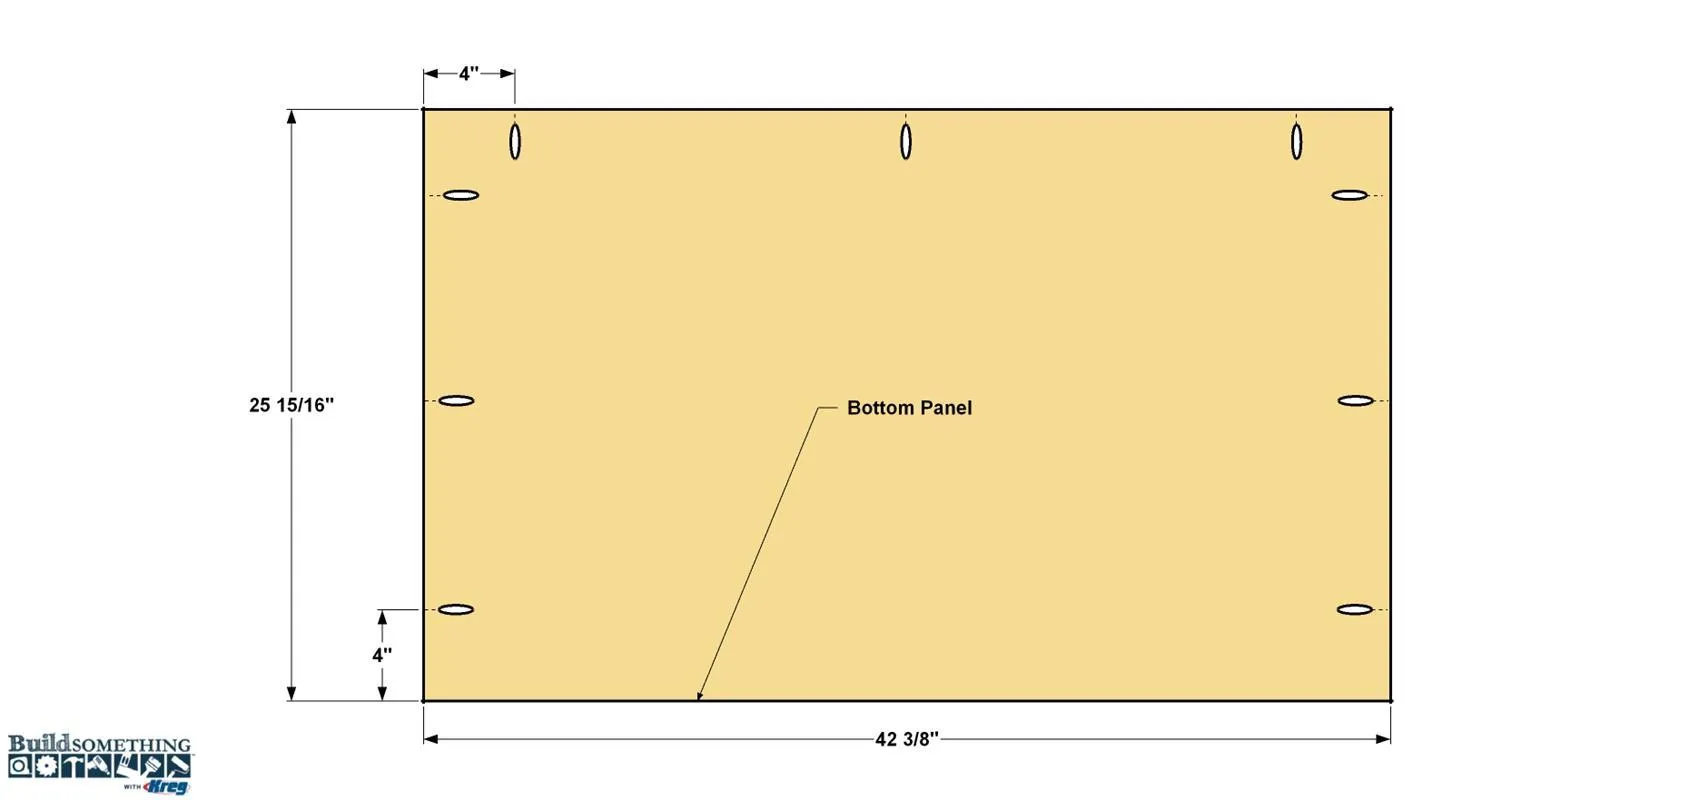
Cut the Bottom Panel to size from 3/4" plywood as shown in the cut diagram. Set your Kreg jig for 3/4" thick material and drill pocket holes at the locations shown.
5Attach the Bottom Panel
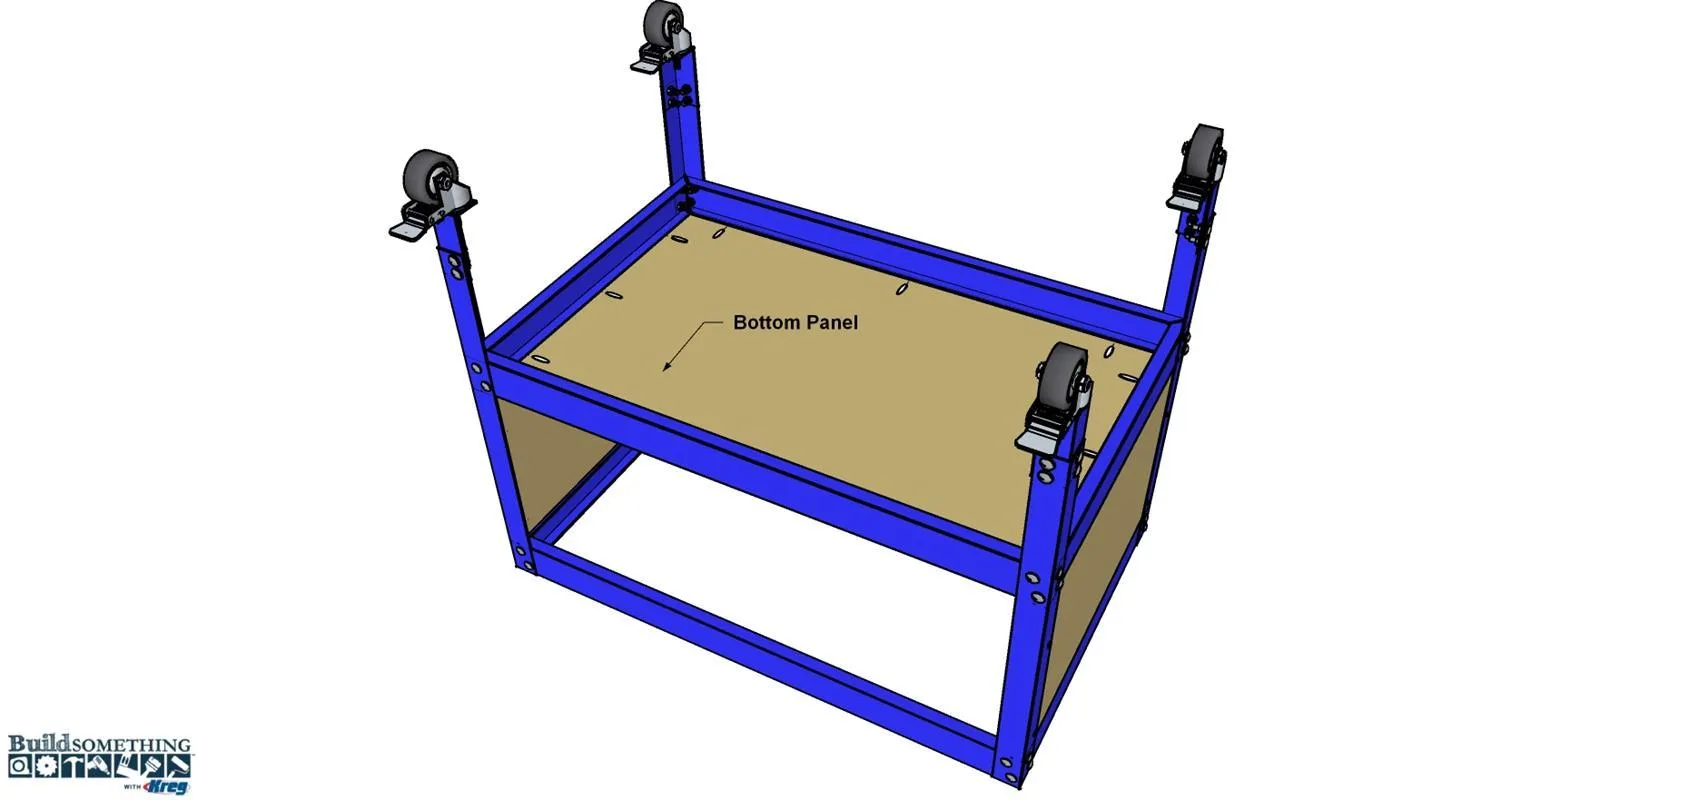
- Set the Bottom Panel in place with the pocket holes facing downward and secure it to the Side Panels and the Back Panel using 1 1/4" coarse-thread Kreg Screws. To secure the front edge of the Bottom Panel, first slip a washer onto a 5/8" pan-head screw.
- Then position the screw midway along the front edge of the Bottom Panel and against the edge of the bench rail—so that the washer will overlap the rail and the bottom panel. rive the screw in until the washer is snug against the bench rail and the Bottom Panel.
6Make and Mount the Door Spacers
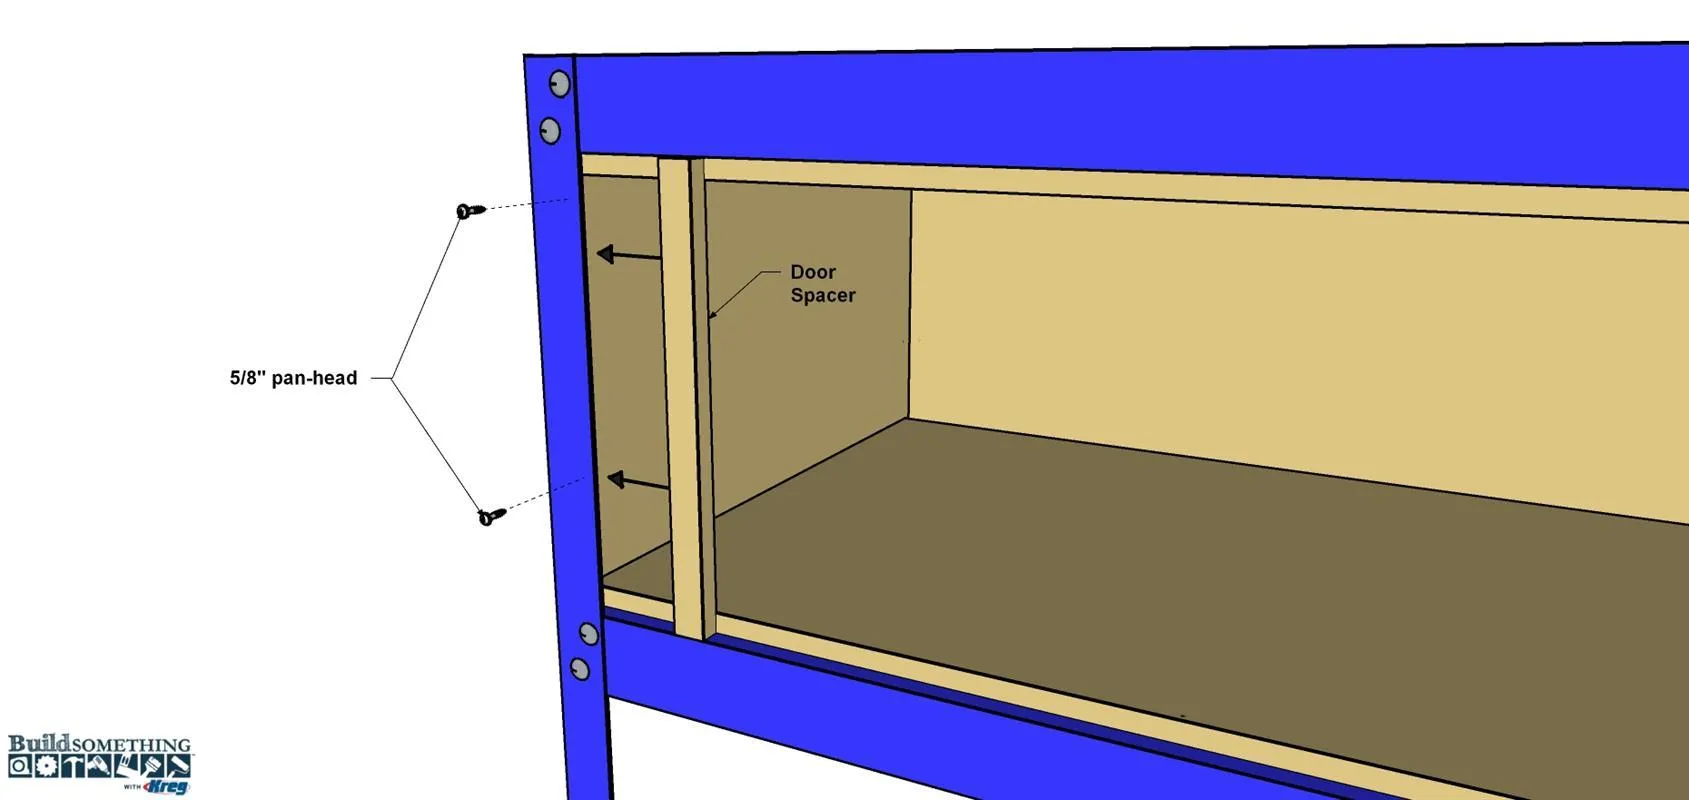
Cut the two Door Spacers to size from 3/4" plywood, as shown in the cut diagram. Slip each one in place behind the bench leg, as shown, and make sure the inner edges sit flush with the edges of the legs. Secure the Door Spacers to the legs with 5/8" pan-head screws.
7Make the Door Stop
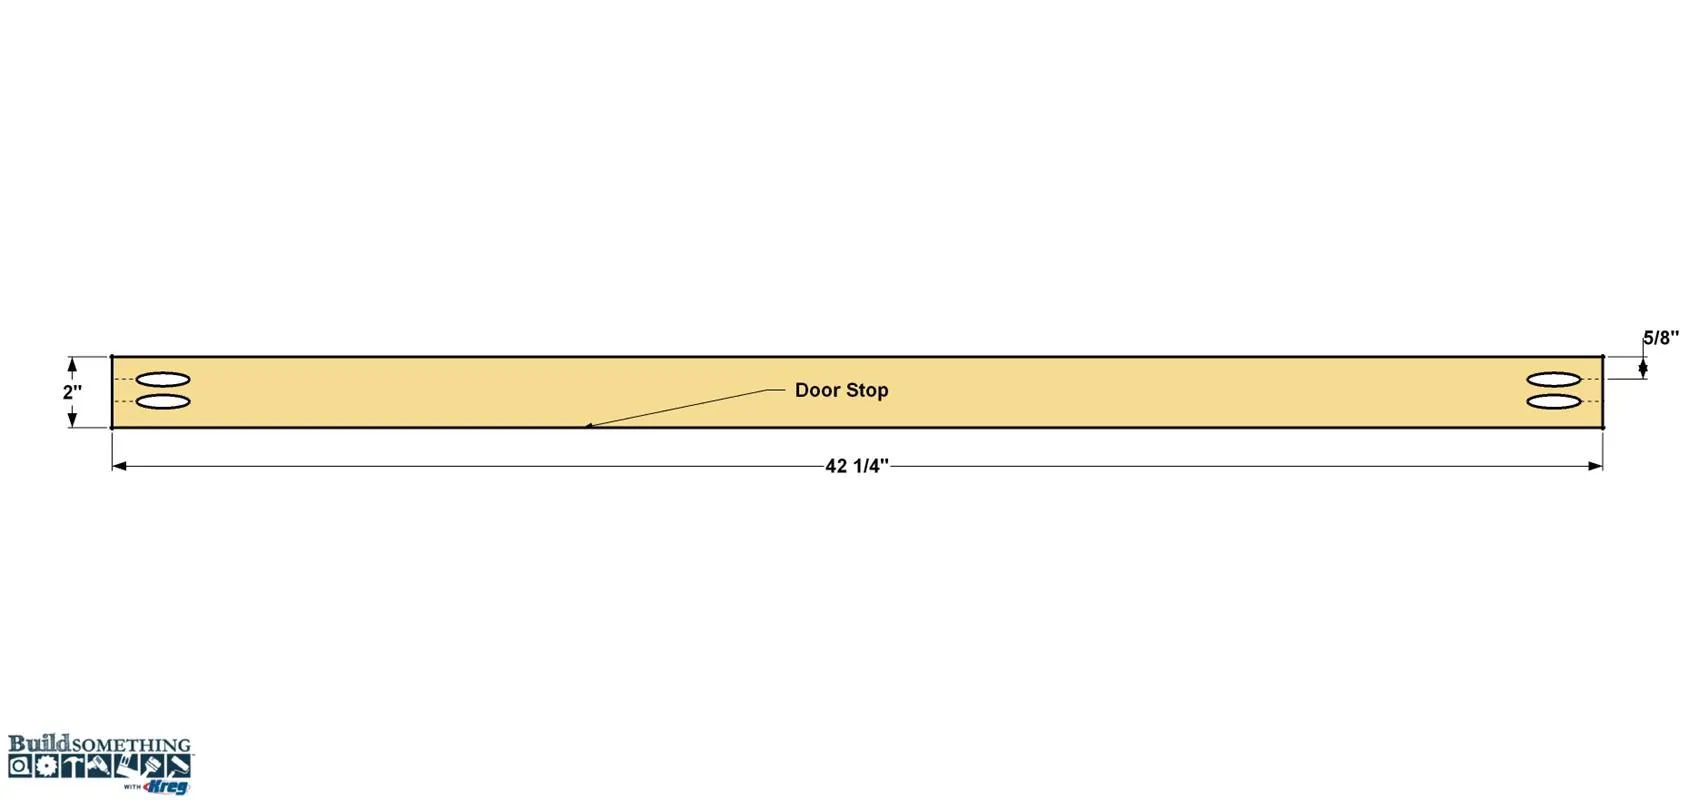
From 3/4" plywood, cut the Door Stop to length, as shown in the cut diagram. Drill pocket holes at the locations shown.
8Install the Door Stop
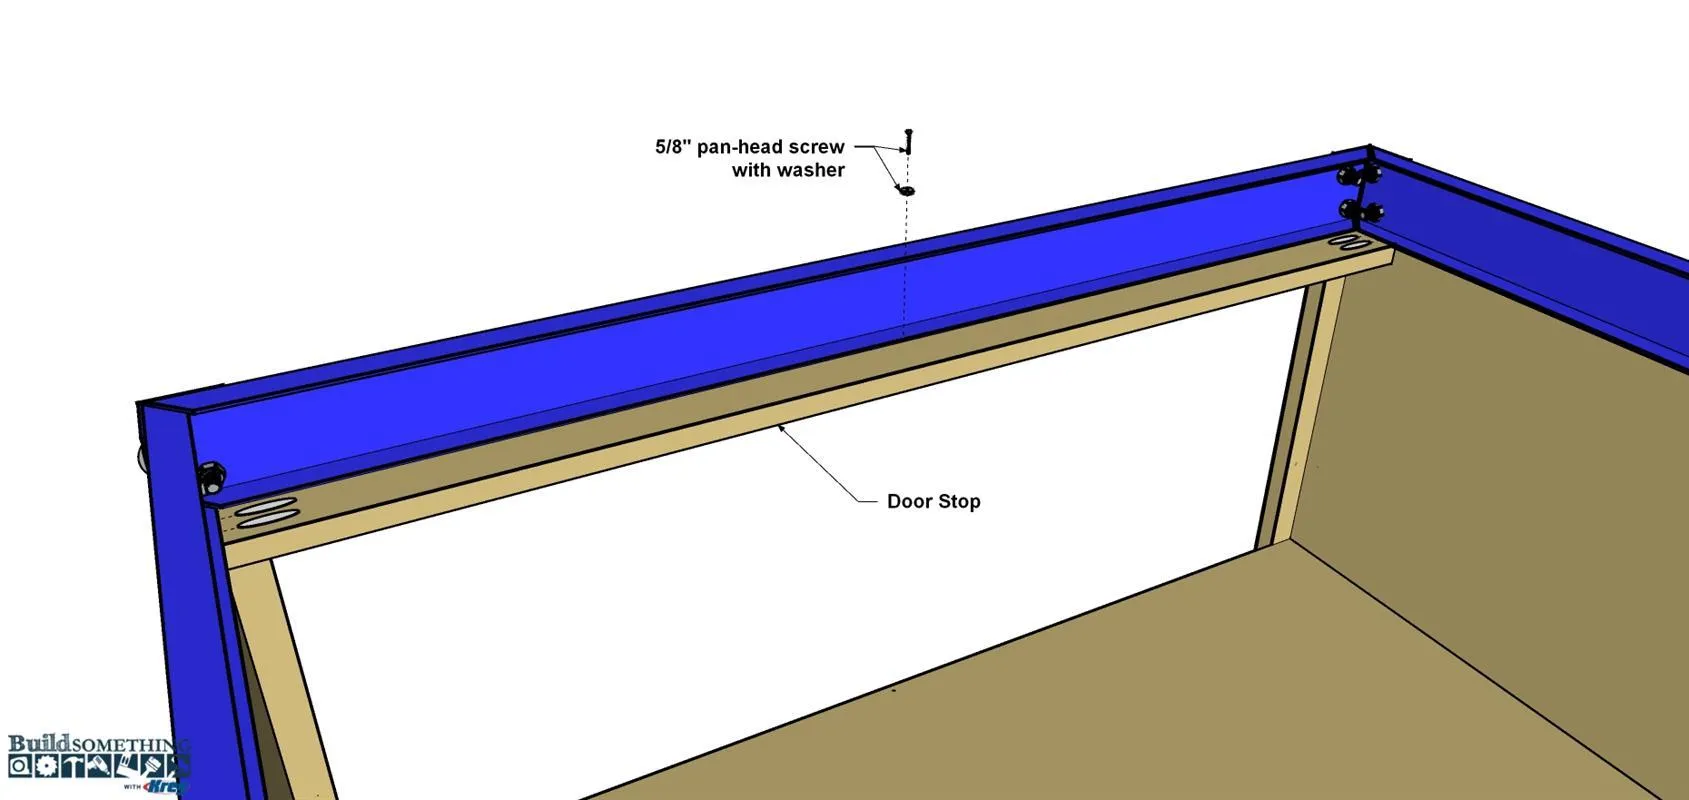
Position the Door Stop and secure it to the Side Panels with 1 1/4" coarse-thread Kreg Screws. Secure the Door Stop to the top frame rail with one 5/8" pan-head screw and a washer, as shown.
9Make and Install the Doors
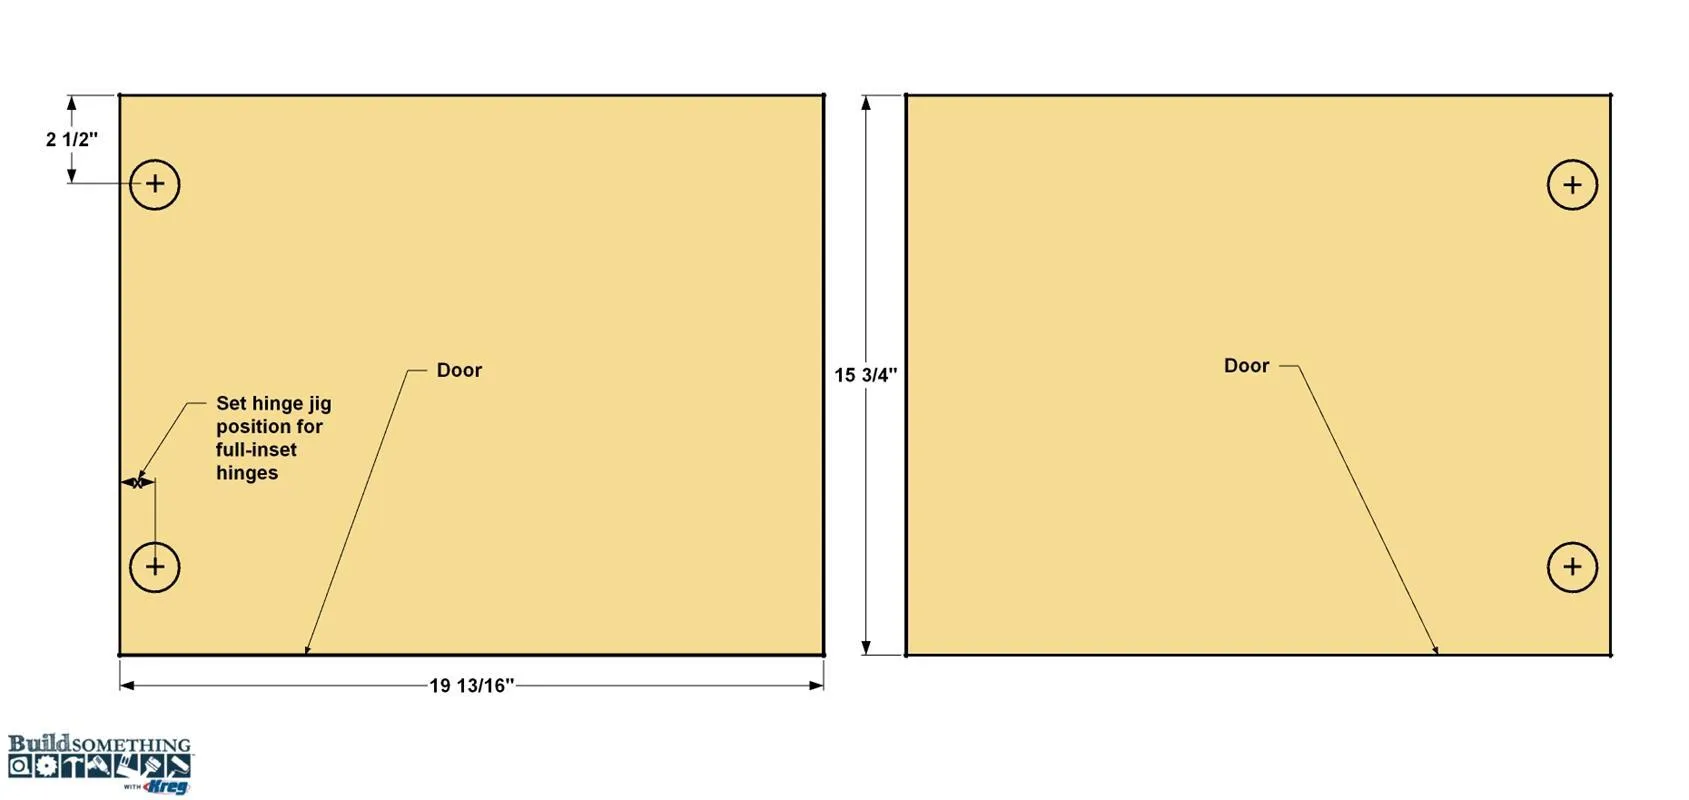
- Cut two Doors to size from 3/4" plywood, as shown in the cut diagram.
- Drill cup holes for the hinges at the locations shown. To make this easy, we used the Kreg Concealed Hinge Jig. Mount the Hinges to the doors and then mount the Doors to the Door Spacers using the screws supplied with the hinges.
- Adjust the hinges as needed per the manufacturer’s instructions. Install the Door hardware of your choice. We used the Kreg Cabinet Hardware Jig to simplify drilling the holes.
Tags
- Workbenches
- Beginner
Reviews & builds
No reviews yet
Sign in to review this plan or share your build.
No reviews yet. Be the first to build this.