Notch
NotchWindow Pane Buffet – That Holds A Mini Fridge!
Step-by-step build — 15 steps. Also available as a print sheet.
1Assemble Legs & Sides
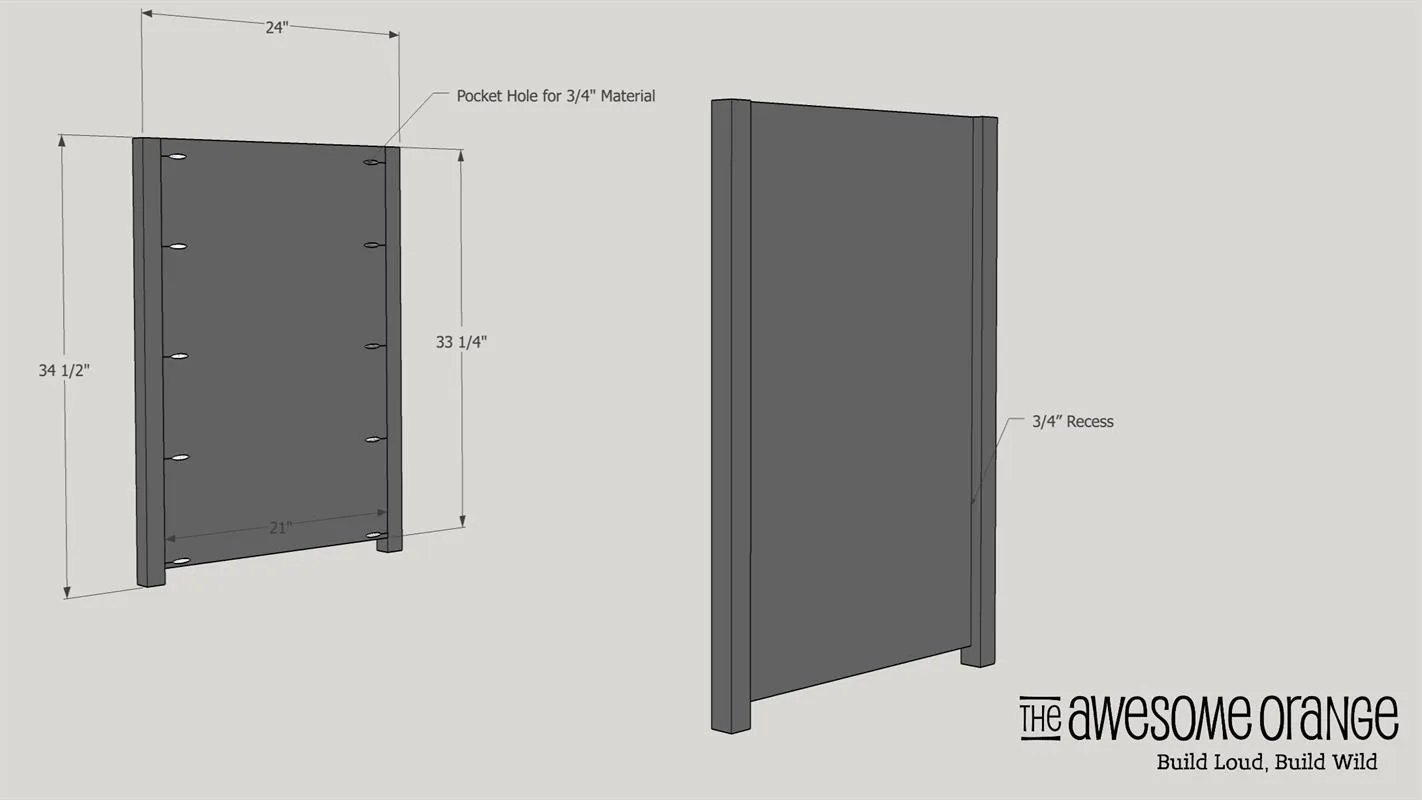
Using 3/4" pocket holes and 1 1/4" pocket hole (PH) screws and glue attach the Legs to the Side pieces flush with the top of the legs and to one of the sides. This will leave 1 1/4" at the bottom and a 3/4" indent on the side panels. The indent faces out and the flush side faces in.
2Attach Bottom
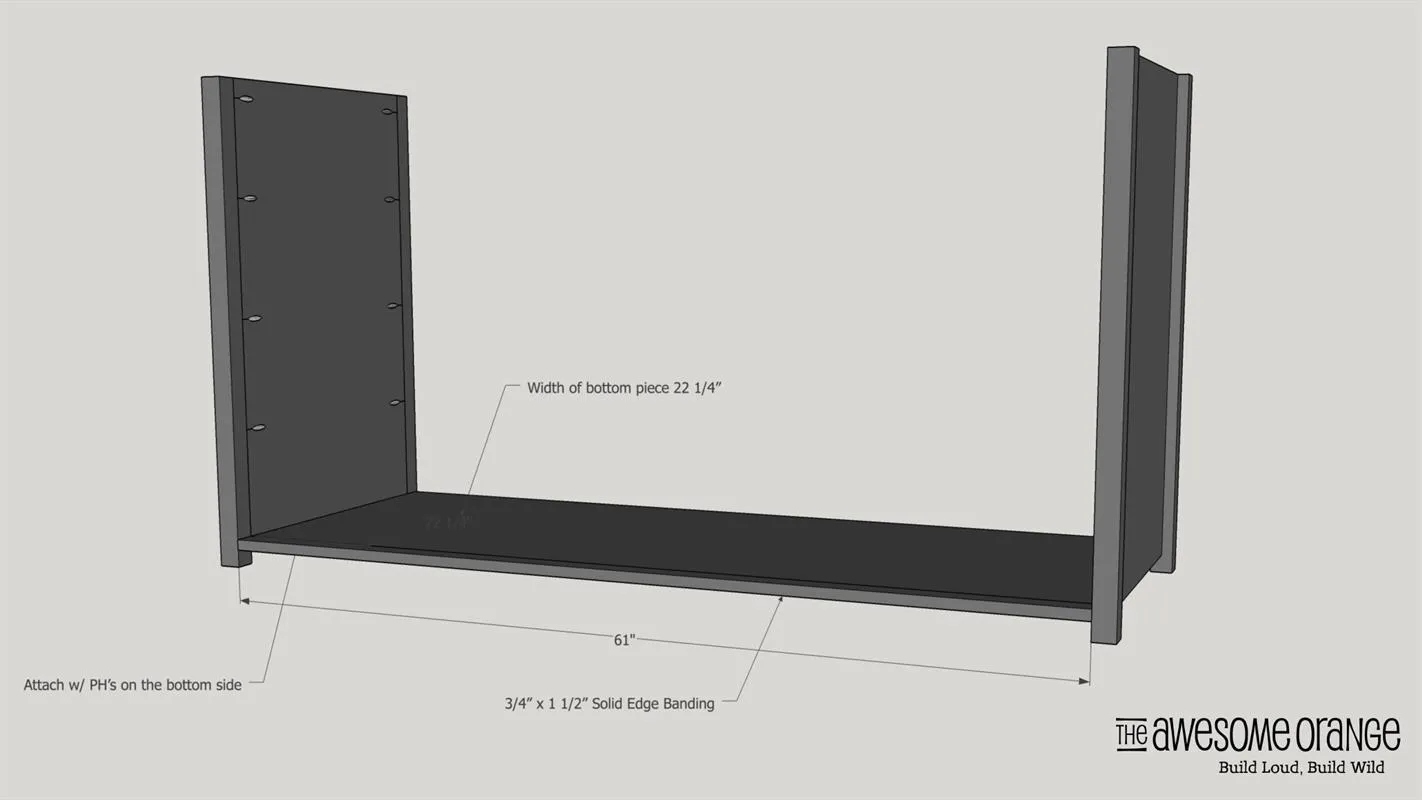
- Add the 3/4" x 1 1/2" solid edge banding to the bottom 3/4" plywood using 3/4" PH's and 1 1/4" PH screws and glue.
- Drill additional 3/4" PH's on sides to attach bottom plywood piece to the two legs. Pocket holes should face down or be on the underside of the piece so not visible. ***Be sure to check square at thru-out build to ensure door opening is square.
3Add Top Face Frame Support
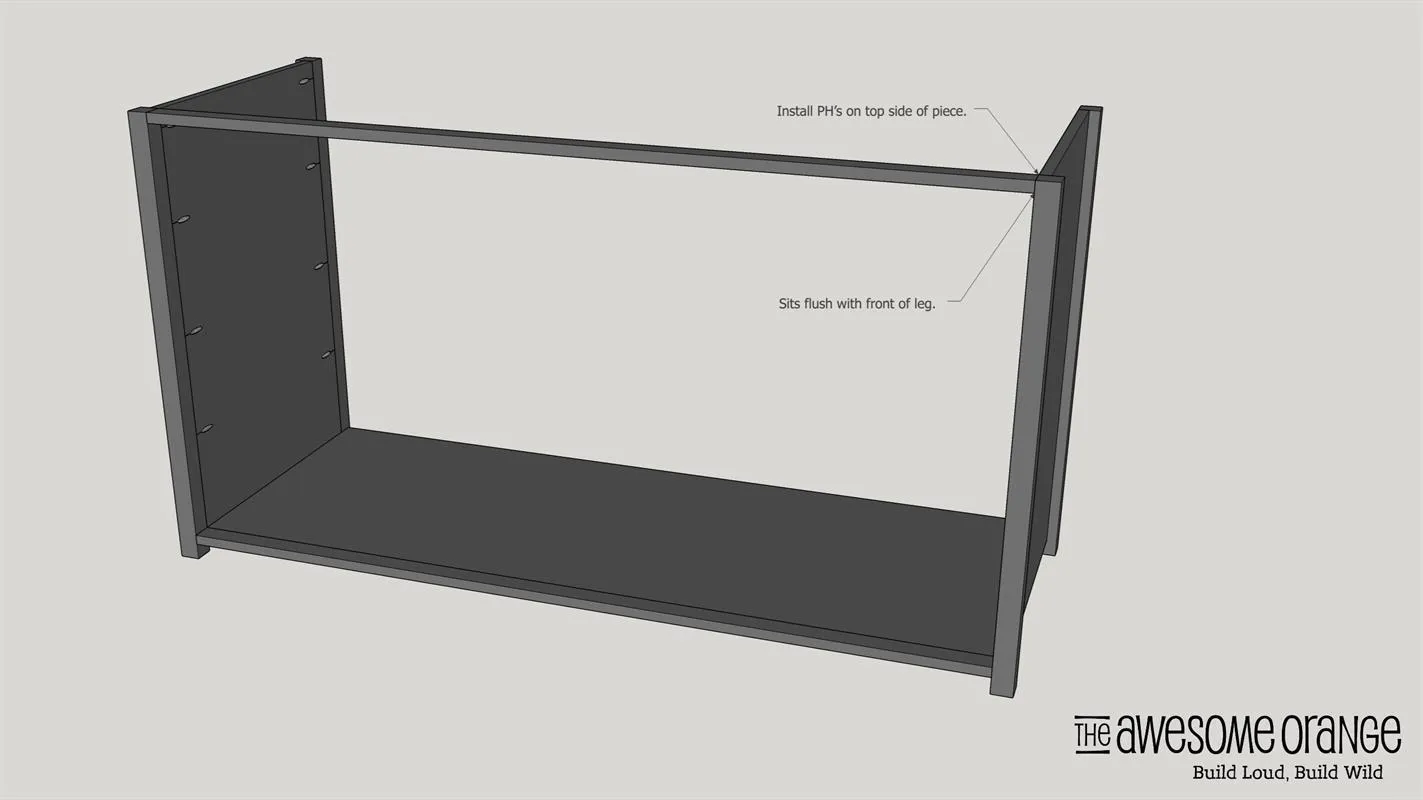
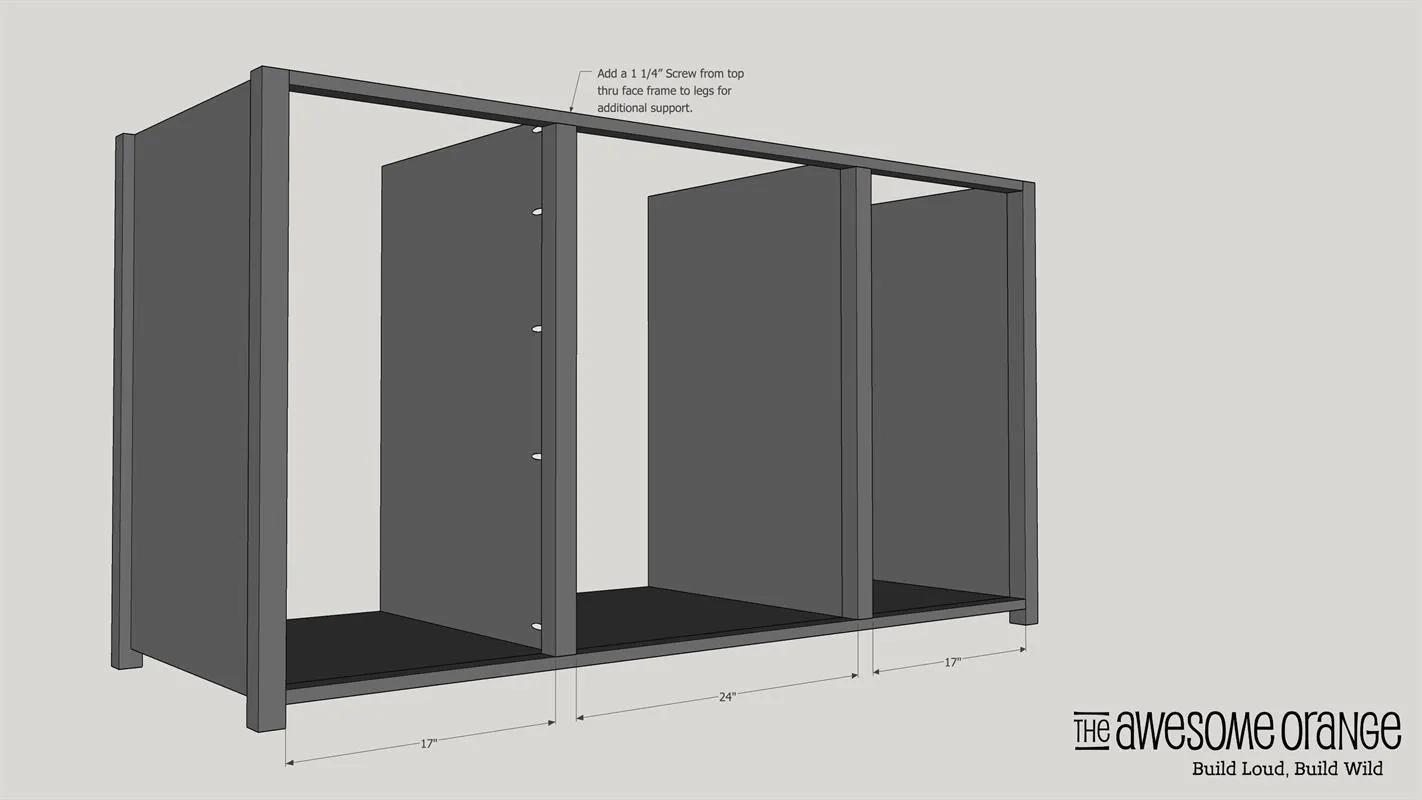
Add a 3/4" x 1 1/2" support between the legs at the top using 3/4" PH's and 1 1/4" PH screws. Be sure to install PH's facing up so you won't see them once top is on. This piece will be the same length as the banding that you put on the bottom piece.
4Add Face Frame to Dividers
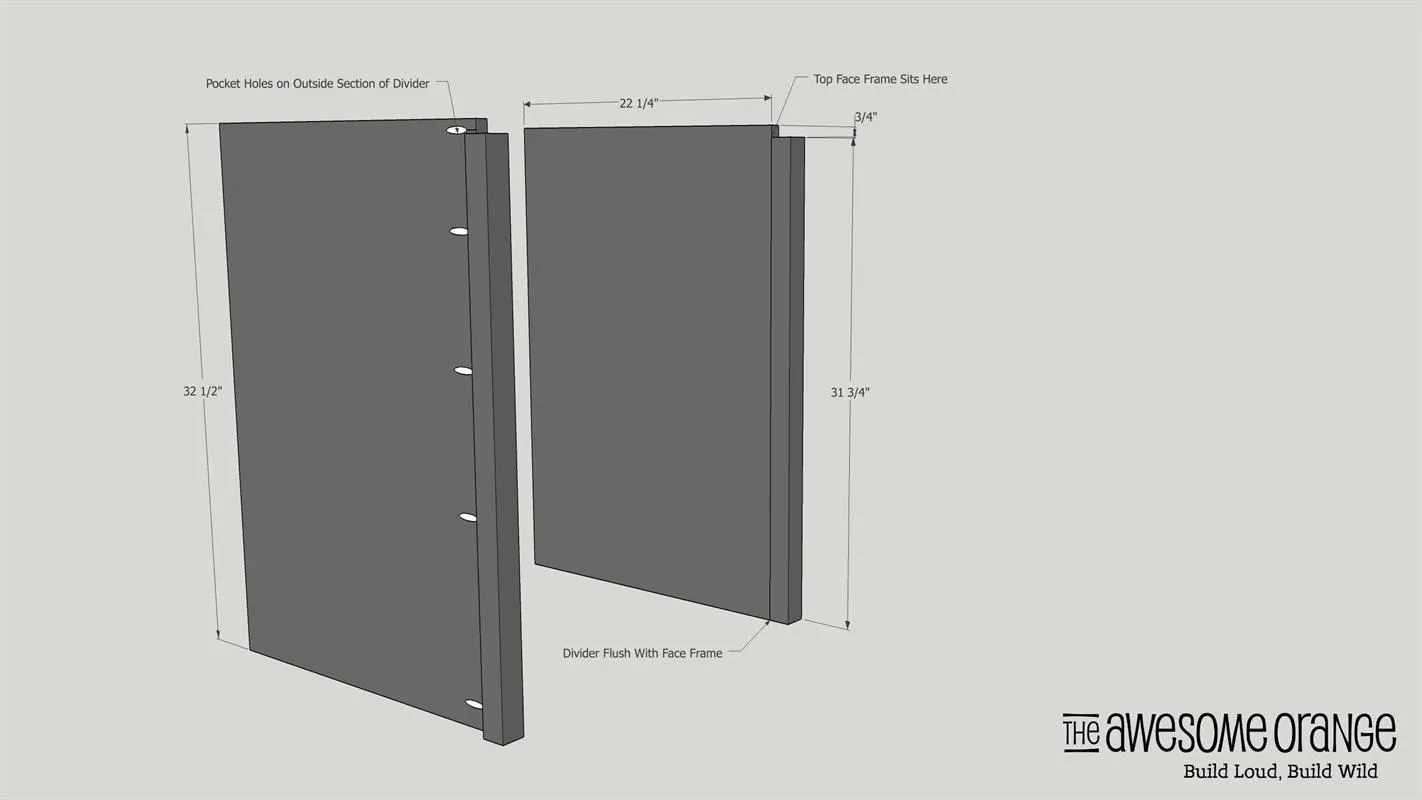
Add 1 1/2" x 1 1/2" x 31 3/4" face frame to the dividers. This will leave a 3/4" gap at the top where the top face frame will cover the rest of the divider.
5Add Dividers to Bottom
Using 3/4" PH's and 1 1/4" PH screws and glue attach dividers (with face frame attached) to the front of the bottom piece. See photo for upright location. Flush side of divider points in toward middle mini fridge section on both sides. Also drill a 1 1/4" screw from top face frame into divider face frame for additional support. ***You may need to adjust this location to fit your mini fridge, so be sure and refer to the specs of fridge before continuing to build.
6Add Cabinet Supports
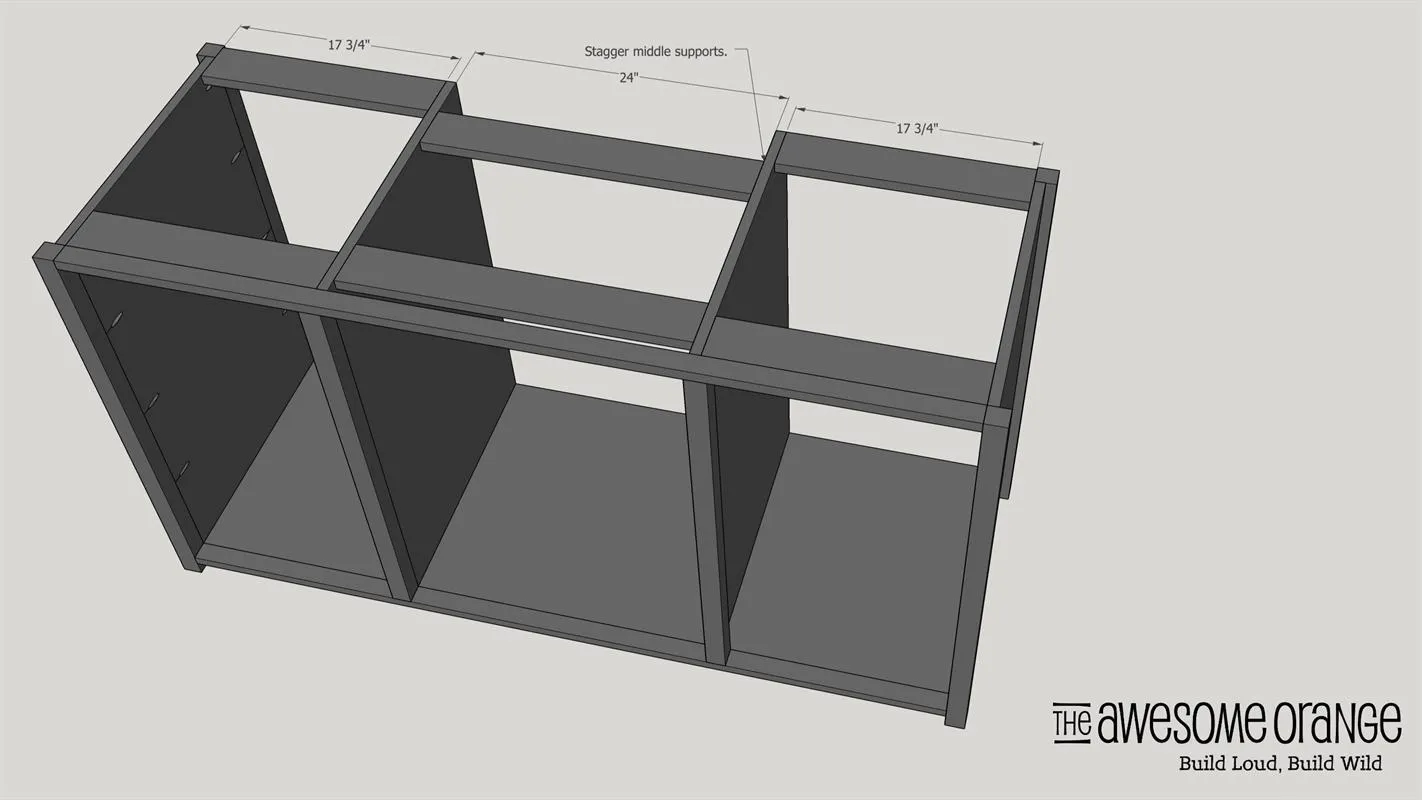
Using 3/4" PH's and 1 1/4" PH screws and glue add cabinet supports flush to the top of each cabinet section. These are for added support. Be sure to stagger the middle supports so that your PH's don't hit in the middle. PH's should face up so they won't be seen inside the cabinet. Also, be sure to check square thru-out.
7Drill Adjustable Shelf Supports
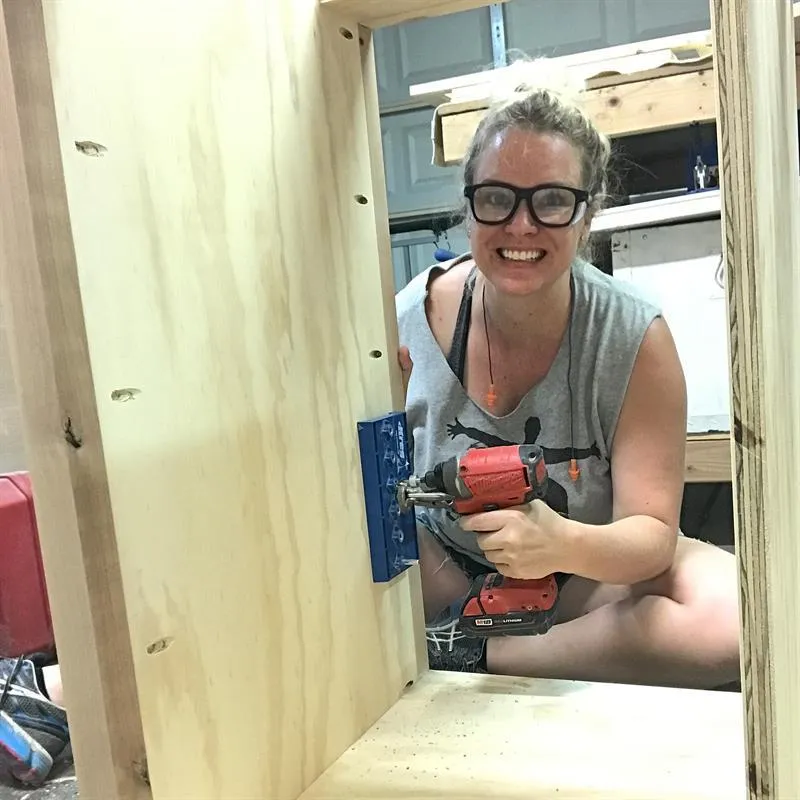
- Drill adjustable shelf supports holes using Kreg's Shelf Pin Jig.
- Add shelf pins and shelves. Edge band plywood shelves using iron-on edge banding. This is only necessary on the edge that is facing out. Shelves will be approximately 3/4" x 18" x 22".
8Glue Up Top
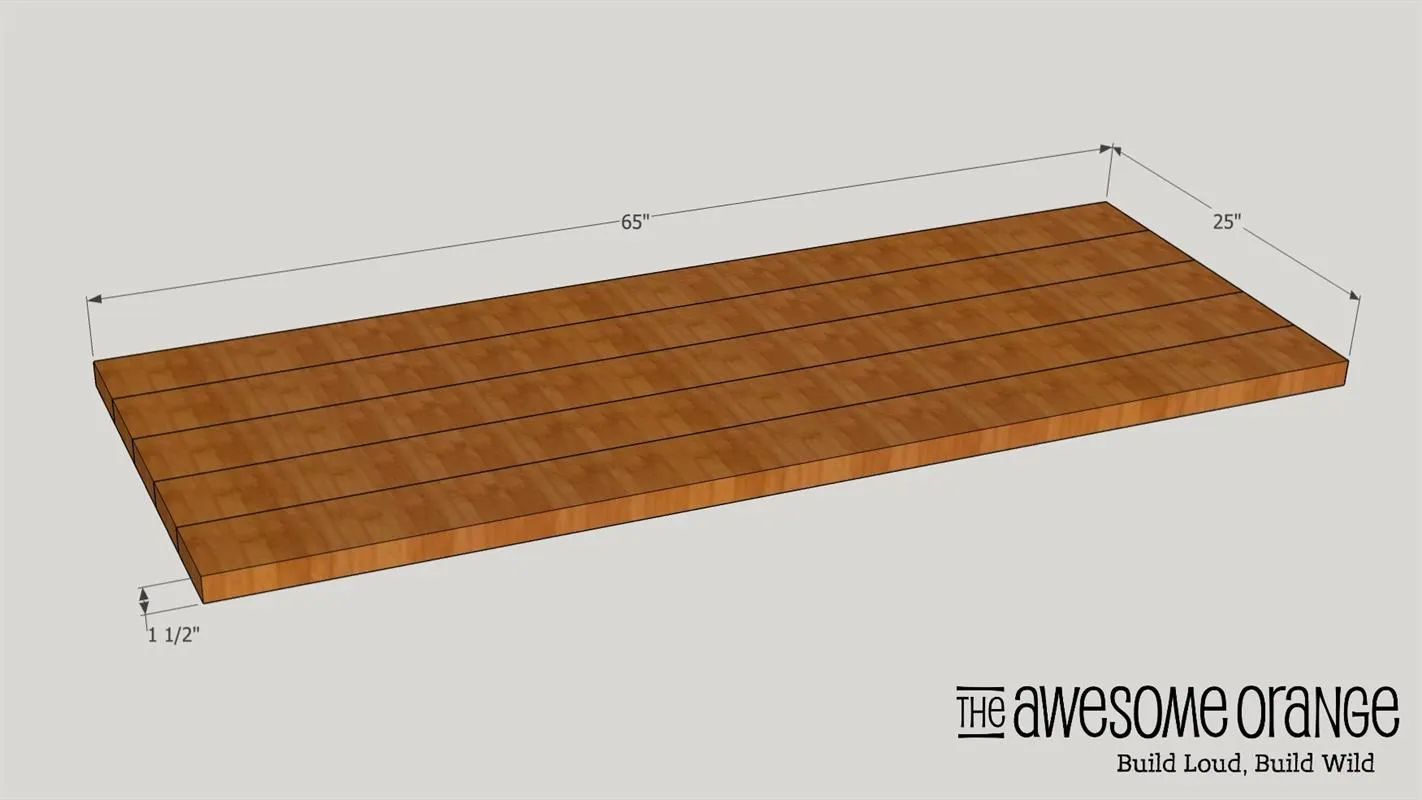
- Rip round overs off the 2x6's to a final width of 5".
- Glue 5 of these pieces together for an overall width of 25".
- Once top is dry trim to final length 65" using a circular saw.
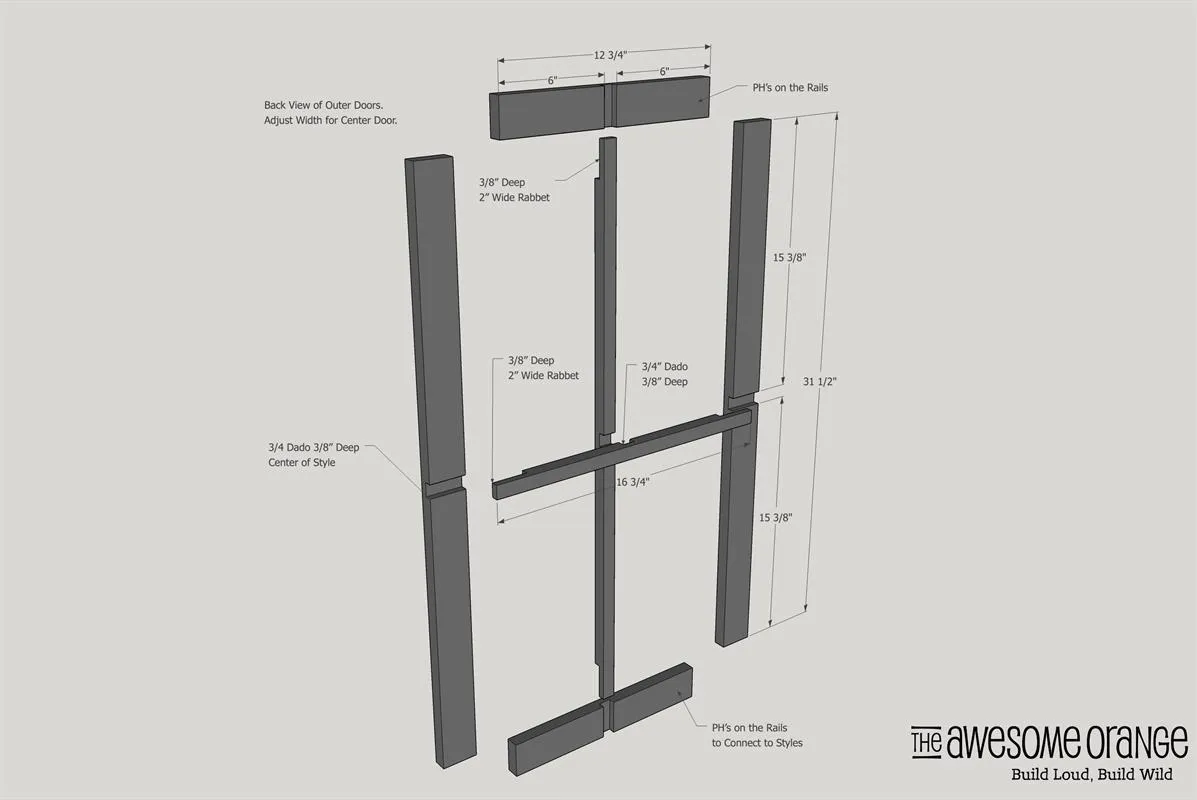
9Assemble Doors
- Once you have all rails and styles cut to appropriate lengths cut a dado 3/4" W and 3/8" deep in the middle of each piece. Do this for the vertical and horizontal pane pieces as well.
- Then dado the ends of the vertical and horizontal pane pieces 2" in from the ends and 3/8" deep. This will create a lap joint from the pane pieces and the rails and styles.
- Then assemble the rails and styles using 3/4" PH's and 1 1/4" PH screws and glue.
- Glue and and brad nail in the pane pieces to the rails and styles. The brad nails aren't necessary but I did that so I didn't have to wait for the glue to dry for the next step.
10Route Rabbet in Doors
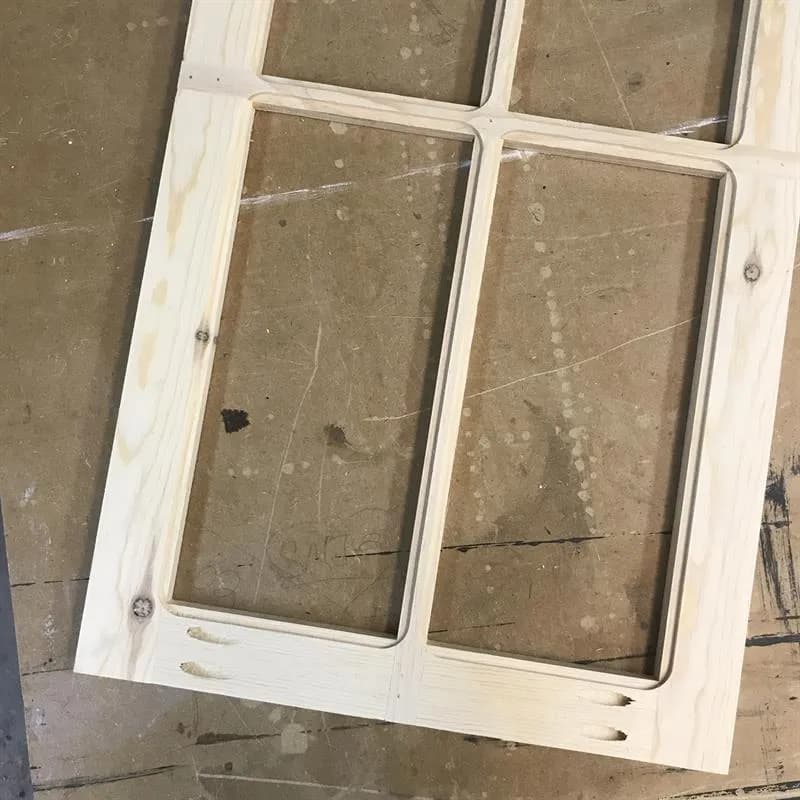
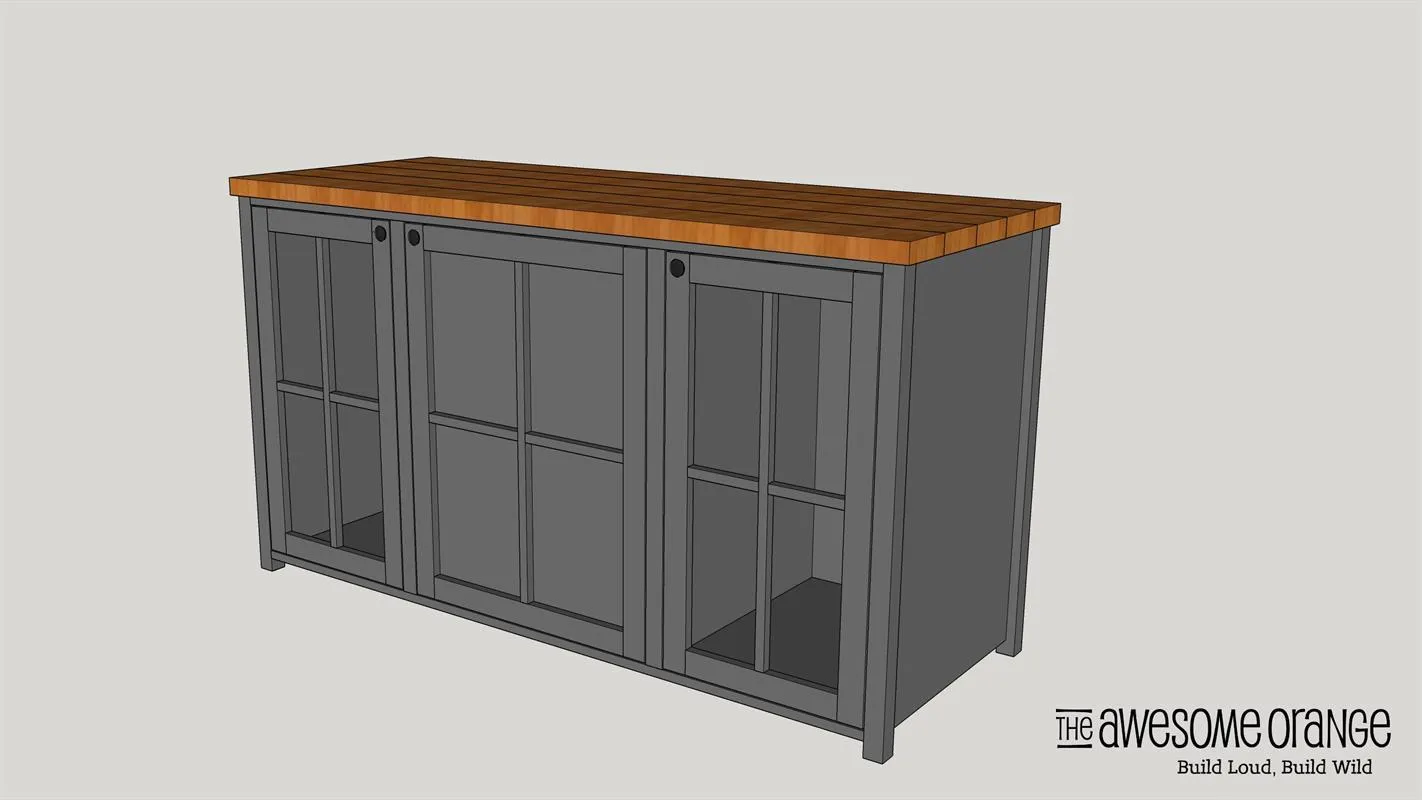
Route rabbets in each pane of the cabinet doors 1/4" deep and 1/4" wide to accept 1/8" thick glass. Once rabbets are done you will need to clean up or square up corners with a chisel or corner punch. ***After painting or staining cabinet doors, install the glass pieces using clear silicone for the two outside doors. For the middle door I inserted 1/4" underlayment so you wouldn't be able to see the mini fridge.
11Install Doors
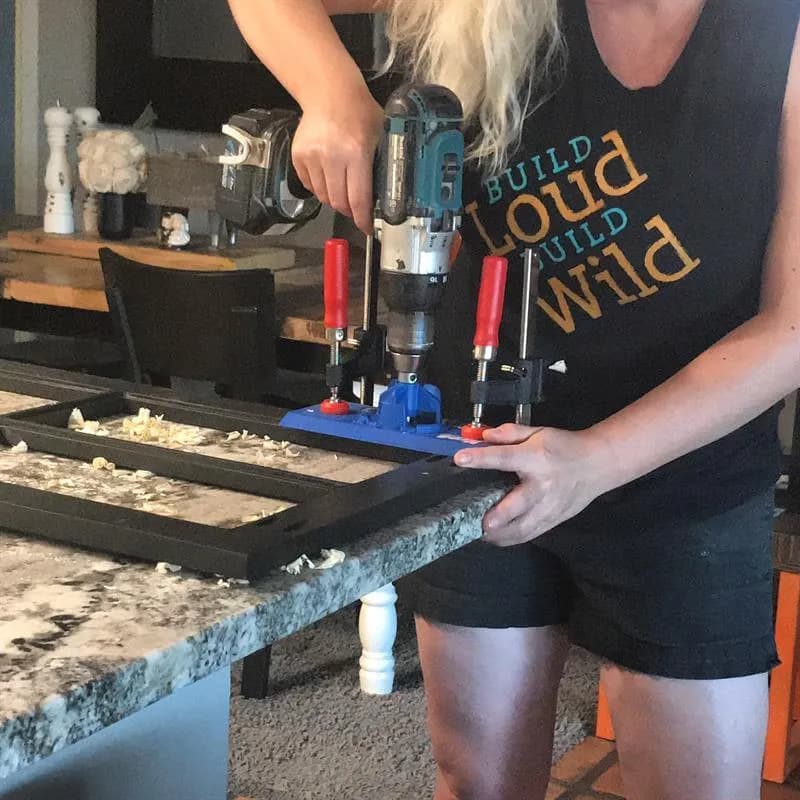
Install doors using Kreg's Concealed Hinge jig. See hinge manufactures requirements on how to set up jig and install. I recommend installing hinges approximately 3 1/2" from the ends of the doors. Once doors are installed, install the magnetic stops at both the top and bottoms of the cabinet. This will allow the door to sit flush with the face frame.
12Attach Top
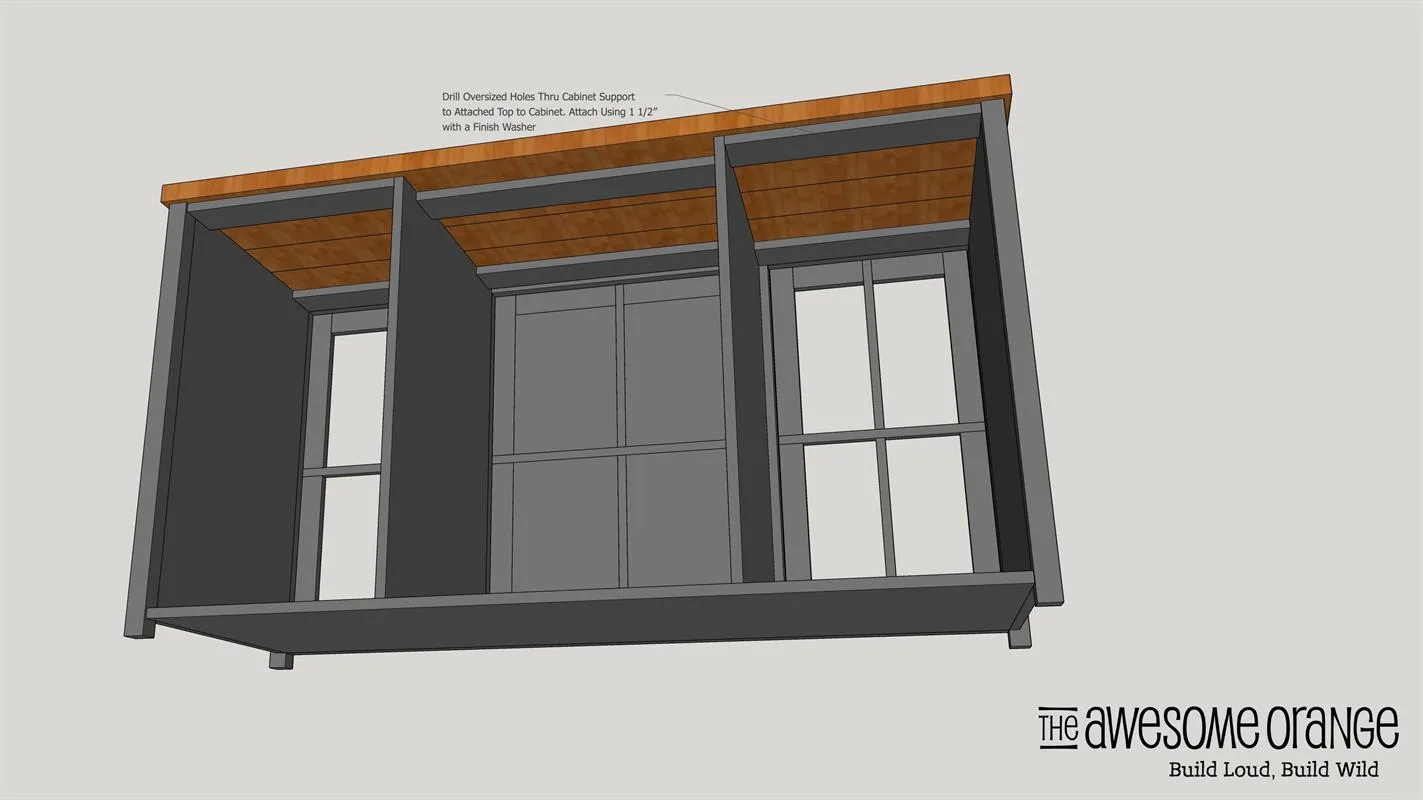
Drill oversized holes (bigger than the screws you are using) in the cabinet support pieces. And then attach top using 1 1/2" screws with a washer into top. The oversized holes in the cabinet supports allow for wood movement.
13Finish It!
Sand and then finish it in your choice of stain, paint, or sealer! ***Paint or stain the cabinet doors before installing the glass, its just way easier that way! Base is painted in Behr Urethane Alykld in SW Color: Tricorn Black Top is finished in Rubio Monocoat Oyster
14Add Back
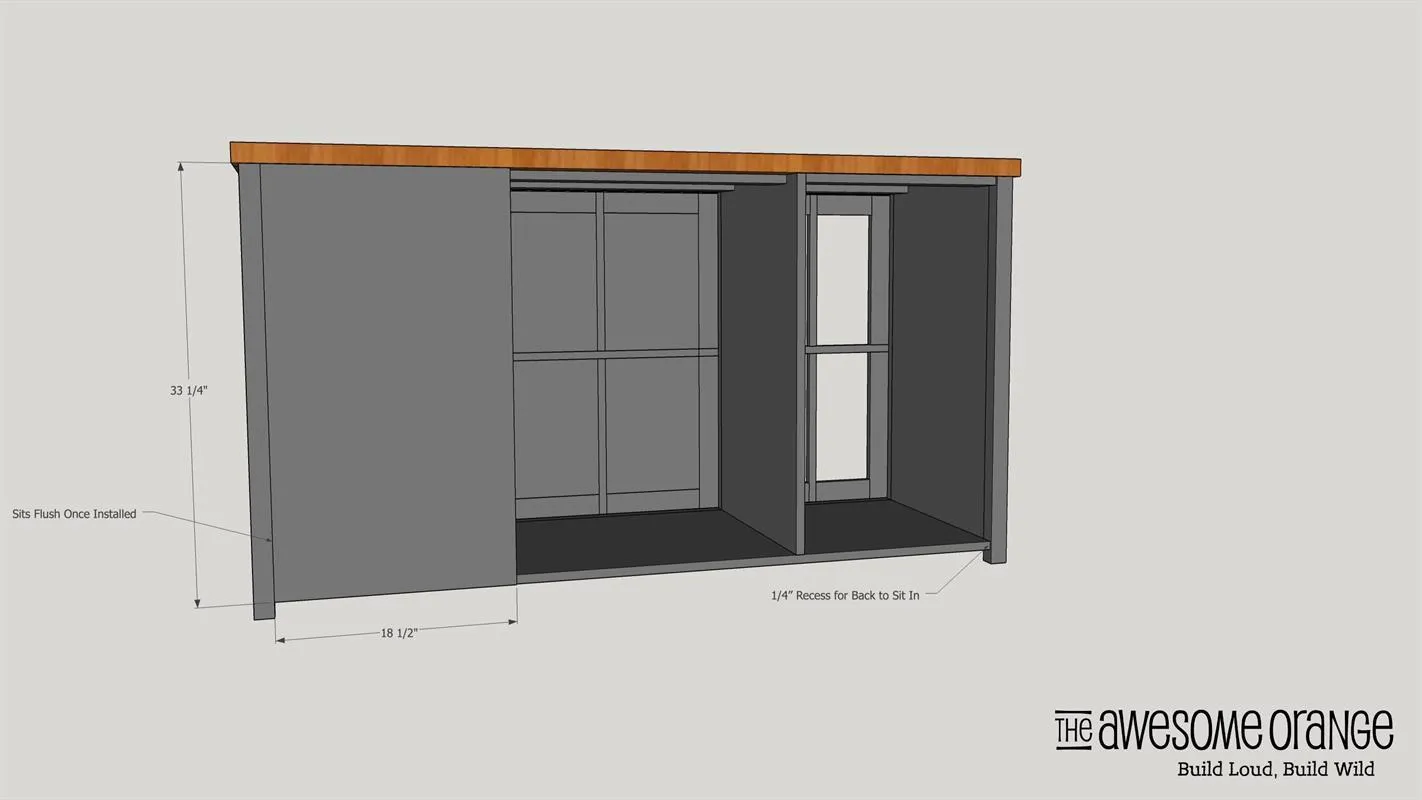
Add 1/4" underlayment on back of the two outside cabinet sections using 5/8" 18ga brad nails. ***It will only have something to nail to on three sides. Back of the middle cabinet section is left open for additional airflow for the mini fridge.
15Visit www.theAwesomeOrange.com
Visit www.theAwesomeOrange.com for more photos of this build!