 Notch
NotchWall-Mounted Media Cabinet
Step-by-step build — 11 steps. Also available as a print sheet.
1Create a Back Panel
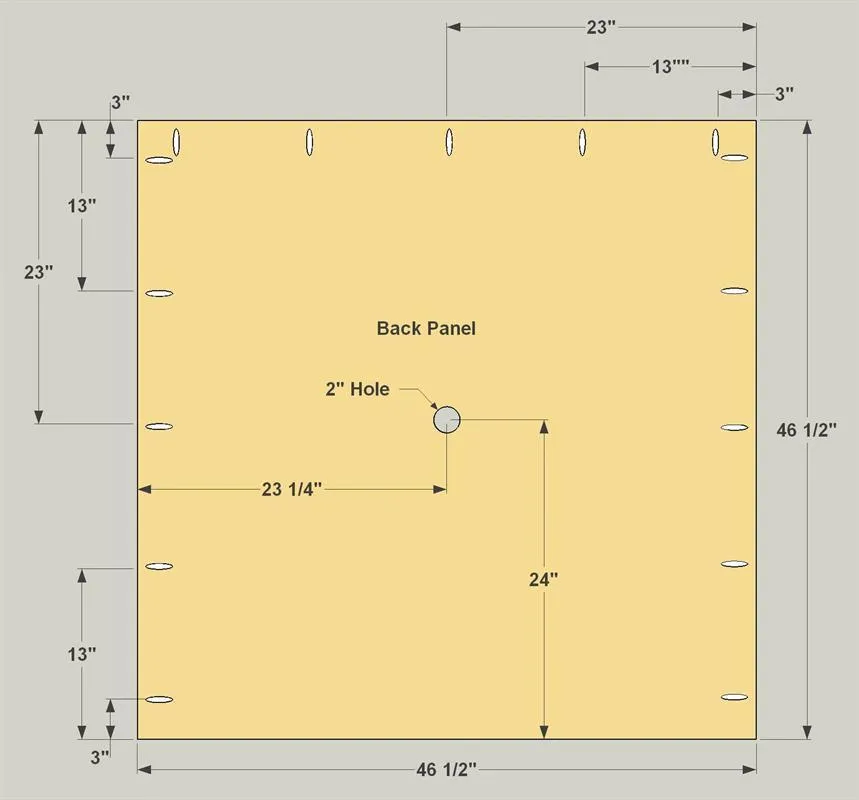
- Cut one Back Panel to size from a sheet of 3/4" plywood, as shown in the cutting diagram.
- Then, with your pocket-hole jig, set up for 3/4" material and drill pocket holes in the Back Panel, as shown. Before you drill the holes, check to see which face is the most-attractive, and then drill the holes in the other face.
- Also drill a 2-hole near the center for cords to pass through.
2Cut Panel Trim
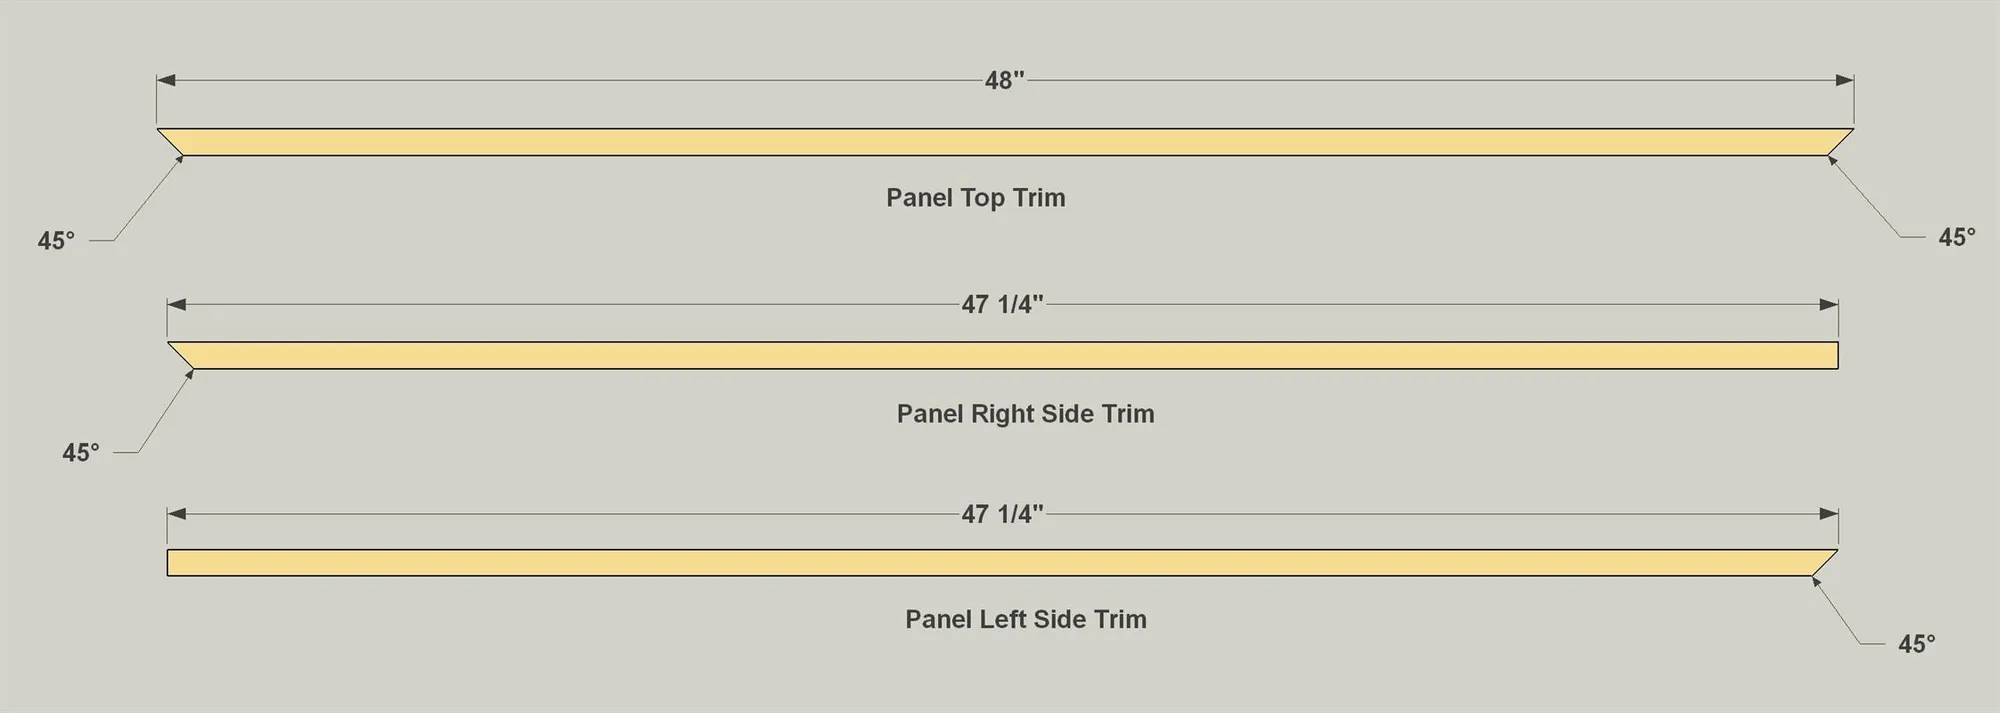
Cut one Panel Top Trim to length from a 1x2 board with both ends cut at 45°, as shown in the cutting diagram. Also cut two pieces of Panel Side Trim to length, cutting one end of each at 45°, and the other end square.
3Add the Trim and a Cleat
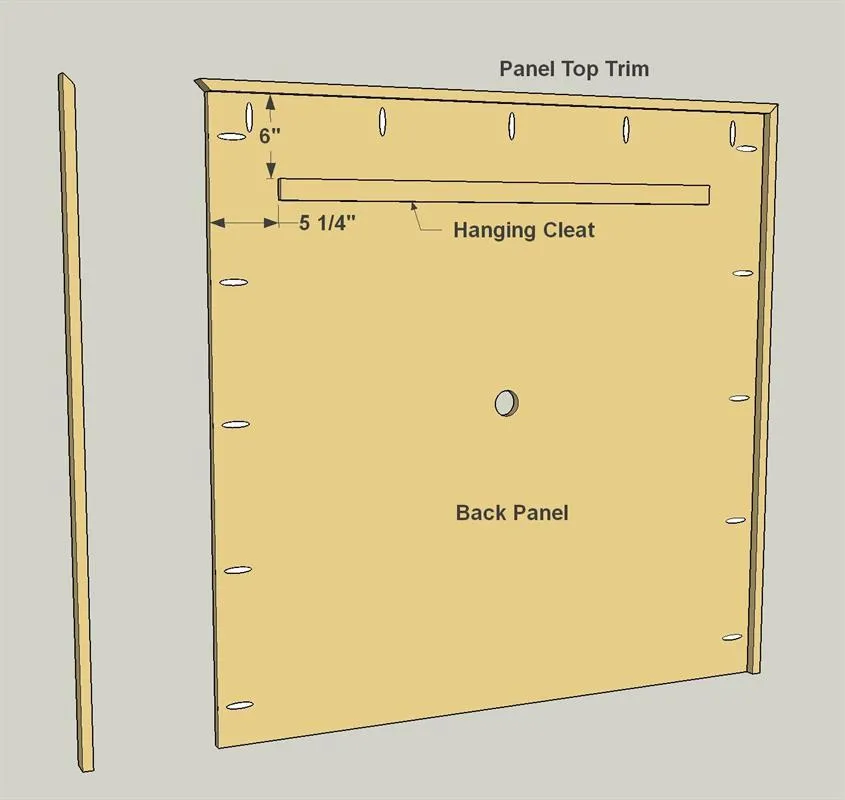
After sanding the Trim pieces, you can attach them to the Back Panel using 1 1/4" fine-thread pocket-hole screws, as shown. Also attach a Hanging Cleat to the backside of the panel using #8 x 1" flat-head screws.
4Make a Case Top and Bottom
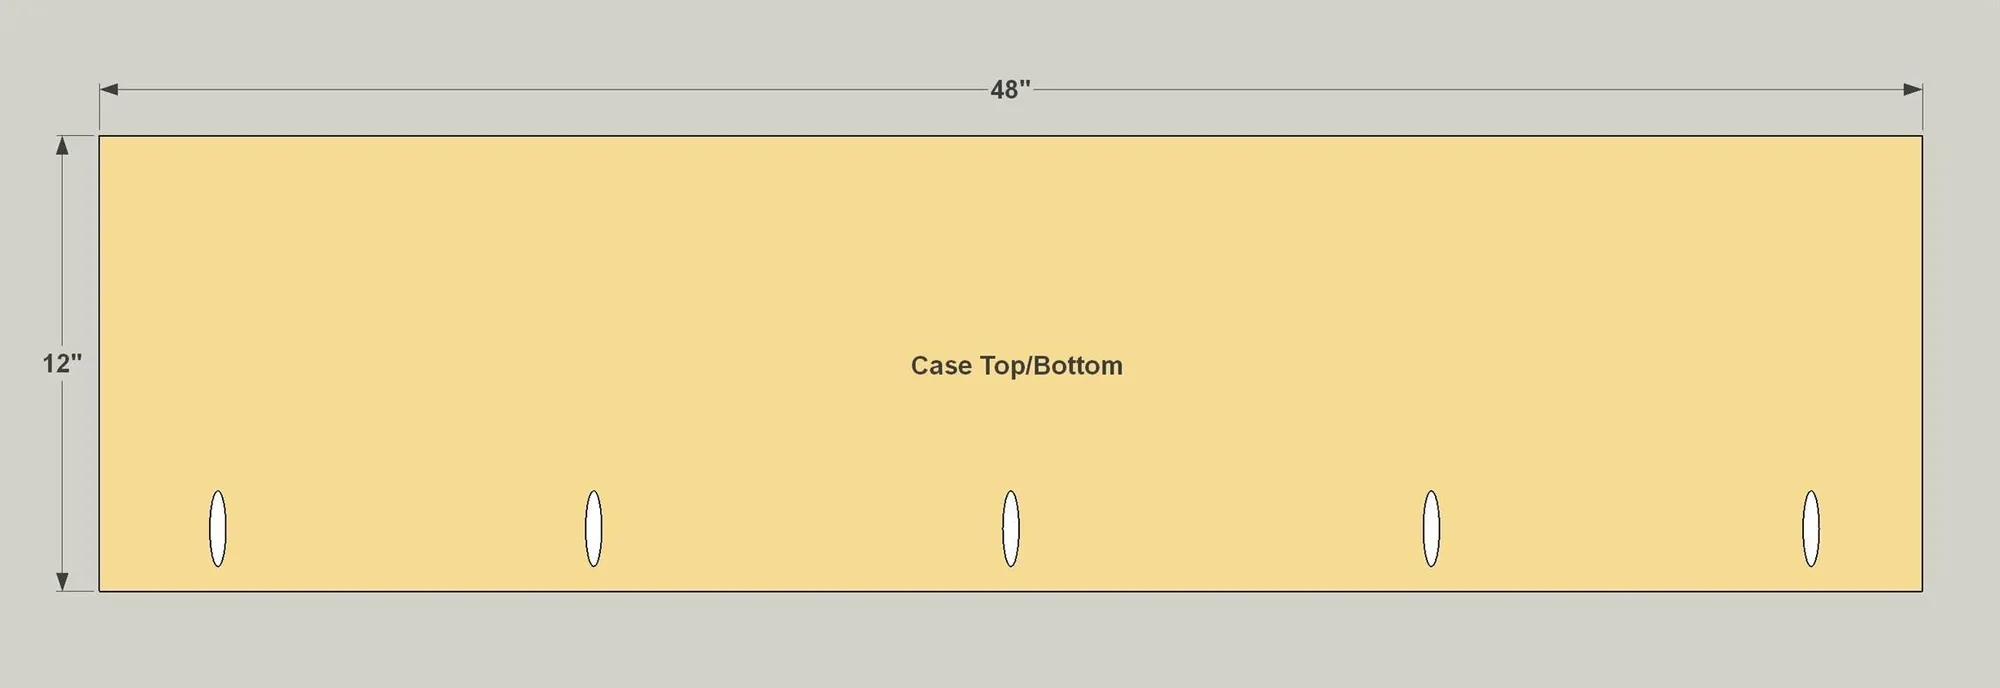
Cut one Case Top and one Case Bottom to size from a sheet of 3/4" plywood, as shown in the cutting diagram. Then, with your pocket-hole jig. set up for 3/4" material and drill pocket holes in the Top and Bottom, as shown.
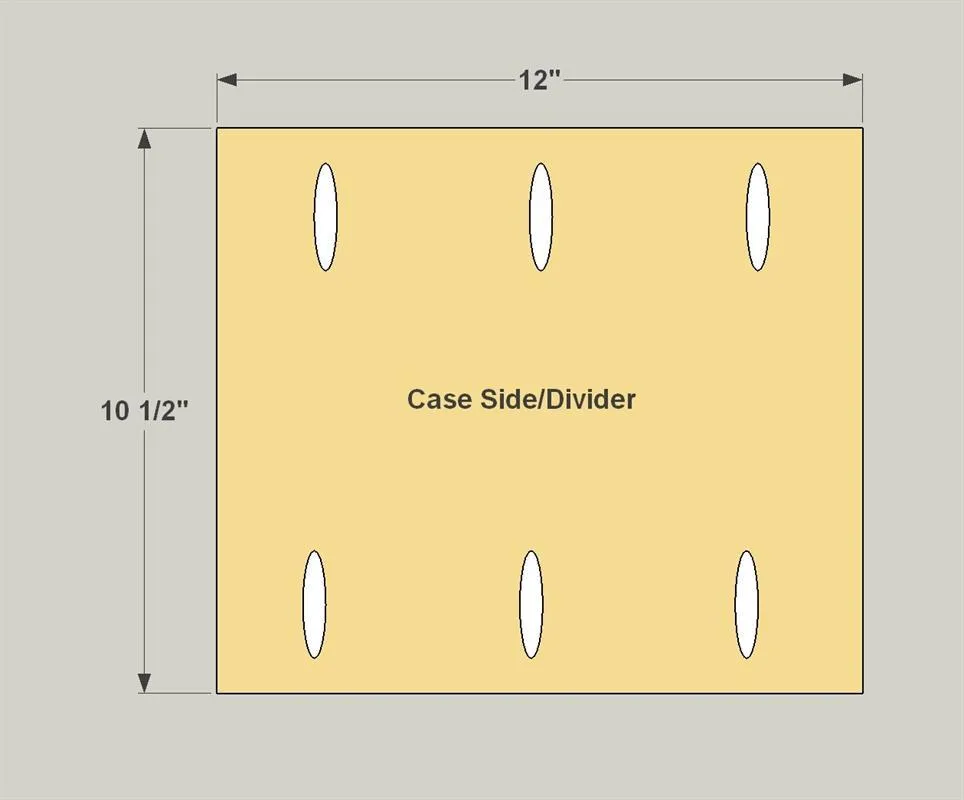
5Create Sides and a Divider
- Cut two Case Sides and one Case Divider to size from a sheet of 3/4" plywood, as shown in the cutting diagram.
- Then, with your pocket-hole jig, set up for 3/4" material and drill pocket holes in the Sides and Divider, as shown. Before you drill the holes, check to see which face is the most-attractive, and then drill the holes in the other face.
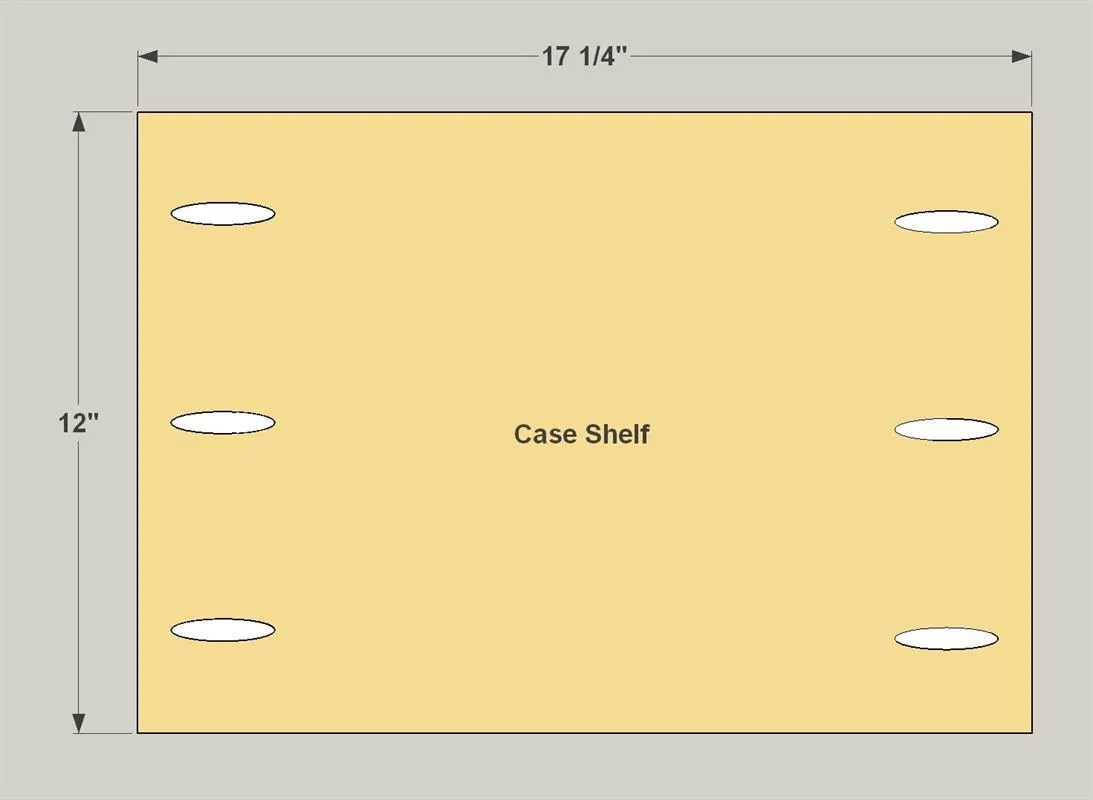
6Add a Shelf
Cut a Case Shelf to size from a sheet of 3/4" plywood, as shown in the cutting diagram. Then, with your pocket-hole jig, set up for 3/4" material, drill pocket holes as shown.
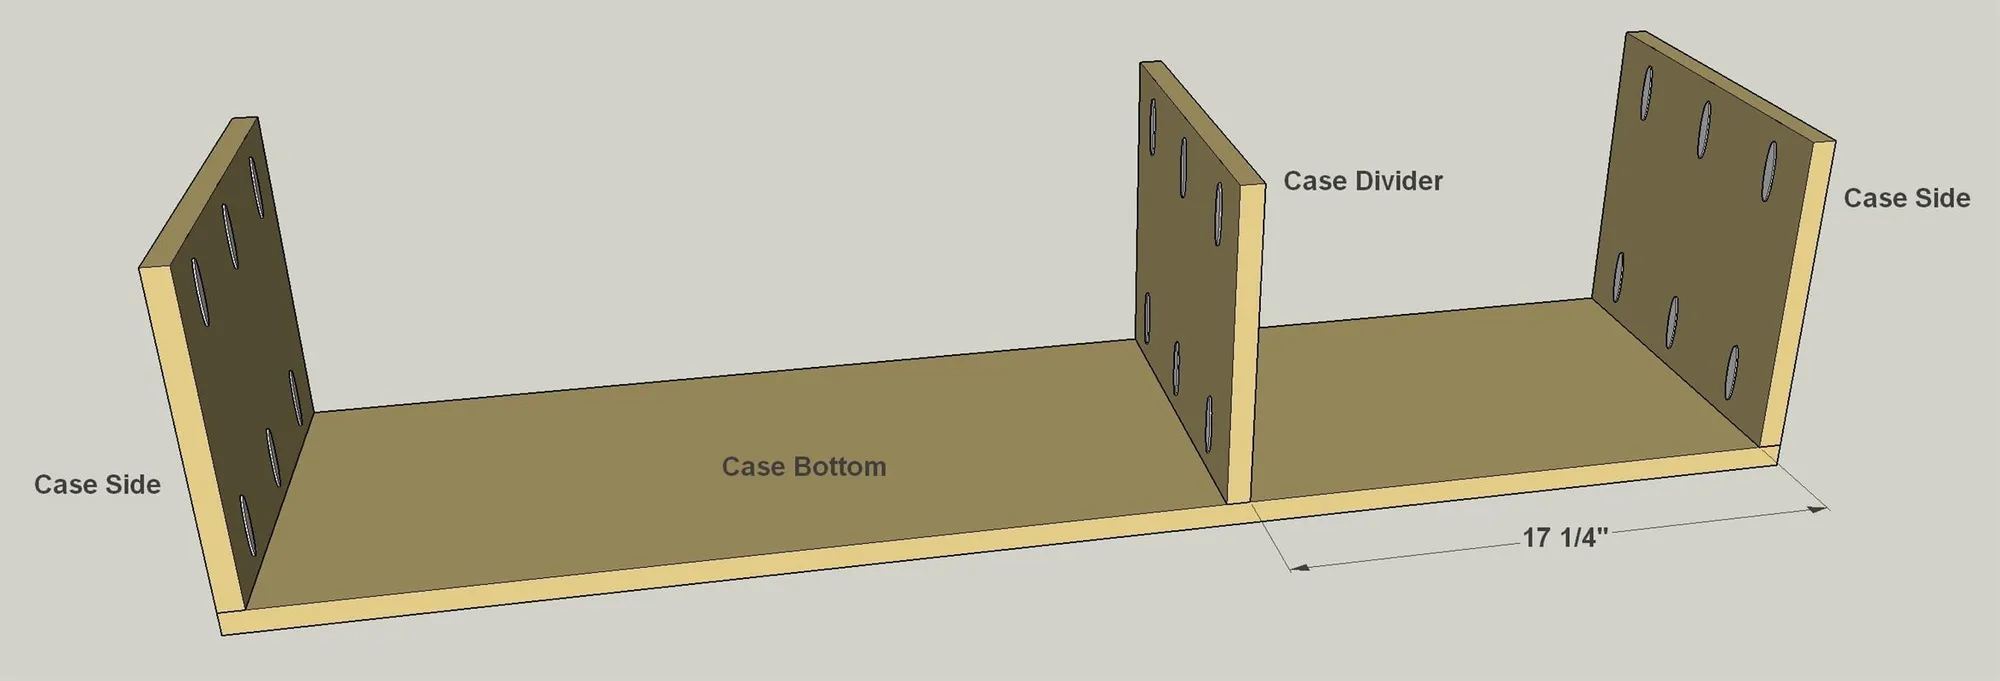
7Start Case Assembly
- Lay out all of the case parts so you can identify the front edges that will be visible. Cover those edges with iron-on edging.
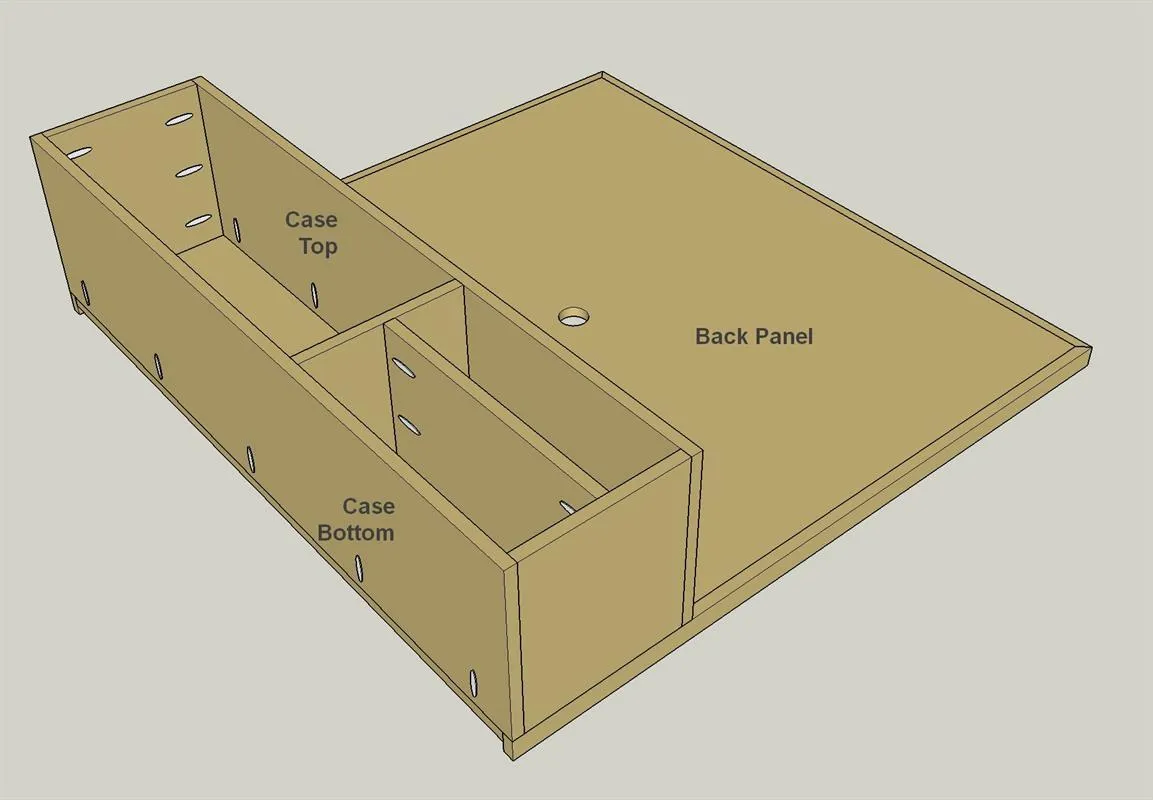
- Then, attach the Case Sides and Divider to the Case Bottom using 1 1/4" coarse-thread pocket-hole screws, as shown.
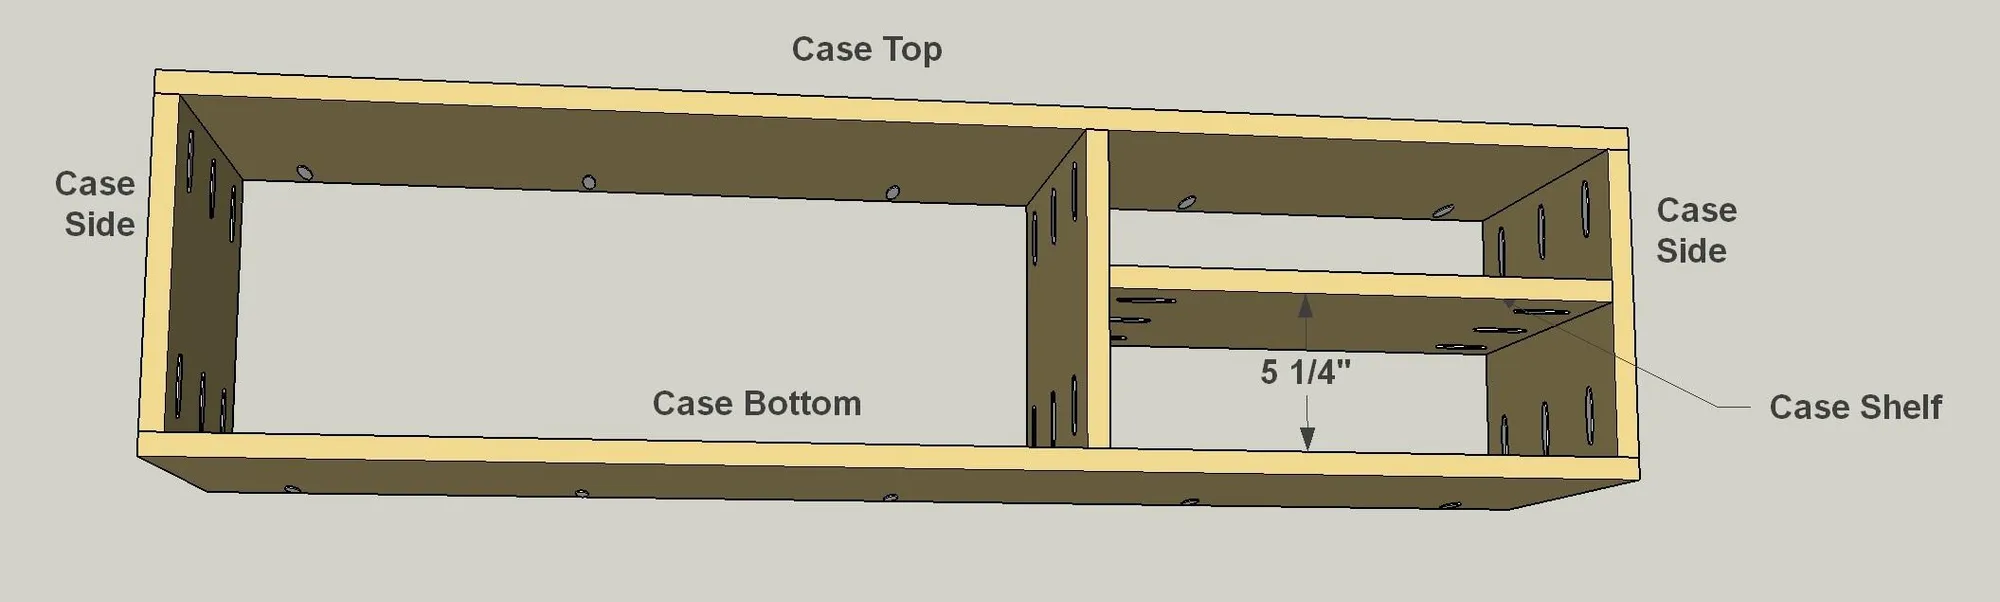
8Complete Case Assembly
Now you can attach the Case Shelf and the Case Top using 1 1/4" coarse-thread pocket-hole screws, as shown. Because of the tight quarters, you may need to use a right-angle attachment on your drill, as well as a short #2 square-drive bit. You can pick up both at your local home center.
9Attach the Case
With the case complete, you can attach it to the Back using 1 1/4" coarse-thread pocket-hole screws, as shown.
10Add Doors if Desired
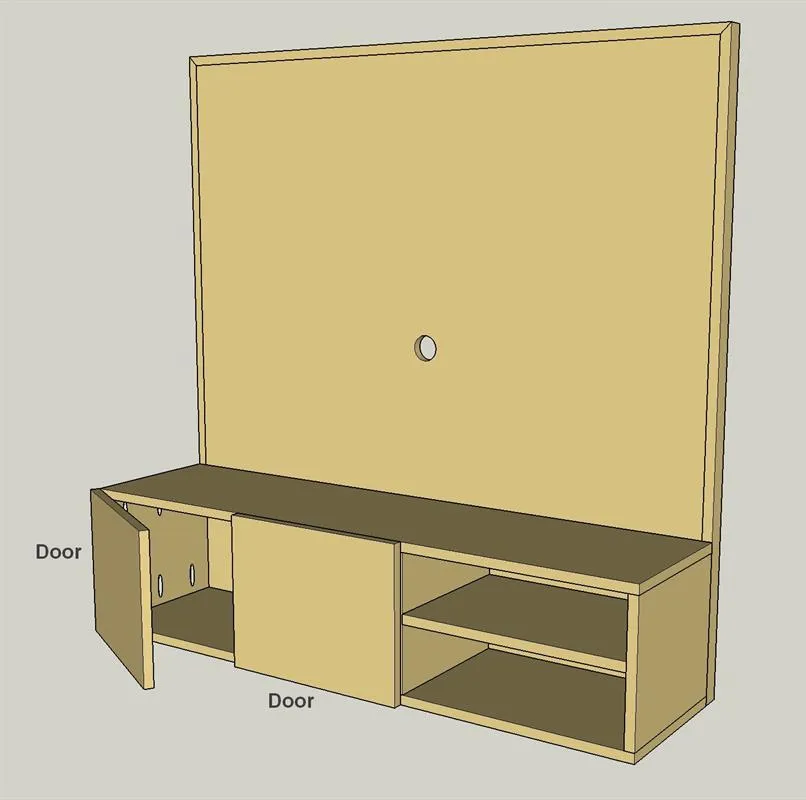
- If you want to enclose the left-hand side of the case, cut two Doors to size from 3/4" plywood, as shown in the cutting diagram.
- Then iron on edging to all four edges.
- Finally, mount the doors using full-overlay cabinet door hinges.
- Then you can stain, finish, or paint the cabinet to fit into your decor.
11Mount the Cabinet
Before mounting the cabinet to the wall, determine the components that you plan to keep in the case. The compartments are large enough for compact items like satellite boxes and Blue-Ray players. Then, drill any necessary holes through the back panel to allow cords to pass through. After that, mount the cabinet on your wall by attaching the hanging system to the Hanging Cleat and to the wall according to the manufacturer’s instructions.