 Notch
Notch- Difficulty
- Intermediate
- Time
- 3–5.8 hours
- Cost
- $$
About this build
Display your favorite artifacts or store books in a unique way with these wall-mounted shelves. The two outer sections flank a center box for a unique look that's not at all difficult to create. All you need are a few boards and some screws, plus a miter saw to make straight 90° cuts.
Tools
Essential
- Drill / Driver
- Miter Saw
- Pocket Hole Jig
- Random Orbit Sander
Optional / nice to have
- Tape Measure
Materials
| Item | Qty |
|---|---|
| Board, 1x6 96" | 1 board |
| Board, 1x12 96" | 1 board |
| Board, 1x3 24" | 1 board |
| 1 1/4" fine-thread pocket hole screws | 28 each |
| #8 x 2" wood screws | 8 each |
| 18" Hangman Picture Hanging System (or similar) | 1 each |
| Wood glue | 1 each |
| Paint/stain of choice | 1 each |
Overall cost: $$. Lumber prices vary by region, species, and season, so we give a band rather than a figure we would only be pretending to know.
Cut list
| Part | Qty | T × W × L |
|---|---|---|
| Long Side | 2 | 3/4" × 5" × 16" |
| Long Top | 1 | 3/4" × 5" × 14" |
| Long Bottom | 1 | 3/4" × 5" × 14" |
| Short Side | 2 | 3/4" × 5" × 7" |
| Short Top | 1 | 3/4" × 5" × 6" |
| Short Bottom | 1 | 3/4" × 5" × 6" |
| Center Side | 2 | 3/4" × 11" × 16" |
| Center Top | 1 | 3/4" × 11" × 14" |
| Center Bottom | 1 | 3/4" × 11" × 14" |
| Cleat | 1 | 3/4" × 2" × 14" |
What to buy
Buy 3 boards at 8 ft.
3/4" × 11"
1 board
3/4" × 5"
1 board
3/4" × 2"
1 board
Assumes 8 ft stock, a 1/8" saw kerf, and buying each part at its own width. Change the board size or kerf on the full board plan →
Instructions
1Make Parts for the Outside Boxes
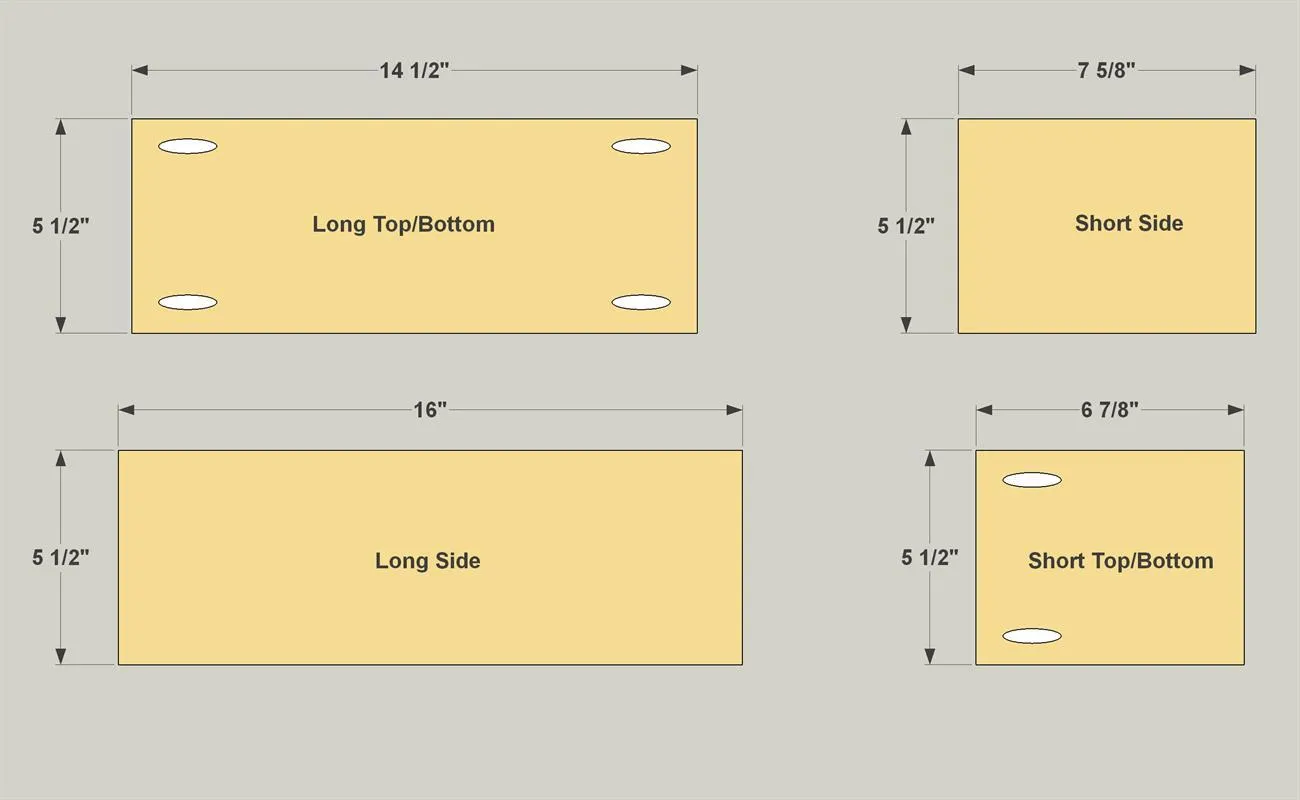
- Cut parts to length for the outer boxes from a 1x6 board, as shown in the cutting diagram. You'll need two Long Sides, two Short Sides, one Long Top, one Long Bottom, one Short Top, and one Short Bottom. With your pocket hole jig set up for 3/4" material, drill pocket holes where shown.
- Then you can sand the parts.
2Assemble the Outside Boxes
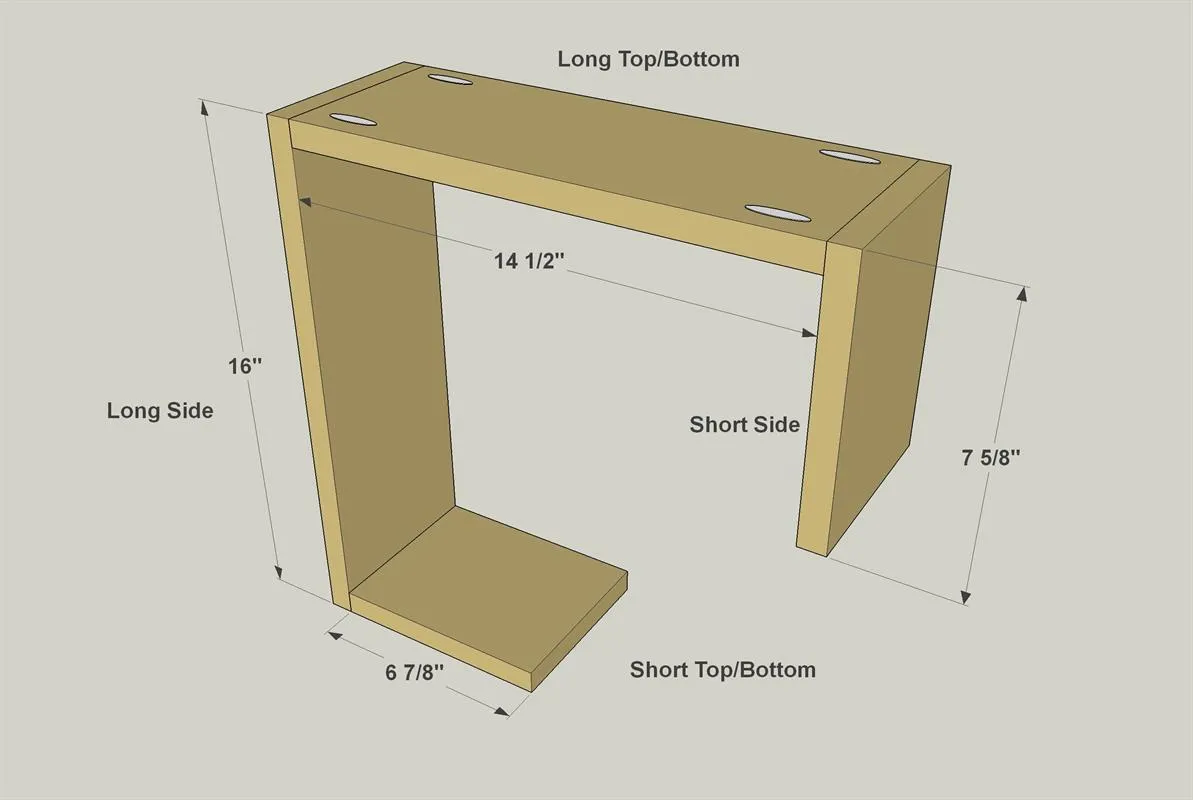
Now you can assemble the outside boxes using 1 1/4" pocket hole screws. Which screw you should choose depends on the type of wood you are using. See the Tip, below.
Tip: Choose the Right Screw When you shop for pocket hole screws, you'll see two types: fine-thread (left) and coarse-thread (right). Which you should choose depends on the type of wood you are using for your project. Fine-thread is meant for hardwoods, such as oak, maple, cherry, hickory, or poplar. Coarse-thread screws are for softwoods, such as pine and spruce, as well as plywood and other sheet goods.
3Make Parts for the Center Box
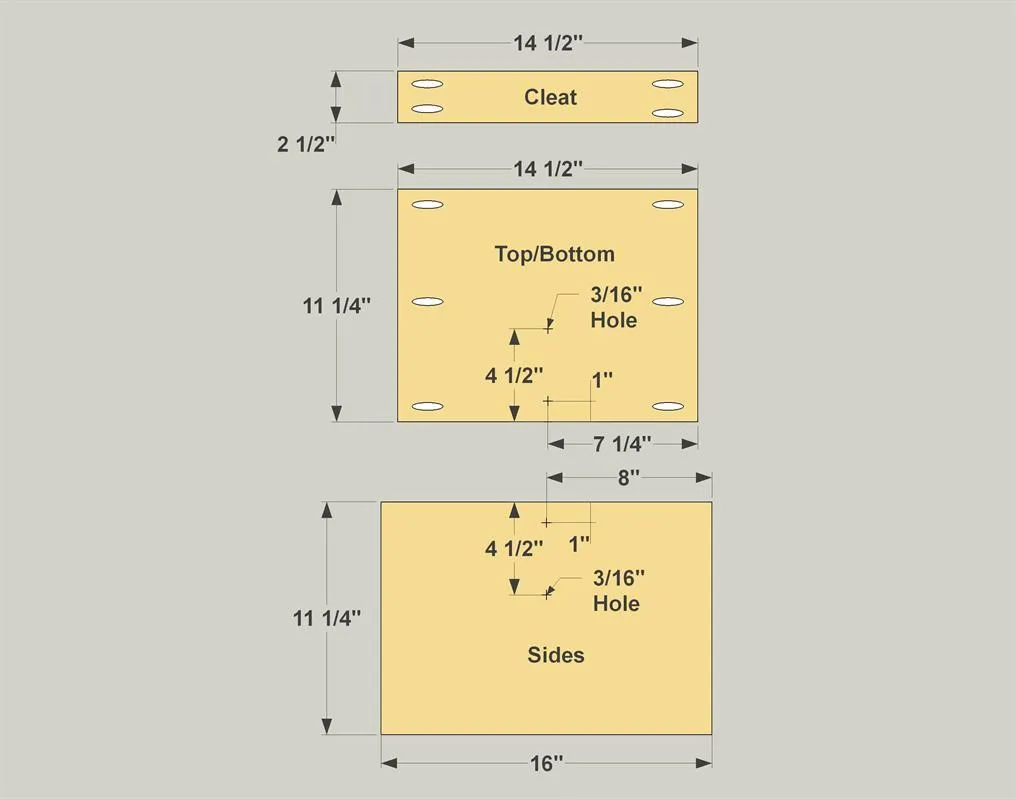
- Cut parts to length for the center box from a 1x12 board, as shown in the cutting diagram. You'll need two Center Sides, one Center Top, one Center Bottom.
- Also cut one Cleat from a 1x3 board. With your pocket hole jig set up for 3/4" material, drill pocket holes where shown.
- Also drill 3/16" holes in the Sides, Top, and Bottom, where shown. These are for wood screws you’ll use later when attaching the outer boxes.
- Then you can sand the parts.
4Assemble the Center Box
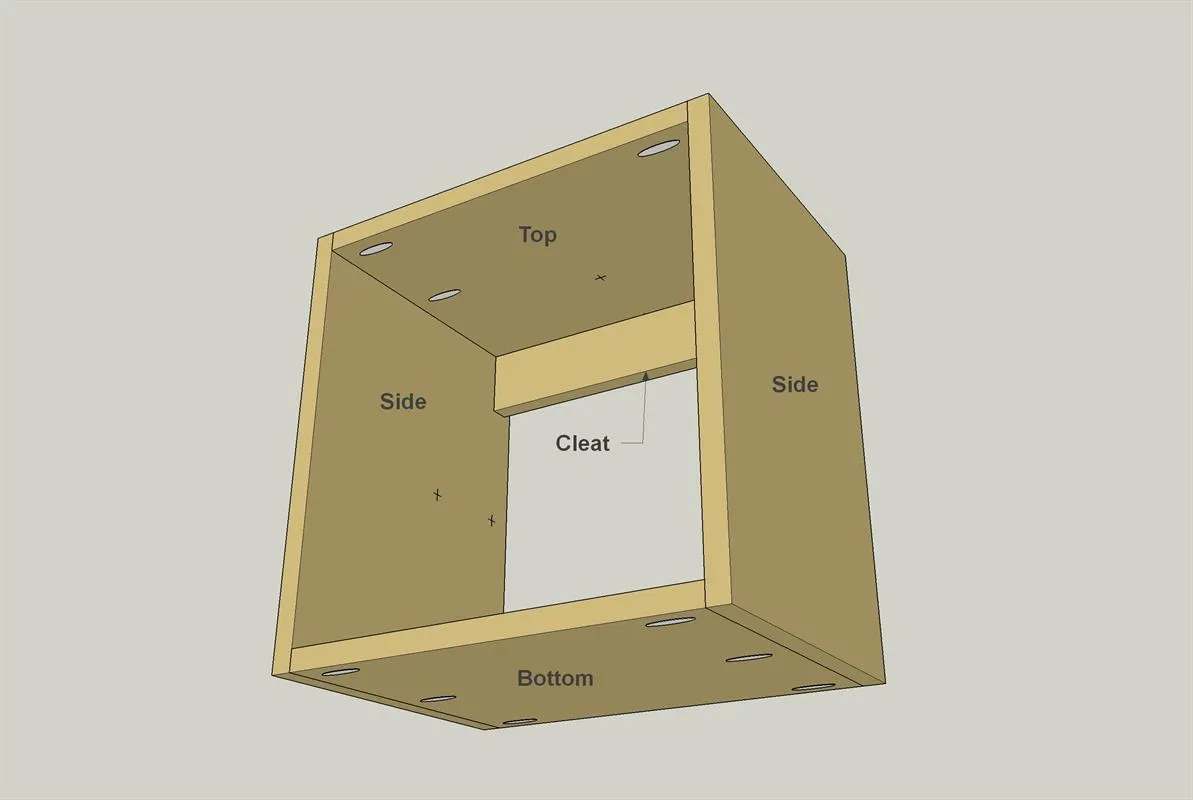
Now you can assemble the center box, as shown, using 1 1/4" pocket hole screws.
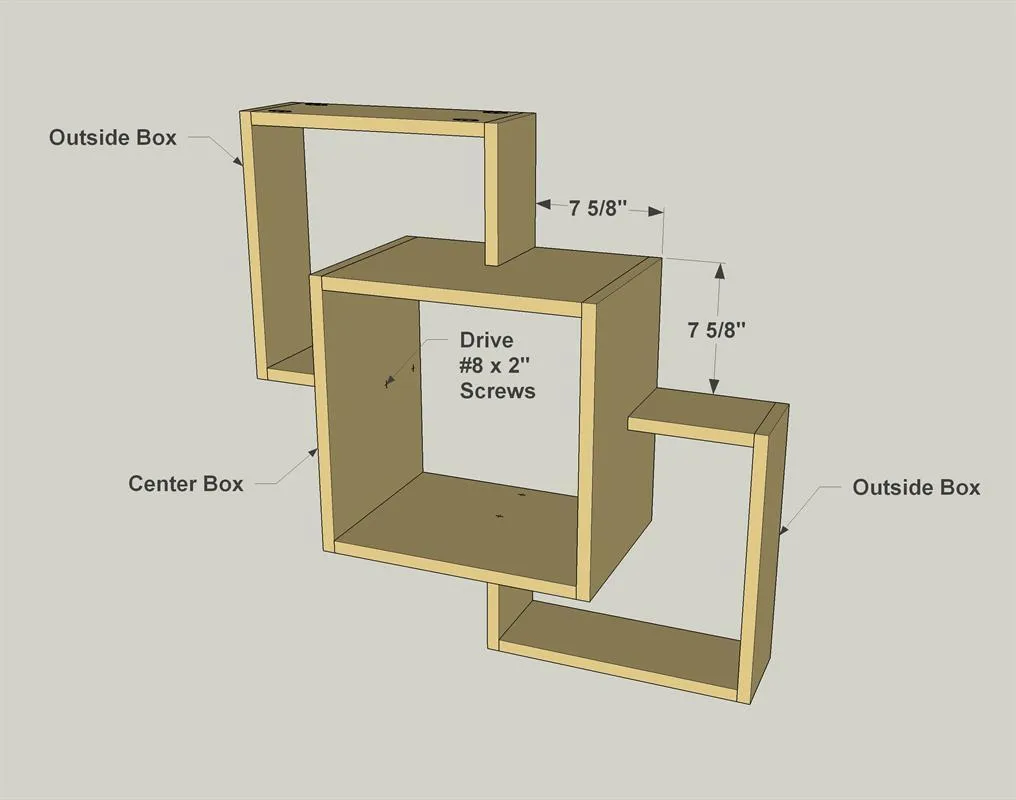
5Bring the Boxes Together
- Lay the boxes on a flat surface, and align the outside boxes with the center box, as shown.
- Now you need to mark positions for pilot holes in the ends of the outside box parts that will receive #8 x 2" wood screws. To do that, insert a screw into each hole in the center box, and push the tip into the mating piece on the outside boxes.
- Then, remove the outside boxes and drill 1/8" holes about 1" deep in the ends of the boards at these locations. Hold the drill straight as you make these holes. With the holes drilled, you can attach the outer boxes using those #8 x 2" screws.
6Stain, Paint, and Hang Your Shelves
With everything complete, you can apply the stain or paint of your choice. Or, try a combination of both to give the project some extra pop. When you’re ready to mount your display shelves to the wall, there are lots options. One that works great is called a “Hangman” system. The 18" version is a good choice, but it’s a bit too long. Just cut it to length with a hacksaw, mount the pieces to the cleat and wall according to the instructions, and you’re set.
Tags
- Floating Shelves
- Intermediate
Reviews & builds
No reviews yet
Sign in to review this plan or share your build.
No reviews yet. Be the first to build this.