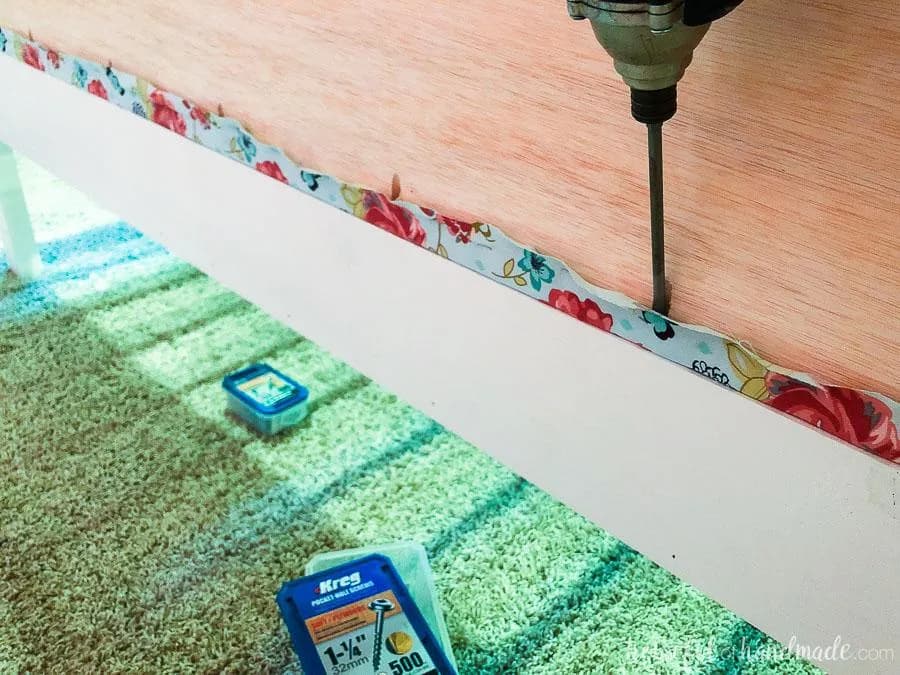
Notch
Upholstered Daybed
Step-by-step build — 16 steps. Also available as a print sheet.
1Router inner frame pieces
Router a 1/4" x 1/4" notch on the inside back of the inner frame pieces as shown in the picture below. For the inner frame vertical pieces, do not router the notch for the top and bottom 1 1/4" of the boards.
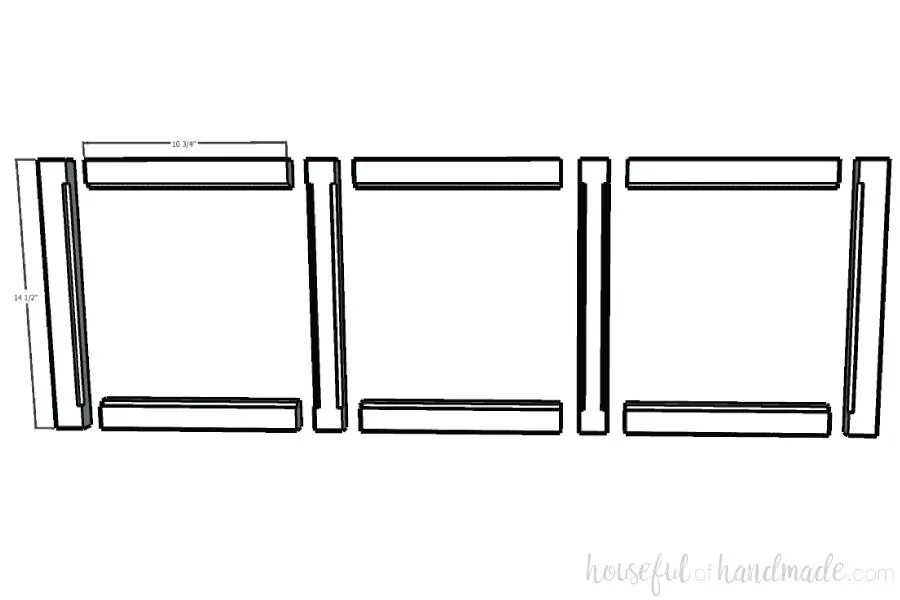
2Assemble the inner frame
Drill pocket holes set for 3/4" material to each side of the inner frame horizontal pieces. Using wood glue and 1 1/4" pocket hole screws, secure the horizontal pieces to the vertical pieces making sure the inner frame is flush on the top and bottom.
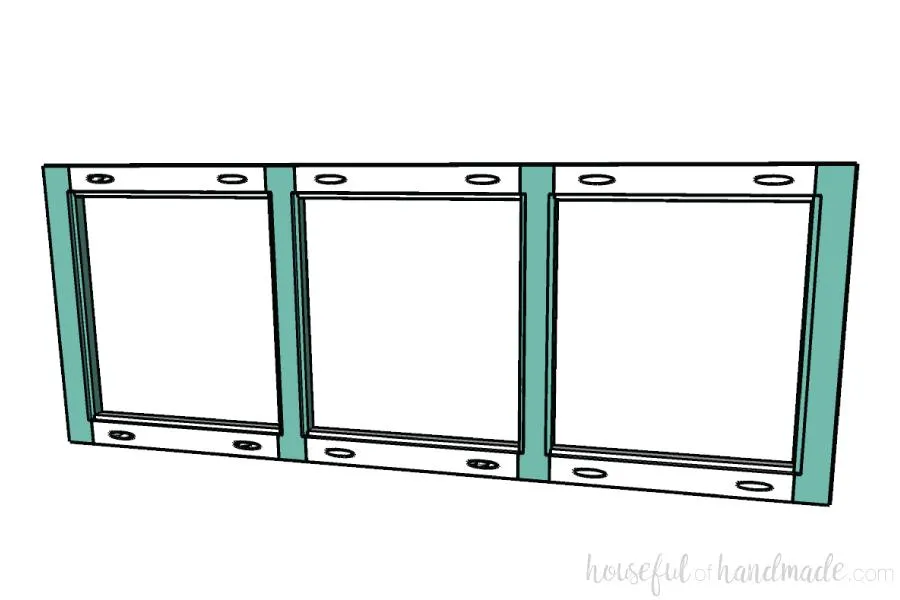
3Attach the outer frame pieces
Drill pocket holes set for 3/4" thick wood to both ends of the vertical inner frame pieces. Secure the outer frame pieces to the top and bottom of the inner frame so they are flush at the ends and inset from the back the same depth as the 1/2" plywood (around 0.43").
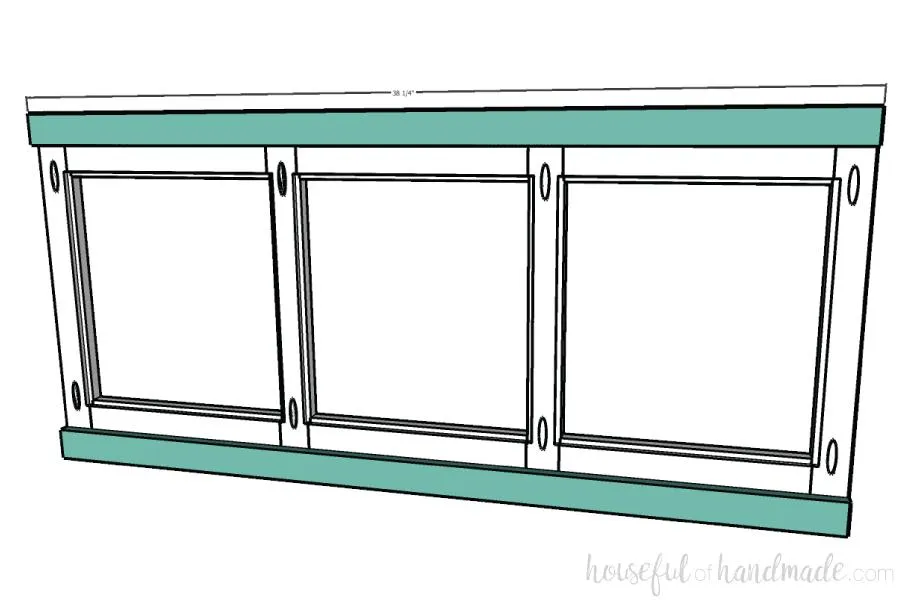
4Attach the legs
- Drill pocket holes set for 1 1/2" thick wood to the ends of the outer frame pieces.
- Attach the leg pieces to the sides so they are flush at the top and flush to the 2x2 outer frame pieces. Make sure to attach the legs so the two sides are mirrored.
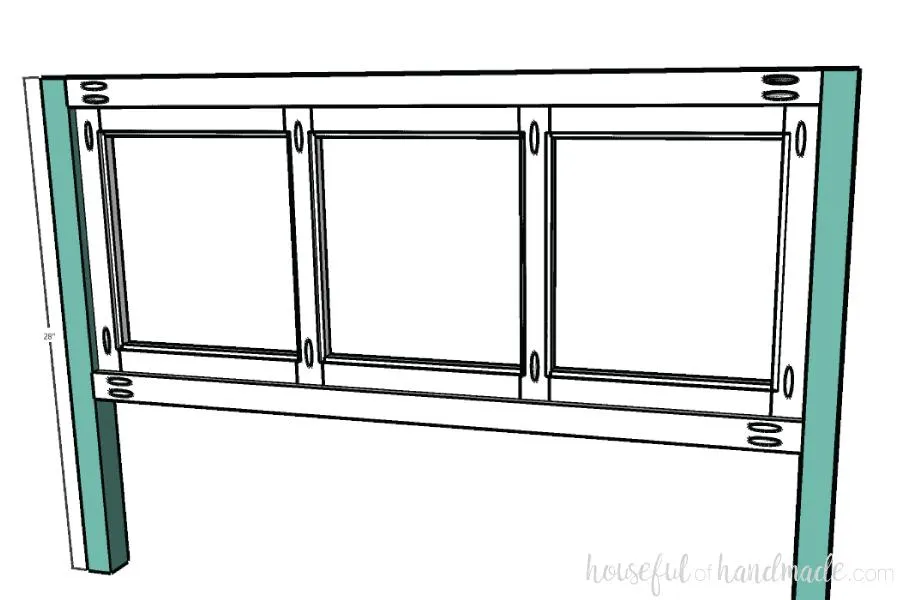
5Add the beadboard inset
Cut the beadboard (or 1/4" plywood if you do not want the beadboard design) easily with the Kreg AccuCut and a circular saw. I like to cut the beadboard about 1/8" smaller than the opening so it is easier to fit into the routered edge. Secure with wood glue and 1/2" finishing nails.
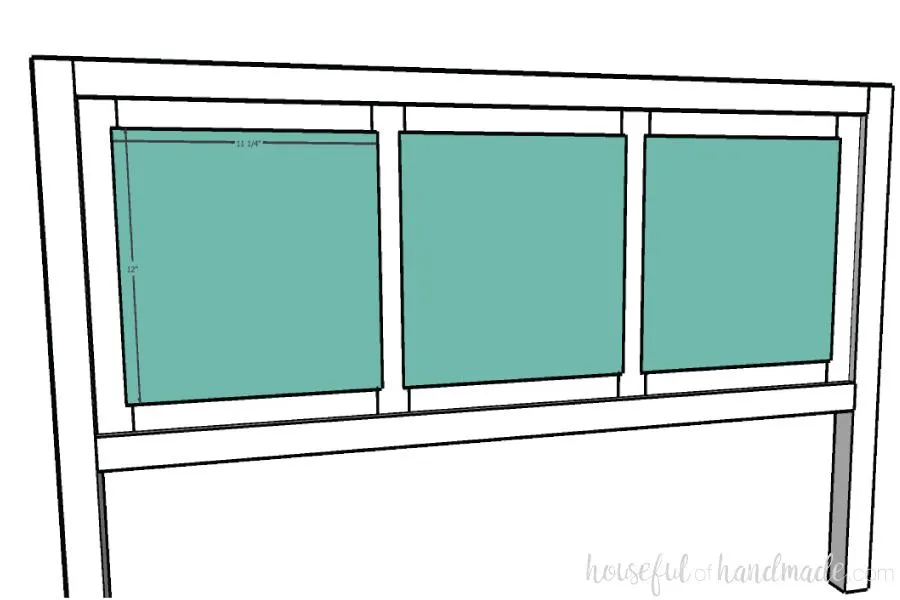
6Add the plywood insets
Cover the back of the inner frame and beadboard with the 1/2" plywood insets using wood glue and 1" finishing nails around the edges.
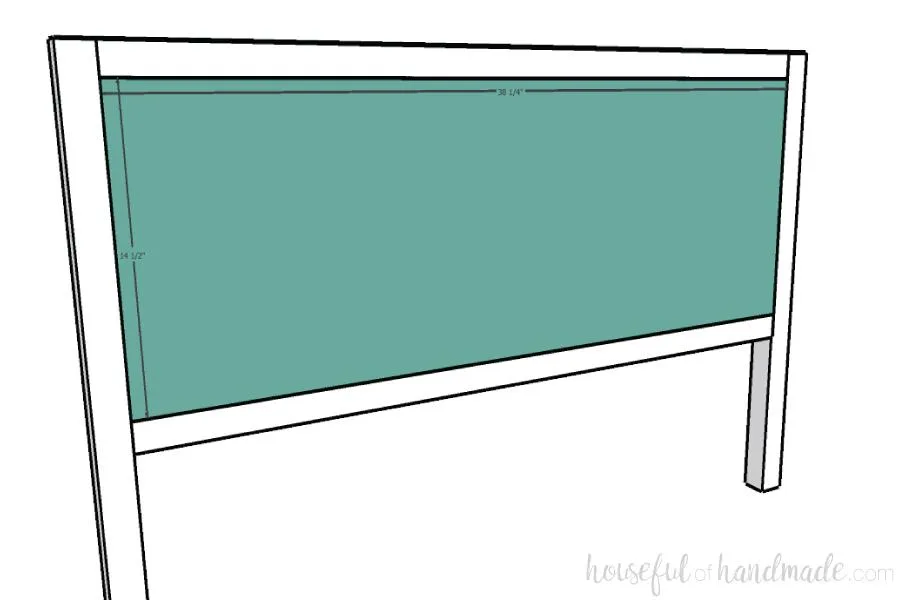
7Finish off top of sides
Attach the top side pieces with wood glue and 1 1/4" finishing nails so they are flush with the back and inside of the sides. Again, make sure you are mirroring the sides.
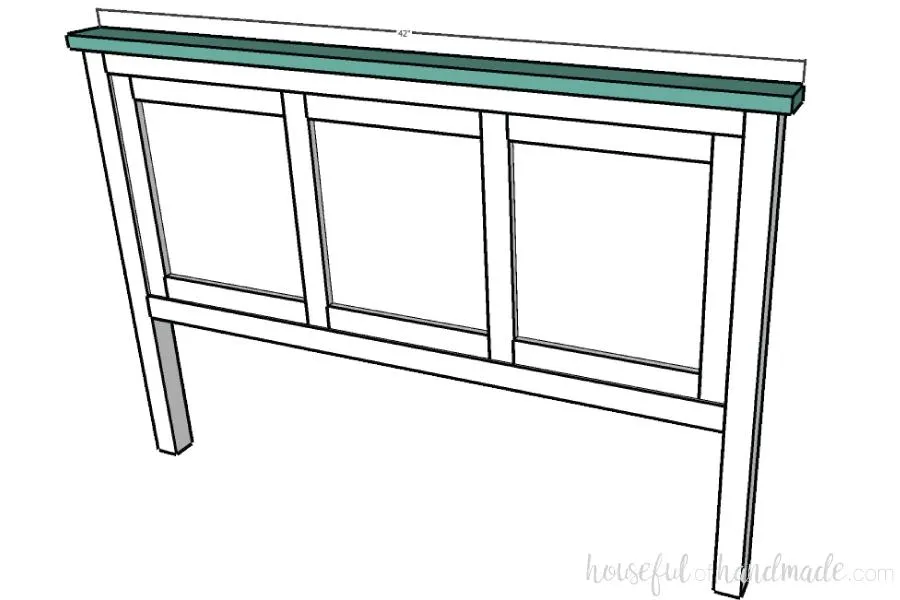
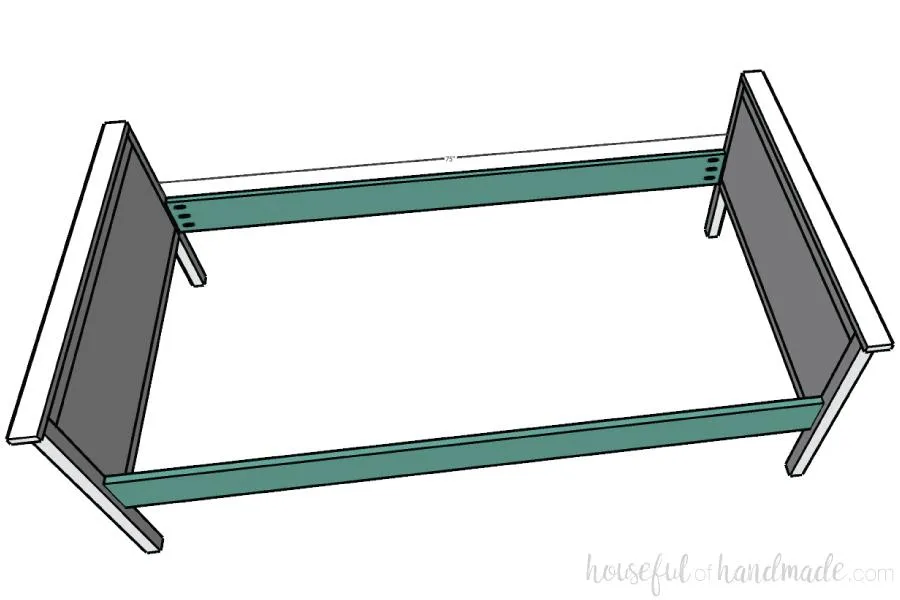
8Build the frame
- Drill pocket holes set for 3/4" thick wood to the sides of the frame pieces.
- Build the frame by securing the frame pieces to the sides. The back frame piece should be flush to the back of the side piece and even with the bottom of the outer frame pieces. The front frame piece should be set back from the front of the side legs 3/4".
9Add slat supports
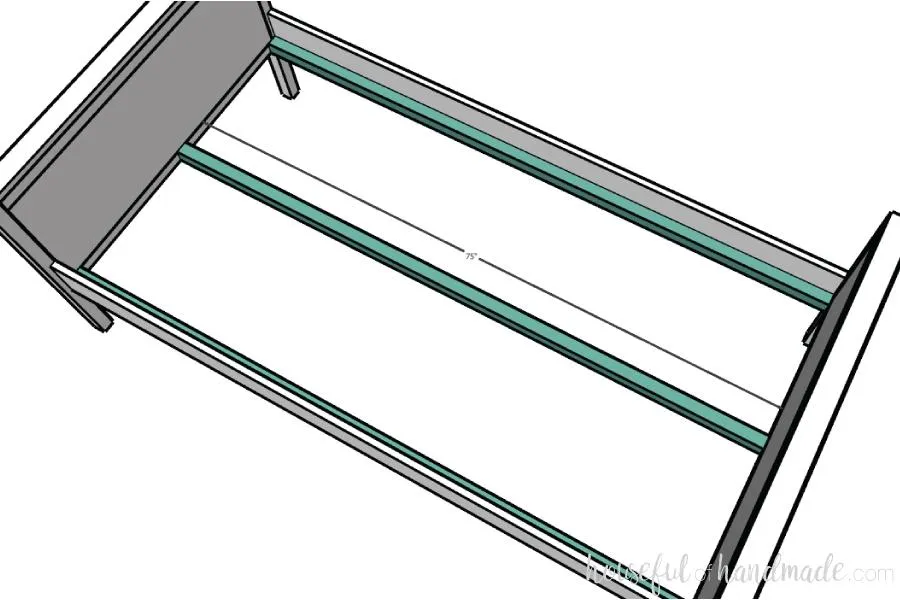
Attach the side slat supports to the side of the frame pieces so they are flush with the bottom of the frame pieces with wood glue and 1 1/4" finishing nails. Attach the center slat support with pocket holes on either end.
10Add bed slats
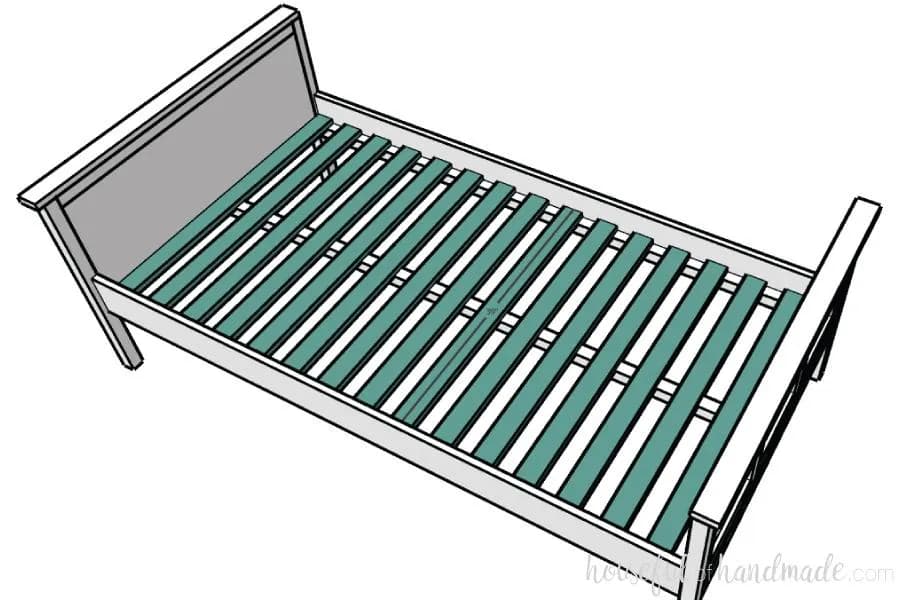
Cut the slats from inexpensive 1x3 furring strips and space evenly along the bed frame. Secure with 1 1/4" finishing nails.
11Cut the headboard
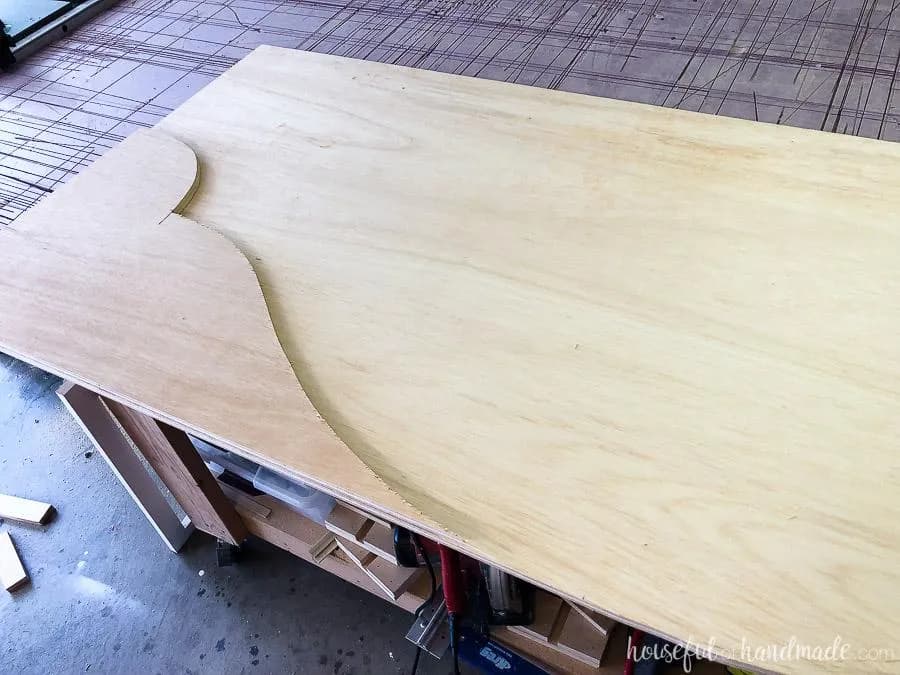
- From the 30" x 74 3/4" piece of plywood, cut a decorative edge on the top. I freehanded the design by marking the center and where I wanted the design to stop on the sides (so it was flush with the top of the sides) then drew the design one half.
- Cut the one half with a jig saw, then use the cut-off piece to draw the same design mirrored on the other half.
- Cut it out as well.
12Cut the foam
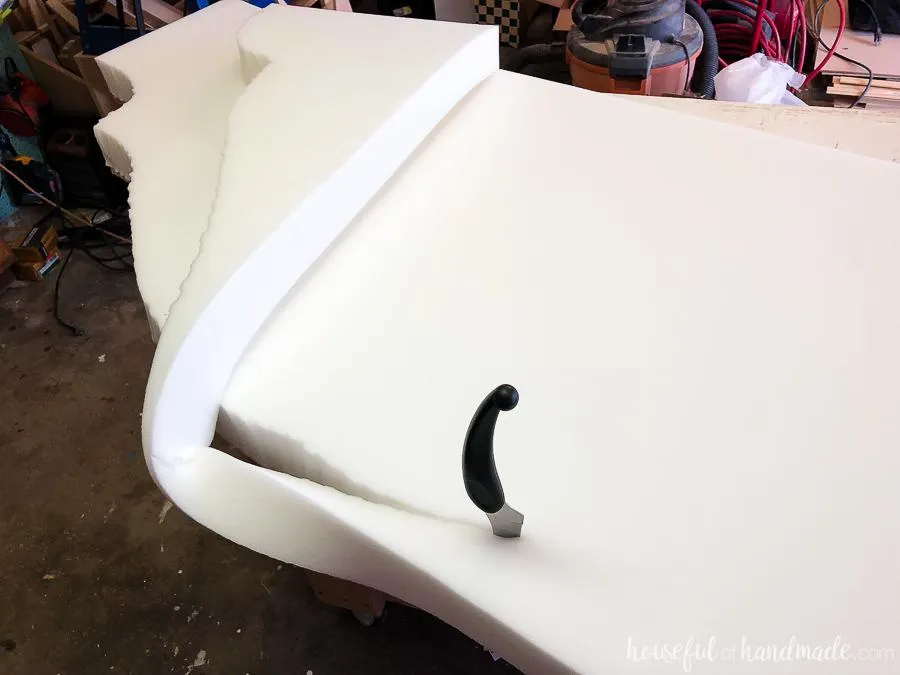
I used 3" foam for the back which made the mattress fit snuggly against it (which will hopefully keep my daughter from loosing things in the seam). If you want more room between the mattress and headboard, you can use 2" foam. Place the foam on top of the cut our headboard and use a serrated knife (I use a bread knife) to cut it to the same shape).
13Drill pocket holes in headboard
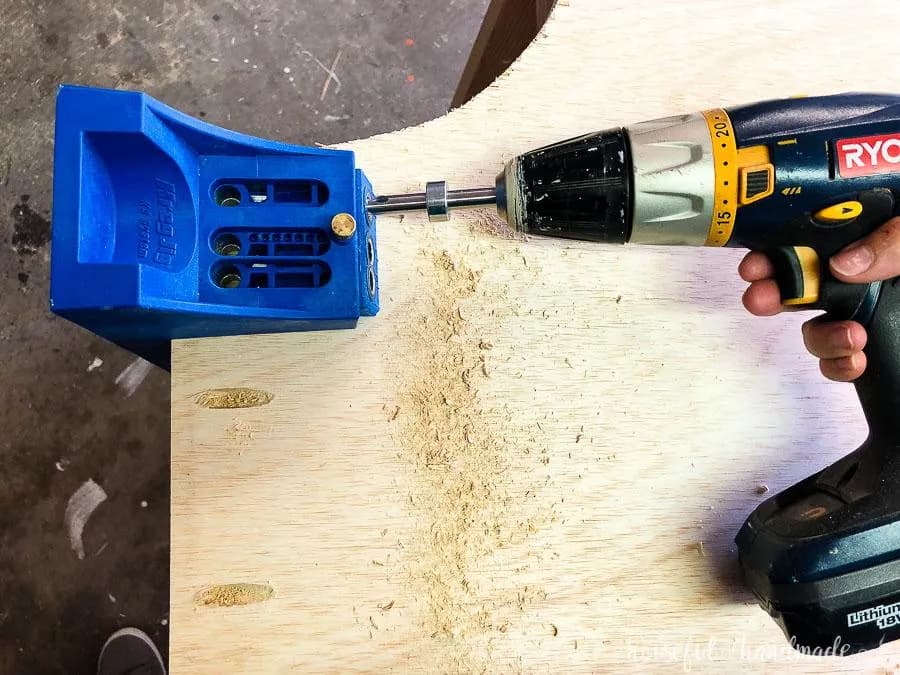
Add pocket holes set for 1/2" thick material to the edges of the headboard where it connects to the sides and the bottom.
14Upholster the headboard
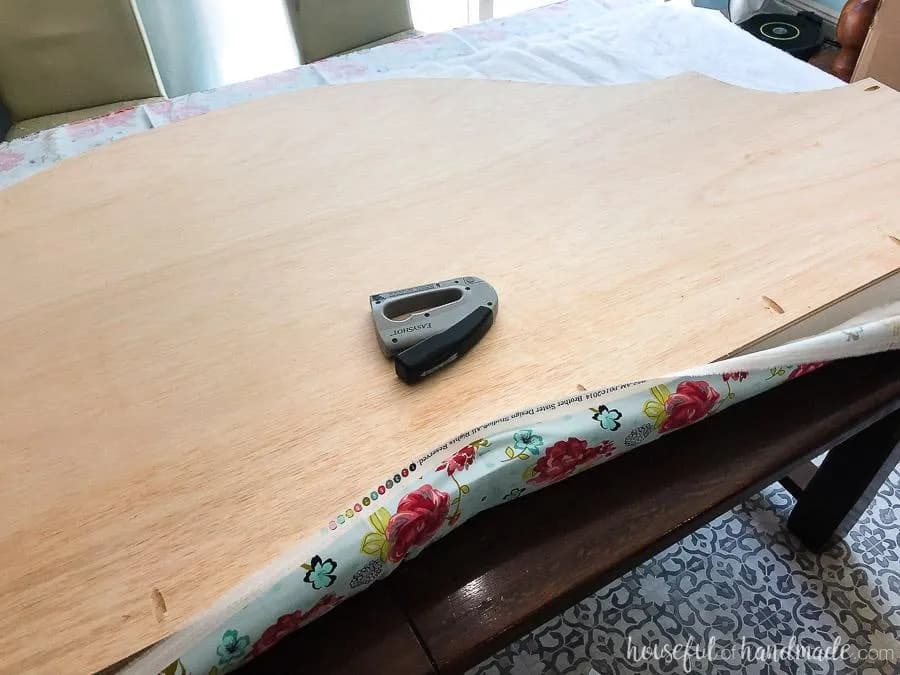
- Lay out the fabric with right side facing down.
- Then lay the batting on top of it.
- Place the batting on top then finish with the plywood with pocket holes facing up.
- Pull the fabric tight.
- Then start to staple the fabric to the plywood. Make sure to pull the fabric and batting tight as you move around the headboard. Be careful not to staple over the pocket holes, you need to keep them accessible.
- Trim the extra fabric away as you go.
15Upholstering the headboard top
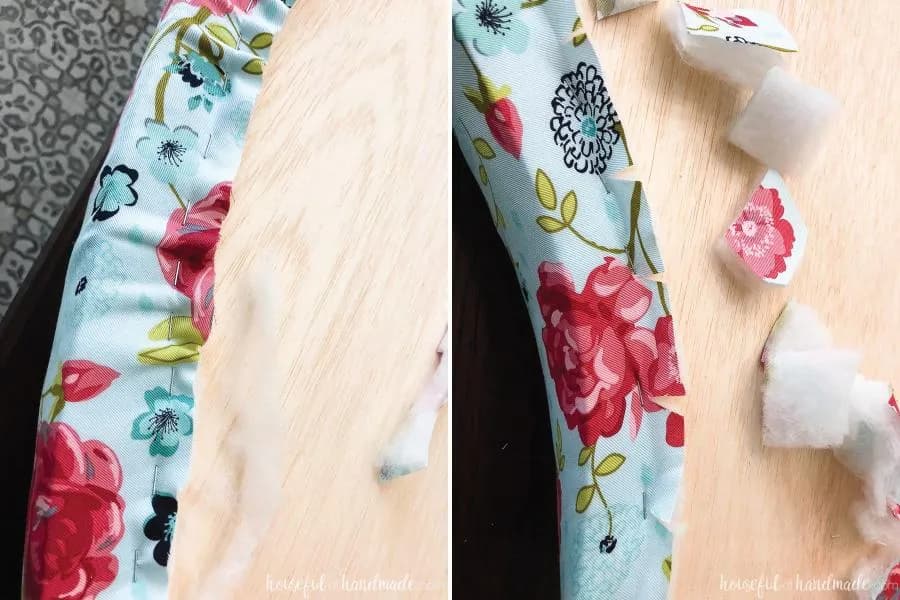
For the decorative edge of the headboard, you will need to slightly ruffle the fabric around the outside curves. For the inside curves, you will need to snip the fabric so it lays flat, but don't snip too close to the edge of the plywood of the fabric can tear. Use the slight stretch of the fabric to pull it around the curves.
16Attach the headboard
Attach the headboard to the bed frame and sides wit 1 1/4" pocket hole screws through the pocket holes in the plywood. Keep the back of the plywood flush with the back of the bed.