 Notch
Notch- Difficulty
- Intermediate
- Time
- 4.8–9 hours
- Cost
- $$$
About this build
Need to step up your tailgating game? Score big with this custom party table that has bottle openers, storage for food and drinks and oh yeah, folds in half for easy transport. It's enough to make any gridiron fan jealous.
Tools
Essential
- Circular Saw
- Drill / Driver
- Impact Driver
- Jigsaw
- Miter Saw
- Pocket Hole Jig
- Random Orbit Sander
- Router
Optional / nice to have
- Combination Square
- Tape Measure
Materials
| Item | Qty |
|---|---|
| Plywood, 3/4" Thick Half Sheet | 1 board |
| Board, 1x6 96" | 3 board |
| Board, 1x2 72" | 2 board |
| Board, 1x3 72" | 2 board |
| Board, 2x4 96" | 2 board |
| Board, 2x2 96" | 1 board |
| Board, 1x4 48" | 1 board |
| 3" T- Hinge | 2 each |
| 1/2" x 4' Bolt | 4 each |
| 1/2" Nut | 4 each |
| 1/2" washer | 4 each |
| Bottle Openers | 2 each |
| Piano Hinge | 1 each |
Overall cost: $$$. Lumber prices vary by region, species, and season, so we give a band rather than a figure we would only be pretending to know.
Cut list
| Part | Qty | T × W × L |
|---|---|---|
| Plywood top | 2 | 3/4" × 24" × 36" |
| Table Ends | 4 | 1" × 6" × 25 1/2" |
| Table Sides | 4 | 1" × 6" × 36" |
| Condiment Bin End | 4 | 1" × 3" × 5" |
| Condiment Bin Side | 4 | 1" × 3" × 17" |
| Condiment Bin Bottom | 2 | 1" × 4" × 17" |
| Food Bin Cut Out | 2 | 3/4" × 11 3/4" × 17 1/2" |
| Food Bin Side | 4 | 1" × 2" × 19" |
| Food Bin End | 4 | 1" × 2" × 11 3/4" |
| Main Leg | 4 | 2" × 4" × 29 1/2" |
| Main Leg Cross Brace | 2 | 1" × 6" × 24" |
| Secondary Leg | 2 | 2" × 2" × 28 1/2" |
| Secondary Leg Cross Brace | 1 | 1" × 2" × 21" |
What to buy
Buy 13 boards at 8 ft.
2" × 4"
2 boards
2" × 2"
1 board
1" × 6"
4 boards
1" × 4"
1 board
1" × 3"
1 board
1" × 2"
2 boards
3/4" × 24"
1 board
3/4" × 11 3/4"
1 board
Assumes 8 ft stock, a 1/8" saw kerf, and buying each part at its own width. Change the board size or kerf on the full board plan →
Instructions
1Table Top
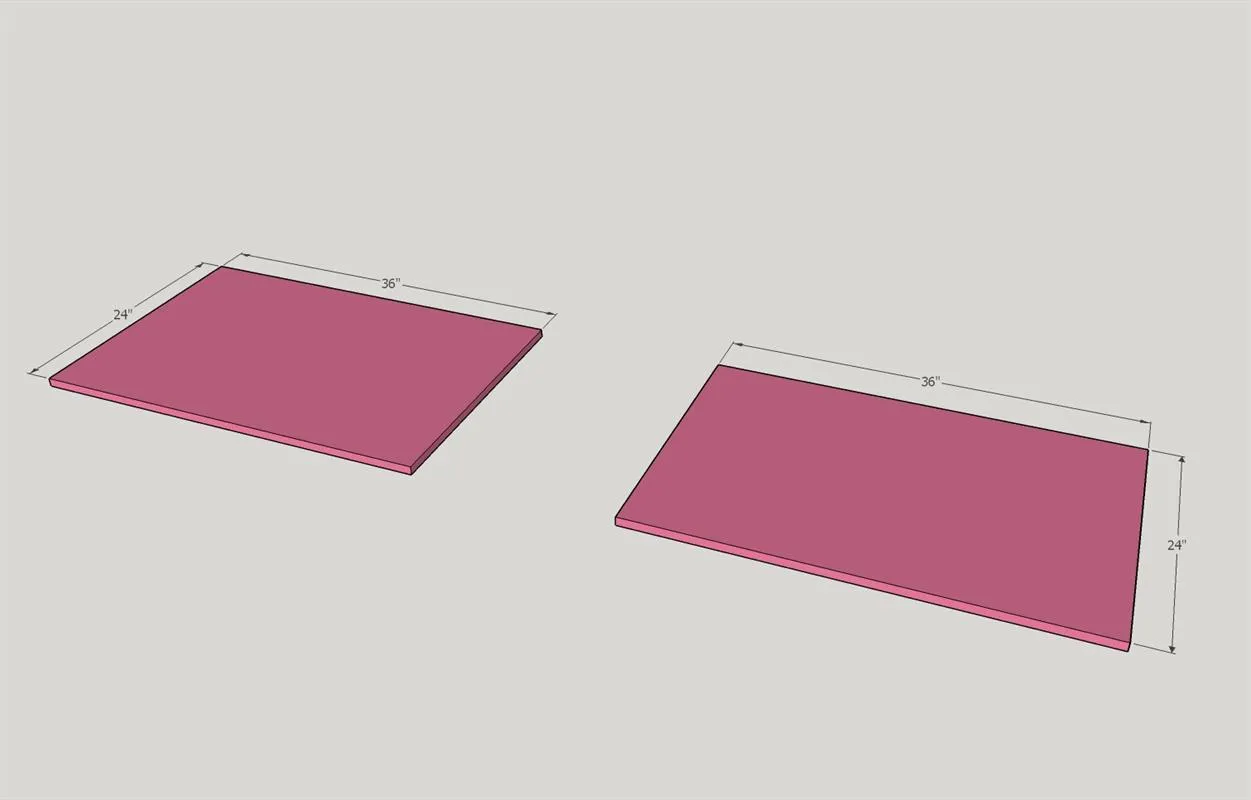
Cut two sheets of 3/4" plywood to 24" x 36" Pre-drill 3/4" pocket holes to attach sides with 1-1/4" pocket screws in step 2. For optional epoxy filled field lines, visit www.LazyGuyDIY.com
2Table Sides
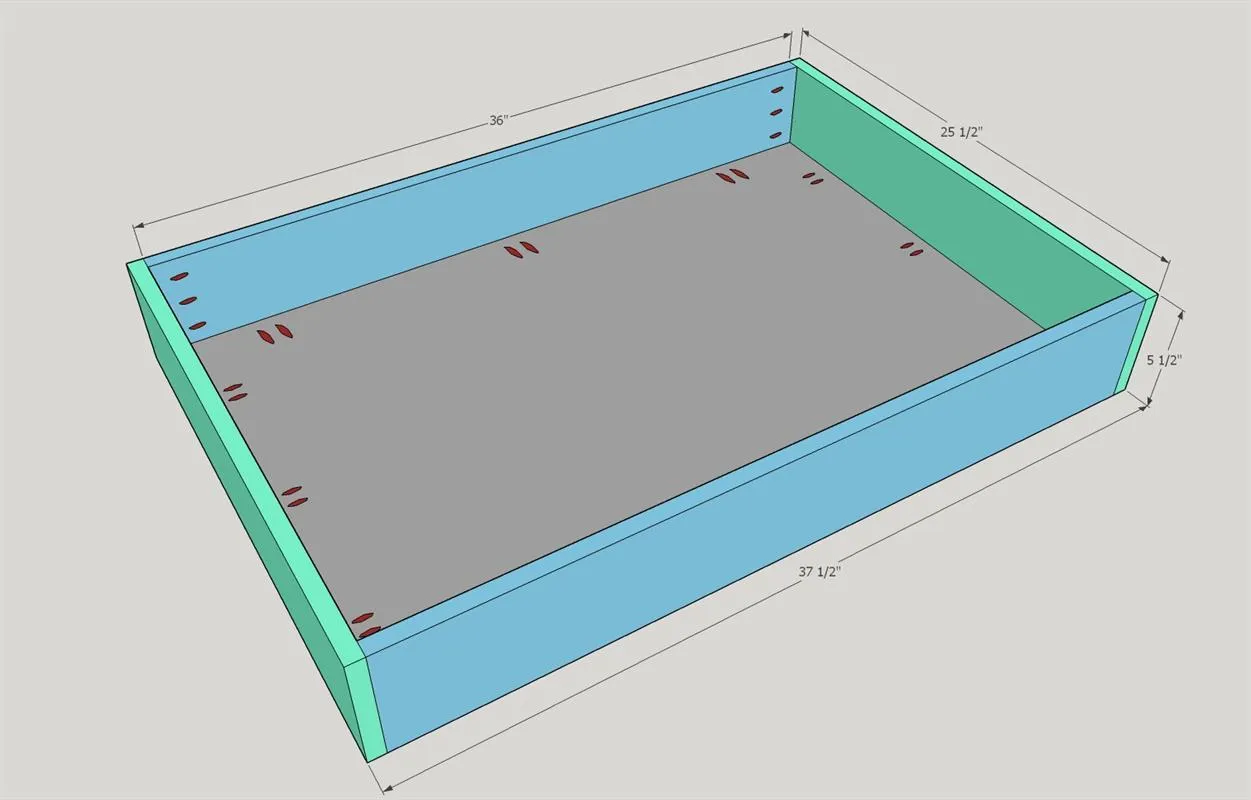
For each half of the table, cut (2) 1" x 6" x 25.50" & (2) 1" x 6" x 36". Pre-drill 3/4" pocket holes for 1-1/4" pocket screws. Attach to 24" x 36" plywood top for both tables.
3Add cut outs for storage
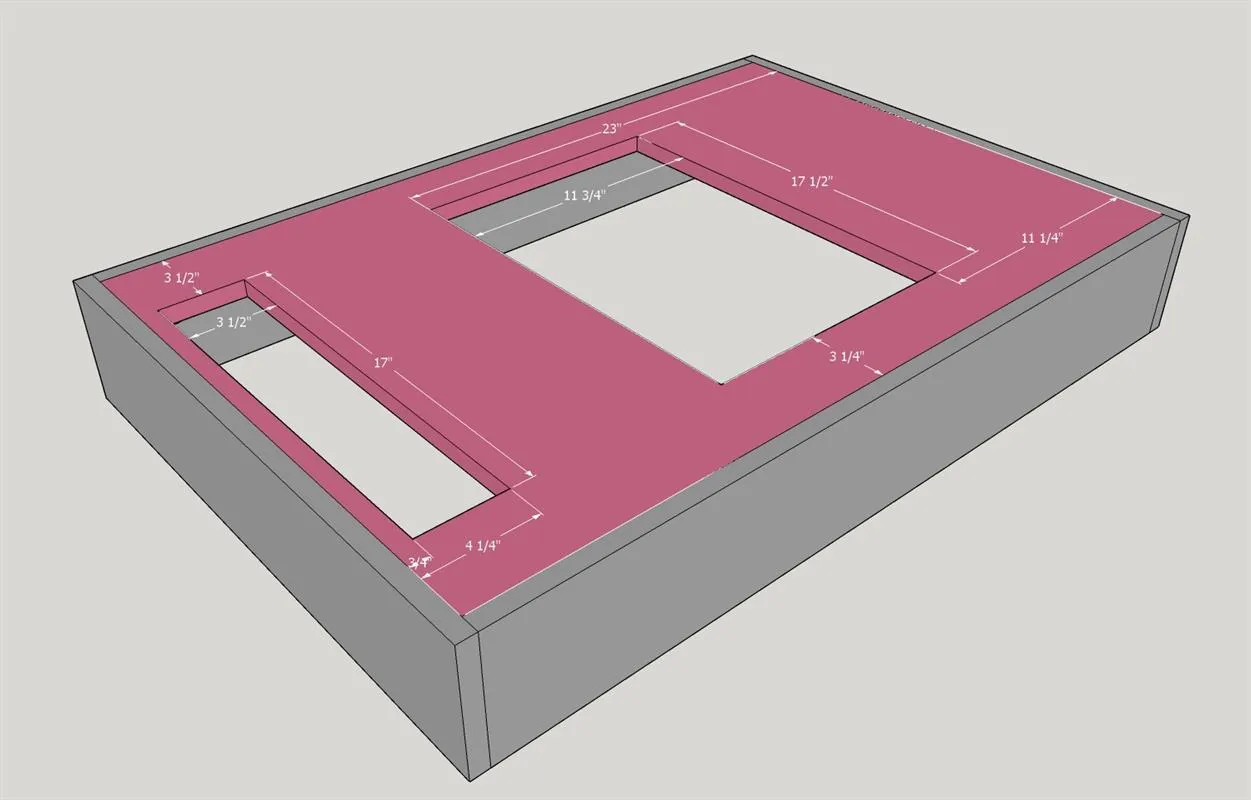
Using a jigsaw, add cut outs for condiment storage and food storage. Condiment storage is off set 3/4" from end of plywood and 3.50" from sides. Hole will be 17" x 3.50". Discard cut out. Food storage is inset 11.75" from opposite plywood edge and 3.25" from sides. Cut out will be 17.50" x 11.75". Save cut out to use as lid. Measurements will need to be exact to allow for leg clearance underneath.
4Add Condiment Bin
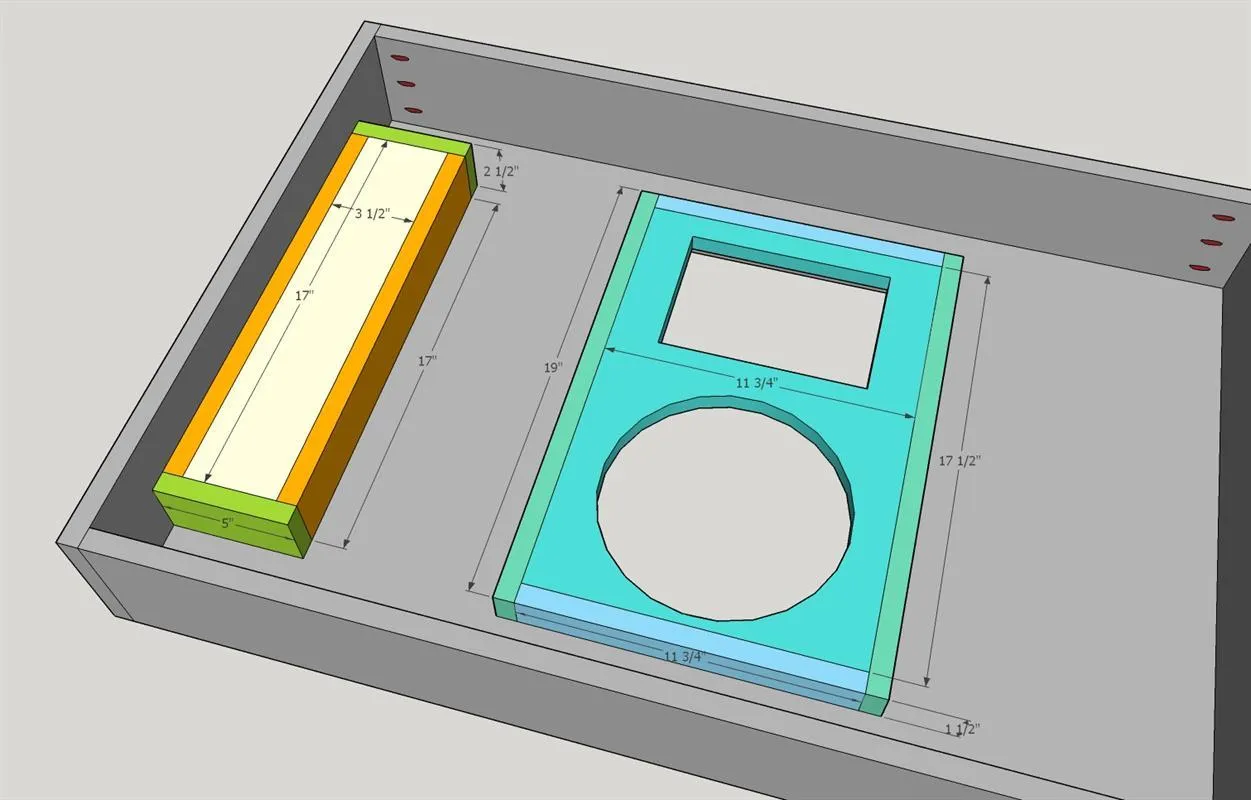
- For each table half, cut a 1" x 4" to 17" (bottom of condiment bin).
- Cut (2) 1" x 3" to 17" (sides) and (2) 1" x 3" x 5" (ends).
- Assemble condiment bin and attach to corresponding cut out with 1-1/4" pocket screws.
5Attach Main Legs
- Pre-drill a 1/2" hole through the side of the table for leg securing bolt (Legs attach on end with condiment bin).
- Attach legs using 1/2" x 4" bolt with fasting nut and washer.
- Cut piece of 1" x 6" x 24" and attach to pair of legs 1" from the bottom. Optional cutout for hand hold with forstner bit and jigsaw.
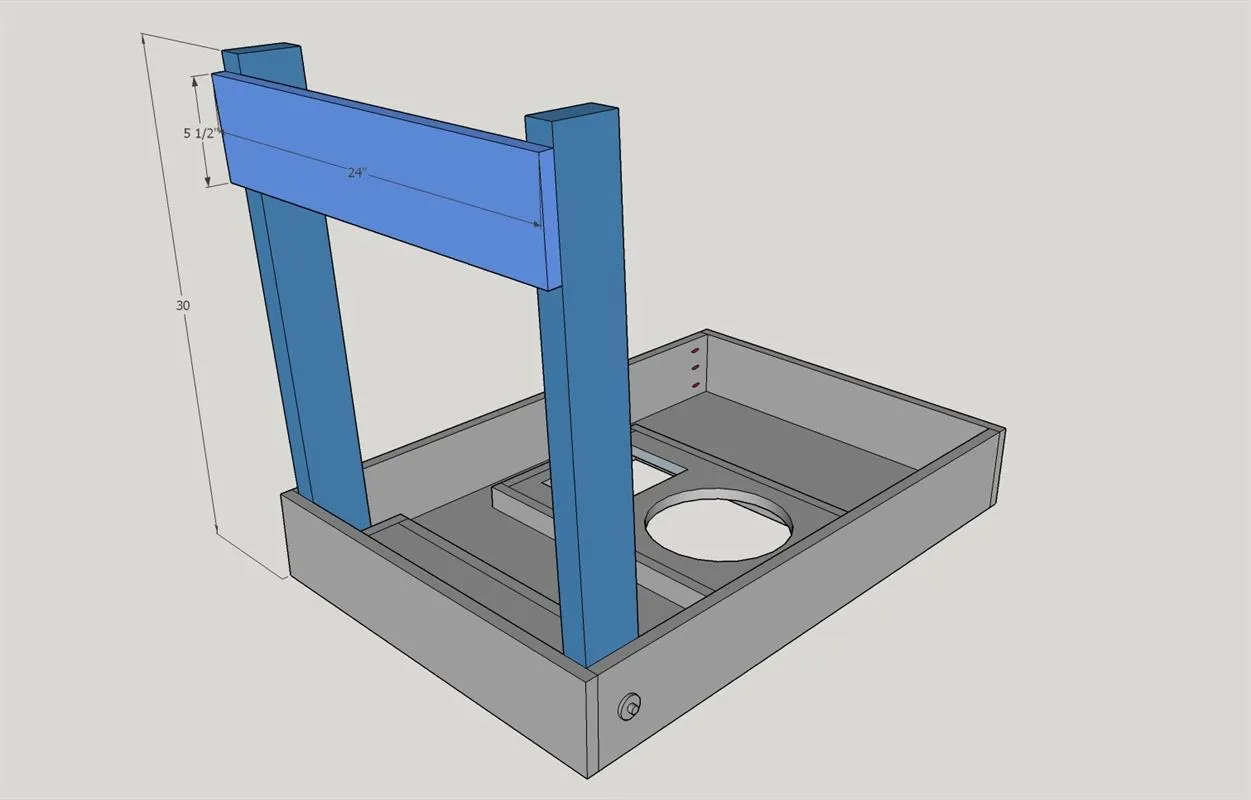
6Attach Secondary Legs
- On only one of the table halves, cut a 2" x 4" to 23".
- Attach inset 3/4" from end opposite of condiment bin. (optional peg support shown, visit www.LazyGuyDIY.com for bonus step).
- Cut (2) 2" x 2" to 28.50".
- Attach to 2" x 4" base with t-hinge so legs will sit inside of main support legs.
- Add 1" x 2" x 21" cross brace attached 1" from bottom of leg.
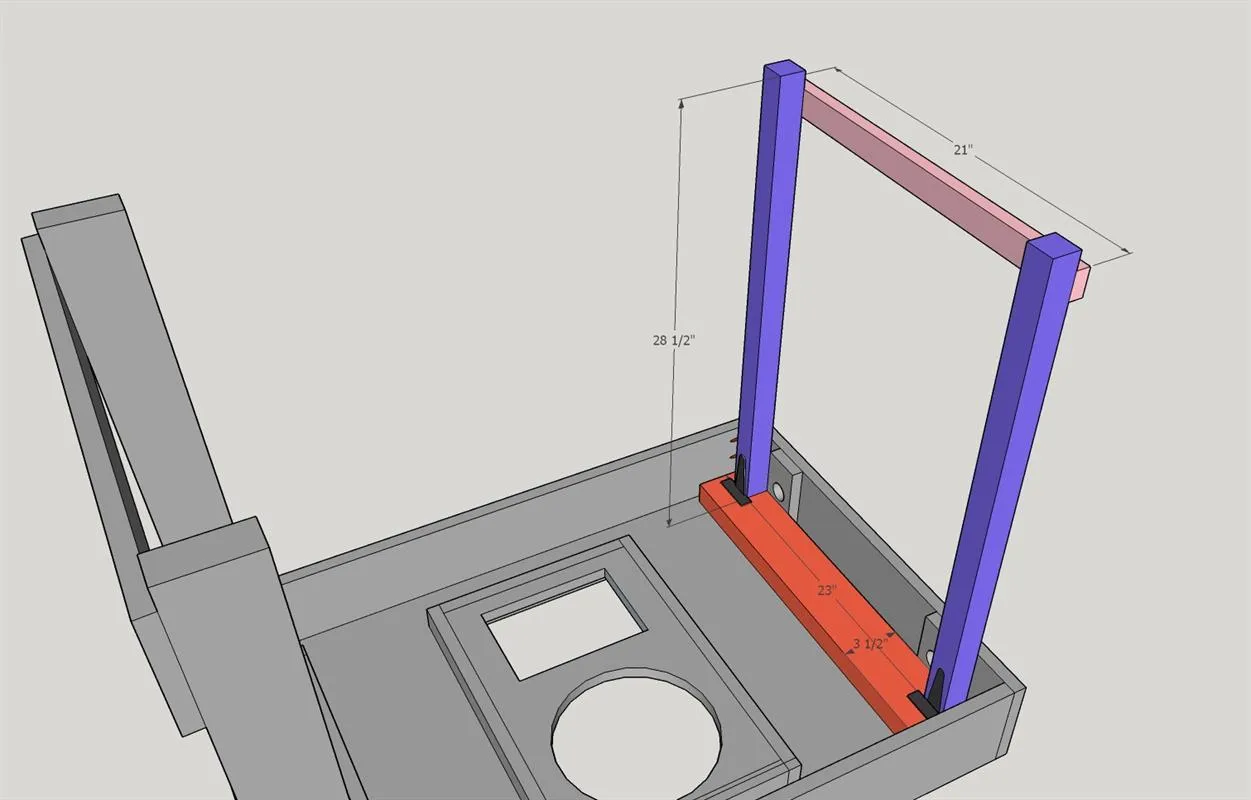
7Add final accessories & hinge
- Attach both halves using piano hinge and wood screws.
- Cut out optional hand holds with forstner bit and jig saw or add handles for carrying.
- Add Bottle openers for frosty beverage assistance.
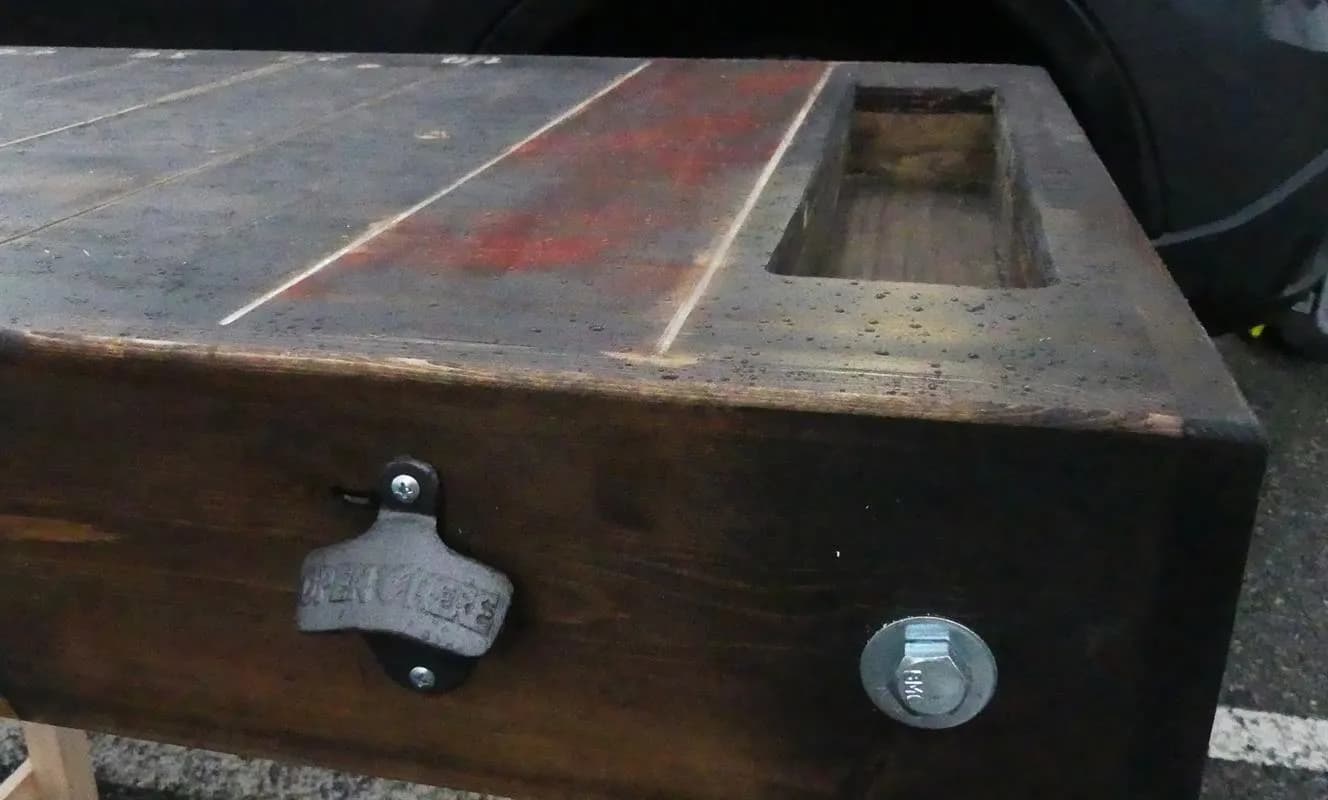
8Storage bin lid
On the bottom of the cutout from the food storage bin, using a 3/4" forstner bit drill down to a depth to allow 3/4" magnet to be inserted and attached with adhesive. On the inside of the food storage bin (lined up with the magnets attached on the bottom of the lid) attach a scrap piece of 1" x 2" with an inset 3/4" magnet. Lid should be held in place with magnets and sit flush on surface. If needed, attach additional scrap pieces of 1x2 to level the lid so it sits flush.
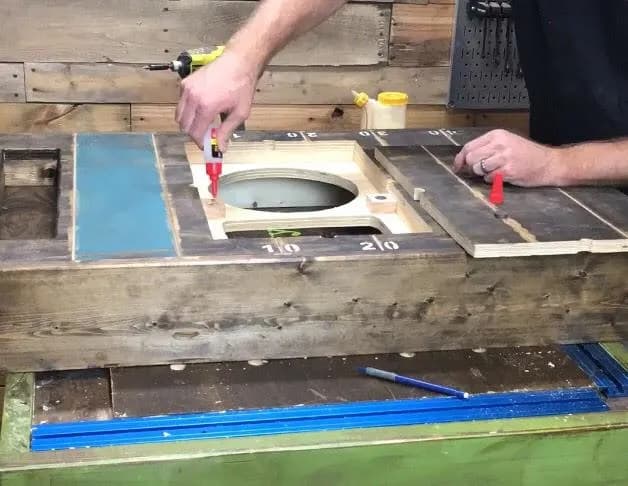
9Add Food Bin
- Using extra cut off from the plywood, for each half, cut a piece to 17.50" x 11.75". Trace shape of storage bin and cut out with jigsaw.
- Cut (2) pieces of 1" x 2" to 11.75" (ends) and two 1" x 2" to 19" (ends).
- Assemble and attach to corresponding cut out.
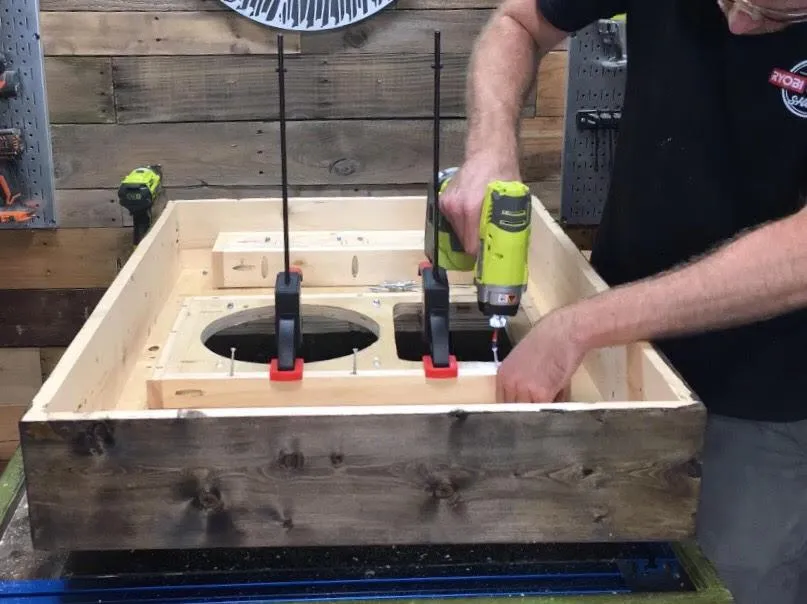
10Rounding the leg ends
In order for the legs to tilt at the fulcrum the end attached to the table will need to be rounded to allow for clearance. There are several methods from using a saw to a sander to round the end. Please be safe if using a sander. For each table half, cut (2) 2" x 4" to 29.50". Pre-drill a 1/2" hole centered 2.50" from end of rounded over end.
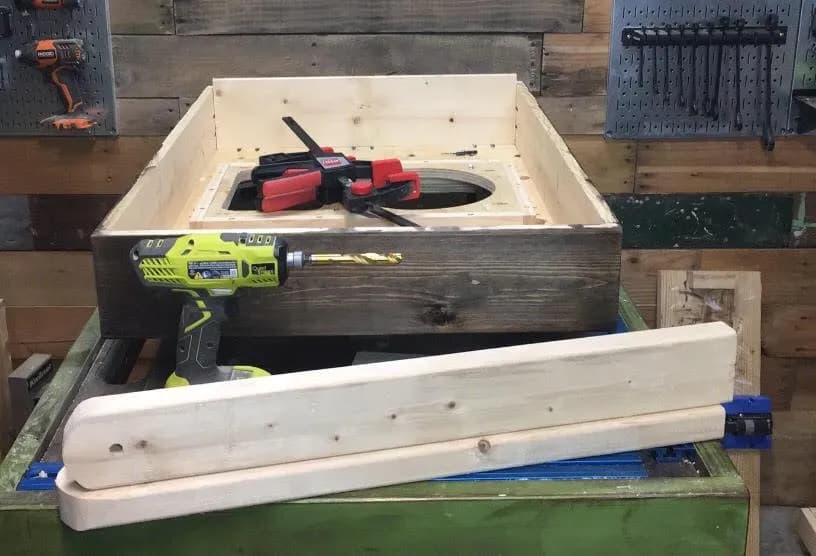
11A note about the legs
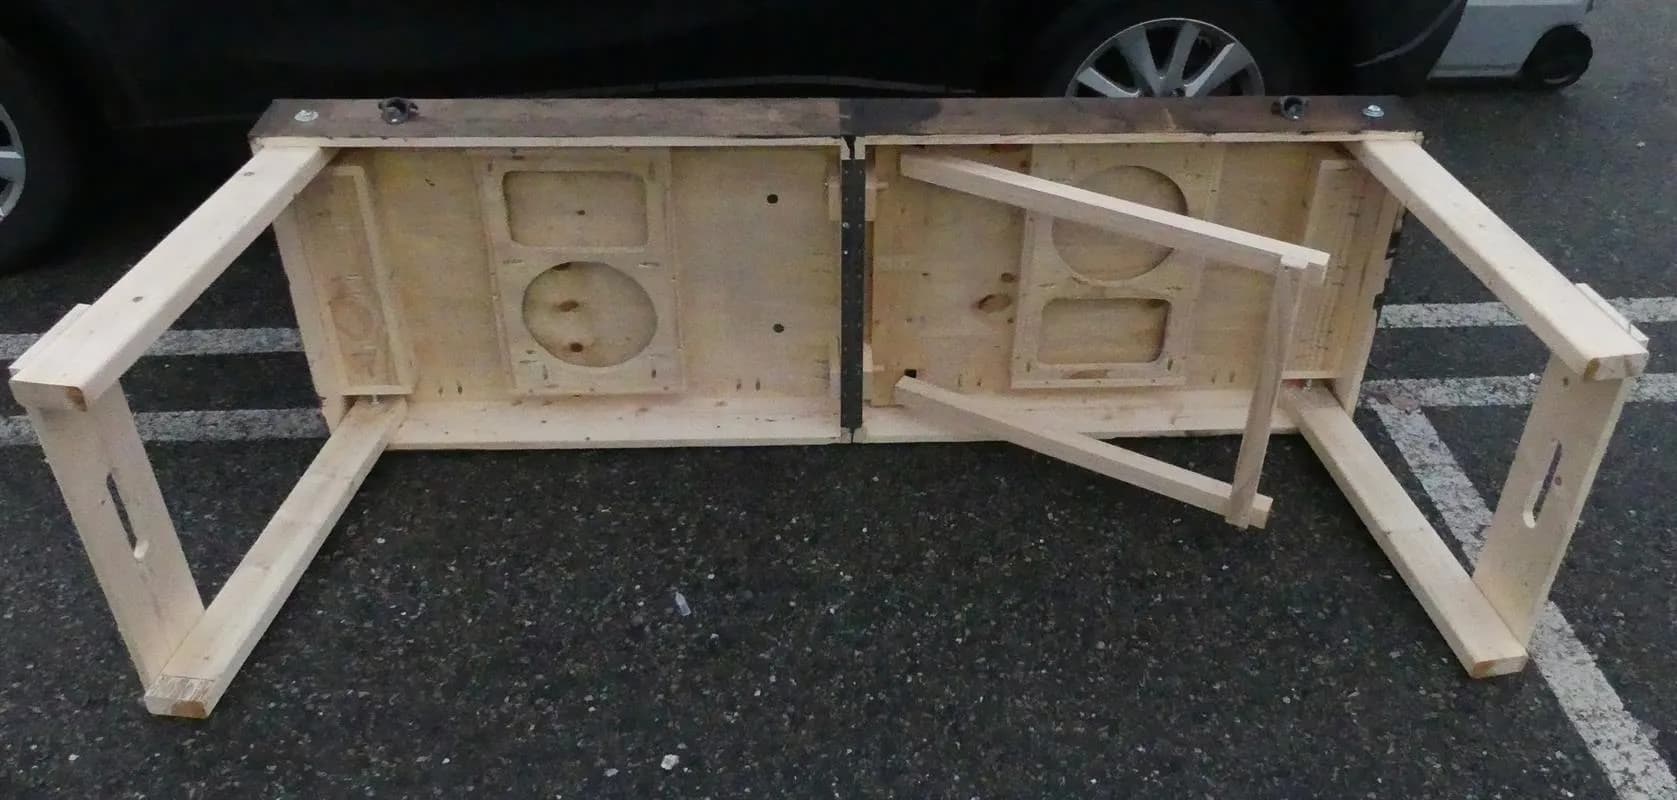
Be sure to dry fit all of the leg pieces before attaching. You might have to add temporary spacers to allow for clearance after assembly. The secondary legs fold down first and sit inside of the main set of legs. The secondary legs are necessary to support the middle of the table because the piano hinge is not strong enough to support the two halves by itself. One set of secondary legs is sturdy enough to support the table, but you can add a set on the other side for symmetry if desired.
Tags
- Outdoor Living
- Intermediate
Reviews & builds
No reviews yet
Sign in to review this plan or share your build.
No reviews yet. Be the first to build this.