 Notch
Notch- Difficulty
- Easy
- Time
- 5.5–10.5 hours
- Cost
- $$$
About this build
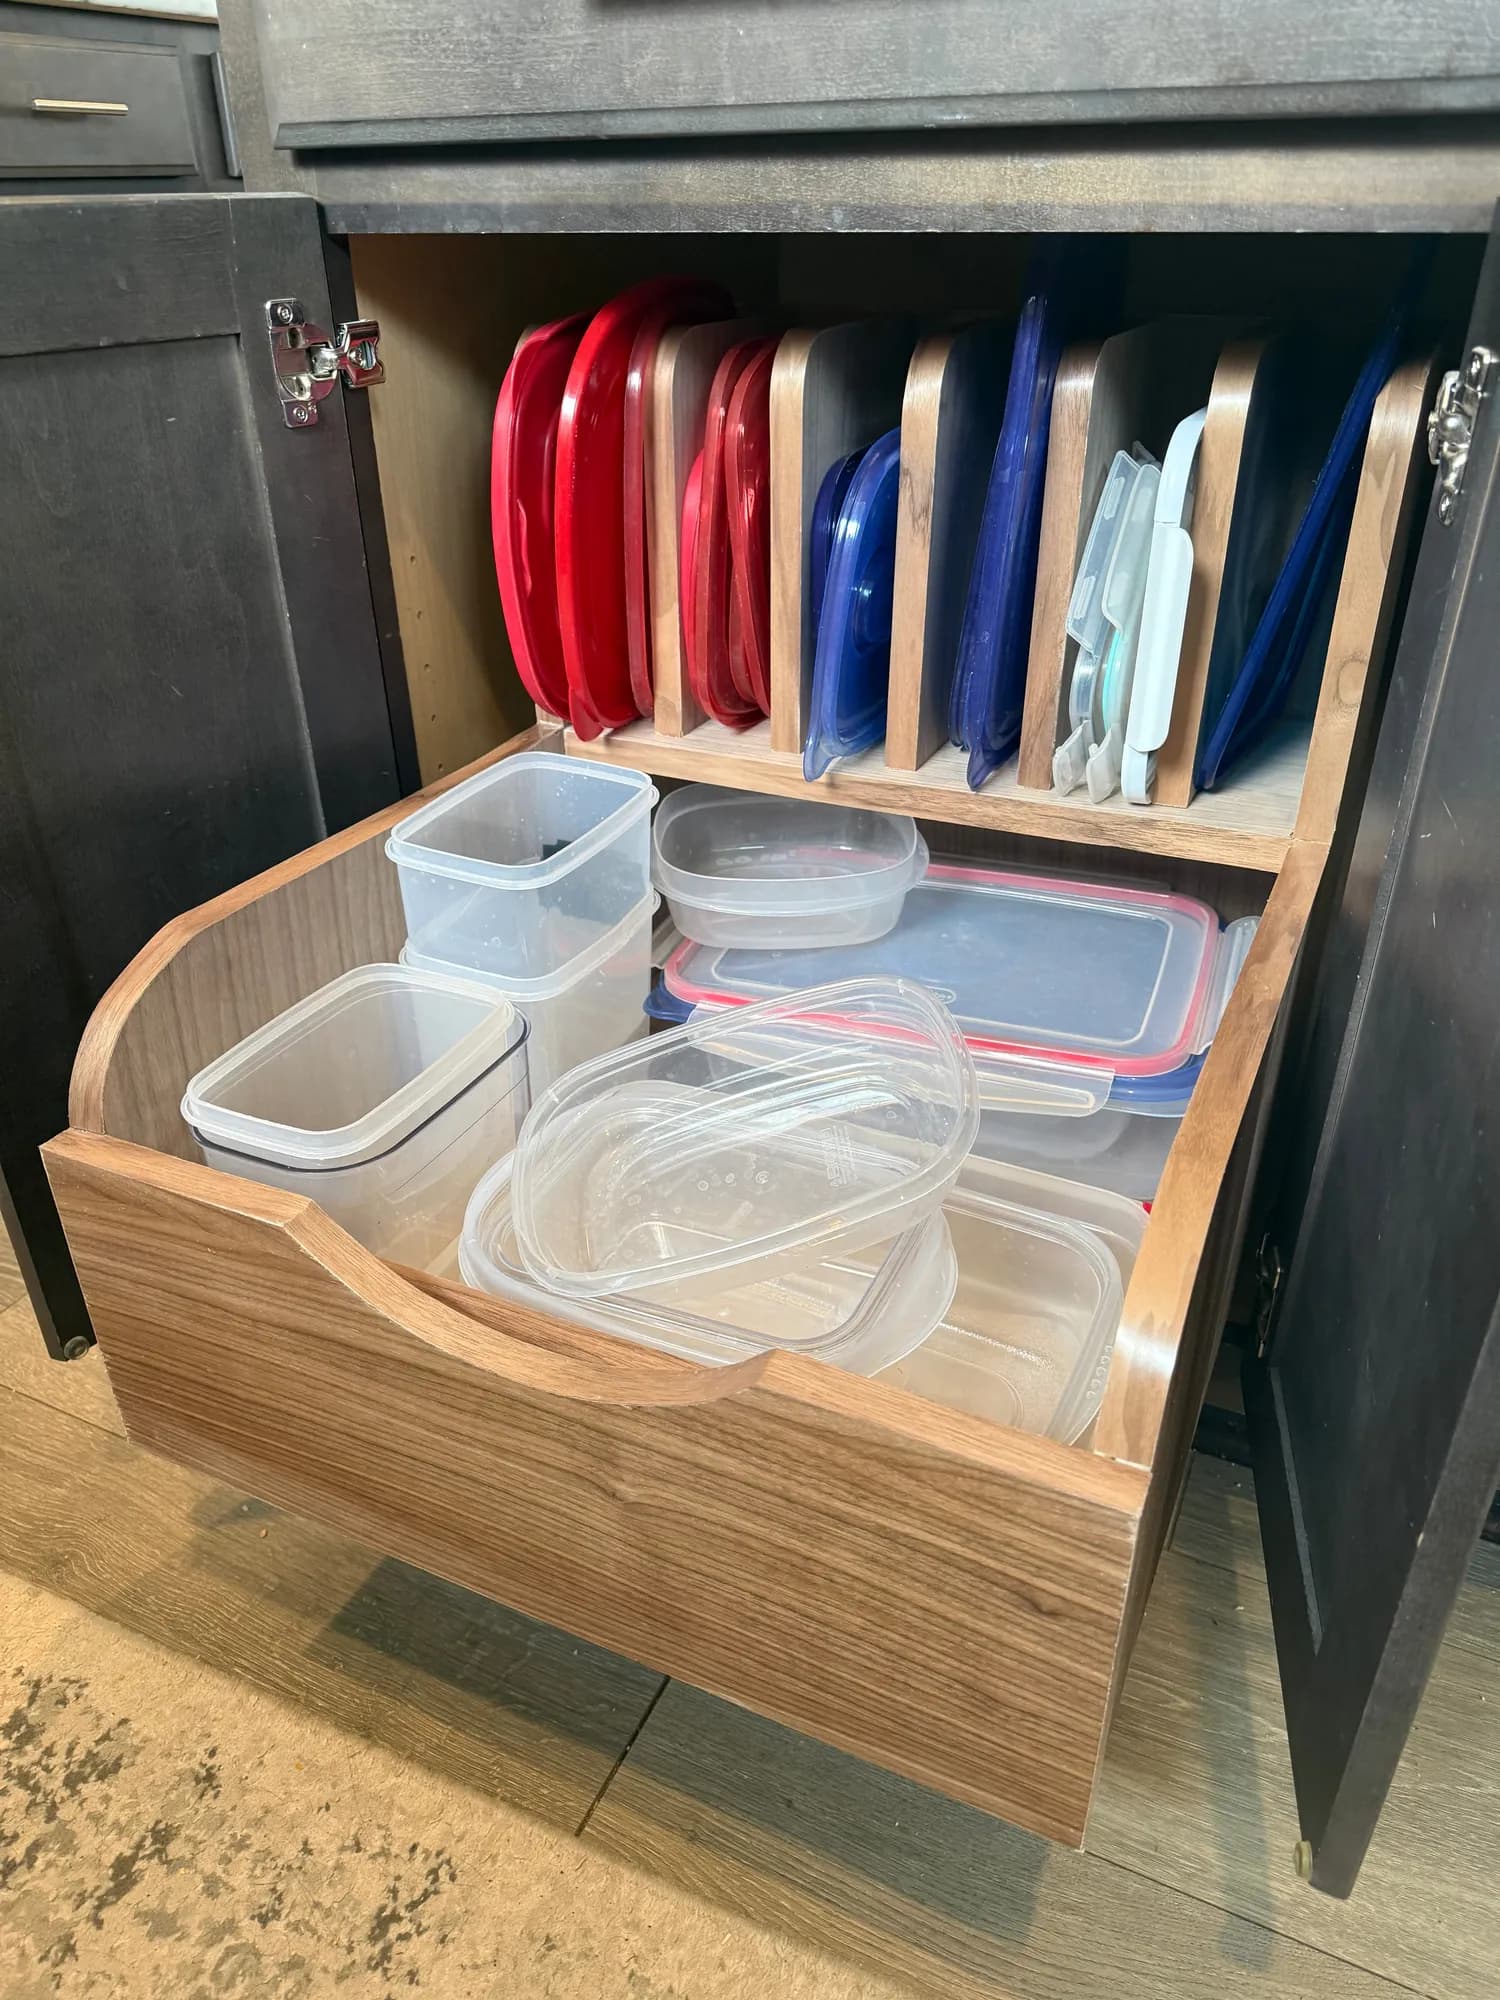
Stop losing lids! Transform your kitchen storage with this beginner friendly guide to building a DIY wood Tupperware organizer inside a deep base cabinet.
Tools
Essential
- Drill / Driver
- Jigsaw
- Pocket Hole Jig
- Random Orbit Sander
- Table Saw
- Track Saw
Materials
| Item | Qty |
|---|---|
| 8' x 4' x 3/4" plywood, 96" x 48" x 3/4" | 1 board |
| 2' x 2' x 1/2" plywood, 24" x 24" x 1/2" | 1 board |
| 2' x 2' x 1/4" plywood, 24" x 24" x 1/2" | 1 board |
| 3/4" edge banding | 1 each |
| 18" center drawer slide (hickory hardware) | 2 each |
| 1 1/4" pocket screw | 50 each |
| 1 1/4" wood screw | 25 each |
| Wood glue | 1 each |
| Stain/paint of choice - I used wood wax | 1 each |
Overall cost: $$$. Lumber prices vary by region, species, and season, so we give a band rather than a figure we would only be pretending to know.
Cut list
| Part | Qty | T × W × L |
|---|---|---|
| Sides | 2 | 3/4" × 18" × 21" |
| Back | 1 | 3/4" × 16" × 18" |
| Front | 1 | 3/4" × 4" × 16" |
| Shelf dividers | 5 | 3/4" × 6" × 8" |
| Shelf | 1 | 3/4" × 7" × 16" |
| Drawer front | 1 | 3/4" × 6" × 18" |
| Bottom | 1 | 1/2" × 17" × 20" |
| Bottom filler pieces | 2 | 1/4" × 7" × 16" |
What to buy
Buy 7 boards at 8 ft.
3/4" × 18"
1 board
3/4" × 16"
1 board
3/4" × 7"
1 board
3/4" × 6"
1 board
3/4" × 4"
1 board
1/2" × 17"
1 board
1/4" × 7"
1 board
Assumes 8 ft stock, a 1/8" saw kerf, and buying each part at its own width. Change the board size or kerf on the full board plan →
Instructions
11
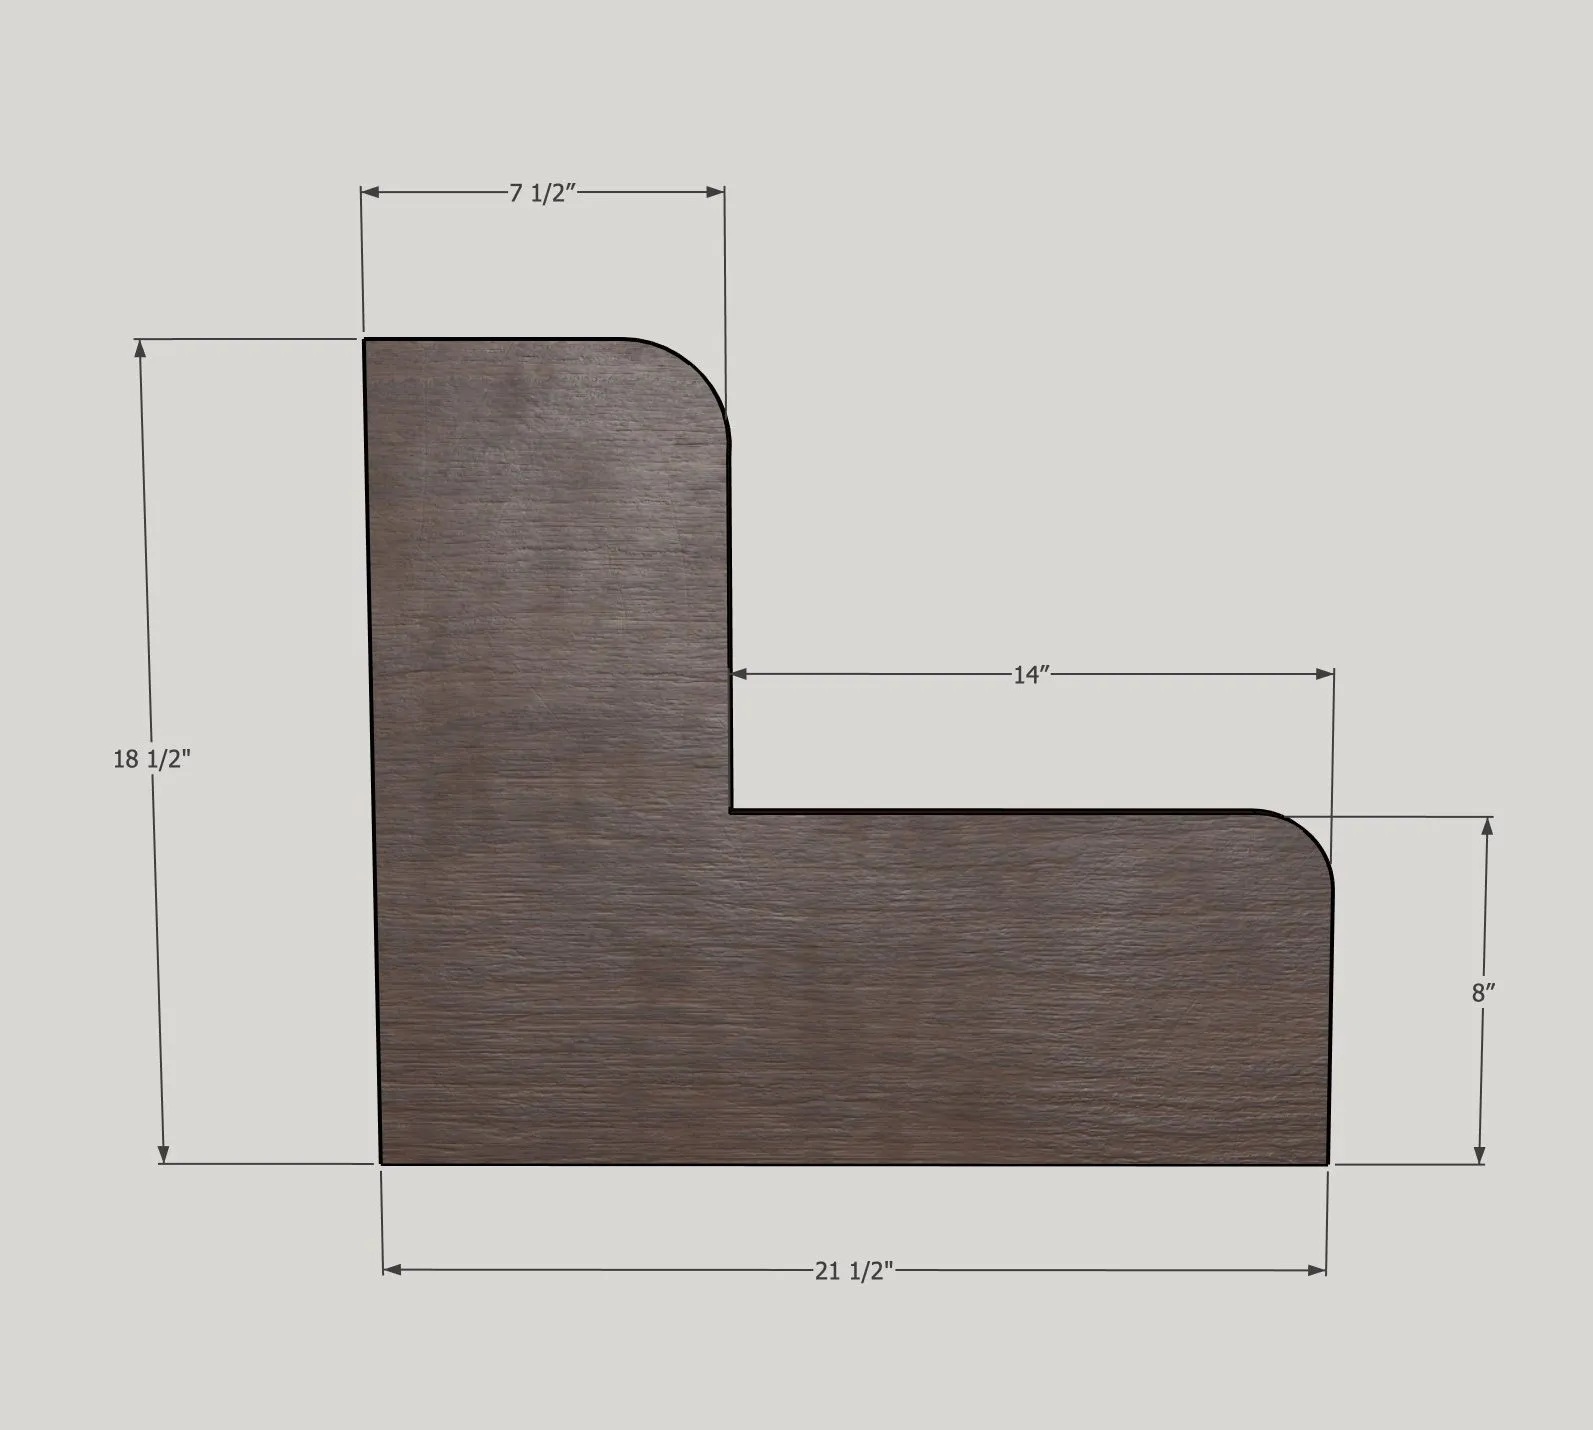
- Cut the Tupperware sides to size using the Kreg track or circular saw.
- Round the top edge using a jigsaw. I used a bowl to get the rounded edge I wanted then cut to size with a jigsaw.
22
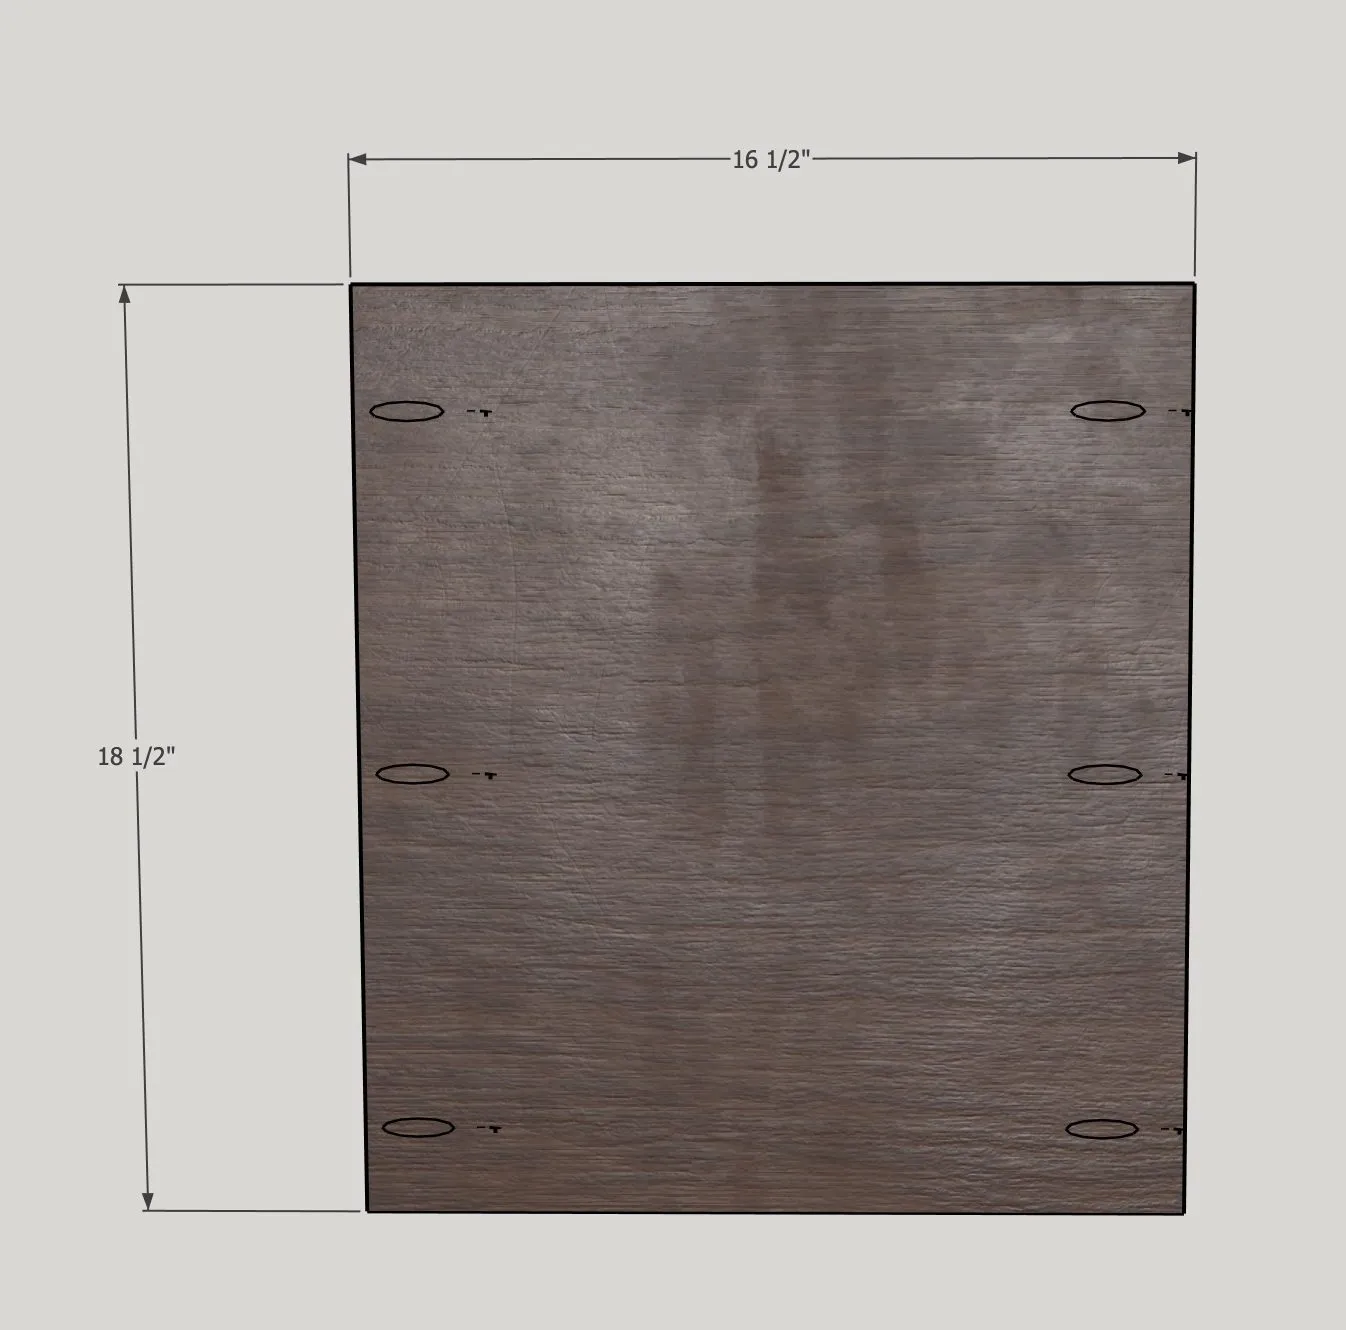
Cut the back to size. Set your pocket hole jig to 3/4" and drill pocket holes as shown in the picture.
33
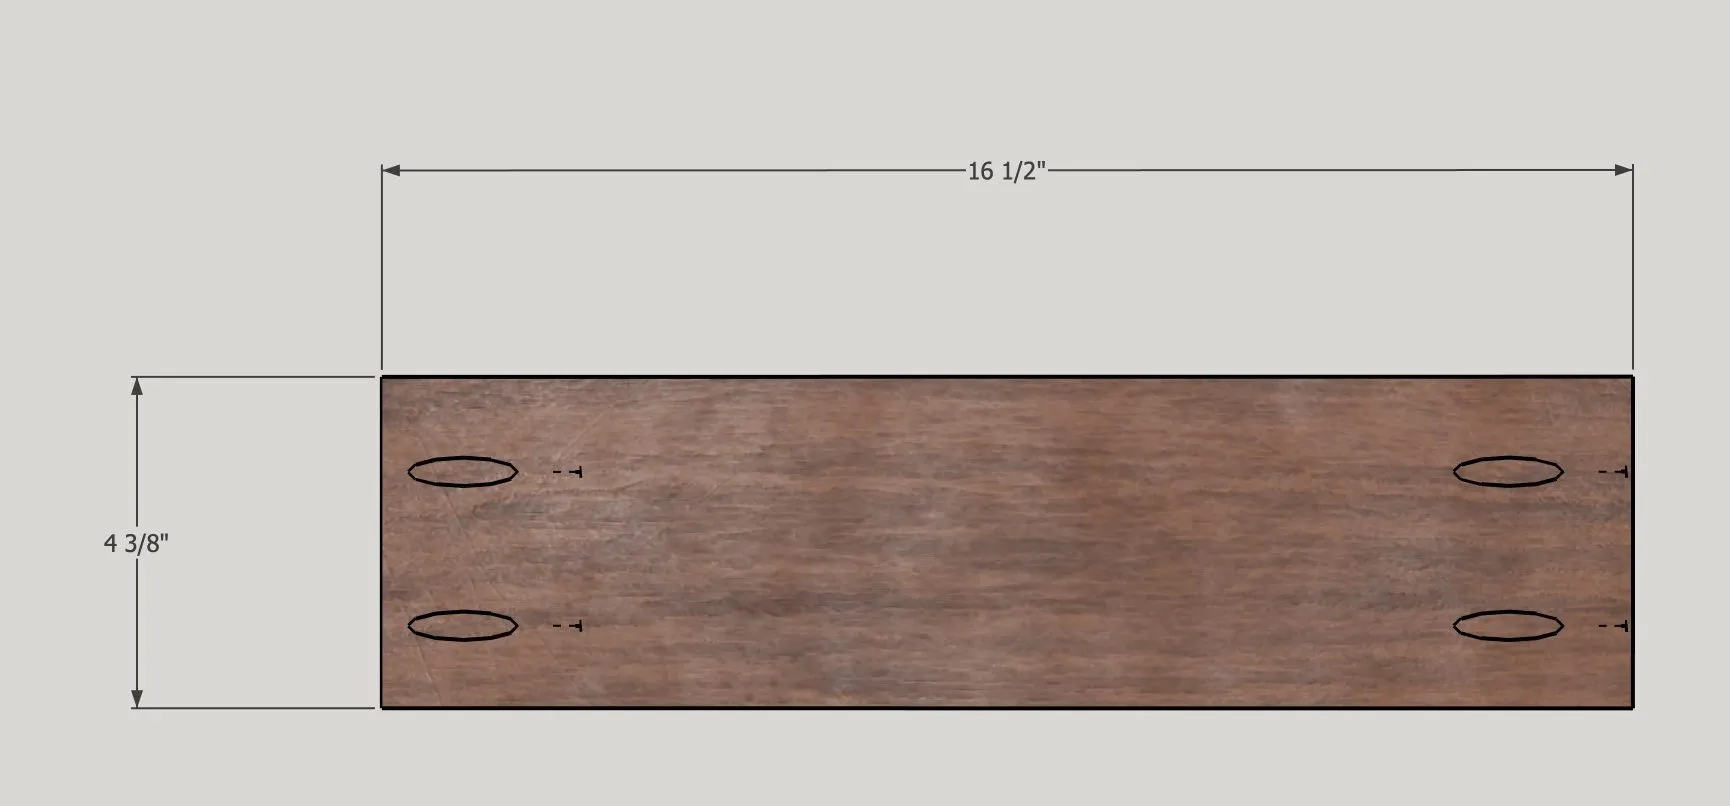
Cut the front drawer piece to size. Drill pocket holes at 3/4" as shown in the picture.
44
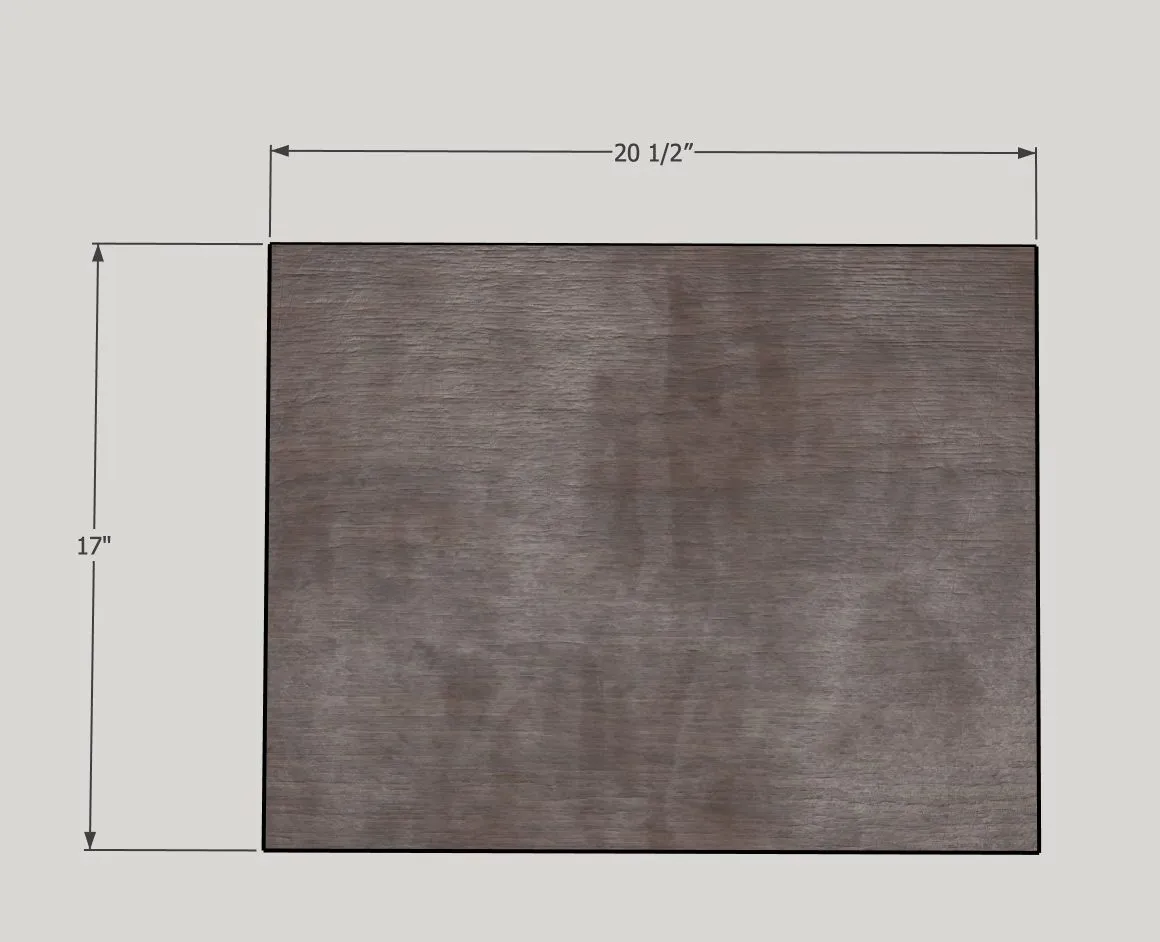
Cut the bottom to size. Make sure you are using the 1/2" plywood for this.
55
Cut a groove on the inside bottom of each piece you just cut except for the drawer bottom. The groove should be 1/2" up from the bottom and it will be 1/2" wide and 1/4" deep. You can cut this with a track saw/circular saw or use a table saw. Make sure the bottom fits easily in those grooves.
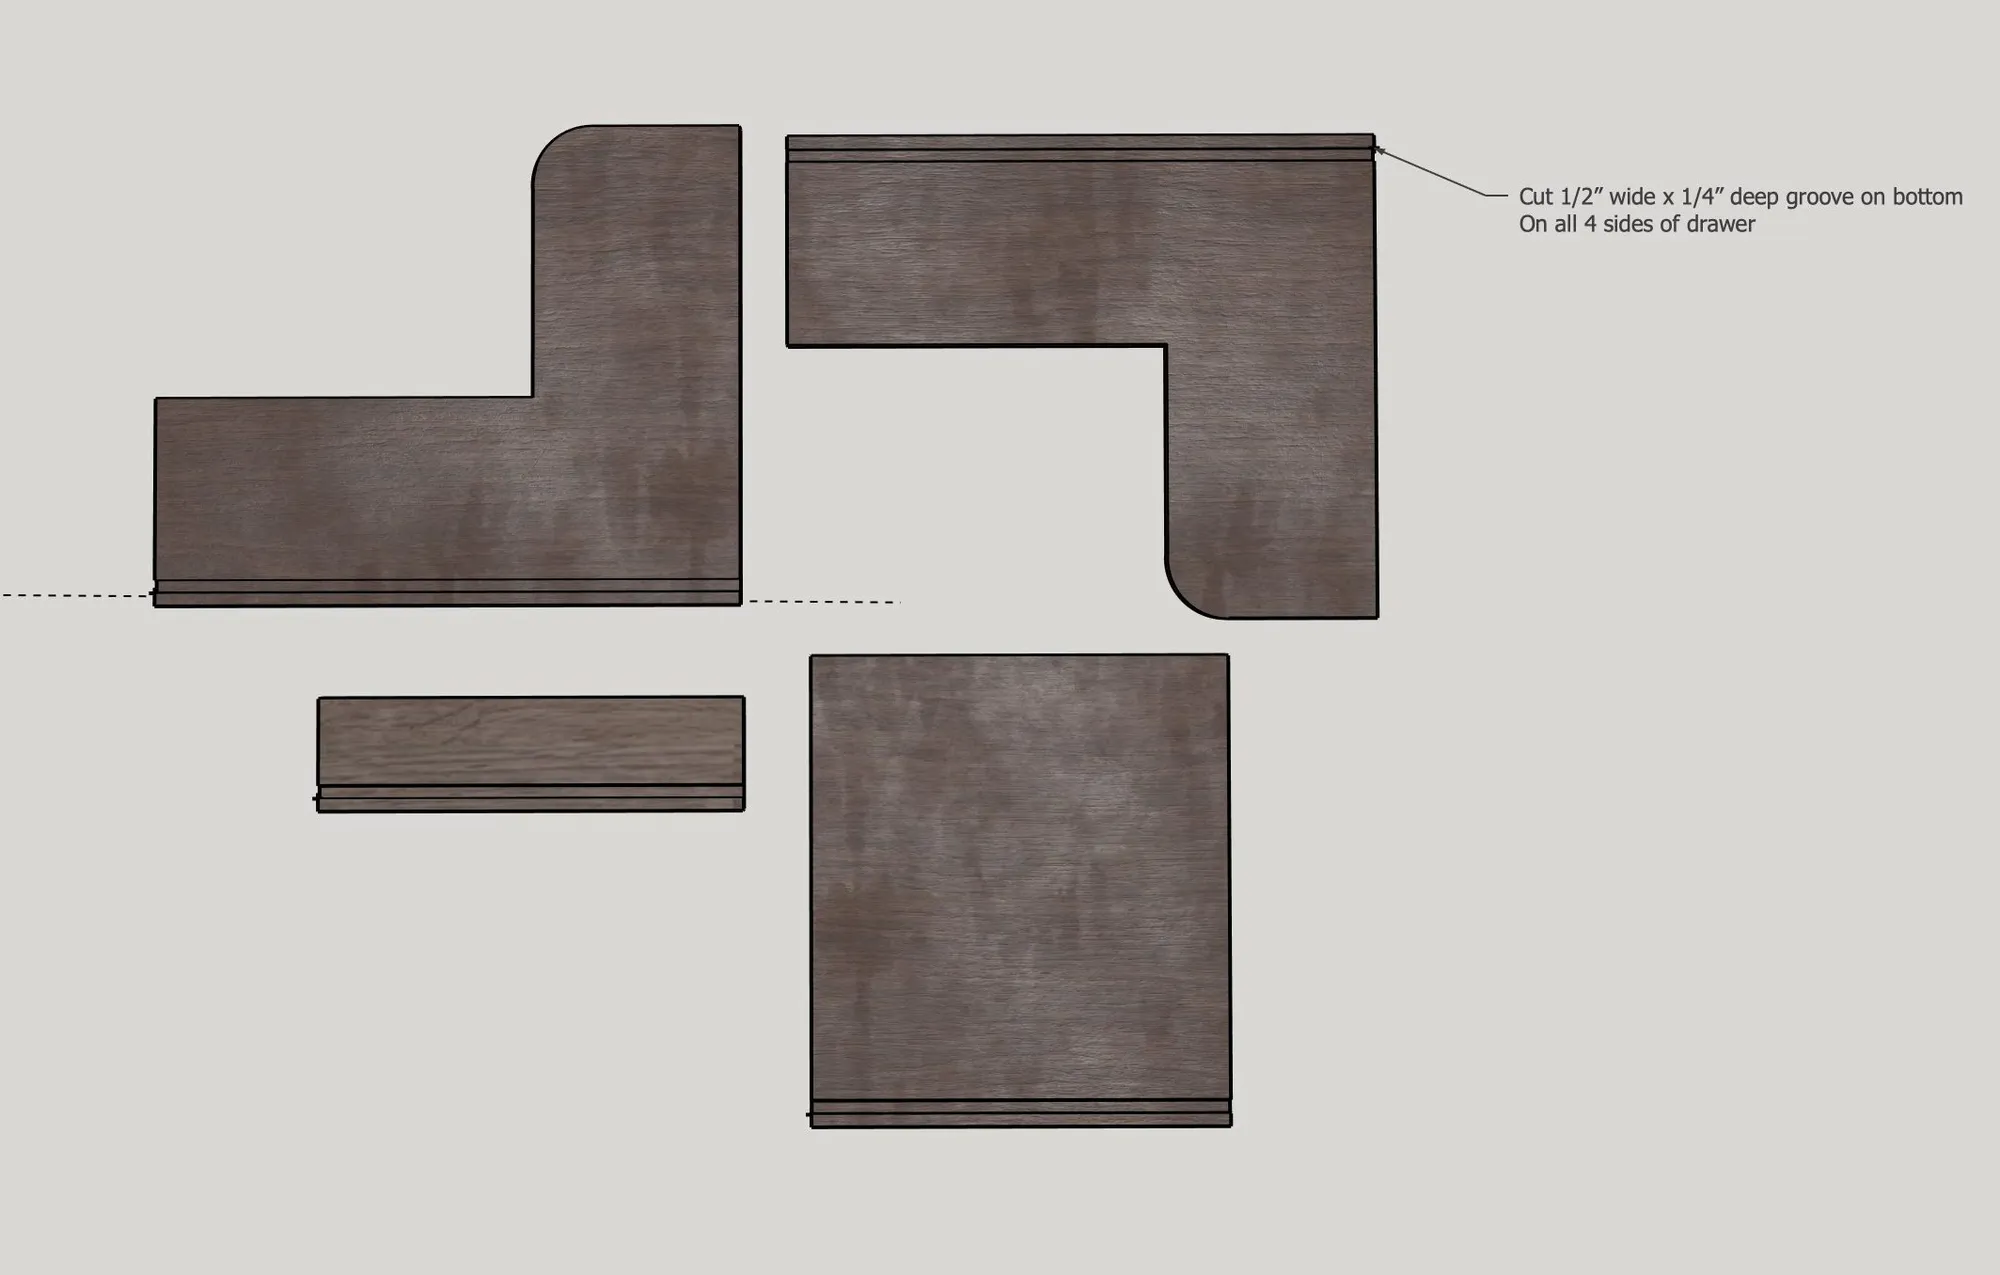
66
I recommend sanding all the pieces now so you don't have too later! Attach the back to the sides using wood glue and 1 1/4" pocket screws.
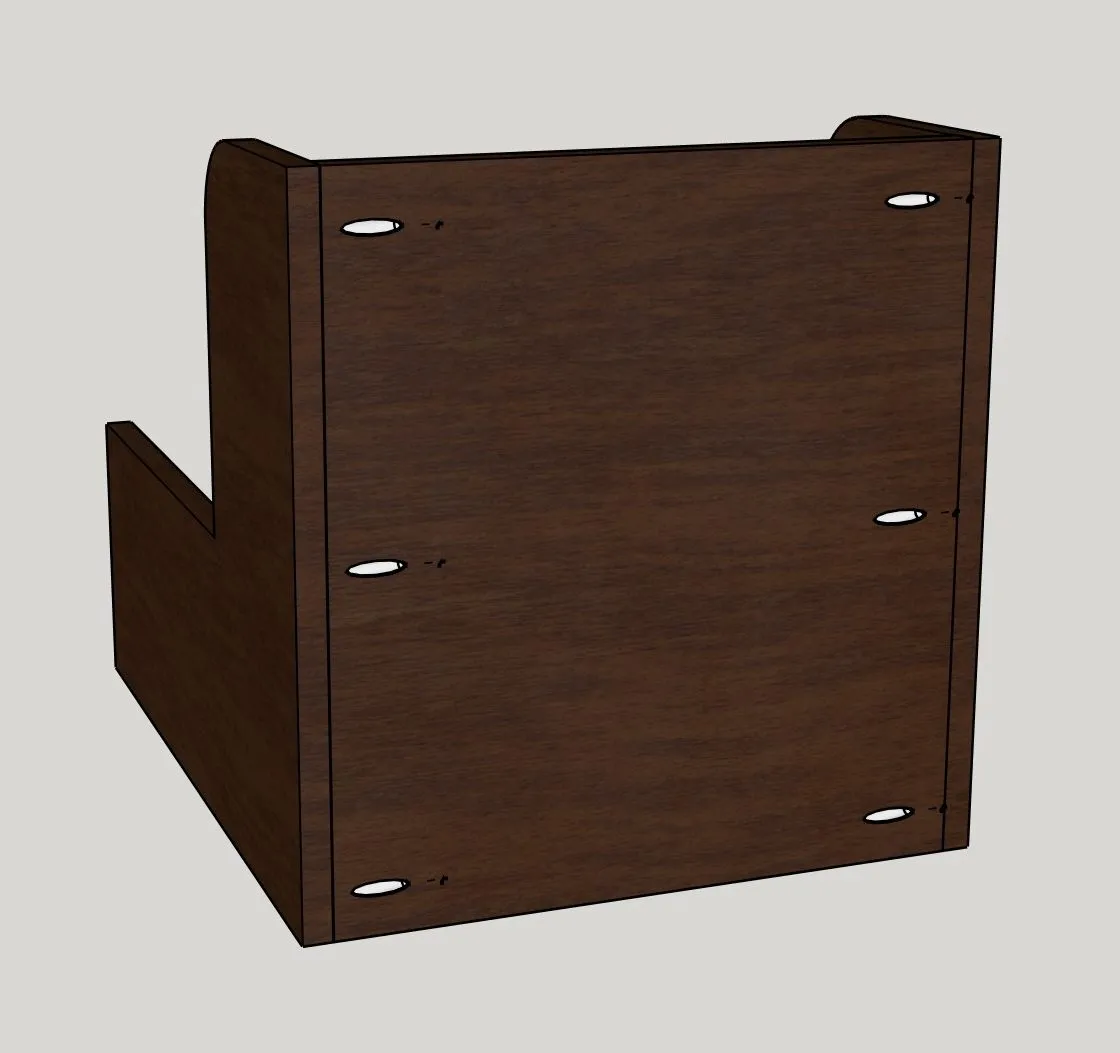
77
After you've slide the drawer bottom into the grooves, attach the front using wood glue and 1 1/4" pocket screws. Make sure the pocket holes face out as shown in the picture.
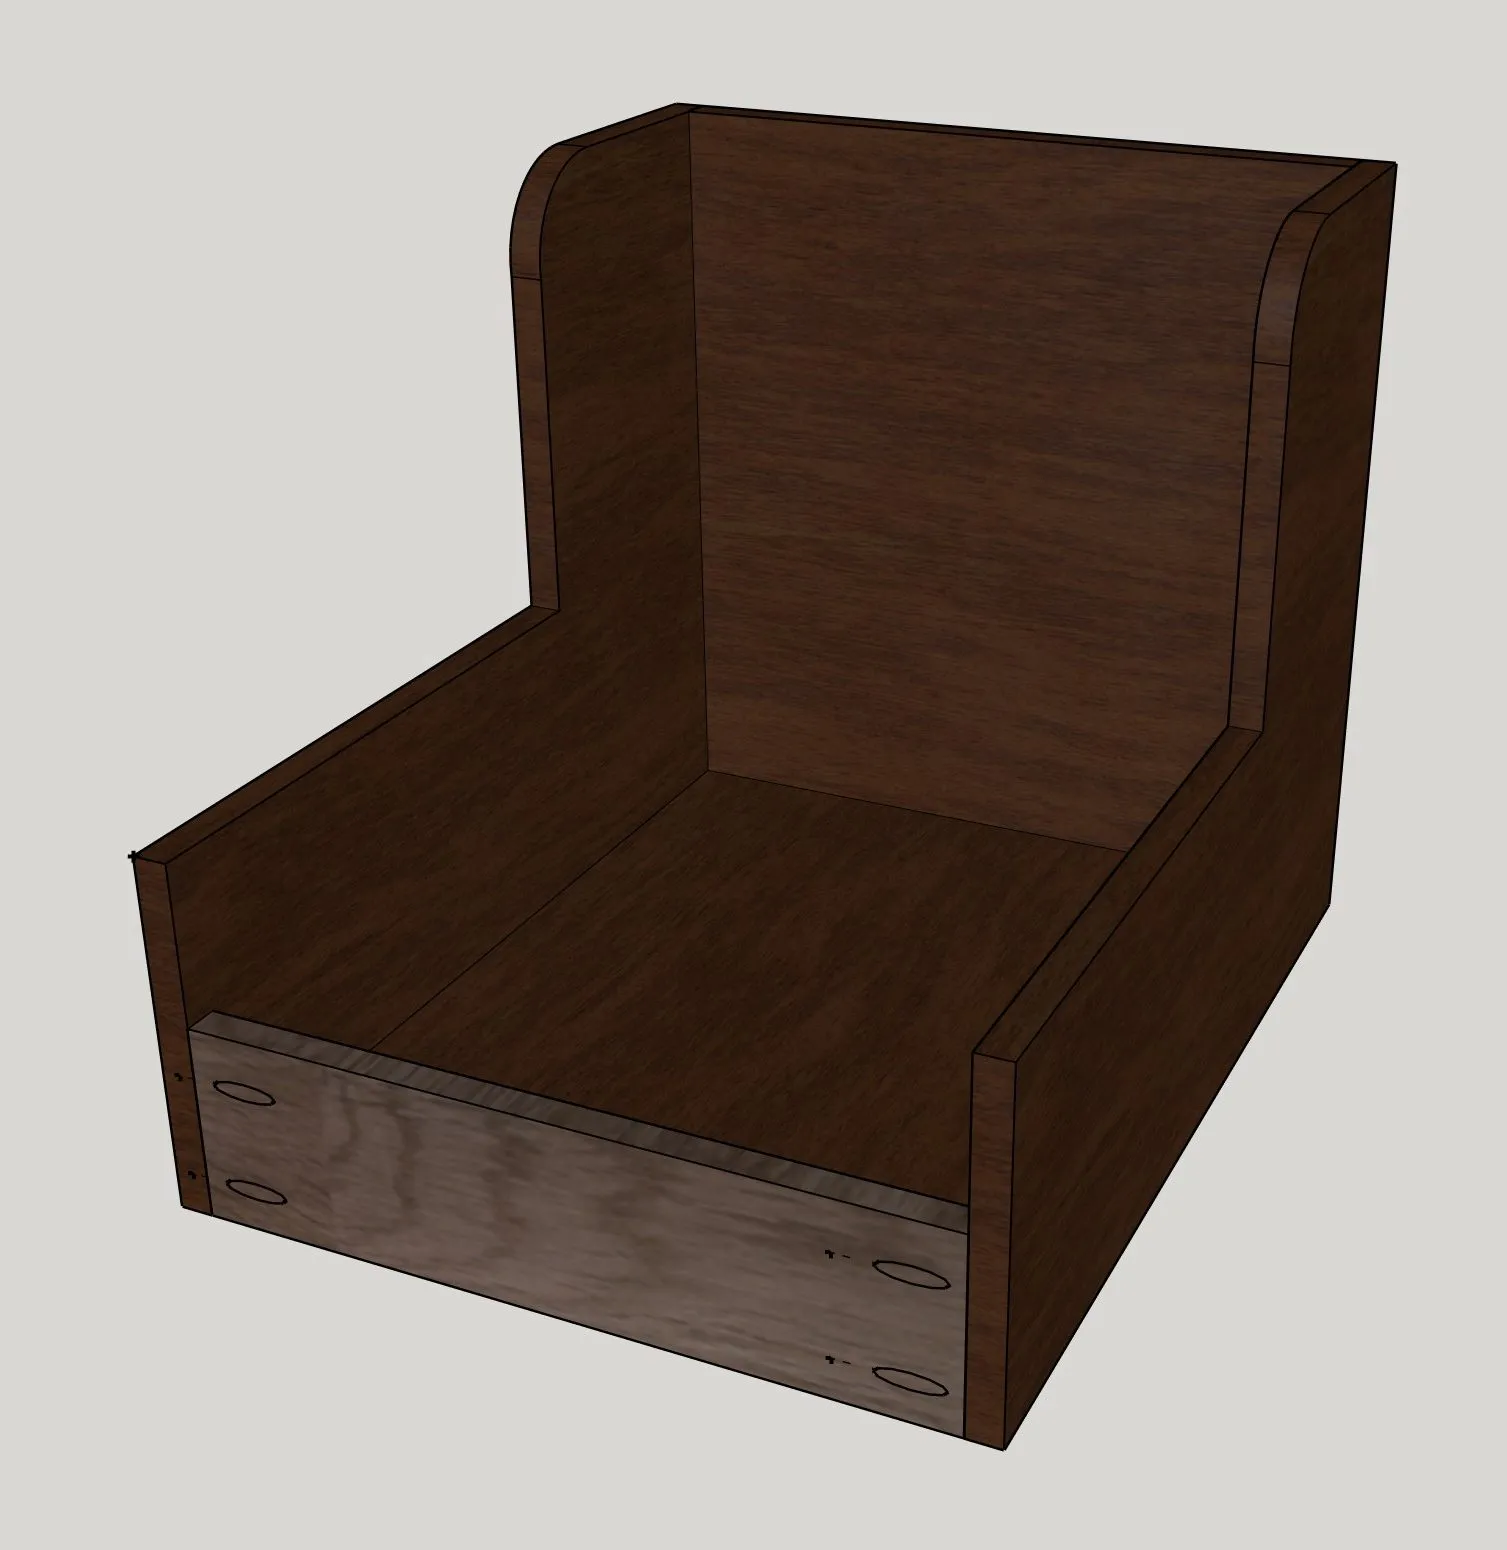
88
Cut the shelf to size and drill 3/4" pocket holes as shown in the picture.
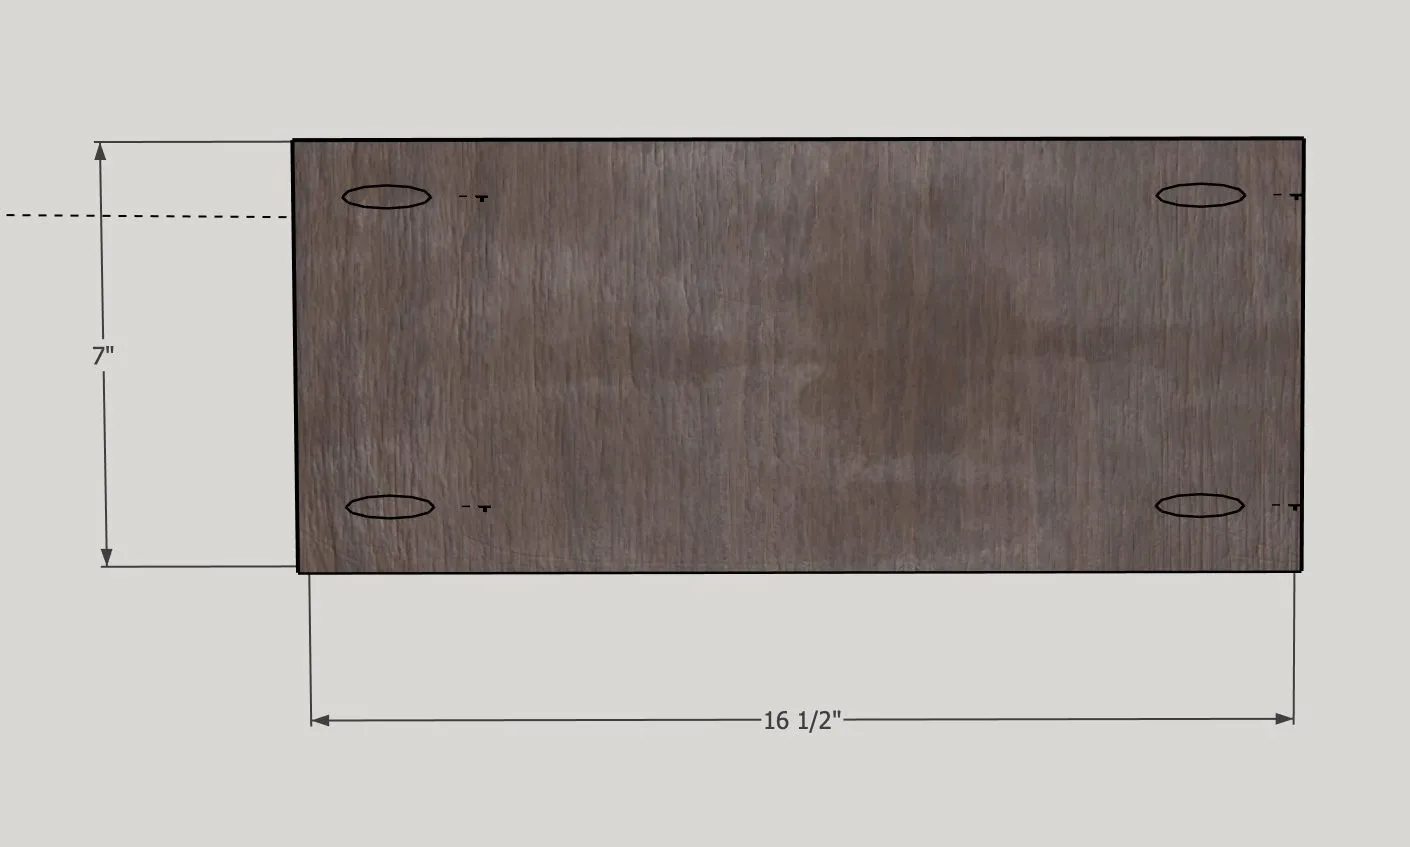
99
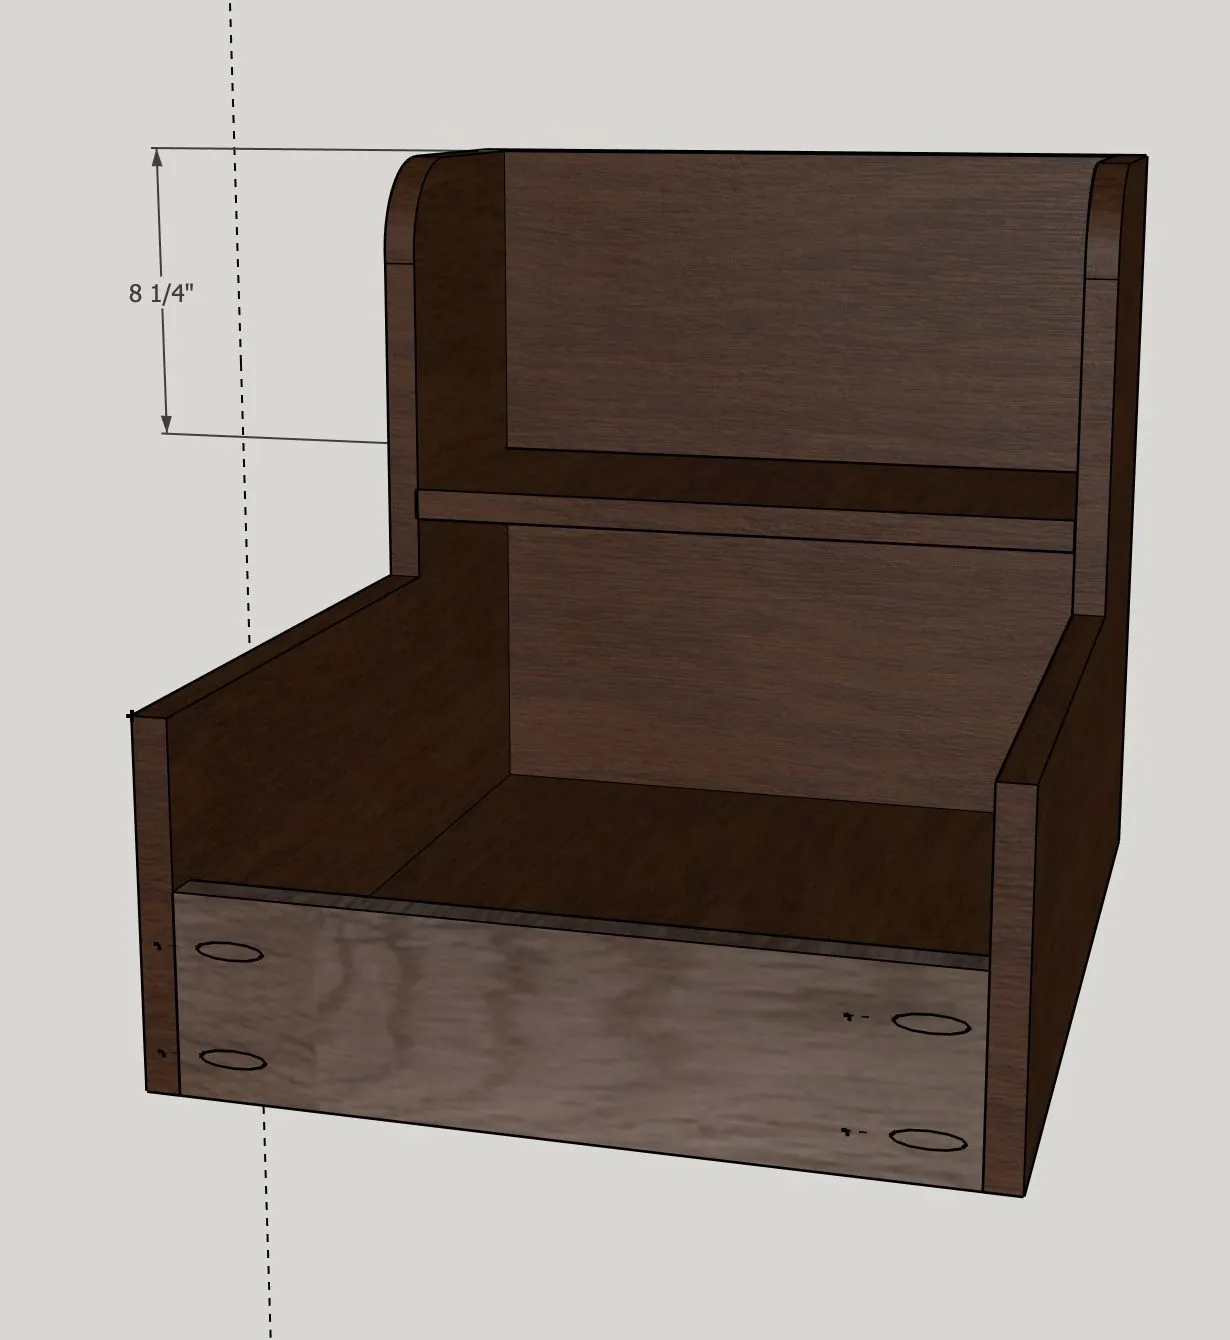
Attach the shelf to the organizer using wood glue and 1 1/4" pocket screws. Make sure it is 8 1/4" down from the top of the organizer as shown in the photo. The pocket holes should be facing down.
1010
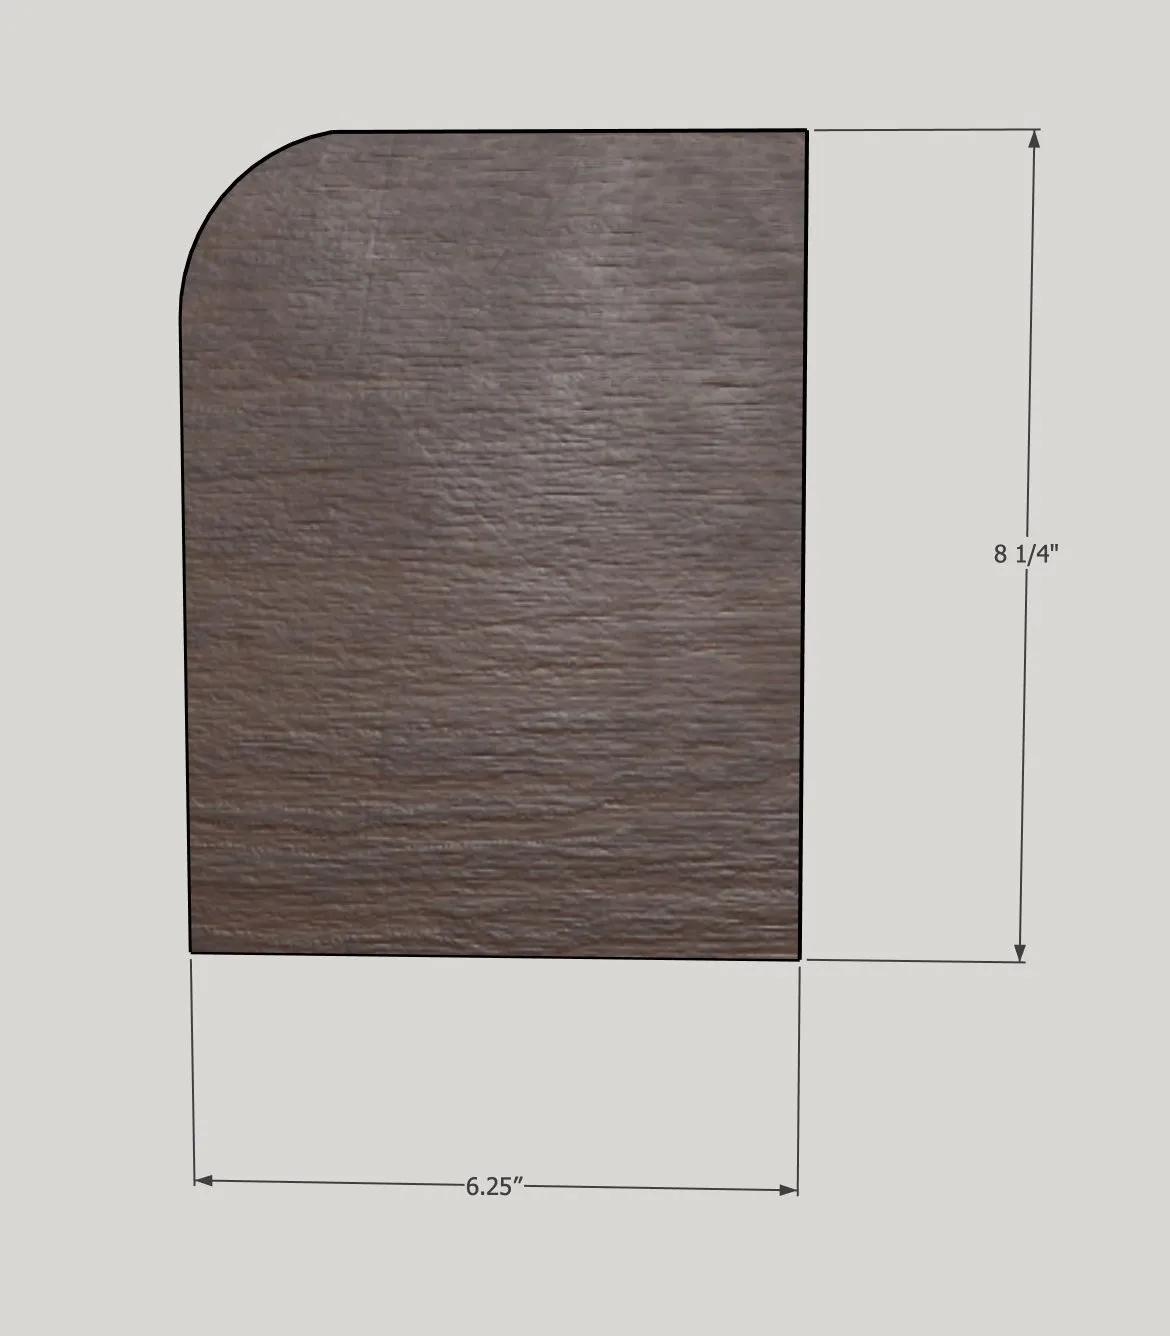
- Cut the shelf dividers to size.
- Round the front, top edge with a jigsaw. I recommend edge banding the front and top before installing these.
1111
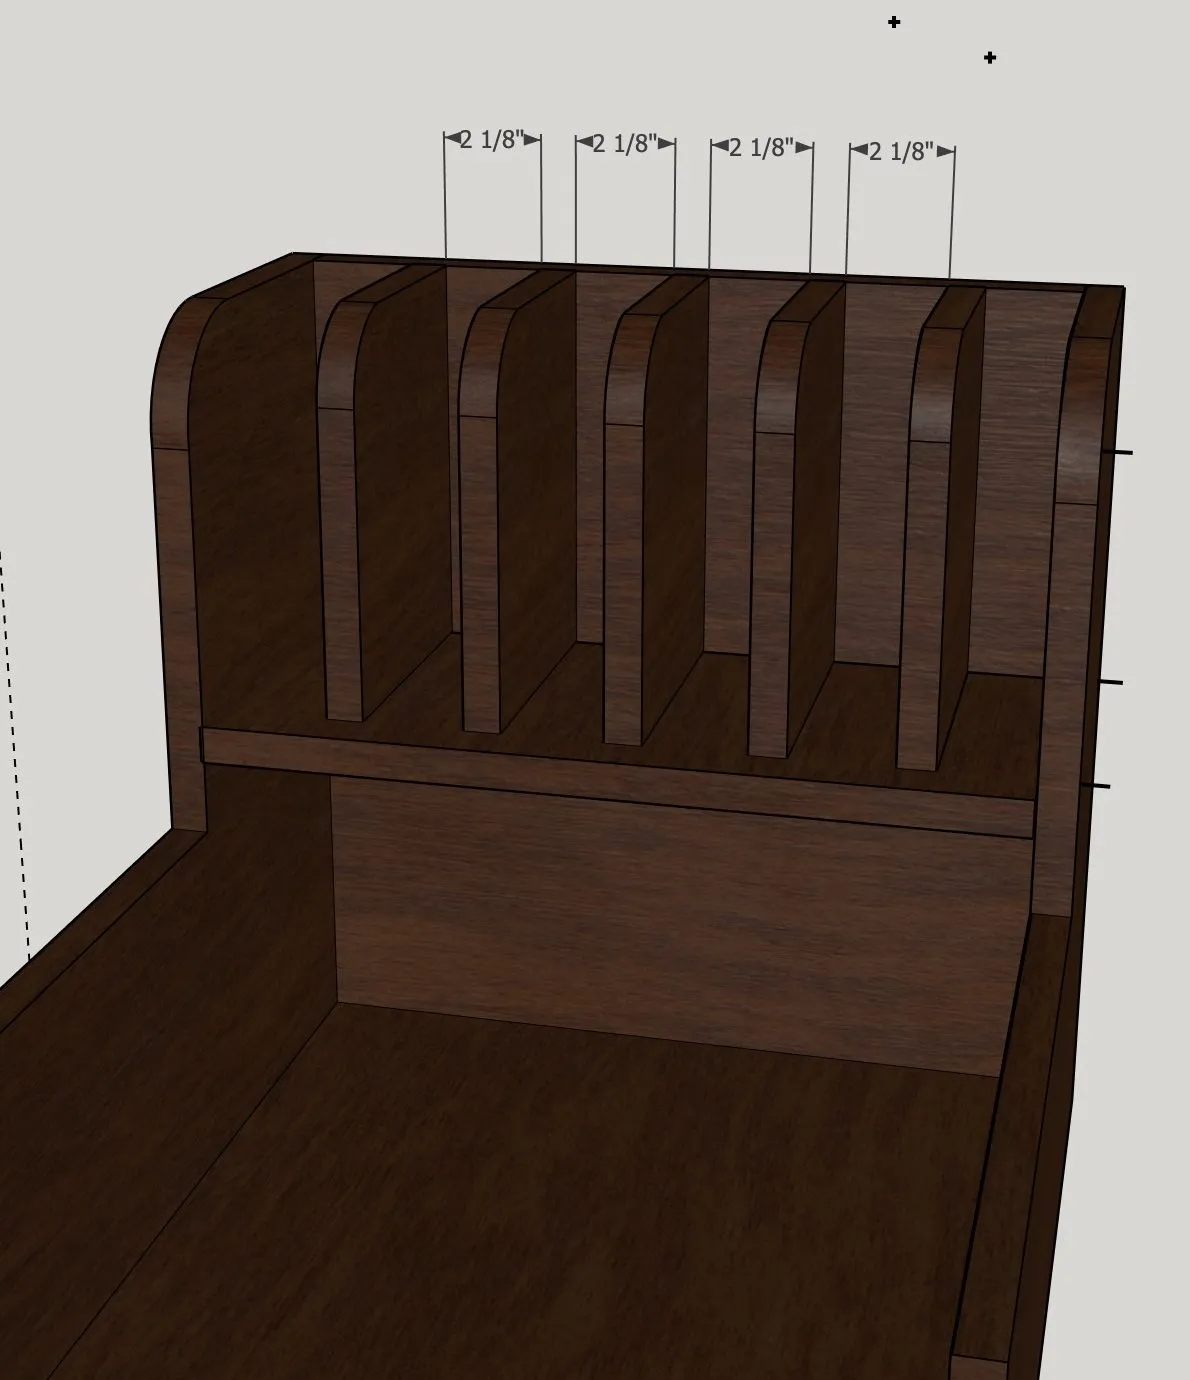
Screw the shelf dividers in as shown in the picture. Use 1 1/4" wood screw and wood glue. Make sure they are spaced evenly apart. They should be screwed in from the back and the bottom of the shelf.
1212
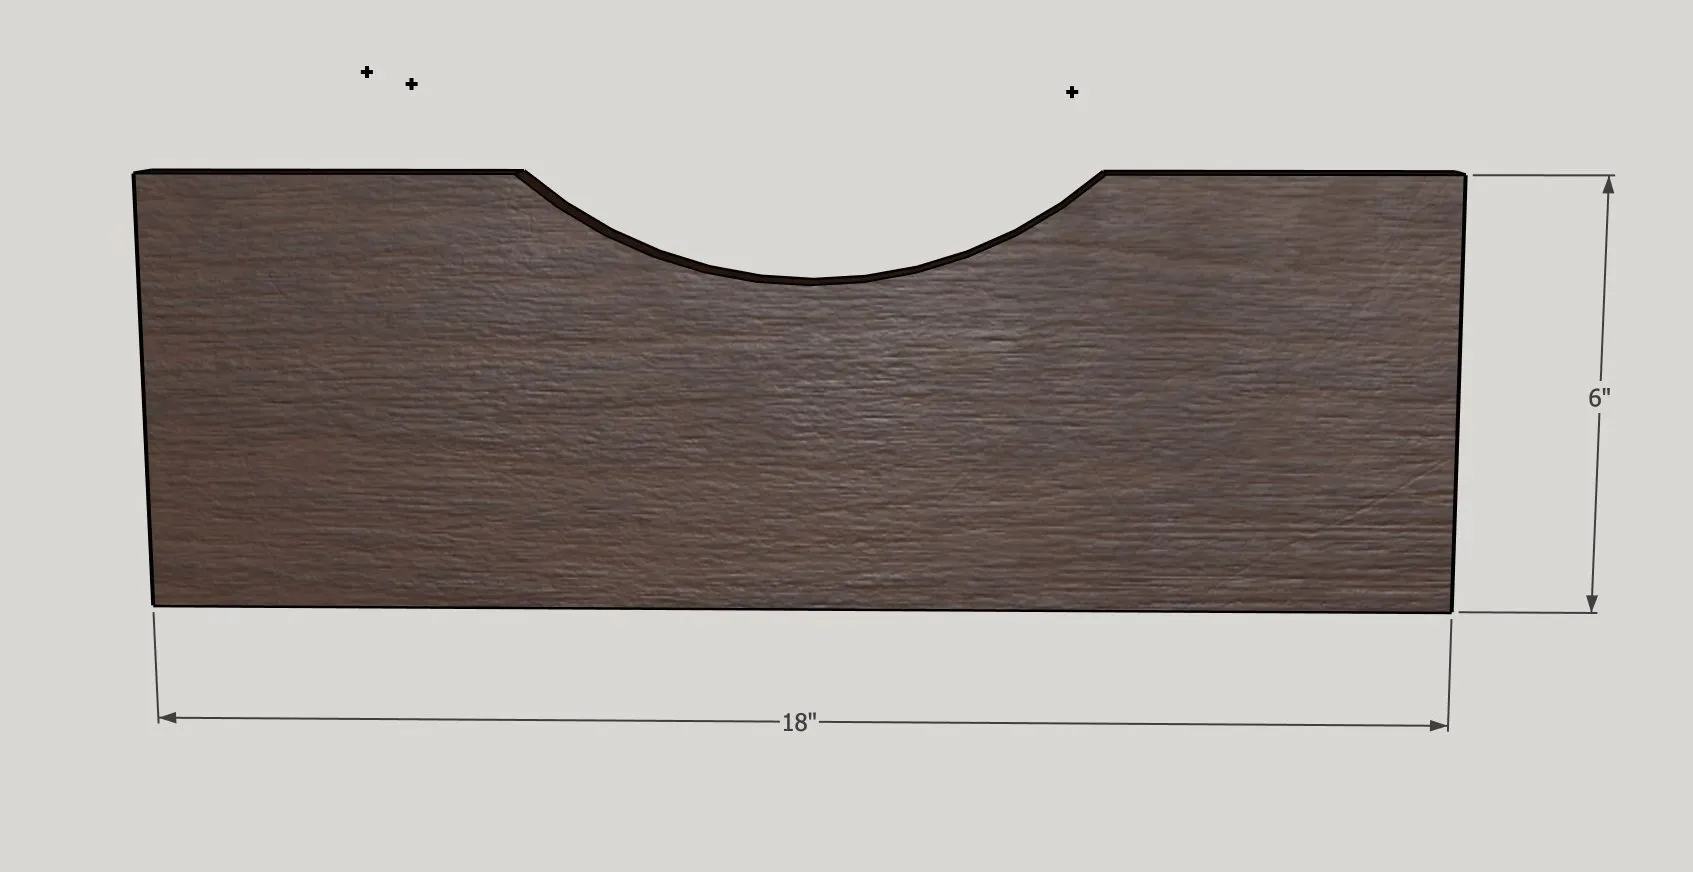
Cut the drawer front t size. Using a jigsaw cut a handle into the front. The design is up to you!
1313
Screw the drawer front onto the organizer from the backside of the drawer. Use 1 1/4" wood screws as shown in the picture.
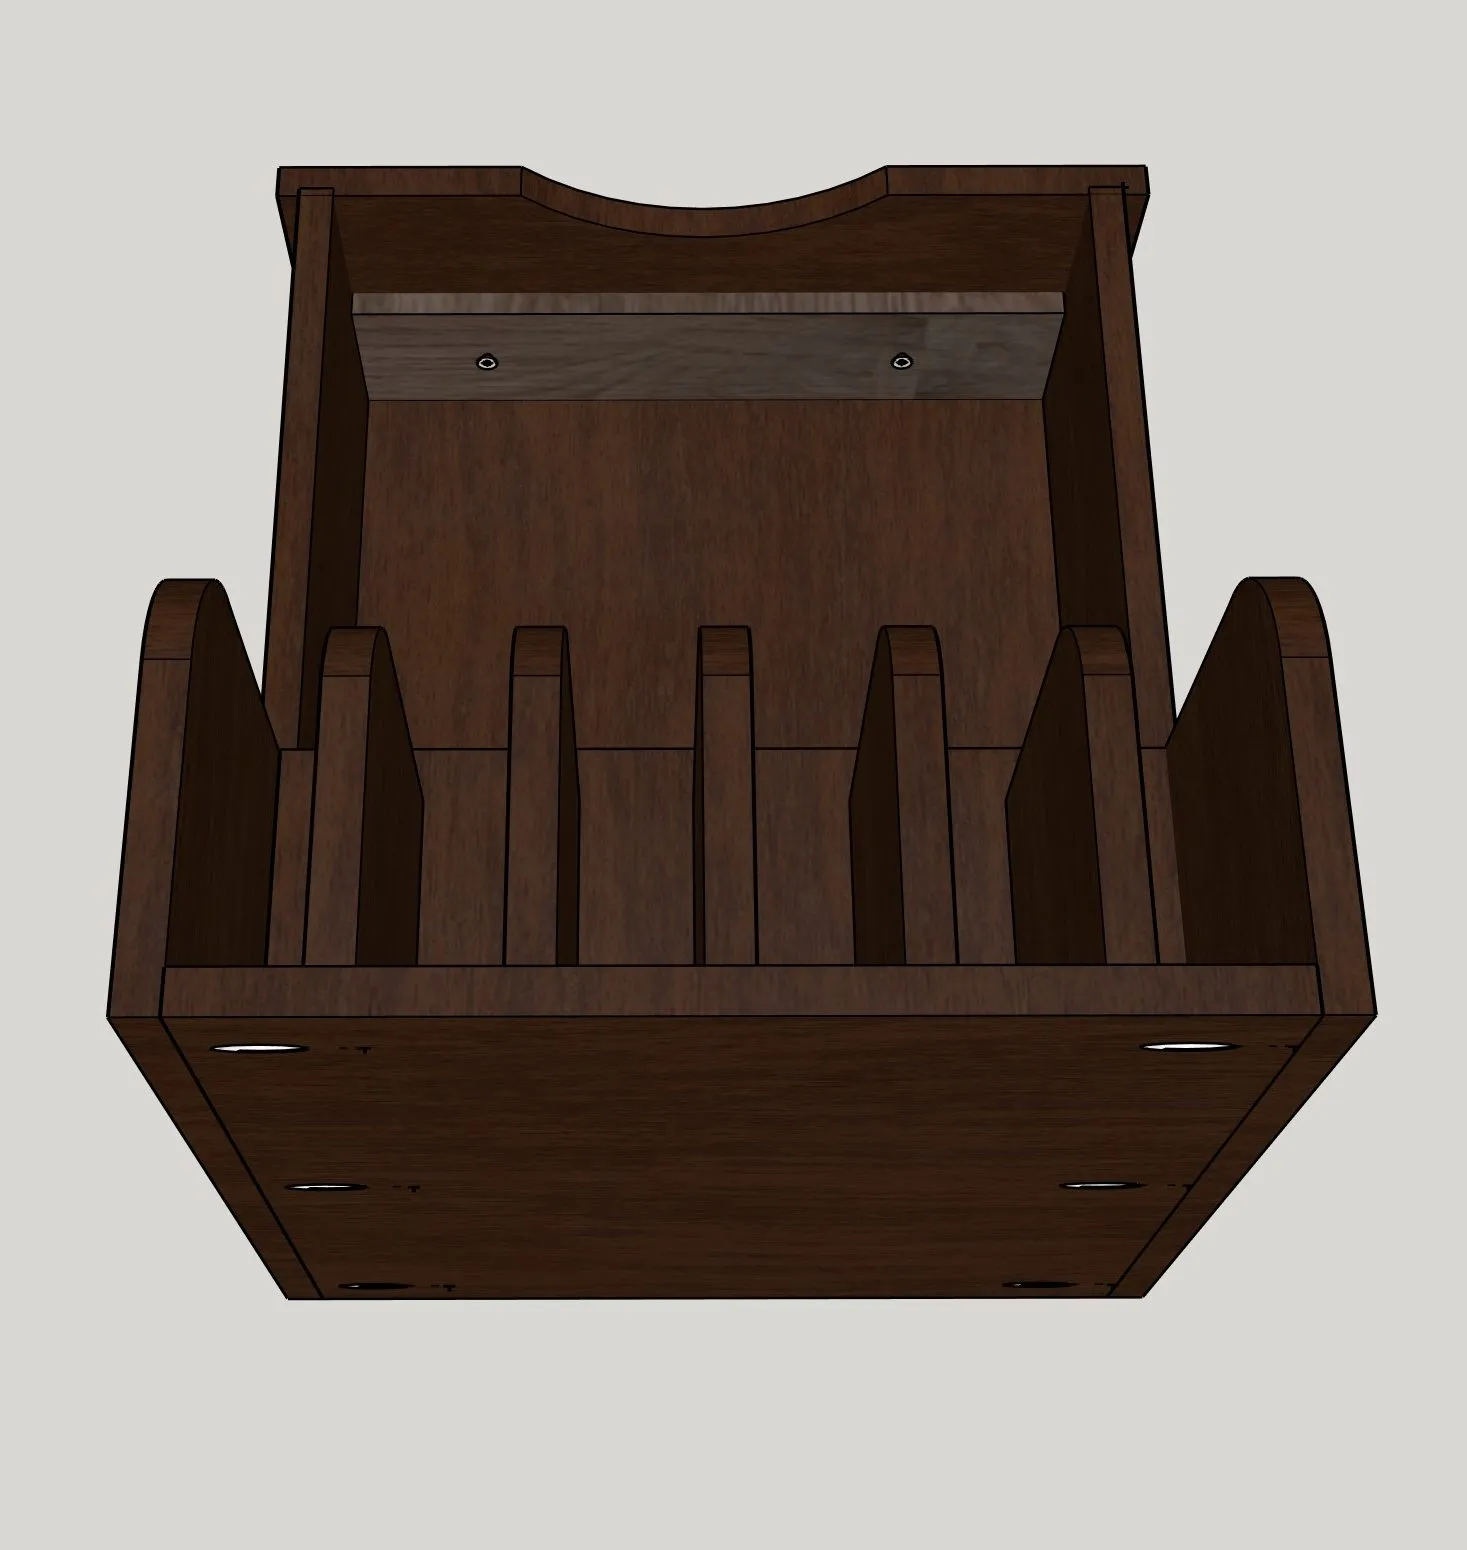
1414
Screw or nail on the bottom pieces of 1/4" plywood at the bottom so the slides can glide easily.
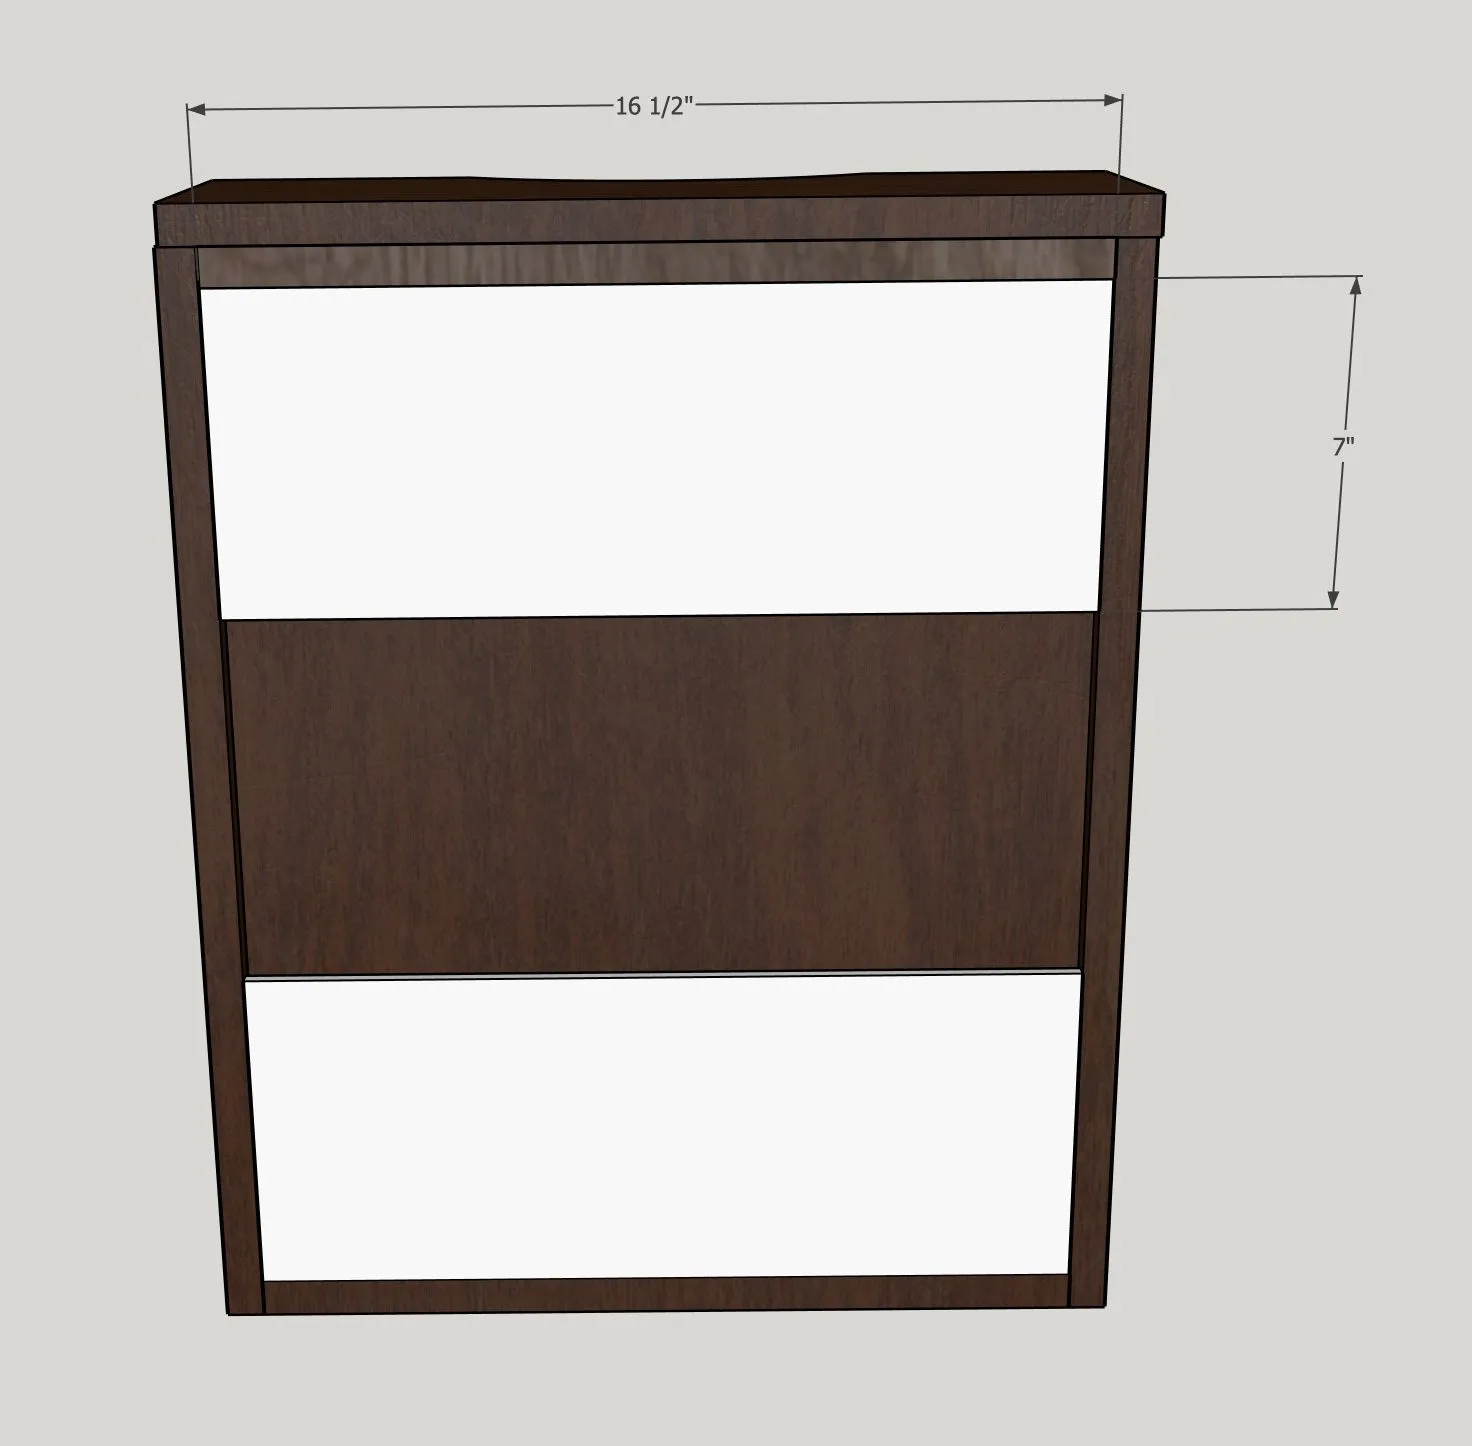
1515
Iron on edge banding on all exposed plywood edges.
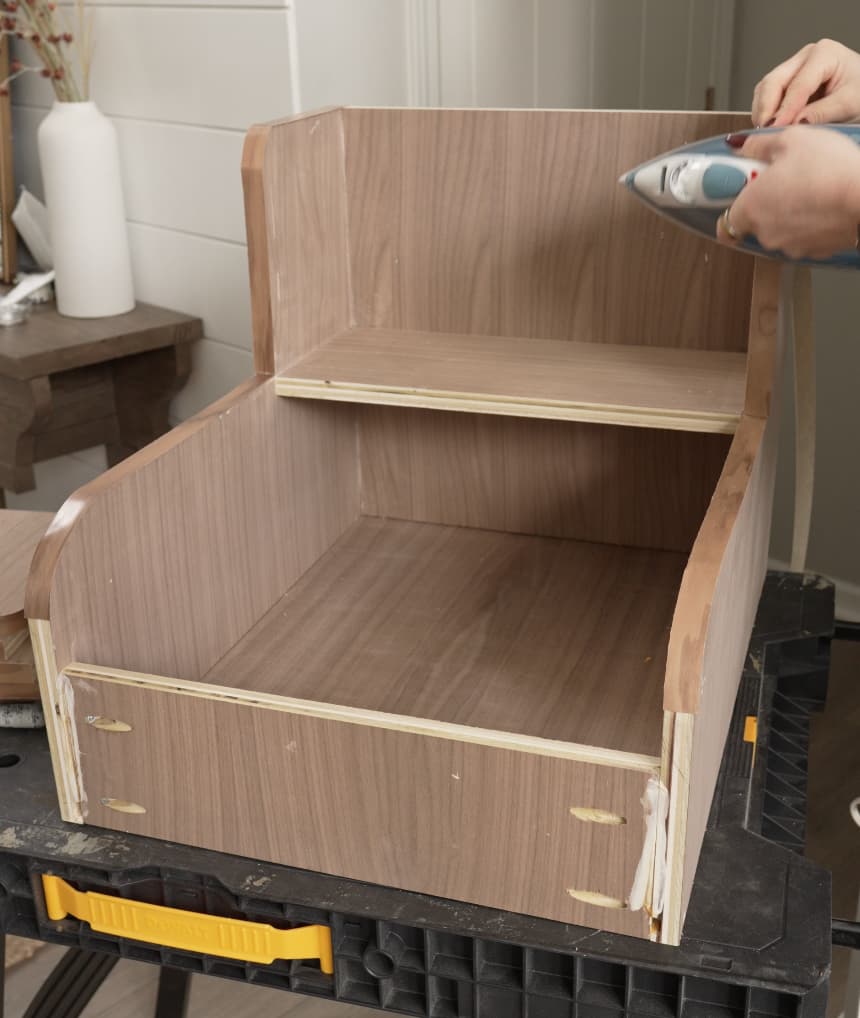
1616
Stain and finish. I used a wood wax to finish it off that is kitchen friendly.
1717
- If your kitchen cabinet has a lip, screw a spacer block to the inside of the cabinet the same length as the drawer slides. I used 3/4" plywood.
- Then screw in the drawer slides to the spacers, put the Tupperware drawer on top and pull out the slides.
- Screw the Tupperware drawer into the slides from the bottom. Make sure it moves nice and smooth and adjust if needed.
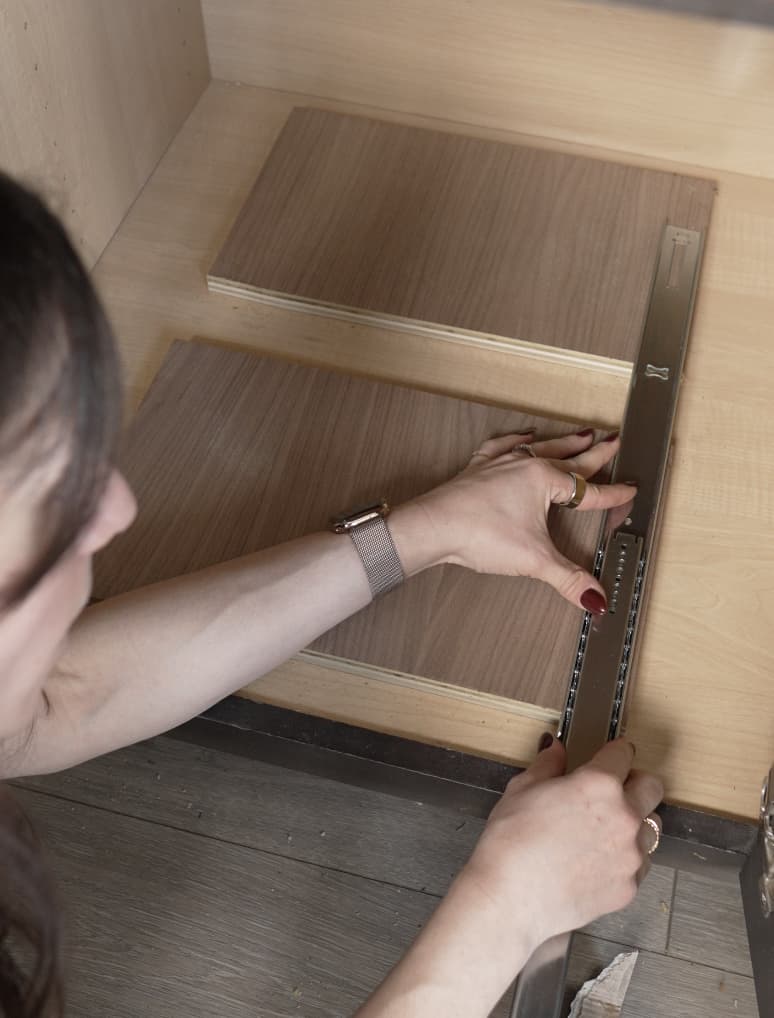
1818
Put in your Tupperware and you've succesfully built yourself an organizer!
Tags
- Kitchen Organization
- Beginner
Reviews & builds
No reviews yet
Sign in to review this plan or share your build.
No reviews yet. Be the first to build this.