Notch
Toy Storage Console with Rolling Bins
Step-by-step build — 19 steps. Also available as a print sheet.
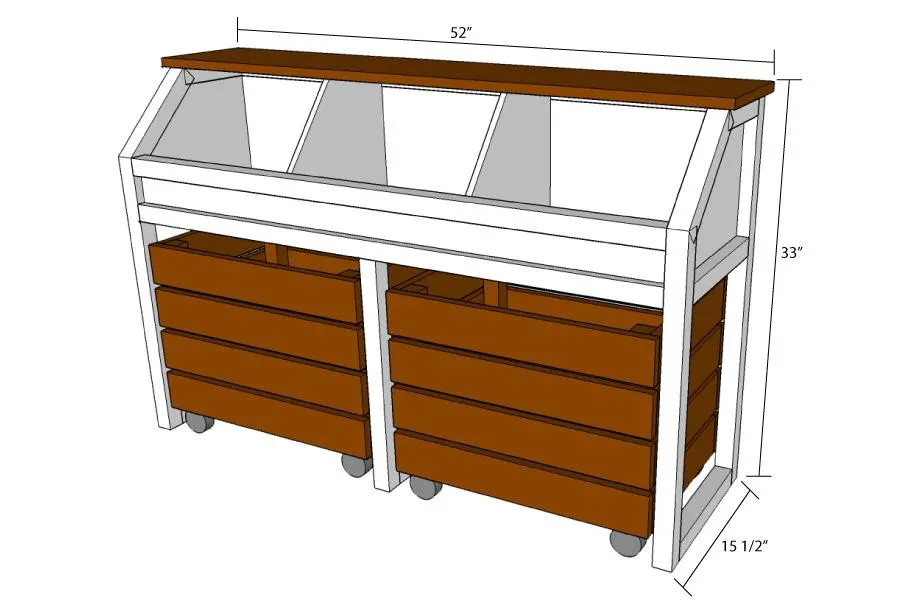
1Dimensions
The final toy storage unit will be 33" tall, 52" long and 15 1/2" deep.
2Cut the front legs
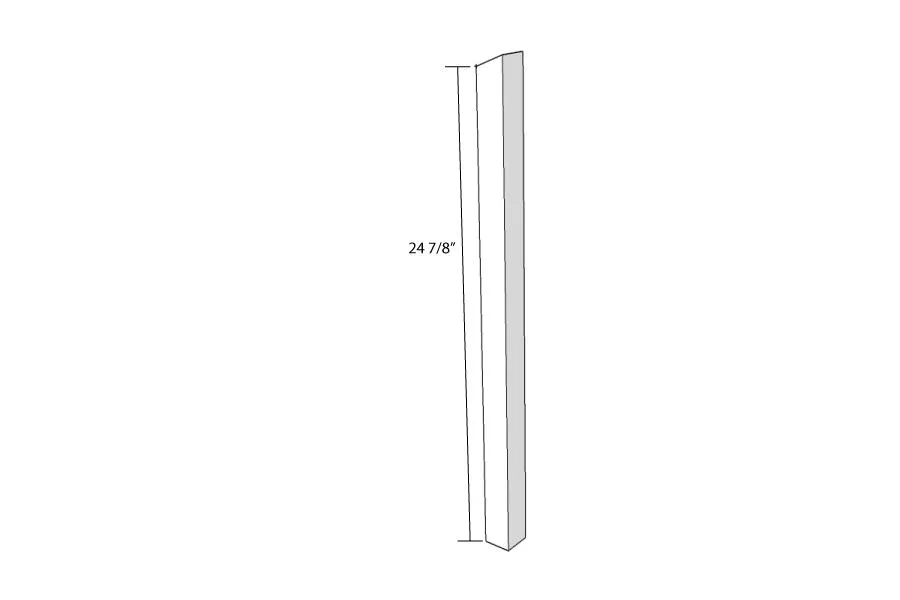
Cut the top of the front legs so the front of each leg is 25 1/2" tall and the back is 24 7/8" tall (a 22.5 degree angle).
3Start assembling the sides
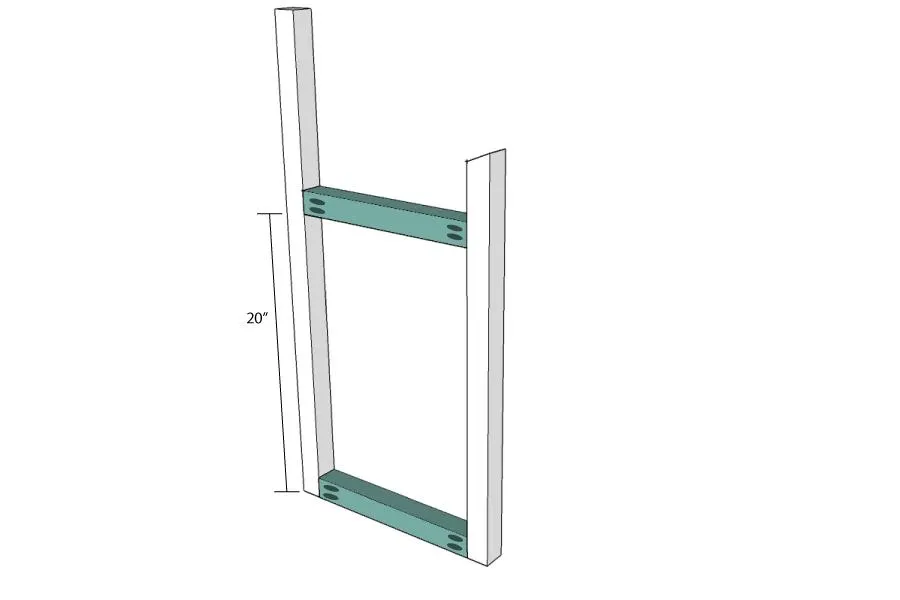
Connect the front and back legs to the leg supports with pocket holes. One leg support should be flush with the bottom and the other should be 20" up from the bottom.
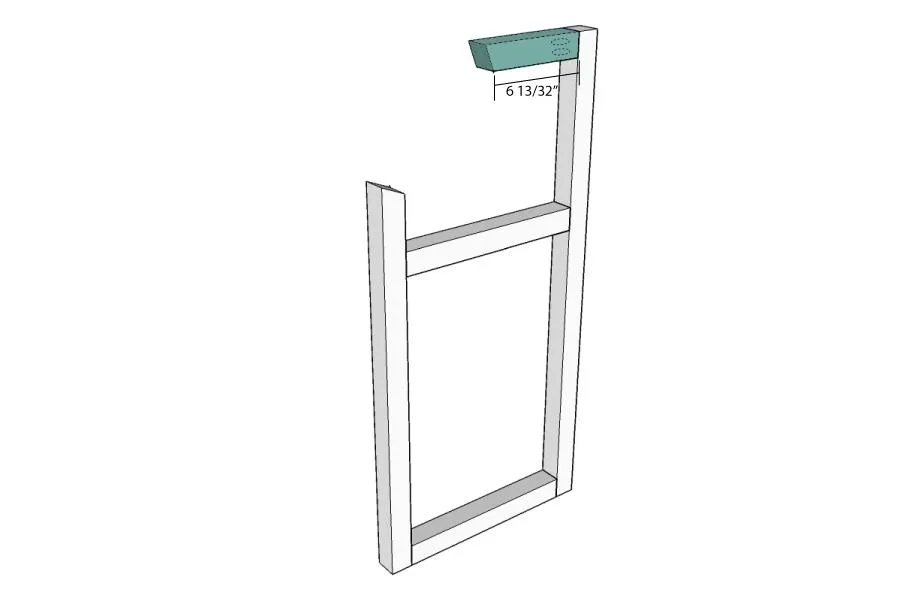
4Add the top of the frame
Cut the side frame top so the top is 7" long and the bottom is 6 13/32" long (a 22.5 degree angle). Attach it to the back leg with pocket holes so it is flush with the top.
5Attach the side panel
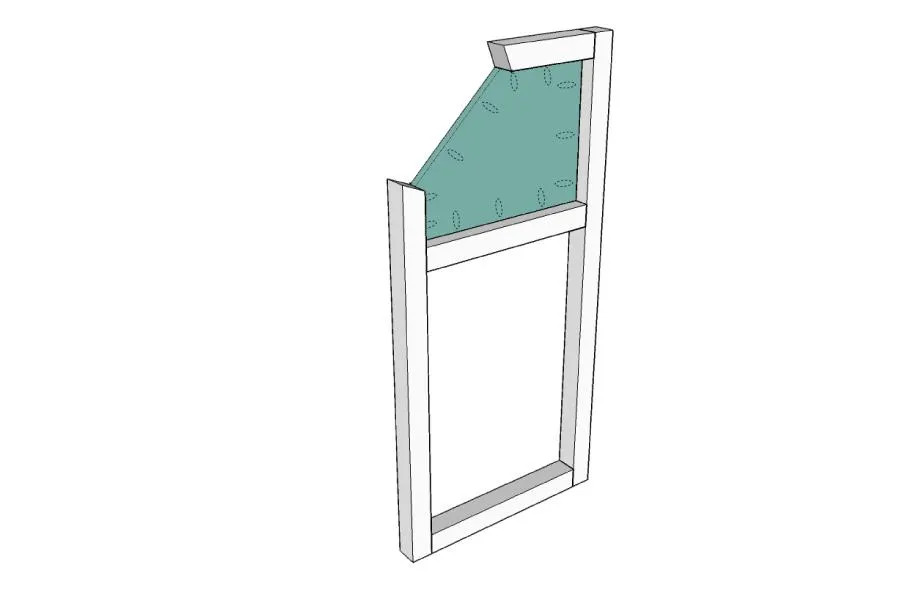
- Mark the top of the side panel 6 13/32" over from the inner edge.
- Mark the side of panel up 3 3/8" up from the outer edge. Draw a line between the two marks and cut along the line.
- Attach the side panel to the side frame with pocket holes. Make sure to add some pocket holes on the angled cut so you can attach the next piece.
6Cut side frame angle board
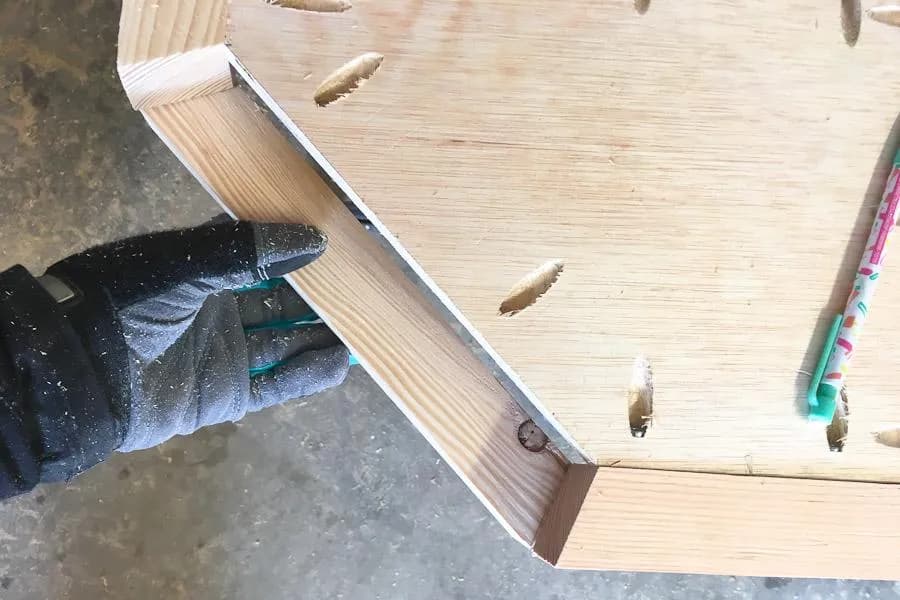
Hold the 10" 2x2 board under the side frame and mark the measurements and angles. The outer measurement should be about 9 23/32" with 22.5 degree angles on both ends, but measuring to fit will give you a better fit.
7Finish the side frame
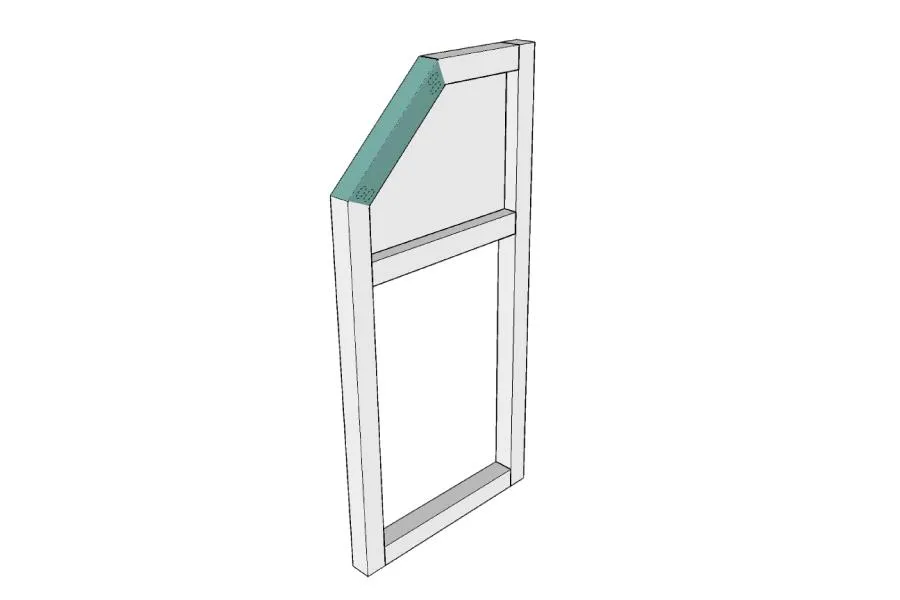
Attach the newly cut board with pocket hole screws. Repeat the above steps for the second side.
8Connect the sides
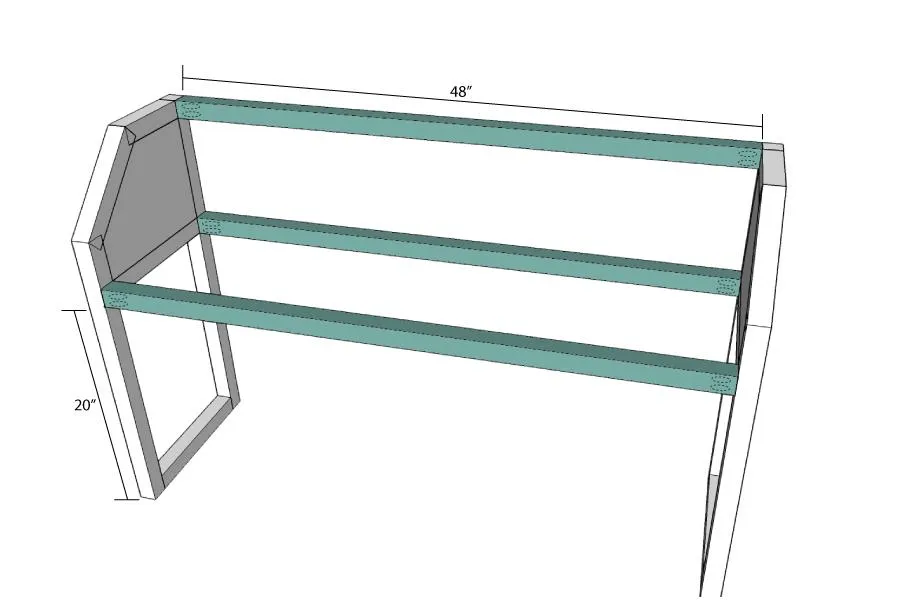
Connect the two sides with the front/back frame boards with pocket holes. One frame board will be flush with the top back of the frame. One frame board will be 20" up from the bottom and flush with the back of the side frame. One frame board will be 20" up from the bottom and flush with the front of the side frame.
9Attach the back panel
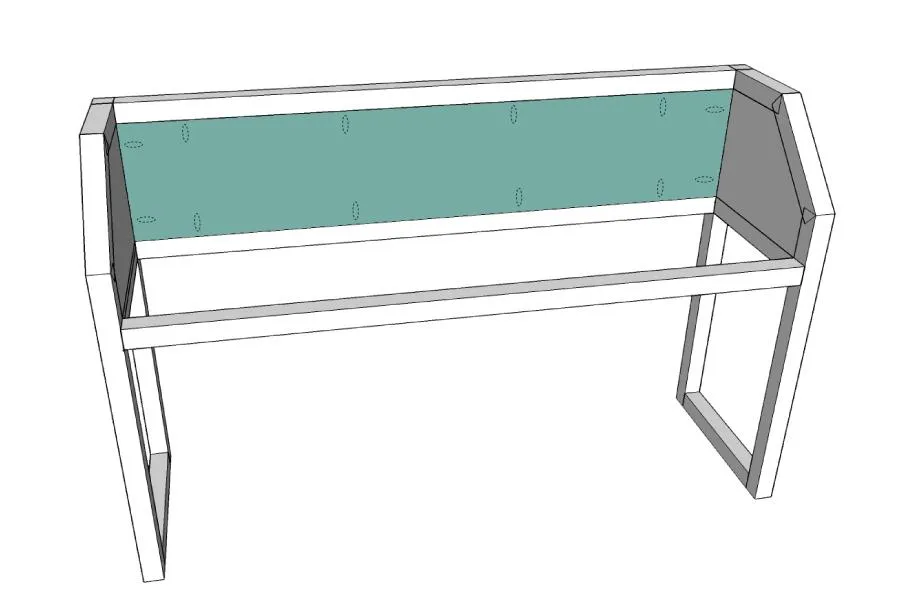
Attach the back panel between the side frames and back frame boards so it is flush with the inside of the boards with pocket holes.
10Add center leg
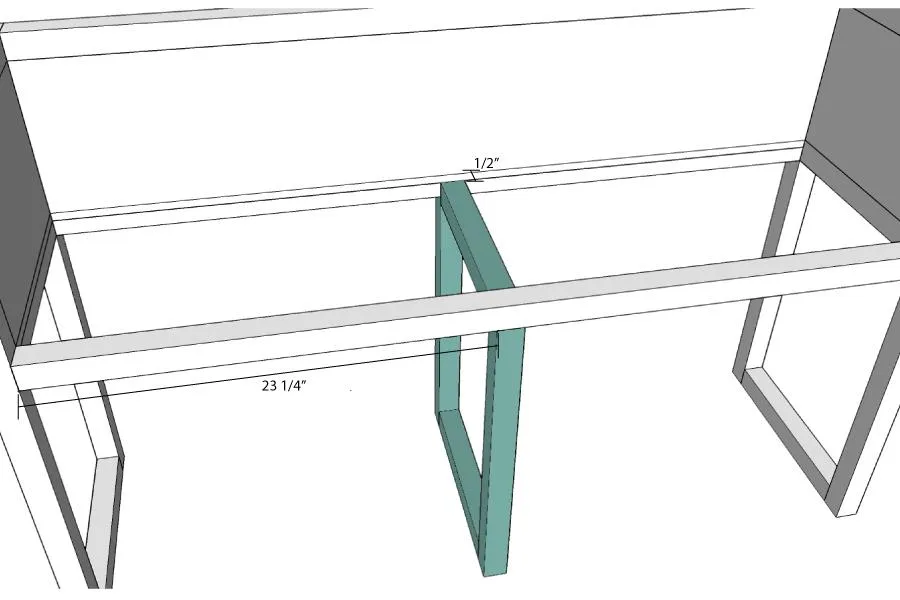
- Build the center leg by securing one leg support between the bottom of the 20" center legs with pocket holes.
- Attach it to the center of the unit with pocket holes.
- Attach the second leg support 1/2" below the front/back frame supports with pocket holes.
11Attach the bottom panel
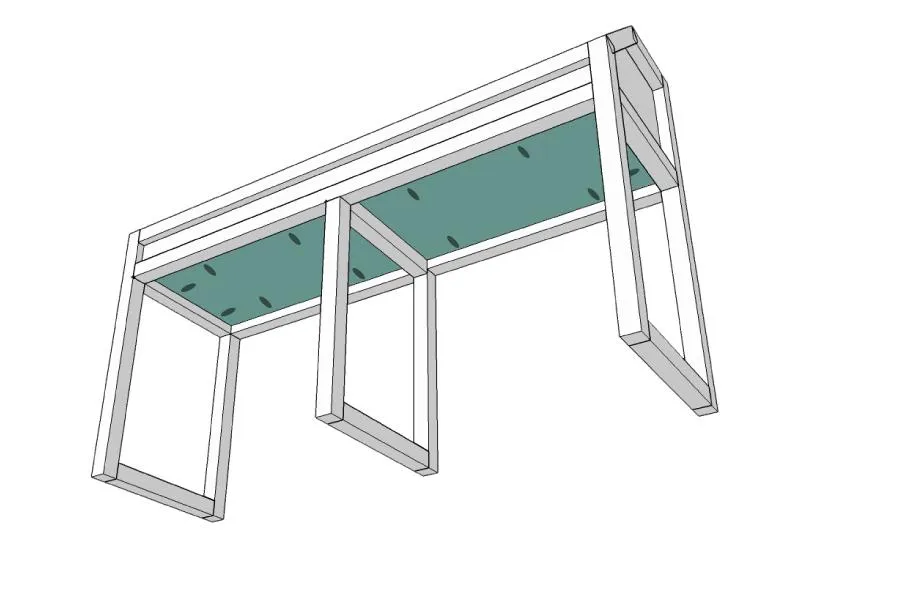
Attach the bottom panel flush with the top of the front/back frame boards with pocket holes.
12Build front frame
Attach the last front frame board to the top of the front panel with pocket holes so they are flush at the back.
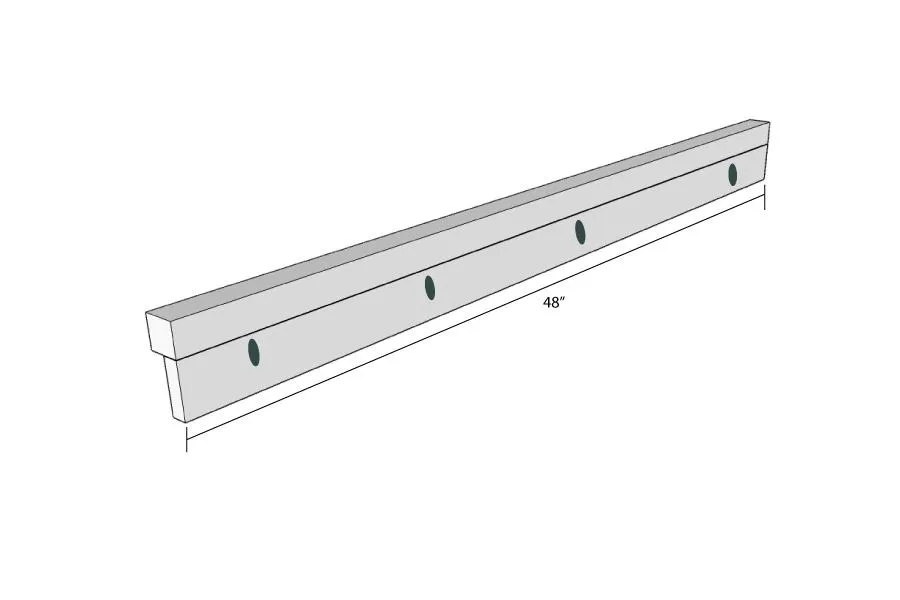
13Attach the front frame
Using pocket holes, attach the front frame to the unit so it is flush along the back.
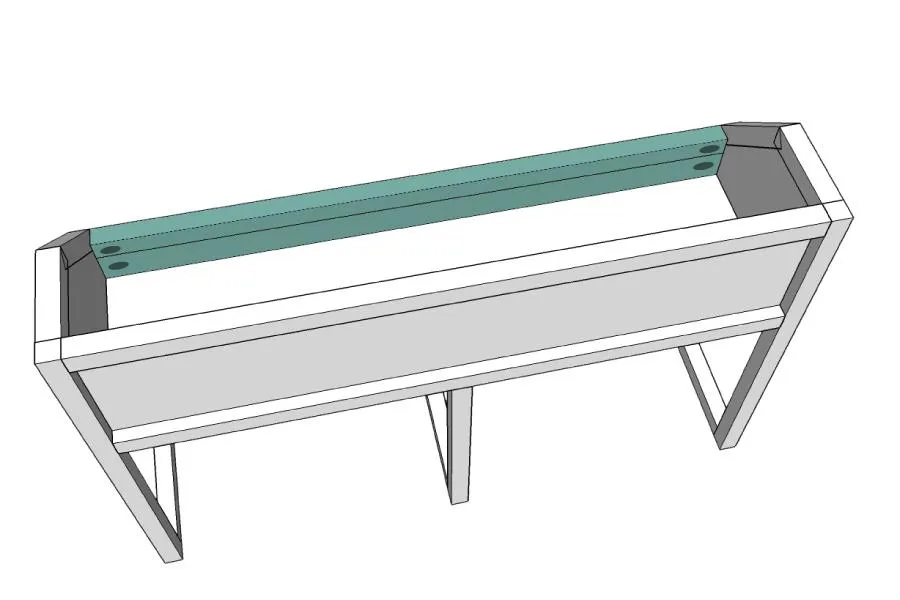
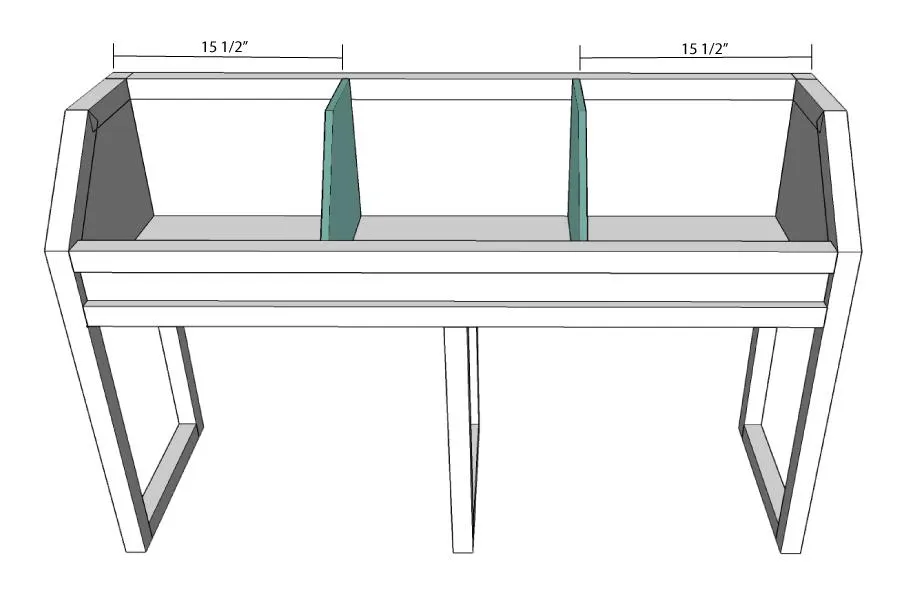
14Add center panels
- Mark the top of the center panels 7" over from the inside of the top and 4" up from the outside bottom. Draw a line between the marks and cut along the line.
- Attach the center panels to the unit 15 1/2" in from each side using wood glue and finishing nails from the back and bottom of the unit.
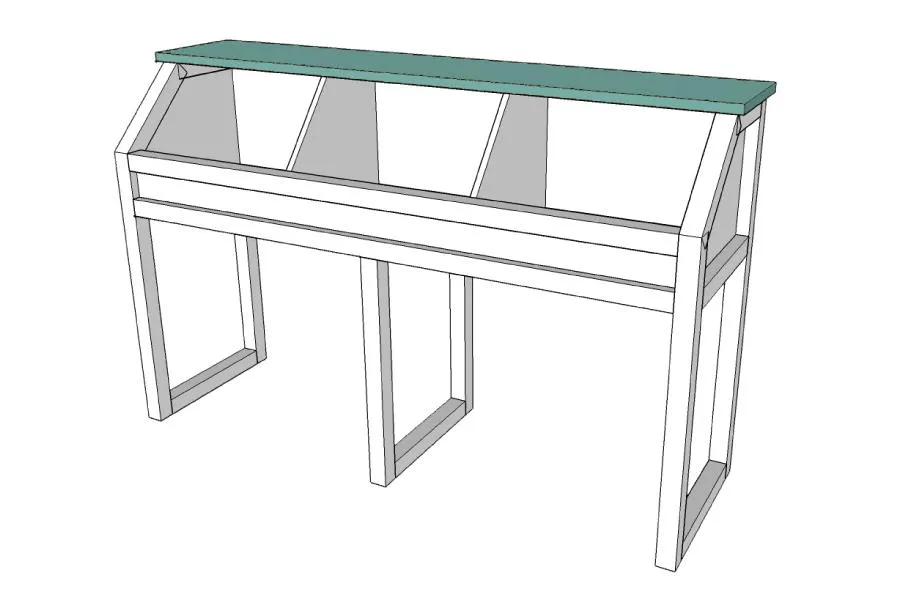
15Attach the top
- Attach the top of the console with wood glue and finishing nails so the top is flush with the back and has a 1/2" overhang on either side.
- Sand, paint and finish the piece. If you want to use a different finish for the top like I did, sand, paint, stain the pieces before attaching the top board.
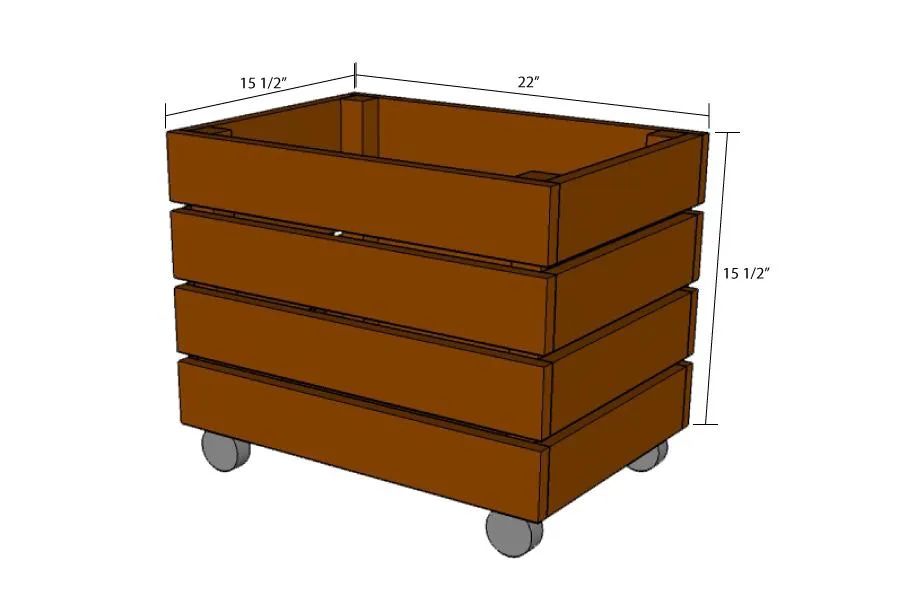
16Build the bin supports
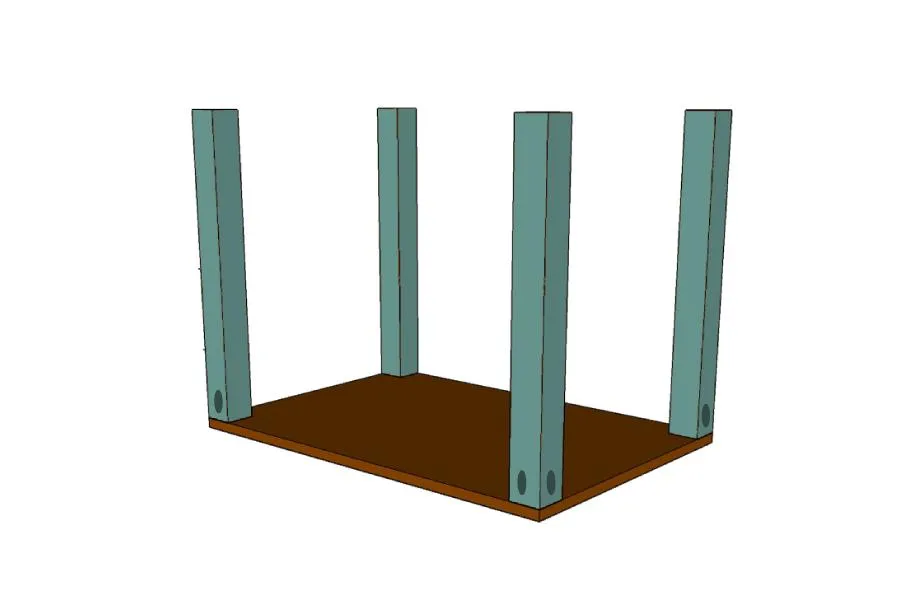
Attach the bin supports to the four corners of the bin bottoms with pocket holes on the 2 outside edges of the support boards (so they will be hidden when the bin is finished).
17Attach the side slats
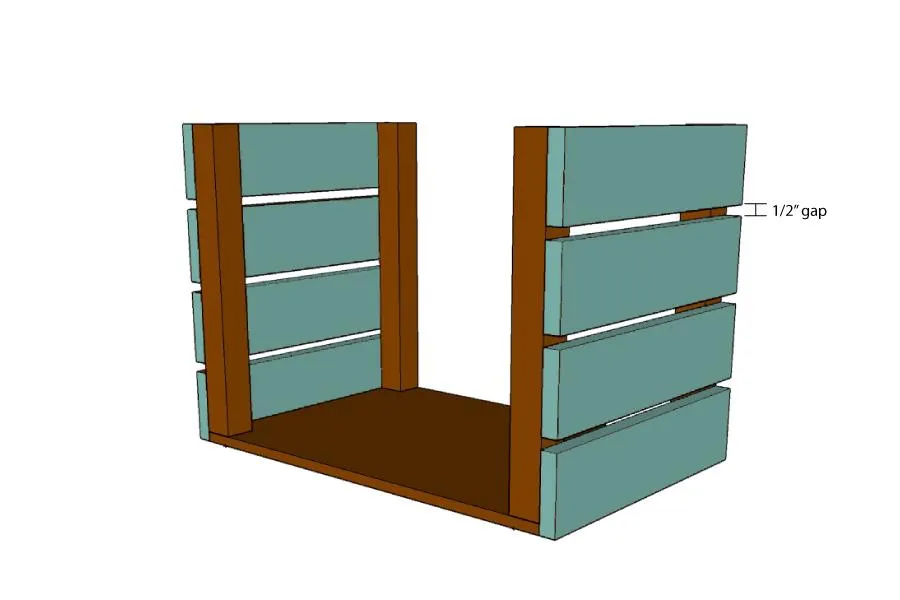
- Attach the side slats to the support boards and bottom with wood glue and finishing nails. The top slat should be flush with the top of the support boards and the bottom slat should be flush with the bottom plywood panel.
- Leave 1/2" gap between the slats.
18Attach the front/back slats
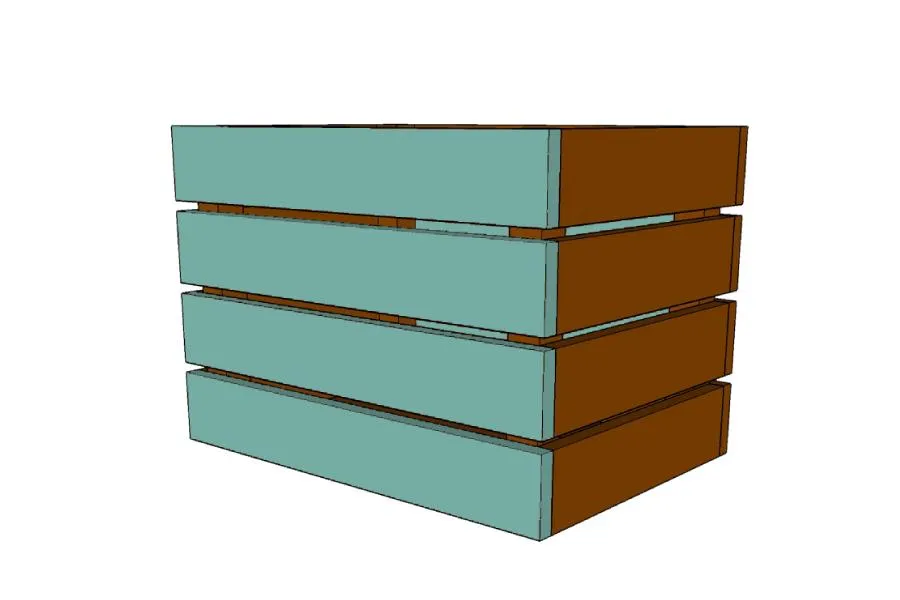
Attach the front and back slats to the bins with wood glue and finishing nails. Line up the slats so they are flush with the side slats.
19Finish the bins
Sand, stain and seal the bins. Then attach castors to the bottom of the bins that are no taller than 3".