 Notch
- Difficulty
- Advanced
- Time
- 4.5–8.5 hours
- Cost
- $$
About this build
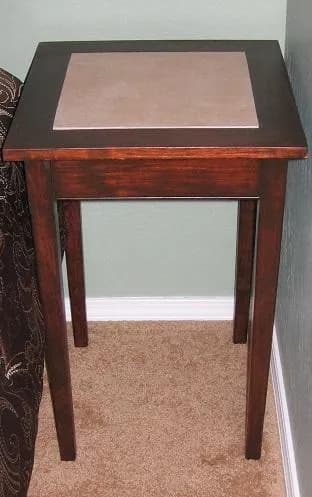
Tile topped nightstands. Built with your choice of wood, these Nightstands makes a beautiful addition to any bedroom. This simple design is easily built, but very stylish.
Tools
Essential
- Drill / Driver
- Miter Saw
- Pocket Hole Jig
- Random Orbit Sander
- Router
- Router Table
- Table Saw
Optional / nice to have
- Bar / Pipe Clamps
- Tape Measure
Materials
| Item | Qty |
|---|---|
| Board, 1 1/2" X 7 1/4" 36" | 1 board |
| Board, 1x8 72" | 1 board |
| Tile 12" X 12" | 1 each |
| Kreg 1 1/4" coarse pocket screws | 36 each |
| Titebond I wood glue | 1 each |
| Sandpaper 100 - 220 grit | 6 each |
| Liquid Nails Clear Silicone Adhesive | 1 each |
| Minwax Satin Espresso Polyshades 1 step finish | 1 each |
Overall cost: $$. Lumber prices vary by region, species, and season, so we give a band rather than a figure we would only be pretending to know.
Cut list
| Part | Qty | T × W × L |
|---|---|---|
| Legs | 4 | 1" × 1" × 25" |
| Table Skirts | 4 | 3/4" × 3" × 12" |
| Top Stiles | 2 | 3/4" × 3" × 17" |
| Top Rails | 2 | 3/4" × 3" × 11" |
What to buy
Buy 4 boards at 8 ft.
1" × 1"
2 boards
3/4" × 3"
2 boards
Assumes 8 ft stock, a 1/8" saw kerf, and buying each part at its own width. Change the board size or kerf on the full board plan →
Instructions
1Introduction
Please be sure to read through complete instructions before you begin any work on this project. It is also a good idea to dry fit the components before adding glue and doing final assembly. I built the nightstands from 3/4" poplar as I was using a polyurethane with stain on them. So the type of wood was going to be hidden. You can build it from any wood you like and stain or paint it to your taste. Please note the plans are for one table and you will need to double the materials to make two stands.
2Cut legs
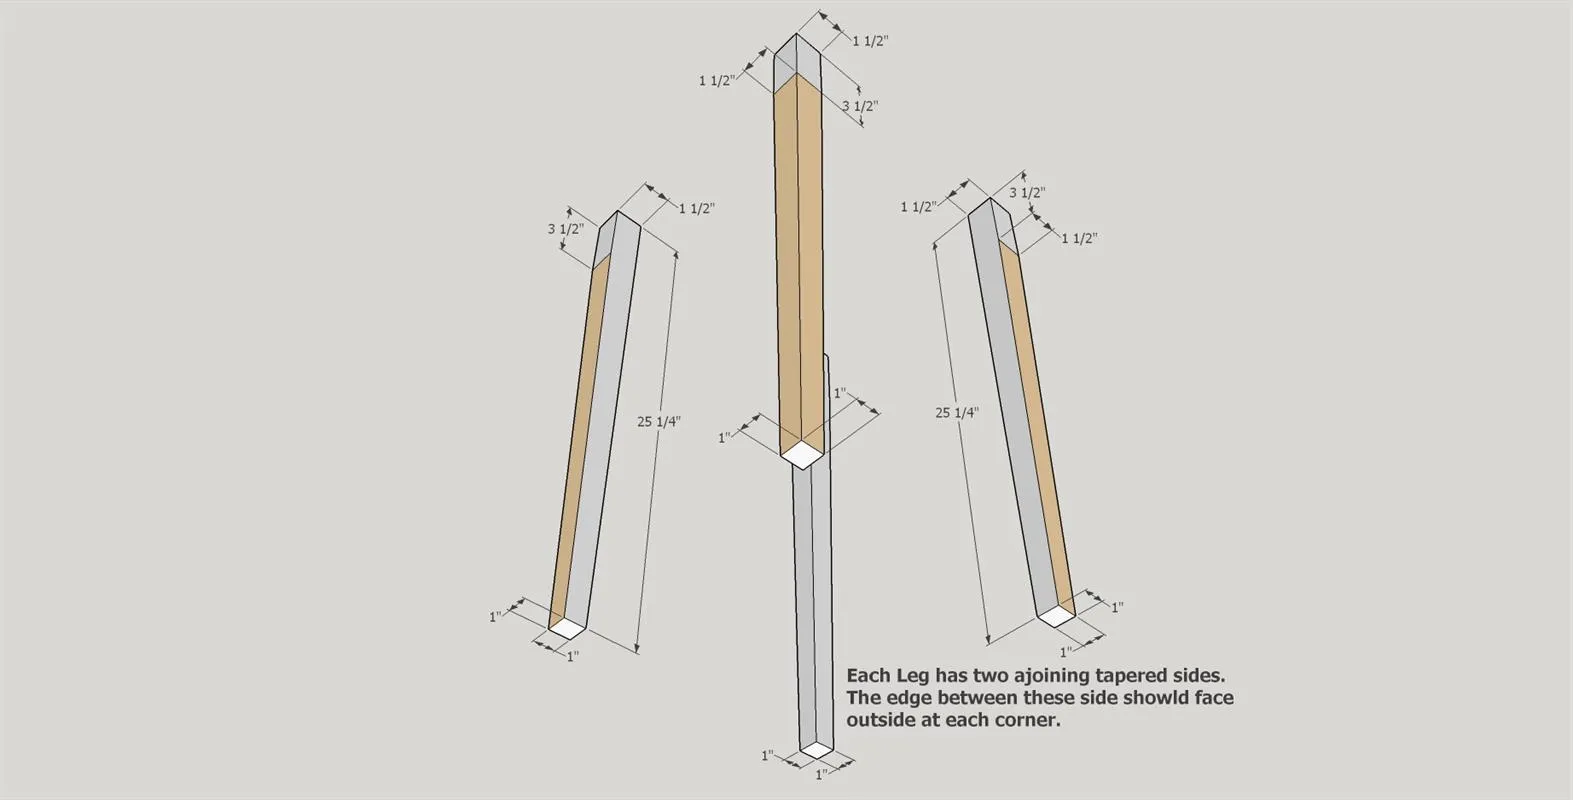
- Cut the four legs as mentioned in the parts list. If you cannot locate 1 1/2" thick wood you can use two 3/4" boards that you glue together.
- Once the legs are cut to size you need to taper two adjacent sides of each leg. I have linked a very good U Tube video (Extra section) that describes how to do this on a table saw using a tapering jig. The two tapers start 3 1/2" from the top of the leg and should go from 1 1/2" to 1" at the bottom. Please see attached diagram. Make sure to mark the tapered sides as you will need to assemble the table with the edge between the tapers facing the outside of each corner. Use 100 - 180 grit sandpaper to smooth the legs.
3Top assembly
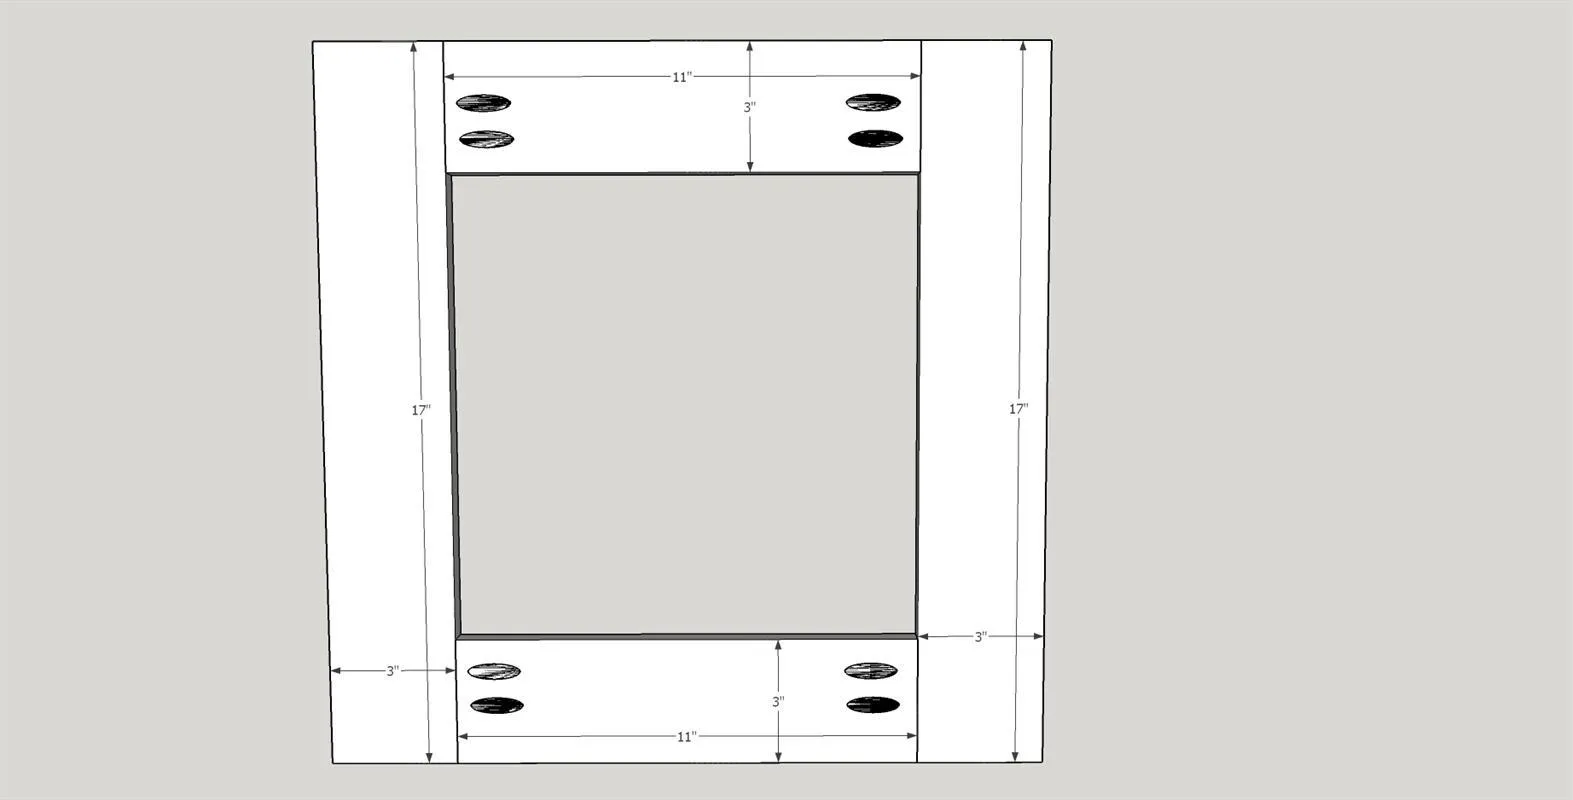
Cut the two top stiles and two top rails as described in the parts list. Using a Kreg pocket screw jig (set to 3/4" for all pockets on this project), drill two pocket holes in both ends of the top stiles as shown in the attached diagram. Make sure to mark the location of the pocket holes before drilling to prevent mistakes. Use Titebond I wood glue and Kreg 1 1/4" pocket screws to complete assembly. Use 100 - 180 grit sandpaper to smooth the assembly.
4Routing top assembly
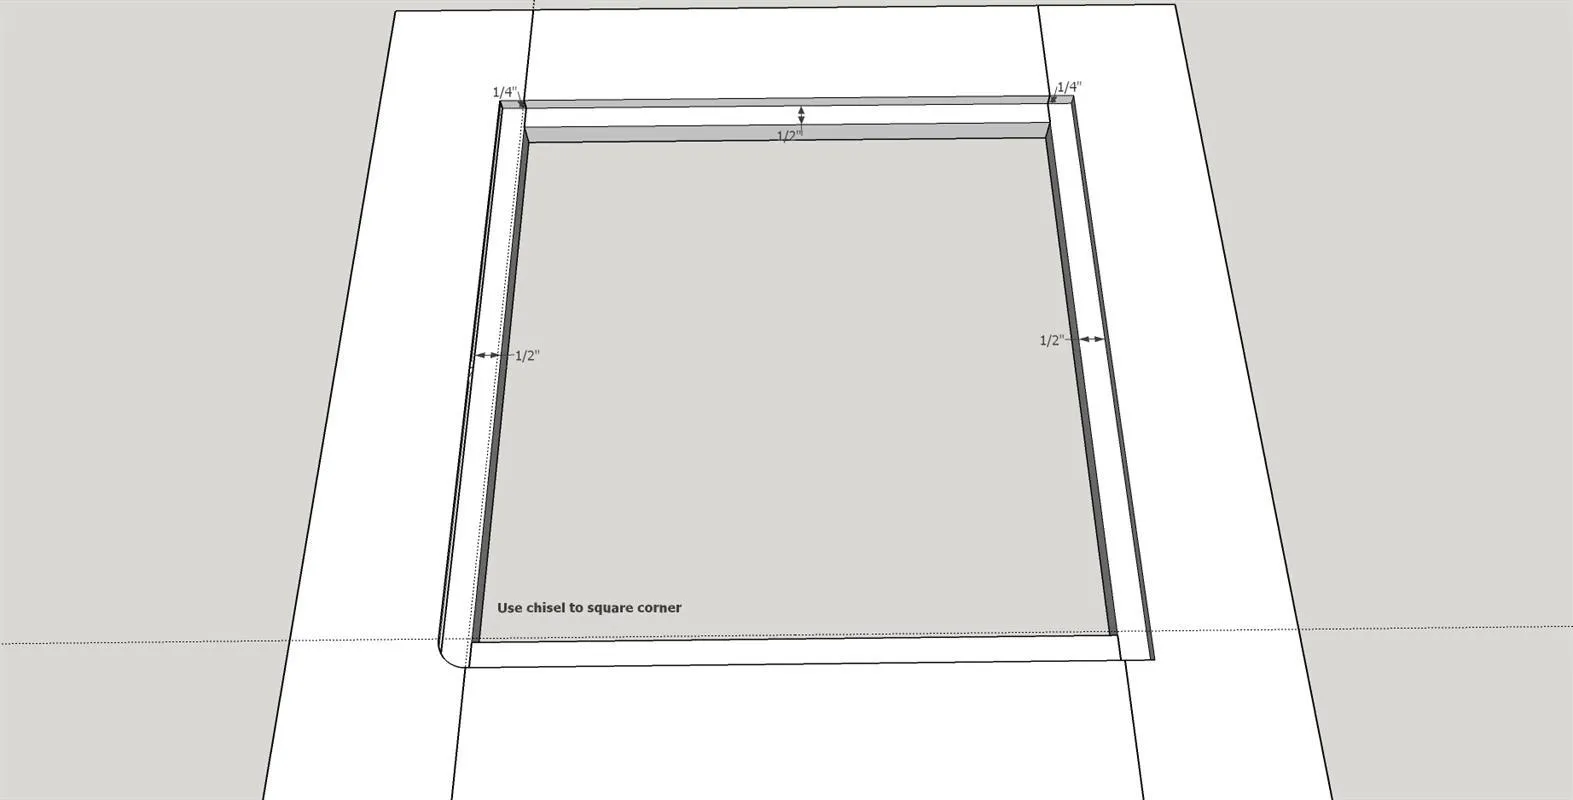
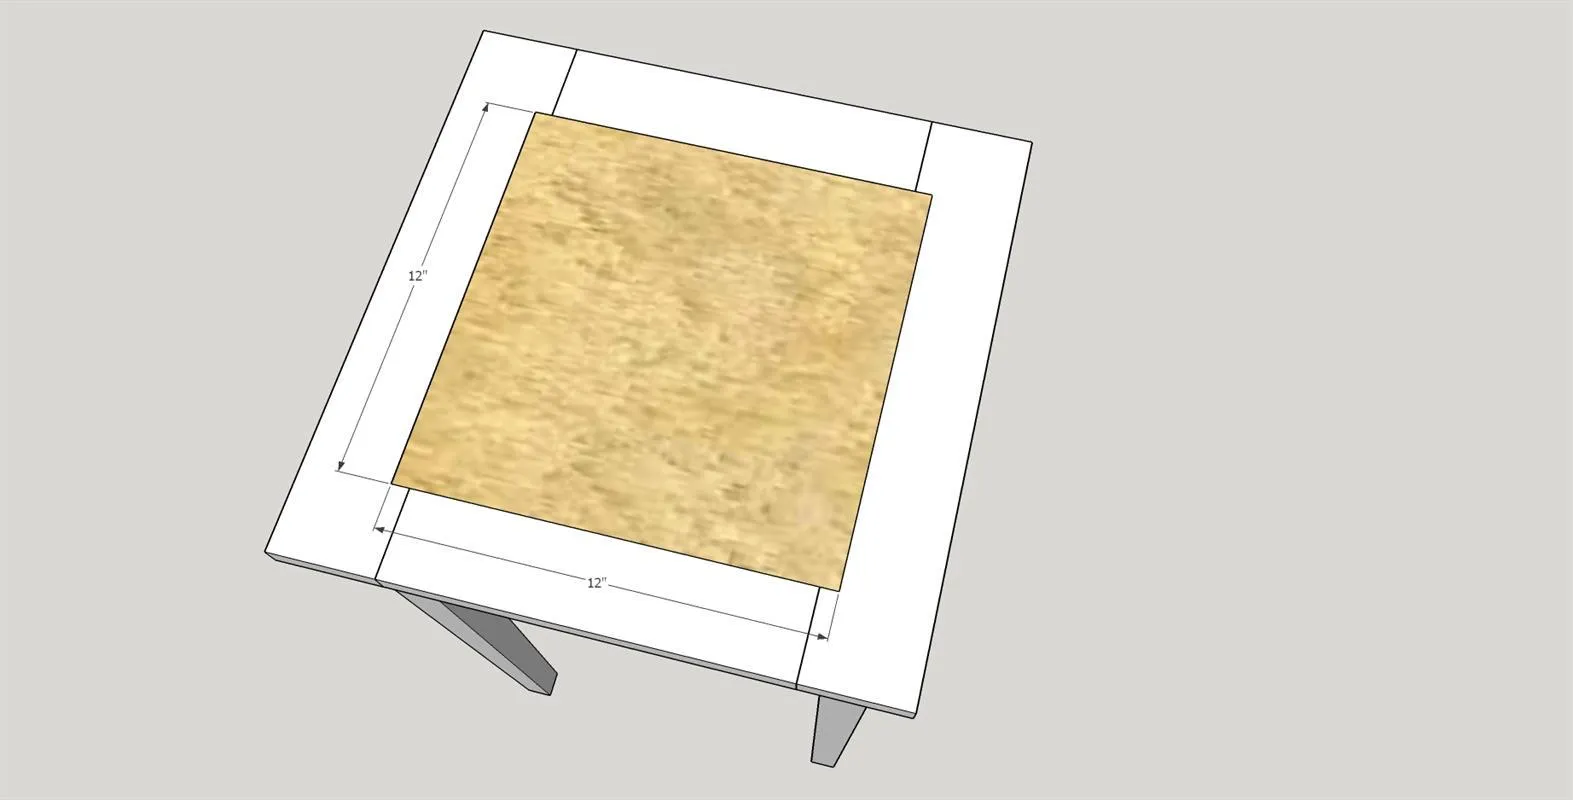
Use a rabbiting bit (I used a Freud 32-522) in your router to cut a 1/2" wide by 1/4" deep rabbit on the inside of the top frame to hold the tile. See attached diagram. Note that you will need to use a chisel to square the corners as the router will leave round corners.
5Preparing the skirts
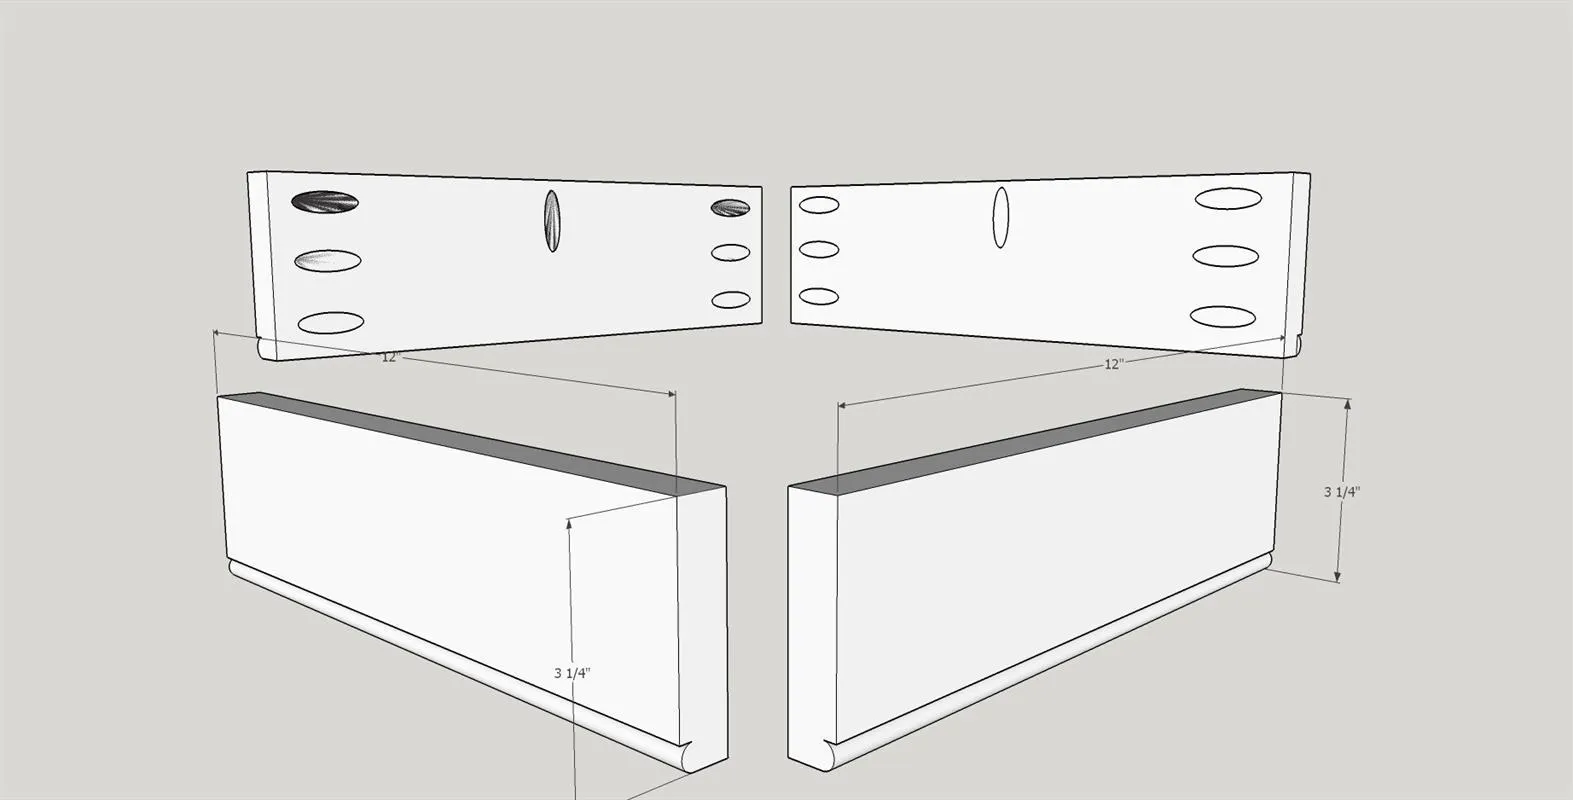
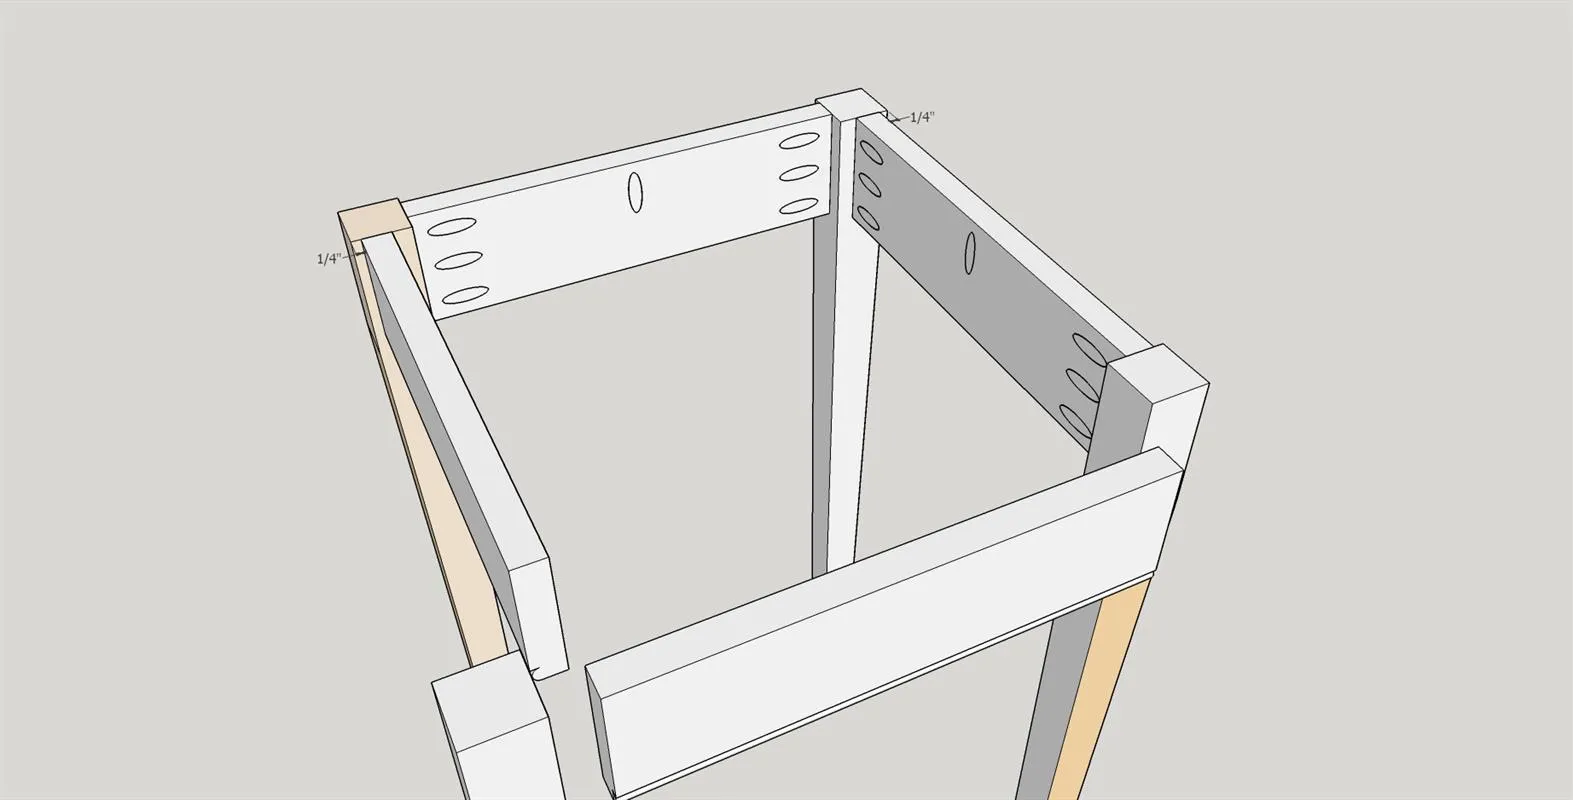
Cut the four table skirts as described in the parts list. Using a 3/16" beading router (I use a Freud 80-104) in a router table cut a bead along the lower edge of all four skirts. Using a Kreg pocket screw jig (set to 3/4" for all pockets on this project), drill three pocket holes in both inside ends of the four skirts and one pocket hole in the inside top edge to hold on the top assembly as shown in the attached diagram. It is a good idea to mark where you are putting the holes to prevent mistakes. Use 100 - 180 grit sandpaper to smooth the skirts.
6Assemble the legs and skirts
Use Titebond I wood glue and Kreg 1 1/4" pocket screws to assemble the skirts and legs. The skirts should be inset 1/4" from the outside of the legs. See attached diagram. Keep in mind that the edge between the two tapered sides of the legs should face out at each corner.
7Attach the top
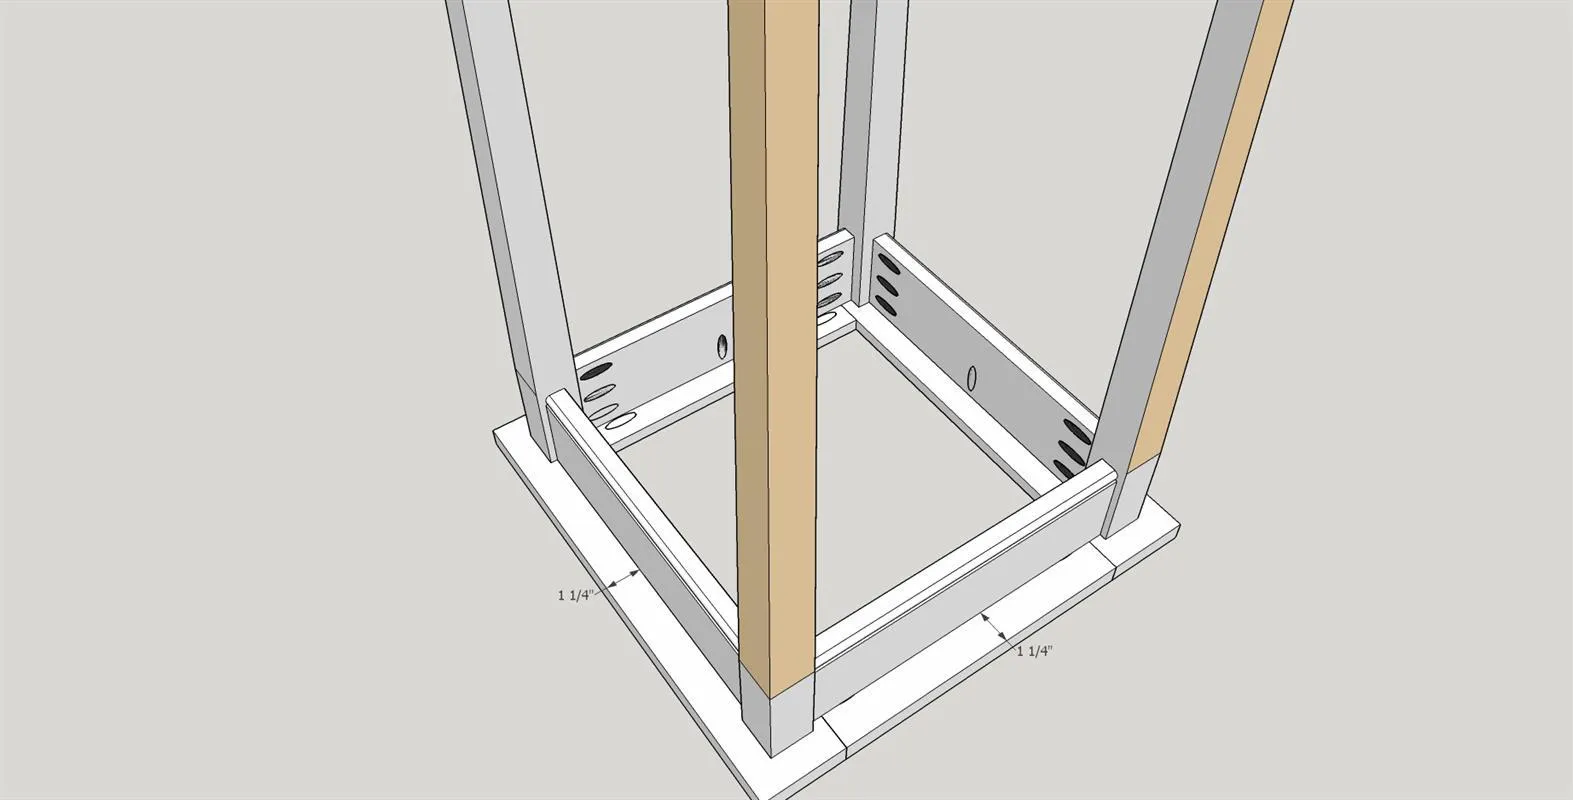
Use four Kreg 1 1/4" pocket screws to attach the leg skirt assembly to the top. The spacing on each side should be 1 1/4" from the center of the skirt to the edge of the top. See attached diagram.
8Insert tile
Using Liquid Nails Clear Silicone Adhesive attach the 12" X 12" tile to the top of the nightstand.
9Finishing
- Now that the build is complete use 220 sandpaper to do a once over on all surfaces in preparation for the finish.
- Clean well to remove all dust. (I use compressed air and clean dry rags). I used Minwax Satin Espresso Polyshades 1 step finish as my wife wanted a dark finish on the furniture for the guest bedroom.
Tags
- Advanced Woodworking Projects
- Advanced
Reviews & builds
No reviews yet
Sign in to review this plan or share your build.
No reviews yet. Be the first to build this.