 Notch
Notch- Difficulty
- Easy
- Time
- 2.5–4.5 hours
- Cost
- $$
About this build
This simple and easy Charcuterie Board makes a great gift idea. It's a quick project that you can complete in less than a day! It's subtle three tiers and integrated handles give this board character. It provides plenty of space for your favorite dips, cheese, fruits and meats.
Tools
Essential
- Drill / Driver
- Jigsaw
- Miter Saw
- Pocket Hole Jig
- Random Orbit Sander
- Router
- Router Table
Optional / nice to have
- Bar / Pipe Clamps
- Tape Measure
Materials
| Item | Qty |
|---|---|
| Maple or Walnut Boards, 1x4 96" | 2 board |
| 1 1/4" Kreg FINE Thread Pocket Hole Screws | 18 each |
| Waterproof Wood Glue | 1 each |
| Food-safe Mineral Oil (or other cutting board oil) | 1 each |
| Maple Hole Plugs (Make or Purchase) | 10 each |
Overall cost: $$. Lumber prices vary by region, species, and season, so we give a band rather than a figure we would only be pretending to know.
Cut list
| Part | Qty | T × W × L |
|---|---|---|
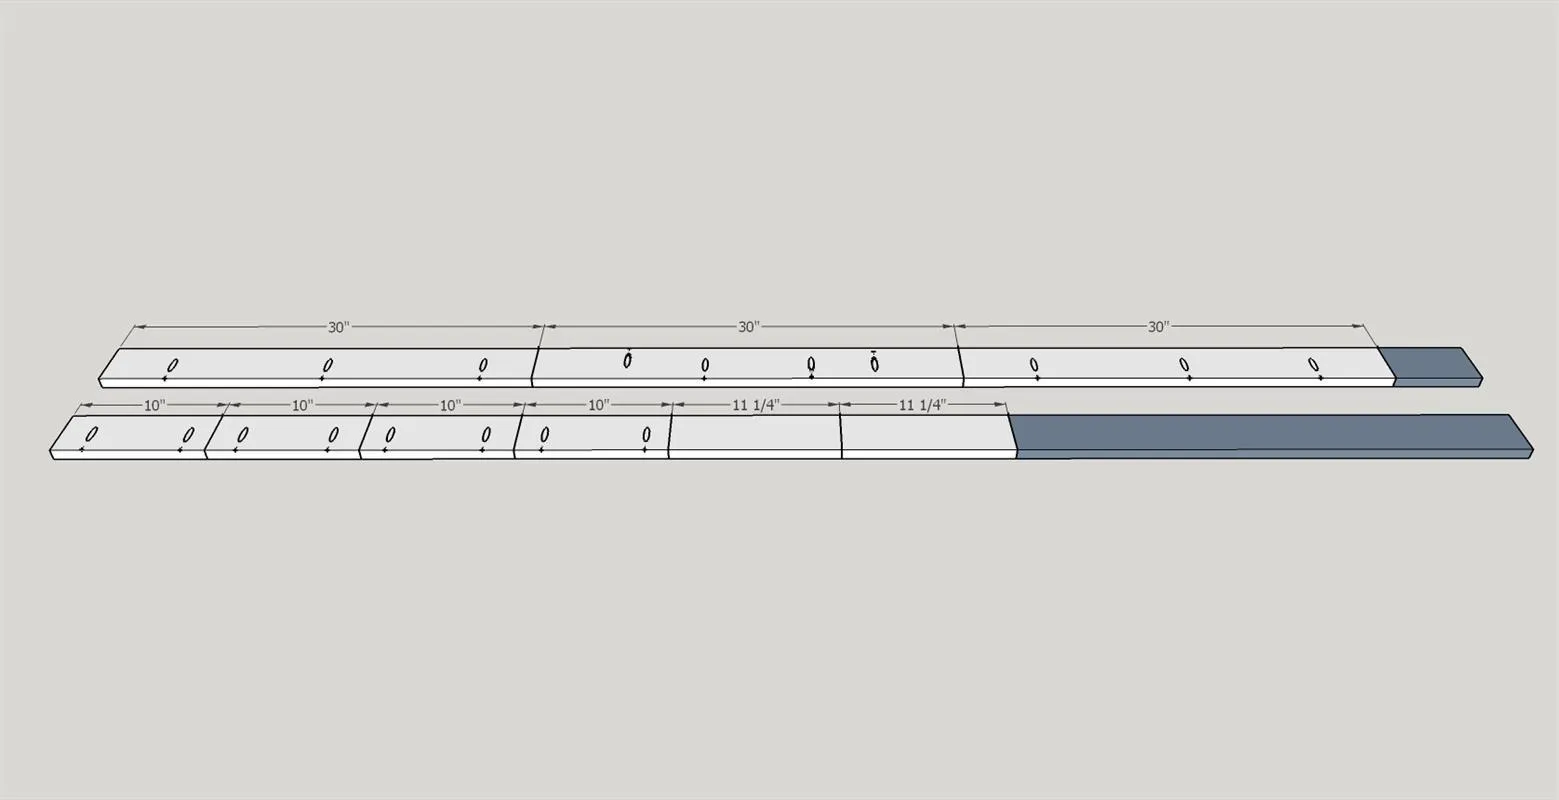
| Boards | 3 | 3/4" × 3" × 30" |
| Boards | 4 | 3/4" × 3" × 10" |
| Boards | 2 | 3/4" × 3" × 11" |
What to buy
Buy 2 boards at 8 ft.
3/4" × 3"
2 boards
Assumes 8 ft stock, a 1/8" saw kerf, and buying each part at its own width. Change the board size or kerf on the full board plan →
Instructions
1Cut Boards & Drill Pocket Holes
Cut boards to the sizes indicated and drill pocket holes in locations shown.
2Attach boards together
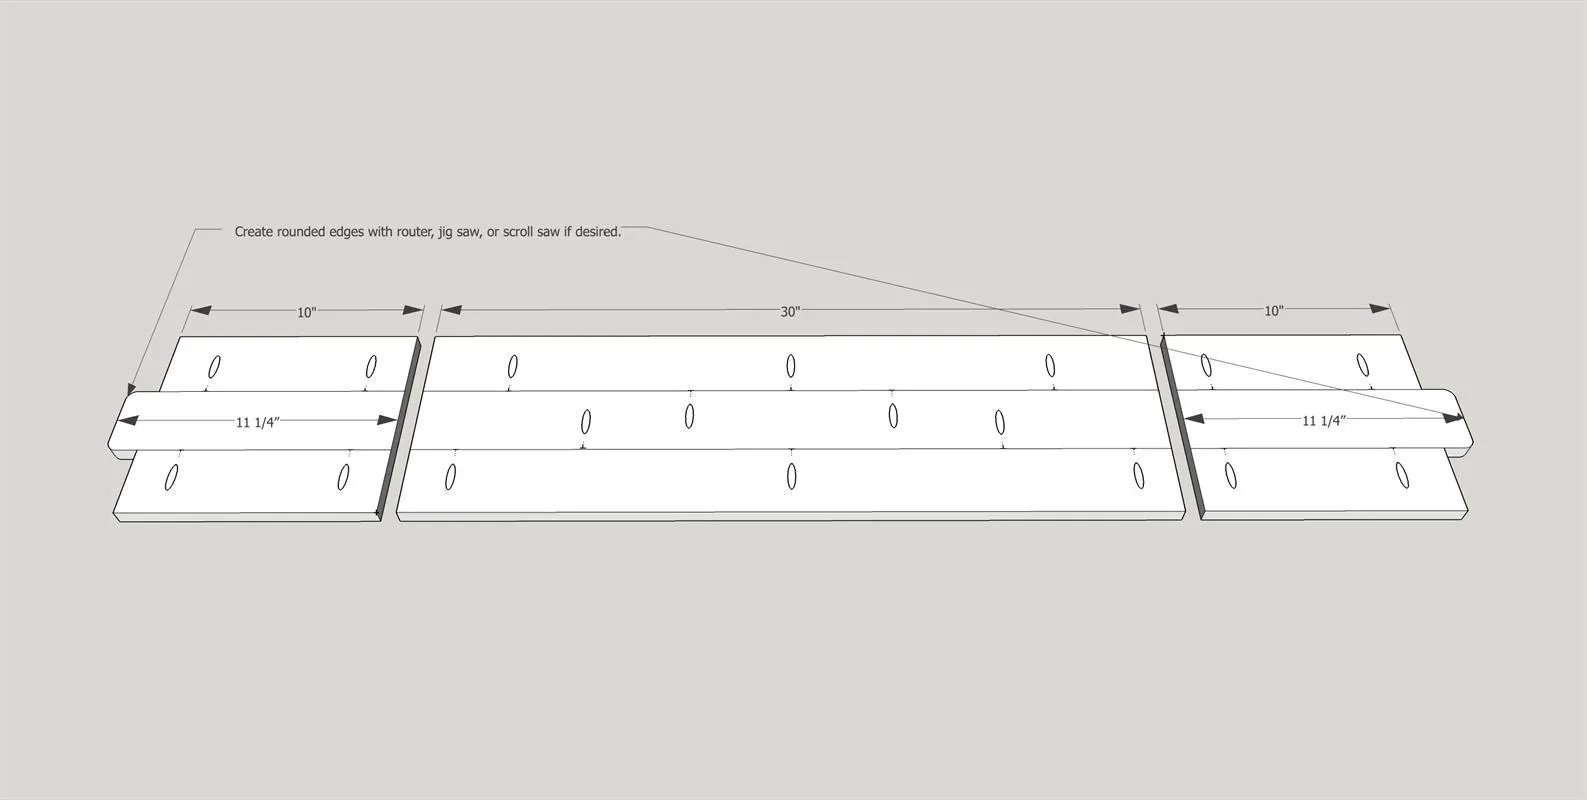
Assemble as three separate pieces as shown using waterproof wood glue and 1 1/4" FINE thread pocket hole screws.
3Assemble
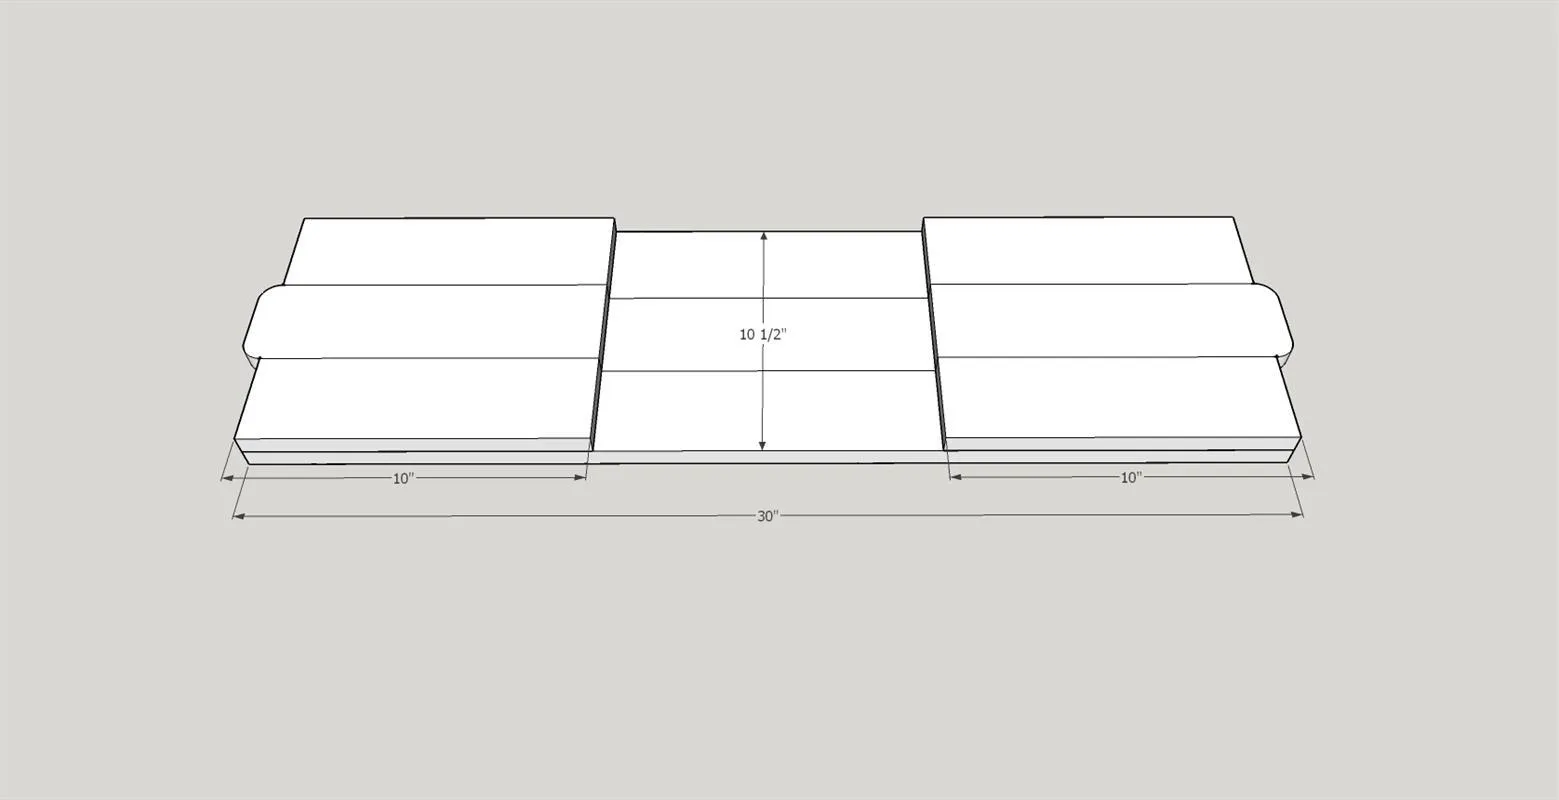
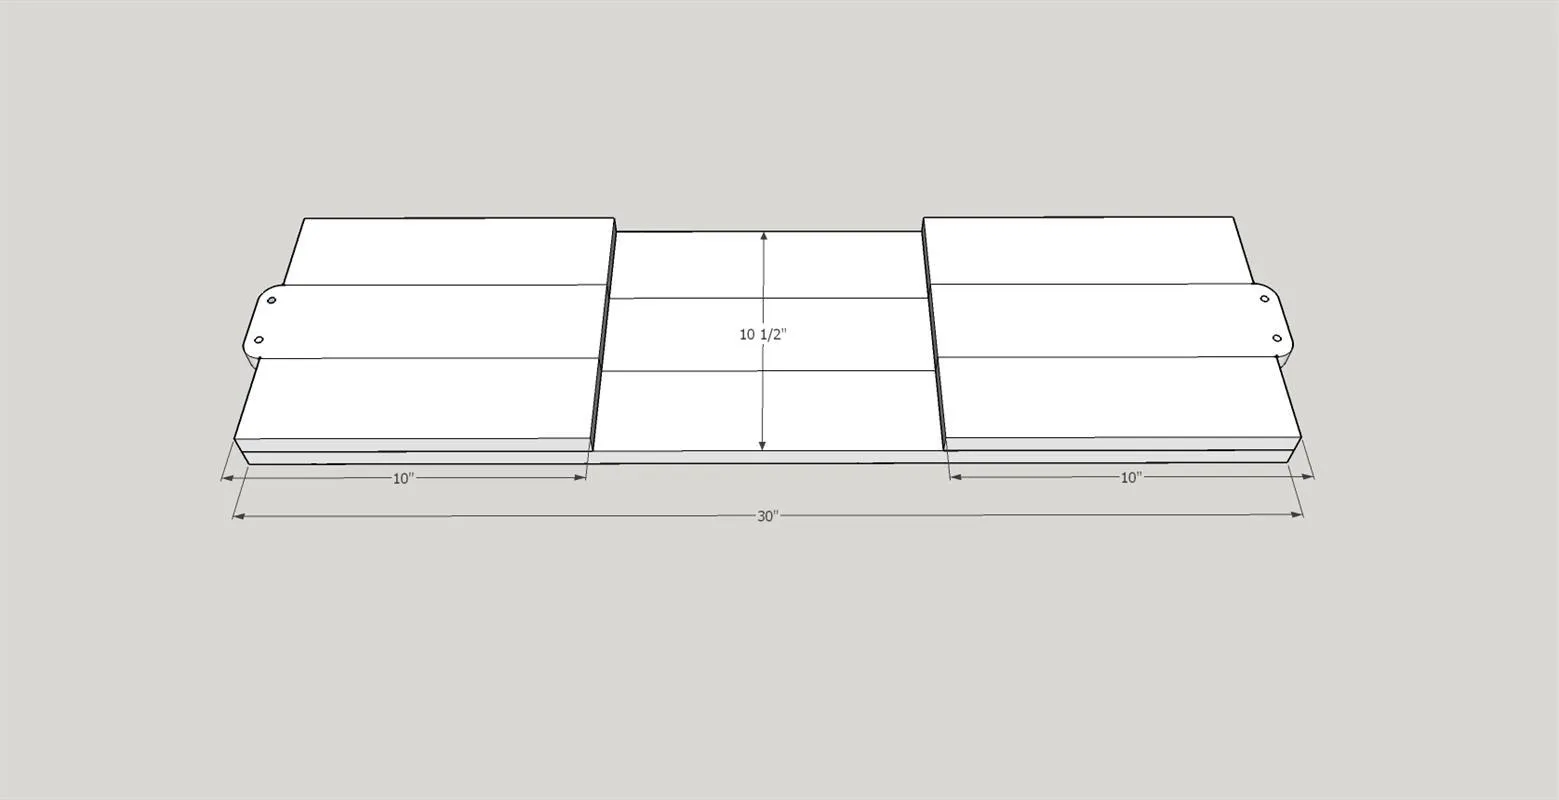
Glue each 10"/11 1/4" section to the 30" main board using waterproof glue. Clamp overnight.
4Router Edges
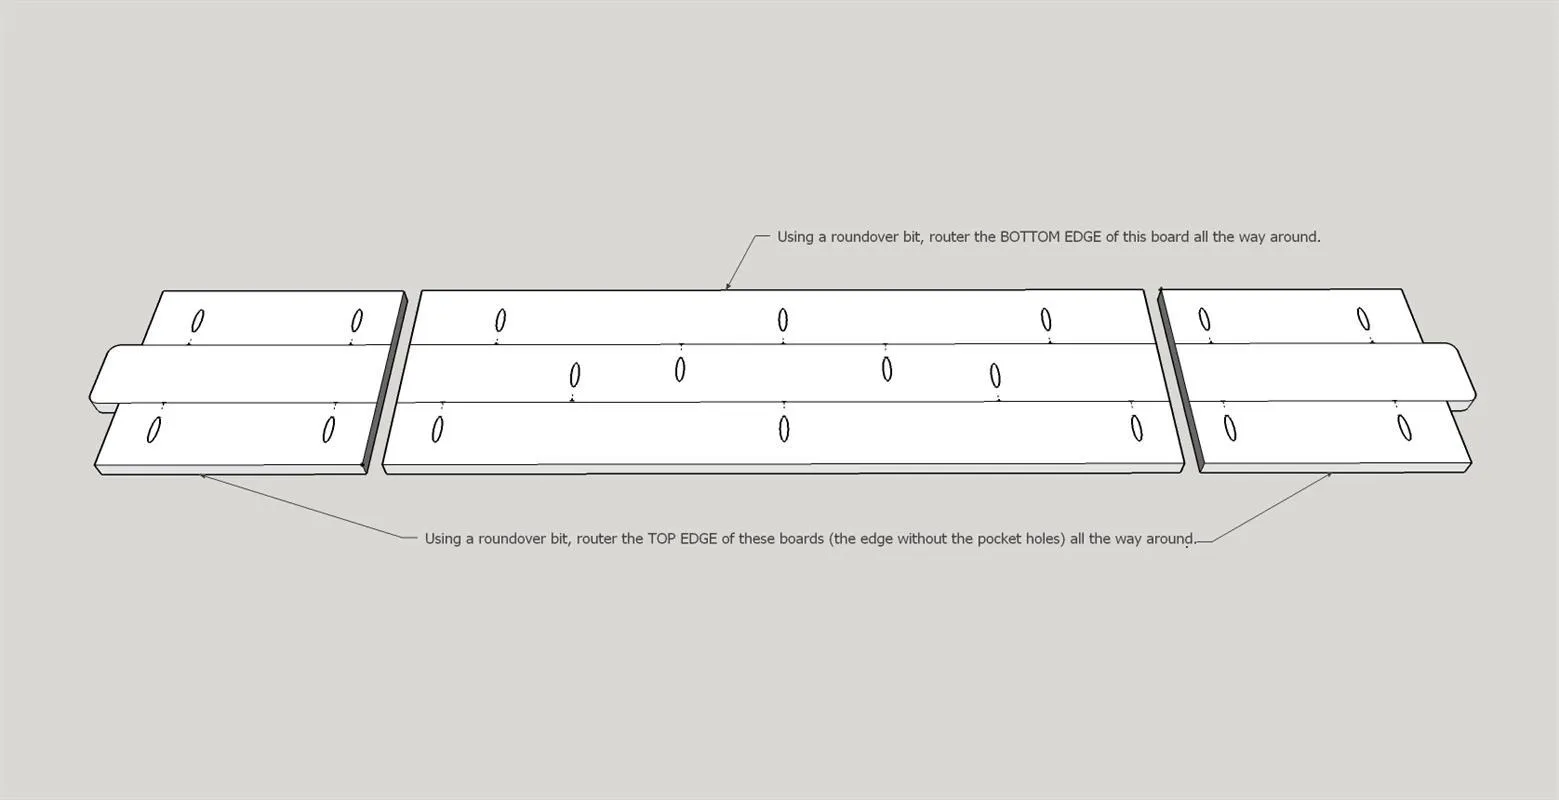
This is also an optional step, but it does create a better looking finished piece. I used my Kreg Router Table setup to do this to all three pieces, but you can also use a router on its own. Router the BOTTOM EDGE of the 30" board (the side WITH the pocket holes) with a round-over bit all the way around the perimeter. Router the TOP EDGE of the 10"/11 1/4" boards (the side WITHOUT the pocket holes) with a round over bit, all the way around the perimeter.
5Round out edges of handles
(Optional) Using a jigsaw or scroll saw. Carefully round out the edges of the handles. I measured 1/2" from each corner and then created an arch between both points to give myself a template, but you can choose to design your own.
6Sand & Finish
- Fill the pocket holes on the bottom of the board with plugs using the Kreg Plug Cutter and the remaining Maple pieces, or purchase some precut maple plugs from Kreg.
- Glue them into the holes with waterproof/resistant wood glue.
- Sand with a 150 grit sandpaper on an orbital sander until the. Follow-up with a 220 grit sandpaper.
- Then use a wet towel to wipe down the board. This will raise the wood fibers just a little bit. When the board has dried, sand again with 220 grit.
- Apply several coats of food-safe mineral oil/cutting board/butcher block oil and allow to penetrate. If you can find a way to submerge and soak this in the oil overnight it would be even better.
7(Optional) Add Hardware Handles
If you'd like to add some hardware handles, select some that have a distance of less than 3 1/2" between the holes. Use your Kreg Hardware Jig to easily drill the hole locations.
Tags
- DIY Cutting Boards
- Beginner
Reviews & builds
No reviews yet
Sign in to review this plan or share your build.
No reviews yet. Be the first to build this.