 Notch
- Difficulty
- Easy
- Time
- 2.8–5.5 hours
- Cost
- $
About this build
This handy stand holds your tablet so you don’t have to, and puts it at a perfect angle for use. You can even store the stand flat by removing the leg and locking it into the face.
Tools
Essential
- Miter Saw
- Random Orbit Sander
Optional / nice to have
- Bar / Pipe Clamps
Materials
| Item | Qty |
|---|---|
| Board, 1/2" x 2" 48" | 3 board |
| Wood Glue | 1 each |
| Paint or Finish | 1 each |
Overall cost: $. Lumber prices vary by region, species, and season, so we give a band rather than a figure we would only be pretending to know.
Cut list
| Part | Qty | T × W × L |
|---|---|---|
| Outside Leg | 2 | 1/2" × 1" × 11" |
| Tall Center Leg | 1 | 1/2" × 1" × 10" |
| Short Center Leg | 1 | 1/2" × 1" × 2" |
| Outside Faces | 2 | 1/2" × 1" × 11" |
| Tall Inside Face | 3 | 1/2" × 1" × 8" |
| Short Inside Face | 2 | 1/2" × 1" × 2" |
| Center Face | 1 | 1/2" × 1" × 2" |
What to buy
Buy 1 board at 8 ft.
1/2" × 1"
1 board
Assumes 8 ft stock, a 1/8" saw kerf, and buying each part at its own width. Change the board size or kerf on the full board plan →
Instructions
1Cut the Leg Parts
- Cut two Outside Legs, one Tall Center Leg, and one Short Center Leg to length from a 1/2"-thick board, as shown in the cutting diagram. Note: These, as well as the other parts are cut extra-long, and will be trimmed after assembly.
- Also cut a short piece of scrap about 2" long to use as a spacer.
2Assemble the Leg
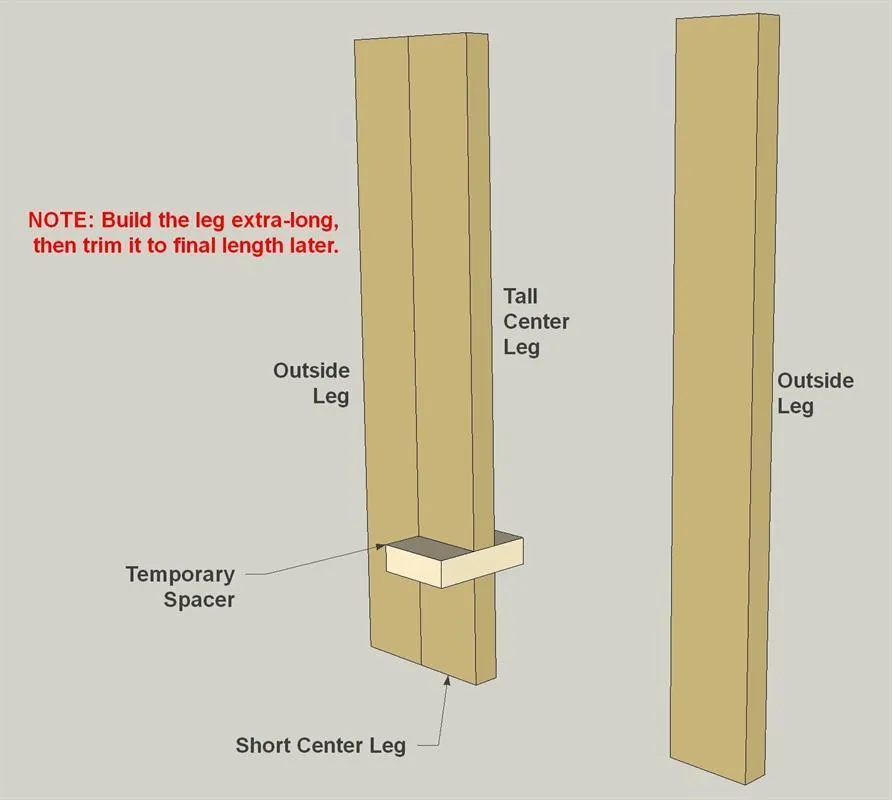
- Assemble the leg parts. To do this, spread glue on both edges of the Tall Center Leg and Short Center Leg.
- Then clamp them to the Outside Legs, with your scrap spacer in between the Tall Center Leg and Short Center Leg. This creates a gap for the tablet’s cord to pass through later.
- Once you have the clamps in place, remove the spacer before the glue dries to ensure that sure you don’t glue the spacer in place.
3Trim the Leg
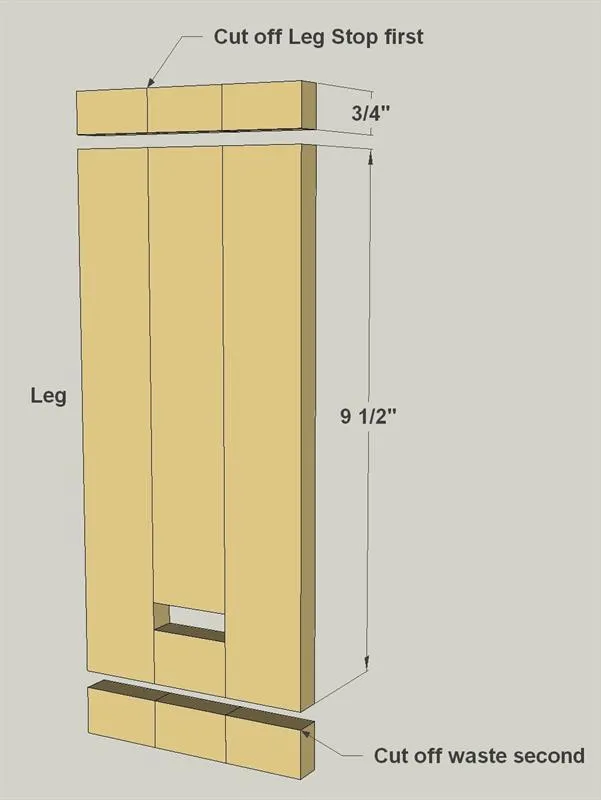
After the glue sets, you can trim the leg. You’ll cut some off the top end to create a Leg Stop, and then cut the bottom end (near the slot) to trim the Leg to final length.
4Glue on the Leg Stop
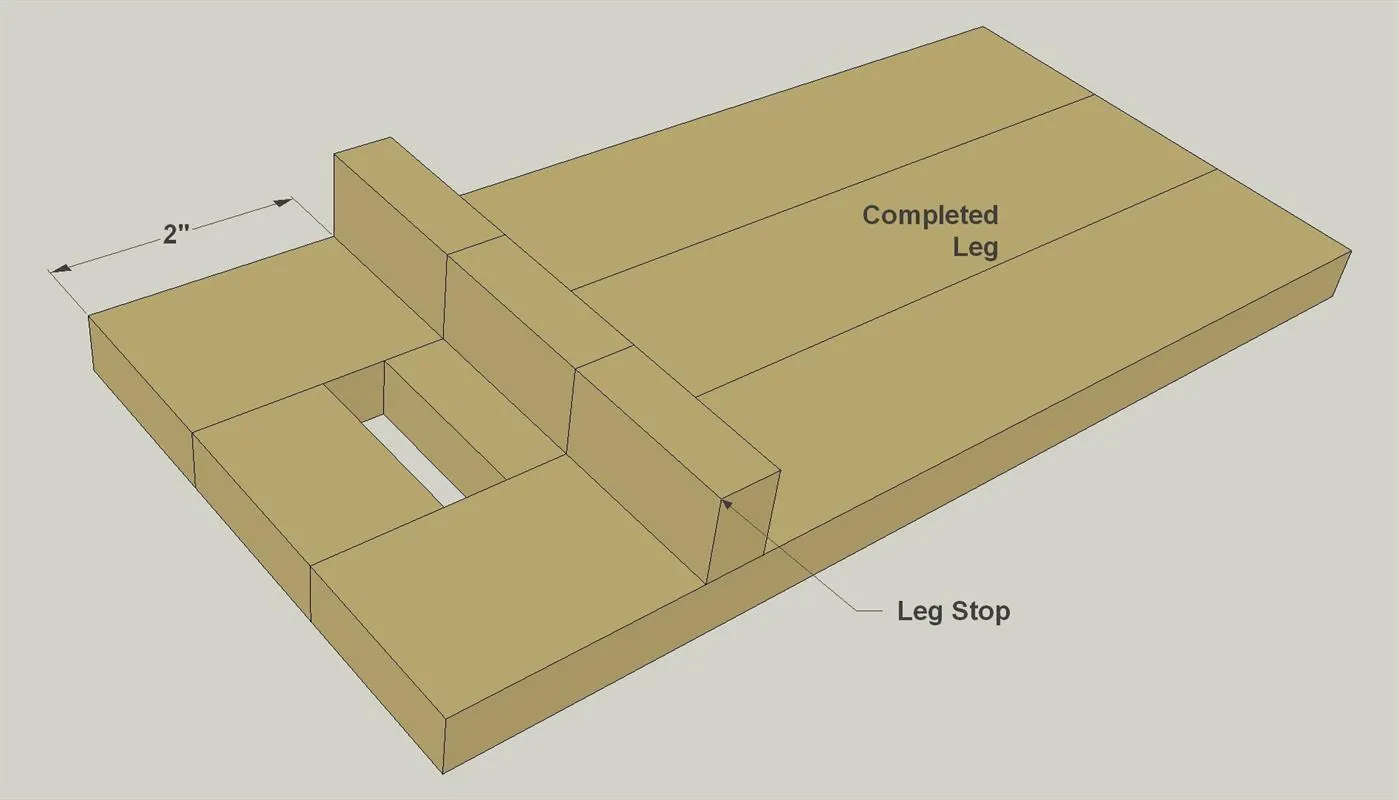
Glue the Leg Stop, which you cut off of the top of the leg assembly, onto the leg as shown.
5Cut the Face Parts
- Cut two Outside Faces, three Tall Inside Faces, one Short Inside Face, and one Center Face to length from a 1/2"-thick board, as shown in the cutting diagram. Note: These, as well as the other parts are cut extra-long, and will be trimmed after assembly.
- Also cut another spacer about 4" long.
6Assemble the Face
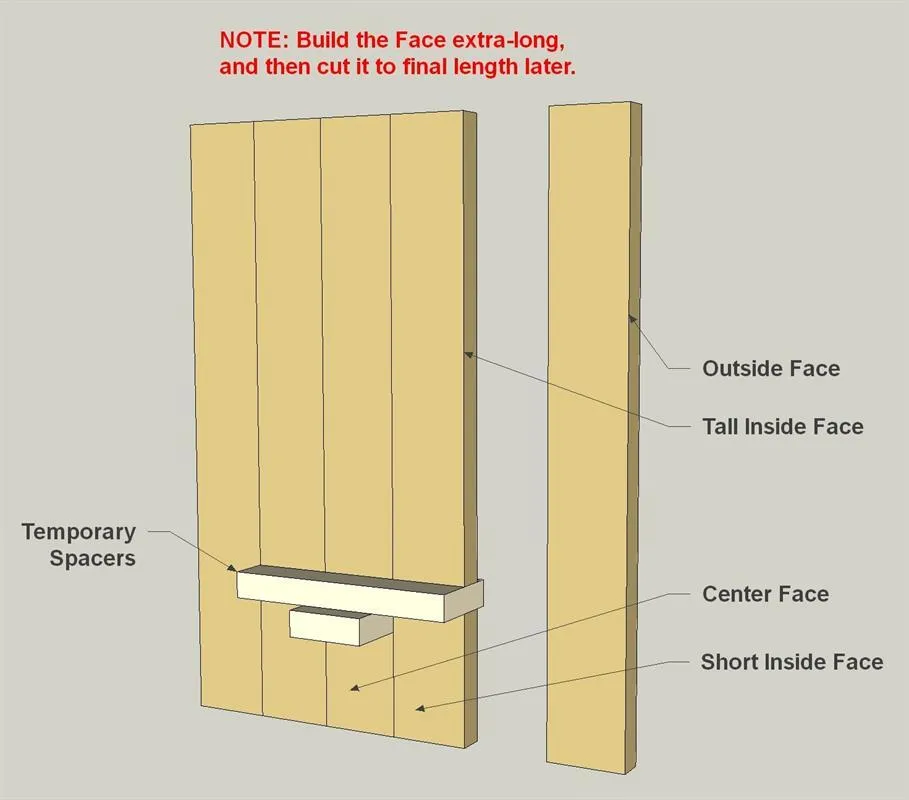
- Assemble the face parts. To do this, spread glue on both edges of the Tall Inside Faces, Short Inside Faces, and Center Face.
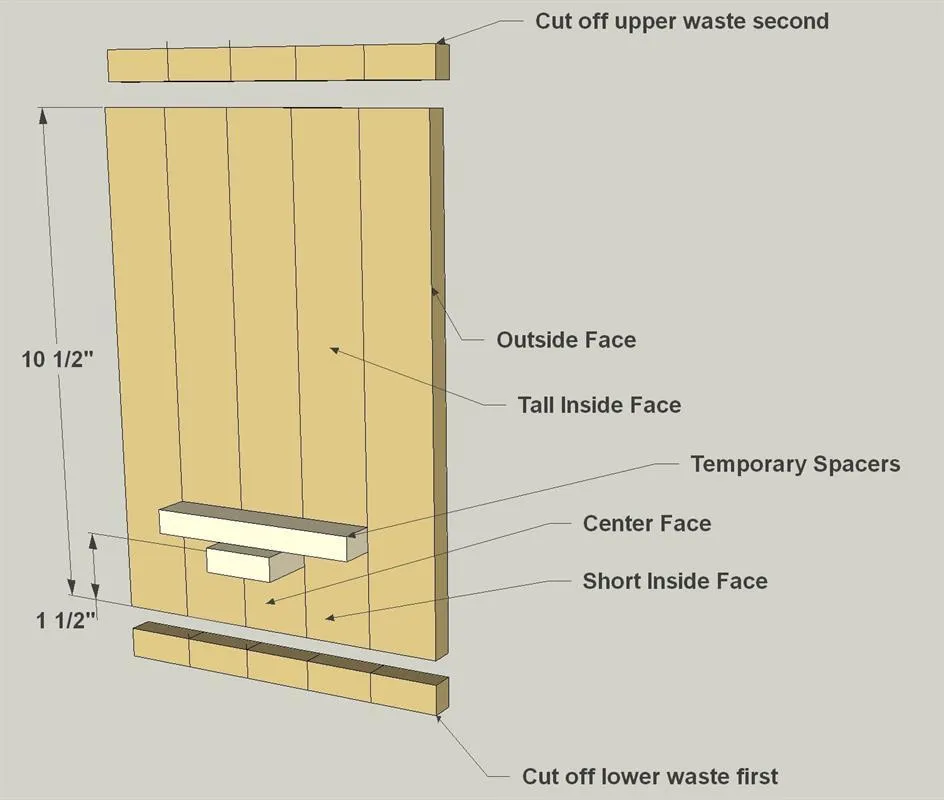
- Then clamp them to the Outside Faces, with your scrap spacers positioned to create the center slot and notch. The slot will allow the leg to slip through the face, and the notch provides cord clearance.
- Once you have the clamps in place, remove the spacers before the glue dries to ensure that sure you don’t glue them in place.
7Trim the Face
After the glue sets, you can trim the Face. You’ll cut some off the bottom end (near the slot) first, and then cut the top end to trim the Face to final length.
8Test Fit, then Finish
Now you can test fit the leg into the slot. If the fit is tight, sand or file to enlarge the slot. Do this just a little at a time to make sure that you don’t take off too much. After that, you can paint or finish your tablet stand and put it to work.
Tags
- Desk Accessories
- Beginner
Reviews & builds
No reviews yet
Sign in to review this plan or share your build.
No reviews yet. Be the first to build this.