 Notch
- Difficulty
- Easy
- Time
- 3.3–6.5 hours
- Cost
- $$
About this build
Even if you’ve never built furniture before, you can create this coffee table. Start with a quarter sheet of plywood, cut some dimensional lumber to length with a miter saw, and put it all together using pocket-hole joinery. Then kick back, relax, and enjoy your new table and your newfound skills.
Tools
Essential
- Drill / Driver
- Miter Saw
- Random Orbit Sander
Optional / nice to have
- Tape Measure
Materials
| Item | Qty |
|---|---|
| Board, 2x2 36" | 2 board |
| Board, 1x3 48" | 1 board |
| Board, 1x4 48" | 1 board |
| Board, 1x4 96" | 1 board |
| Board, 1x2 96" | 2 board |
| Plywood, 3/4" Thick Quarter Sheet | 1 board |
| 1 1/4" pocket hole screws | 70 each |
| Wood Glue | 1 each |
Overall cost: $$. Lumber prices vary by region, species, and season, so we give a band rather than a figure we would only be pretending to know.
Cut list
| Part | Qty | T × W × L |
|---|---|---|
| Legs | 4 | 1" × 1" × 15" |
| End Apron | 2 | 3/4" × 3" × 21" |
| Side Apron | 2 | 3/4" × 3" × 45" |
| Stretcher | 2 | 1" × 2" × 22" |
| Top | 1 | 3" × 24" × 48" |
| Side Edging | 2 | 3/4" × 1" × 49" |
| End Edging | 2 | 3/4" × 1" × 22" |
What to buy
Buy 7 boards at 8 ft.
3" × 24"
1 board
1" × 2"
1 board
1" × 1"
1 board
3/4" × 3"
2 boards
3/4" × 1"
2 boards
Assumes 8 ft stock, a 1/8" saw kerf, and buying each part at its own width. Change the board size or kerf on the full board plan →
Instructions
1Create the Legs
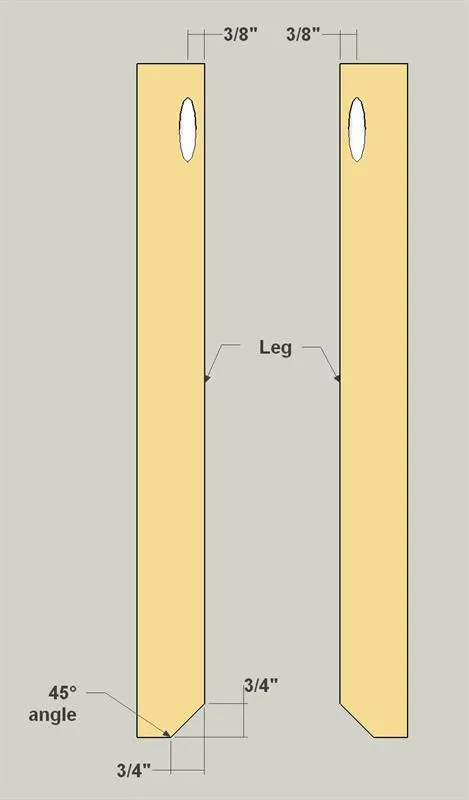
- Cut four Legs to length from 2x2 boards, as shown in the cutting diagram.
- Then cut the bevel on the bottom end of each leg. You can do this easily with a miter saw. With your pocket hole jig set up for 3/4" material, drill pocket holes in the ends of all four pieces, as shown. Make sure you are placing the pocket holes in the leg face shown so that you’ll end up with two sets of “mirror image” legs.
Tip: Lay Out Parts to Avoid Confusion Sometimes, similar parts have to be made differently depending on where they are located. That’s the case with these coffee table legs. They all need a single pocket hole on one inside face. To avoid confusion, position the parts how they’ll be oriented, and then mark them so you can keep them sorted out.
2Make the End Aprons
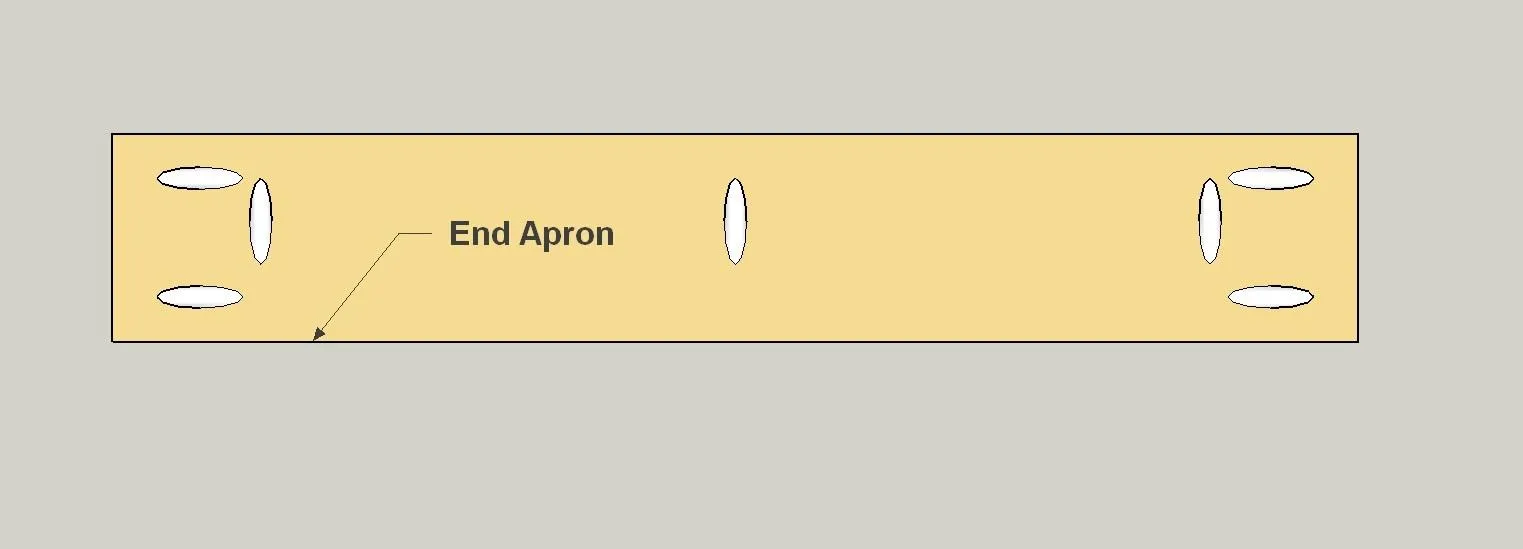
Cut two End Aprons to length from 1x4 boards, as shown in the cutting diagram. With your pocket hole jig set up for 3/4" material, drill pocket holes in both Aprons, as shown.
3Create the Ends
Now you can attach the End Aprons to the Legs using 1 1/4" fine-thread pocket hole screws. Make sure you have the pocket holes in the Aprons oriented correctly for attaching the table top later.
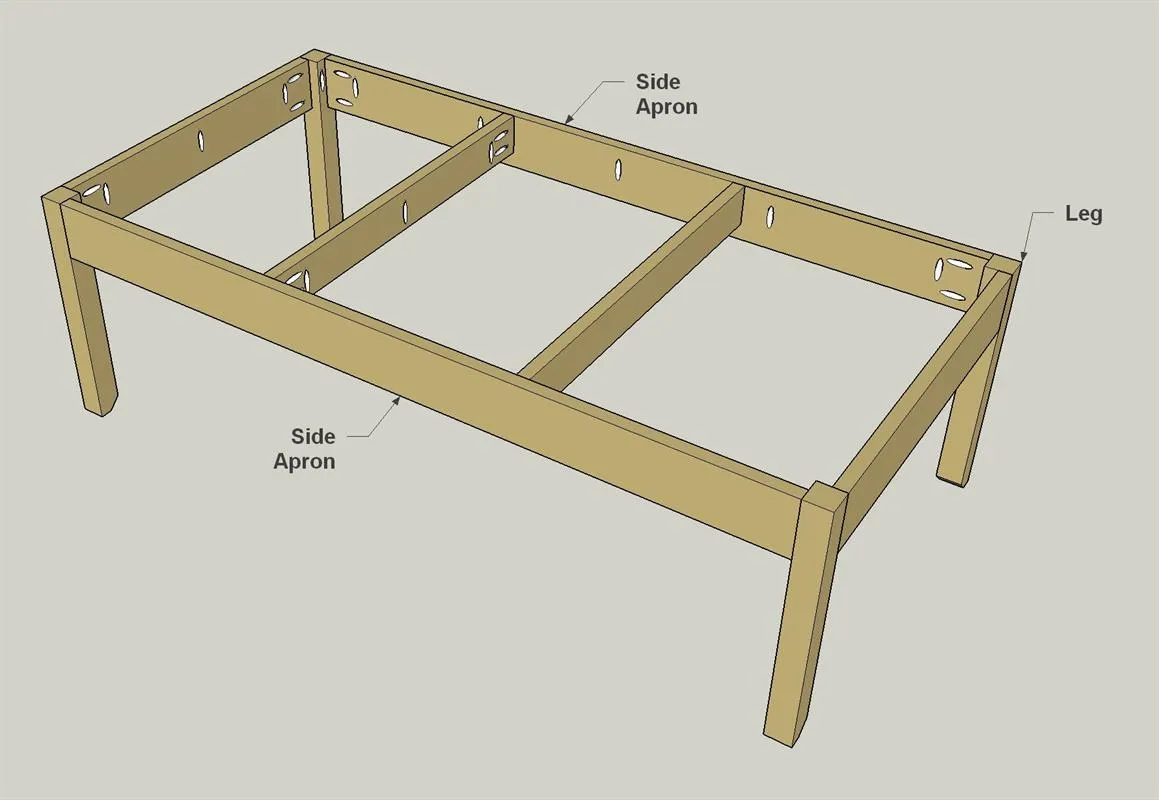
4Make Side Aprons and Stretchers
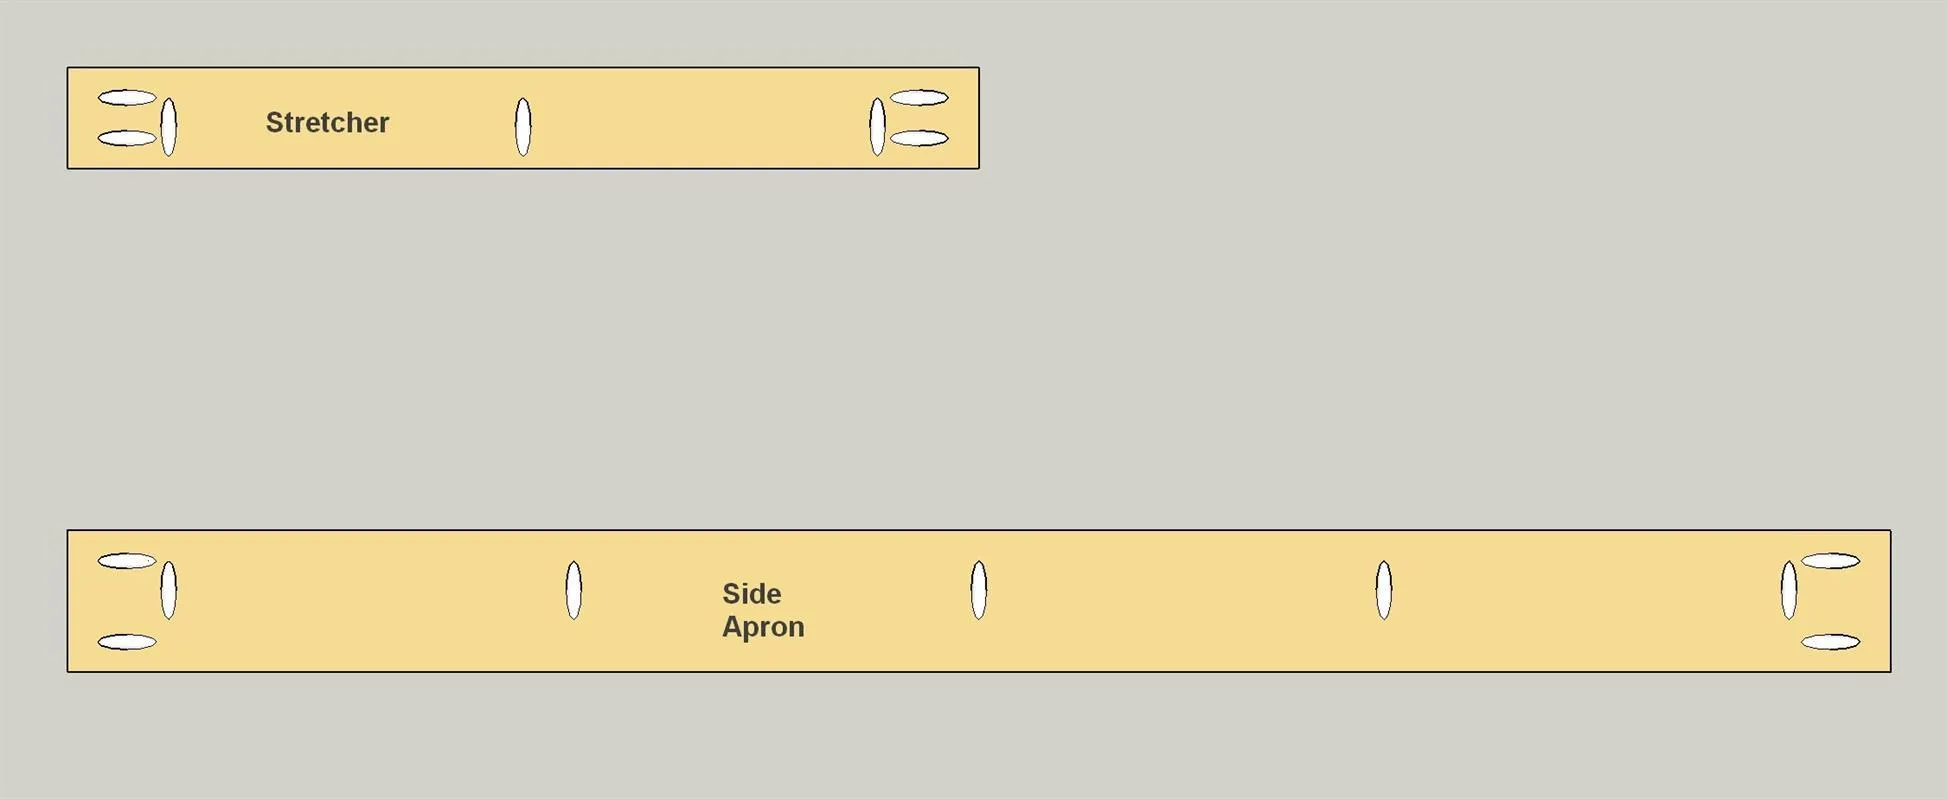
- Cut two Side Aprons to length from 1x4 boards, as shown in the cutting diagram.
- Then cut two Stretchers from 1x3 boards. With your pocket hole jig set up for 3/4" material, drill pocket holes in the pieces, as shown.
5Assemble the Aprons and Stretchers
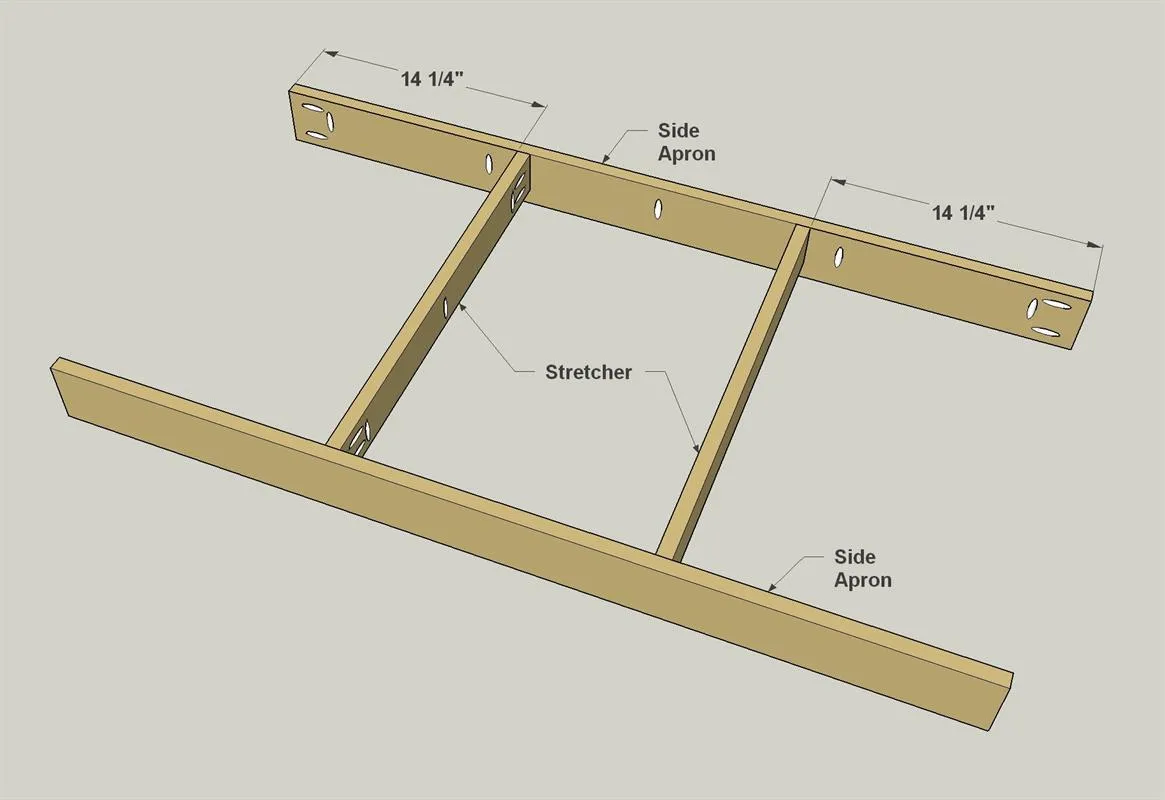
Now you can attach the Stretchers to the Aprons using 1 1/4" fine-thread pocket hole screws. Make sure that the pocket holes are all oriented in the proper direction for attaching the table top later.
6Assemble To Make the Table Base
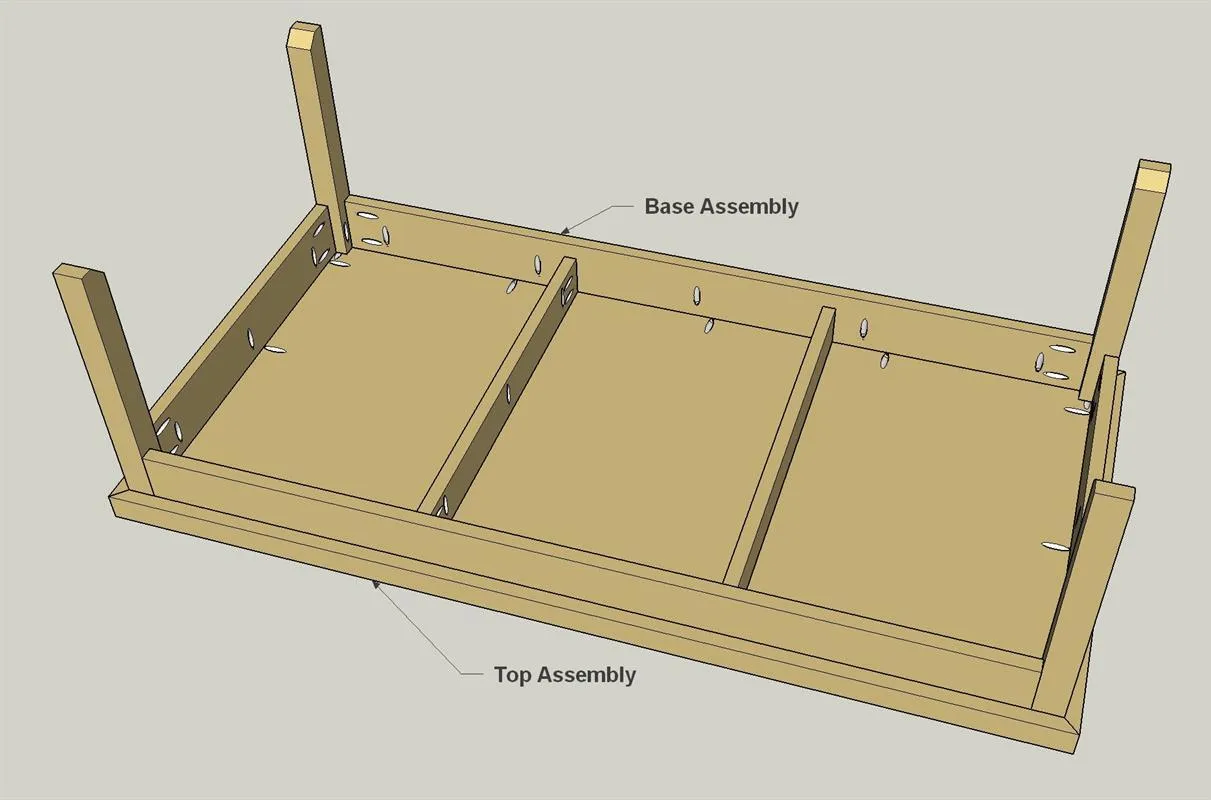
Now you can attach the Apron/Stretcher assembly to the End assemblies you made earlier to create the table base. Use 1 1/4" fine-thread pocket hole screws.
7Make a Table Top
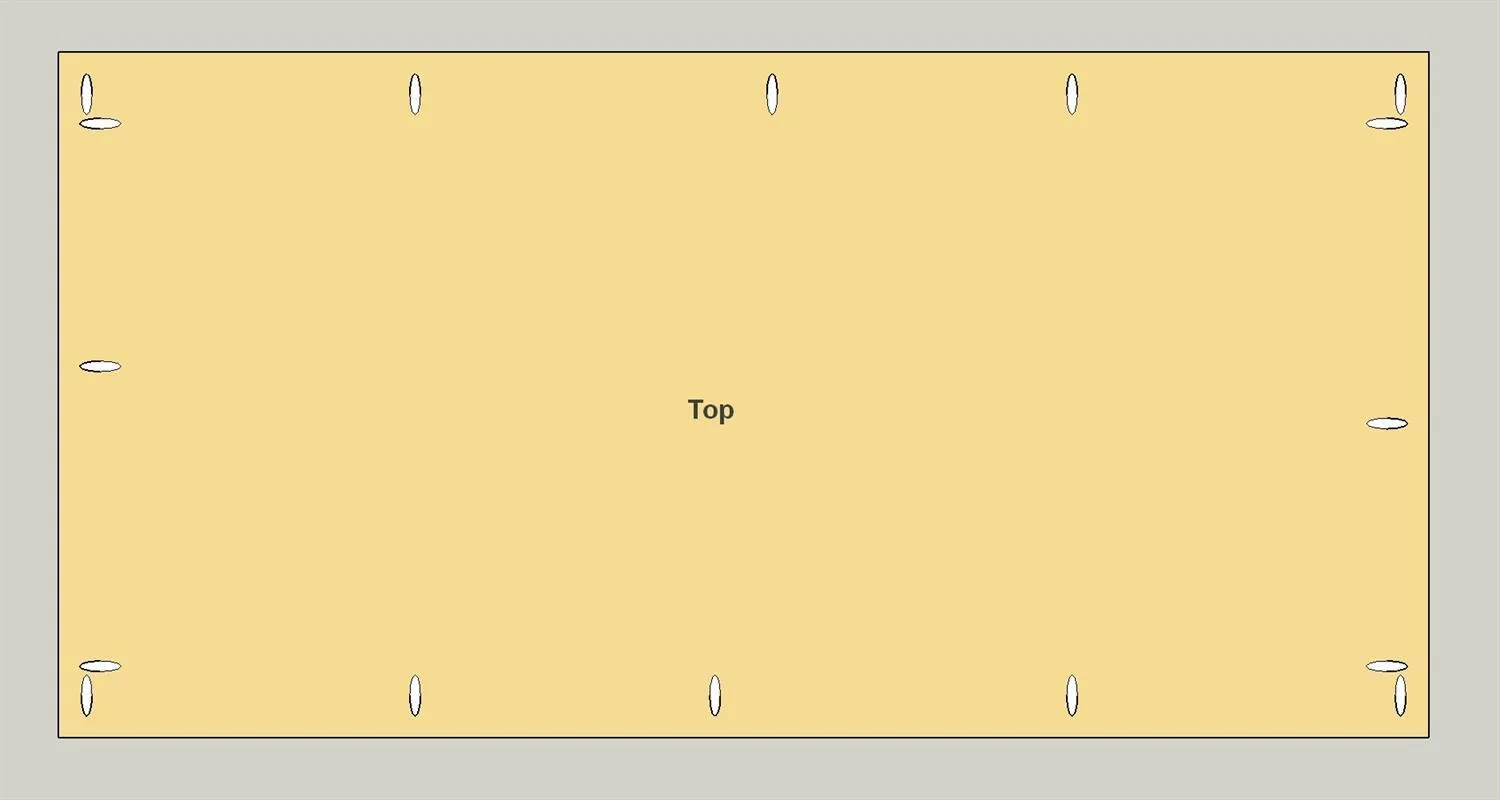
Now you can make the table Top. The easiest way is to simply purchase a pre-cut quarter-sheet of 3/4" plywood. Or cut the Top to size from a larger sheet. With your pocket hole jig set up for 3/4" material, drill pocket holes in the Top, as shown.
8Make Solid-Wood Edging
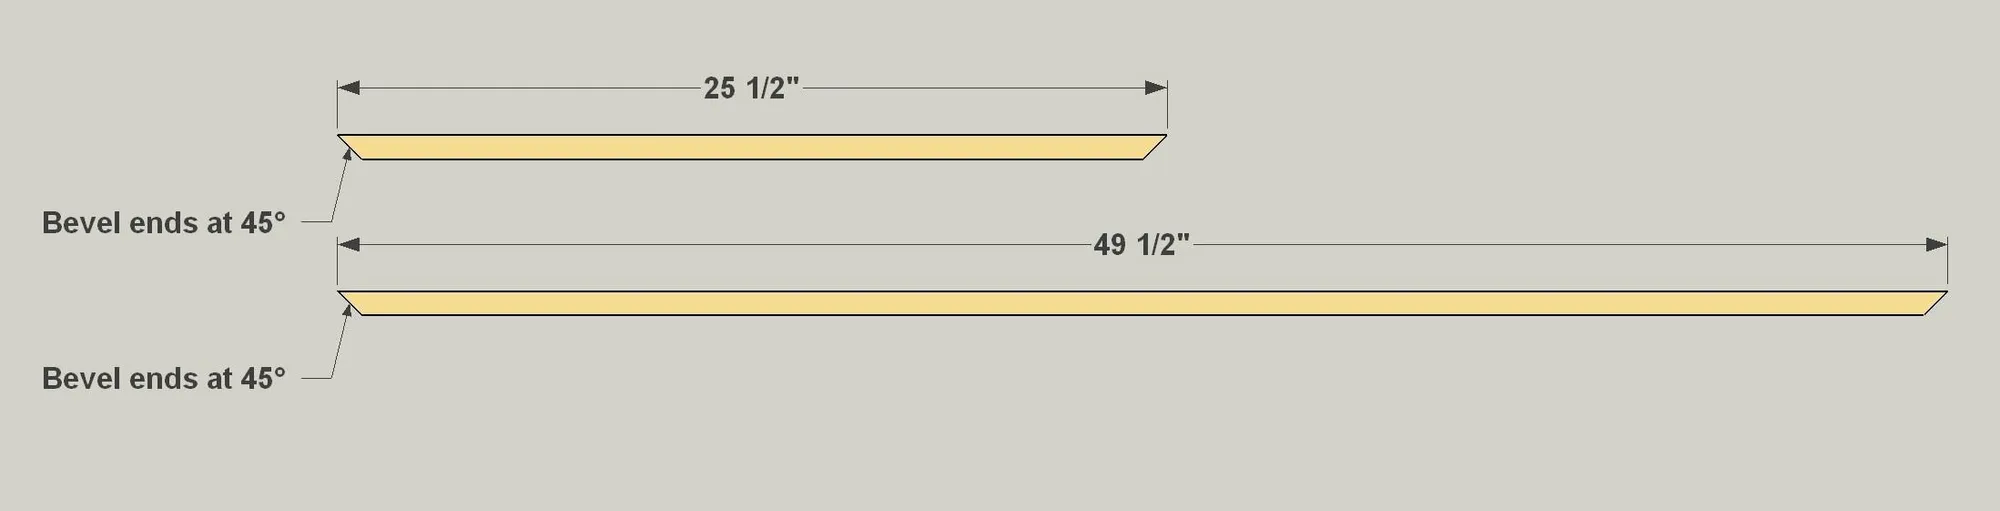
Now, to dress up the Top, cut two pieces of Side Edging and two pieces of End Edging to length from 1x2 boards, as shown in the cutting diagram. Note that the ends get bevel cut at 45°. You don’t need a miter saw that has a tilting head for cutting bevels, though. Just stand each piece on edge and set your miter saw to cut a 45° miter.
9Attach the Edging
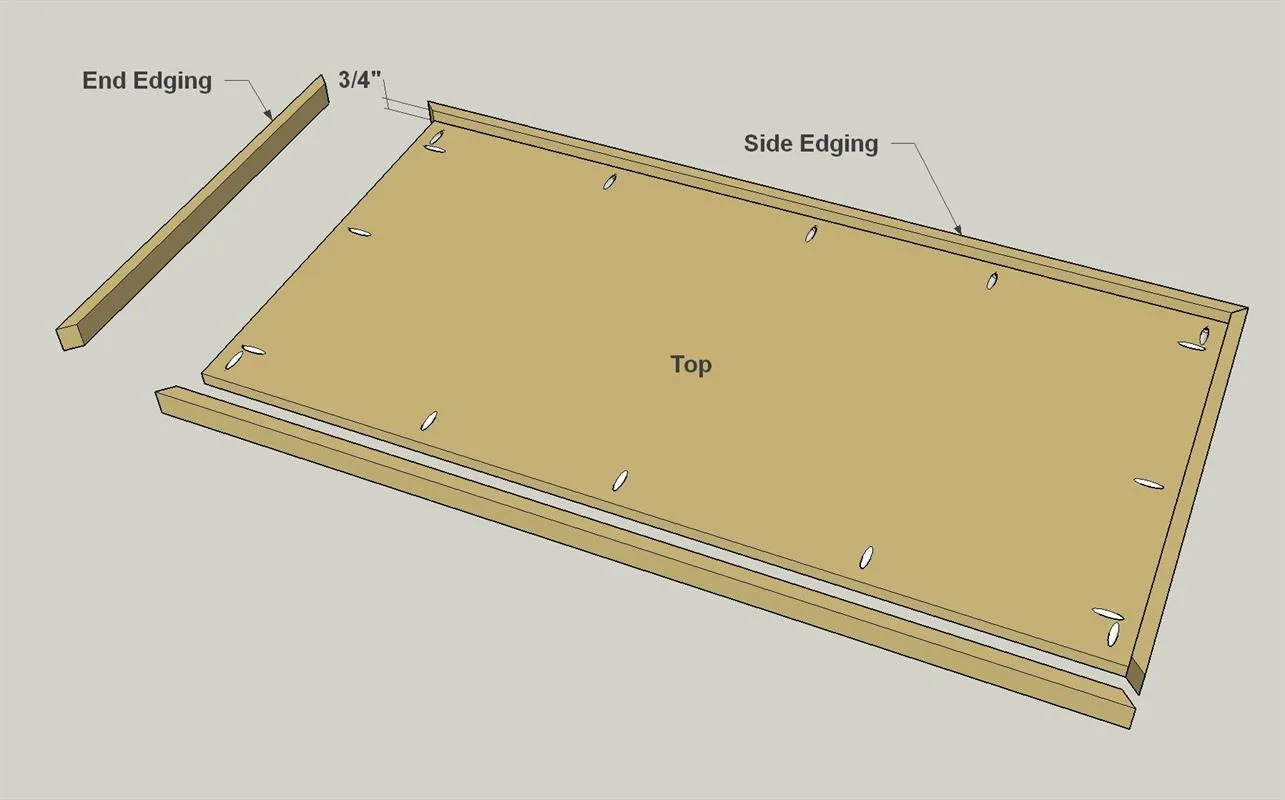
Now you can attach the Edging using 1 1/4" fine-thread pocket hole screws, as shown. Align the corners carefully, and add a bit of wood glue to help keep them tight.
10Put It All Together
After you give everything a final sanding, you can attach the Top assembly to the table base using 1 1/4" fine-thread pocket hole screws, as shown. Then paint, stain, or finish the coffee table to suit your tastes.
Tags
- Coffee Tables
- Beginner
Reviews & builds
No reviews yet
Sign in to review this plan or share your build.
No reviews yet. Be the first to build this.