 Notch
NotchStylish Photo Shelf
Step-by-step build — 7 steps. Also available as a print sheet.
1Cut the Shelf
Cut one Shelf and one Back to length from a 1x4 board, as shown in the cutting diagram.
2Drill Pocket Holes
With your jig set up for 3/4" stock, drill pocket holes in the rear face of the Back.

3Add Curves to the Back
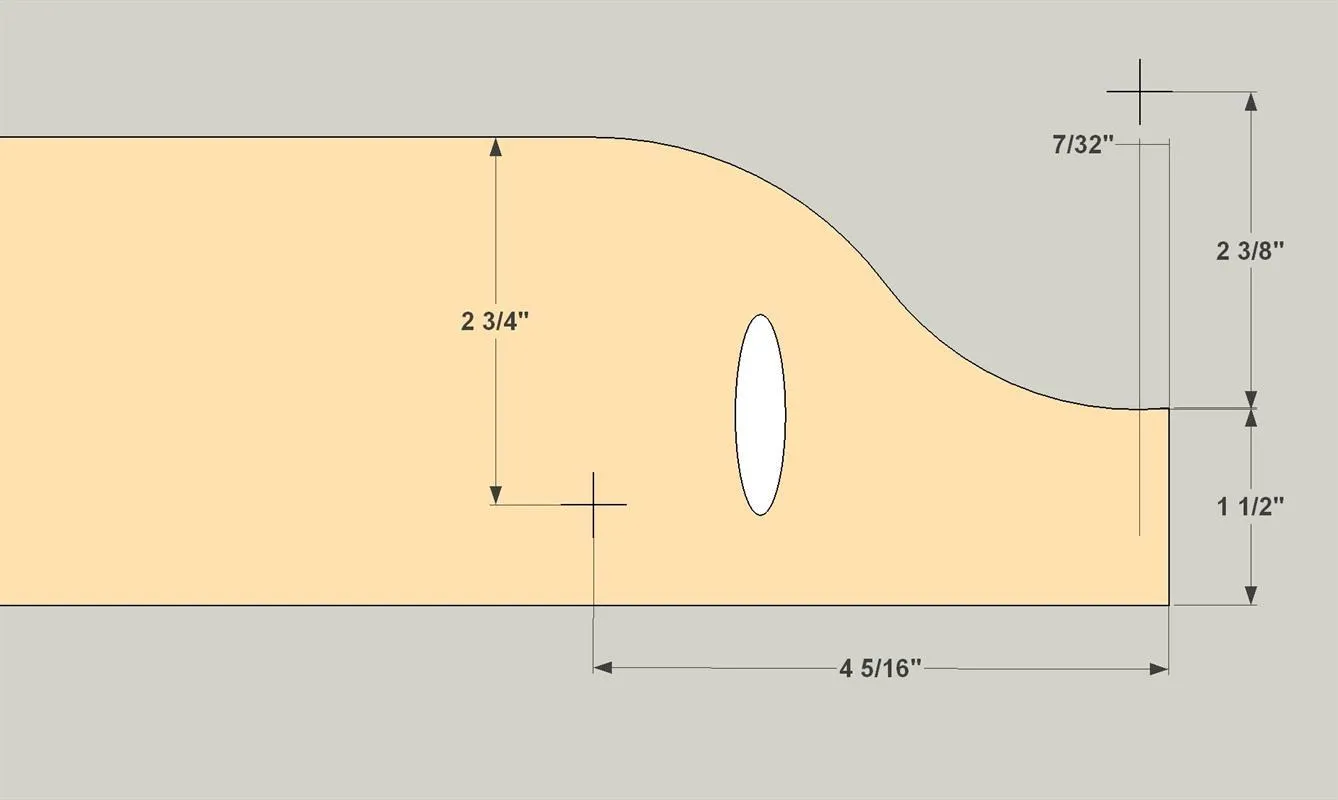
- Lay out the curved shapes on each end of the Back using a compass. You’ll set it to a 2 3/8" radius for the outer curves, and to 2 3/4" for the inner curves. If the two arcs don’t meet exactly when you lay them out, that’s okay. Just connect the lines.
- Cut the shapes with a jigsaw, and then sand them smooth.
4Join the Back and Shelf
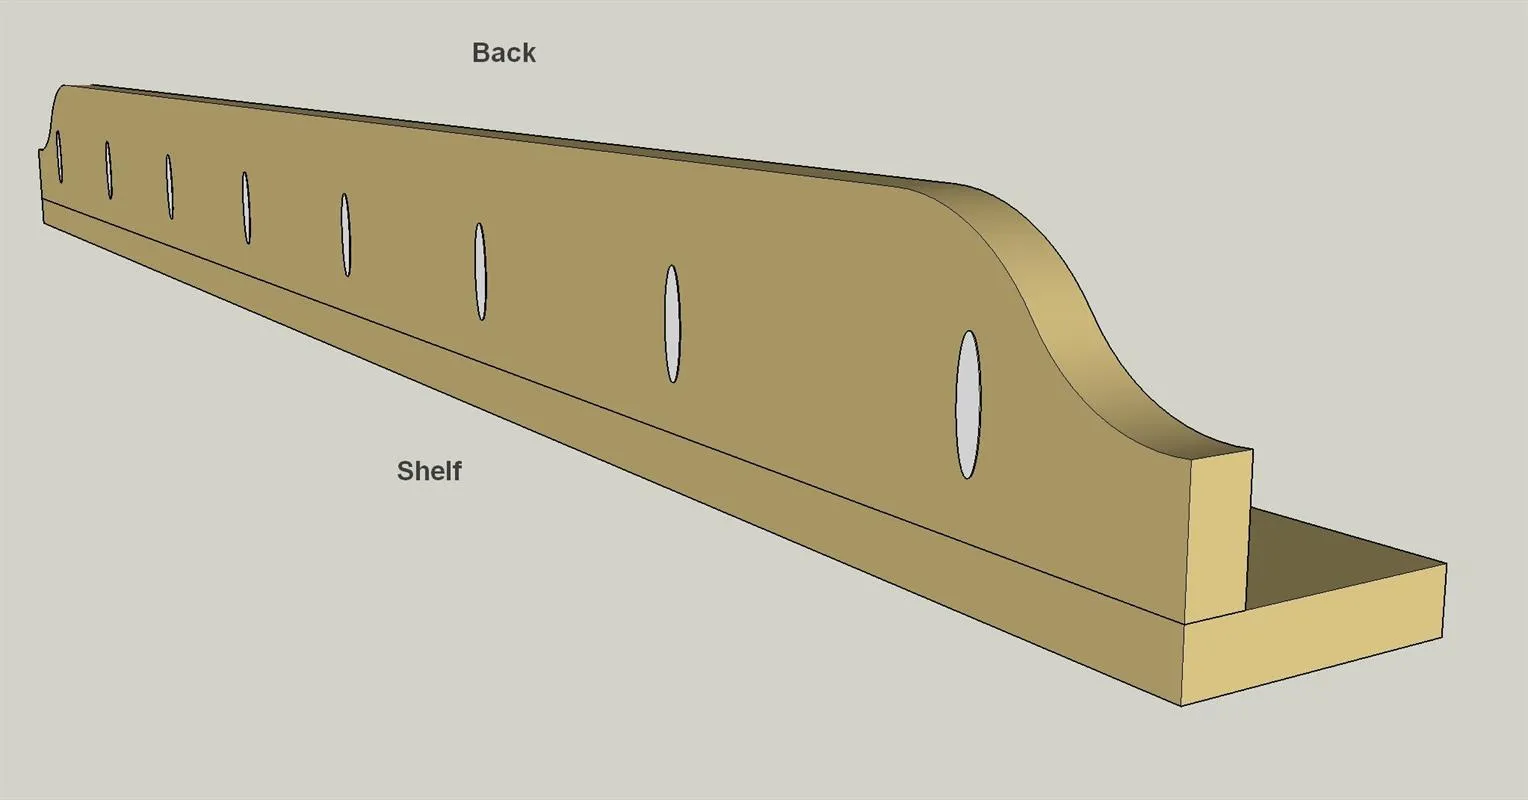
After sanding the Back and the Shelf, connect them using 1 1/4" coarse-thread pocket-hole screws.
5Cut Molding to Fit
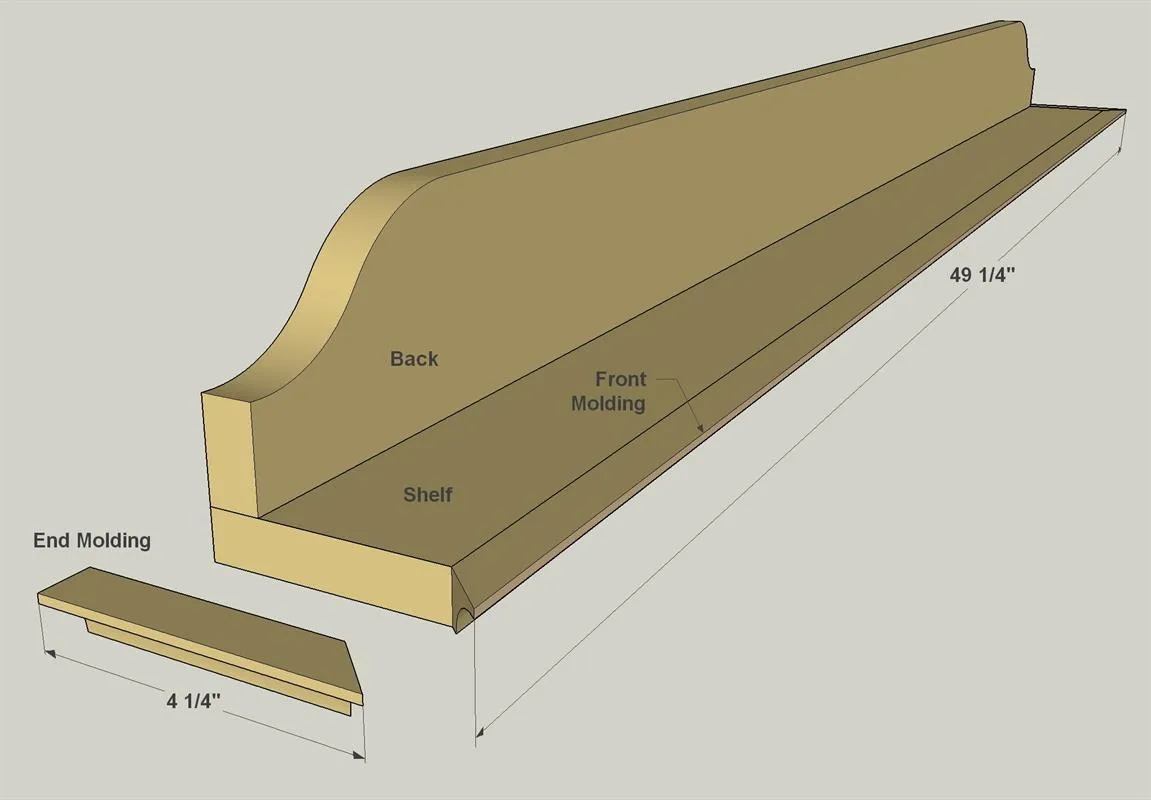
- Cut one piece of Front Molding to length, as shown in the cutting diagram. Note that each end gets mitered at 45° to allow the molding to wrap around the Shelf.
- Also cut two pieces of End Molding, mitering one end of each piece where it will join to the Front Molding.
6Attach the Molding
- Glue the Front Molding and End Molding in place on the Shelf.
- Take care to align the miters. To hold the pieces in place as the glue sets, use masking tape.
7Finish the Shelf and Add Hangers
After the glue sets on the molding, you can sand as needed, and then stain, finish, or paint the photo shelf to suit your tastes. Then add hangers, and hang the shelf on the wall.