 Notch
- Difficulty
- Easy
- Time
- 3.3–6 hours
- Cost
- $$
About this build
This stuffed animal storage cage will provide a convenient place for the kids to neatly store their stuffed animals. The bungee sides allow them to easily pull the animals out, and the open top allows them to toss them back in when done.
Tools
Essential
- Drill / Driver
- Miter Saw
- Pocket Hole Jig
- Random Orbit Sander
Optional / nice to have
- Bar / Pipe Clamps
- Tape Measure
Materials
| Item | Qty |
|---|---|
| Board, 1x4 96" | 2 board |
| Board, 1x2 96" | 2 board |
| 1/4" Bungee Cord (50' Spool) | 1 each |
| 1 1/4" Pocket-Hole Screws | 16 each |
| 1 1/4" Drywall Screws | 16 each |
Overall cost: $$. Lumber prices vary by region, species, and season, so we give a band rather than a figure we would only be pretending to know.
Cut list
| Part | Qty | T × W × L |
|---|---|---|
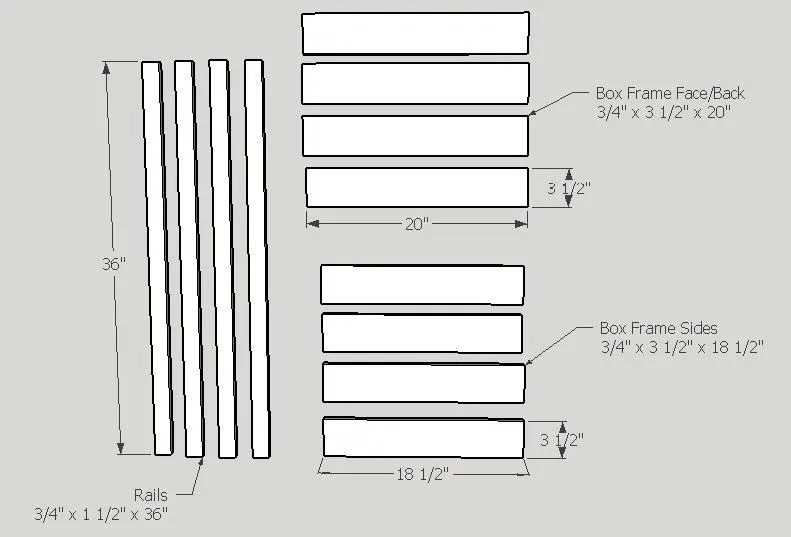
| Box Frame Face/Back | 4 | 3/4" × 3" × 20" |
| Box Frame Sides | 4 | 3/4" × 3" × 18" |
| Rails | 4 | 3/4" × 1" × 36" |
What to buy
Buy 4 boards at 8 ft.
3/4" × 3"
2 boards
3/4" × 1"
2 boards
Assumes 8 ft stock, a 1/8" saw kerf, and buying each part at its own width. Change the board size or kerf on the full board plan →
Instructions
1Cut Components
Cut components from Parts/Cut List. It is helpful to use a stop to get consistent lengths.
2Drill Pocket-Holes
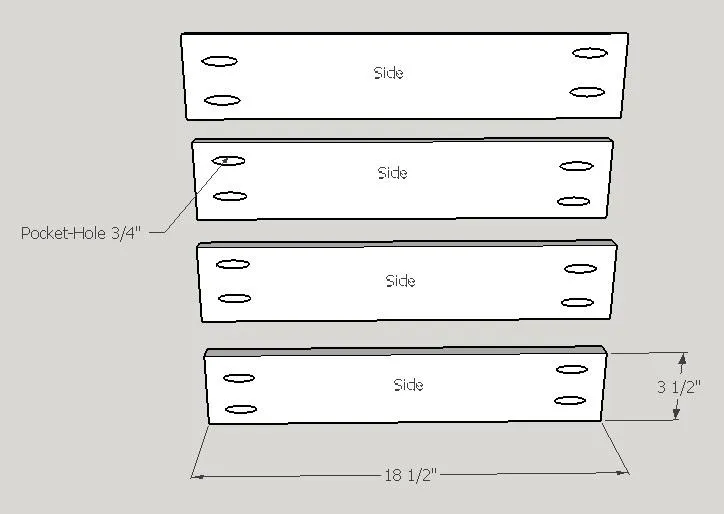
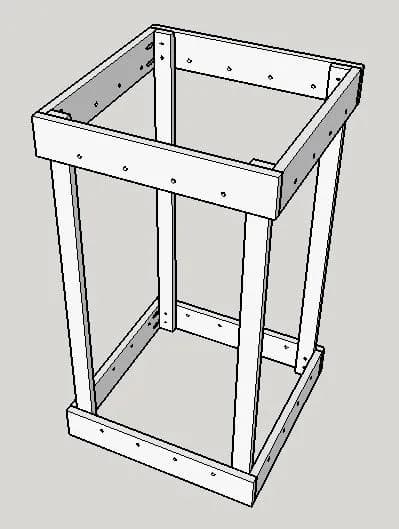
Drill pocket-holes as shown in the ends of the four box frame sides (3/4” x 3 1/2” x 18 1/2"). Set your jig for 3/4” material.
3Drill Bungee Holes
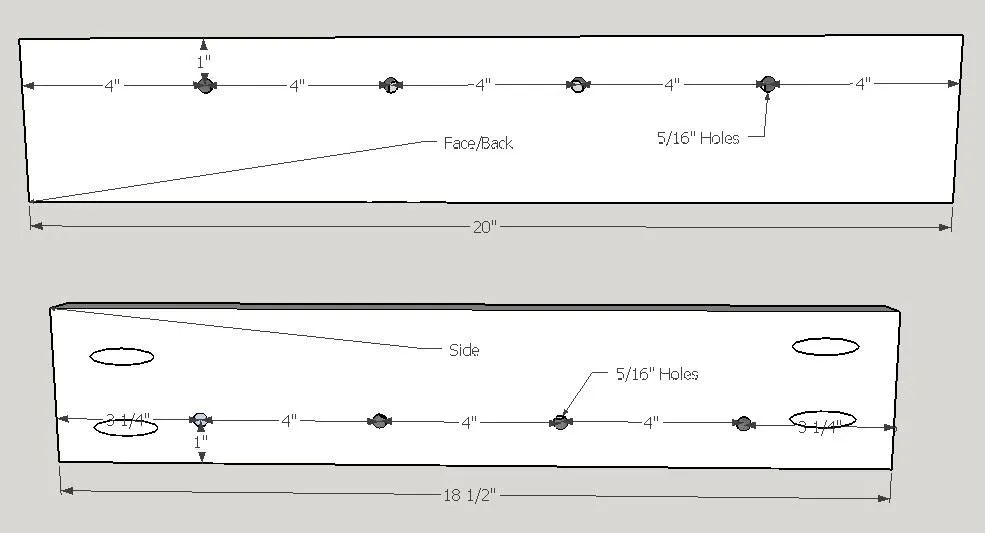
Measure, mark, and drill the four 5/16" bungee holes in all eight of the box frame components as shown. It’s helpful to drill the holes in one and then clamp it to each of the others to use as a template for consistent hole positions.
4Sand Components
Sand the surfaces of all components prior to assembly.
5Assemble Box Frames
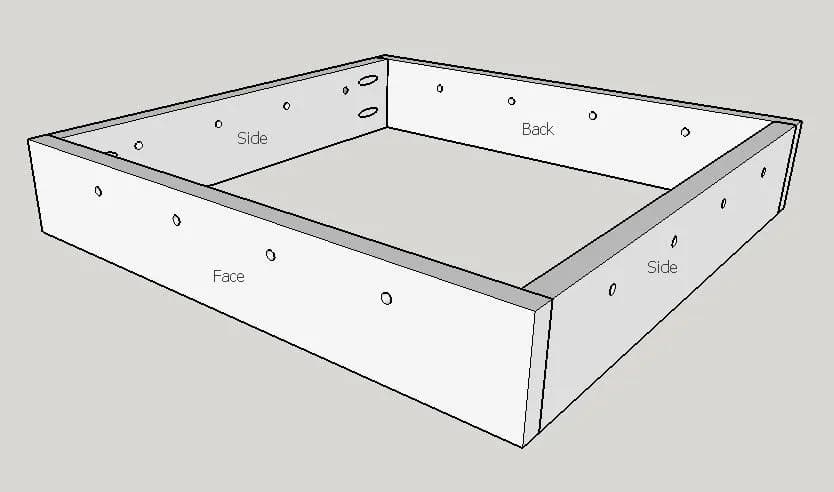
Assemble the top and bottom box frames as shown with 1 1/4” pocket-hole screws.
6Assemble Cage
- Attach the top and bottom box frames together using the 3/4” x 1 1/2” x 36” rails.
- Attach with 1 1/4” drywall screws. I recommend pre-drilling to prevent splitting the rails.
7Final Sanding
Final sand the cage as needed. I recommend sanding all of the exposed edges/corners to round them off a bit at this point.
8Paint/Stain
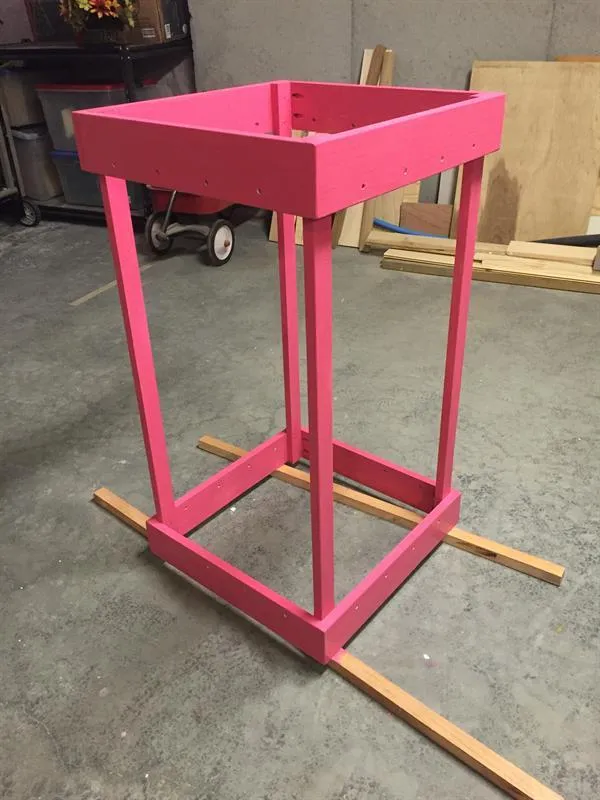
Paint or stain the assembled cage as desired. Allow sufficient time to dry before proceeding to next step.
9Install The Bungee
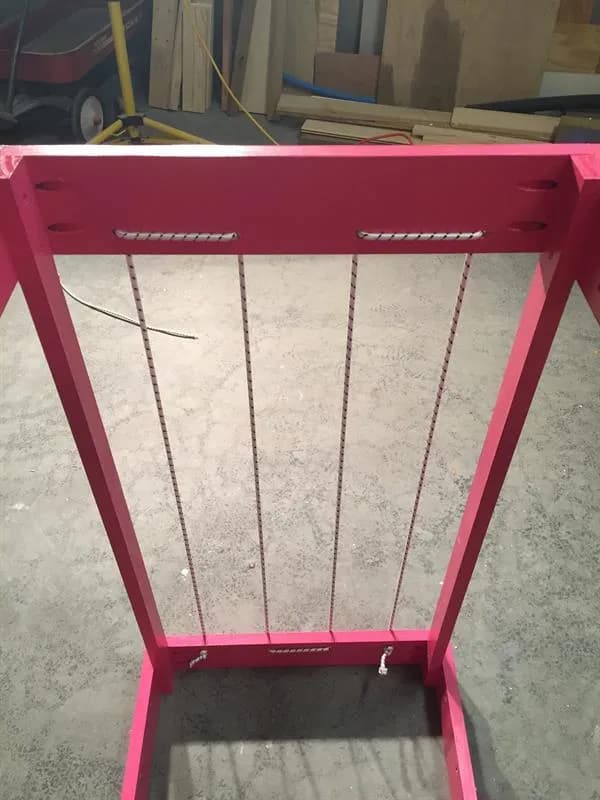
- Feed the bungee from the inside bottom on one side.
- Pull about 10’ through the first hole and then go straight up and pull it all from the outside to the inside on the top.
- Pull the cord to the side to the next hole on the top and feed it back through.
- Once you get it fed through all holes on the side, tie a knot in the end that you just fed through the last hole on the bottom.
- Now work backwards and pull the bungee tight against the knot and work all the way back to the first hole. I found that pulling it very tight worked best.
- Once you work back through the first hole, use the scissors to cut the bungee off of the spool.
- Leave about 8 – 10” so you can tie a knot to secure the bungee for that side.
- Repeat for all sides.
10Trim Bungee
After all bungee is installed, trim the ends of the knots with scissors and melt the ends of the bungee with a lighter to help prevent fraying.
Tags
- Gifts
- Beginner
Reviews & builds
No reviews yet
Sign in to review this plan or share your build.
No reviews yet. Be the first to build this.