 Notch
Sofa Arm Table
Step-by-step build — 5 steps. Also available as a print sheet.
1Cut the Parts
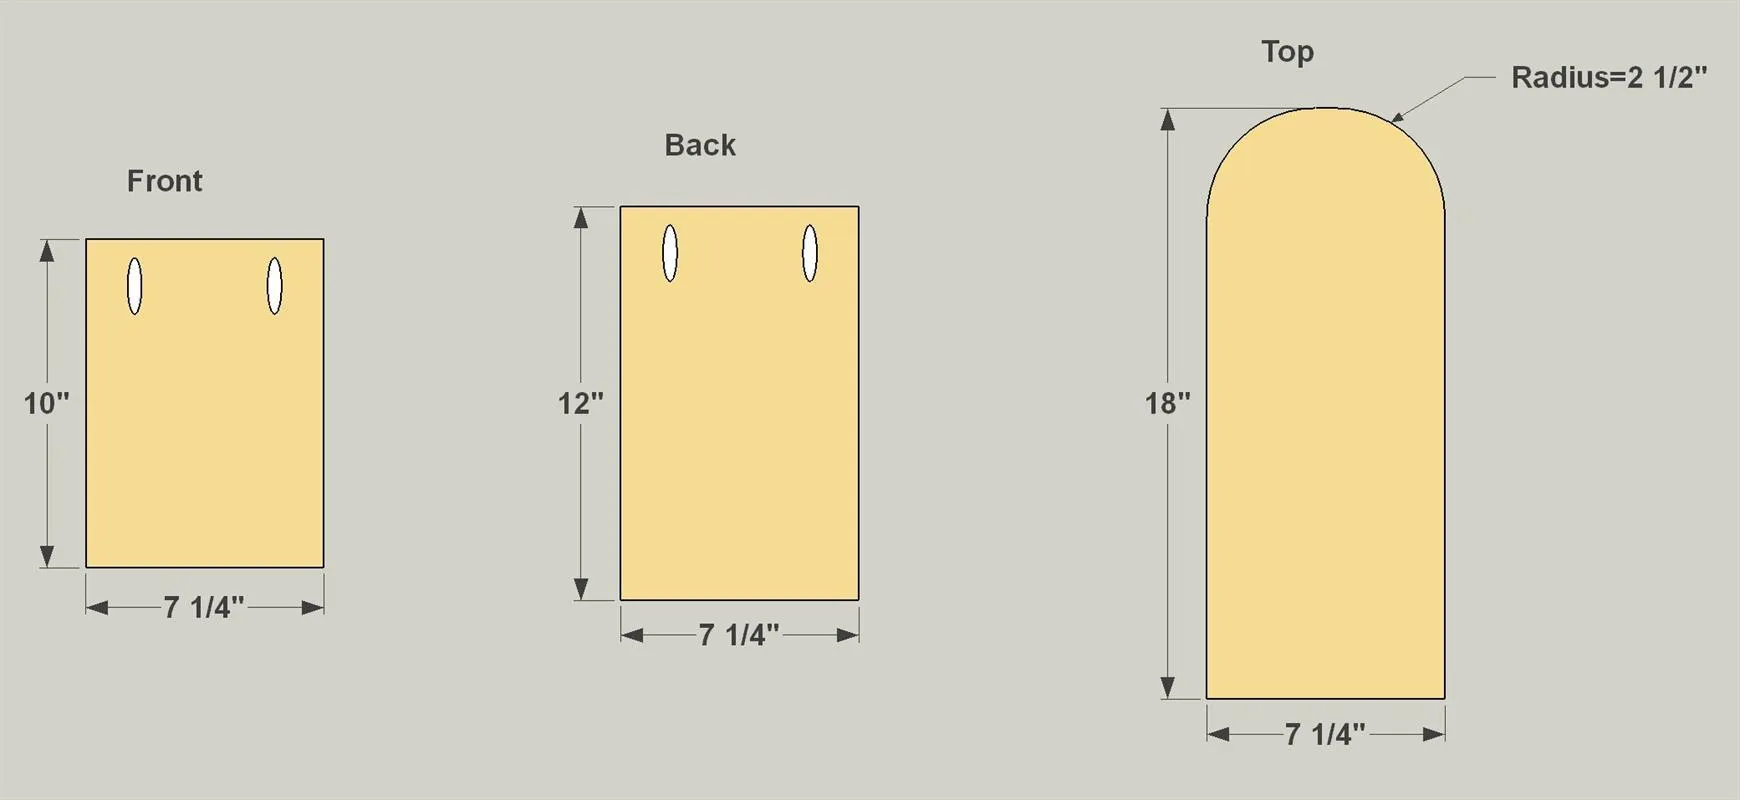
Cut one Back, one Top, and one Front to length from a 1x8 board, as shown in the cutting diagram.
2Add Curves and Pocket Holes
- Using a compass, lay out a 2 1/2" radius on two corners of the Top, and cut the arcs using a jigsaw.
- Sand the arcs smooth.
- Then, with your pocket-hole jig set up for 3/4" material, drill pocket holes in the Back and Front, as shown.
Tip: Sand to Perfect the Shape When cutting with a jigsaw, don’t try to cut exactly on the line. Cut just outside the line—on the “waste” side—and then sand to get the exact shape. You’ll get better, smoother results.
3Attach the Back
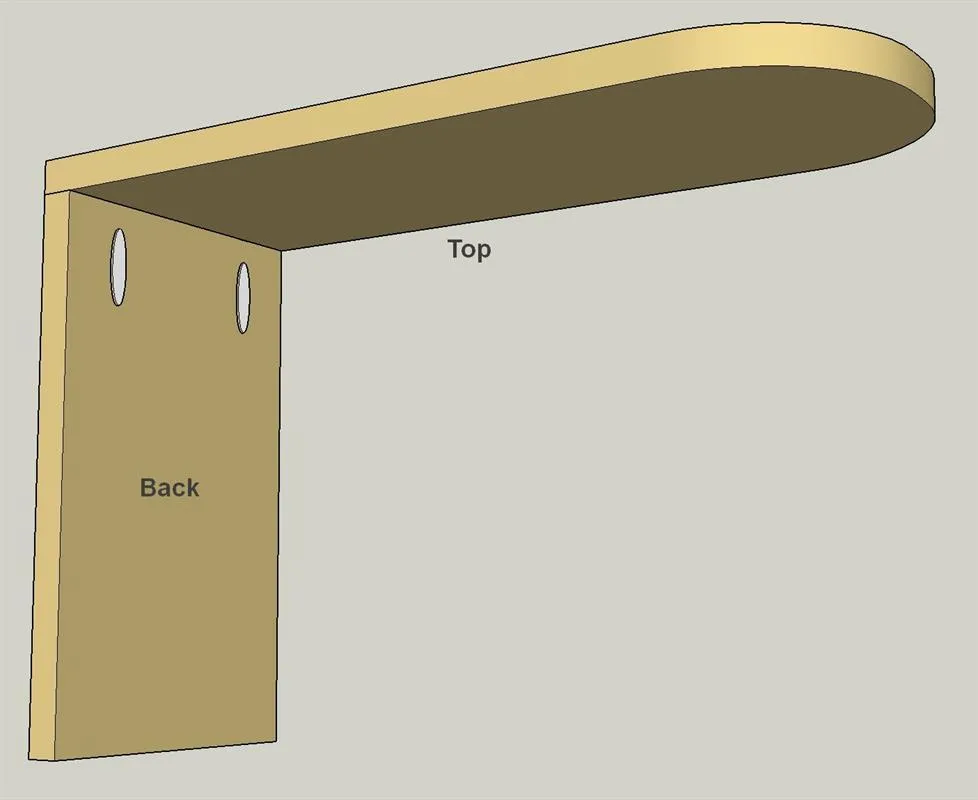
Attach the Back to the Top using 1 1/4" pocket-hole screws. If you’re using hardwood, such as oak, use fine-thread screws. Use coarse-thread screws for softwoods like pine.
4Attach the Front
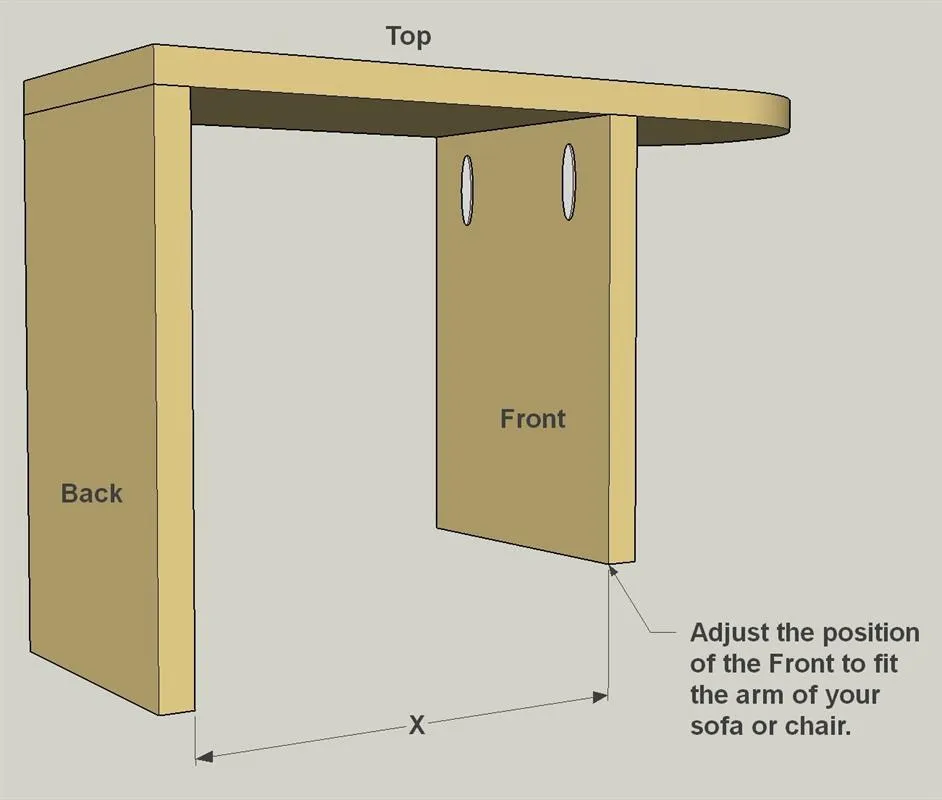
Before you attach the front, check the width of your sofa or chair arm. You should subtract 1/2" or so in order to make sure the table will slide over and fit snugly. Once you’ve determined where to position the Front, attach it using 1 1/4" pocket-hole screws.
5Sand then Stain
After assembly, sand the table as needed, and then apply stain or finish to give it the look you want.