Notch
Rotating Shelf
Step-by-step build — 8 steps. Also available as a print sheet.
1Assemble sides
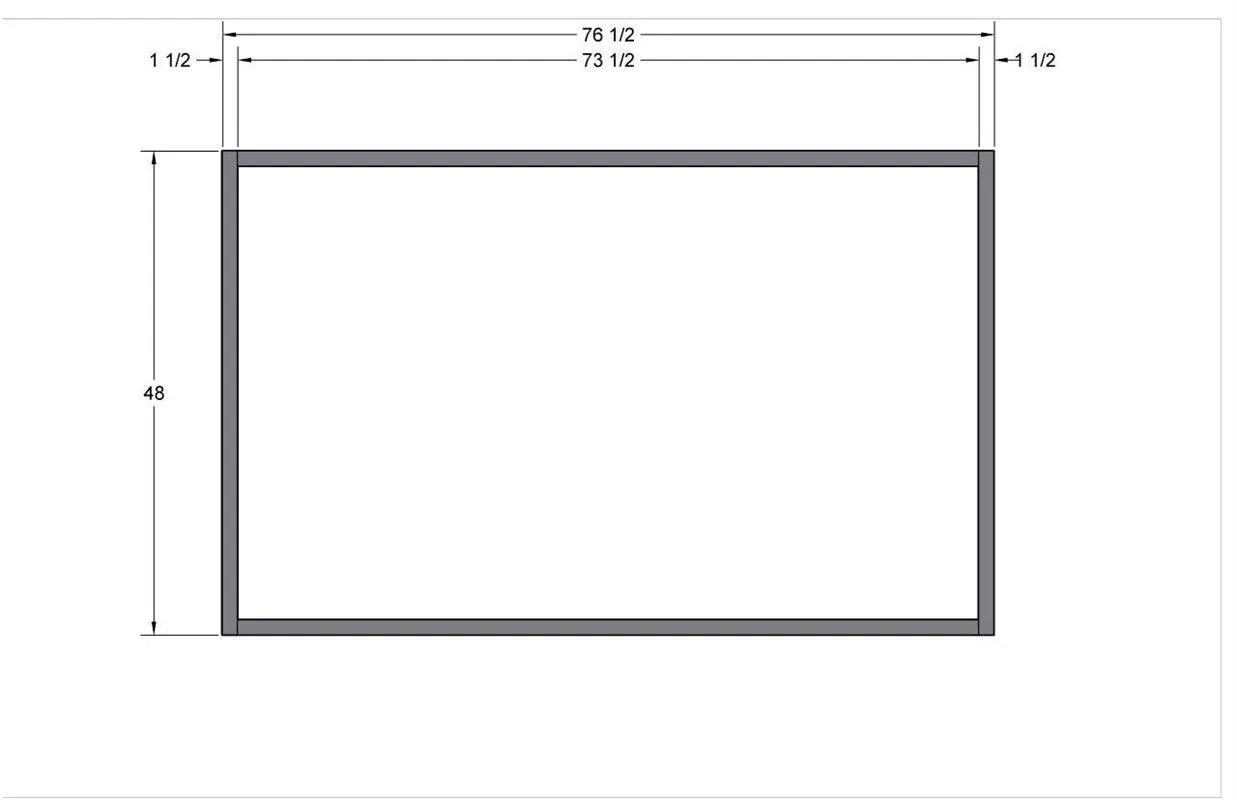
Drill Kreg Pocket holes on the inside ends of the 73 1/2" boards. Drill (3) pocket holes in the end of each side. (1) centered (2) 1" from the edge of the board.
2Drill Pocket Holes
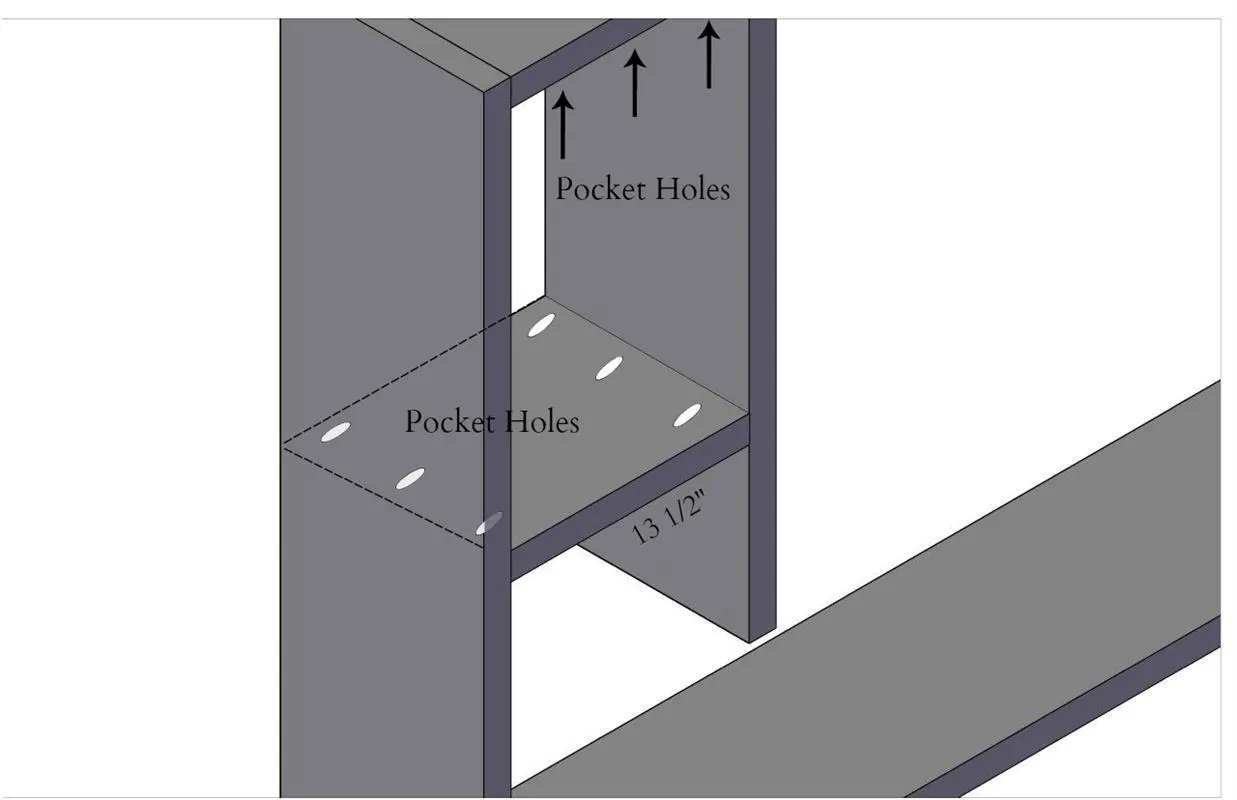
- Drill pocket holes on the end of each 13 1/2" board. You will need (3) Kreg pocket holes in each end. Again, (1) pocket hole will be centered, the other (2) will be placed 1" from either the edge. For a total of (6) pocket holes per board.
- Drill Kreg Pocket Holes in one end of the 33" boards. Again, you will need (3) pocket holes drilled. (1) will be centered, the other (2) will be one 1" from the edges.
31st Shelf
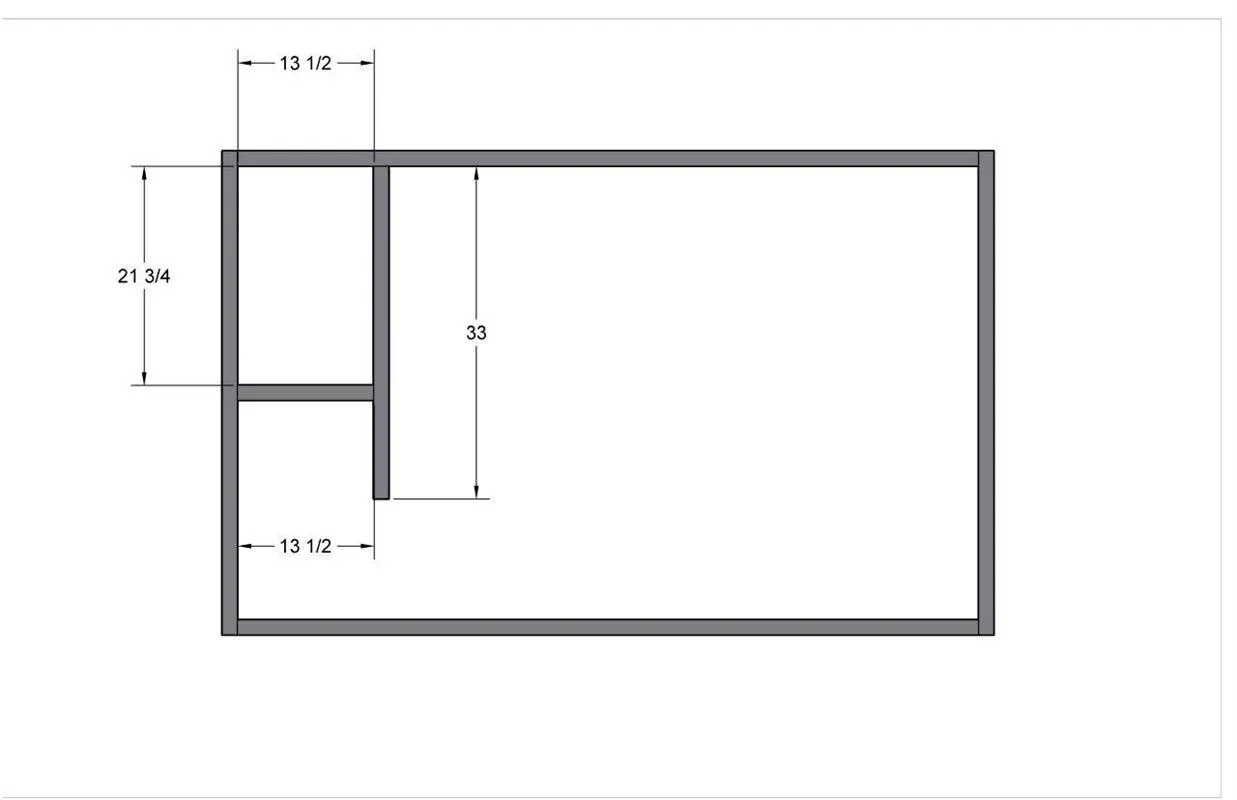
Attach the first "shelf" (33") to the "divider" (13 1/2"). Measure and make sure it is square before using 2" Kreg Pocket Screws to secure the divider to the "shelf.
42nd Shelf
- Repeat Step 3.
- Once you have attached the second "divider" to the second "shelf" you will then insert and attach the other end of the "divider" to the first "shelf". Again, always make sure you align, and square your boards before securing with Kreg Screws.
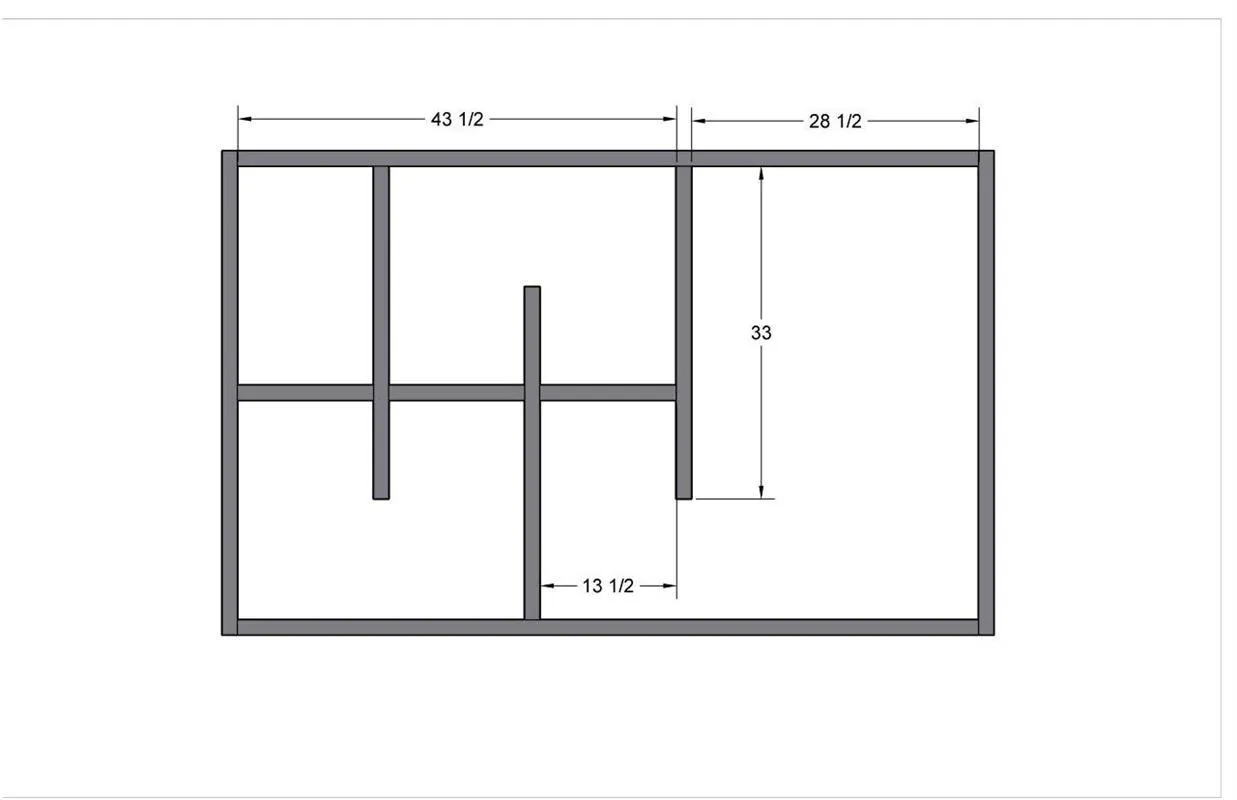
53rd Shelf
Repeat Step 4.
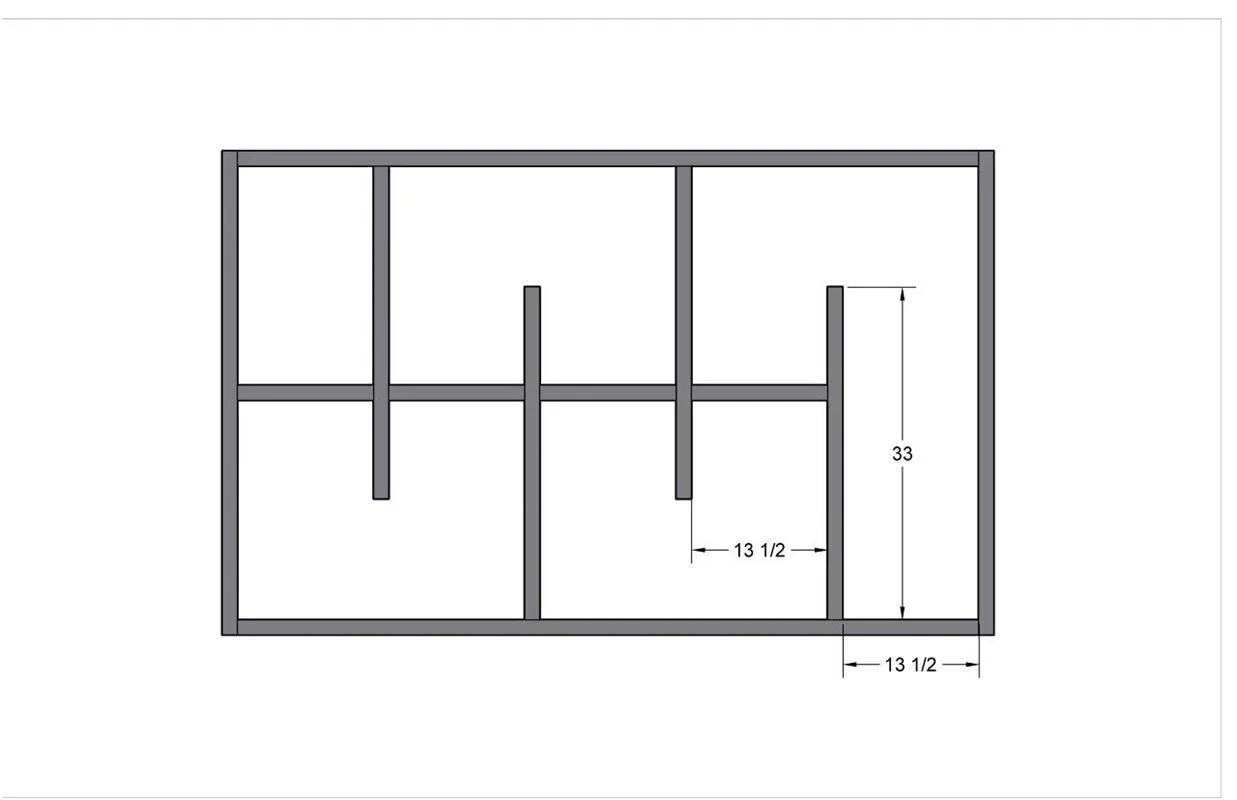
6Last Divider
Insert the remaining "divider. Attach it centered on the end board and squared to the previous 33" shelf.
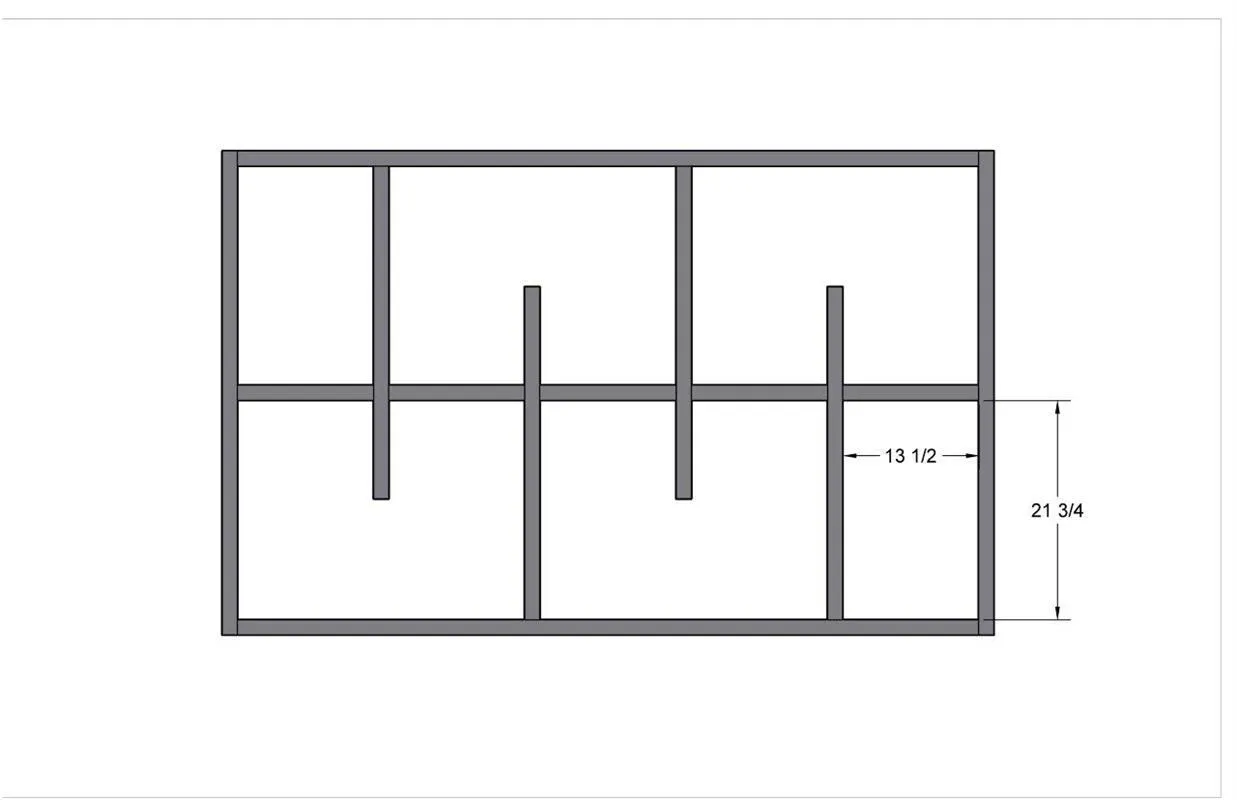
7Insert Wood Plugs
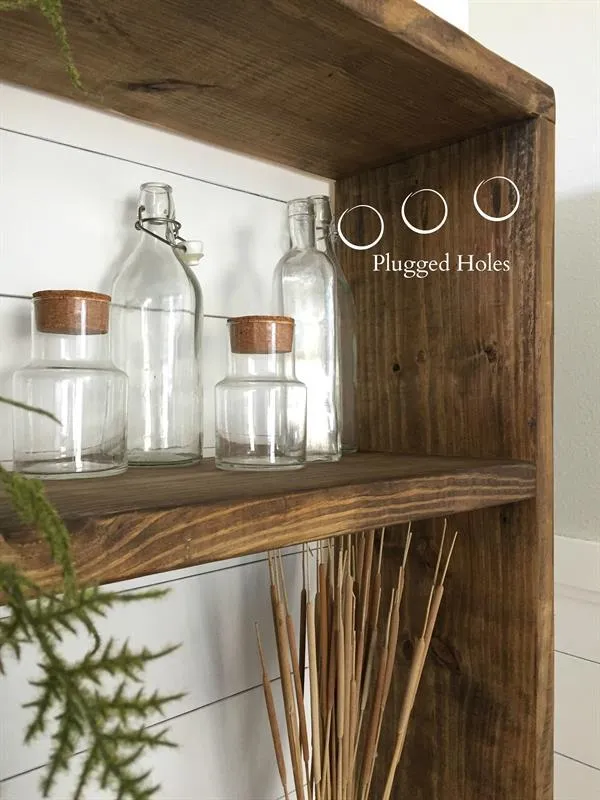
By using the wood plugs you will be able to easily conceal any pocket holes. Simply add a small dab of wood glue, and insert. I add a small amount of wood filler, once dry sand down until smooth.
8Sand and Stain
Once all wood filler is dry, sand down the entire unit, and then finish in your preferred paint/stain.