 Notch
NotchRectangle Chandelier
Step-by-step build — 10 steps. Also available as a print sheet.
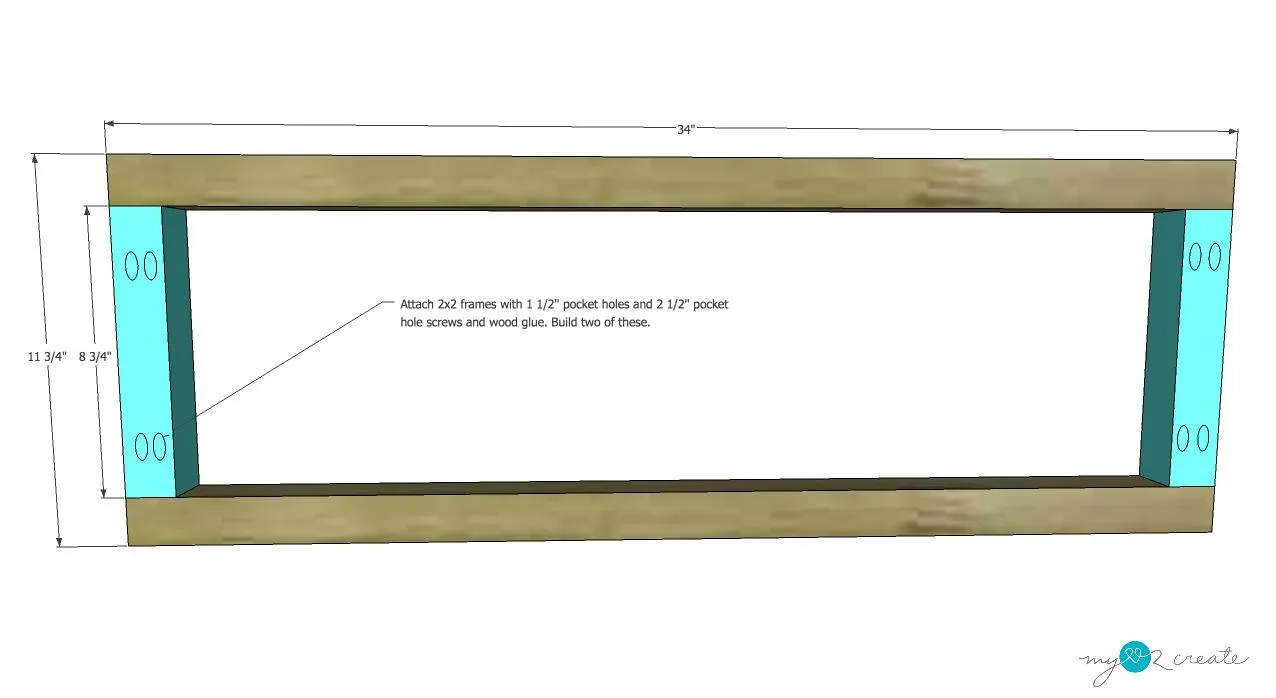
1Build 2x2 frames
Build the long 2x2 frames for the light fixture with 1 1/2'' pocket holes and 2 1/2'' pocket hole screws and wood glue.
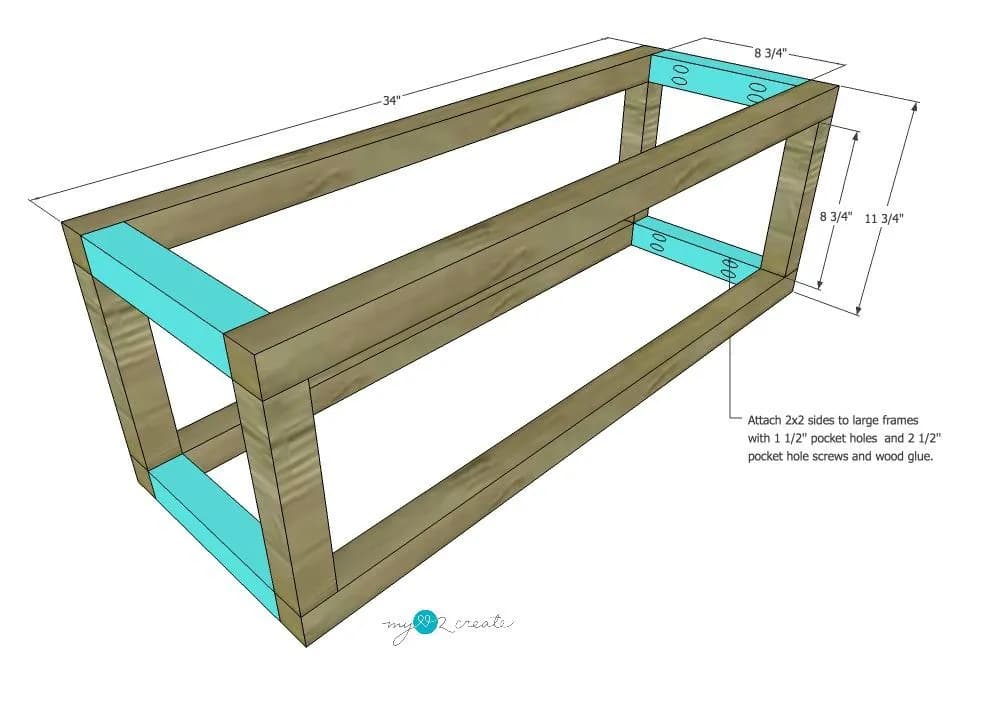
2Attach 2x2 frames with side rails
Complete the 2x2 light fixture box by attaching the two frames together with the side rails. Attach on the inside with 1 1/2'' pocket holes and 2 1/2'' pocket hole screws and wood glue. You can also omit the pocket holes on this step and glue and nail them in from the sides with 2'' finish nails. Either option will work, I ended up doing this on my build because I was out of 2 1/2'' pocket hole screws and in a remote location.
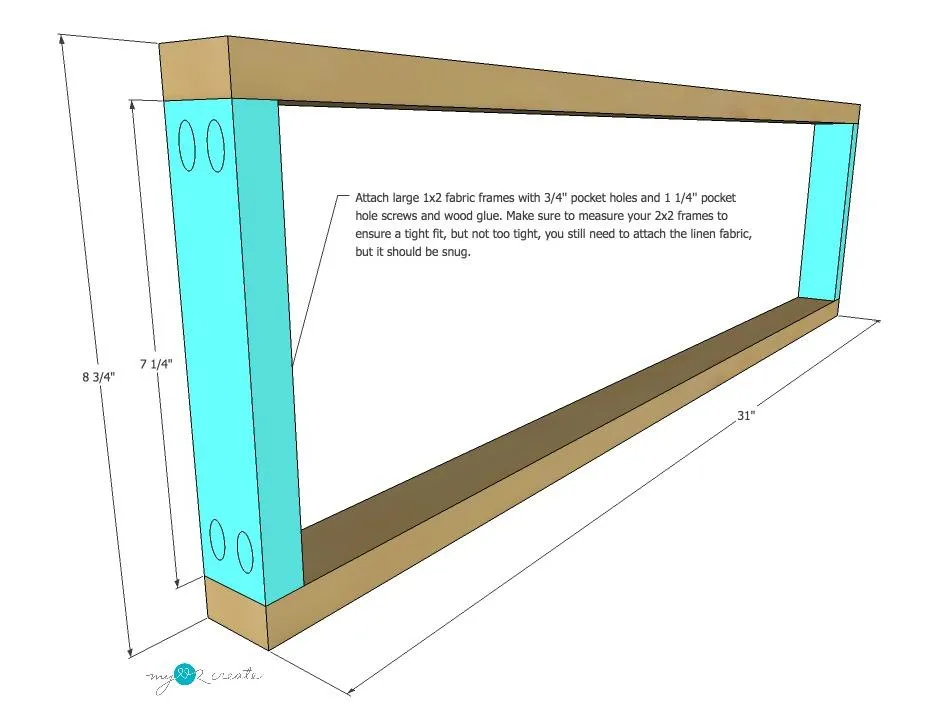
3Build large fabric frames
Build the two large linen fabric frames as shown with 1x2's. Attach with 3/4'' pocket holes and 1 1/4'' pocket hole screws on the outside.
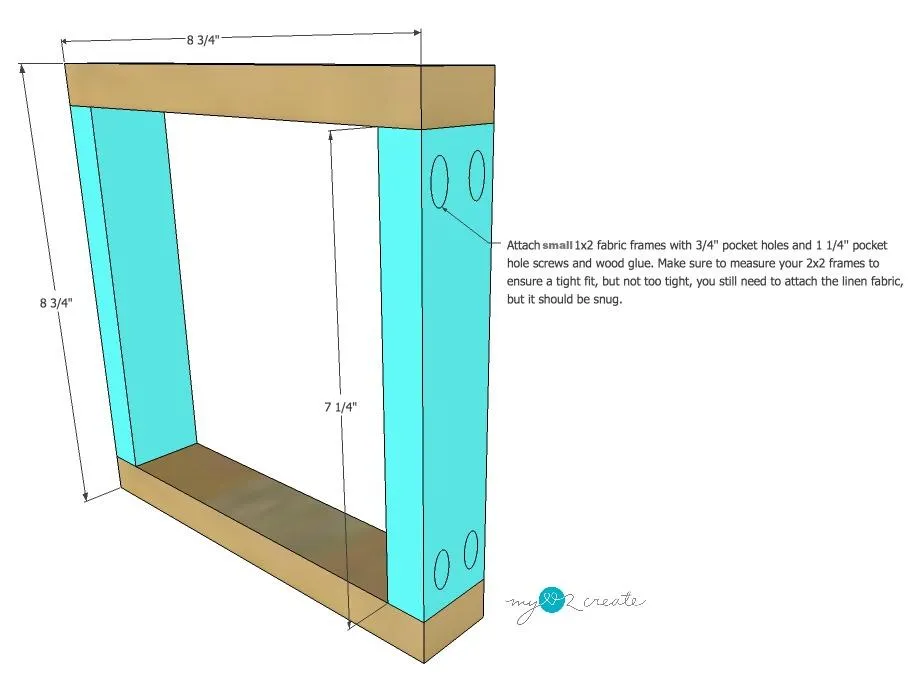
4Build small fabric frames
Build two small fabric frames as shown using 1x2 boards. Attach with 3/4'' pocket holes and 1 1/4'' pocket hole screws on the outside.
5Stain or Paint light fixture box
- Sand and fill any holes that may show.
- Stain or Paint light fixture box to desired finish.
- Also dry fit the linen fabric frames to ensure they are the correct size before applying the linen. I made this light fixture for my sister's dining room and she choose Minwax classic gray stain.
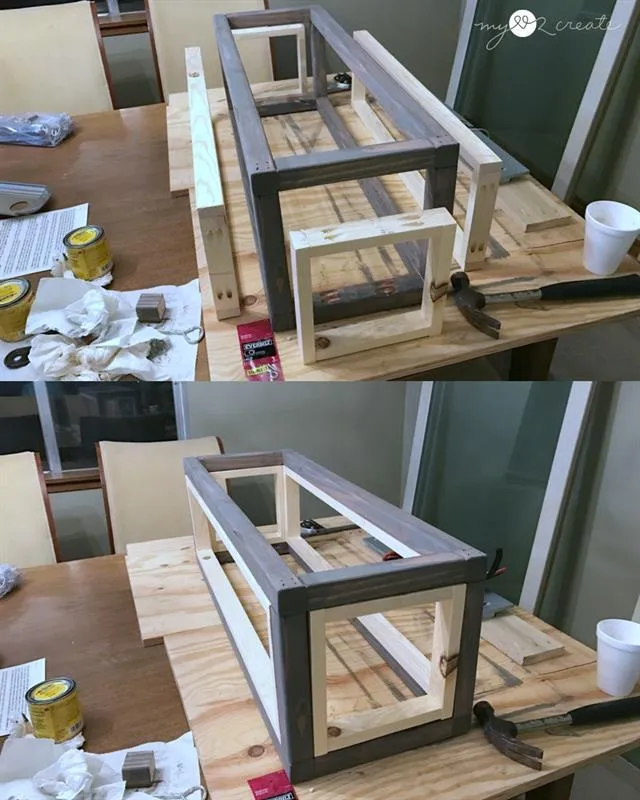
6Attach linen to fabric frames
- Lay out your 1 yard of linen fabric, be sure to press before you use it.
- Place the four frames on the fabric.
- Cut fabric 2 1/2'' to 3'' bigger on each side of each frame. Stretch and fold ends over and staple to inside of 1x2 frames.
- Start on the long side and work your way around stretching snug, but not too tight.
- Leave the corners for last.
- Cut excess fabric on corners and fold and staple inside the frame.
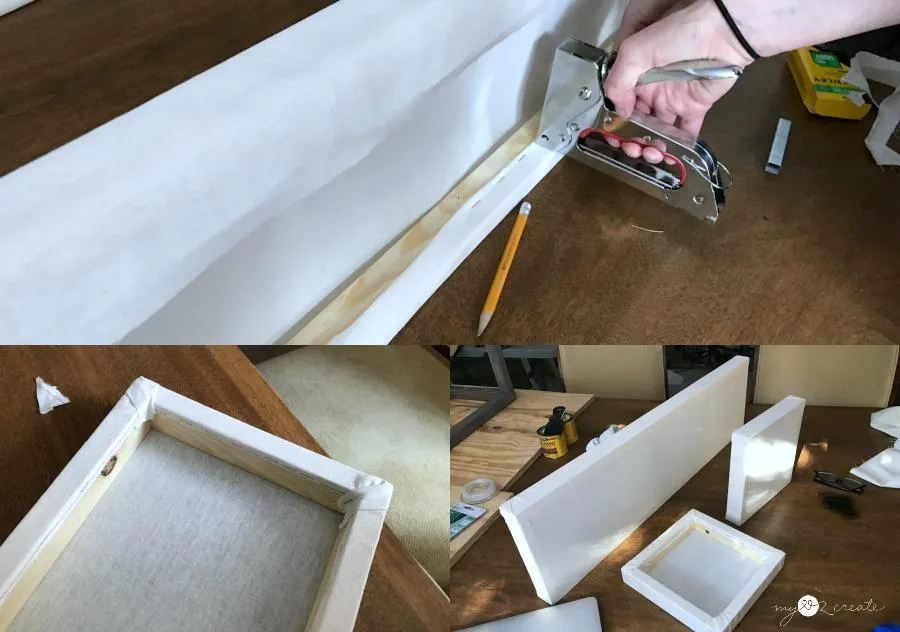
7Add linen frames to box
Fit the fabric frames into the light fixture box one at a time. Make sure to push them in from the inside of the box frame. Once installed, staple or screw them to the 2x2 frame from the inside. Note: My 1x2's were slightly wider than my 2x2's, and so I set my linen frames 1/4'' outside of the 2x2 frame. If your 1x2's and 2x2's are both 1 1/2'' like the normally are, then you will not have to do this.
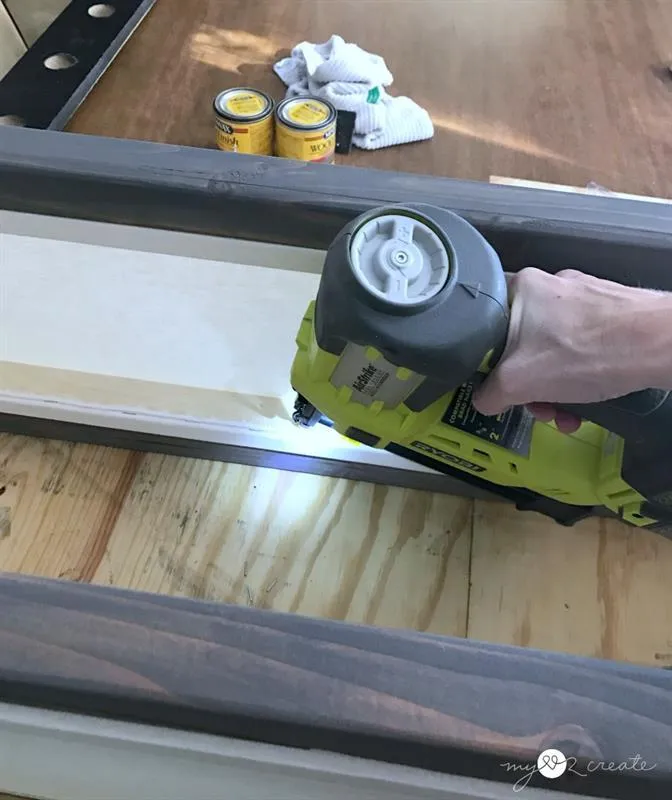
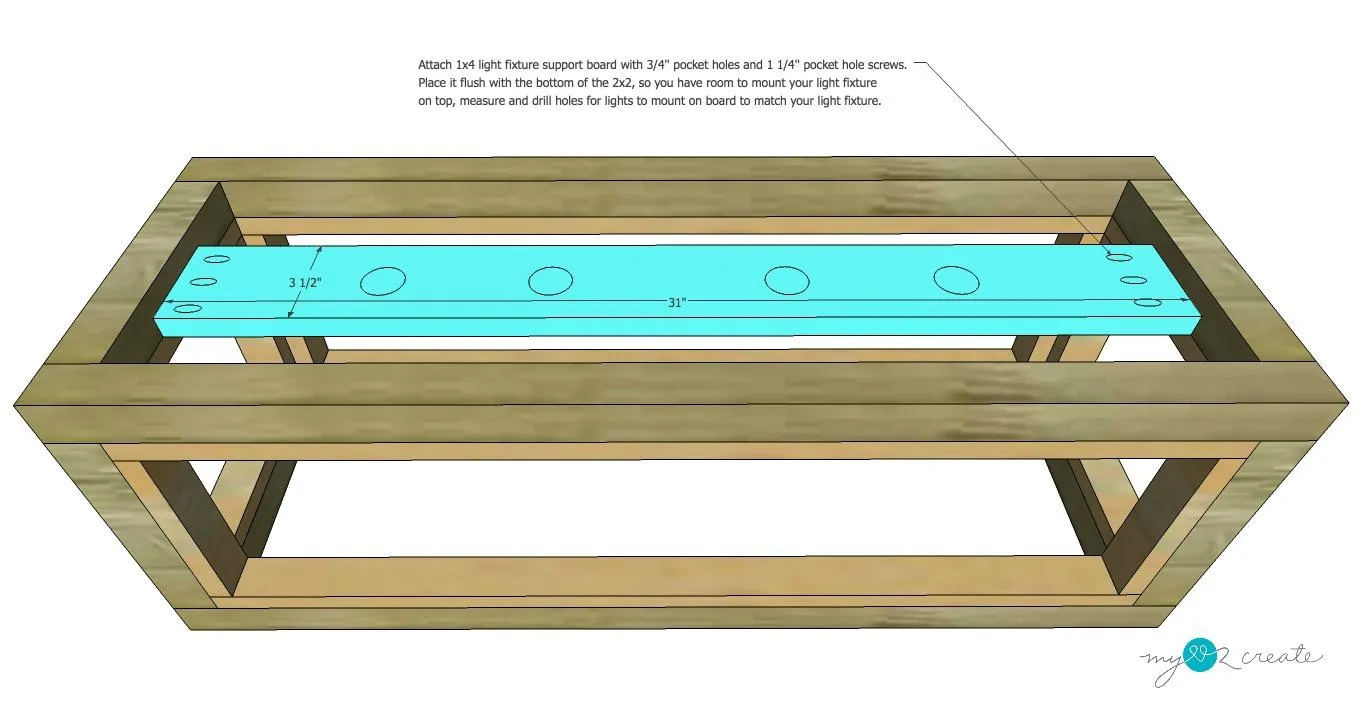
8Attach light fixture support board
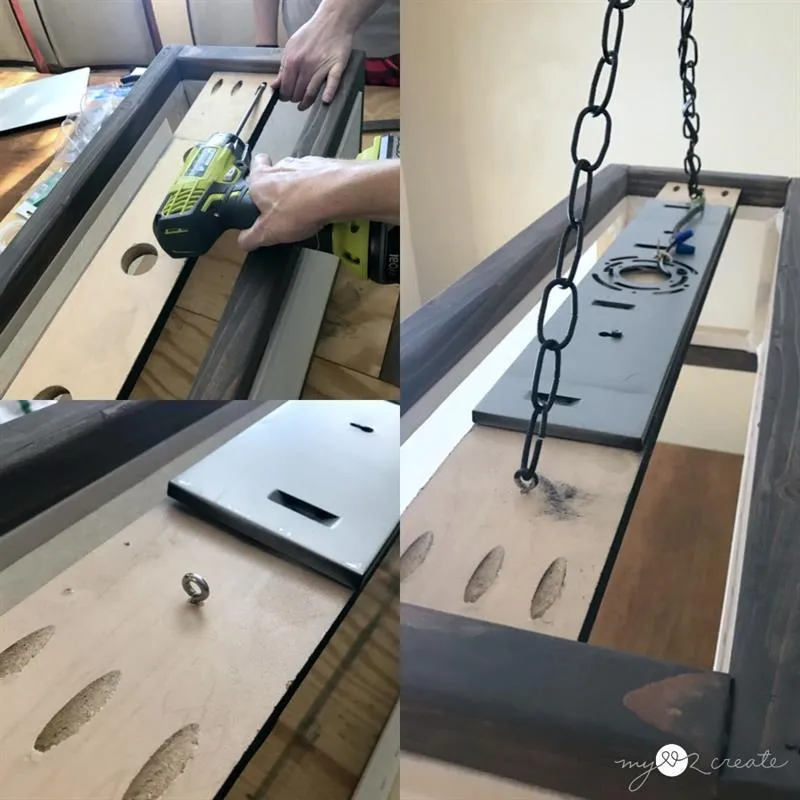
Depending on which light fixture you purchase for your light you may have to adjust your board size and placement. My light fixture was repurposed from an old bathroom wall mounted light that I purchased at a thrift store for $4. I used a 1x4 board to mount the light inside of the light fixture box, and drilled holes for my lights and 3/4'' pocket holes for mounting the board in the frame.
9Attach lighting hardware and hang
Attach your lighting hardware and wire and hang light according to directions. I screwed my wall mount light onto my 1x4 support board, and wired it to a new cord to go up to the ceiling and wired it there. For the top hardware I used the old chandelier pieces, and added screw eyes to my 1x4 support board and attached chains for hanging. If you purchase your own lighting kit or hardware follow the instructions included. I choose to repurpose my lighting supplies.
10Visit www.MyLove2Create.com
For a picture tutorial and more details on this build!