 Notch
Notch- Difficulty
- Easy
- Time
- 3.8–7.3 hours
- Cost
- $$
About this build
Elevate your dog’s dining experience with a raised stand for its food and water bowls. The stand holds two 6″ dog bowls at a convenient height for larger dogs. You can build one for your furry friend with just a few pine boards, a few tools, and some paint or stain.
Tools
Essential
- Drill / Driver
- Jigsaw
- Miter Saw
- Random Orbit Sander
Optional / nice to have
- Bar / Pipe Clamps
- Tape Measure
Materials
| Item | Qty |
|---|---|
| Board, 1x8 48" | 1 board |
| Board, 2x2 48" | 1 board |
| Board, 1/2" x 2 (1 1/2" actual width) 48" | 1 board |
| Board, 1x12 24" | 1 board |
| 1 1/4" coarse-thread pocket hole screws | 26 each |
| 6"-diameter dog bowls | 2 each |
| Wood glue | 1 each |
Overall cost: $$. Lumber prices vary by region, species, and season, so we give a band rather than a figure we would only be pretending to know.
Cut list
| Part | Qty | T × W × L |
|---|---|---|
| End Panel | 2 | 3/4" × 7" × 7" |
| Leg | 4 | 1" × 1" × 10" |
| End Rail | 2 | 3/4" × 1" × 7" |
| Front Panel | 1 | 3/4" × 7" × 15" |
| Back Panel | 1 | 3/4" × 7" × 15" |
| Front Rail | 1 | 3/4" × 1" × 15" |
| Back Rail | 1 | 3/4" × 1" × 15" |
| Stile | 2 | 1/2" × 1" × 7" |
| Top | 1 | 3/4" × 11" × 19" |
What to buy
Buy 5 boards at 8 ft.
1" × 1"
1 board
3/4" × 11"
1 board
3/4" × 7"
1 board
3/4" × 1"
1 board
1/2" × 1"
1 board
Assumes 8 ft stock, a 1/8" saw kerf, and buying each part at its own width. Change the board size or kerf on the full board plan →
Instructions
1Make a Pair of End Panels
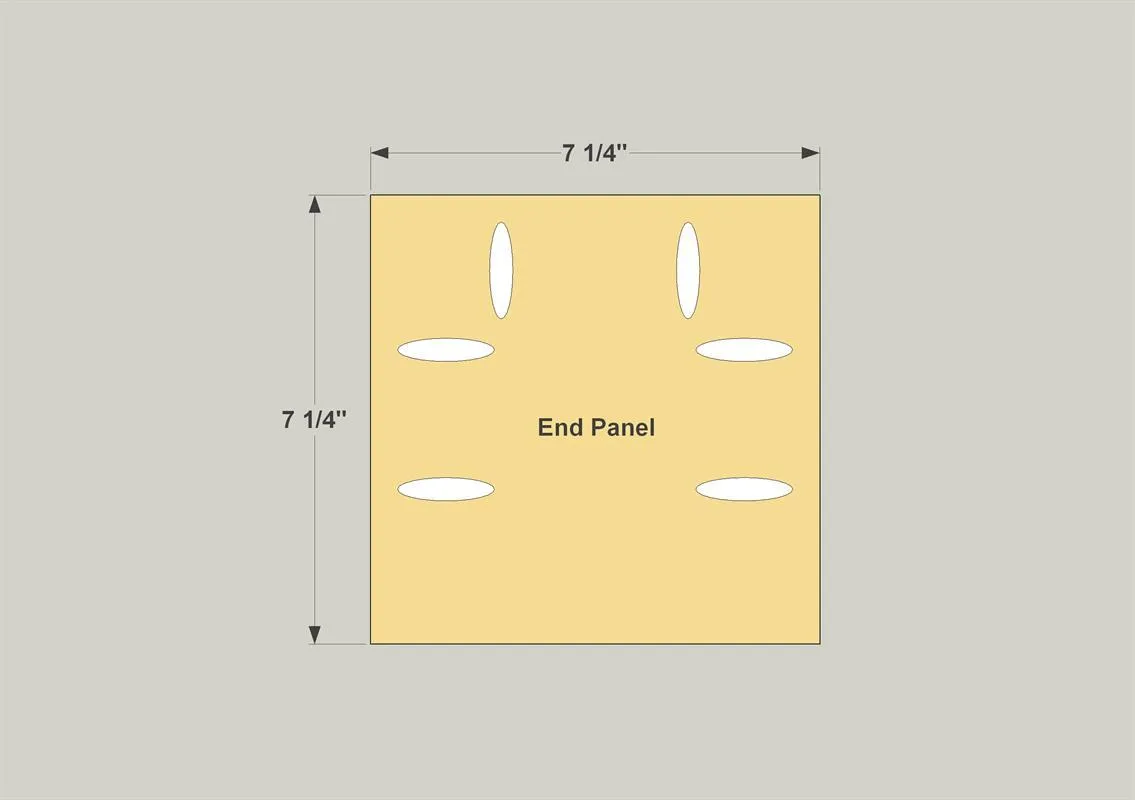
Cut two End Panels to length from a 1x8 board, as shown in the cutting diagram. Then, with your pocket-hole jig set up for 3/4" material, drill pocket holes where shown.
2Attach the End Panels to the Legs
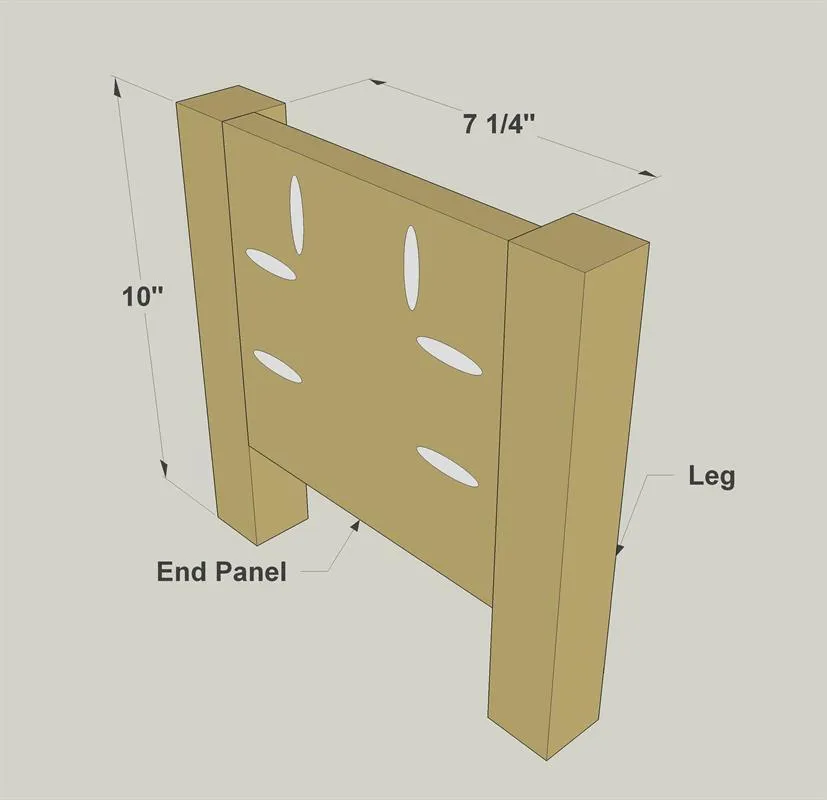
Cut four Legs to length from a 2x2 board, as shown in the cutting diagram. Secure two Legs to each End Panel with 1 1/4" pocket hole screws as shown.
3Make the End Rails
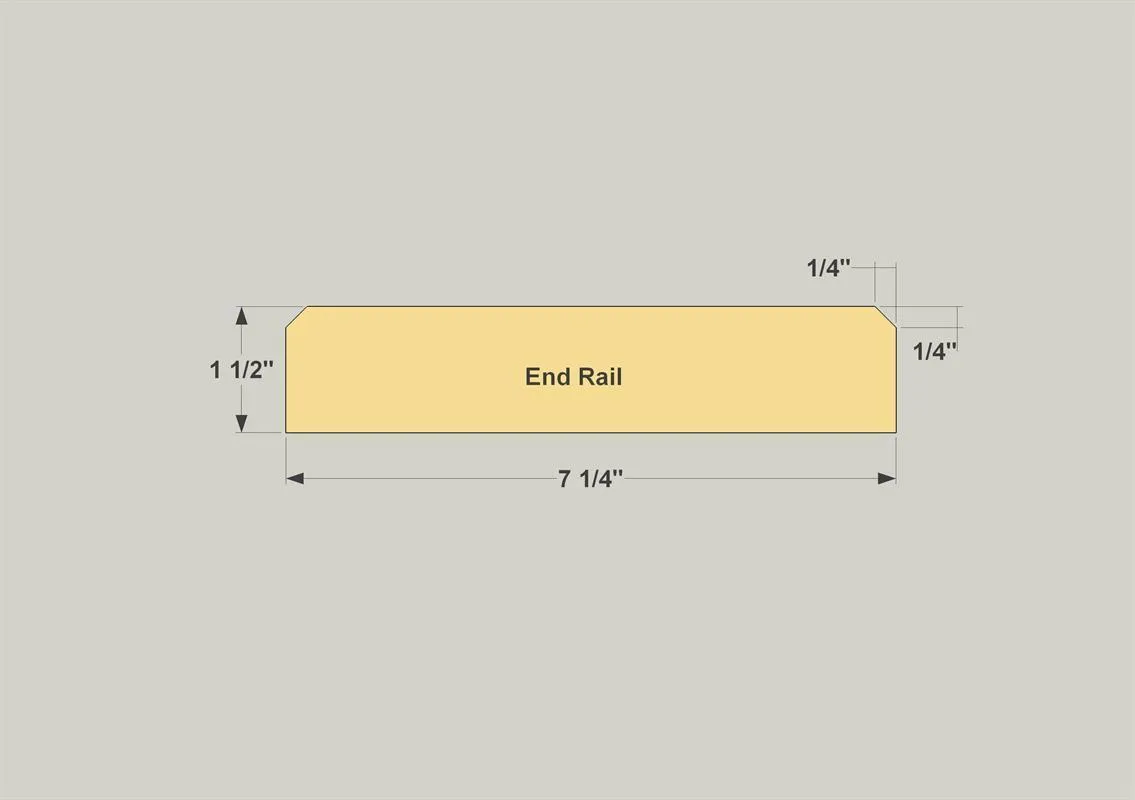
Cut two End Rails to length from a 1x2 board, as shown in the cutting diagram. Then, using a jig saw or a miter saw set at 45°, cut off two corners on each Rail, as shown.
4Attach the End Rails
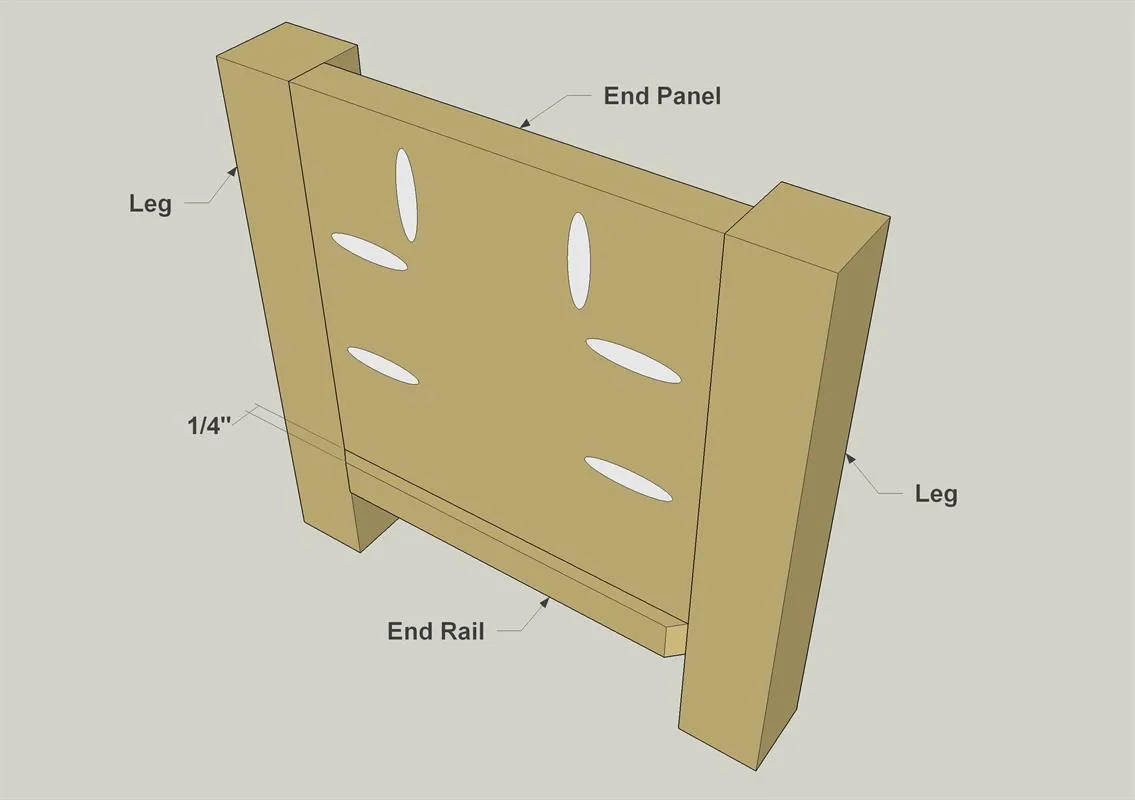
Glue and clamp Each End Rail to the bottom of each End Panel so that the End Rails are offset 1/4" toward the inside face of the End Panels, as shown.
5Make Front and Back Panels
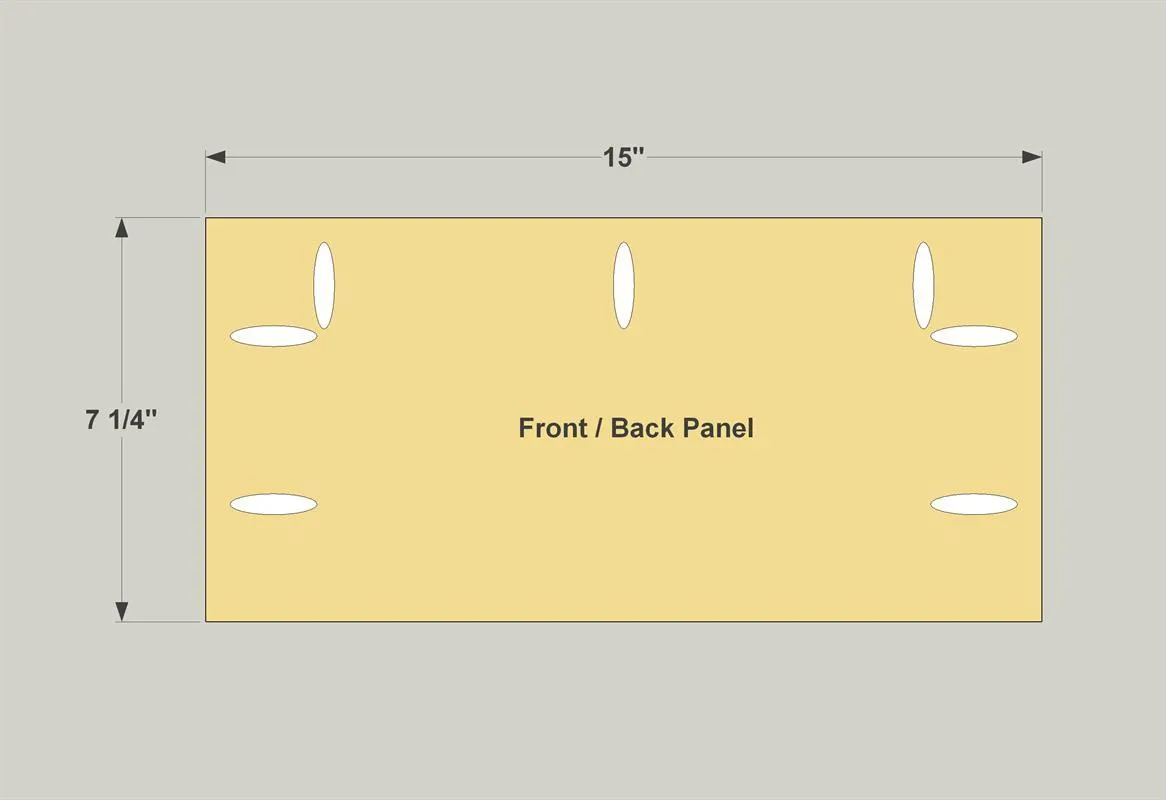
Cut one Front Panel and one Back Panel to length from a 1x8 board, as shown in the cutting diagram. Then, with your pocket-hole jig set up for 3/4" material, drill pocket holes in these panels, as shown.
6Attach the Front Back Panels
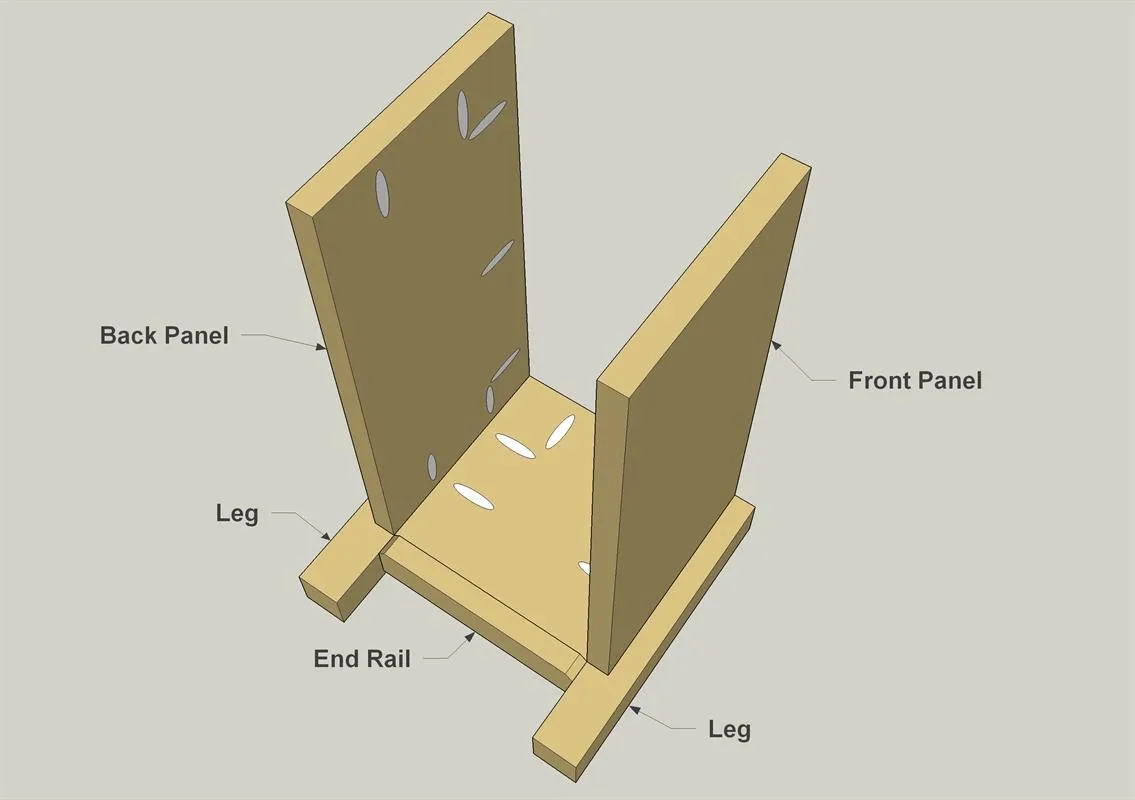
Attach the Front Panel and Back Panel to one end assembly using 1 1/4" pocket hole screws, as shown. Then secure the second end assembly in place.
7Make Front and Back Rails
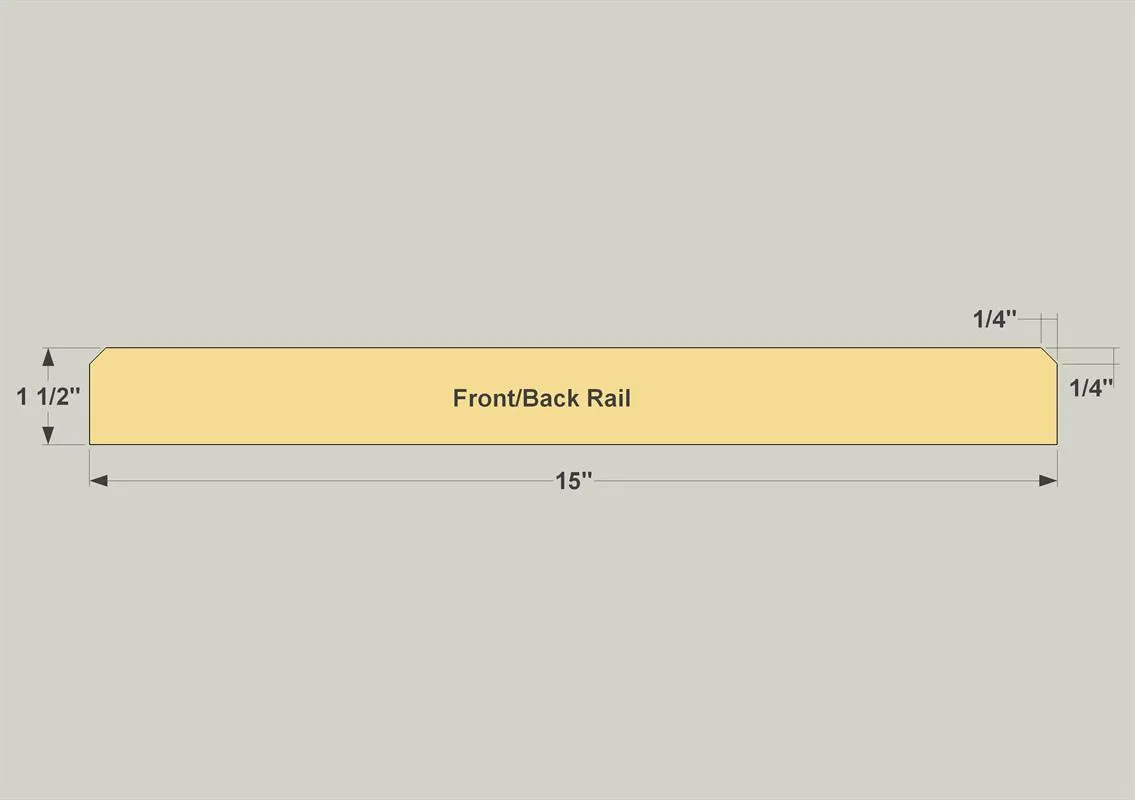
Cut one Front Rail and one Back Rail to length from a 1x2 board, as shown in the cutting diagram. Then, using a jig saw or a miter saw set at 45°, cut off two corners on each Rail, as shown.
8Attach the Front and Back Rails
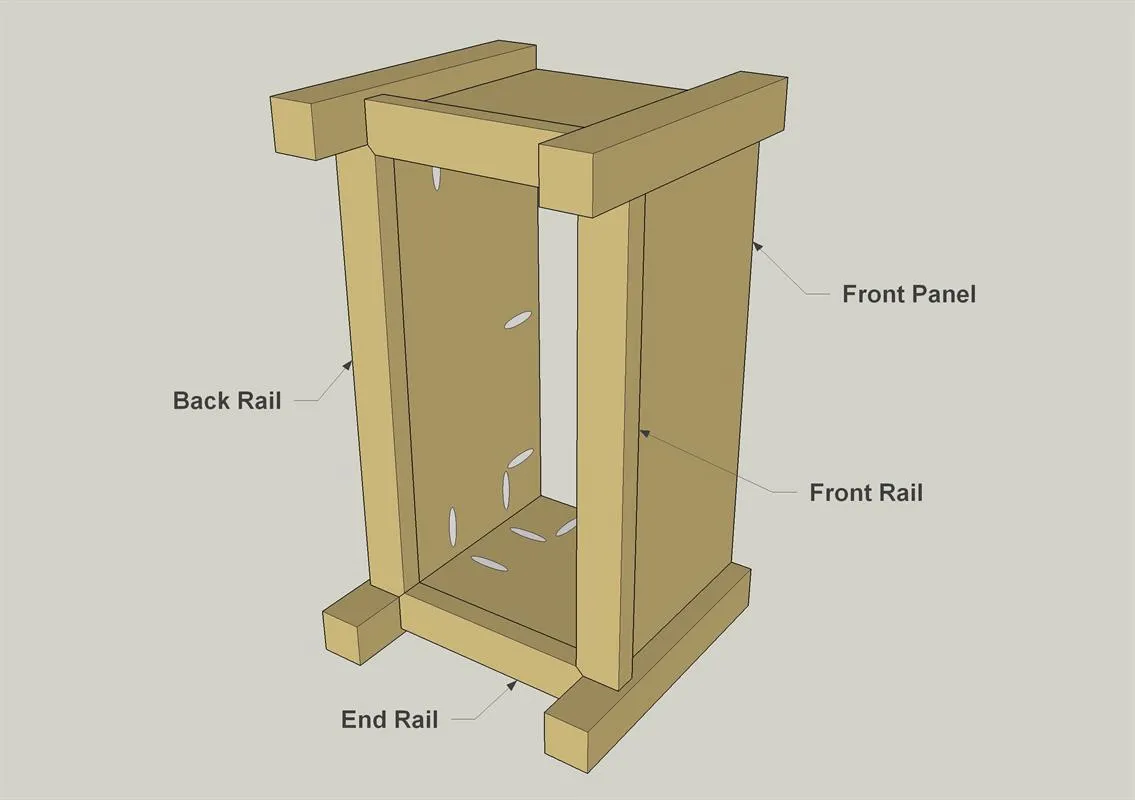
Glue and clamp the Front and Back Rails in place, as shown. To position them, make sure that thee cut-off corners meet with the cut-off corners on the End Rails.
9Add a Pair of Stiles
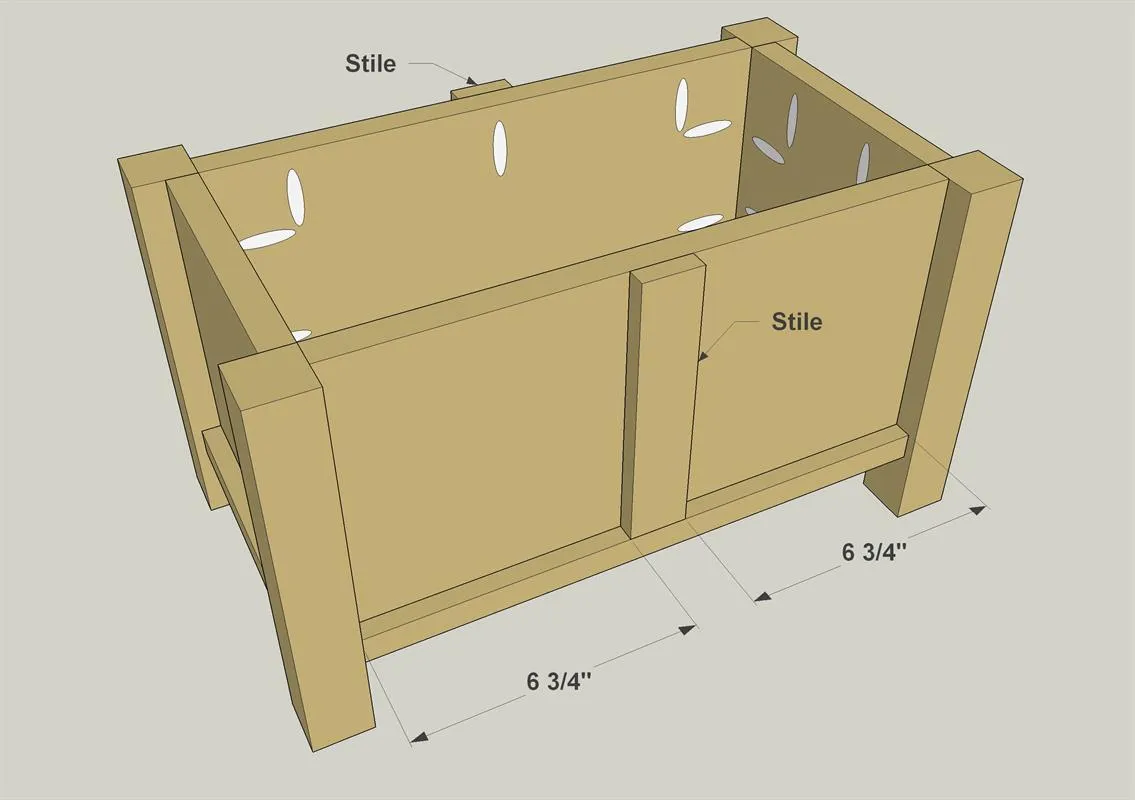
Cut two Stiles to length from a 1/2" x 2" board (1 1/2" actual width), as shown in the cutting diagram. Then glue and clamp the Stiles to the Front and Back Panels where shown.
10Make the Top
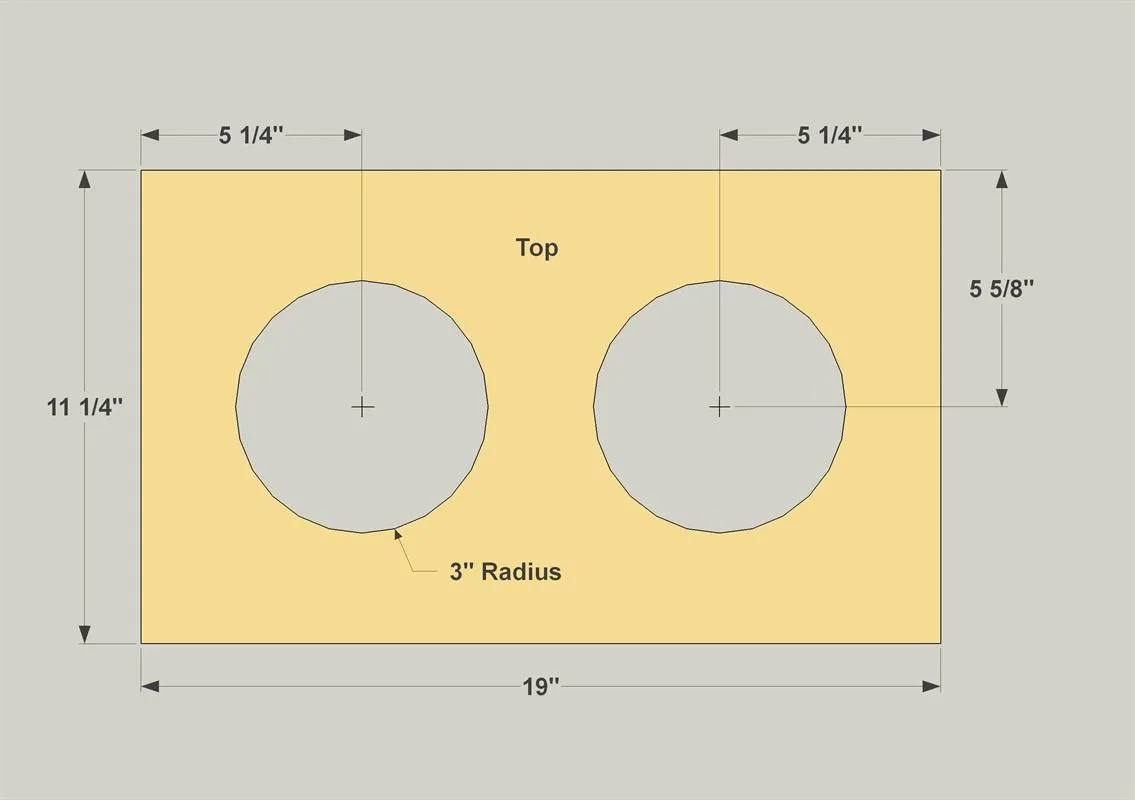
- Cut the Top to length from a 1x12 board, as shown in the cut diagram. Use a compass to lay out holes for the bowls, as shown. Make sure to get your bowls first so that you can verify their size. After laying out the holes, drill a 3/8" starter hole just inside each marked circle. Use a jigsaw to cut out the circles. Just insert the blade in the starter hole, and then cut.
- Sand the openings smooth when you are done.
11Attach the Top
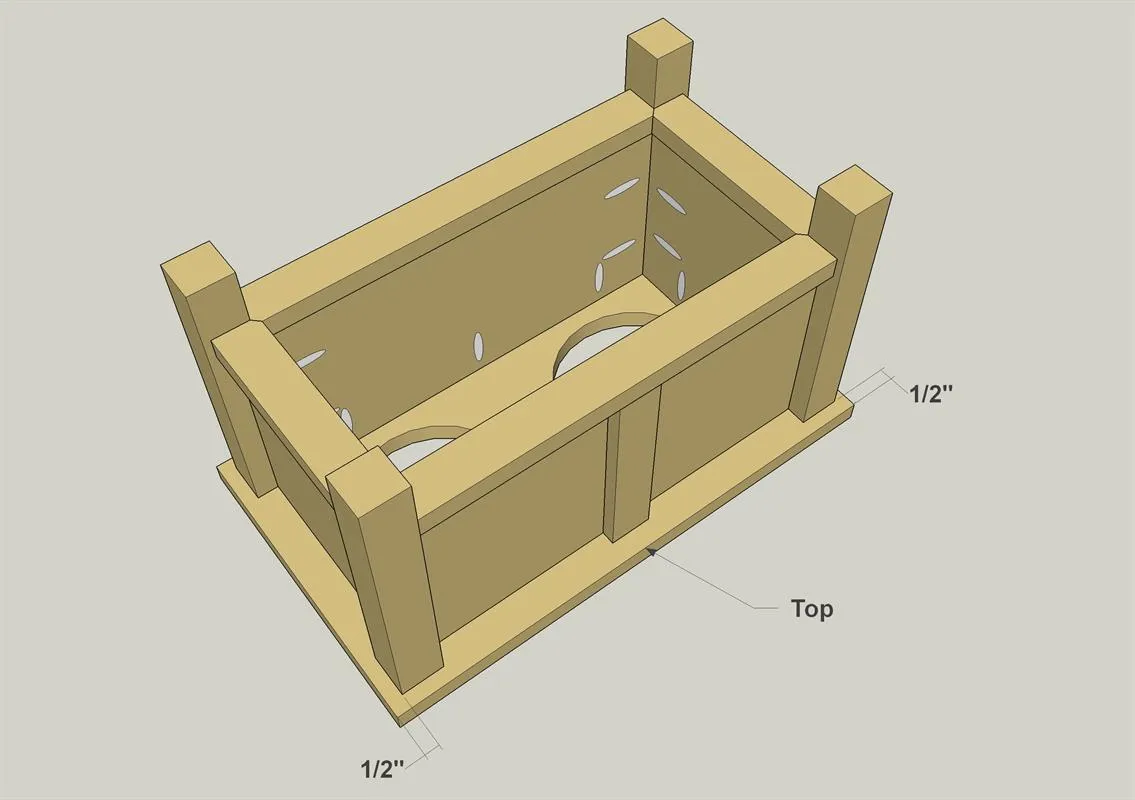
Attach the Top to the base using 1 1/4" pocket hole screws, as shown. Then you can sand the project, and apply the paint or stain of your choice.
Tags
- Pets
- Beginner
Reviews & builds
No reviews yet
Sign in to review this plan or share your build.
No reviews yet. Be the first to build this.