 Notch
Notch- Difficulty
- Intermediate
- Time
- 4.3–8 hours
- Cost
- $$
About this build
This pub table looks great, and will fit in your kitchen—or many other places—thanks to its compact size. Plus, the pub table is surprisingly simple to build from just a few boards you can get at any home center. It’s the perfect companion to the Pub Chair plan you’ll find here on BuildSomething.
Tools
Essential
- Drill / Driver
- Miter Saw
- Pocket Hole Jig
- Random Orbit Sander
Optional / nice to have
- Bar / Pipe Clamps
- Combination Square
- Tape Measure
Materials
| Item | Qty |
|---|---|
| Board, 2x2 96" | 2 board |
| Board, 2x2 72" | 2 board |
| Board, 1x4 72" | 2 board |
| Board, 1x6 72" | 3 board |
| 1 1/4" coarse-thread pocket hole screws | 67 each |
| 2 1/2" coarse-thread pocket hole screws | 16 each |
| 1 1/2" flathead wood screws | 16 each |
| Wood glue | 1 each |
Overall cost: $$. Lumber prices vary by region, species, and season, so we give a band rather than a figure we would only be pretending to know.
Cut list
| Part | Qty | T × W × L |
|---|---|---|
| Foot Rails | 4 | 1" × 1" × 29" |
| Legs | 4 | 1" × 1" × 42" |
| Aprons | 4 | 3/4" × 3" × 29" |
| Corner Blocks | 4 | 3/4" × 3" × 4" |
| Top Boards | 6 | 3/4" × 5" × 33" |
What to buy
Buy 9 boards at 8 ft.
1" × 1"
4 boards
3/4" × 5"
3 boards
3/4" × 3"
2 boards
Assumes 8 ft stock, a 1/8" saw kerf, and buying each part at its own width. Change the board size or kerf on the full board plan →
Instructions
1Make the Foot Rails
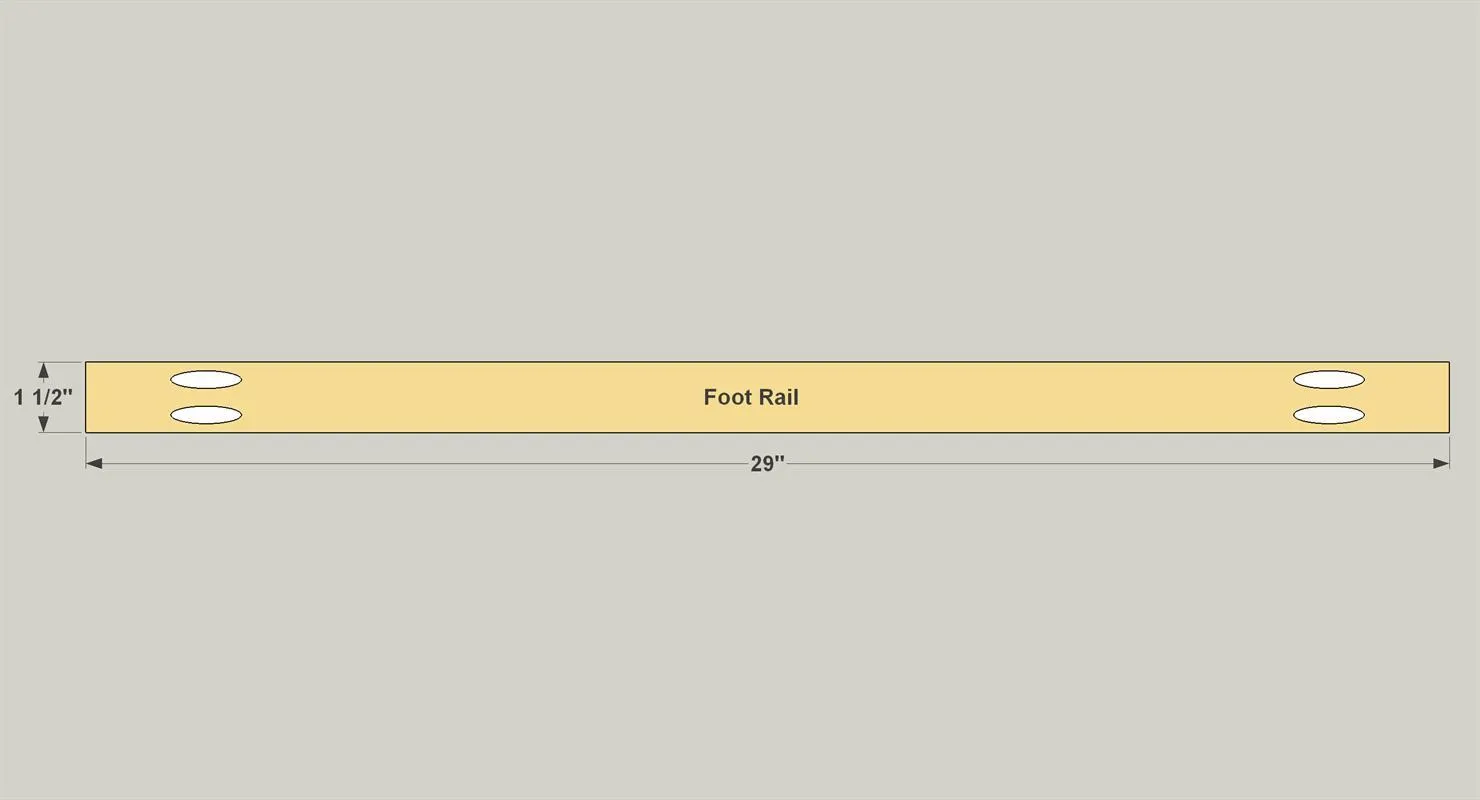
Cut four Foot Rails to size from 2 x 2 boards, as shown in the cutting diagram. Then, with your pocket hole jig set for 1 1/2" material, drill pocket holes in these pieces where shown.
2Cut the Legs to Size
Cut four Legs to size from a 2 x 2 board, as shown in the cutting diagram.
3Make the Aprons
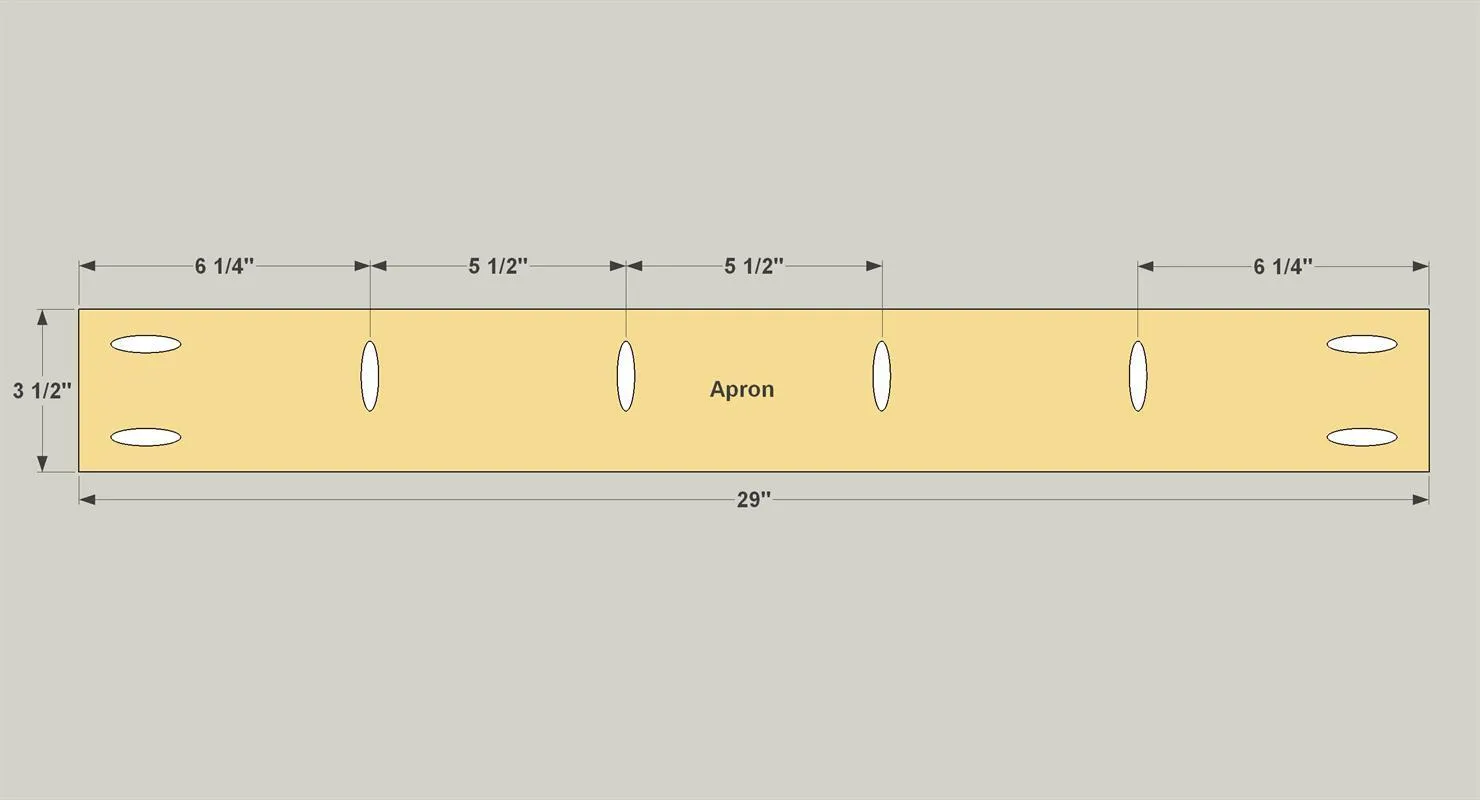
Cut four Aprons to size from 1 x 4 boards, as shown in the cutting diagram. Then, with your pocket hole jig set for 3/4" material, drill pocket holes where shown.
4Start Base Assembly
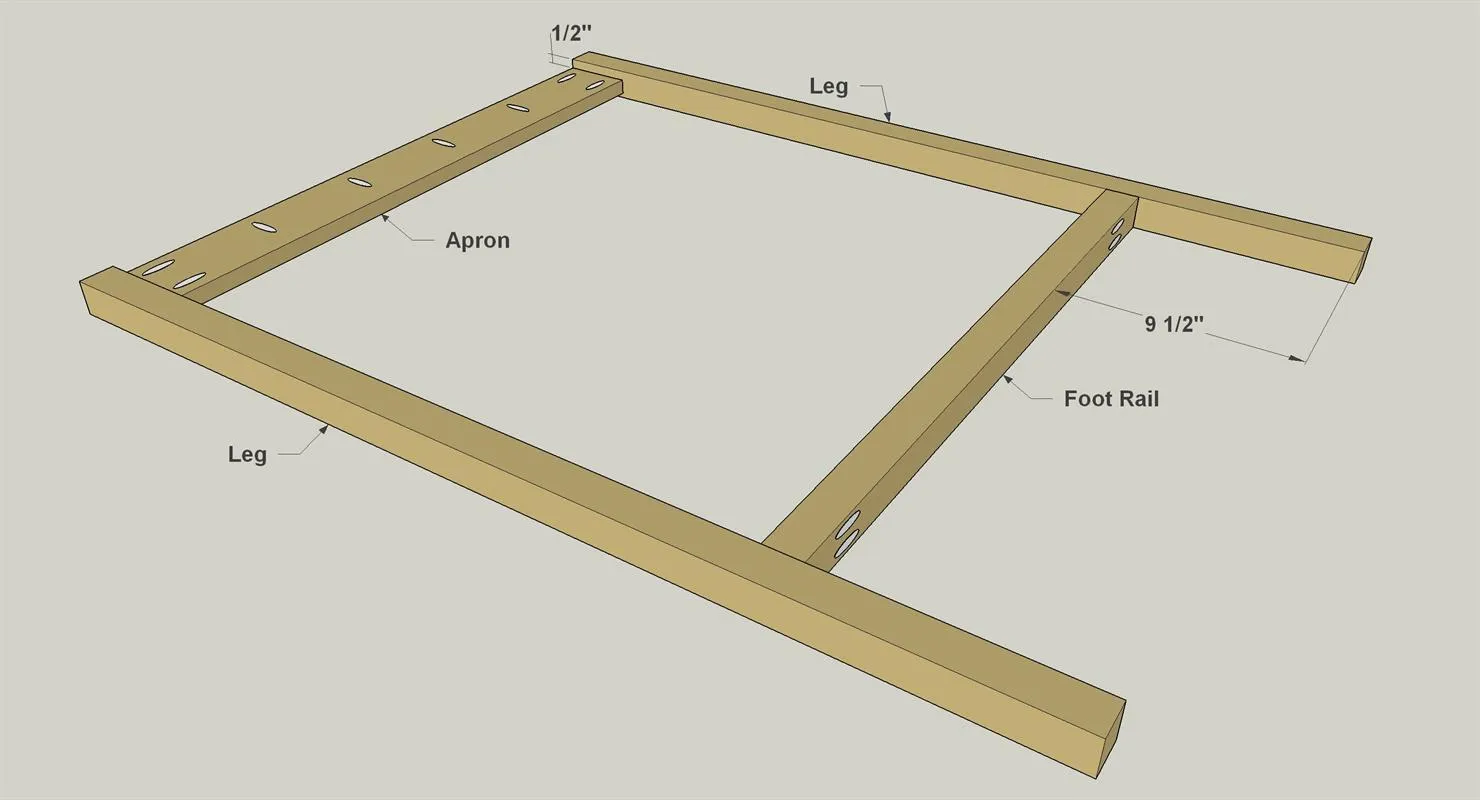
- Begin assembling the table base by creating two assemblies that each consist of two Legs, one Foot Rail, and an Apron.
- Position the Foot Rail between the Legs, as shown, and then attach it using 2 1/2" coarse-thread pocket hole screws.
- Then position the Apron and attach it to the Legs using 1 1/4" coarse-thread pocket hole screws.
- Repeat the process for the other assembly.
5Complete the Base
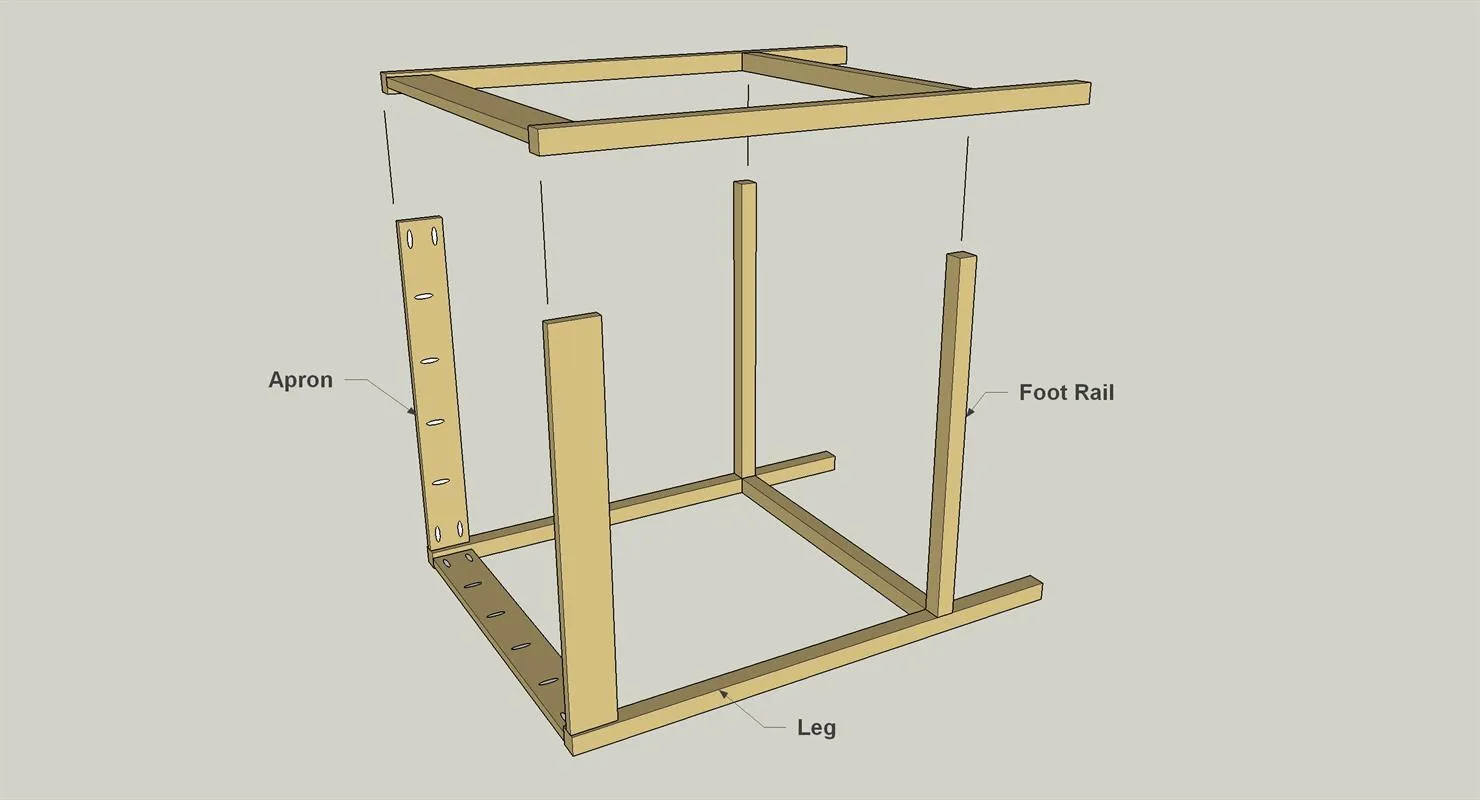
- Now you can bring these two assemblies together to complete the base.
- Attach the final two Foot Rails using 2 1/2" course-thread pocket hole screws.
- Then position the final two Aprons, and attach them to the Legs using 1 1/4" coarse-thread pocket hole screws.
6Make Corner Blocks
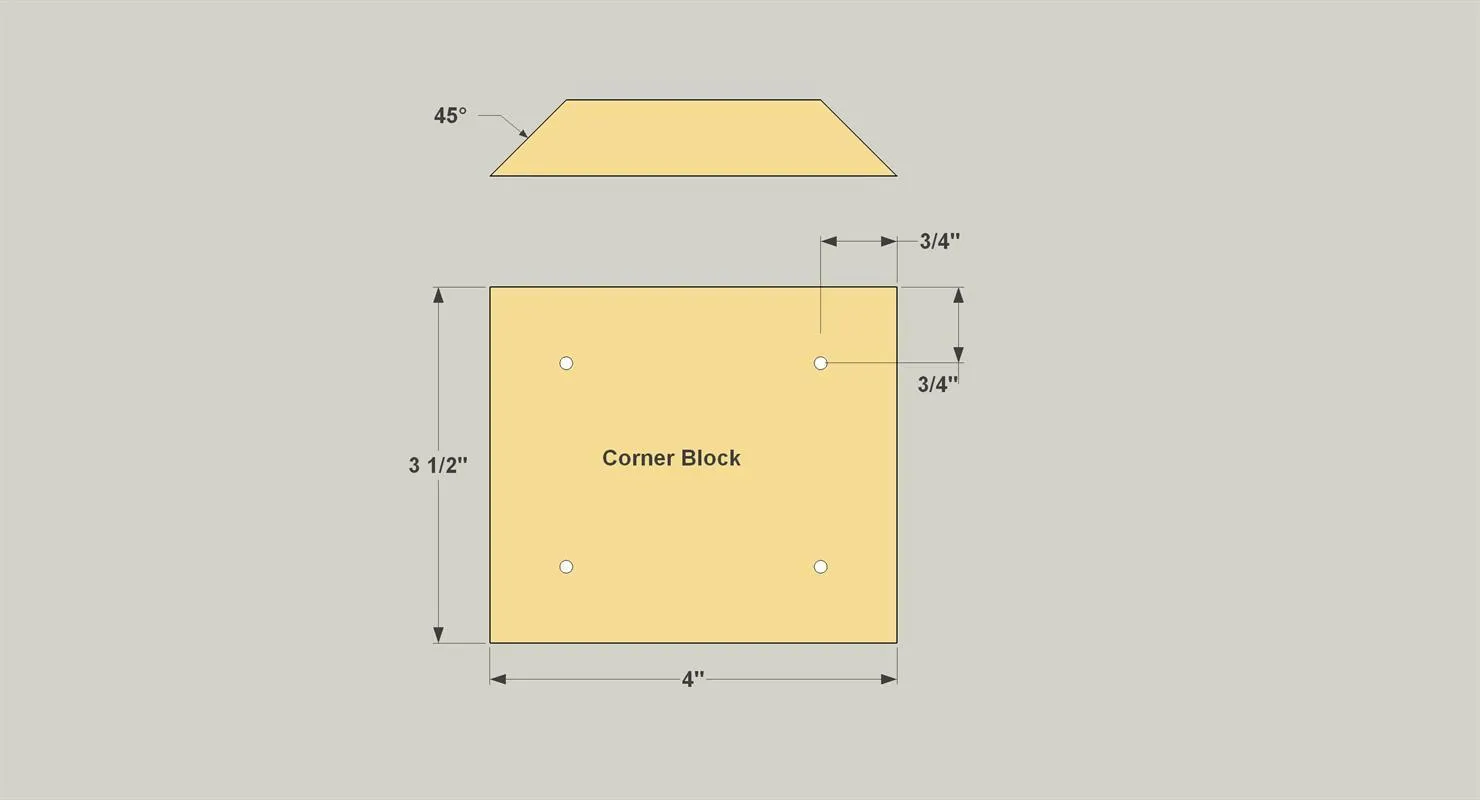
- Cut four Corner Blocks from 1 x 4 board, as shown in the cutting diagram. These will be used to reinforce the table base. Note that both ends of each Corner Block are beveled at 45°.
- Drill four 1/8” pilot holes through each Corner Block where shown.
7Install the Corner Blocks
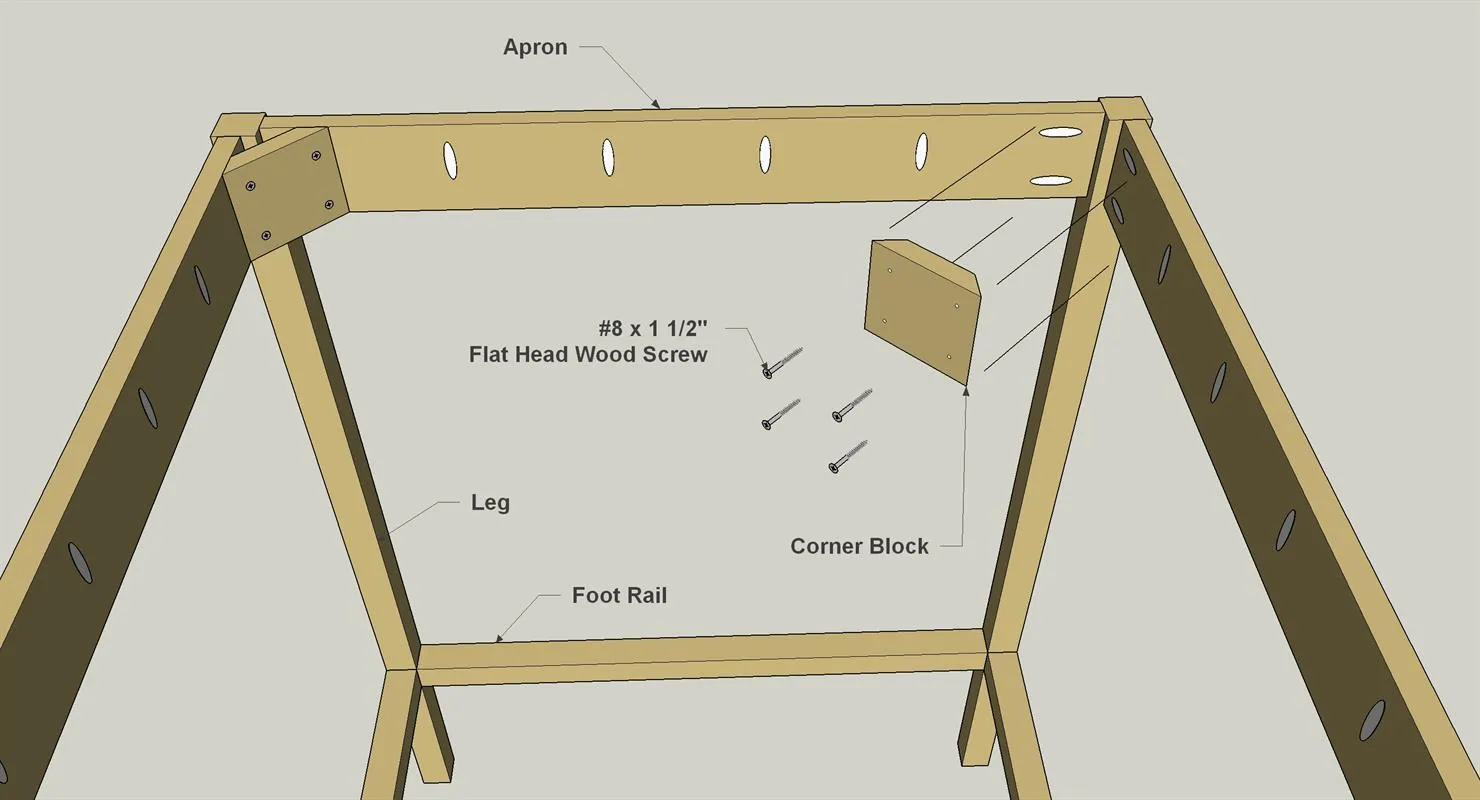
Attach the Corner Blocks to the Base using 1 1/2" flathead wood screws, as shown.
8Make the Top Boards
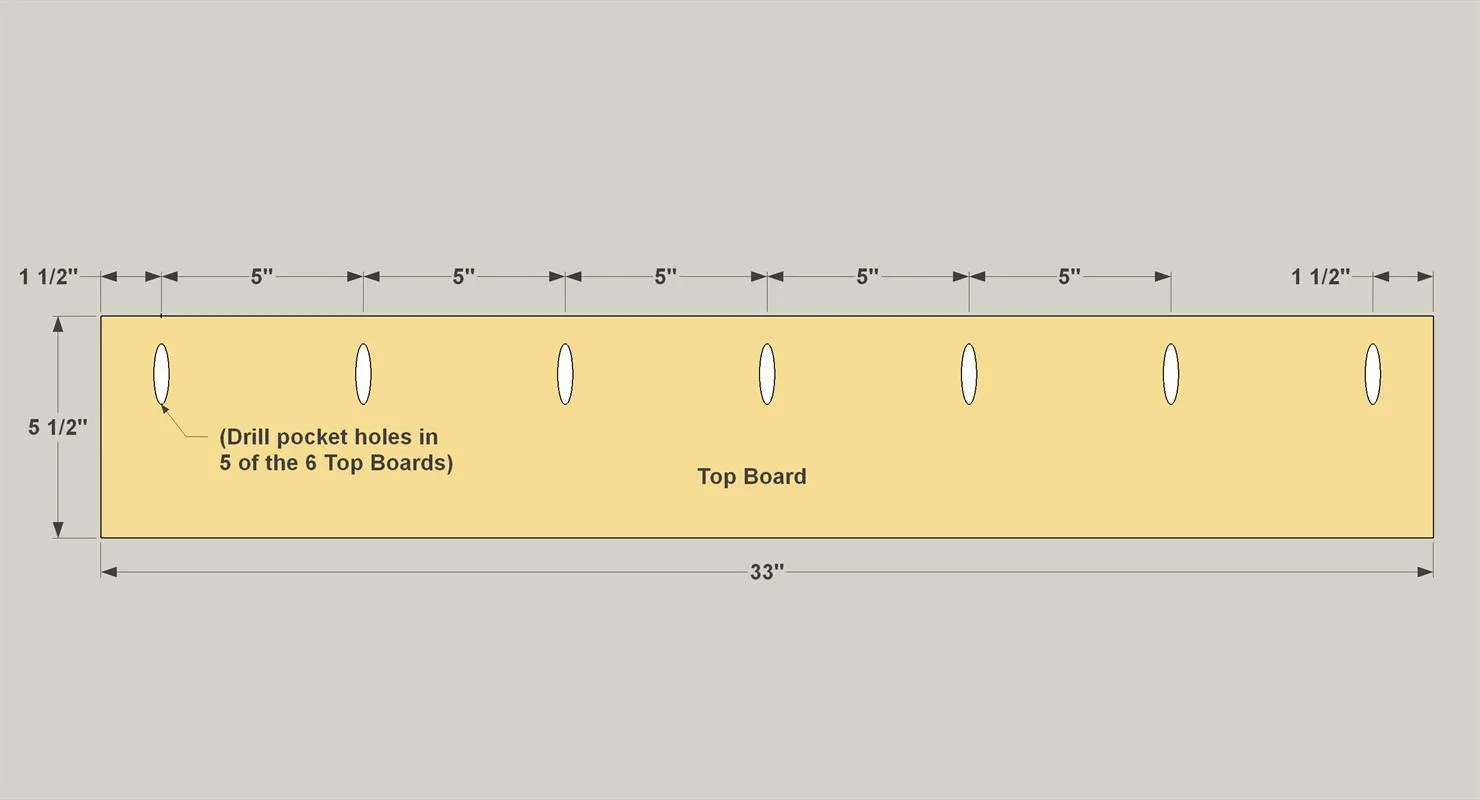
Cut six Top Boards to length from 1 x 6 boards, as shown in the cutting diagram. With your pocket hole jig set for 3/4" material, drill pocket holes in five of the Top Boards, as shown. You don’t need to drill pocket holes in the sixth Top Board.
9Assemble the Top
- Now you can assemble the top.
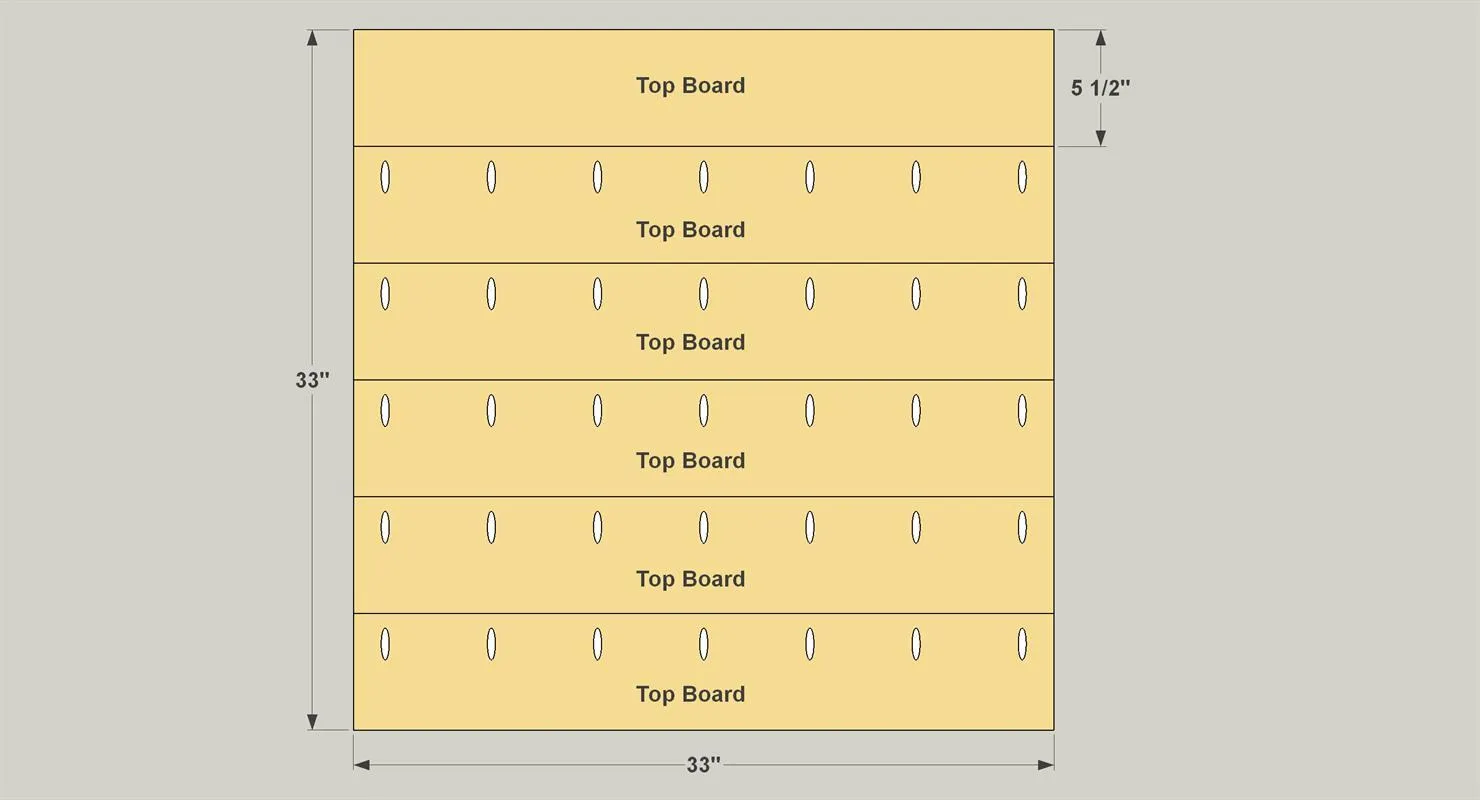
- Lay out he Top Boards as shown, and then attach them together using glue and 1 1/4" coarse-thread pocket hole screws.
- Once the glue is dry, sand the top smooth.
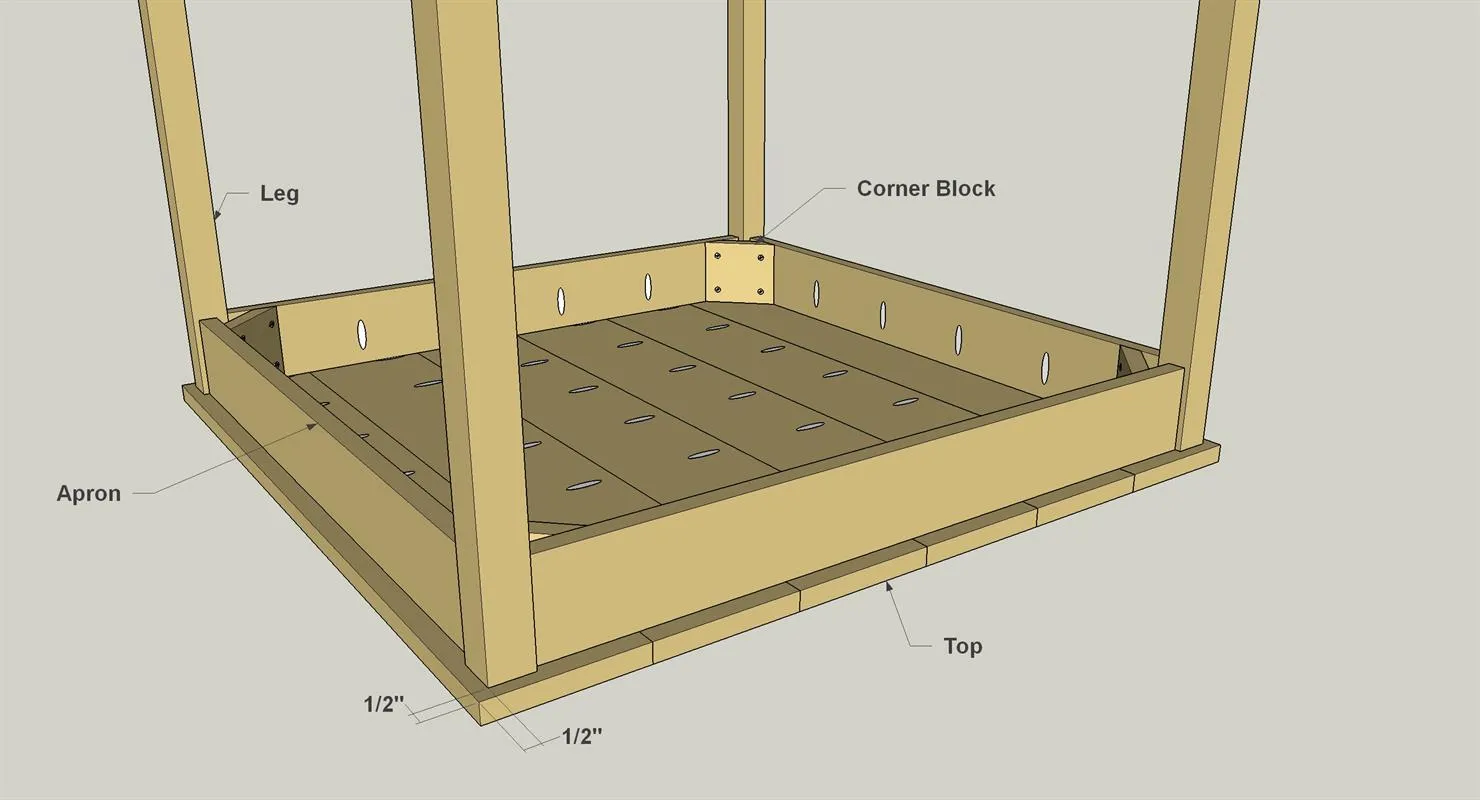
10Attach the Top to the Base
With the top complete, you can attach it to the table base, as shown, using 1 1/4" coarse-thread pocket hole screws. Make sure that the top overhangs the table base equally on all sides.
11Sand and Finish
Once your table is assembled, you can give everything a final sanding. Then apply the stain or finish of your choice.
Tags
- Kitchen
- Intermediate
Reviews & builds
No reviews yet
Sign in to review this plan or share your build.
No reviews yet. Be the first to build this.