 Notch
Notch- Difficulty
- Intermediate
- Time
- 2.8–5.3 hours
- Cost
- $$$
About this build
This privacy planter was designed to look good and hold some plants that will grow taller and smell good. Plus the large cap is a great place to set your drink.
Tools
Essential
- Drill / Driver
- Impact Driver
- Jigsaw
- Miter Saw
- Pocket Hole Jig
- Random Orbit Sander
Optional / nice to have
- Tape Measure
Materials
| Item | Qty |
|---|---|
| Cedar Deck Board, 5/4 x 6 120" | 1 board |
| Cedar Deck Board, 5/4 x 6 96" | 11 board |
| Cedar Board, 2x4 96" | 1 board |
| Cedar Post, 4x4 96" | 2 board |
| 2-1/2" Blue-Kote Pocket Screws | 116 each |
| 1-1/2" Blue-Kote Pocket Screws | 20 each |
| 1-5/8" Exterior Wood Screws | 16 each |
| 2" Exterior Wood Screws | 4 each |
Overall cost: $$$. Lumber prices vary by region, species, and season, so we give a band rather than a figure we would only be pretending to know.
Cut list
| Part | Qty | T × W × L |
|---|---|---|
| Cap | 2 | 1 1/4" × 6" × 57" |
| Front/Back | 14 | 1 1/4" × 6" × 46 1/2" |
| Side | 14 | 1 1/4" × 6" × 11 1/2" |
| Planter Base | 8 | 1 1/4" × 6" × 14" |
| Cap Sides | 2 | 1 1/4" × 6" × 22" |
| Posts | 4 | 4" × 4" × 40 1/4" |
| Supports | 2 | 2" × 4" × 46 1/2" |
What to buy
Buy 15 boards at 8 ft.
4" × 4"
2 boards
2" × 4"
1 board
1 1/4" × 6"
12 boards
Assumes 8 ft stock, a 1/8" saw kerf, and buying each part at its own width. Change the board size or kerf on the full board plan →
Instructions
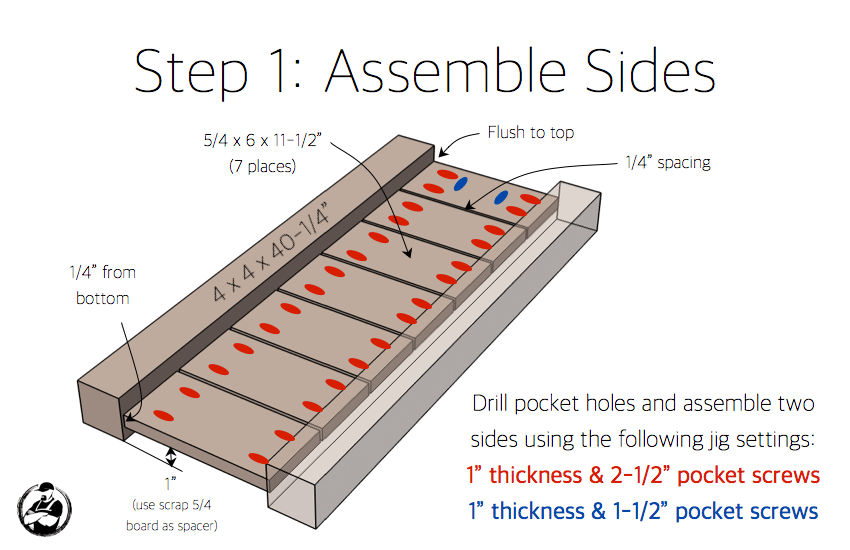
1Assemble Sides
- Assemble the sides by drilling pocket holes and attaching using 2-1/2" pocket screws.
- Drill extra pocket holes at the top for 1-1/2" long pocket screws. These will be used to attach the cap. Note: You can download a printable PDF of the plans in the "extras" tab
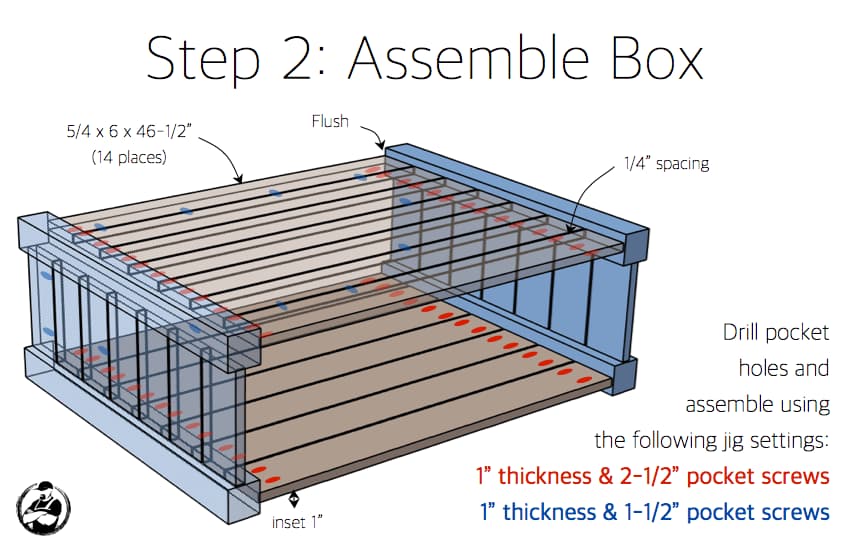
2Assemble Box
- Assemble the box by drilling pocket holes and attaching using 2-1/2" blue-kote pocket screws.
- Drill extra pocket holes at the top for 1-1/2" long pocket screws. These will be used to attach the cap.
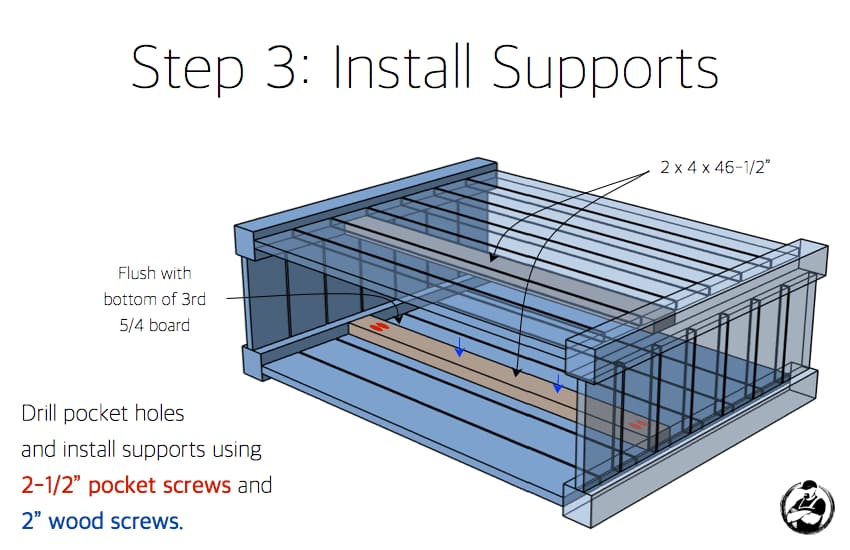
3Install Supports
Install the supports by first drilling pocket holes in each end and attaching using 2-1/2" blue-kote pocket screws and 2" exterior wood screws.
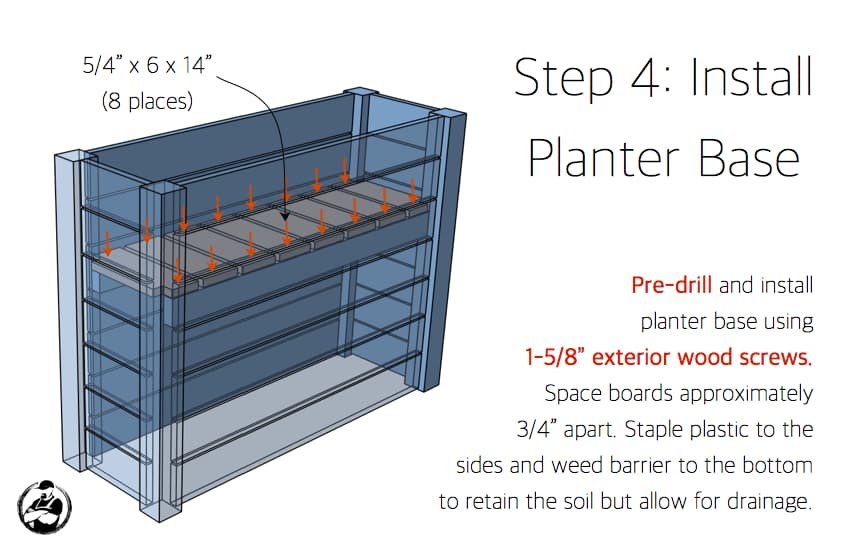
4Install Planter Base
Pre-drill and install planter base using 1-5/8” exterior wood screws. Space boards approximately 3/4” apart. (Spacing is just to allow for drainage and not crucial) Staple plastic to the sides, then overlap weed barrier and staple it to the bottom to retain the soil but allow for drainage.
5Assemble Cap
Drill pocket holes and assemble the cap using 1-1/2” blue-kote pocket screws.
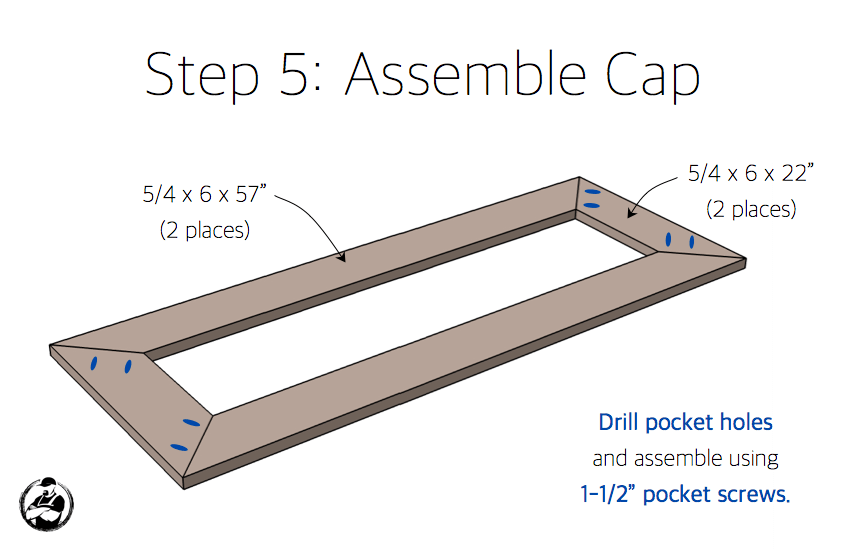
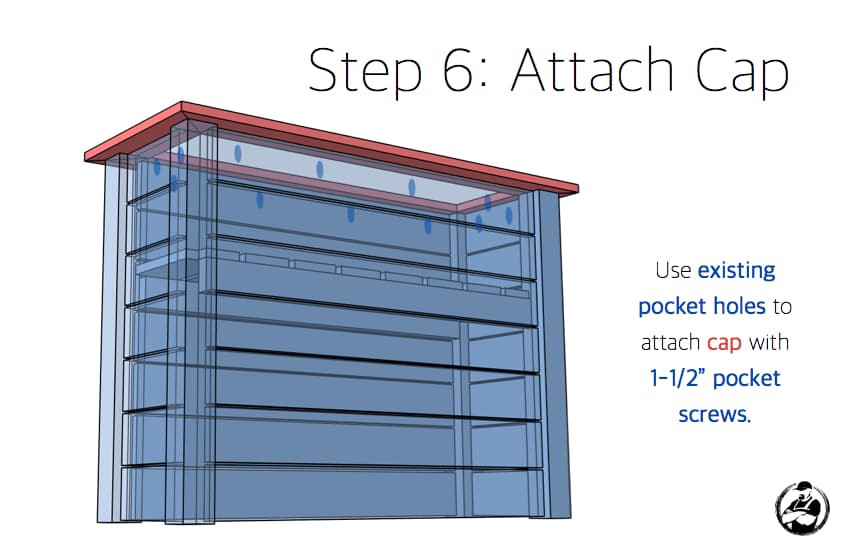
6Attach the Cap
Use existing pocket holes to attach cap with 1-1/2” blue-kote pocket screws.
Tags
- Outdoor Living
- Intermediate
Reviews & builds
No reviews yet
Sign in to review this plan or share your build.
No reviews yet. Be the first to build this.