Notch
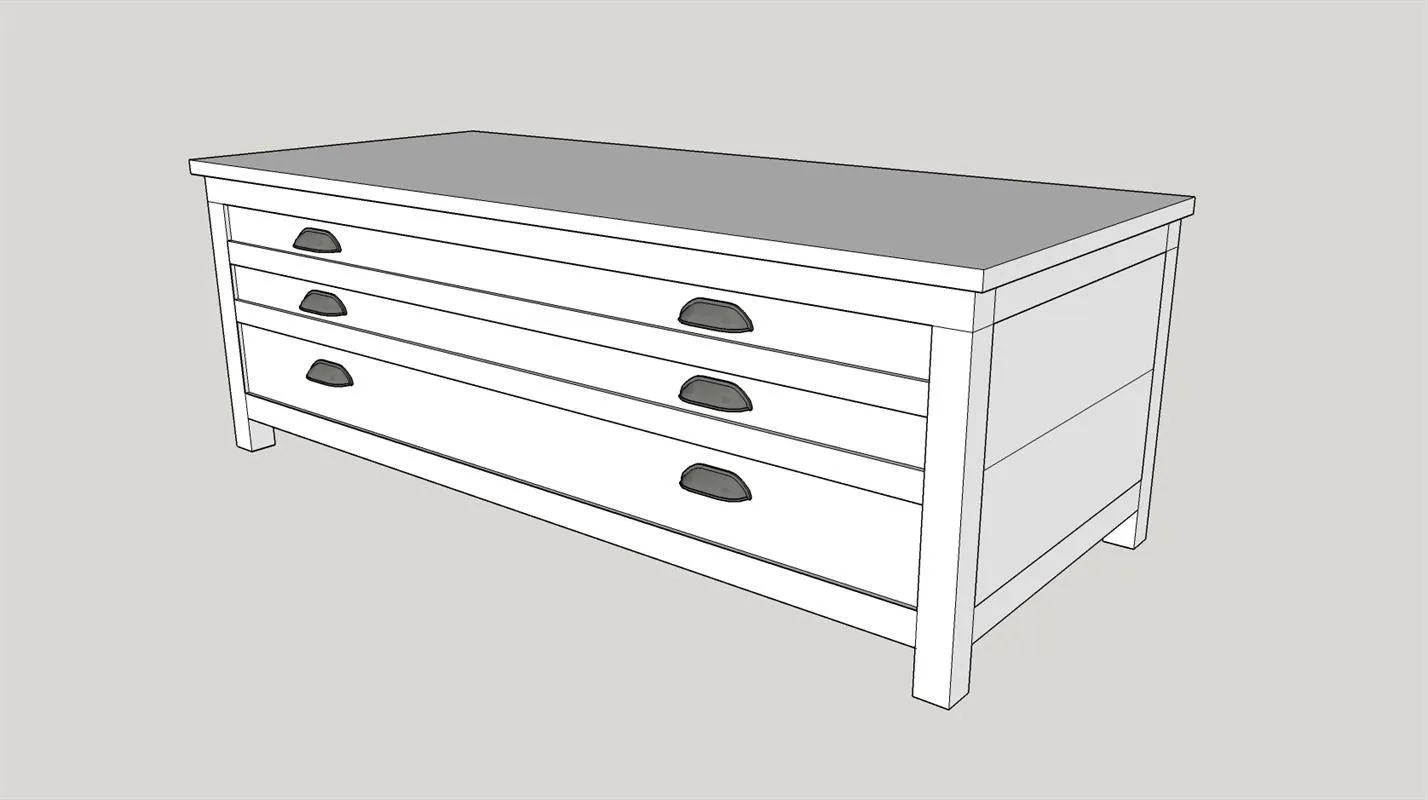
NotchPrintmaker’s Coffee Table | RH Inspired
Step-by-step build — 9 steps. Also available as a print sheet.
1Front & Back Frames
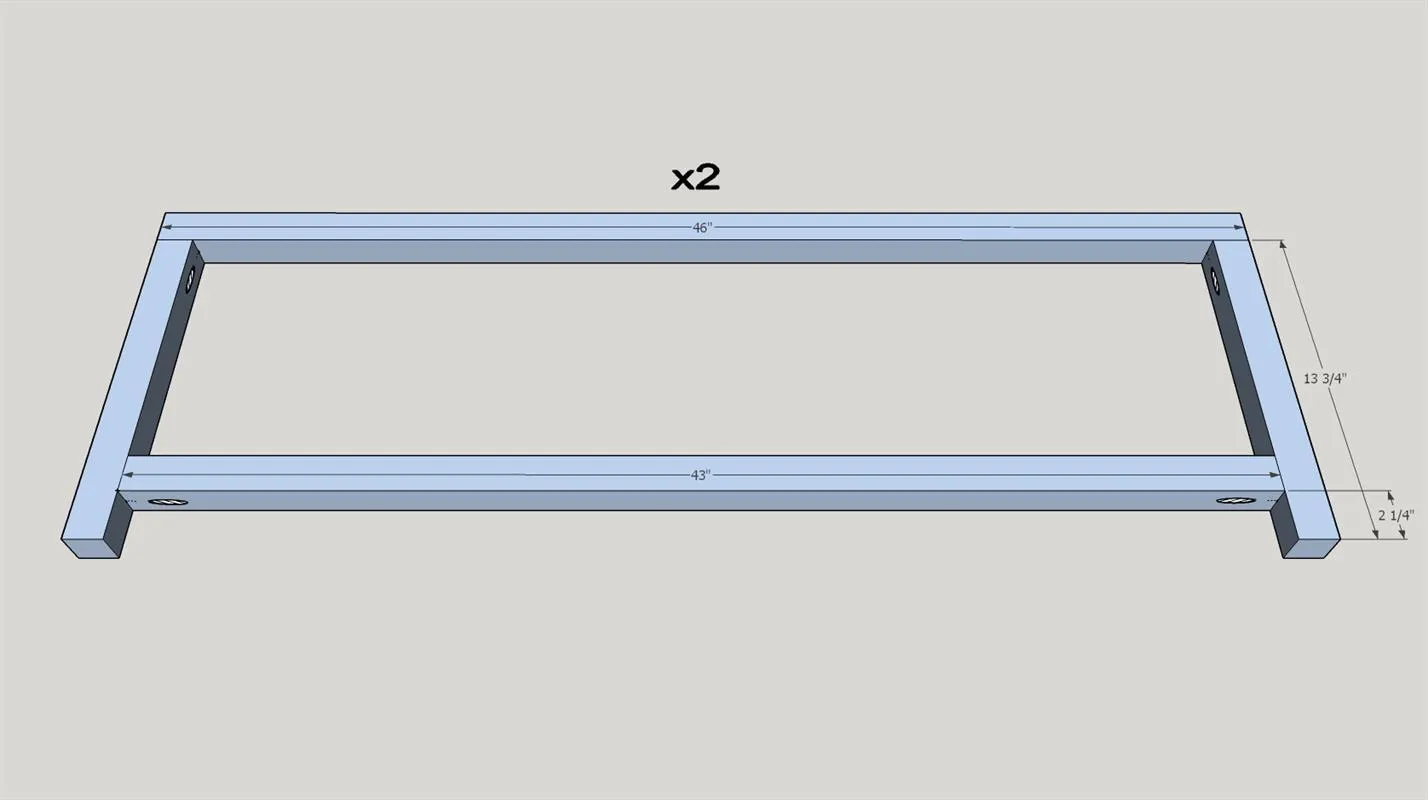
Create two of these frames, one for the front and one for the back. Secure with wood glue and 2 1/2" pocket hole screws where indicated.
2Sides
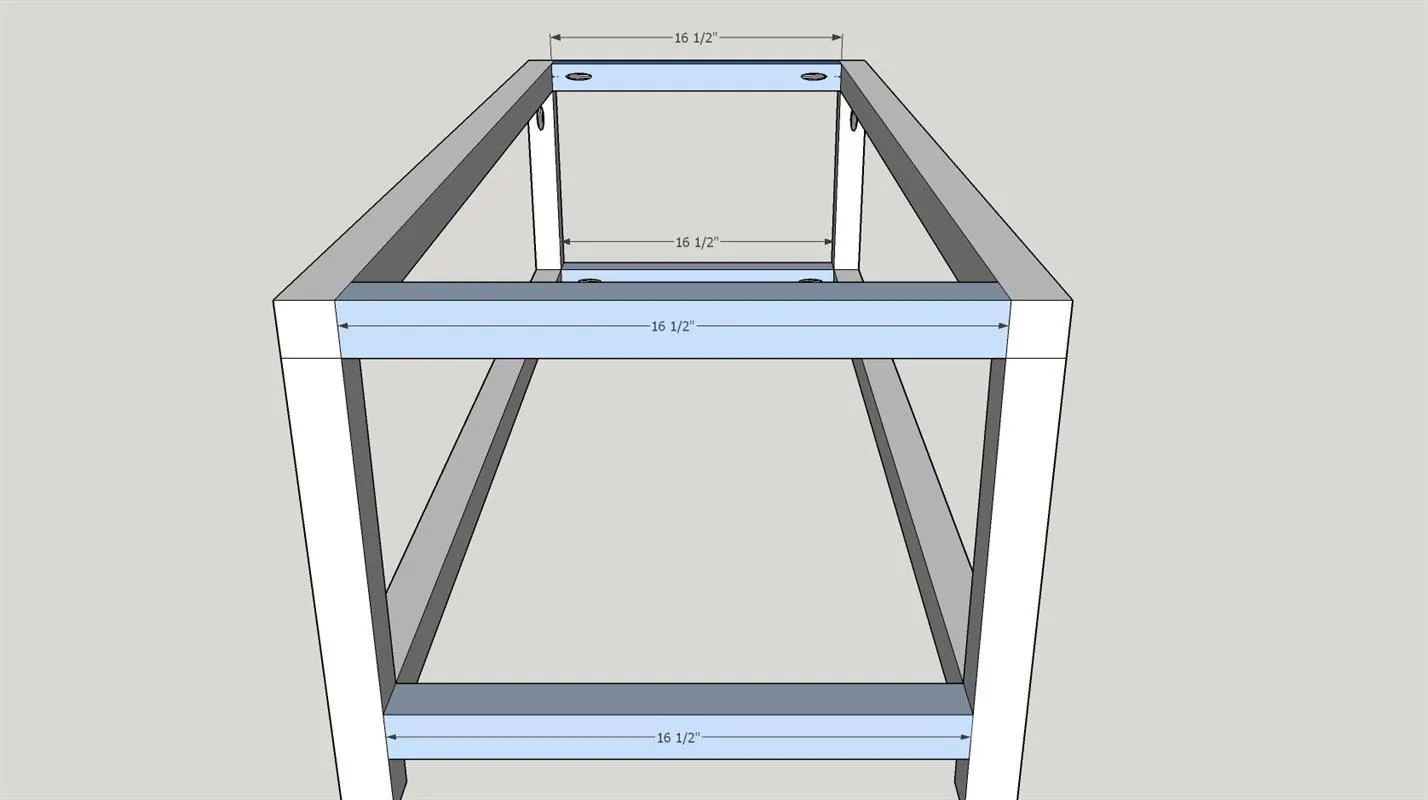
Attach the front and back ends together with the 1 1/2" x 1 1/2" x 16.5" pieces using wood glue and 2 1/2" pocket hole screws as indicated.
3Bottom/Base
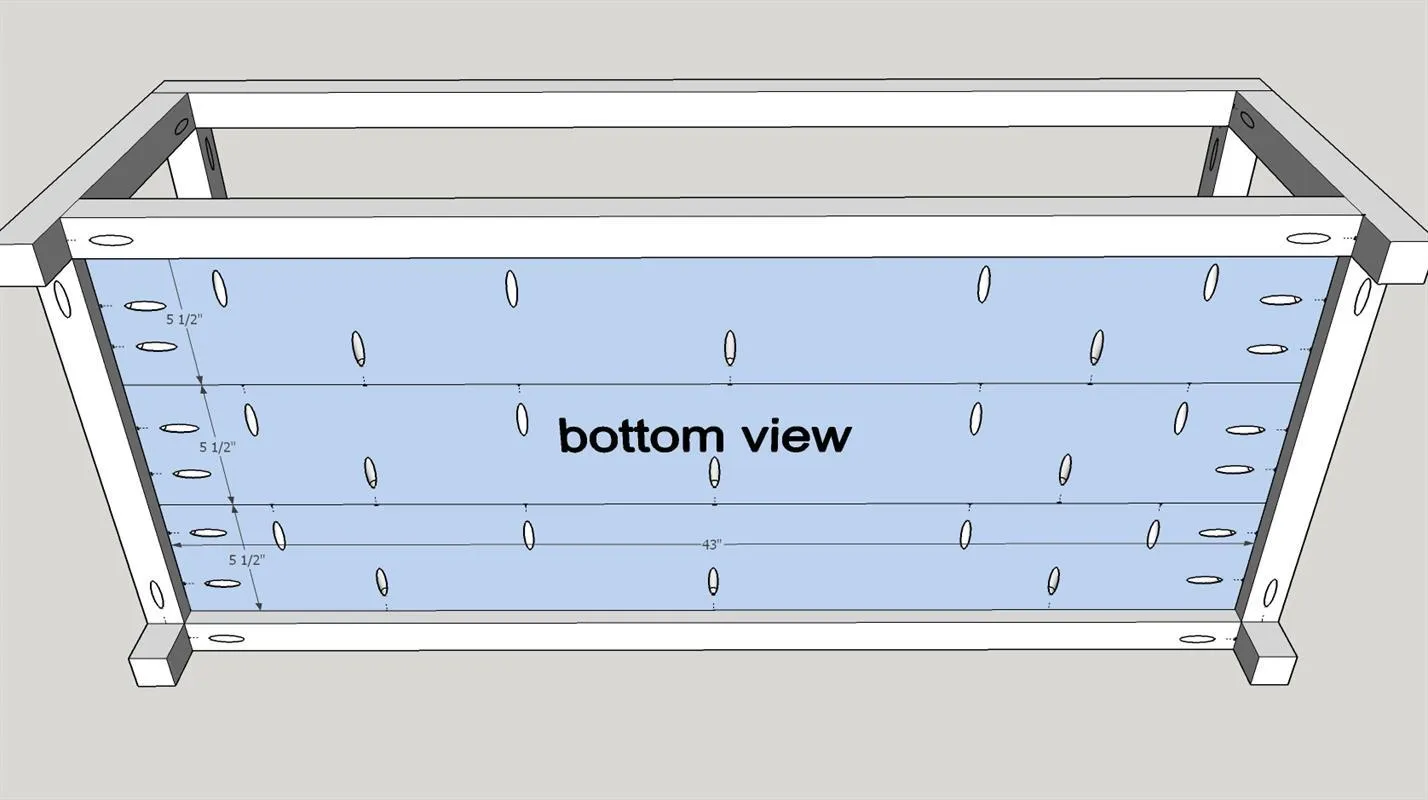
- Drill pocket holes in the locations indicated on the diagram. Dry fit the three boards into the base to ensure they are the right size.
- Remove, then glue and clamp the three boards together while you connect them with 1 1/4" pocket hole screws.
- Insert into the base of the frame, and attach with 1 1/4" pocket hole screws.
4Side Panels
- Insert the 3/4" x 5" x 16.5" boards (2 on each side) inside the end frame, but flush with the outside of the frame.
- Attach with wood glue and 1 1/4" pocket screws. Complete this on both sides of the frame.
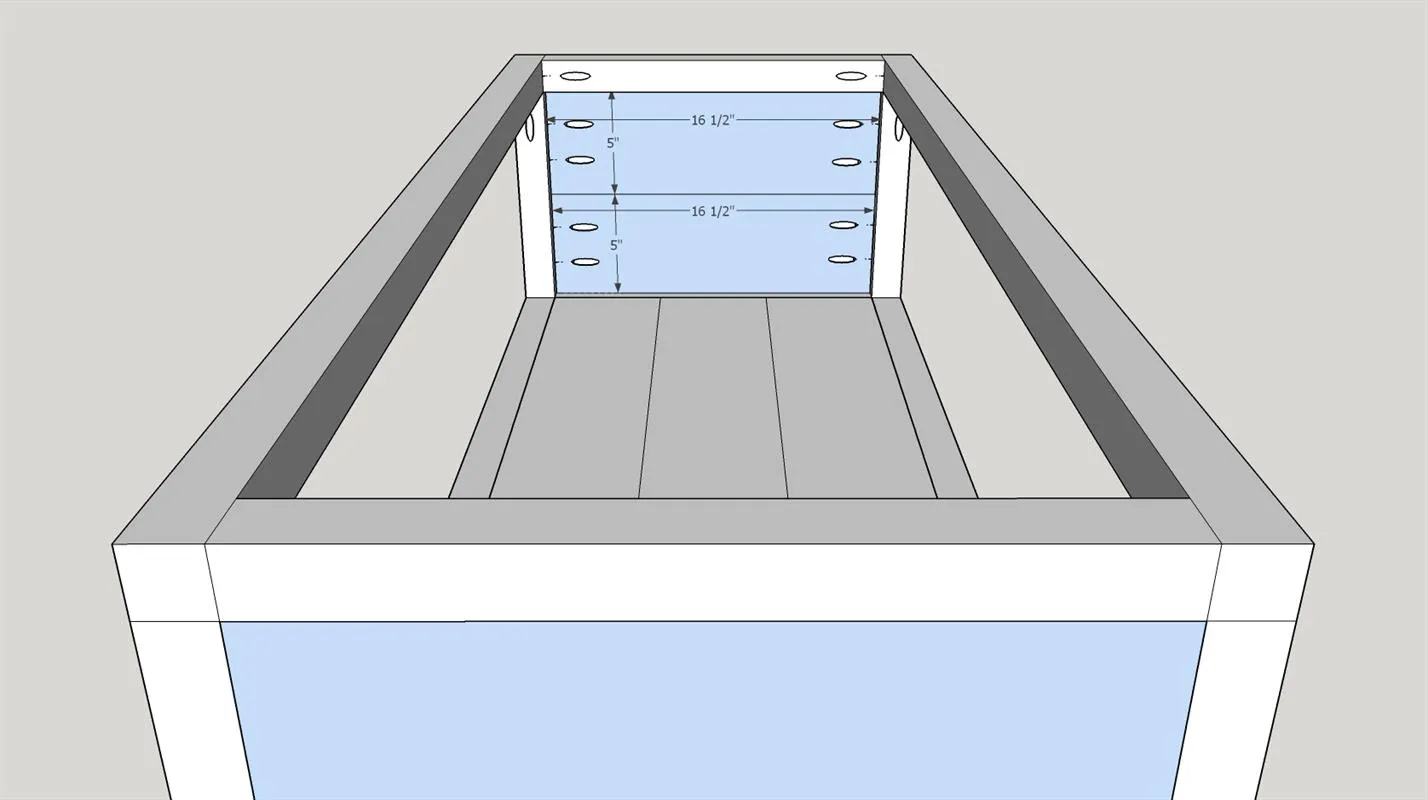
5Back Panels
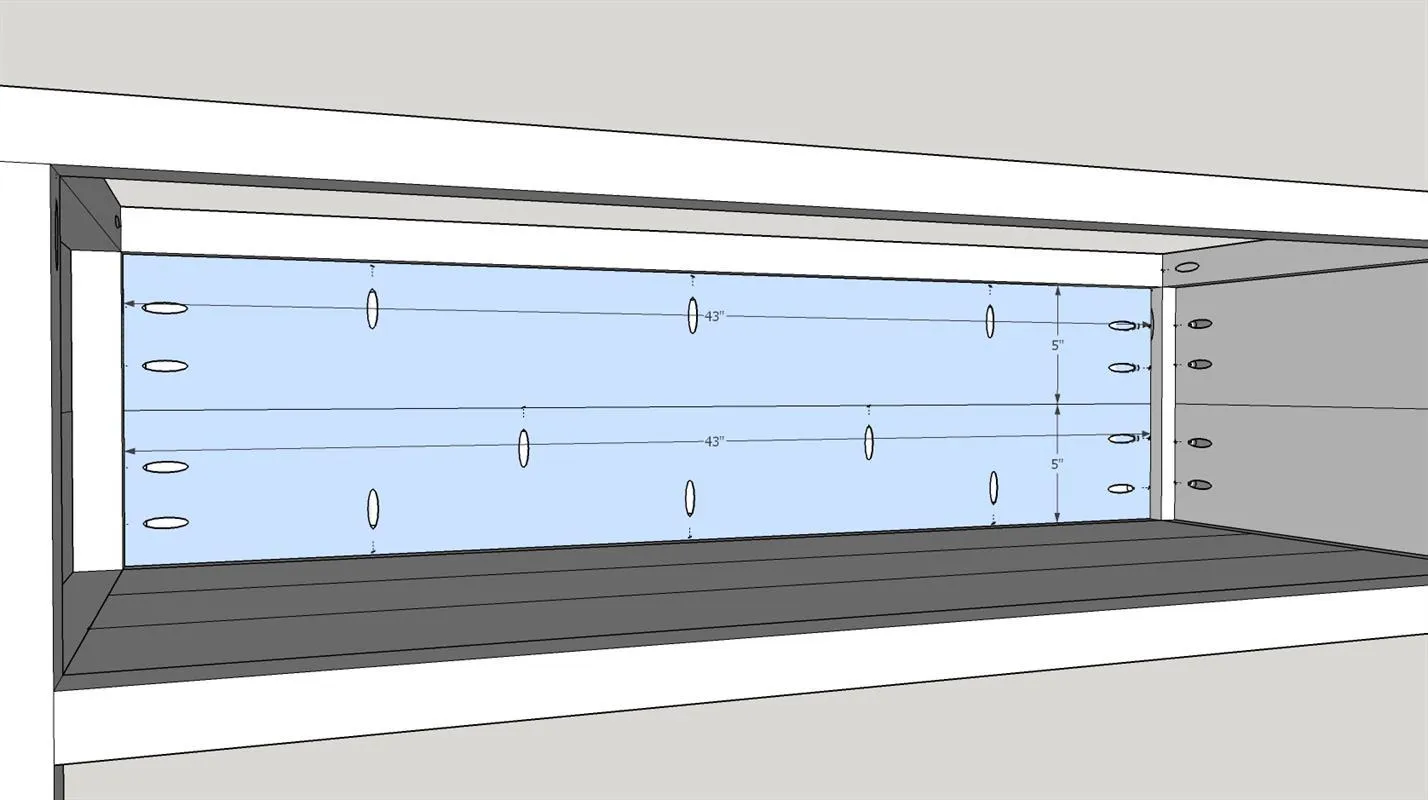
Insert the 3/4" x 5" x 43" boards inside the end frame, but flush with the outside of the frame. Attach with wood glue and 1 1/4" pocket screws.
6Front Boards
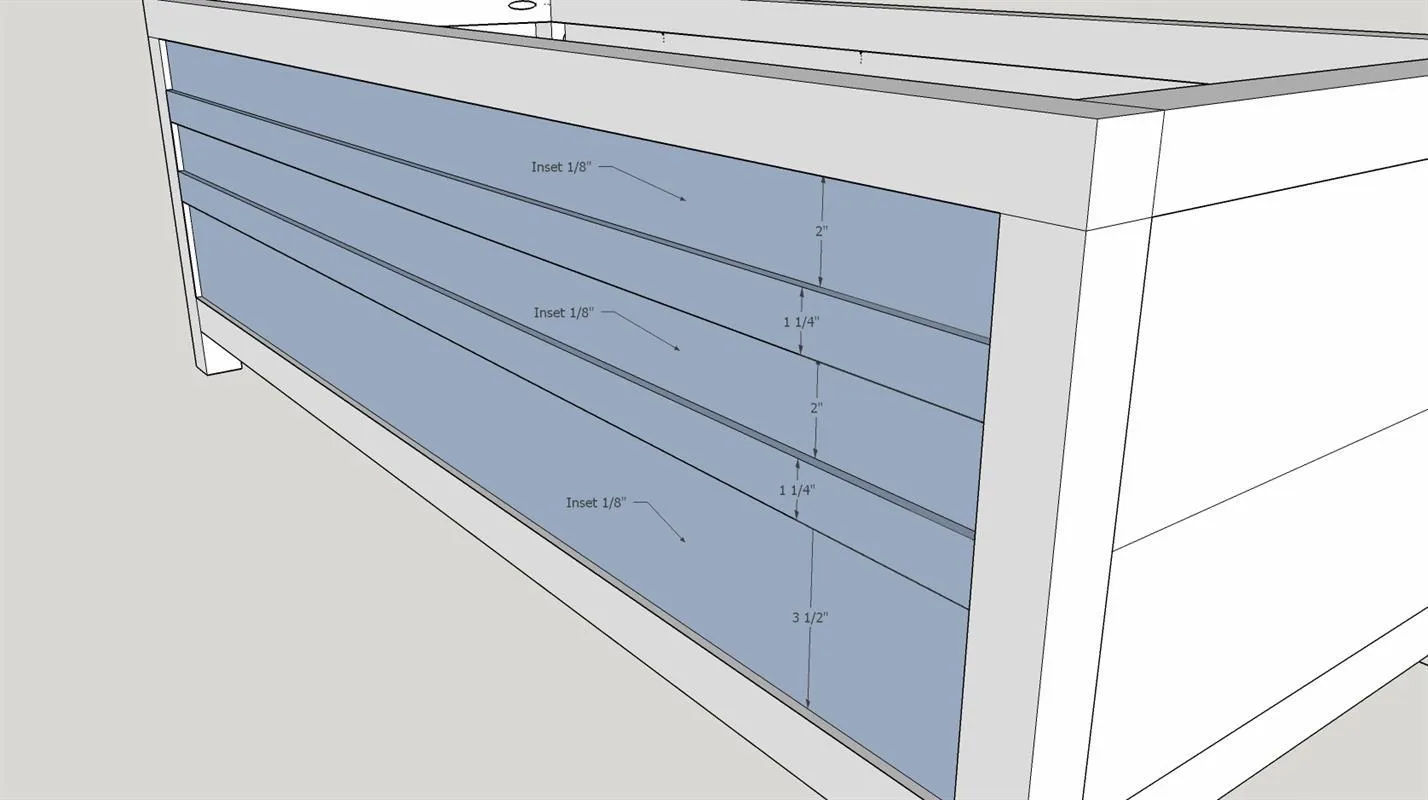
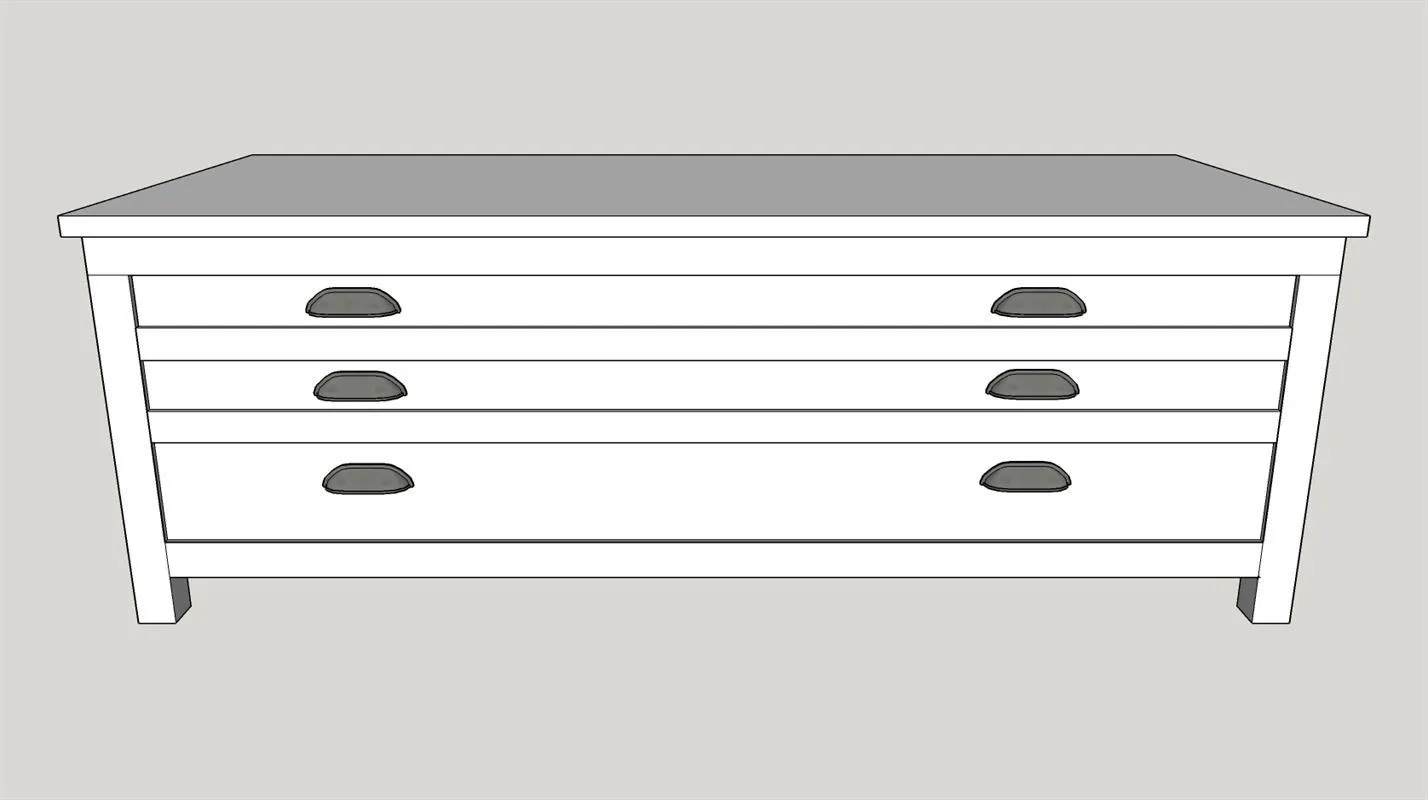
You can't see it in this diagram, however, you'll need two pocket holes at the end of each board for the front. The pieces between the faux drawers will use 2 1/2" pocket hole screws. The faux drawers will use 1 1/4" pocket hole screws. Attach as shown on the diagram, making sure that you inset the faux drawers at least 1/8" to give the appearance that they can actually move.
7Top
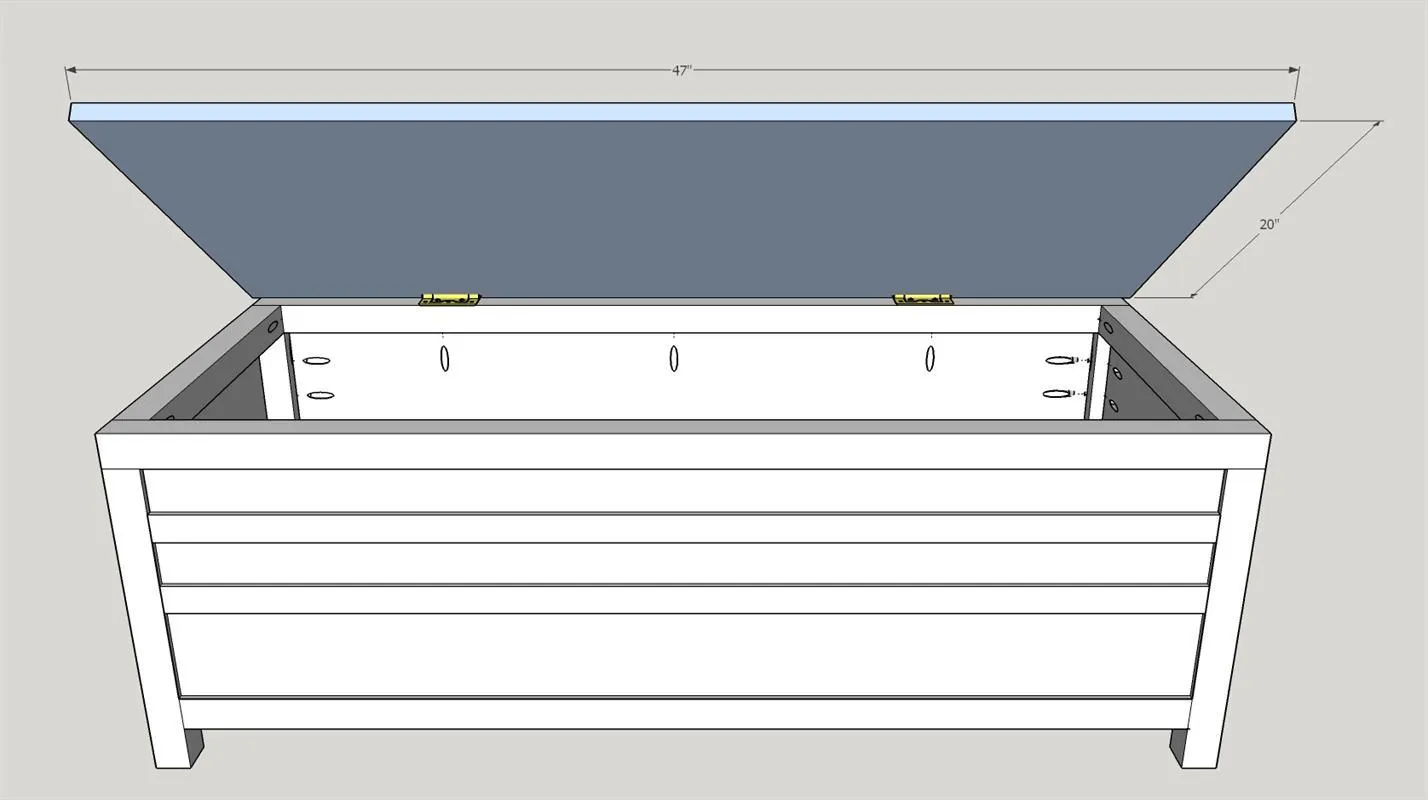
Center the top on the base. Find a helper to hold the top while you attach the Butt-Type Non-Mortise Hinges.
8Handles
- Mark locations for handles, approximately 14" from the edge of the coffee table.
- Mark the hole locations required for the handles (using the handles you purchase as a guide - all will be a little different).
- Drill 5/8" holes and attach handles.
9Sand, Condition, Stain & Seal
Sand all parts of the coffee table. If you want an even finish with the stain, make sure you sand well. We wanted a more vintage look so we didn't sand as carefully so that the stain would be absorbed more in some areas and less in others. We also used a dead flat varnish to seal and waterproof the piece.