 Notch
NotchPorch Bed Swing
Step-by-step build — 13 steps. Also available as a print sheet.
1Step 1
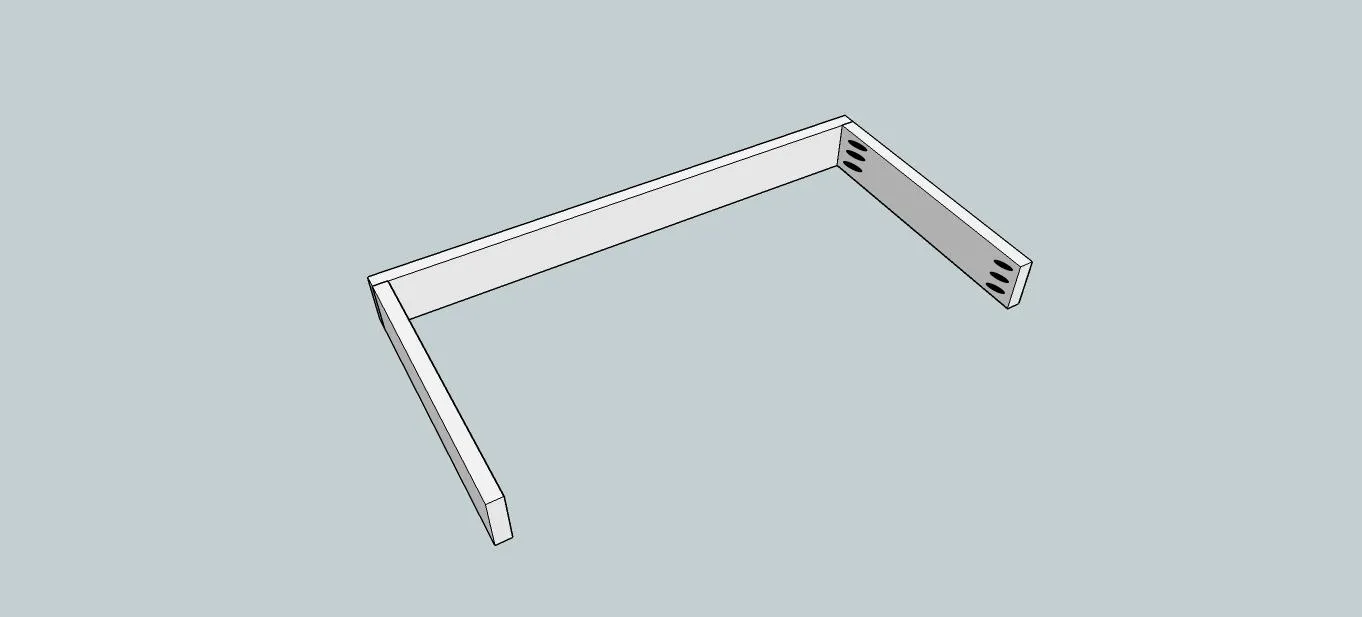
Attach side frame (2- 1 1/2" x 5 1/2" x 28 1/4") to the front frame (1- 1 1/2" x 5 1/2" x 56") using 1 1/2" pocket holes 2 1/2" Kreg blue kote screws (blue coated screws are for outdoor use). Make sure and use generous wood glue on all joints, and for this project make sure it is an outdoor wood glue so your swing will last through the elements! Note: Black ovals in the photos are to represent your pocket holes.
2Step 2
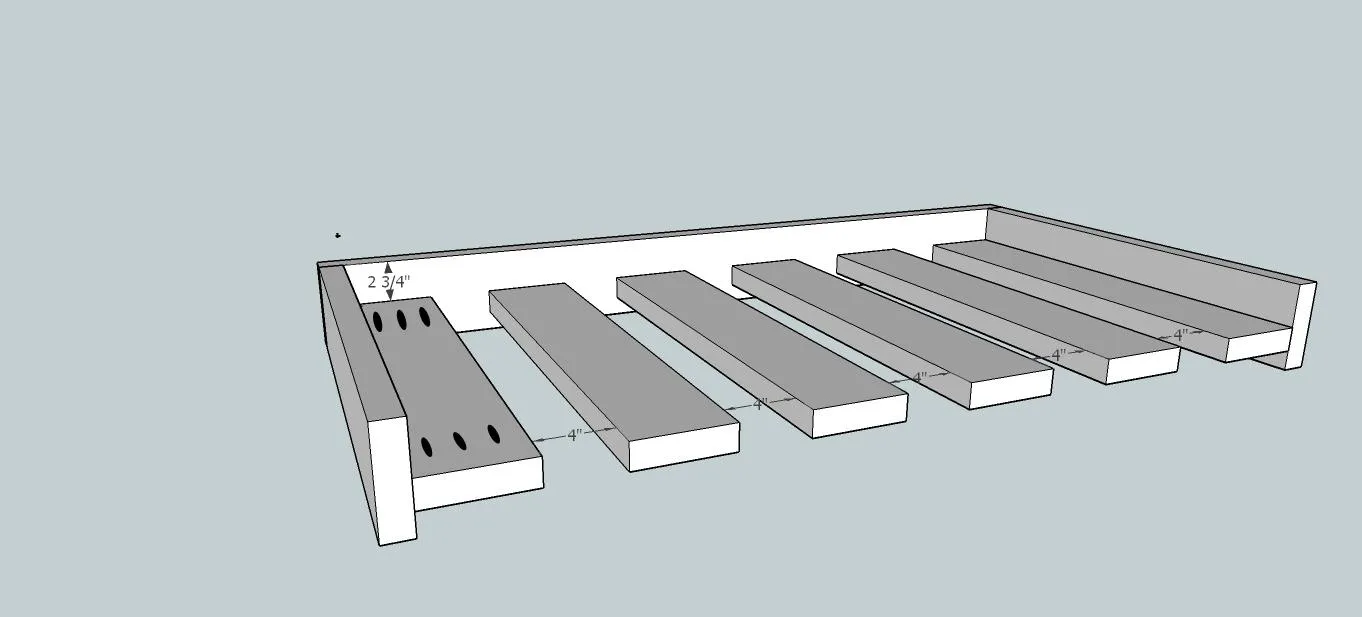
Attach the mattress supports (6-1 1/2" x 5 1/2" x 28 1/4") making sure to leave a 4" gap in between boards and still using 1 1/2" pocket holes and 2 1/2" screws. The pocket holes can be facing up (the mattress will cover them), or down (the bottom of the swing), the boards need to be set down 2 3/4" from the top of the front and back frame. Note: all boards should have pocket holes as illustrated on the first board.
3Step 3
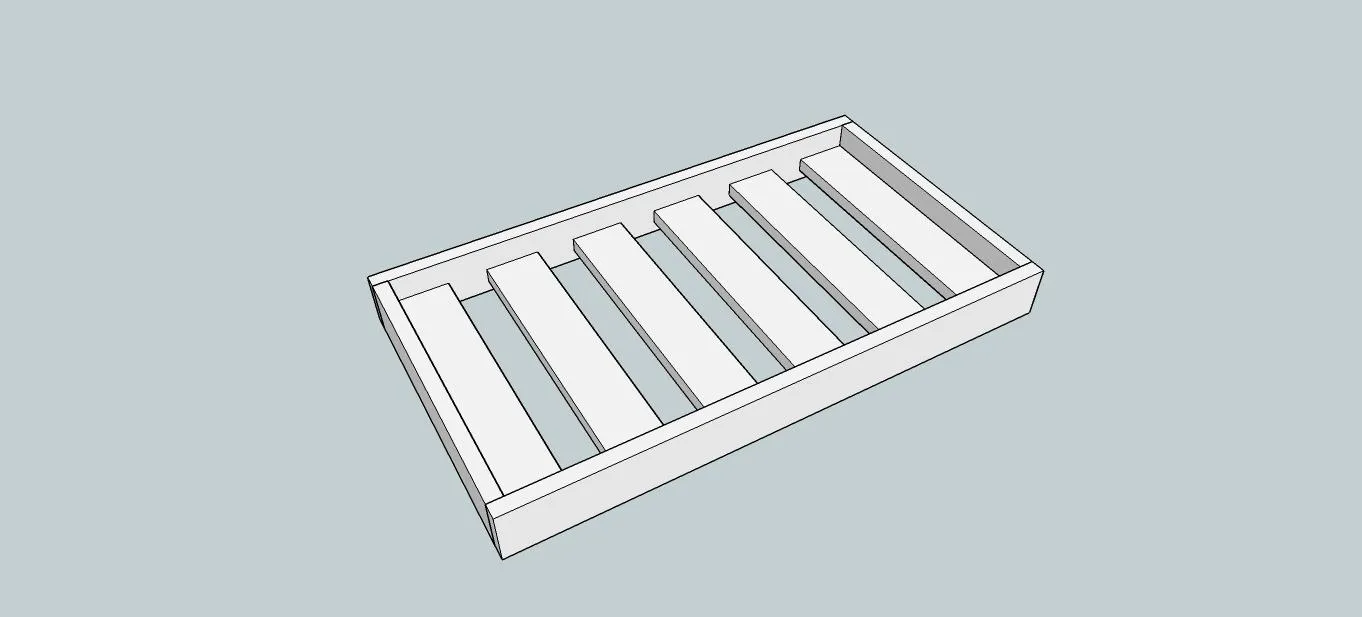
Attach back frame (1- 1 1/2" x 5 1/2" x 56").
4Step 4
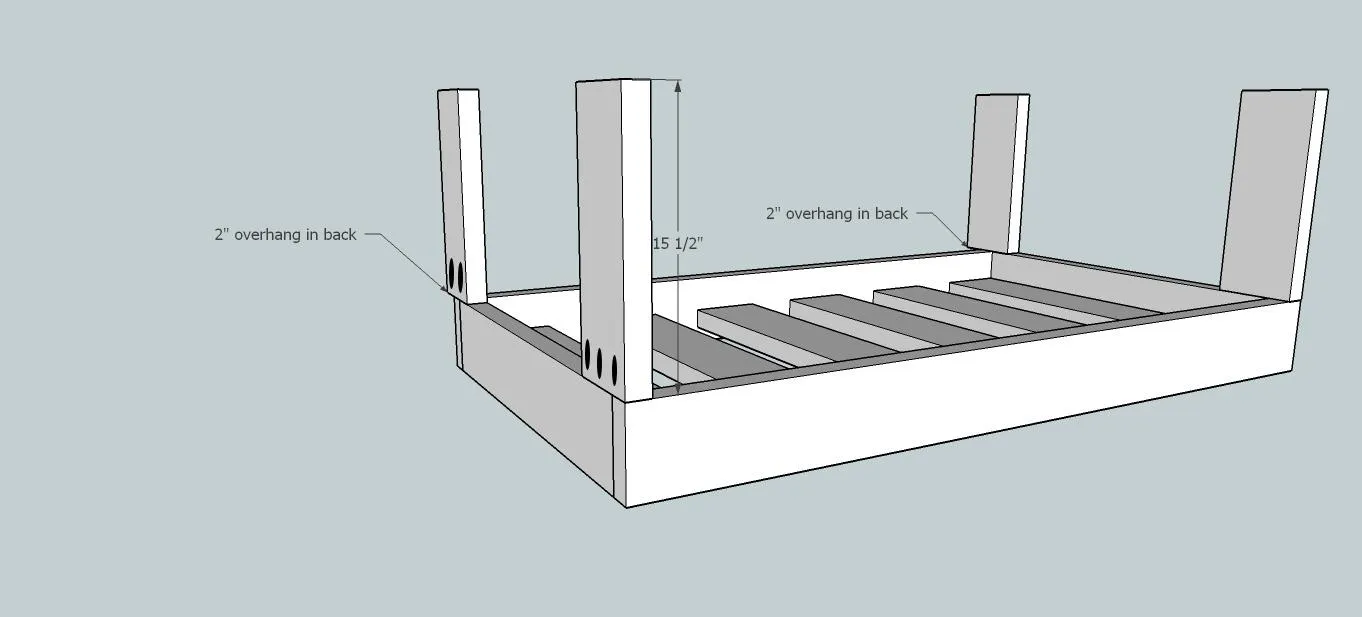
Attach the 4 side rails (1 1/2" x 5 1/2" x 15.5"). The back two side rails will have an overhang of 2" which is why it only shows 2 pocket holes on the back board. Front side rails will have three pocket holes and are flush to the front. Still using 1 1/2" pocket holes and 2 1/2" screws.
5Step 5
Attach the 4 side rails (1 1/2" x 5 1/2" x 21") to the 15.5" side rails that were just attached in the previous step. Using a 1/2" countersink drill bit predrill holes into each 21" side rail and attach with 2 1/2" kreg screws (I use Kreg screws and countersink them so their rounded heads won't stick out because I love how tough the screws are...I can't strip the head...they're my favorite but you can use any screws here at 2 1/2"). Make sure the back boards have the same 2" overhang as the previous back side rails. Black circles indicate countersink holes.
6Step 6
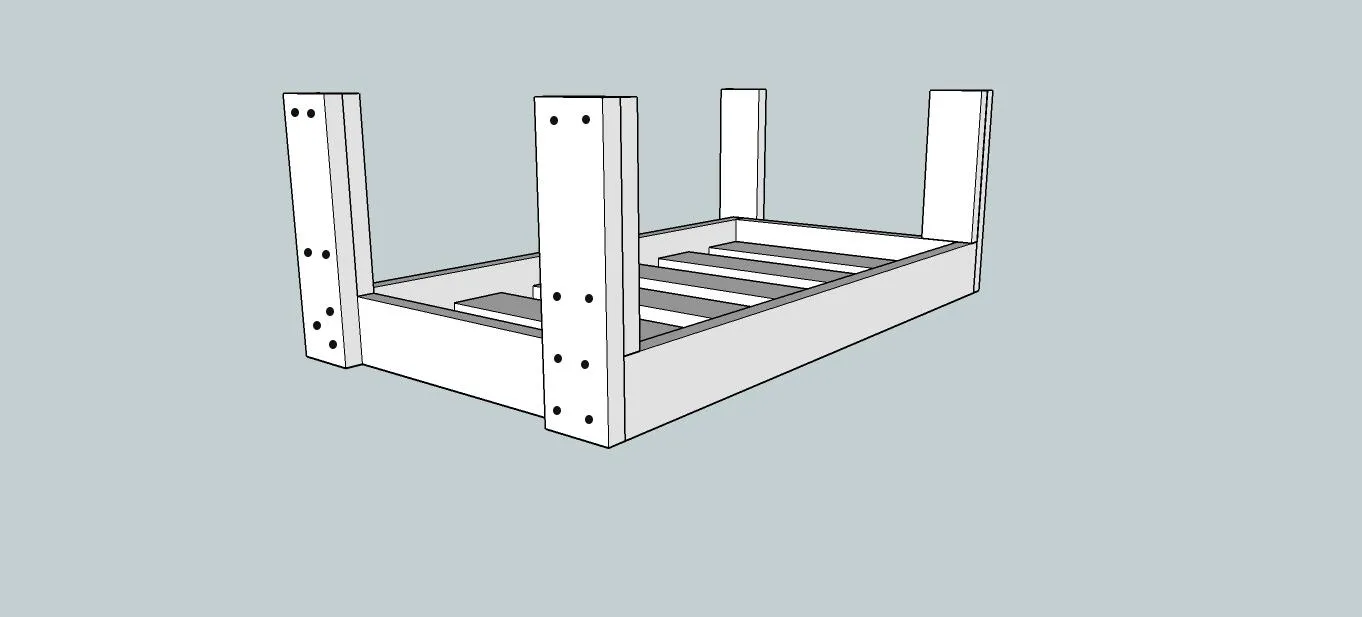
Attach bottom side support (2- 1 1/2" x 3 1/2" x 21 1/4")The board will sit flush to the outside of the side rails that were attached in the last step, this will leave a 1/2" over hang to the inside, I rounded the corners on this over hang.
7Step 7
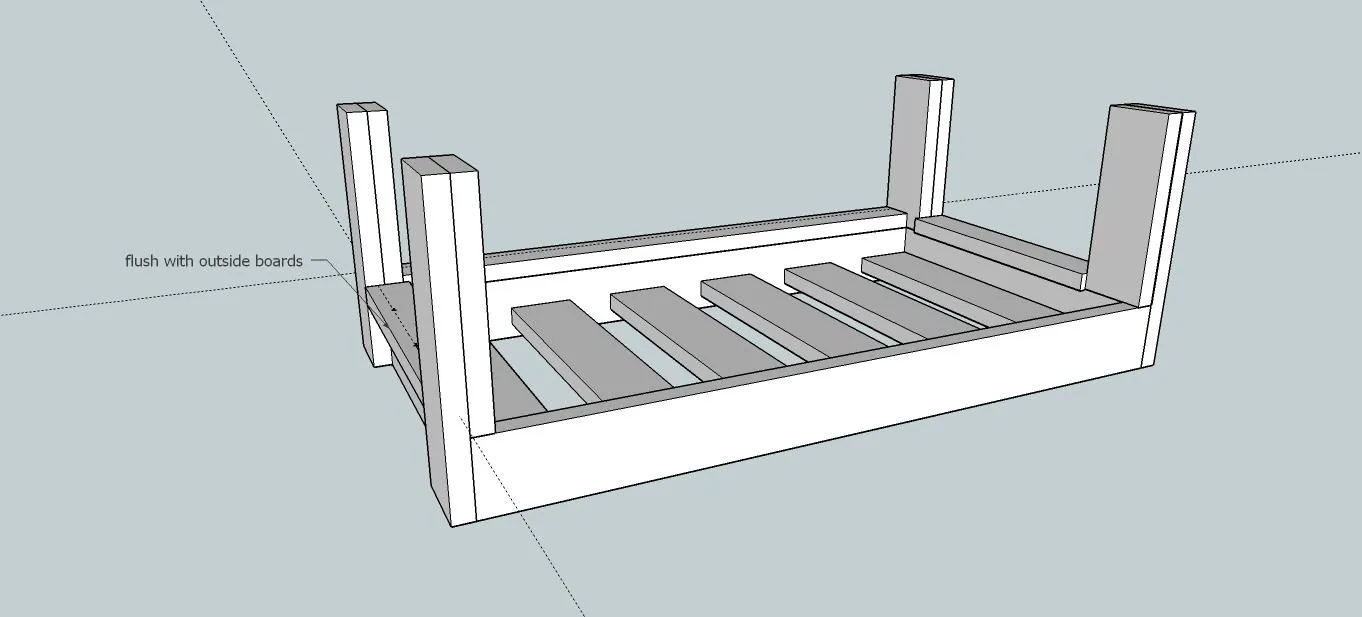
Attach bottom back support (1- 1 1/2" x 3 1/2" x 53") The board should be flush with the back frame and side rails, countersink holes should be drilled to attach this to the back frame or you can use 1 1/2" pocket holes along the back frame. Picture shows countersink holes.
8Step 8
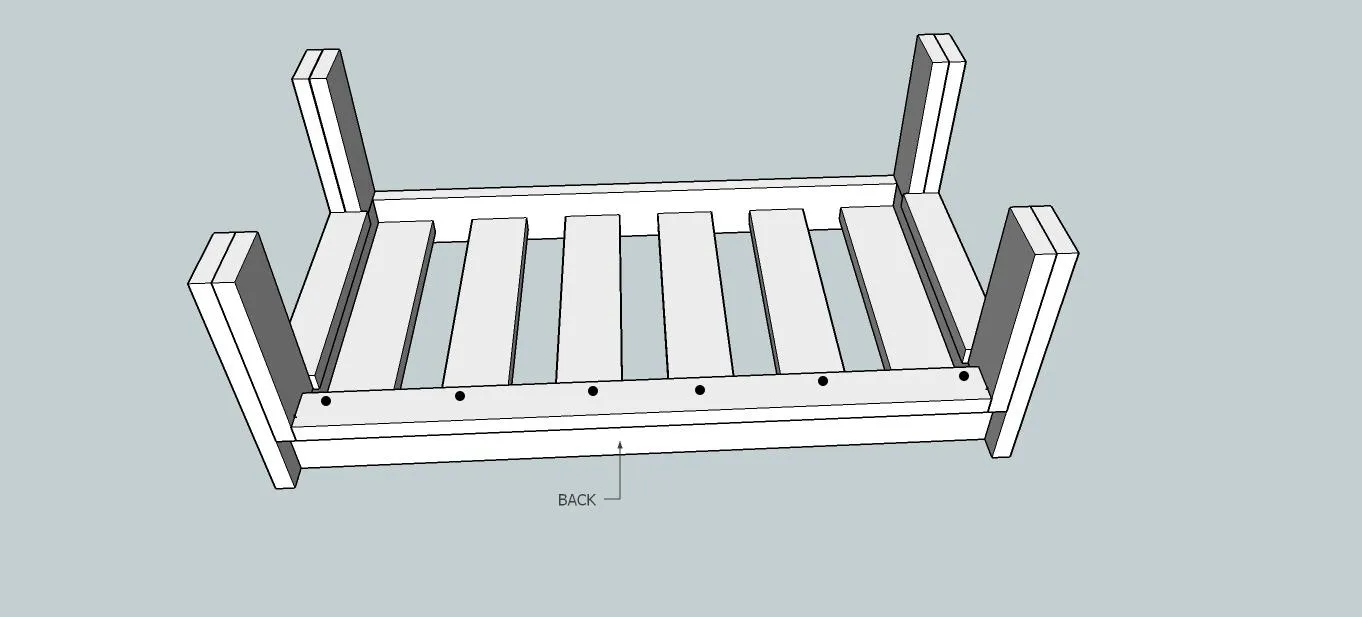
- Cut a pattern out of your decorative slats (10- 1 1/2" x 3 1/2" x 14") at this time if you prefer or just use them as 2x4s, it will look great either way!
- Attach them to the bottom side and back supports, you can space them however you would like, I placed mine in pairs to create the cutout shape, every 7 1/8" on the sides, leaving a 1" gap in the middle of the two pair and 7 1/4" along the back with a 1" gap in between the pairs. Staple up through the bottom supports to hold them in place.
9Step 9
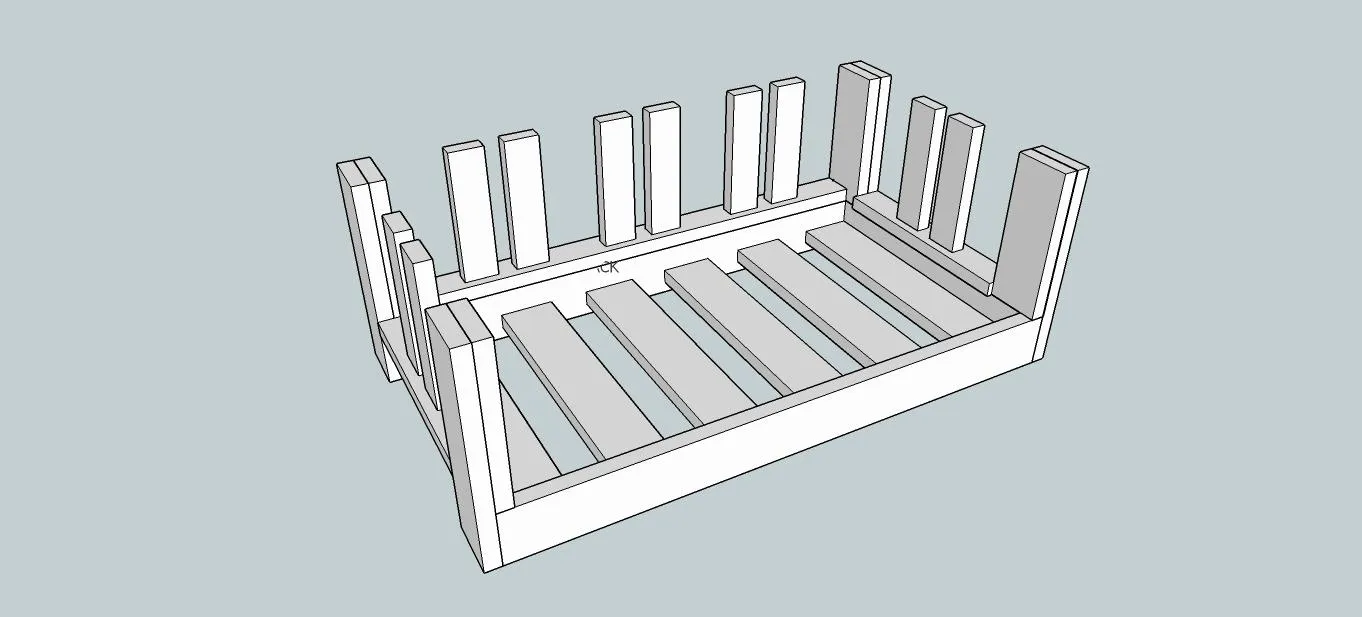
Attach top back supports (1- 1 1/2" x 3 1/2" x 59") Countersink this on the ends and staple each decorative slat through the top back support.
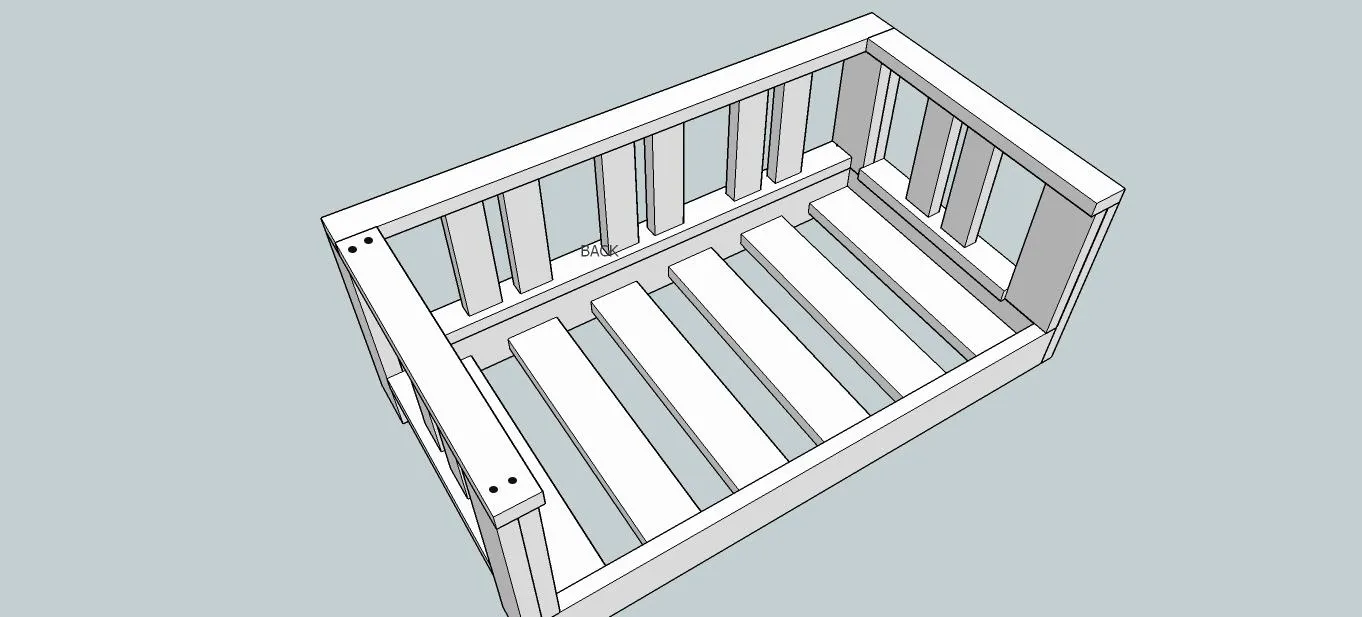
10Step 10
Attach top side support (2- 1 1/2" x 3 1/2" x 29 3/4") countersink screws and staple into decorative slats.
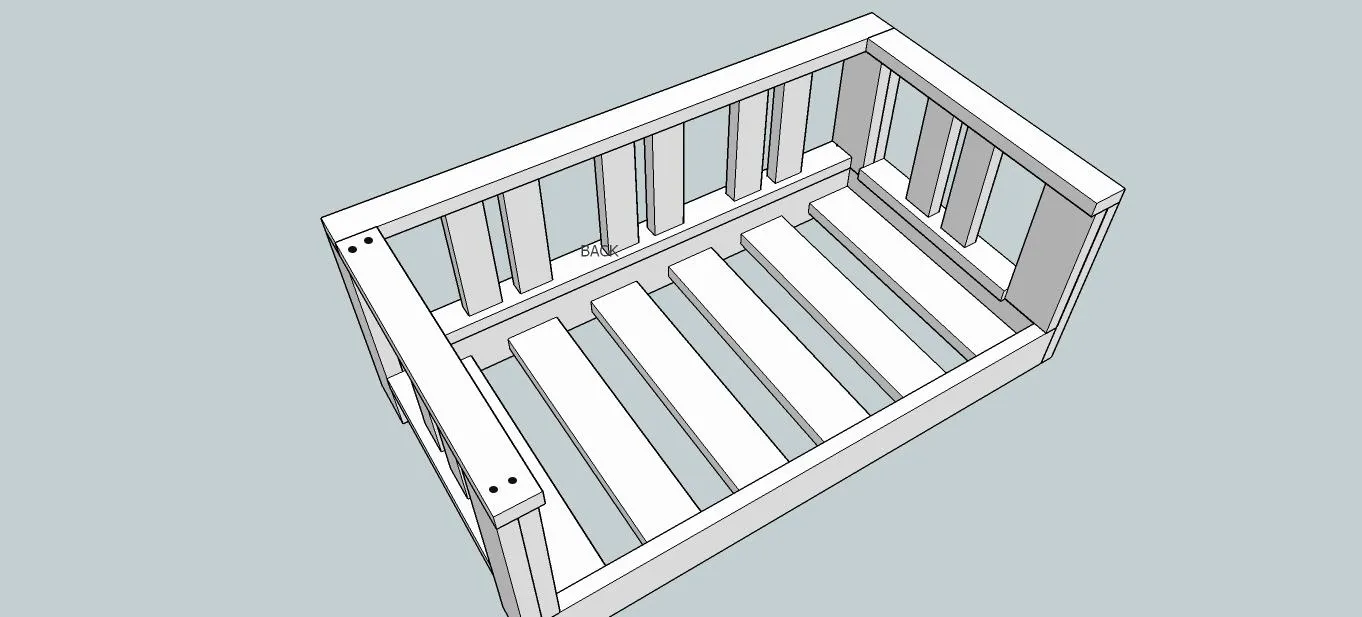
11Step 11
- Predrill holes for your u-bolts in the bottom rope hangers (2- 1 1/2" x 3 1/2" x 70").
- Flip the swing over to attach bottom rope hangers by countersinking your screws and centering them with 5 1/2" hanging over on each side, you can determine exactly where you want them from front to back, keeping in mind you want the swing to stay steady. Mine are roughly in 1 1/2" from the front and back.
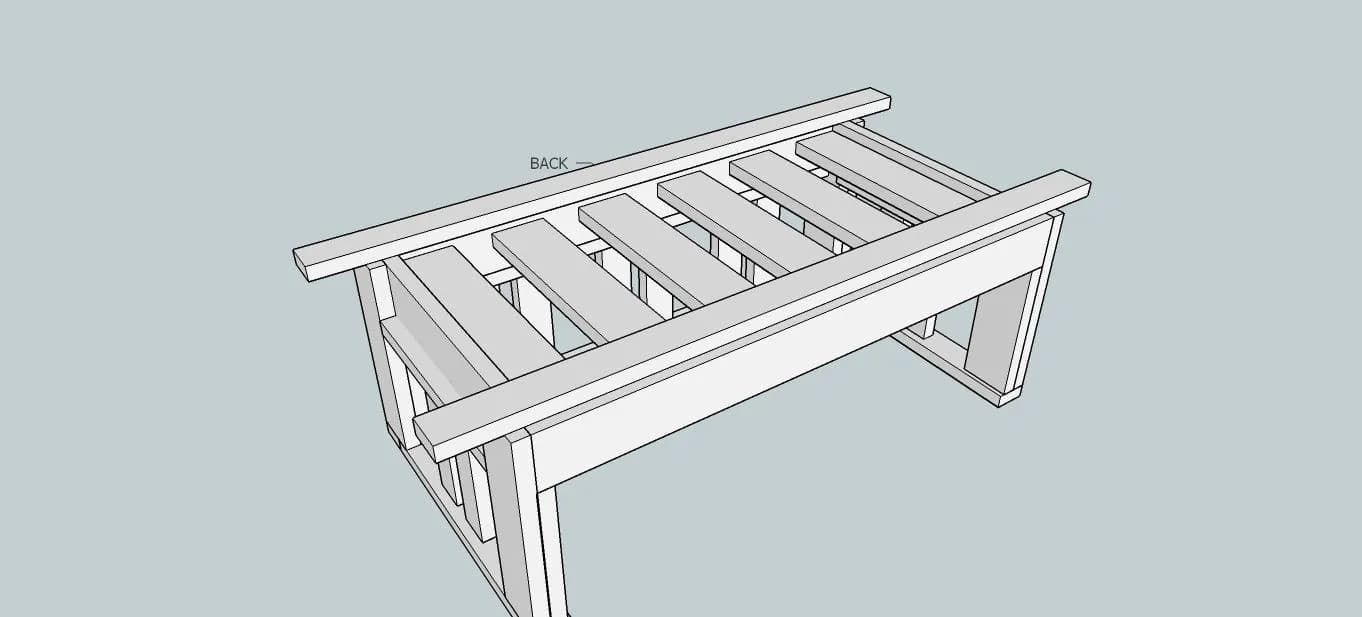
12Step 12
Pick the perfect exterior finish and hang that baby up on your front porch! If you would like to add finials, predrill holes and screw them in!
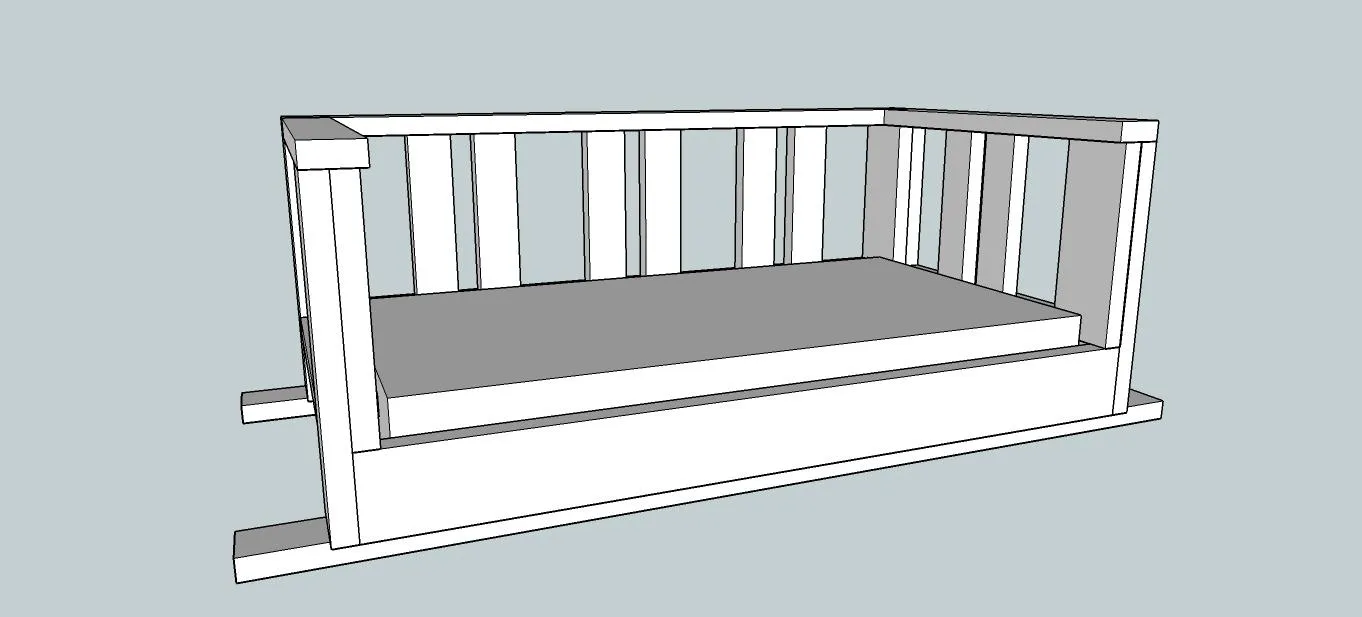
13Step 13
Make sure and visit http://builditcraftitloveit.com for more DIY projects!