 Notch
Notch- Difficulty
- Easy
- Time
- 2–4 hours
- Cost
- $$
About this build
Put your favorite plants on a pedestal by building an attractive stand. Both the high and low versions hold a 12"-diameter pot. You’ll find pots around this same size in any garden supply store or home center. With just a few simple cuts and pocket-hole joints, construction is quick and simple.
Tools
Essential
- Circular Saw
- Drill / Driver
- Pocket Hole Jig
- Random Orbit Sander
Optional / nice to have
- Bar / Pipe Clamps
- Tape Measure
Materials
| Item | Qty |
|---|---|
| Pine board, 2x2 x 72" (short stand) | 2 board |
| Pine board, 2x2 x 96" (tall stand) | 2 board |
| 2 1/2" coarse-thread Kreg Pocket-Hole Screws (Short Stand) | 12 each |
| 2 1/2" coarse-thread Kreg Pocket-Hole Screws (Tall Stand) | 24 each |
| 12" terra cotta clay pot | 2 each |
Overall cost: $$. Lumber prices vary by region, species, and season, so we give a band rather than a figure we would only be pretending to know.
Cut list
| Part | Qty | T × W × L |
|---|---|---|
| Low Stand Leg | 4 | 1" × 1" × 18" |
| Low Stand Long Cross | 1 | 1" × 1" × 13" |
| Low Stand Short Cross | 2 | 1" × 1" × 5" |
| Tall Stand Leg | 4 | 1" × 1" × 32" |
| Tall Stand Long Cross | 2 | 1" × 1" × 13" |
| Tall Stand Short Cross | 4 | 1" × 1" × 5" |
What to buy
Buy 3 boards at 8 ft.
1" × 1"
3 boards
Assumes 8 ft stock, a 1/8" saw kerf, and buying each part at its own width. Change the board size or kerf on the full board plan →
Instructions
1Make the Cross Braces
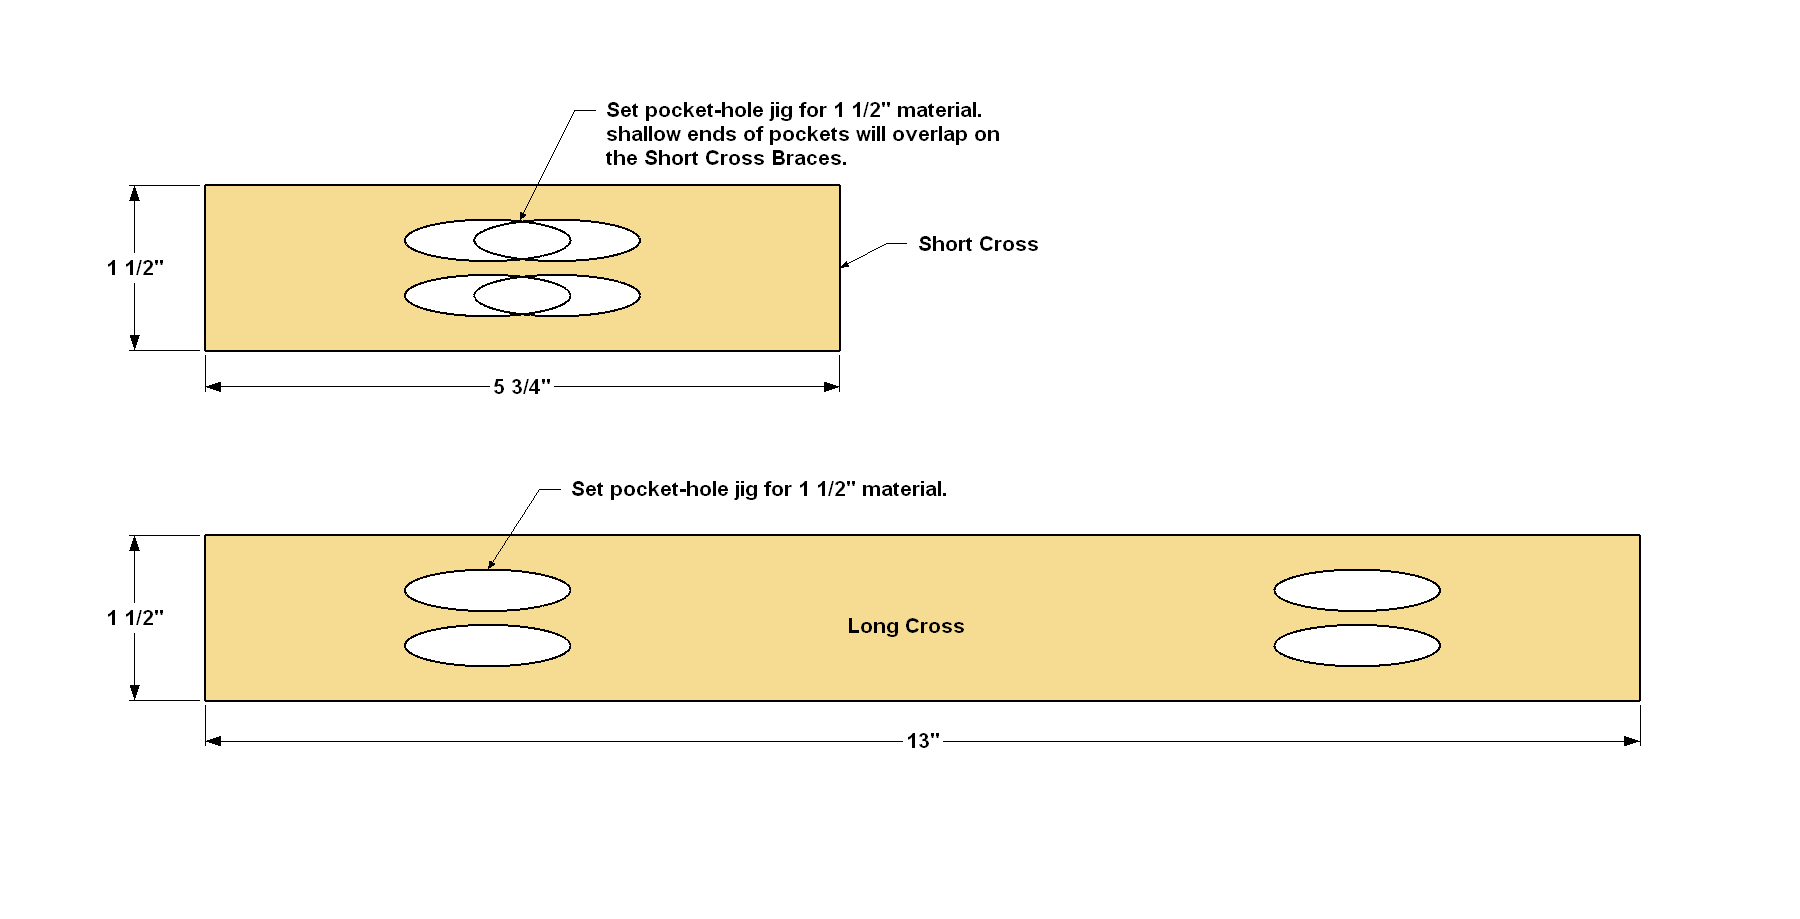
To get started, build the Cross Braces. The dimensions are the same whether you’re building the high stand or the low one. If you’re building a tall stand, cut two Long Cross Braces and four Short Cross Braces to length from a 2x2 pine board, as shown in the cutting diagram. If you’re building the low stand, you only need one Long Cross Brace and two Short Cross Braces, as shown. After cutting the pieces, set your Kreg® Pocket-Hole Jig for 1 1/2"-thick material, and then drill pocket holes at the locations shown. On the Short Cross Braces, the upper ends of the pocket holes will overlap, as shown. This doesn’t cause any problems at all. Sand the faces and edges smooth—but not the ends—when you’re done drilling pocket holes.
2Assemble the Braces
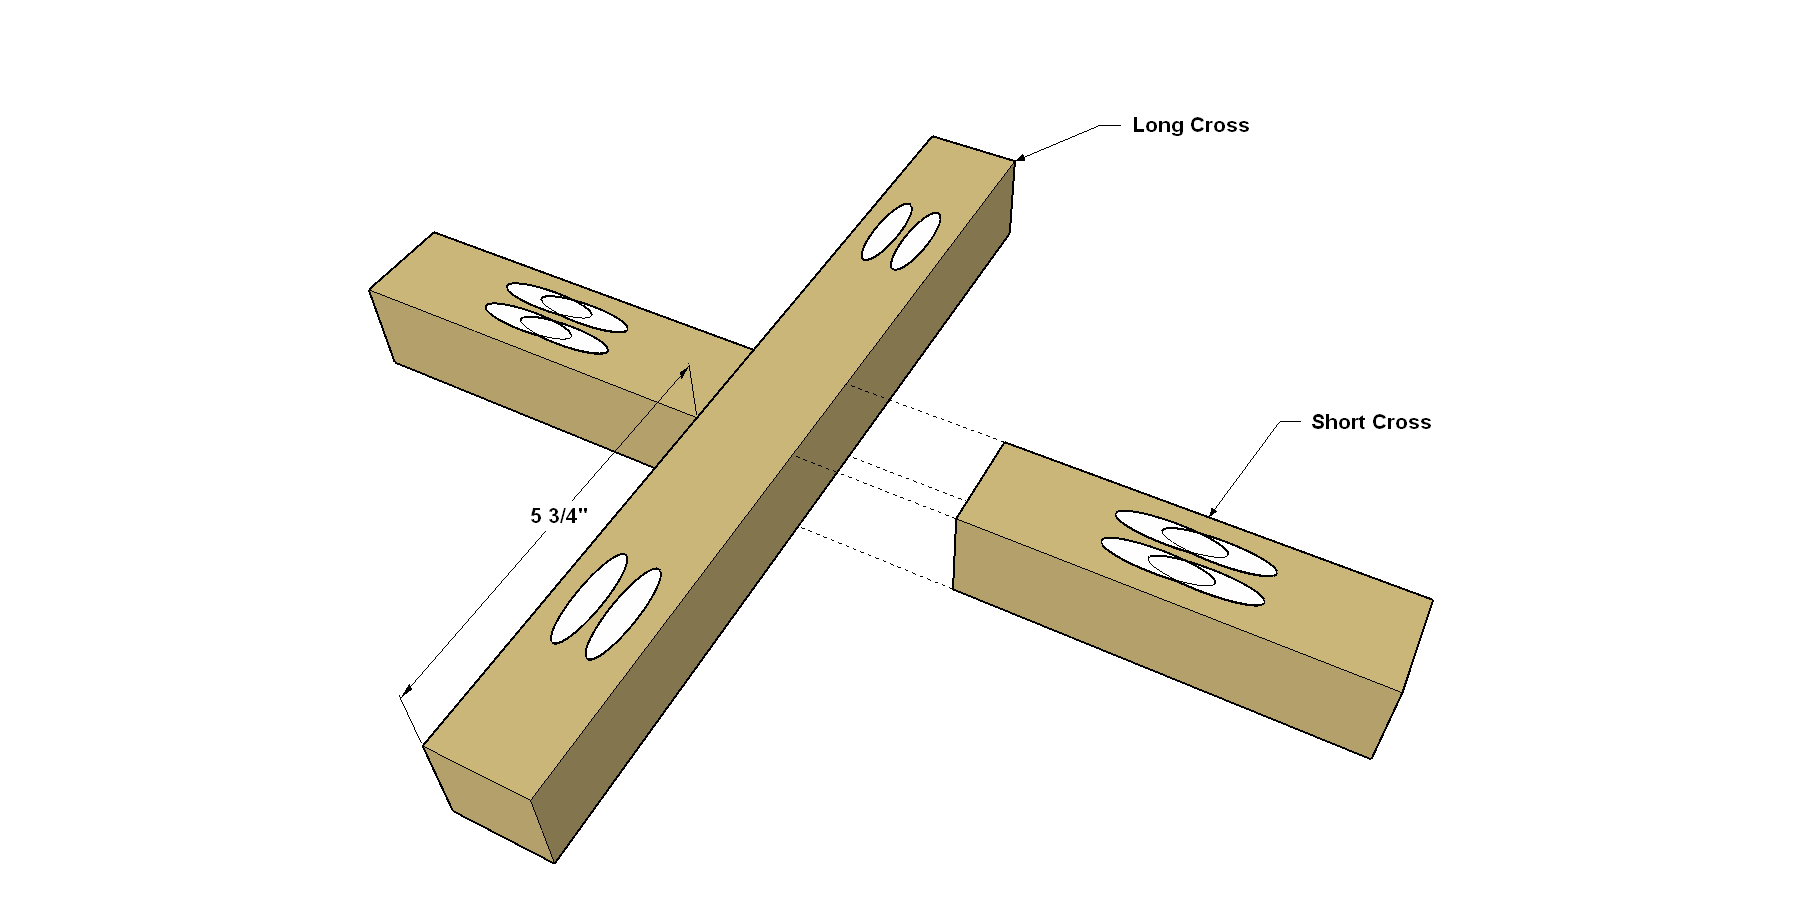
Align the Short Cross Braces to the Long Cross Brace at the location shown, and then secure them using 2 1/2" Kreg Pocket-Hole Screws. For a tall stand, repeat this process.
3Make the Legs
Cut four Long Legs or four Short Legs to length—depending on which stand you are building—from 2x2 boards, as shown in the cutting diagram.
4Attach the Braces to the Legs
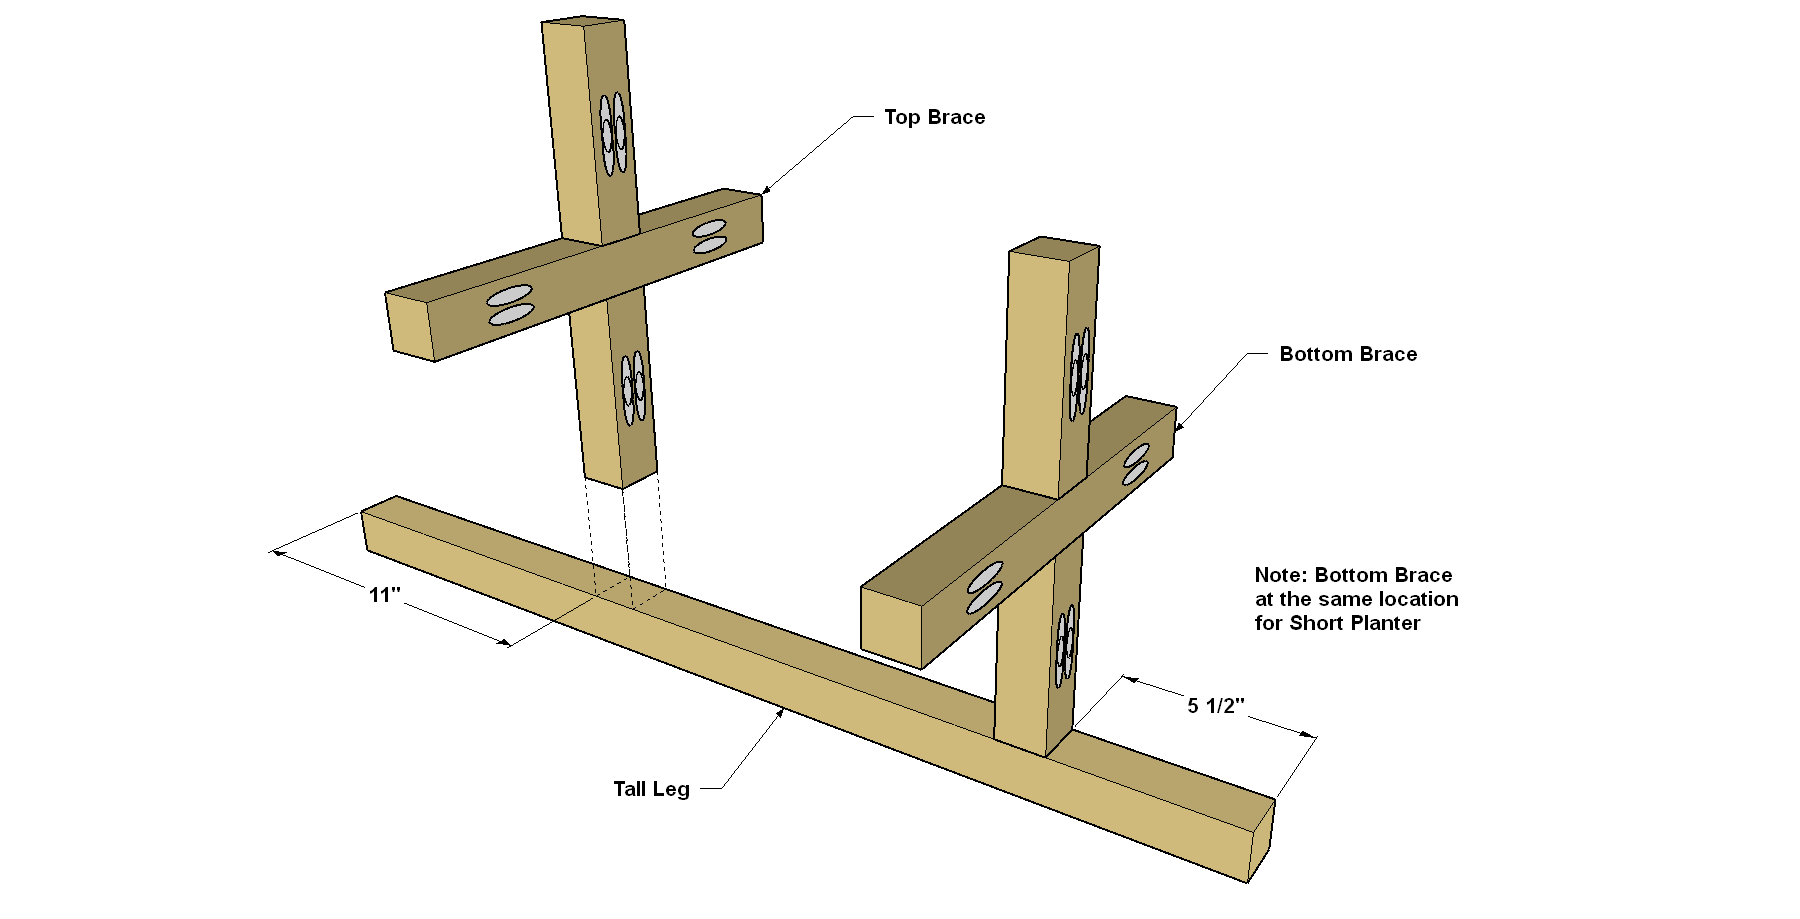
- Now you can assemble your plant stand by connecting the brace assembly to the Legs. Before you do this, check the height of your pots. The ones we used were almost 11" tall. If yours are taller or shorter, you may want to adjust the position of the brace assembly. For the high stand, position the brace assemblies on one Leg as shown. For the low stand, position the brace assembly at the lower position. Secure the brace(s) to the Leg using 2 1/2" Kreg Pocket-Hole Screws.
- Then you can add the rest of the Legs. Because space is tight, you’ll want to use a right-angle attachment like the Kreg 90° Pocket-Hole Driver on your drill.
5Apply Your Favorite Finish
With your stand assembled, you can add finish. We painted the upper “ring” on the pots, and painted the upper end of each Leg to match. Then we wiped a clear oil finish on the rest of the stand.
Tags
- Mother's Day Gifts
- Beginner
Reviews & builds
No reviews yet
Sign in to review this plan or share your build.
No reviews yet. Be the first to build this.