 Notch
- Difficulty
- Easy
- Time
- 3.3–6 hours
- Cost
- $$
About this build
Add extra storage to your bathroom with these farmhouse style storage shelves. Perfectly sized to fit over the toilet and hold all your toiletries. You are going to love the decorative elements of this quick and easy build.
Tools
Essential
- Brad Nailer
- Drill / Driver
- Impact Driver
- Jigsaw
- Miter Saw
- Pocket Hole Jig
- Random Orbit Sander
Optional / nice to have
- Bar / Pipe Clamps
- Tape Measure
Materials
| Item | Qty |
|---|---|
| Board, 1x6 96" | 2 board |
| 1 1/4" pocket hole screws | 25 each |
| D-ring hangers | 2 each |
| 1 1/4" finishing nails | 4 each |
| Wood glue | 1 each |
| 1/2" x 1/16" x 36" flat bar aluminum pieces | 2 each |
| Decorative knobs | 3 each |
| 1" wire nails | 5 each |
Overall cost: $$. Lumber prices vary by region, species, and season, so we give a band rather than a figure we would only be pretending to know.
Cut list
| Part | Qty | T × W × L |
|---|---|---|
| Side boards | 2 | 3/4" × 5" × 24" |
| Top & bottom back boards | 2 | 3/4" × 5" × 18" |
| Shelf boards | 3 | 3/4" × 5" × 18" |
| Shelf divider | 1 | 3/4" × 5" × 7" |
What to buy
Buy 2 boards at 8 ft.
3/4" × 5"
2 boards
Assumes 8 ft stock, a 1/8" saw kerf, and buying each part at its own width. Change the board size or kerf on the full board plan →
Instructions
1Draw decorative top & bottom boards
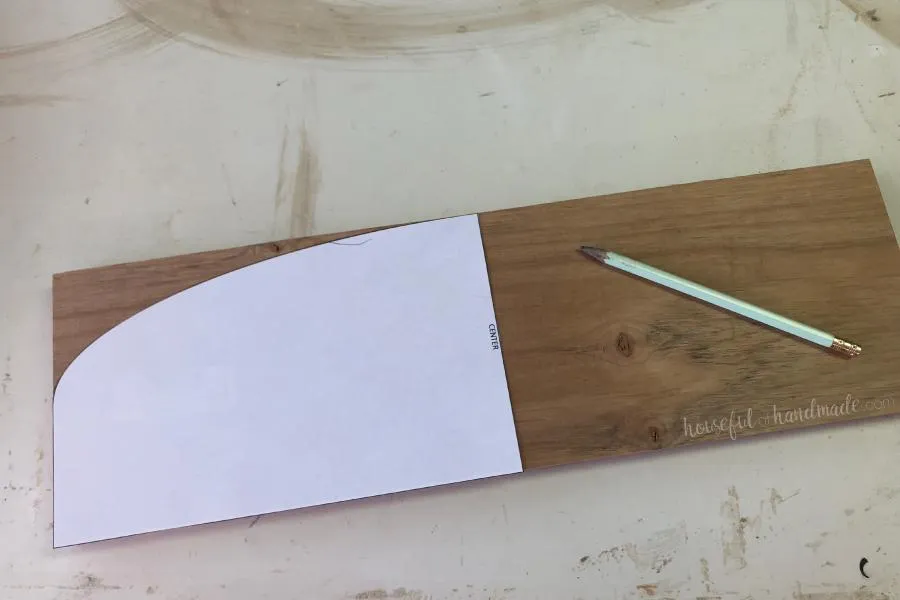
Print out the templates for the top & bottom back boards from the extras. Cut out the templates and trace them onto the boards making sure to line up the bottom and sides of the templates with the bottom and sides of your boards.
2Draw curves on side boards
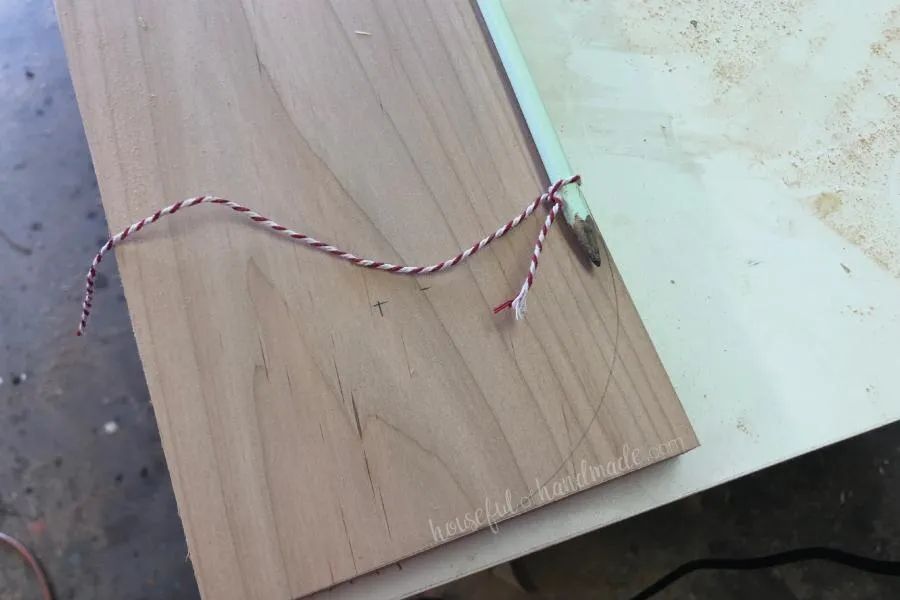
To draw the curves on the side boards, measure 2 3/4" up from the edge and 2 3/4" in from the front and make a mark. Tie a string to a pencil and hold it on the mark with the tip of the pencil flush to the edge of the board. Draw the curve. Repeat the top & bottom of both side boards.
3Cut the decorative edges
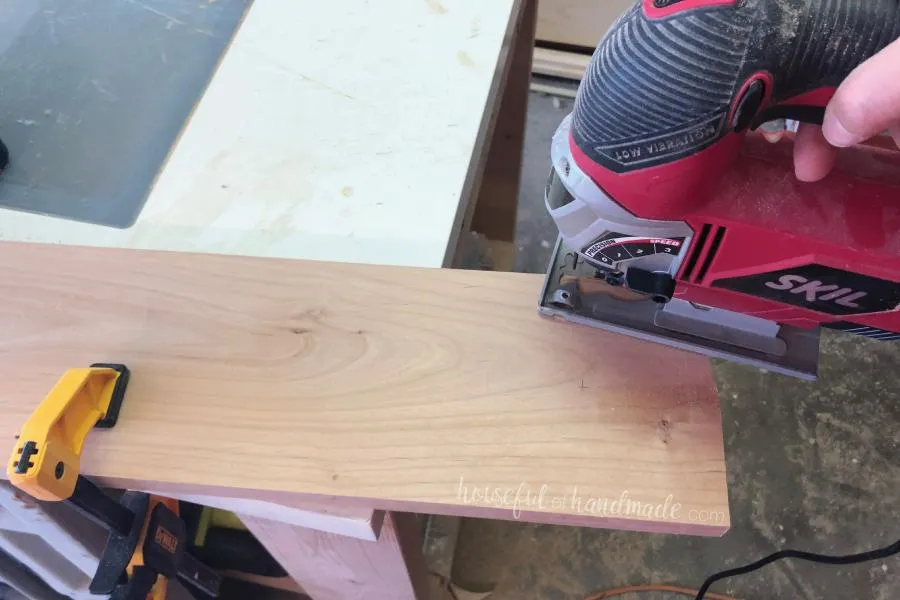
Use a jig saw to cut the curves on the side boards and the decorative top & bottom boards.
4Secure top & bottom boards
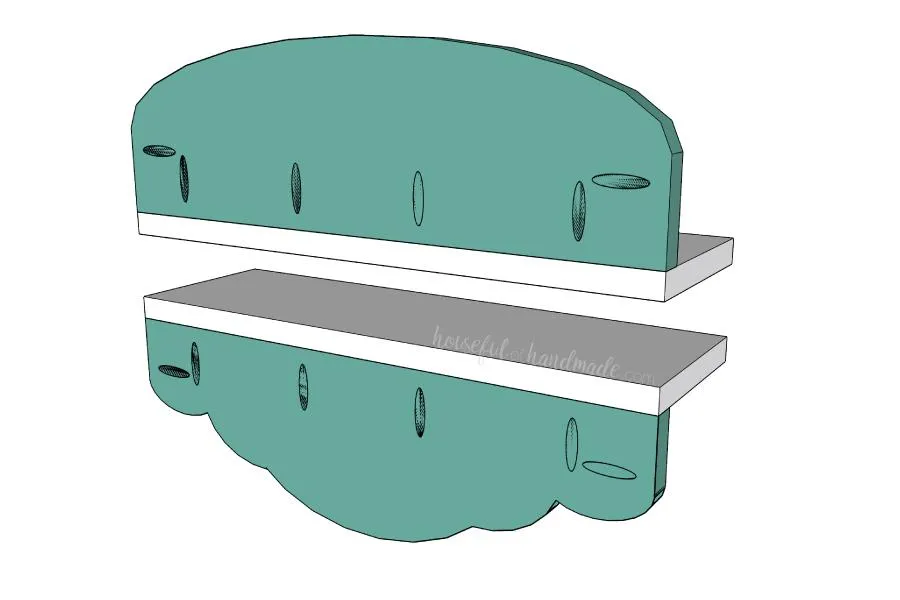
- Drill pocket holes into the back of the top & bottom boards with the Kreg jig set to 3/4" thick wood. Using 1 1/4" pocket hole screws and wood glue, attach the flat edge of the top back board to the top of one of the shelf boards.
- Then repeat to attach the bottom back board to the bottom of one of the shelf boards.
5Drill pocket holes in shelf boards
Set the Kreg jig to drill pocket holes for 3/4" wood. Drill 2 pocket holes into each end of the shelf boards.
6Attach side boards
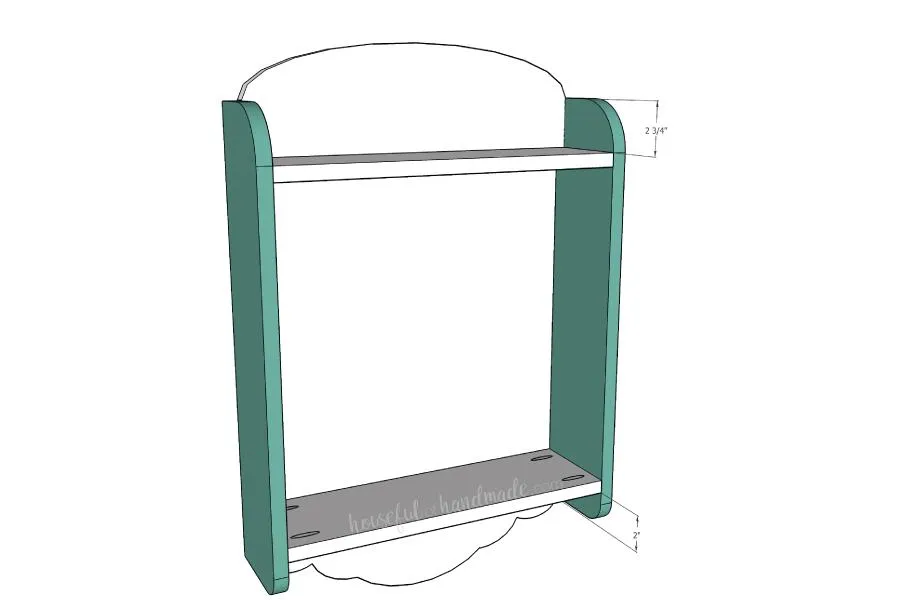
Attach the top & bottom shelves to the side boards using 1 1/4" pocket hole screws and wood glue. The top of the top shelf should be 2 3/4" from the top of the side boards. The bottom of the bottom shelf should be 2" up from the bottom of the side boards. The curved edges should be on the front of the shelves.
7Attach center divider
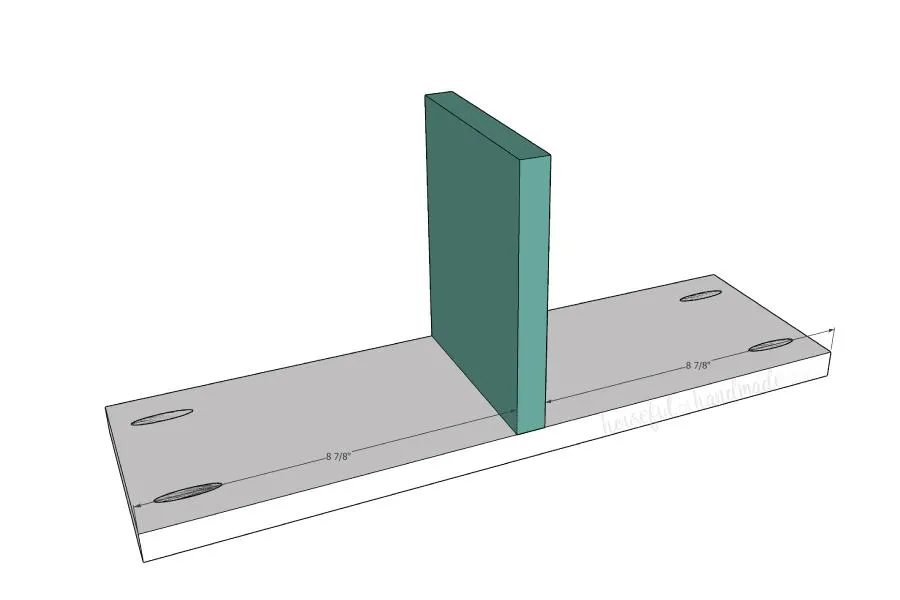
Attach the center divider board to the center of the last shelf board with wood glue and finishing nails.
8Attach center shelf
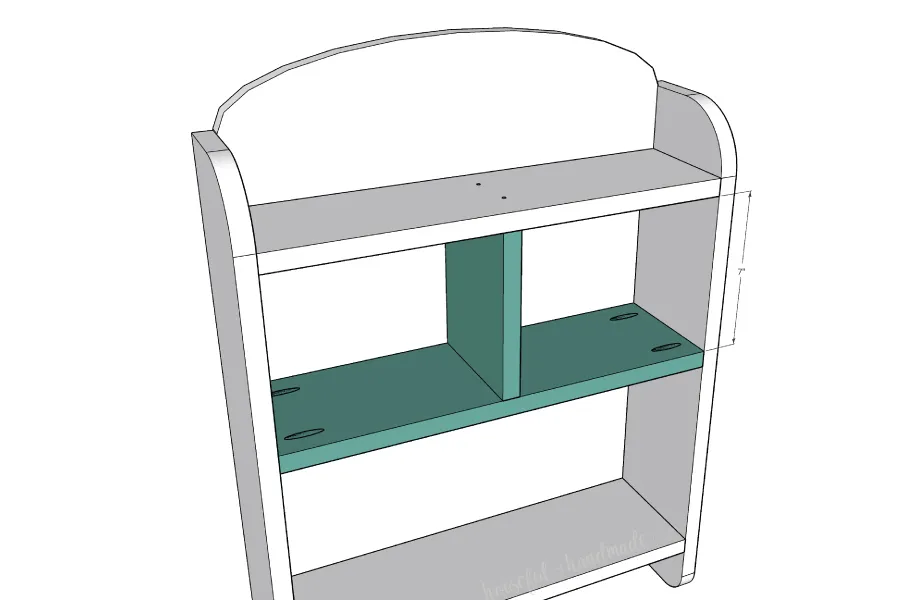
Attach the center shelf board (with divider in place) to the side boards with 1 1/4" pocket hole screws and wood glue. Then secure the center divider to the top shelf with finishing nails.
9Finish
- Fill pocket holes.
- Sand and finish your shelves.
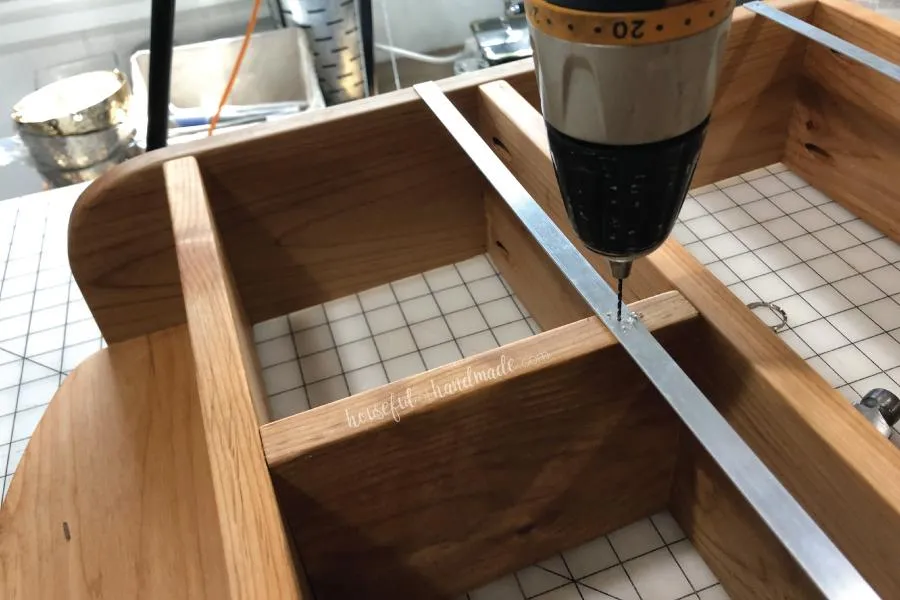
- Drill pilot holes in the bottom back of the shelf to add knobs for hanging items. To add the metal shelf detail, cut a piece of 1/2" x 1/16" bar aluminum to size with snips.
- Drill tiny holes in the aluminum bar and secure with a 1" wire nail.
10Hang shelves
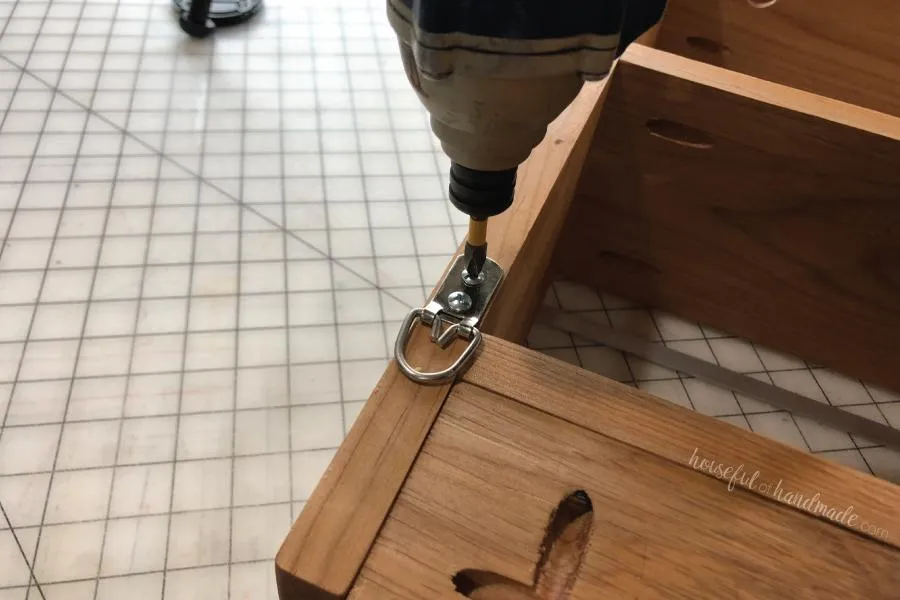
To hang the shelves, attach a D-ring hanger on each of the side boards just under the top shelf board. Make sure to hang the shelf in wall studs or with heavy duty drywall anchors.
Tags
- Bathroom
- Beginner
Reviews & builds
No reviews yet
Sign in to review this plan or share your build.
No reviews yet. Be the first to build this.