 Notch
- Difficulty
- Intermediate
- Time
- 9.8–19.3 hours
- Cost
- $$
About this build
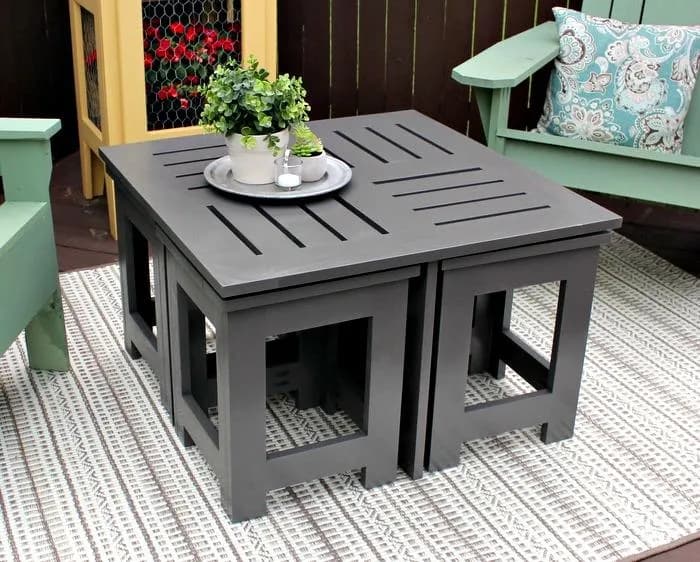
Who couldn't use more space when entertaining outdoors? This stylish outdoor coffee table features 4 hidden side tables. The side tables store neatly under the coffee table when not in use, then can be pulled out and placed next to chairs where guests can have their drinks and snacks easily at hand.
Tools
Essential
- Drill / Driver
- Miter Saw
- Pocket Hole Jig
- Random Orbit Sander
Optional / nice to have
- Tape Measure
Materials
| Item | Qty |
|---|---|
| Board, 1x2 96" | 4 board |
| Board, 1x3 96" | 9 board |
| Board, 1x4 96" | 4 board |
| 1-1/4" exterior pocket screws | 350 each |
| Exterior wood glue | 1 each |
Overall cost: $$. Lumber prices vary by region, species, and season, so we give a band rather than a figure we would only be pretending to know.
Cut list
| Part | Qty | T × W × L |
|---|---|---|
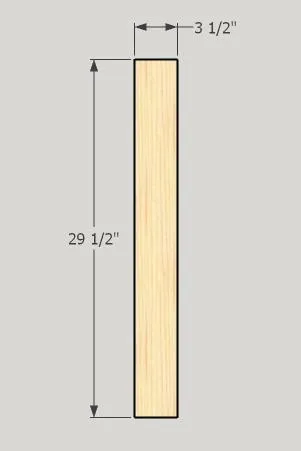
| Top Long Sides | 2 | 3/4" × 3 1/2" × 29 1/2" |
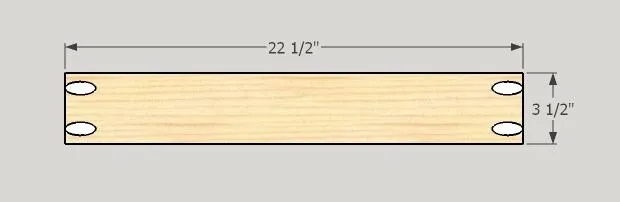
| Top Short Sides and Middle | 3 | 3/4" × 3 1/2" × 22 1/2" |
| Short Top Middle Pieces | 2 | 3/4" × 3 1/2" × 9 1/2" |
| Top Quadrant Pieces | 12 | 3/4" × 2 1/2" × 9 1/2" |
| Coffee Table Legs | 4 | 3/4" × 2 1/2" × 17 1/2" |
| Coffee Table Long Stretchers | 2 | 3/4" × 2 1/2" × 23" |
| Coffee Table Short Stretchers | 4 | 3/4" × 2 1/2" × 11 1/8" |
| Side Table Long Top Pieces | 8 | 3/4" × 3 1/2" × 13 1/2" |
| Side Table Short Top Pieces | 8 | 3/4" × 3 1/2" × 6 1/4" |
| Side Table Middle Top Pieces | 24 | 3/4" × 2 1/2" × 6 1/4" |
| Side Table Wide Legs | 16 | 3/4" × 2 1/2" × 16 1/4" |
| Side Table Wide Rails | 16 | 3/4" × 2 1/2" × 7 1/2" |
| Side Table Narrow Legs | 16 | 3/4" × 1 1/2" × 16 1/4" |
| Side Table Narrow Rails | 16 | 3/4" × 2 1/2" × 7 3/4" |
What to buy
Buy 19 boards at 8 ft.
3/4" × 3 1/2"
4 boards
3/4" × 2 1/2"
11 boards
3/4" × 1 1/2"
4 boards
Assumes 8 ft stock, a 1/8" saw kerf, and buying each part at its own width. Change the board size or kerf on the full board plan →
Instructions
1Cut the Top Long Sides
Cut 2 pieces of 1x4 to 29-1/2".
2Cut Top Short Sides & Middle Pieces
Cut 3 pieces of 1x4 to 22-1/2" and drill pocket holes in each end.
3Assemble the Top
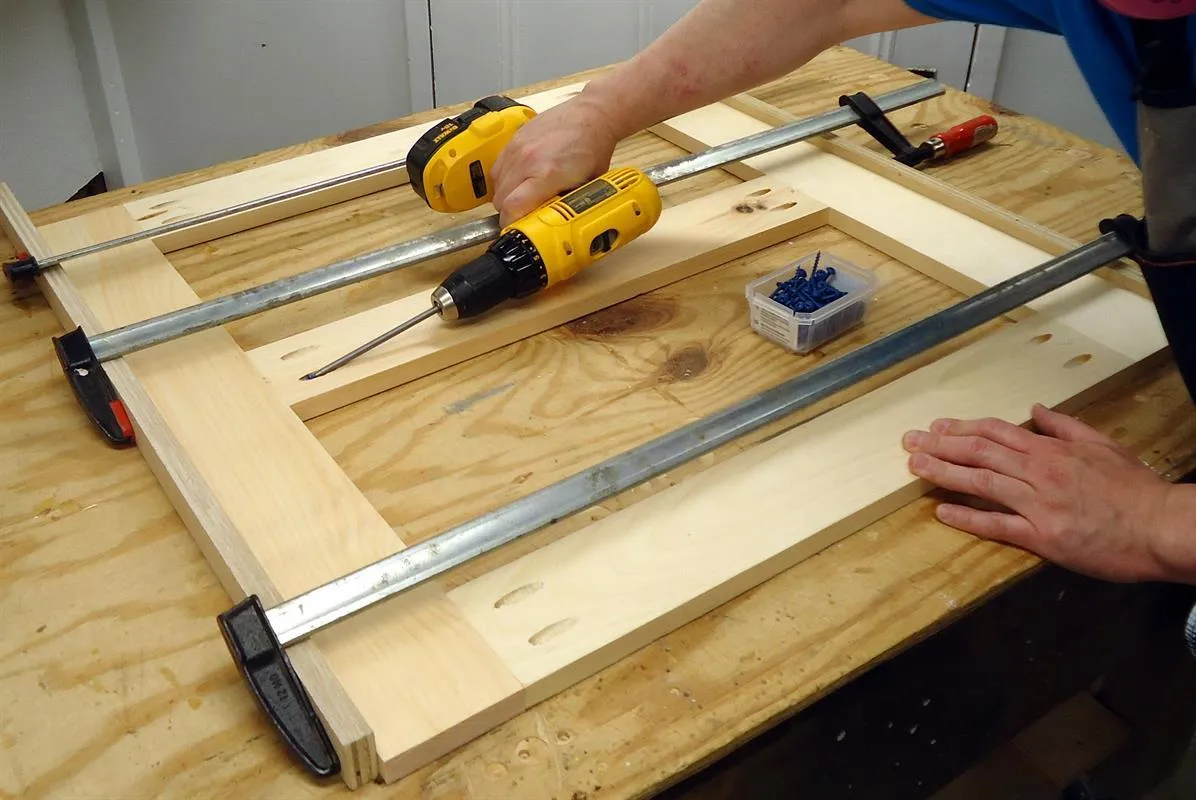
- Place the top long sides on your workbench.
- Apply glue to the top short sides and middle (center the middle on the long sides).
- Clamp and attach using 1-1/4" pocket screws.
4Attach the Short Top Middle Pieces
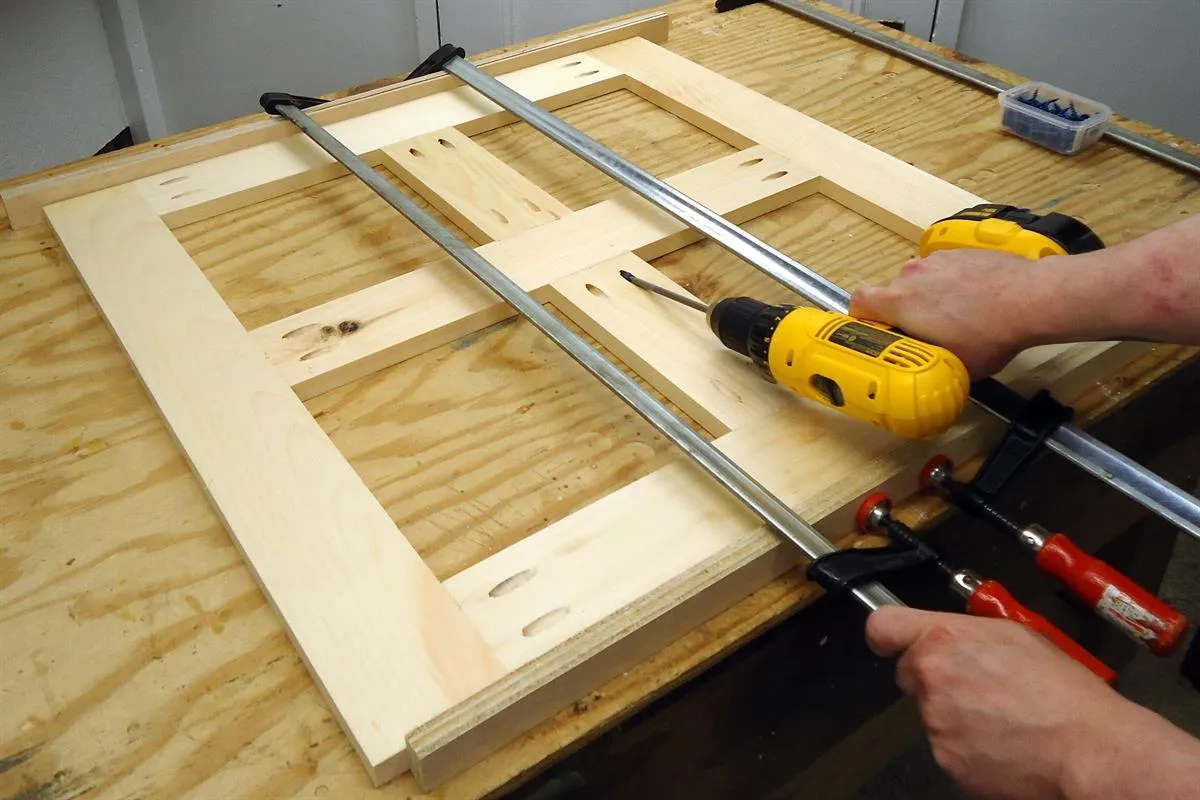
- The top middle pieces are made with 1x4's and should measure 9-1/2". Double check the dimension on either side of the long middle piece, cut 2 short top middle pieces to your dimensions and test fit. We want the fit to be snug.
- Once you're pleased with the fit, drill pocket holes on each end.
- Apply glue to each end, center on the side/long middle, clamp and attach using 1-1/4".
- Repeat for the other piece.
5Cut and Attach the Quadrant Pieces
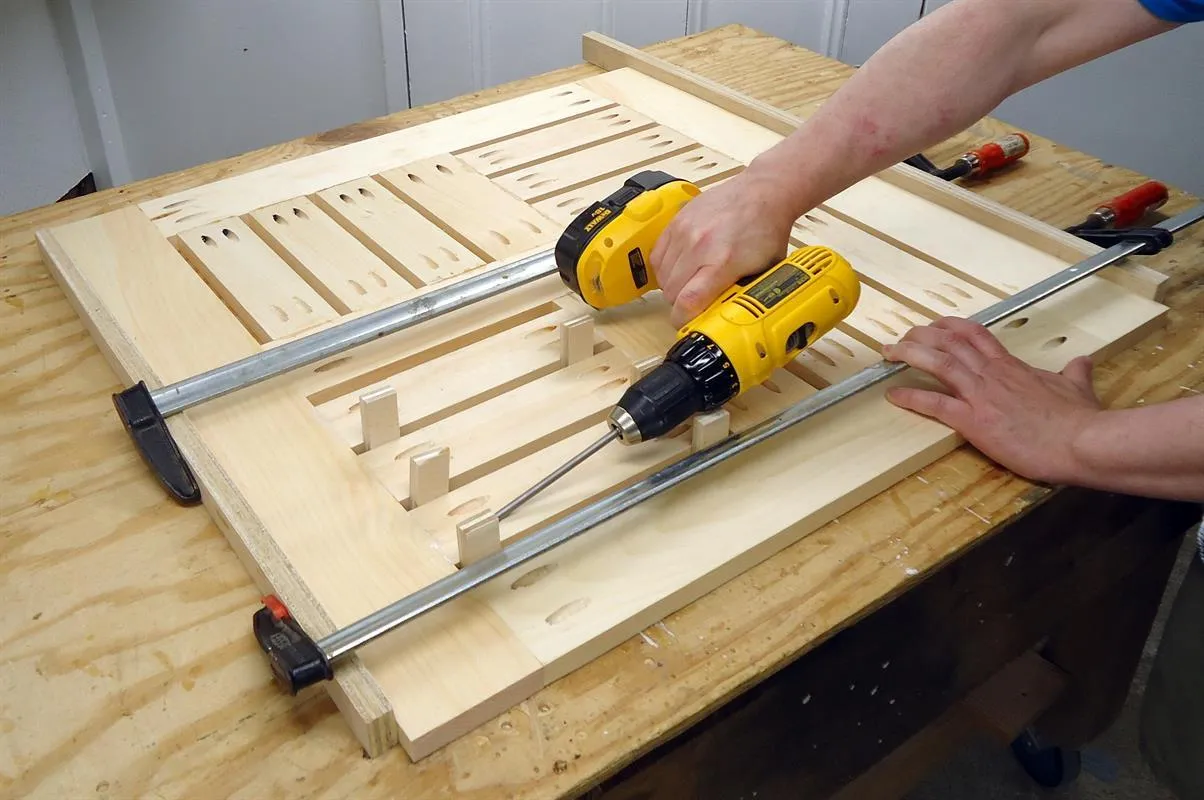
- The top now has four quadrants and for the best fit, it's a good idea to install the remaining pieces, quadrant by quadrant. Each quadrant contains 3 pieces. The pieces are made with 1x3's and should measure 9-1/2". Double check the dimension in one quadrant, cut the pieces to your dimensions and test fit. We want the fit to be snug.
- Drill pocket holes on each end. The spacing between the pieces is 1/2". I used some scrap 1/2" plywood to help position the pieces.
- Place some 1/2" plywood, apply glue to each end and place against the plywood.
- Place more 1/2" plywood, apply glue to each end and place against the plywood. Continue until the quadrant is filled.
- Clamp and attach using 1-1/4".
- Repeat for the other quadrants.
6Cut the Coffee Table Legs
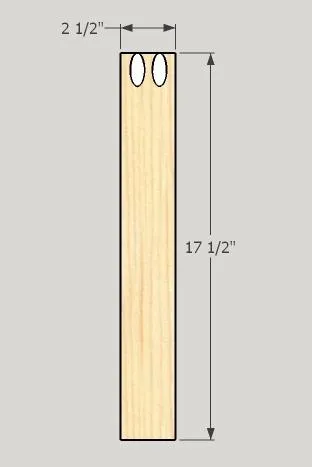
Cut 4 pieces of 1x3 to 17-1/2" and drill two pocket holes in one end. These pocket holes will be used to attach the leg to the top.
7Cut Coffee Table Long Stretchers
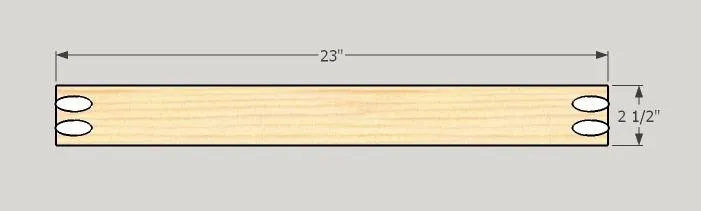
Cut 2 pieces of 1x3 to 23" and drill pocket holes in each end.
8Cut the Short Stretchers
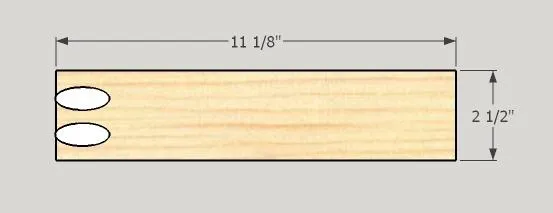
Cut 4 pieces of 1x3 to 11-1/8" and drill two pocket holes in one end.
9Attach Legs to Long Stretchers
- The long stretchers set down from the top of the legs 2-1/2" and up from the bottom 2". To help position the stretchers I used some scrap wood cut to 2-1/2" and 2".
- Place two legs on your workbench making sure the pocket holes are facing up.
- Clamp a piece of 2-1/2" scrap at the top of the legs and 2" scrap at the bottom of the legs.
- Apply glue to the ends of the long stretchers, clamp in position and attach using 1-1/4" pocket screws.
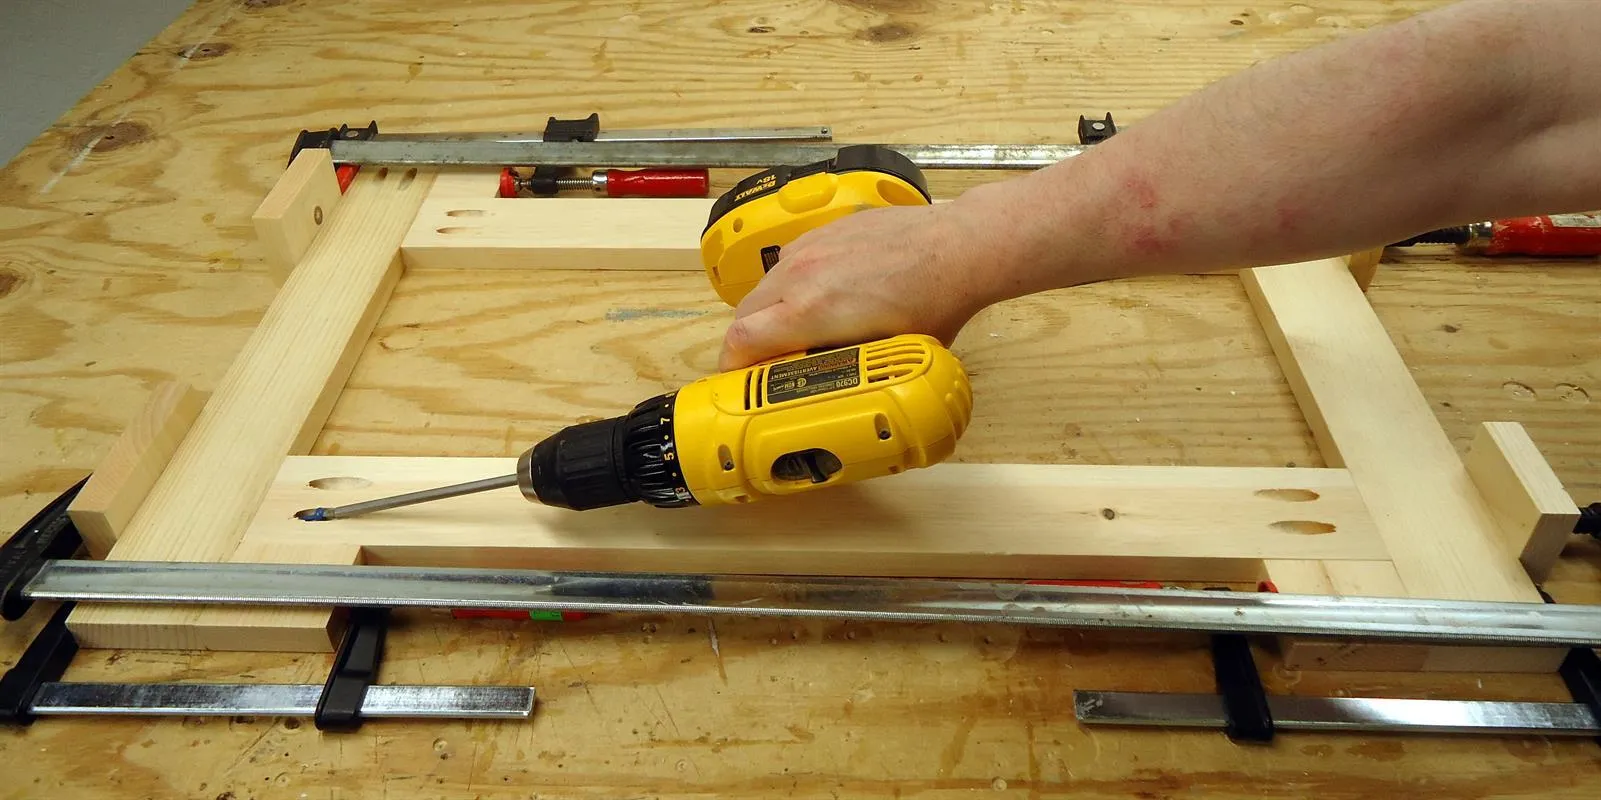
10Attach Legs to Short Stretchers
- The short stretchers set down from the top of the legs 2-1/2" and up from the bottom 2". To help position the stretchers I used some scrap wood cut to 2-1/2" and 2".
- Place a leg on your workbench making sure the pocket holes are facing up.
- Clamp a piece of 2-1/2" scrap at the top of the leg and 2" scrap at the bottom of the leg.
- Apply glue to the ends of the short stretchers, clamp in position and attach using 1-1/4" pocket screws.
- Repeat for the other leg and stretchers.
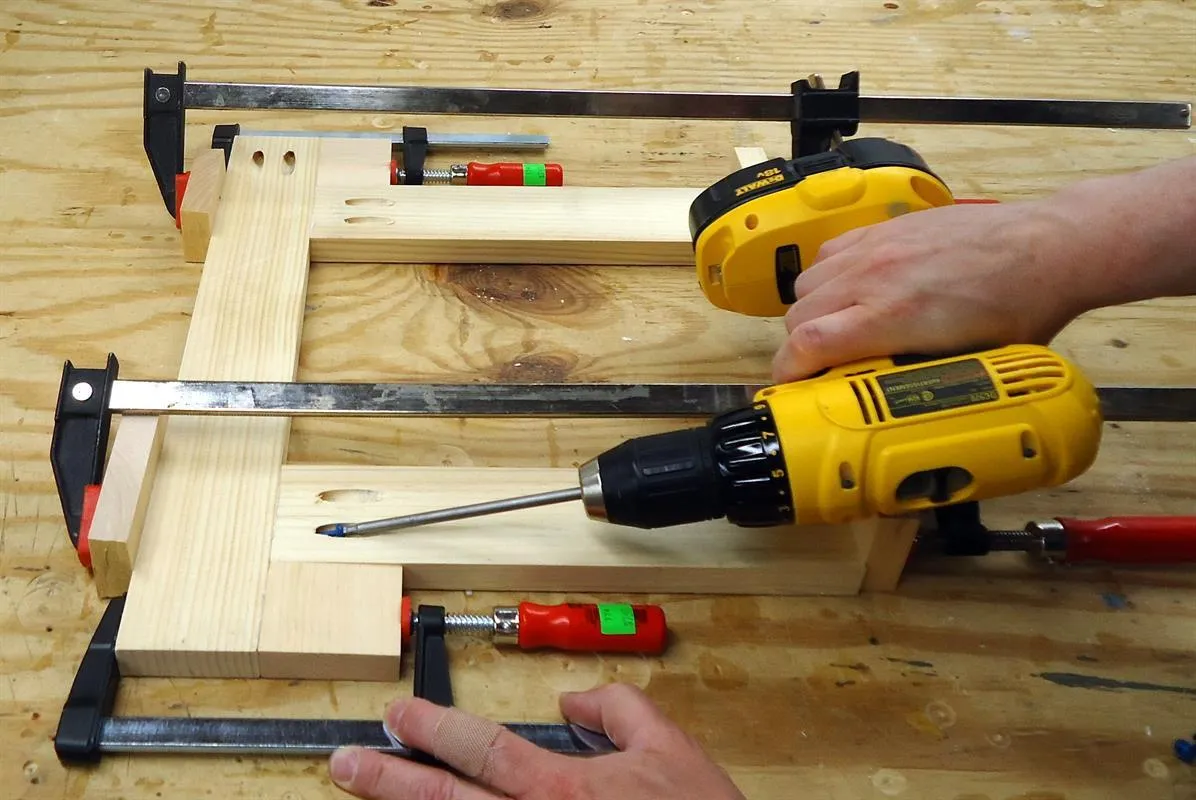
11Drill Short Stretcher Pocket Holes
- Place the short stretcher assemblies on your workbench, so they face each other. We need to offset the pocket holes that will attach the short stretchers to the long stretchers, so the pocket screws don't run into each other. On one side, layout two pocket holes in the top stretcher and one pocket hole in the bottom stretcher. On the other side, layout one pocket hole in the top stretcher and two pocket holes in the bottom stretcher.
- Drill pocket holes at your layout marks.
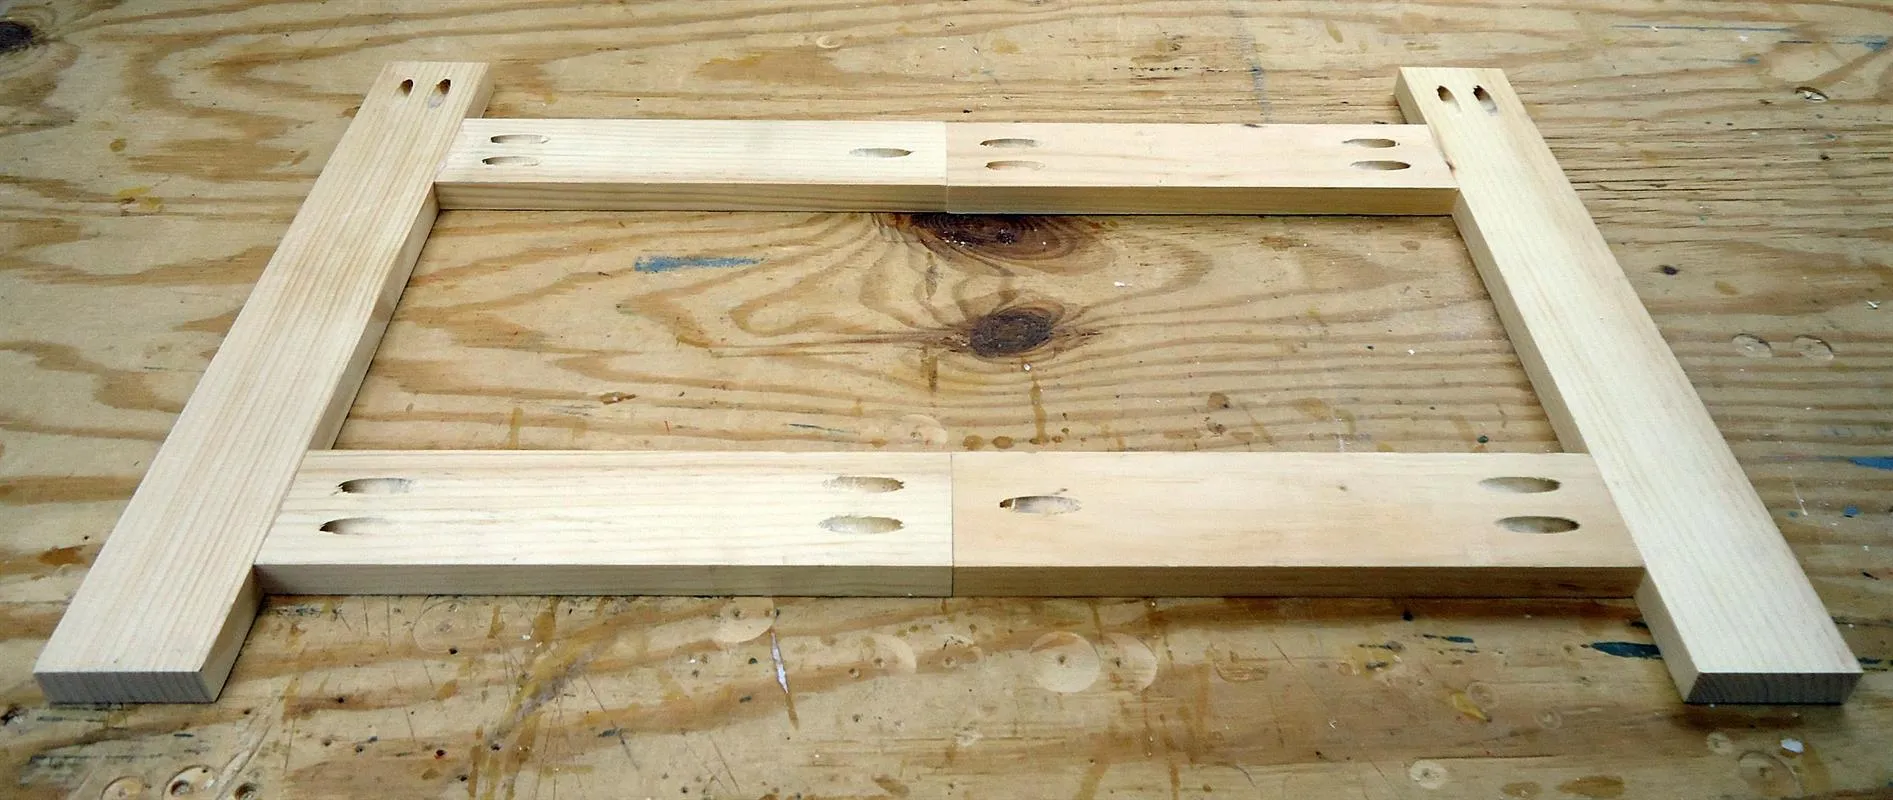
12Assemble the Legs
- Apply glue to the ends of a short stretcher assembly, center on the long stetcher and clamp in position.
- Attach using 1-1/4" pocket screws.
- Repeat for the other short stretcher assembly.
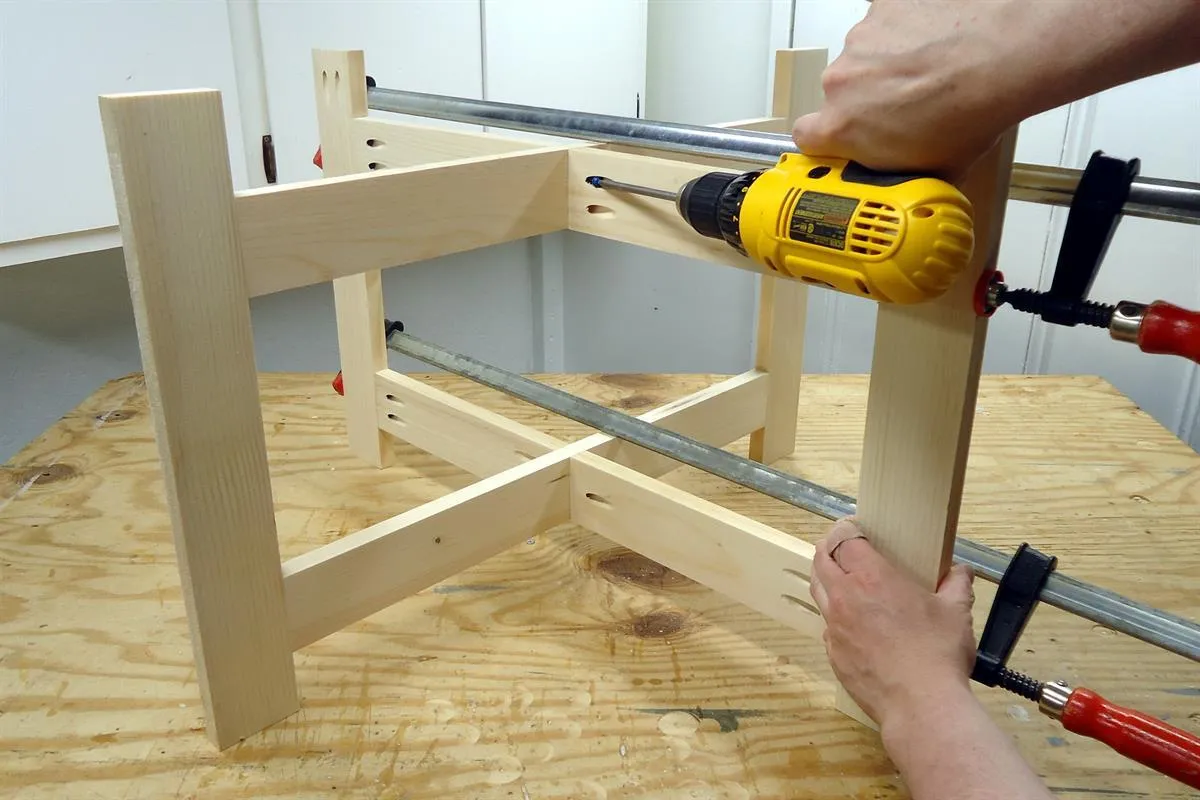
13Attach the Legs to the Top
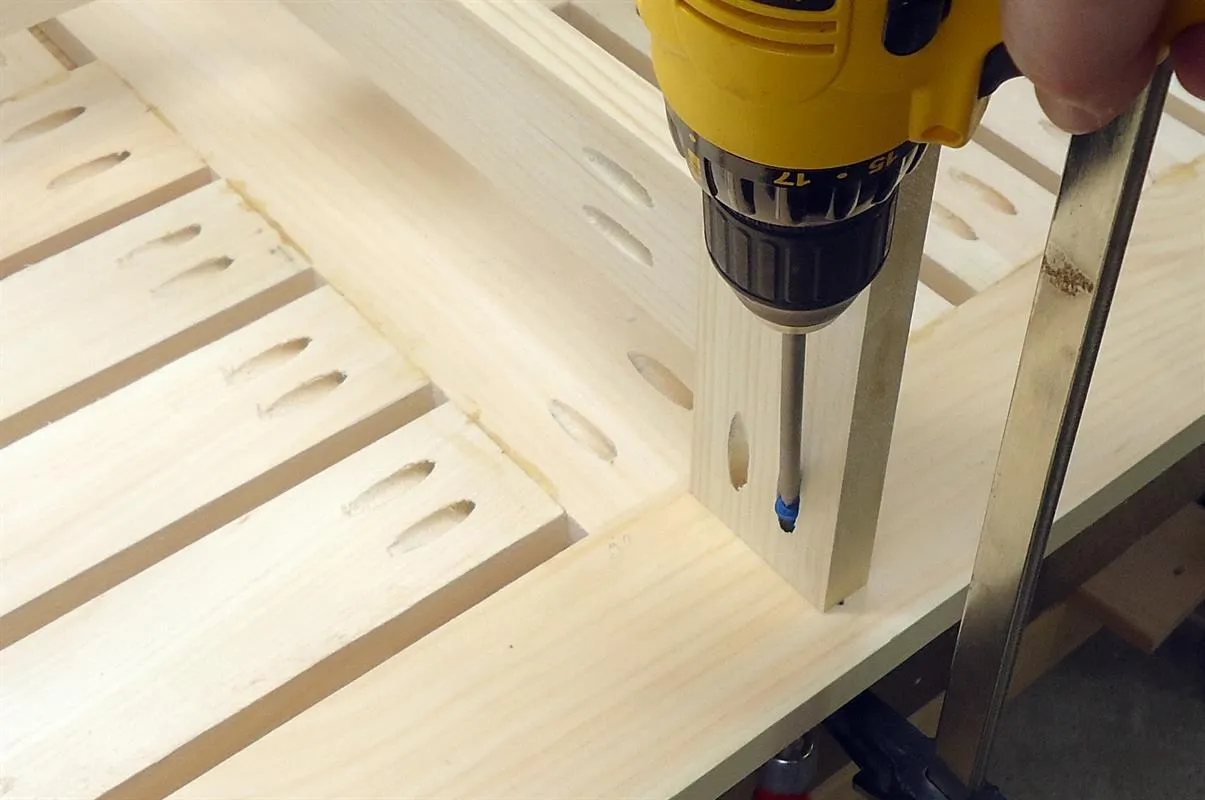
Place the top on your workbench, center the legs on the top, clamp and attach using 1-1/4" pocket screws.
14Cut the Side Table Long Top Pieces
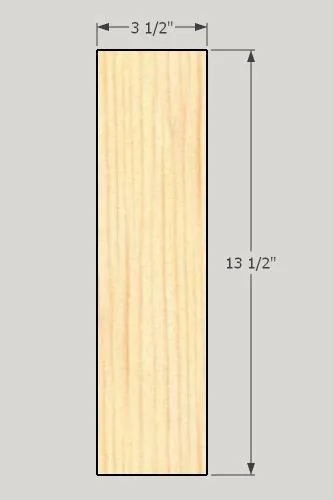
Cut 8 pieces of 1x4 to 13-1/2".
15Cut the Side Table Short Top Pieces
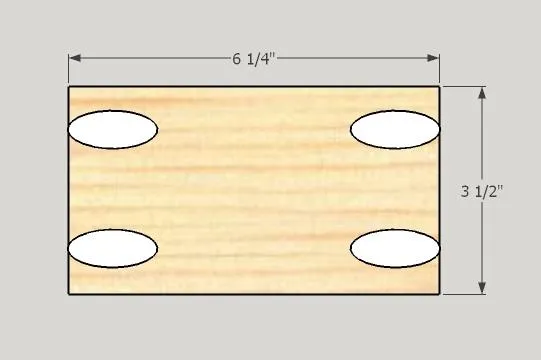
Cut 8 pieces of 1x4 to 6-1/4" and drill pocket holes in each end.
16Cut Side Table Middle Top Pieces
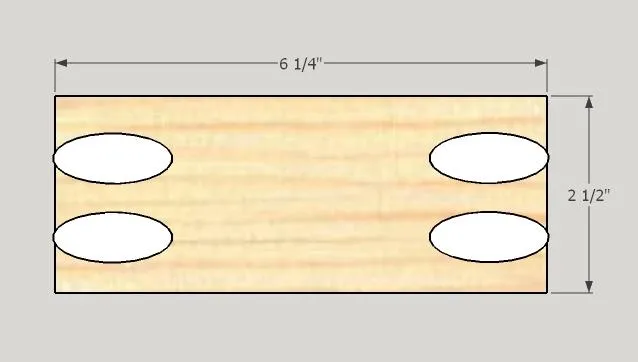
Cut 8 pieces of 1x3 to 6-1/4" and drill pocket holes in each end.
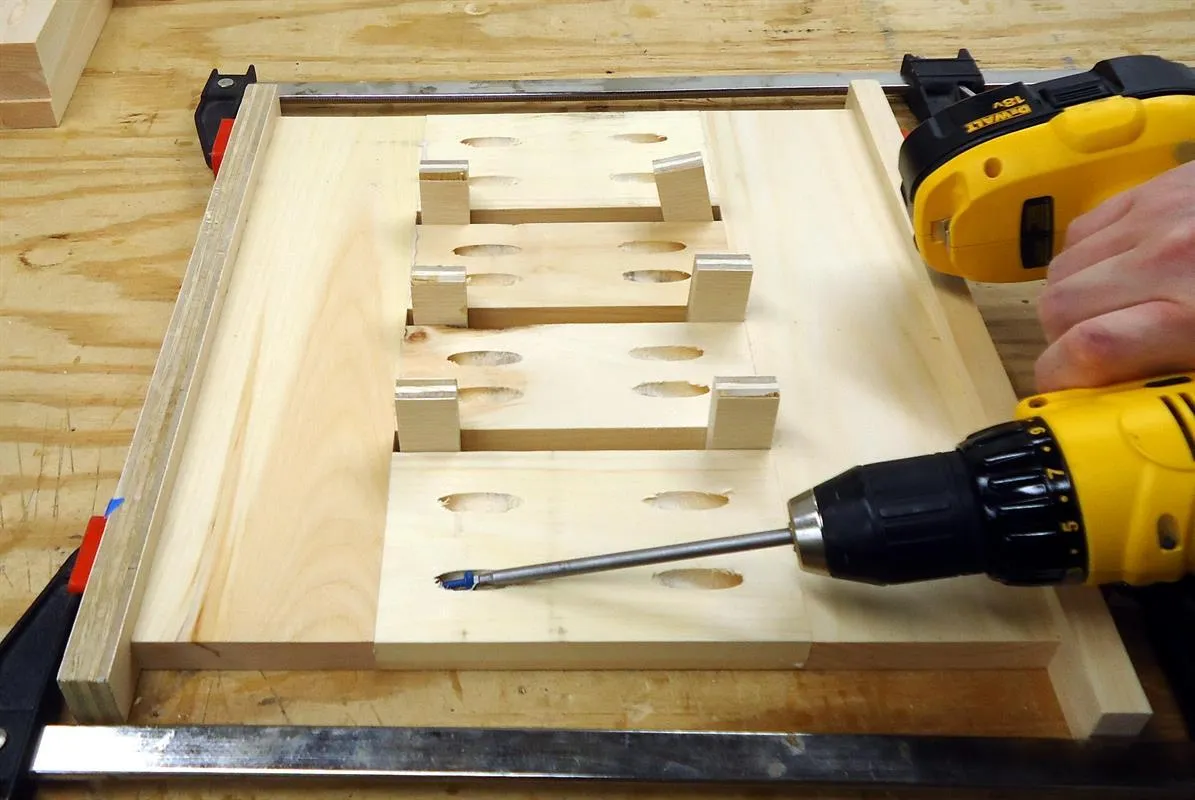
17Assemble the Side Table Tops
- Place 2 long top pieces on your workbench.
- Then apply glue to 2 short top pieces and 2 middle pieces and place between the long top pieces. The spacing between the short top pieces and the middle pieces is 1/2", so I used some scrap 1/2" plywood to help position the pieces.
- Clamp in position and attach using 1-1/4" pocket screws.
- Repeat for the other side table tops.
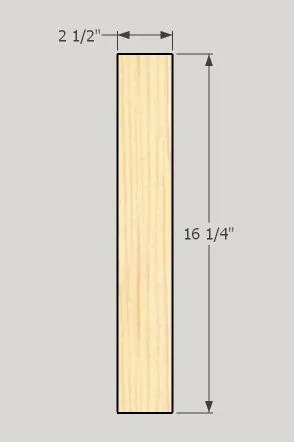
18Cut the Side Table Wide Legs
Cut 16 pieces of 1x3 to 16-1/4".
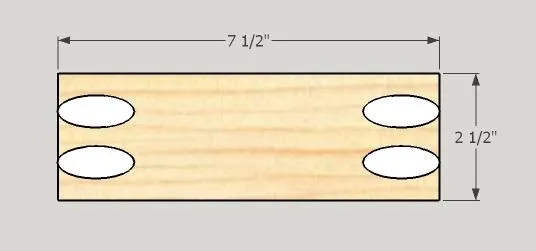
19Cut the Side Table Wide Rails
Cut 16 pieces of 1x3 to 7-1/2" and drill pocket holes in each end.
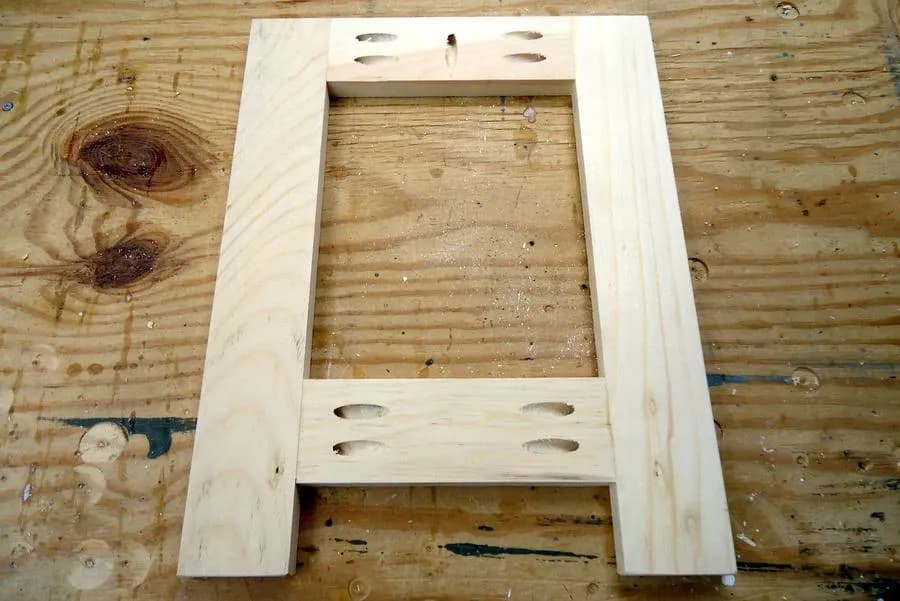
20Assemble the Side Table Wide Legs
- The top rail is flush with the tops of the legs and the bottom rail sets up 2" from the bottom of the legs. To help position the bottom rail I used some scrap wood cut to 2".
- Place two legs on your workbench and clamp a piece of 2" scrap at the bottom of each leg.
- Apply glue to the ends of the rails, clamp in position and attach using 1-1/4" pocket screws.
- Repeat for the remaining leg assemblies.
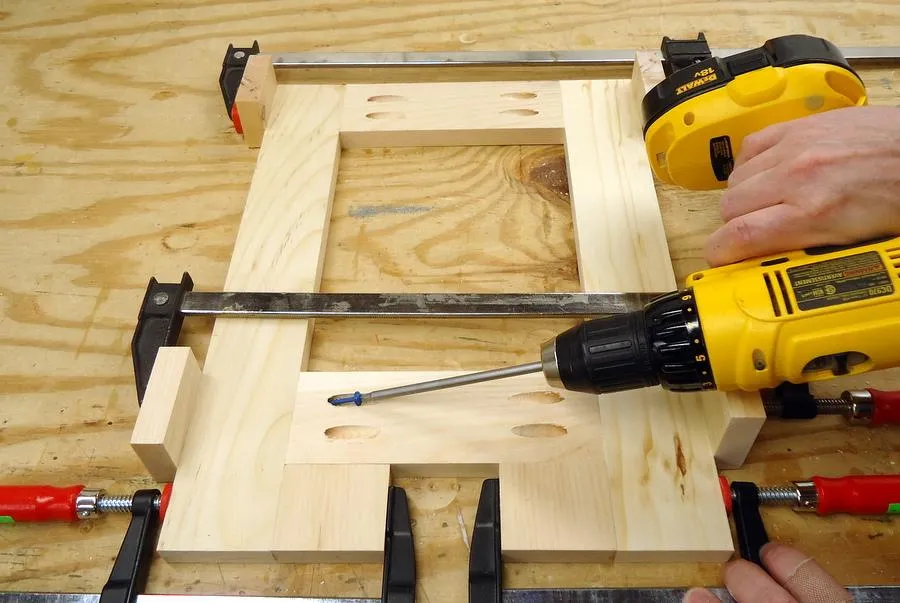
21Side Table Wide Leg Assembly
In the center of each top rail, drill a pocket hole. This pocket hole will be used to attach the leg to the top.
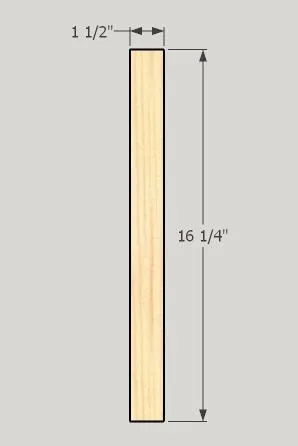
22Cut the Side Table Narrow Legs
Cut 16 pieces of 1x2 to 16-1/4".
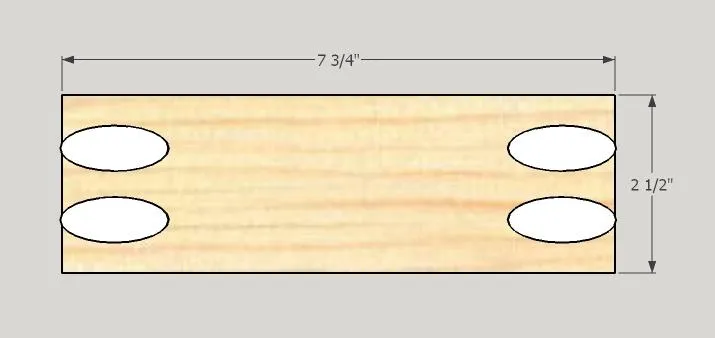
23Cut the Side Table Narrow Rails
Cut 16 pieces of 1x3 to 7-3/4" and drill pocket holes in each end.
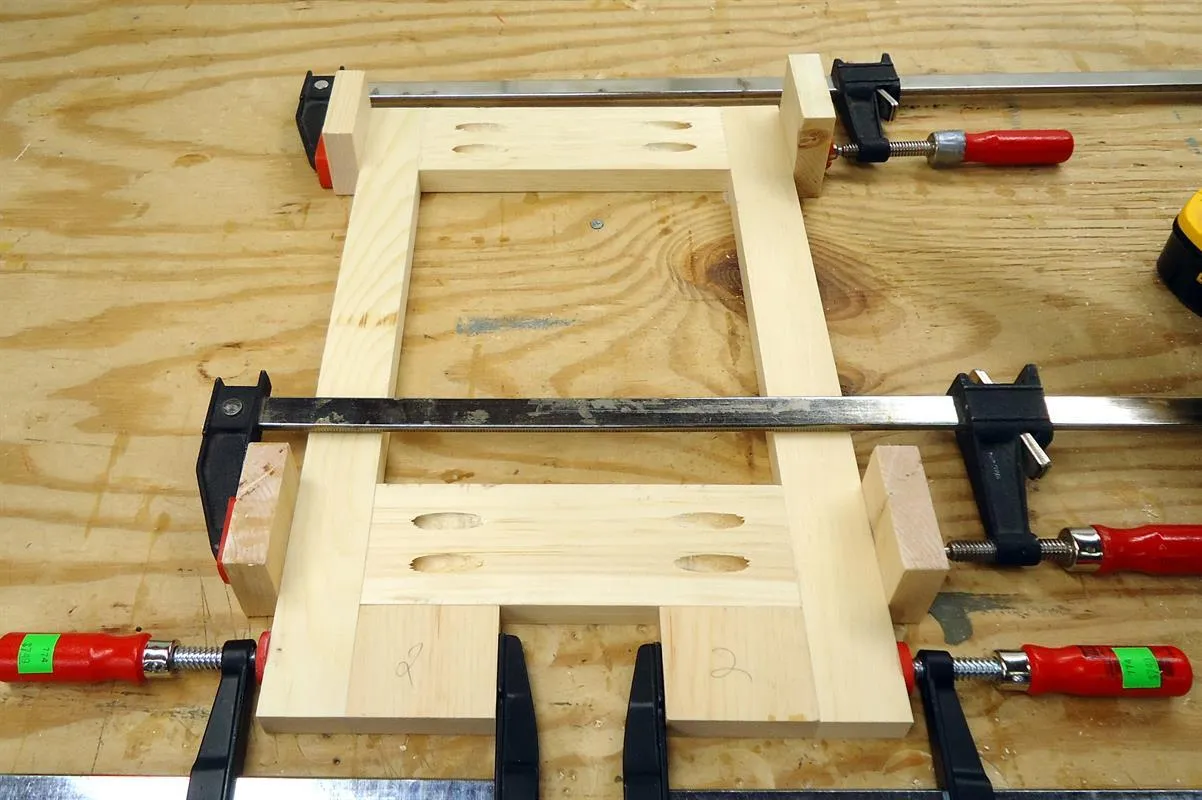
24Assemble the Side Table Narrow Legs
- The top rail is flush with the tops of the legs and the bottom rail sets up 2" from the bottom of the legs. To help position the bottom rail I used some scrap wood cut to 2".
- Place two legs on your workbench and clamp a piece of 2" scrap at the bottom of each leg.
- Apply glue to the ends of the rails, clamp in position and attach using 1-1/4" pocket screws.
- Repeat for the remaining leg assemblies.
25Side Table Narrow Leg Assembly
In the center of each top rail, drill a pocket hole. This pocket hole will be used to attach the leg to the top. At the location of each rail, drill a pocket hole. These pocket holes will be used to attach the narrow leg assemblies to the wide leg assemblies.
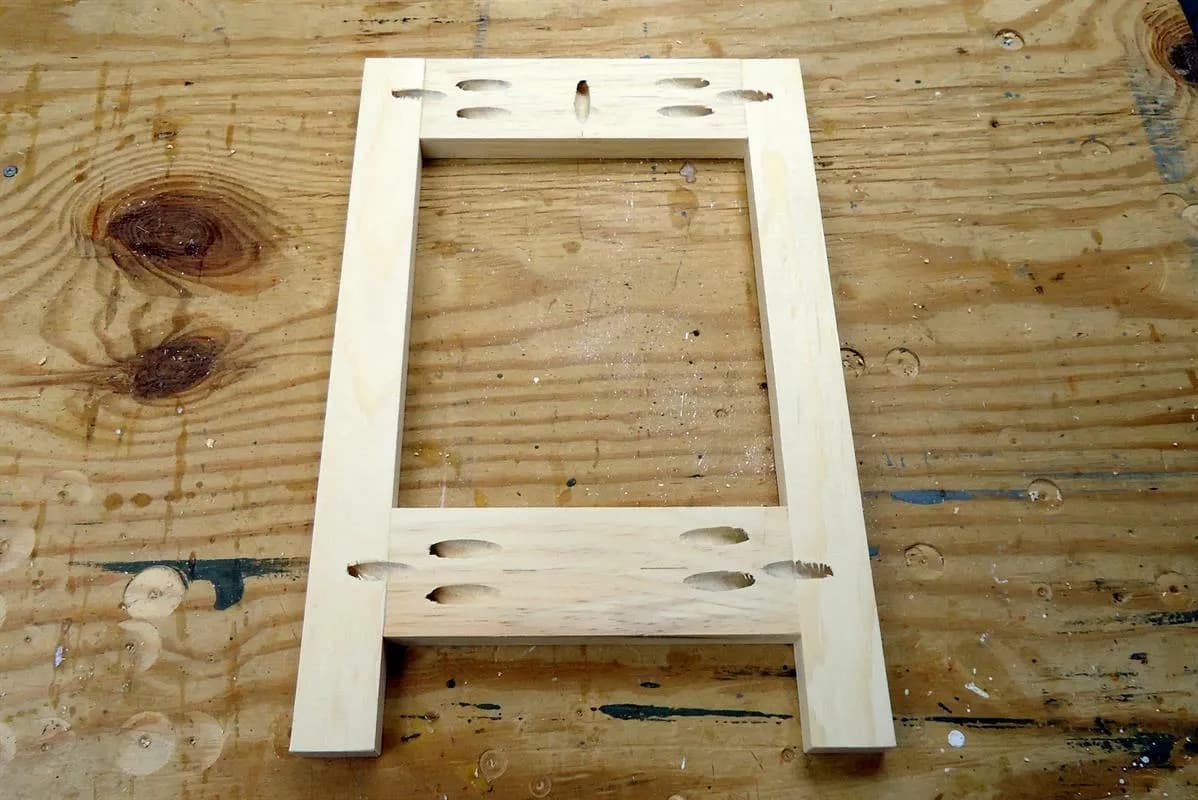
26Assemble Side Table Legs
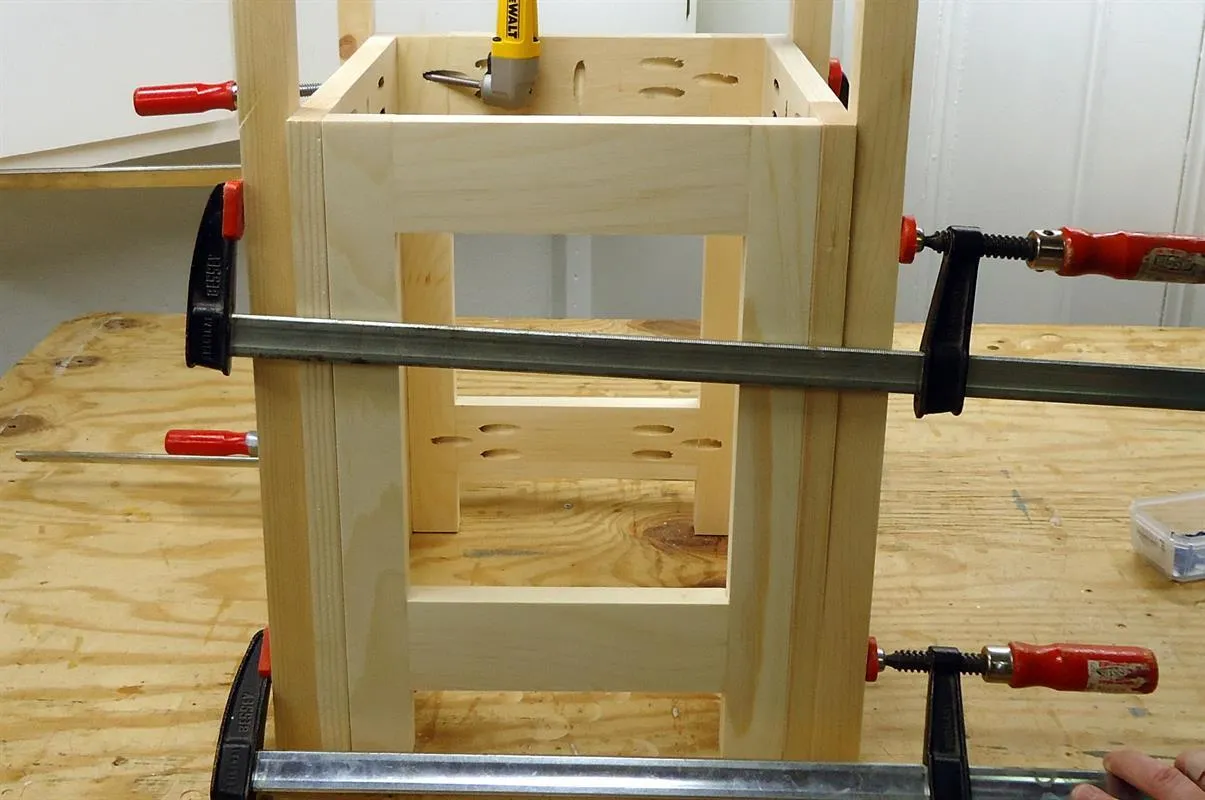
- Apply glue to the edges of 2 narrow leg assemblies, place between 2 wide leg assemblies and clamp.
- Attach using 1-1/4" pocket screws. Note: I needed to use a right angle driver on my drill to attach the pocket screws.
27Attach the Side Table Tops
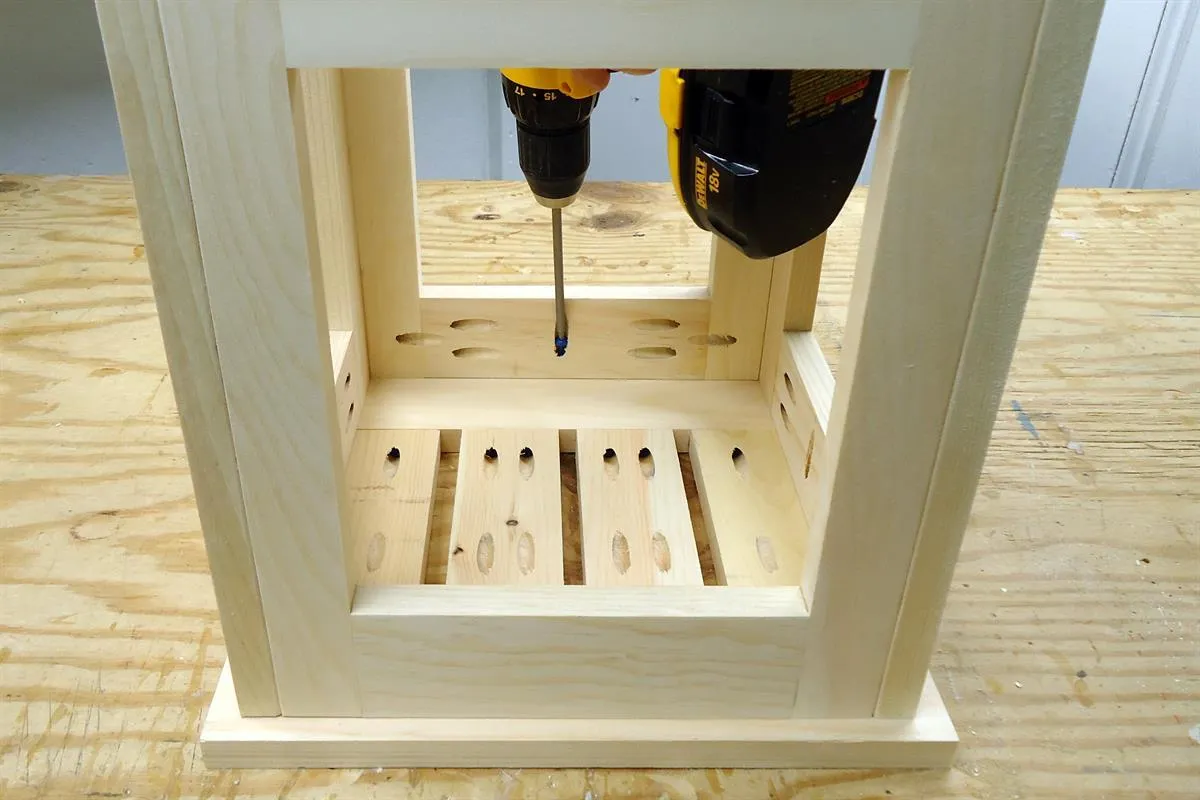
Place a side table top on your workbench, center a leg assembly and attach using 1-1/4" pocket screws.
28Finish
- Sand the coffee table and side tables.
- Apply a coat of primer and several coats of exterior paint or a few coats of exterior stain.
- Once it's dry... enjoy!
Tags
- Outdoor Living
- Intermediate
Reviews & builds
No reviews yet
Sign in to review this plan or share your build.
No reviews yet. Be the first to build this.