Notch
One Sheet Plywood Console
Step-by-step build — 10 steps. Also available as a print sheet.
1Build the Two Sides
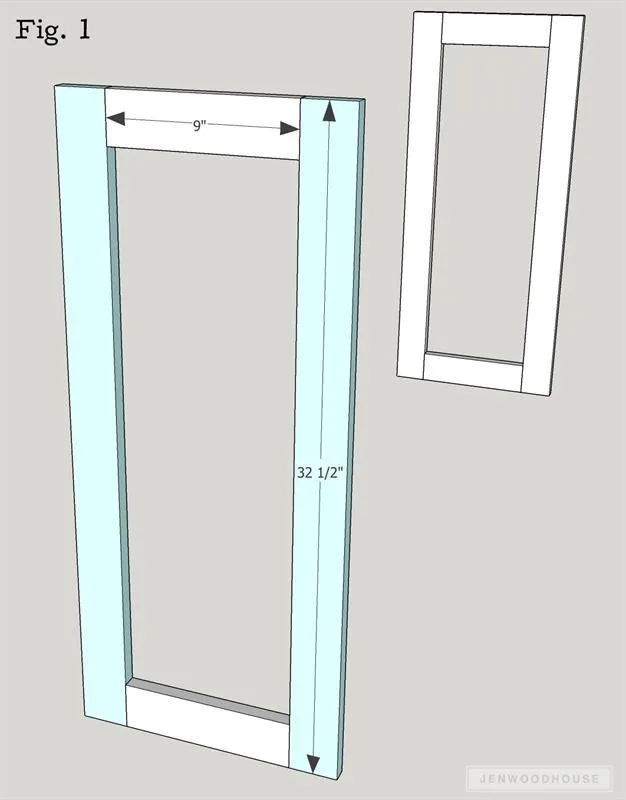
- Measure, mark, and cut side legs and short aprons to size.
- Drill 3/4-inch pocket holes into the ends of the short aprons and attach to the side legs with 1 1/4-inch pocket screws. Be sure to drill 3/4-inch pocket holes facing up in the side legs to attach the top in later steps.
2Add the Front and Back Legs
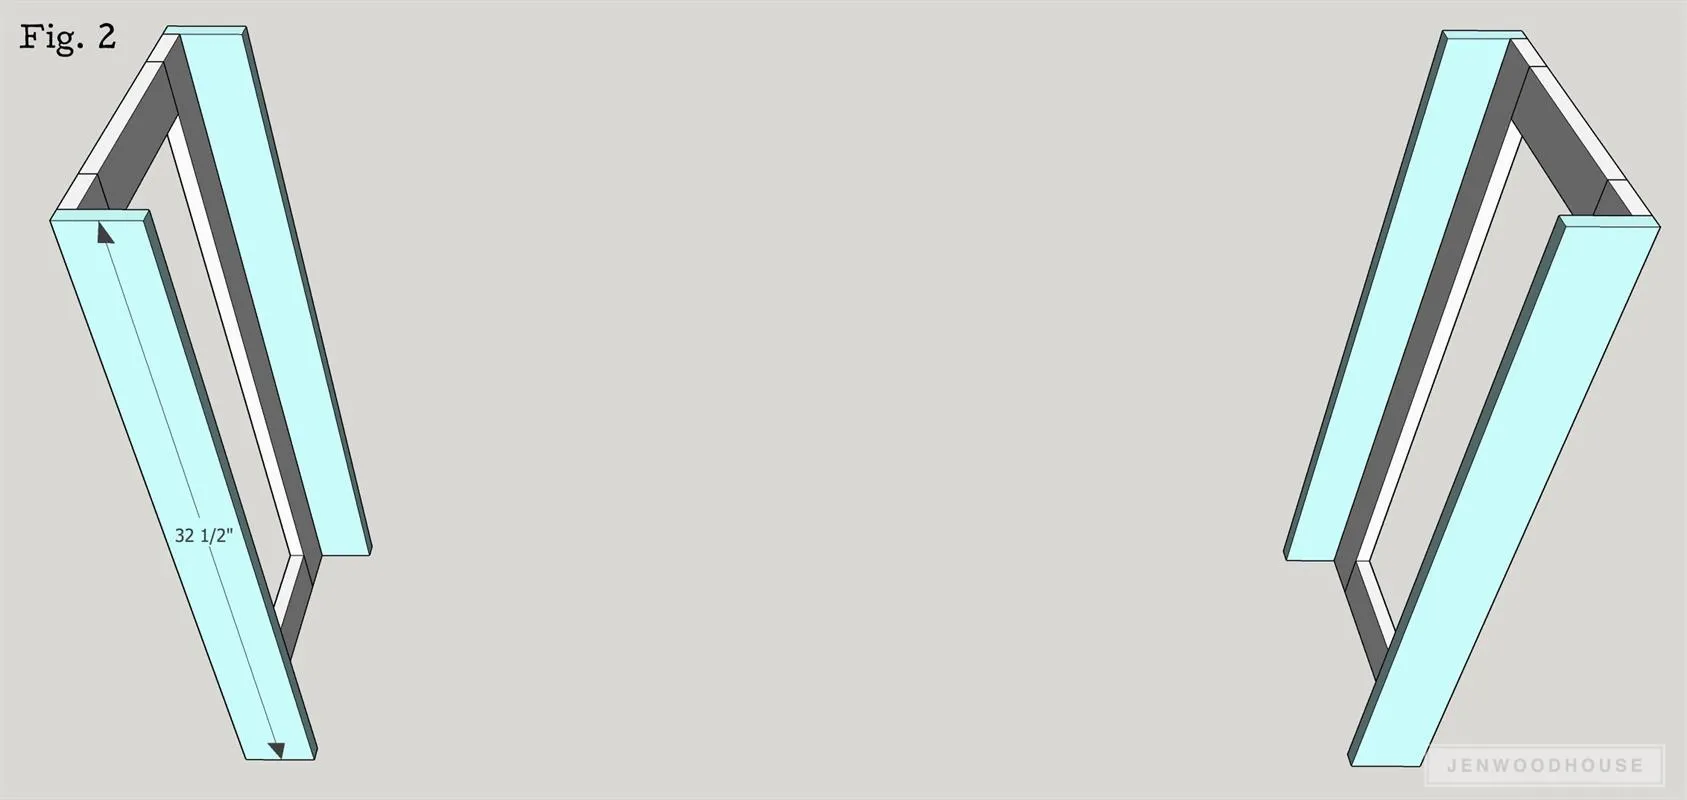
Measure, mark, and cut the front and back legs to size. Attach the front and back legs to the side legs with 1 1/4-inch brad nails and wood glue.
3Attach the Bottom Shelf
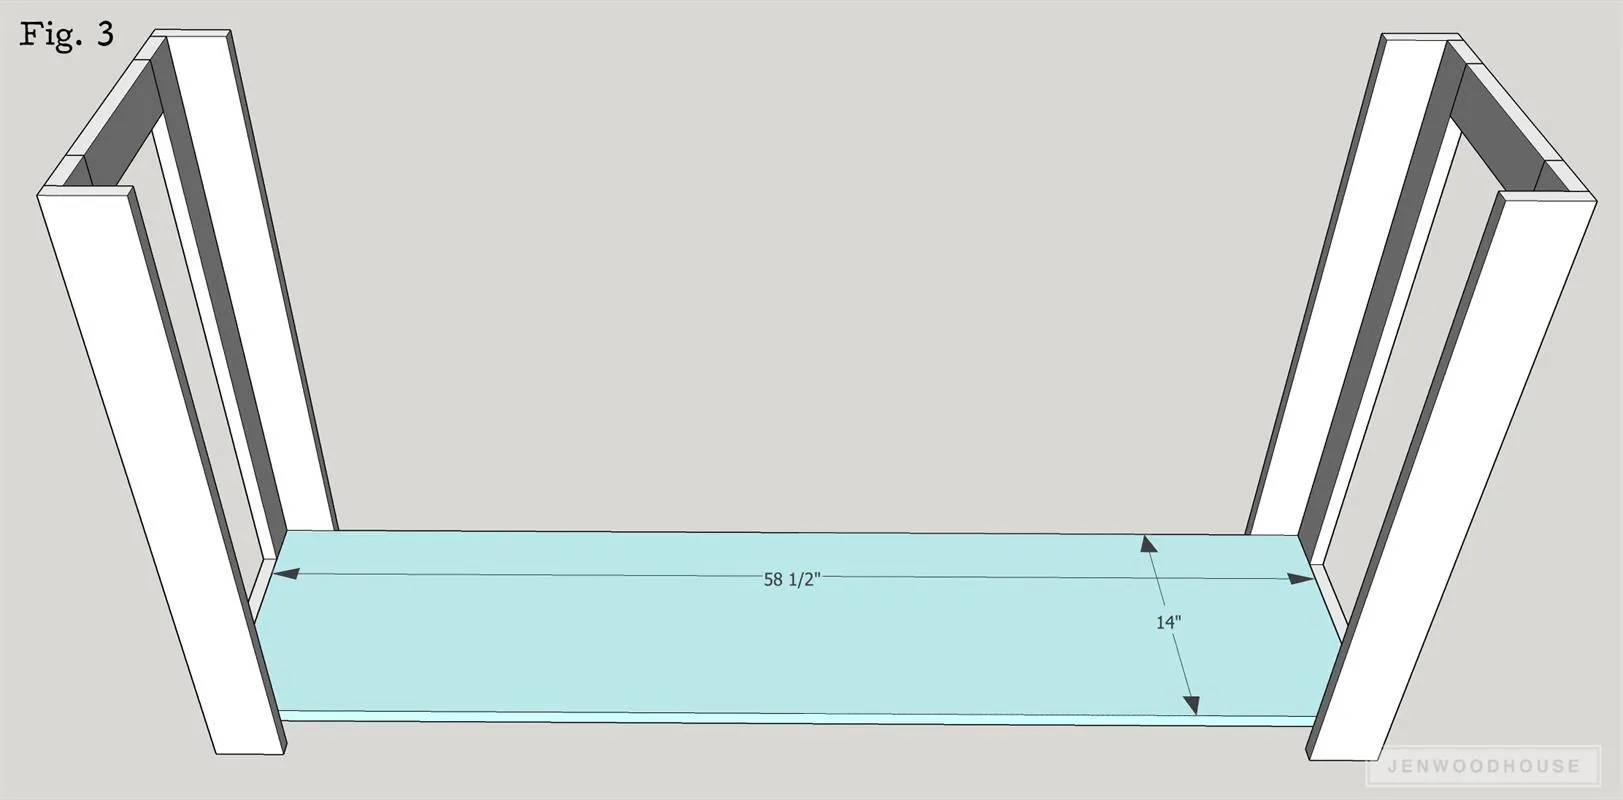
Measure, mark, and cut bottom shelf to size. Drill 3/4-inch pocket holes into the ends and attach to the sides with 1 1/4-inch pocket screws.
4Add the Long Aprons To the Bottom
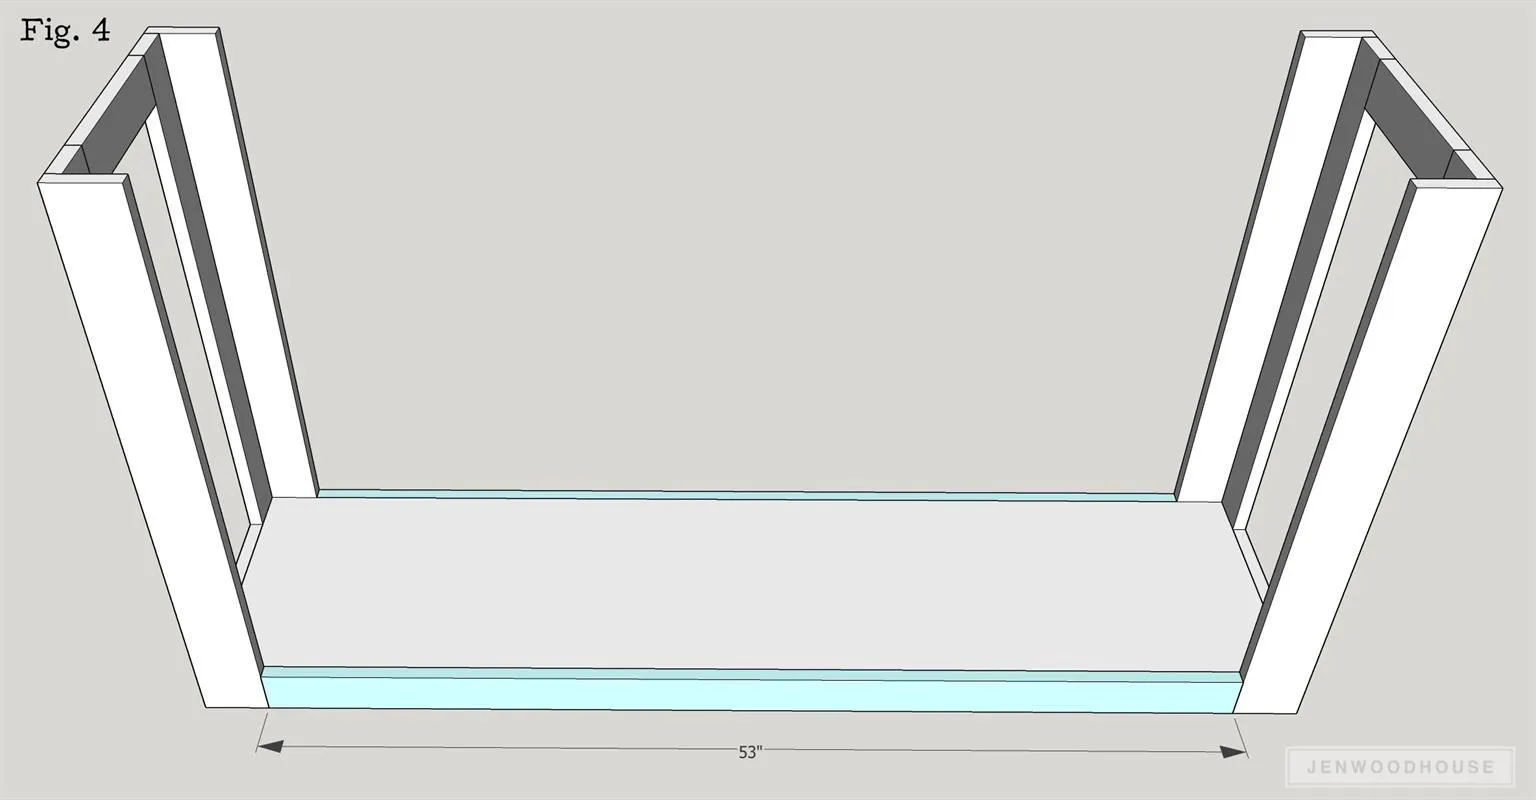
Measure, mark, and cut long aprons to size. Attach to carcass as shown with 1 1/4-inch brad nails and wood glue.
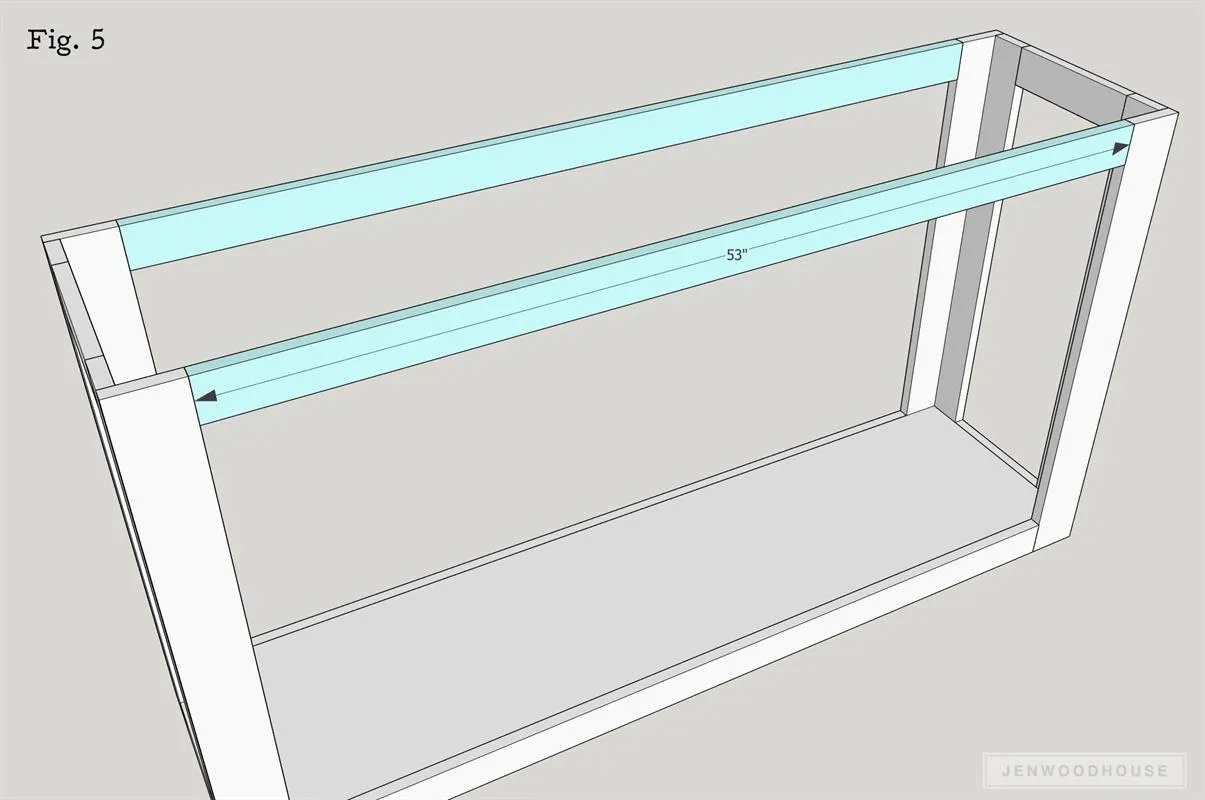
5Add the Long Aprons To the Top
- Measure, mark, and cut long aprons to size.
- Drill 3/4-inch pocket holes into the ends and attach to carcass with 1 1/4-inch pocket screws. Be sure to drill 3/4-inch pocket holes facing up to attach the top in later steps.
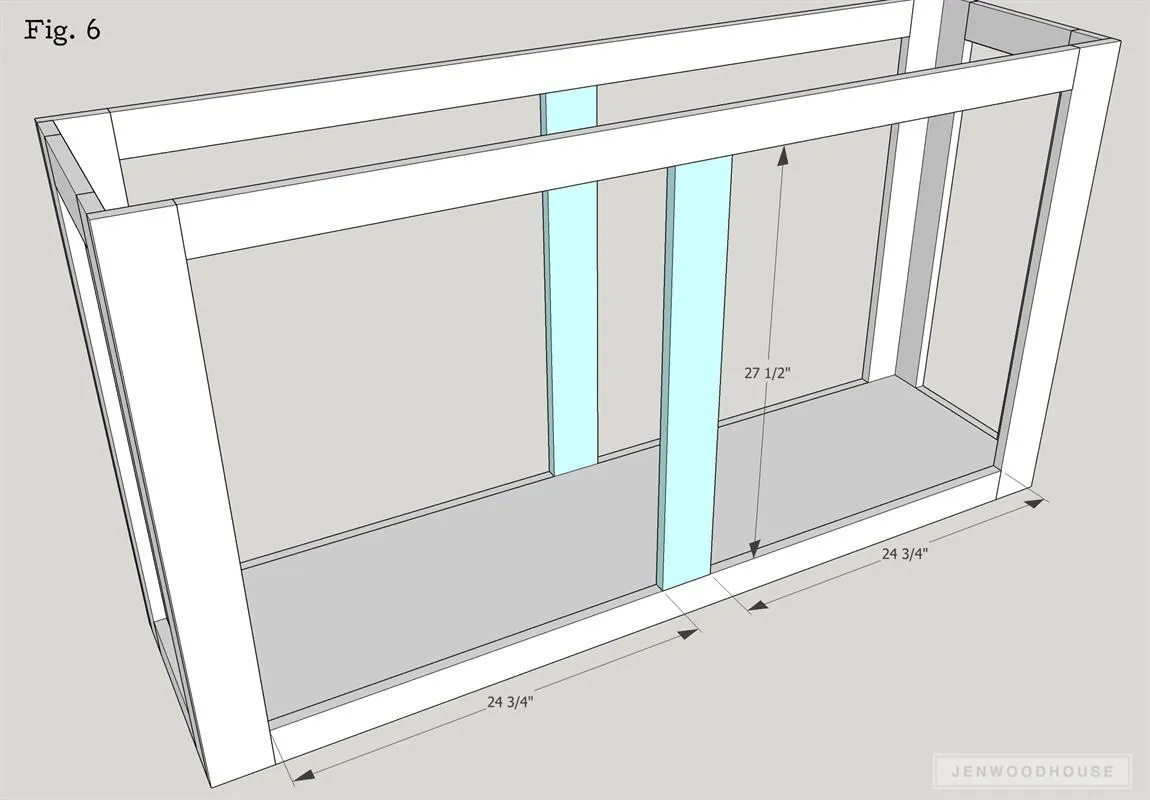
6Attach the Middle Legs
Measure, mark, and cut middle legs to size. Drill 3/4-inch pocket holes into the ends, find the midpoint in the carcass and attach middle legs with 1 1/4-inch pocket screws.
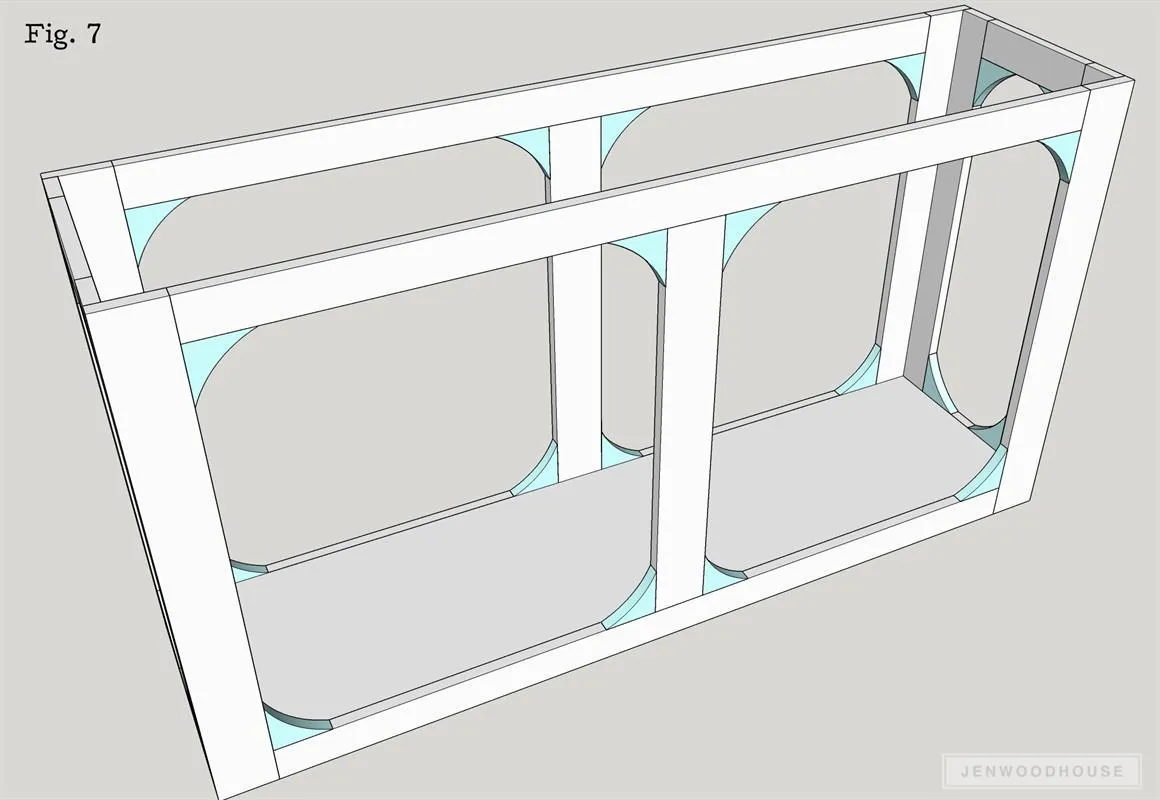
7Add the Curved Details
Measure, mark, and cut curved pieces out with a jigsaw, bandsaw, or scroll saw. Attach as shown with wood glue and 1 inch brad nails.
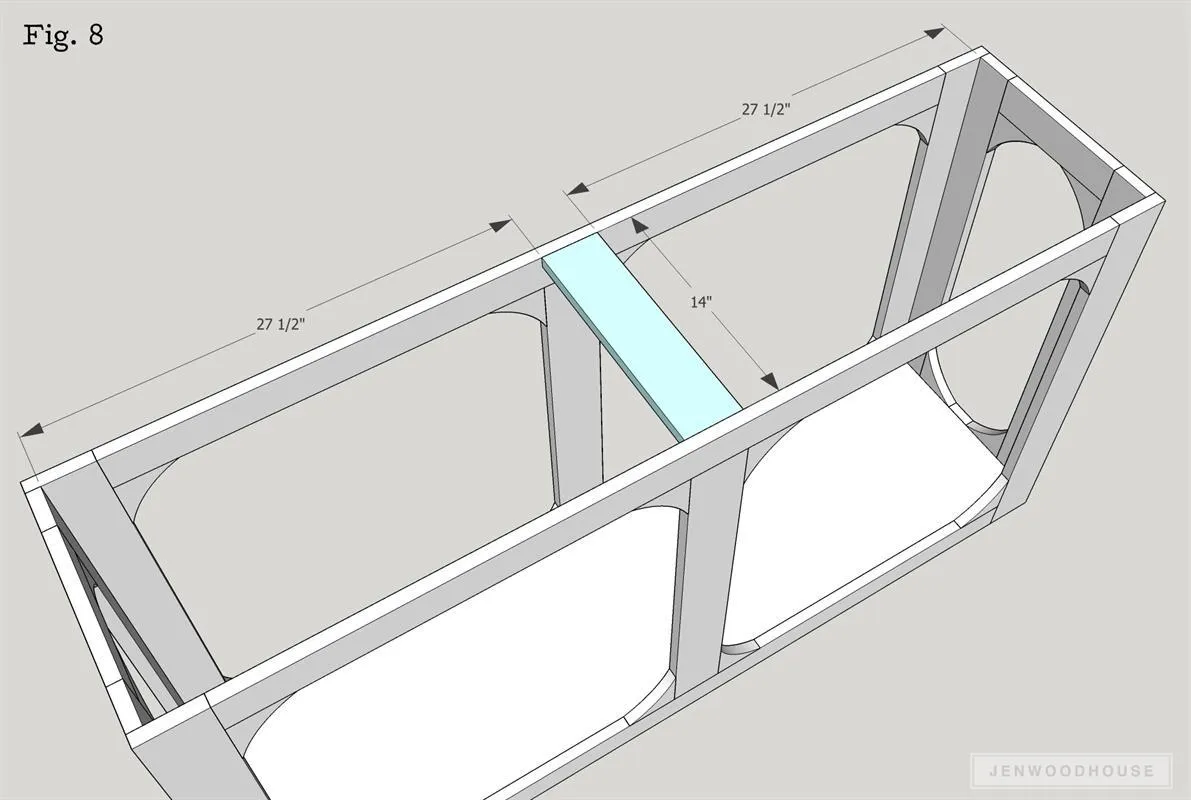
8Add the Underside Support
Measure, mark, and cut middle support to size. Drill 3/4-inch pocket holes into ends and attach as shown with 1 1/4-inch pocket screws.
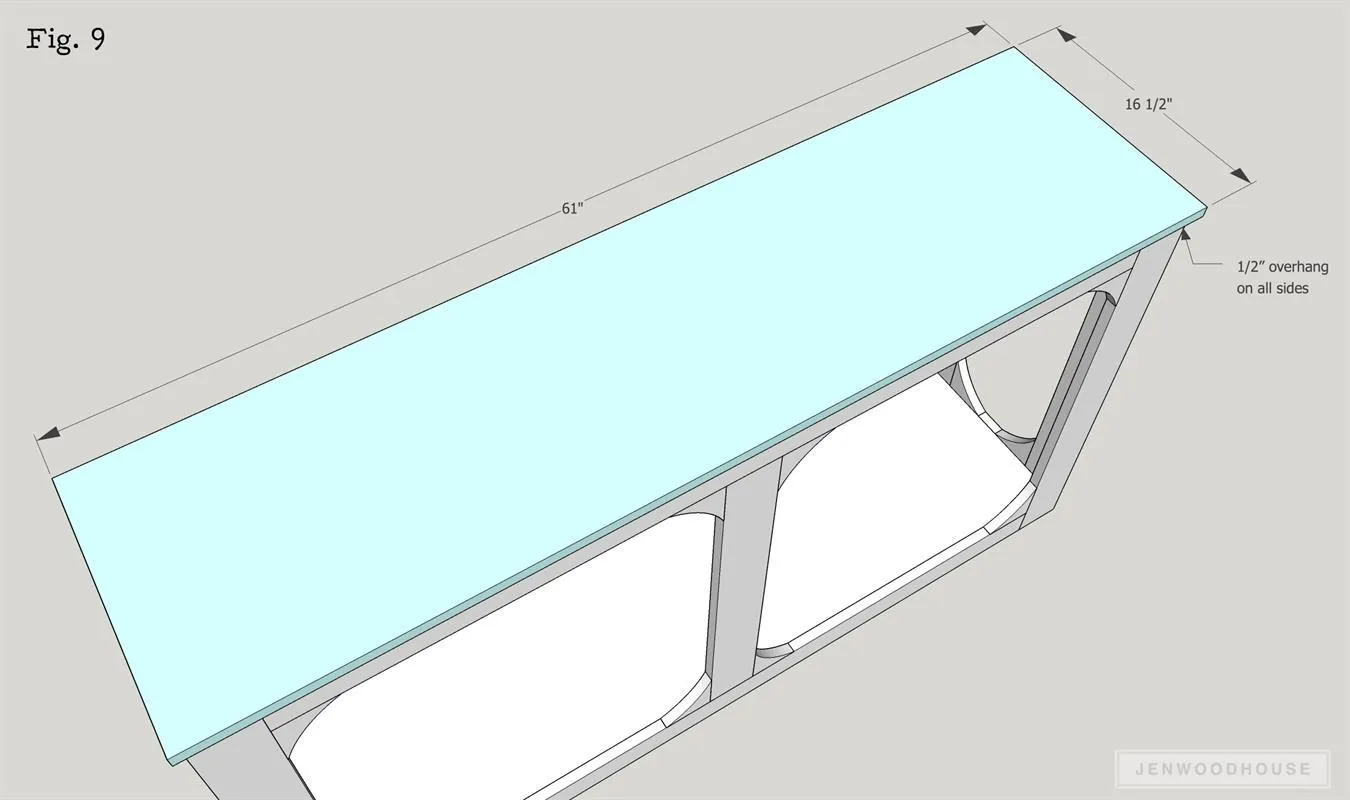
9Attach the Top
- Measure, mark, and cut top to size.
- Position over the carcass with a 1/2-inch overhang on all sides.
- Attach with 1 1/4-inch pocket screws driven from the aprons underneath.
10Visit JenWoodhouse.com
Visit JenWoodhouse.com for more information, DIY project ideas, and building plans.