 Notch
- Difficulty
- Intermediate
- Time
- 4.8–9 hours
- Cost
- $$$
About this build
This one sheet plywood bookshelf is a simple project that is perfect for a kid's room or a playroom to store books, toys, pictures, keepsakes, etc. With adjustable shelves, the possibilities are endless. The 2x2 base and the 1/4" plywood backer are inexpensive, but also optional pieces to add on.
Tools
Essential
- Circular Saw
- Drill / Driver
- Miter Saw
- Pocket Hole Jig
- Staple Gun
Optional / nice to have
- Bar / Pipe Clamps
- Combination Square
- Tape Measure
Materials
| Item | Qty |
|---|---|
| Plywood, 3/4" Thick Full Sheet | 1 board |
| Board, 2x2 96" | 2 board |
| Plywood, 1/4" Thick Half Sheet | 1 board |
| 2 1/2" Kreg Pocket Hole Screws | 8 each |
| 1 1/4" Kreg Pocket Hole Screws | 10 each |
| Shelf Pins | 16 each |
| Kreg Pocket Hole Plugs | 6 each |
| 2" wood screws | 4 each |
| 1 1/4" wood screws | 2 each |
Overall cost: $$$. Lumber prices vary by region, species, and season, so we give a band rather than a figure we would only be pretending to know.
Cut list
| Part | Qty | T × W × L |
|---|---|---|
| Top Panel | 1 | 3/4" × 11" × 48" |
| Side Panels | 2 | 3/4" × 11" × 32" |
| Bottom Panel | 1 | 3/4" × 11" × 46" |
| Middle Divider | 1 | 3/4" × 11" × 31" |
| Legs | 4 | 1" × 1" × 6" |
| Long Frame Pieces | 2 | 1" × 1" × 45" |
| Short Frame Pieces | 2 | 1" × 1" × 8" |
| Shelves | 4 | 3/4" × 10" × 22" |
What to buy
Buy 6 boards at 8 ft.
1" × 1"
2 boards
3/4" × 11"
3 boards
3/4" × 10"
1 board
Assumes 8 ft stock, a 1/8" saw kerf, and buying each part at its own width. Change the board size or kerf on the full board plan →
Instructions
1Cut Down Plywood Sheet
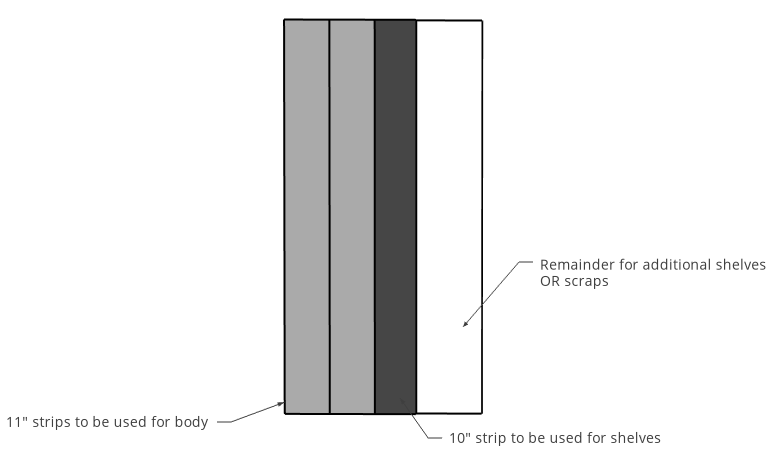
This project calls for one full sheet of 3/4" plywood. There will be some leftover for additional shelves or to save for another project later. First, using a Kreg Rip Cut and a circular saw, rip two 11" wide plywood strips and one 10" wide strip. The 10" strip will become the shelves later, so set it aside for now.
2Cut Bookshelf Pieces
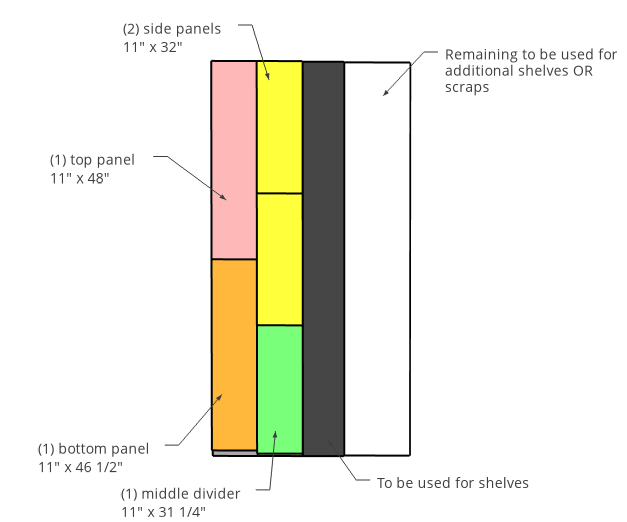
Cut pieces from the 11" strips to assemble the bookshelf from the cut list above--one top (11" x 48"), two sides (11" x 32"), one bottom (11" x 46 1/2") and one divider (11" x 31 1/4"). Apply edge banding as desired to cover the plywood edges.
3Drill Pocket Holes to Assemble
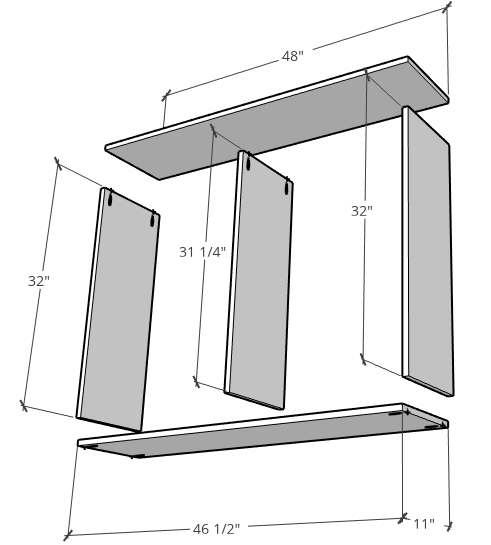
Drill 3/4" pocket holes into the TOP edges of the side panels, the TOP edge of the middle divider and into both ends of the bottom panel.
4Assemble Bookshelf Body
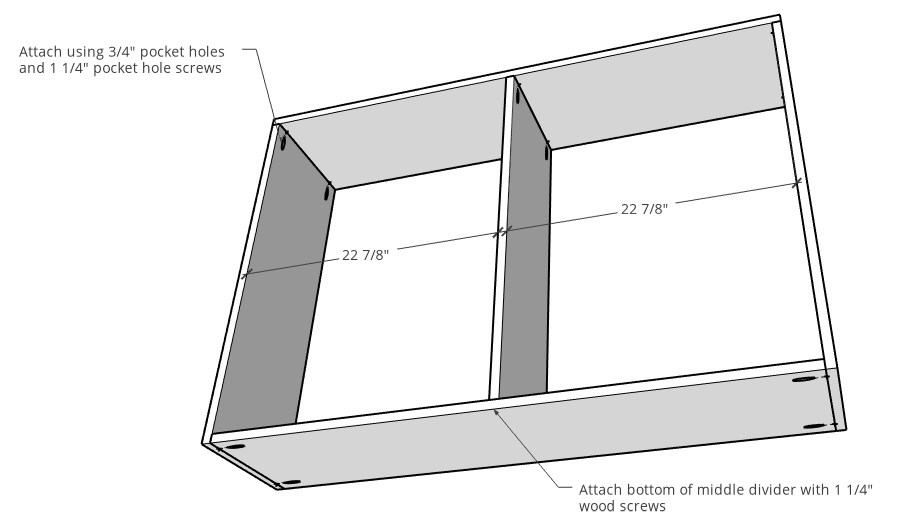
- Assemble bookshelf body using 1 1/4" pocket hole screws through the pocket holes from step 3.
- Attach the bottom of the middle divider using 1 1/4" wood screws through the bottom panel into the middle divider. You can also using pocket holes and screws here as well, but this saves you from having to fill two more pocket holes later.
5Plug Pocket Holes
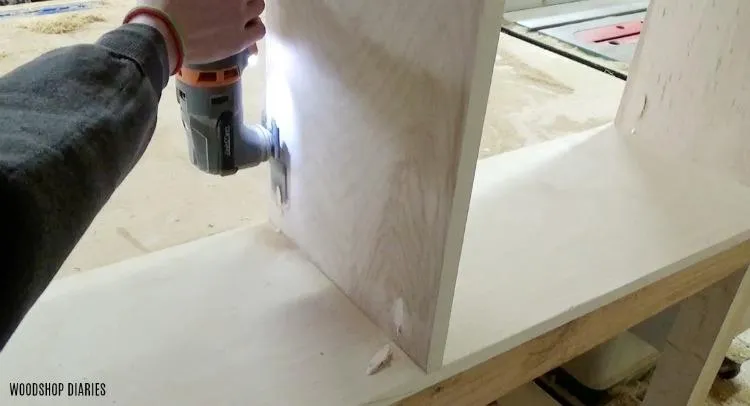
This step is optional. Because you can see the pocket holes at the top of the bookshelf, I used some Kreg pocket hole plugs and glued them into the holes. If you've worked with these before, you know they're kind of one size fits all. They fit nice and flush into 1 1/2" pocket holes but stick out a little with 3/4" pocket holes. Once the glue dries, it's easy to trim these down using an oscillating saw and a flush trim blade, then just sand smooth.
6Assemble Bookshelf Base Short Sides
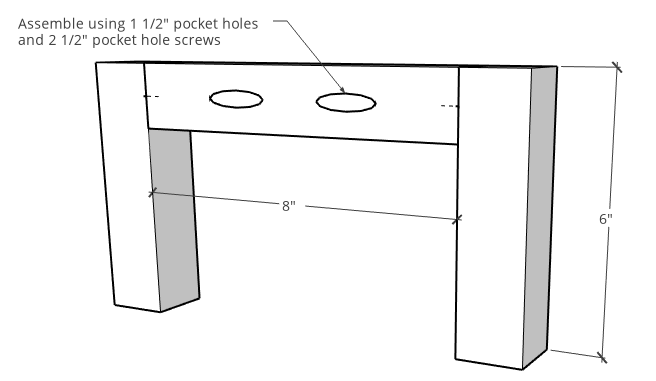
- The base of the bookshelf was built from 2x2s.
- Cut the pieces to make the base from the cut list above. There should be four 6" legs, two 45" long supports and two 8" short supports.
- Drill one 1 1/2" pocket hole into each end of the long and short supports.
- Then, assemble two short sides like shown using wood glue and 2 1/2" pocket hole screws.
7Assemble Bookshelf Base
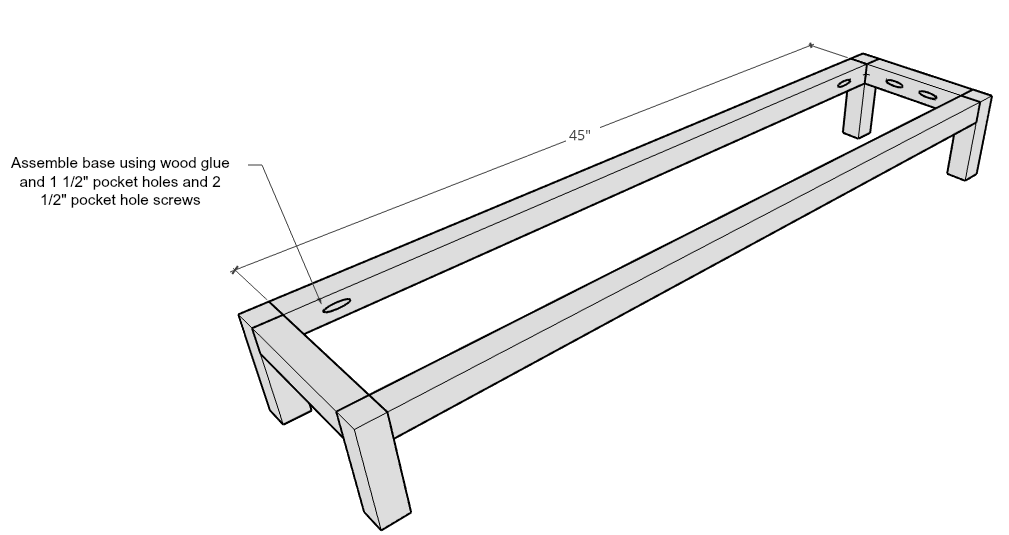
Then, using wood glue and 2 1/2" pocket hole screws, assemble the rest of the base like shown.
8Attach Base to Shelf
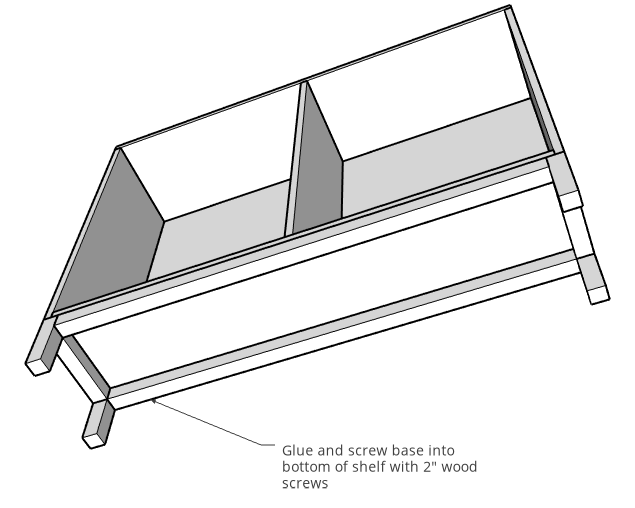
Apply wood glue to top of base and attach onto bottom of bookshelf with 2" wood screws.
9Install Backer
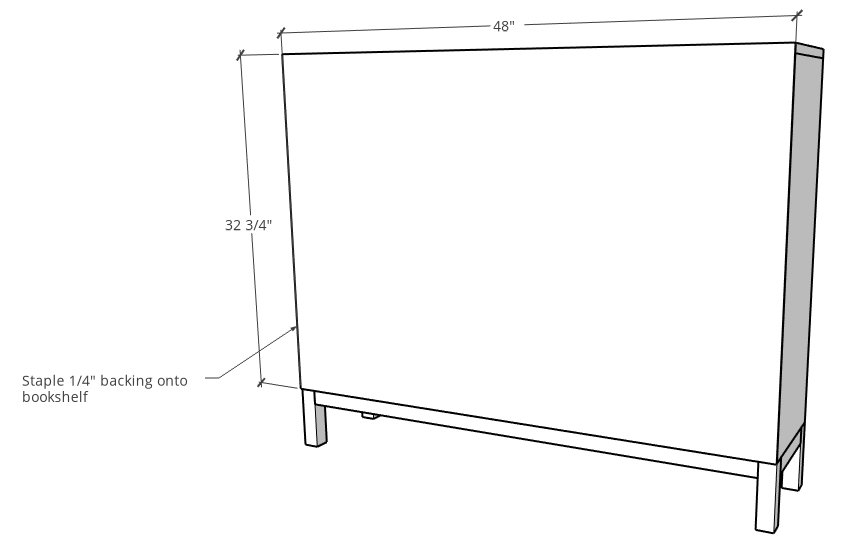
This step is also optional. If desired, cut a 1/4" backer like shown and staple or glue and nail onto the back side of the bookshelf.
10Add Shelf Pins for Adjustable Shelv
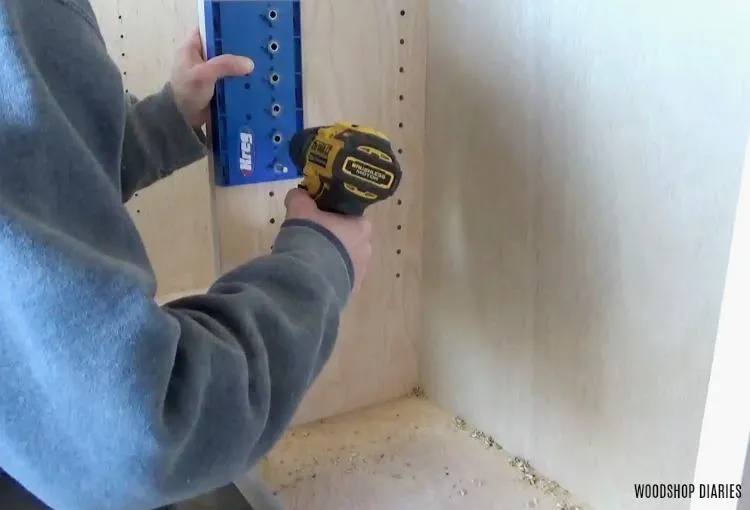
Using a Kreg Shelf Pin Jig, drill shelf pin holes along the sides and middle divider of the bookshelf like shown. This is so that you can add adjustable shelves later.
11Install Shelves
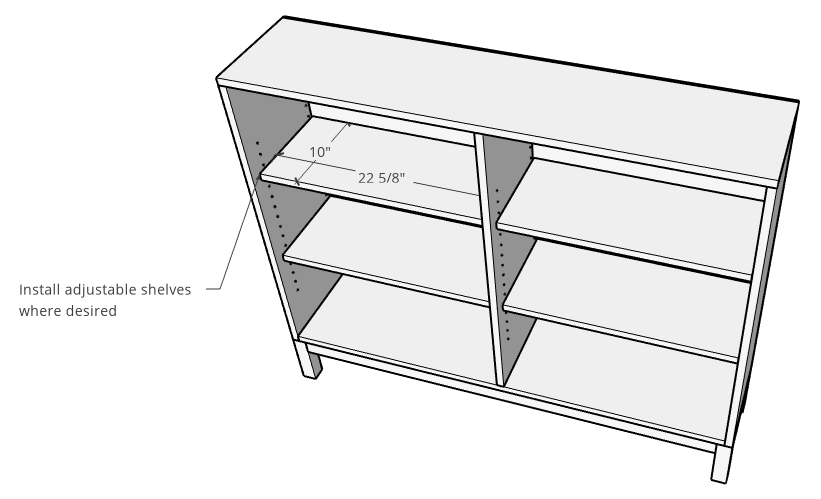
Cut four shelves like shown and install using shelf pins where desired. Cut she shelves 1/4" shorter than the width you will be placing them into so that they don't scrape the sides when you put them in place.
12Finish
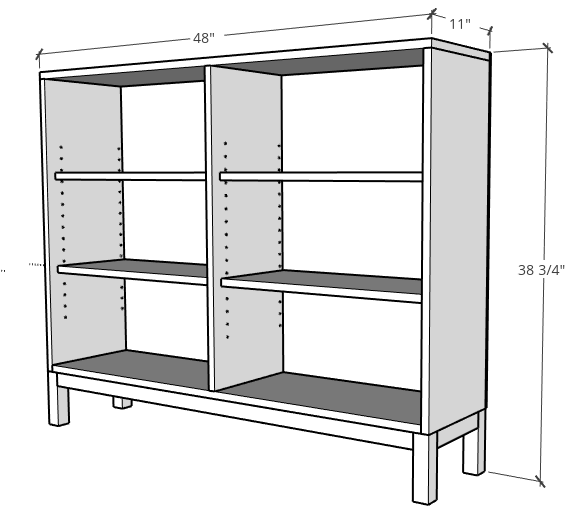
Finish as desired. Because of the nature of tall skinny bookshelves, it may be a good idea to anchor this to the wall once complete to avoid potential tip over.
Tags
- Book
- Intermediate
Reviews & builds
No reviews yet
Sign in to review this plan or share your build.
No reviews yet. Be the first to build this.