 Notch
- Difficulty
- Easy
- Time
- 2.5–4.8 hours
- Cost
- $
About this build
A great compromise of form and function. This Pottery Barn inspired cubby organizer is part of a modular set that can be used in combination with other modular pieces (see image 2), or it can be used alone!
Tools
Essential
- Brad Nailer
- Drill / Driver
- Miter Saw
- Random Orbit Sander
Optional / nice to have
- Tape Measure
Materials
| Item | Qty |
|---|---|
| Board, 1x6 96" | 2 board |
| Board, 1x2 96" | 1 board |
| 2" 16 gauge nails | 1 each |
| Wood Glue | 1 each |
| Mounting Brackets | 2 each |
| Desired Paint and/or Stain | 1 each |
Overall cost: $. Lumber prices vary by region, species, and season, so we give a band rather than a figure we would only be pretending to know.
Cut list
| Part | Qty | T × W × L |
|---|---|---|
| Side Frame | 2 | 3/4" × 5" × 25" |
| Top and Bottom Frame | 2 | 3/4" × 5" × 24" |
| Shelves | 3 | 3/4" × 5" × 11" |
| Shelf Divider | 1 | 3/4" × 5" × 7" |
| Front Rails | 2 | 3/4" × 1" × 25" |
| Back Support | 1 | 3/4" × 1" × 24" |
What to buy
Buy 3 boards at 8 ft.
3/4" × 5"
2 boards
3/4" × 1"
1 board
Assumes 8 ft stock, a 1/8" saw kerf, and buying each part at its own width. Change the board size or kerf on the full board plan →
Instructions
1Assemble Frame
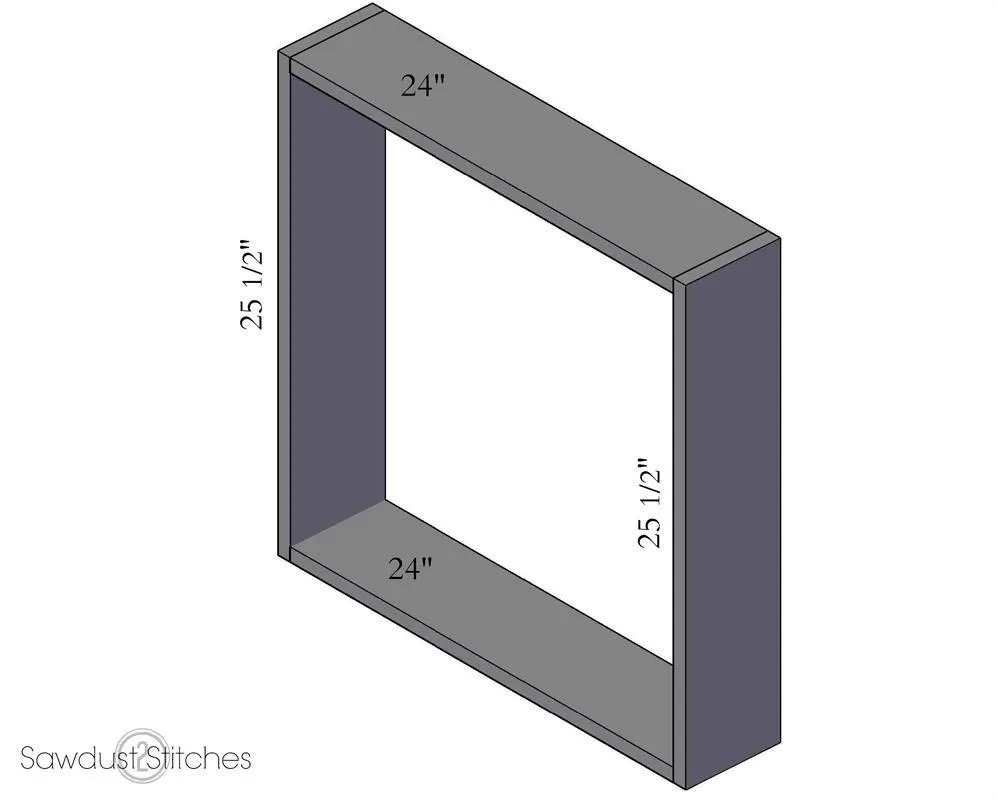
Join both 25 1/2" and 24" 1x6" boards using wood glue and 2 inch, 16 gauge finishing nails. This will form a 25 1/2" square.
2Vertical Divider
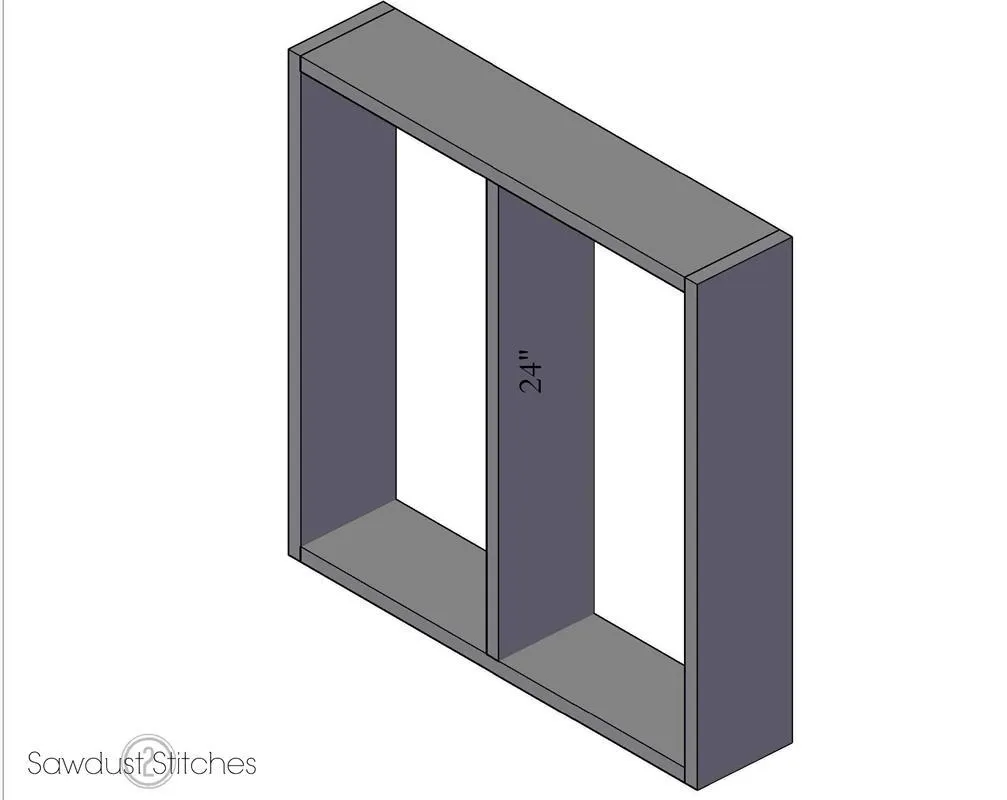
Insert remaining 1"x 6"x 24" board centered vertically. Glue and secure using 2" 18 gauge finish nails.
3Shelf Insert
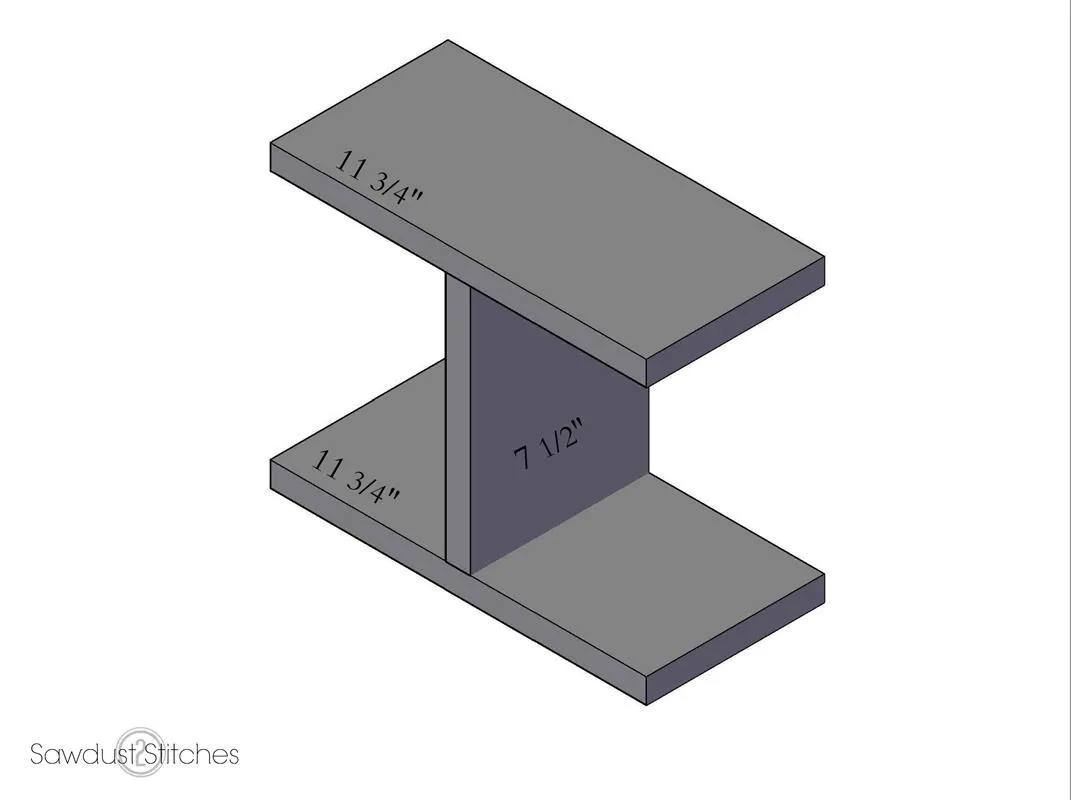
Using (2) of the 1"x 6"x 11 3/4" boards and the 1"x 6"x 7 1/2" board, and form a "I". Make sure that the 7 1/2" board is centered on both 11 3/4" boards. Use wood glue and reinforce with 2" 16 gauge finish nails.
4Shelves
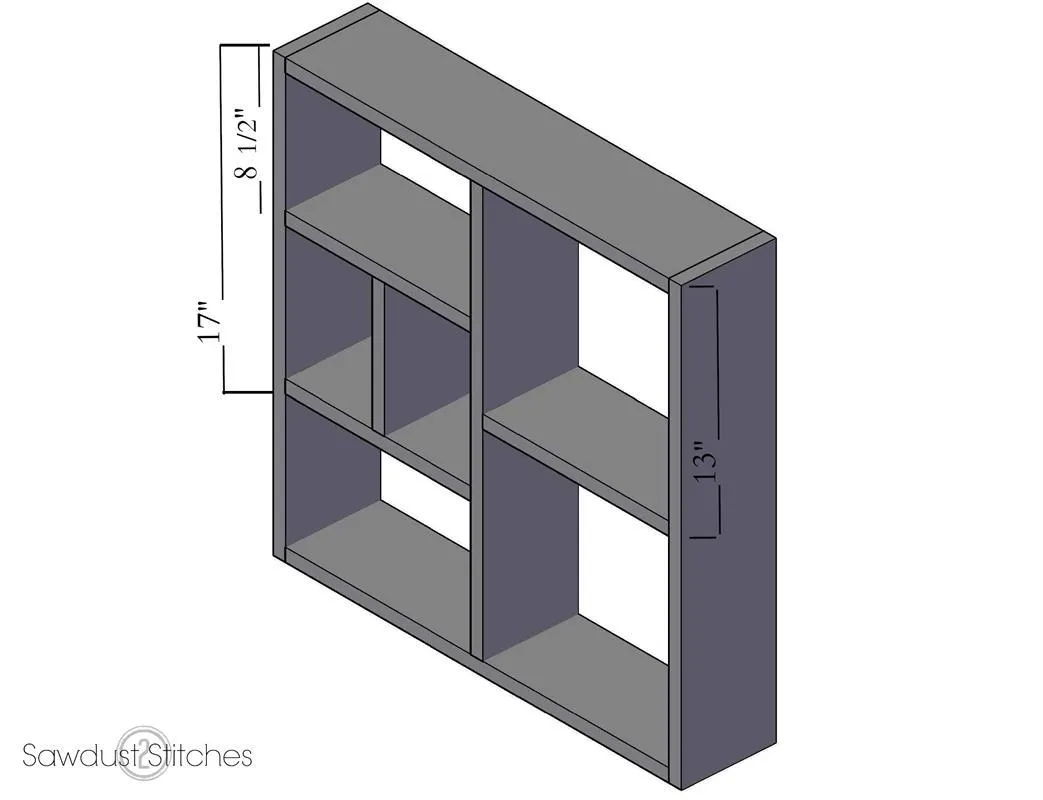
- Insert the pre-assembled "I" shelf so that the base of the bottom board is 17" from the top of the unit. On the right hand side, insert the remaining 1"x 6"x 11 3/4" board.
- Position it so that the bottom of the board is 13" from the top of the unit.
5Front Rails
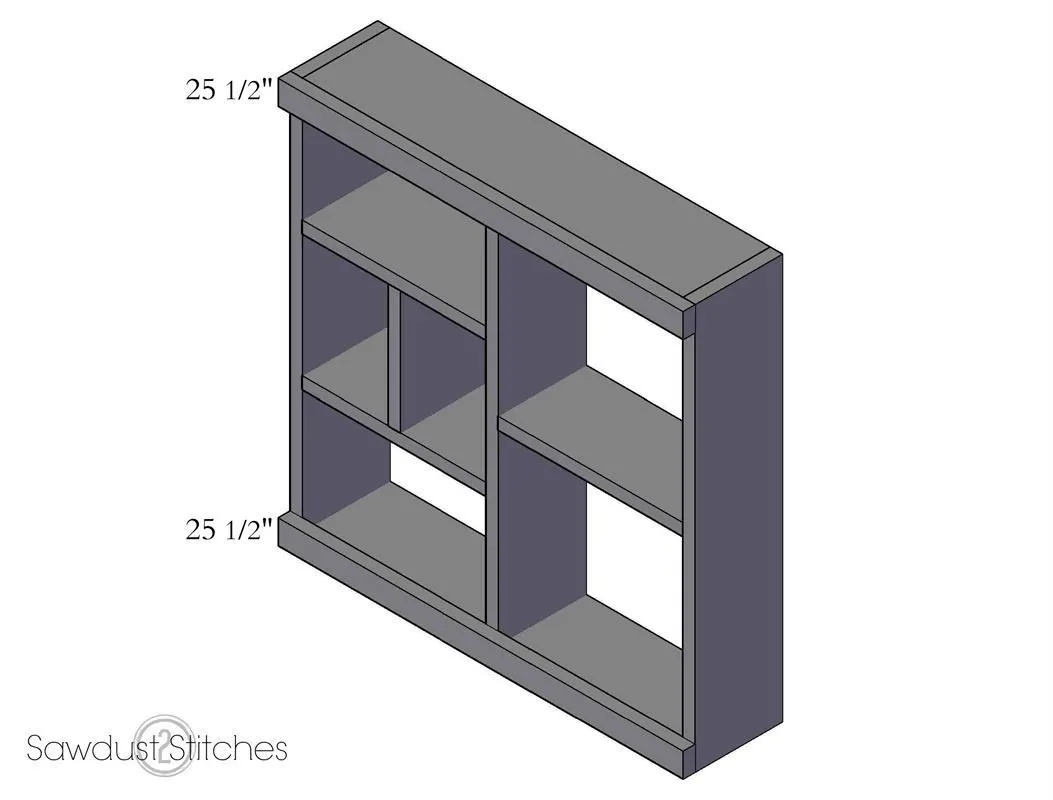
Attach the 25 1/2" 1x2" board(s) to the face of the unit using wood glue and 2 inch 16 gauge finishing nails.
6Back Support
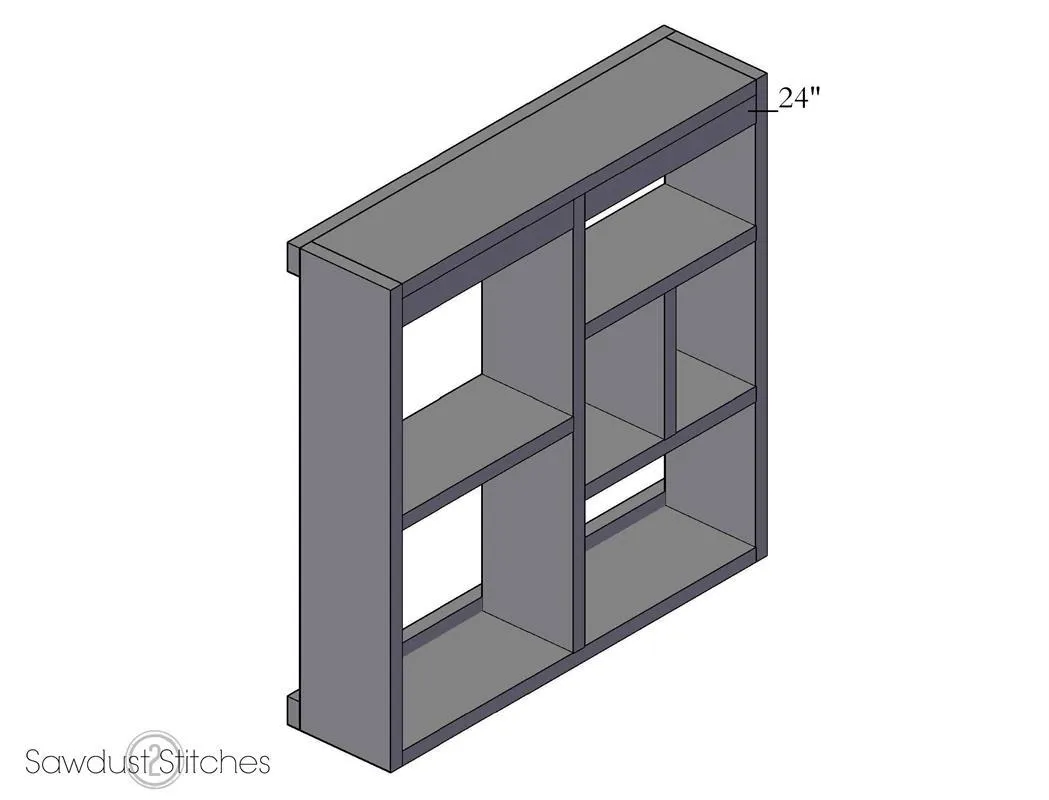
Attach the remaining 24" 1x2"board using wood glue and 2 inch 16 gauge finishing nails. This is an ideal place to attach the unit to the wall, or you can attach hanging hardware to the back.
7Finish
Fill all nail holes with wood filler. Sand smooth, then apply desire stain and/or paint.
Tags
- Gifts
- Beginner
Reviews & builds
No reviews yet
Sign in to review this plan or share your build.
No reviews yet. Be the first to build this.