 Notch
- Difficulty
- Intermediate
- Time
- 5.8–11.5 hours
- Cost
- $$$
About this build
This sleek, modern nightstand will go with any decor and has 2 large drawers for tons of storage. These plans are for one nightstand.
Tools
Essential
- Drill / Driver
- Hammer
- Pocket Hole Jig
- Router
Materials
| Item | Qty |
|---|---|
| 3/4" plywood or solid wood for nightstand box, 4' x 2' or 10 bd ft 48" x 24" | 1 board |
| 3/4" plywood for drawers, 4' x 2' 48" x 24" | 1 board |
| Square dowel, 36" x 1" x 1" or 5 bd ft of 1" thick finished wood | 7 board |
| 1/4" plywood, 4' x 2' 48" x 24" | 1 board |
| 1/4" round dowel, 1/4" x 36" | 1 board |
| Solid wood, 1' x 6' x 6' .75" x 5.25" x 72" | 1 board |
| Wood glue | 1 each |
| 14" slow close drawer slides | 2 each |
| 1.25" screws for drawer fronts | 4 each |
| 1/4" rabbeting bit for router | 1 each |
| 1/2" nails | 10 each |
| Forstner bit | 1 each |
| Hardware of choice | 4 each |
| Figure 8 fasteners | 8 each |
| 1/4" drill bit | 1 each |
Overall cost: $$$. Lumber prices vary by region, species, and season, so we give a band rather than a figure we would only be pretending to know.
Cut list
| Part | Qty | T × W × L |
|---|---|---|
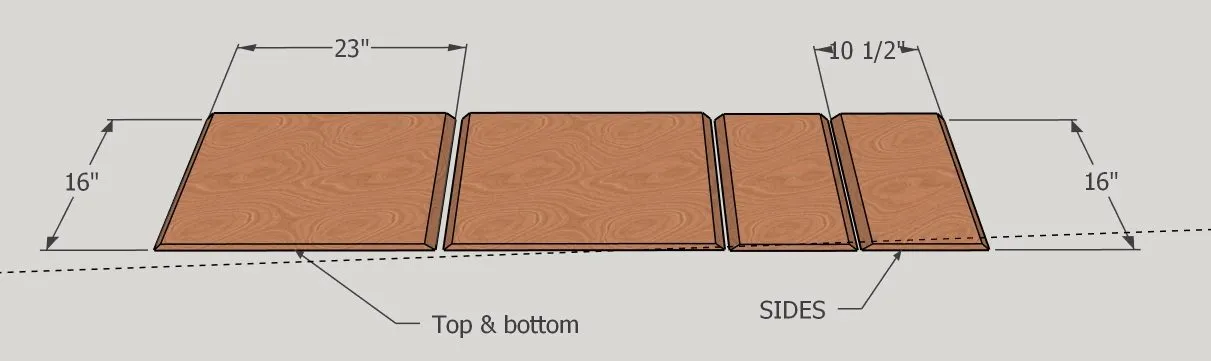
| Nightstand top | 1 | 3/4" × 16" × 23" |
| Nightstand bottom | 1 | 3/4" × 16" × 23" |
| Nightstand sides | 2 | 3/4" × 10 1/2" × 16" |
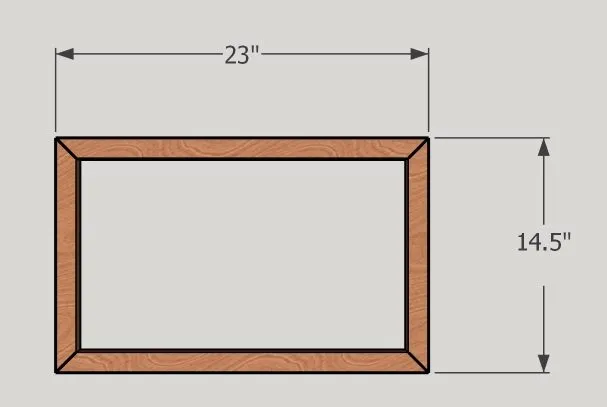
| Mitered front legs top & bottom | 2 | 1" × 1" × 23" |
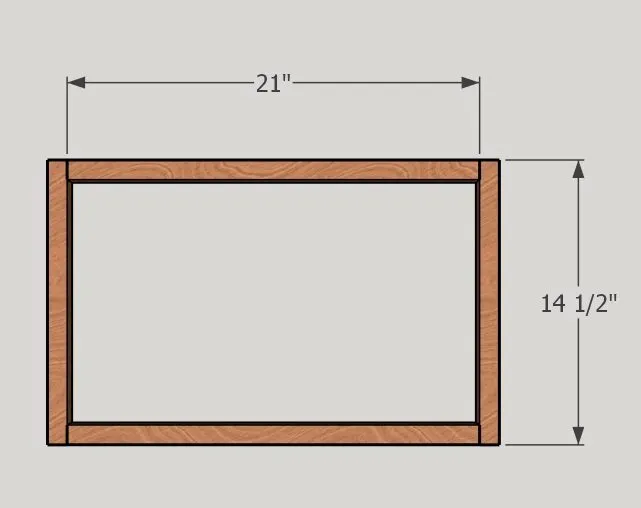
| Mitered front legs sides | 2 | 1" × 1" × 14 1/2" |
| Back legs top & bottom | 2 | 1" × 1" × 21" |
| Back legs sides | 2 | 1" × 1" × 14 1/2" |
| Cross pieces for legs | 4 | 1" × 1" × 14" |
| Drawer front & back | 4 | 3/4" × 3 1/2" × 19" |
| Drawer sides | 4 | 3/4" × 3 1/2" × 14" |
| Drawer bottom | 2 | 1/4" × 13 7/16" × 19 1/2" |
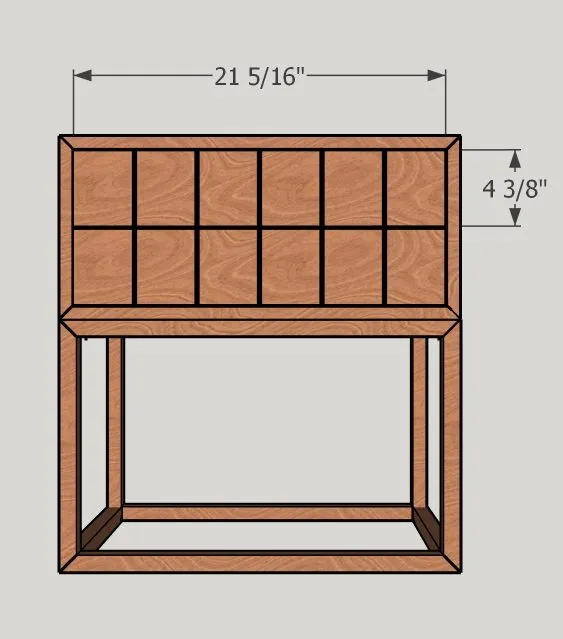
| Drawer front | 2 | 3/4" × 4 3/8" × 21 5/16" |
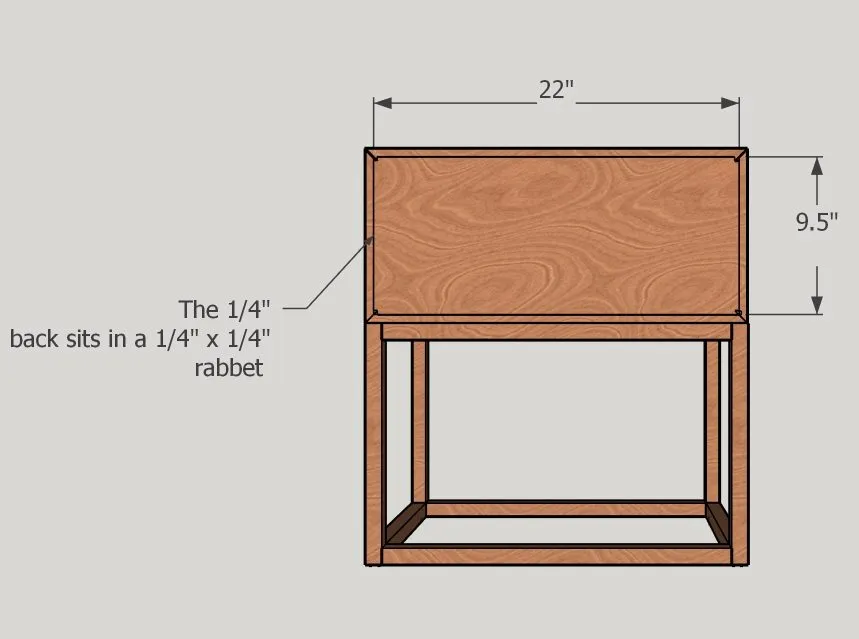
| Nightstand back | 1 | 1/4" × 9 1/2" × 22" |
What to buy
Buy 10 boards at 8 ft.
1" × 1"
3 boards
3/4" × 16"
1 board
3/4" × 10 1/2"
1 board
3/4" × 4 3/8"
1 board
3/4" × 3 1/2"
2 boards
1/4" × 13 7/16"
1 board
1/4" × 9 1/2"
1 board
Assumes 8 ft stock, a 1/8" saw kerf, and buying each part at its own width. Change the board size or kerf on the full board plan →
Instructions
11
Cut the box for the nightstand to size. Bevel the edges with either a track saw or a table saw.
22
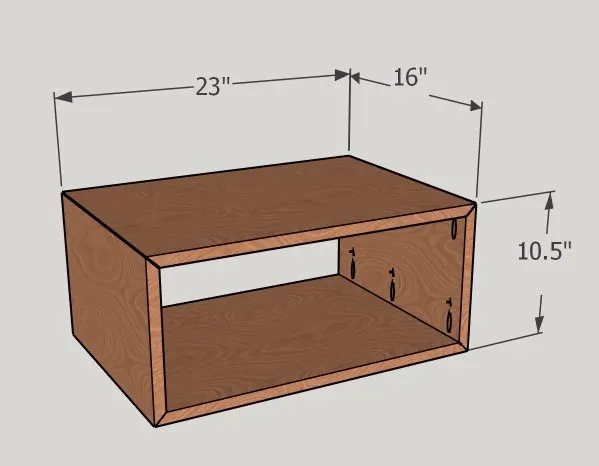
Glue up the box with wood glue and clamps. Let dry overnight. Tip: corner clamps work really well for this!
33
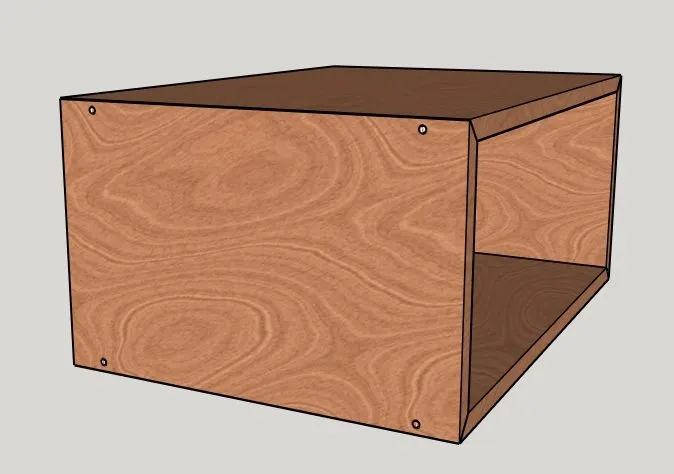
- Drill 1/4" holes about 1.5" away from the edges of the front and back of the box on both the top and bottom. The holes should be 1" deep. Tip: wrap a piece of painters tape 1" down on your drill bit to make the right depth hole.
- Add a little glue to the holes then pound in a 1/4" round dowel until it hits the back of the holes.
- Cut the dowel flush with the nightstand with a hand saw.
44
Cut the mitered legs to size. This will be the front of the base.
55
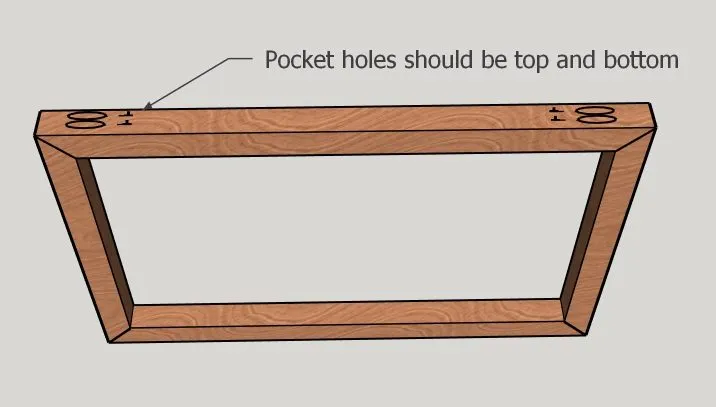
Drill pocket holes on the top and bottom piece for the mitered legs. This will give the pocket screw enough material to grab onto for a strong hold. Use wood glue and 1.5" pocket screws to put the mitered legs together. It helps to use clamps here!
64
Cut the pieces to size for the back legs.
75
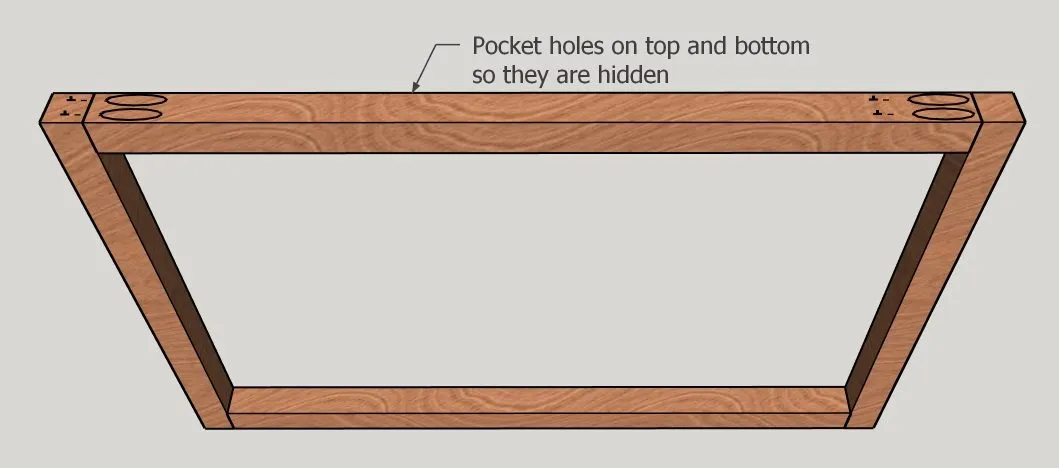
Drill pocket holes in the top and bottom piece, making sure they face up. Use wood glue and 1.5" pocket screws attach the back legs together.
86
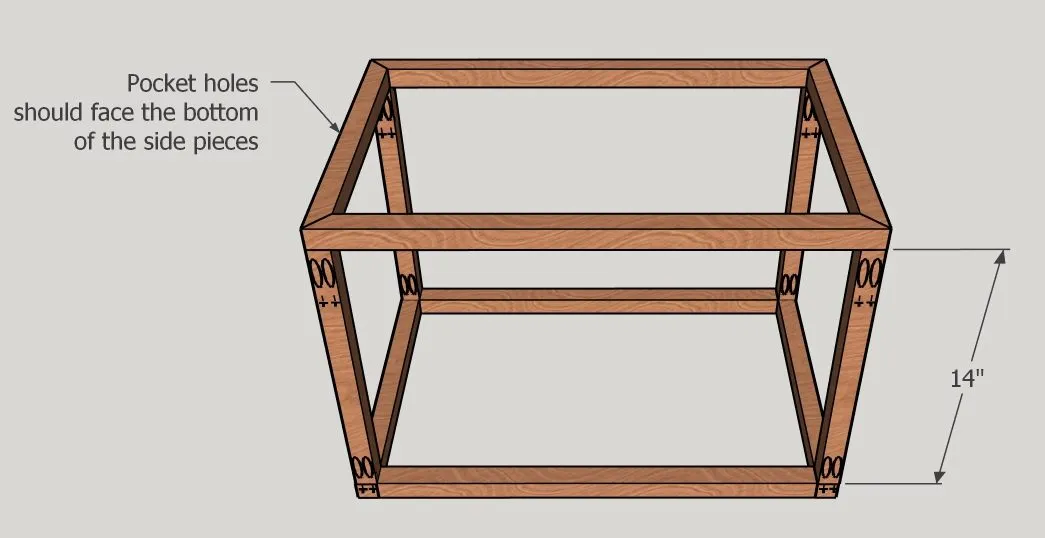
Drill pocket holes into the side pieces for the base, making sure they face the bottom. This allows the pocket screws to have enough hold when they screw into the mitered legs. Use wood glue and 1.5" pocket screws to screw the side pieces to the mitered legs and the back legs.
97
Using figure 8 fasteners and a forstner bit that is slightly larger than the figure 8's, drill 2 holes on each side of the top of the base until the figure 8's sit flush inside. Screw the figure 8's in and then screw in the top of the nightstand to the base. The base of the nightstand should be flush on all sides with the top of the nightstand.
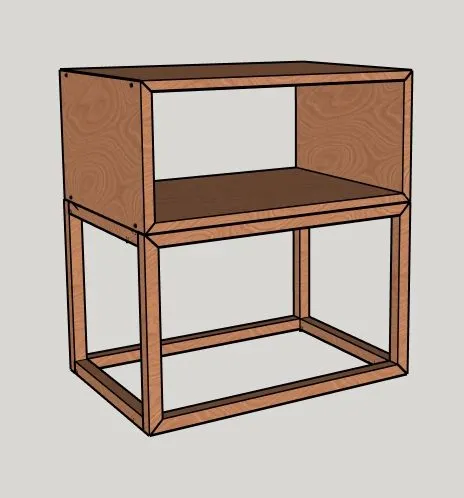
108
- Time to build the drawers!
- Cut the drawer pieces to size. Run 1/4" groove on the inside bottom of all the drawer pieces except for the bottom. You can use a table saw for this or a track saw.
- Drill pocket holes in just the front and back pieces of the drawers.
- Test fit the plywood bottom to make sure it slides easily into the grooves when the drawer box is all together.
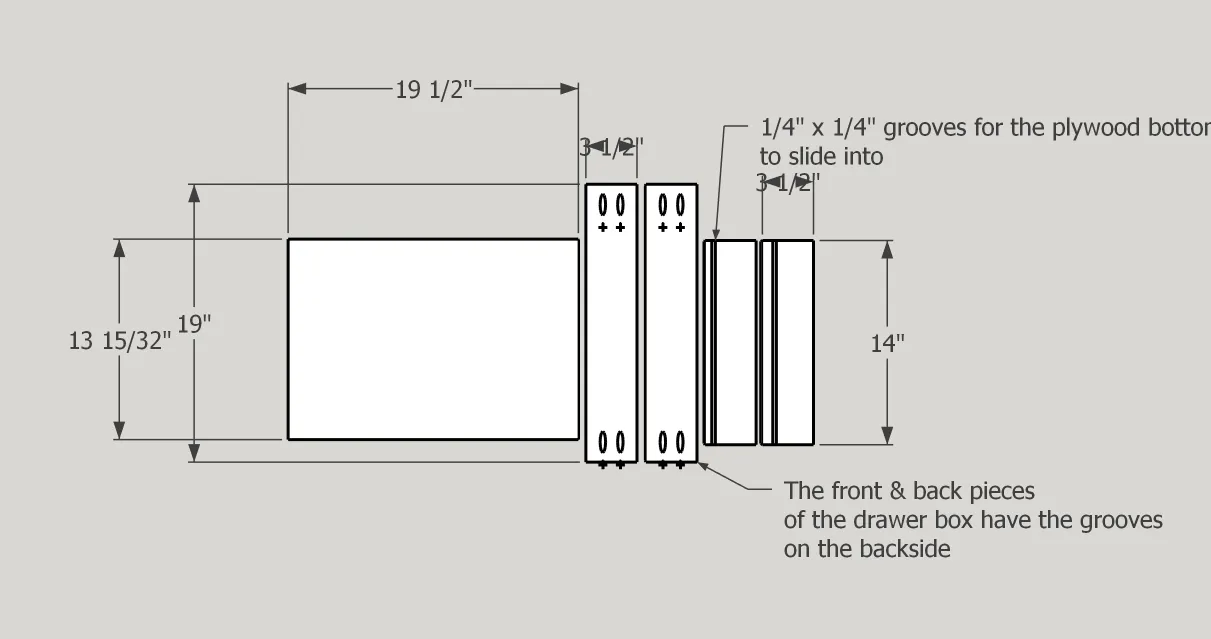
119
Use wood glue and 1.25" pocket screws to put the drawer together.
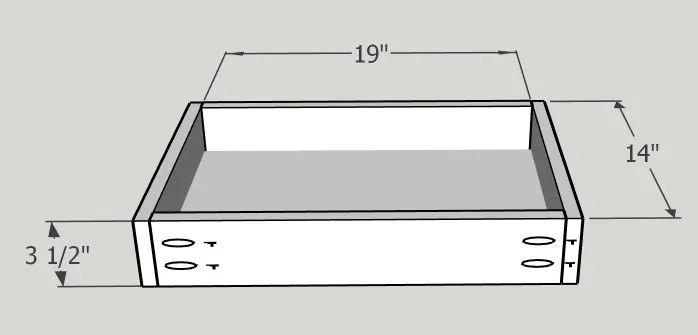
1210
Install the drawer slides so they are offset .75" from the front of the nightstand. The bottom drawer slide should be installed about 1.75" up from the bottom of the nightstand and the second drawer slide should be installed 2" up from the first drawer slide. Tip: cut a scrap piece of wood to the size of the drawer slide spacing, put the drawer slide on top and screw it in. Perfectly level drawer slides! The drawer slides should be in the center of the drawers.
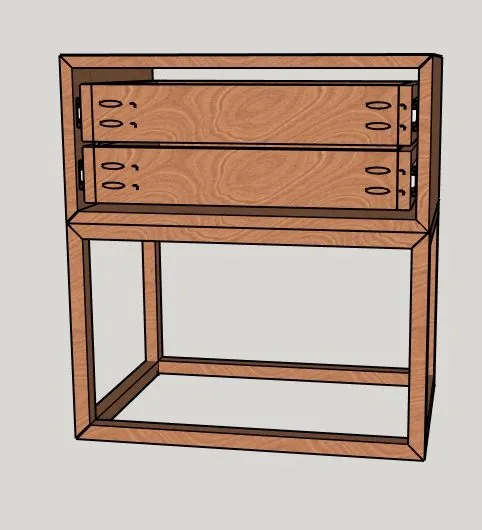
1311
- For the drawer fronts, if you want to make those 5 grooves I suggest using a table saw or a track saw. Evenly space the 5 grooves on the drawer fronts.
- Cut the grooves just once, the width of the blade you are using will be the perfect width. Make sure the grooves go in about 1/4".
- Then attach the drawer fronts using clamps and 1.25" screws from the inside of the drawer. Make sure you have an even gap around all 4 sides of both drawers. There should be about 1/16" to 1/8" gap.
1412
Route a 1/4" x 1/4" rabbet on the backside of the nightstand. Cut the plywood back to size and nail the back onto the rabbet.
1513
Sand, stain and install your favorite hardware and you've made yourself a nightstand!
Tags
- Nightstands
- Intermediate
Reviews & builds
No reviews yet
Sign in to review this plan or share your build.
No reviews yet. Be the first to build this.