 Notch
- Difficulty
- Intermediate
- Time
- 3.8–7.3 hours
- Cost
- $$
About this build
This plan will teach you how to build a dollhouse bookcase with a modern twist. Use it as a dollhouse, a bookcase, or both. (Note: Always be sure to anchor any furniture young children may come in to contact with.)
Tools
Essential
- Brad Nailer
- Drill / Driver
- Miter Saw
- Pocket Hole Jig
- Random Orbit Sander
Optional / nice to have
- Safety Glasses
- Tape Measure
Materials
| Item | Qty |
|---|---|
| Board, 1x8 120" | 2 board |
| Board, 1x8 36" | 1 board |
| Board, 1/2x2 48" | 1 board |
| Board, 1/2x2 24" | 1 board |
| Plywood, 1/4" Thick Full Sheet | 1 board |
| Board, 2x2 4" (I used a scrap piece) | 2 board |
| 1 1/4" pocket hole screws | 24 each |
| Minwax Stain in Natural | 1 each |
| Varathane Water-Based Polyurethane, Matte | 1 each |
| Black Latex Paint | 1 each |
| Fine-Grit Sandpaper for Hand-Sanding the Edges | 1 each |
| White Latex Paint | 1 each |
| Wood Glue | 1 each |
Overall cost: $$. Lumber prices vary by region, species, and season, so we give a band rather than a figure we would only be pretending to know.
Cut list
| Part | Qty | T × W × L |
|---|---|---|
| Shelving pieces | 3 | 3/4" × 7" × 8" |
| Side pieces | 2 | 3/4" × 7" × 8" |
| Shelving dividers | 3 | 3/4" × 7" × 8" |
| Roof pieces | 2 | 3/4" × 7" × 8" |
| Front trim piece | 1 | 1/2" × 1" × 42" |
| Side trim pieces | 2 | 1/2" × 1" × 7" |
| Bottom-Back Plywood | 1 | 1/4" × 19" × 40" |
| Top-Back Plywood (Cut to Roof Shape) | 1 | 1/4" × 16" × 40" |
| Chimney pieces | 2 | 1" × 1" × 4" |
What to buy
Buy 5 boards at 8 ft.
1" × 1"
1 board
3/4" × 7"
1 board
1/2" × 1"
1 board
1/4" × 19"
1 board
1/4" × 16"
1 board
Assumes 8 ft stock, a 1/8" saw kerf, and buying each part at its own width. Change the board size or kerf on the full board plan →
Instructions
1Cut & Prepare Pieces
- Cut pieces according to cut list.
- Then add a 30 degree mitered edge on the following: the tops of the (2) 24" side pieces, the top of (1) 8 1/4" divider piece, the bottom of the (2) 4" chimney pieces, and both ends of the (2) 27" roof pieces. The miter cuts on the ends of the 27" roof pieces should be the same direction, turning the rectangle into a parallelogram. Polish your pieces with an orbital sander. Use fine-grit sandpaper to break down the edges by hand and smooth them out.
2Drill Pocket Holes
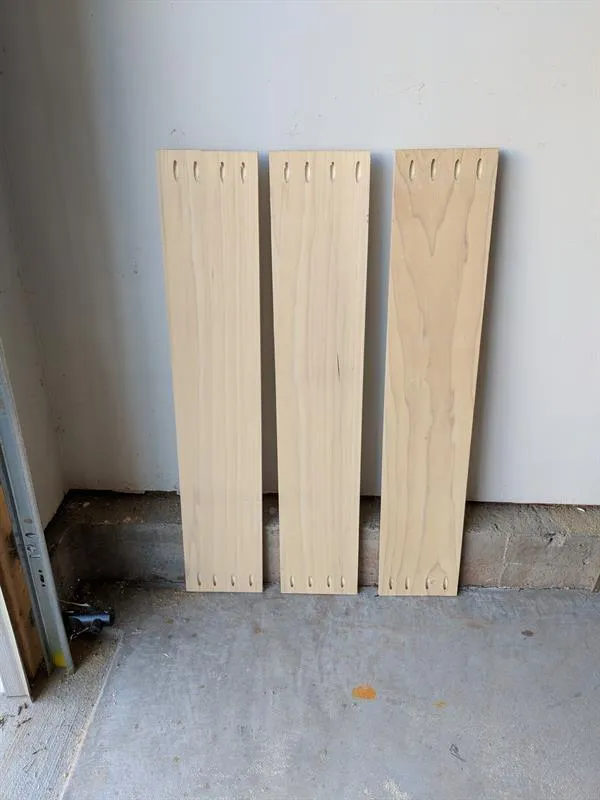
Drill (4) pocket holes in the ends of each 39.5" shelving piece. Before beginning to assemble the dollhouse bookcase, you can stain and finish or paint your pieces. You could also wait until the entire unit is assembled. I chose to stain and finish/paint my pieces before assembling and just touch up in the end.
3Assemble Middle and Top Shelves
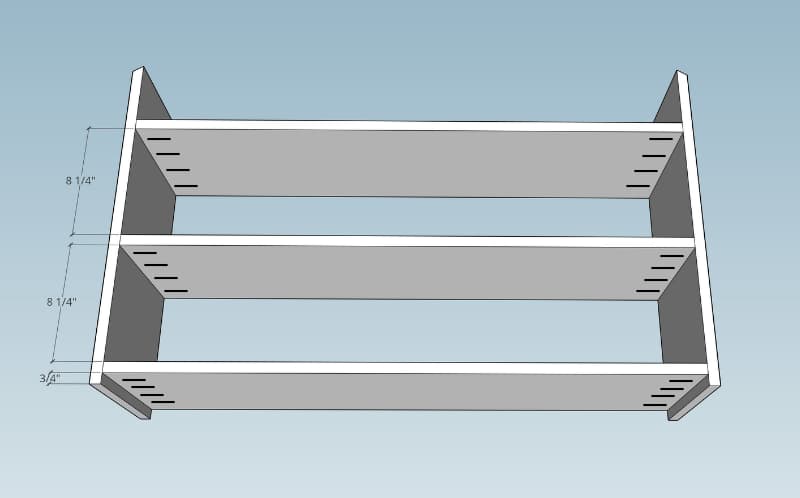
Continue by assembling the middle and top shelving pieces, each 8 1/4" apart as illustrated. You can use one of the 8 1/4 dividers you cut as a spacer.
4Add Bottom Two Shelving Dividers
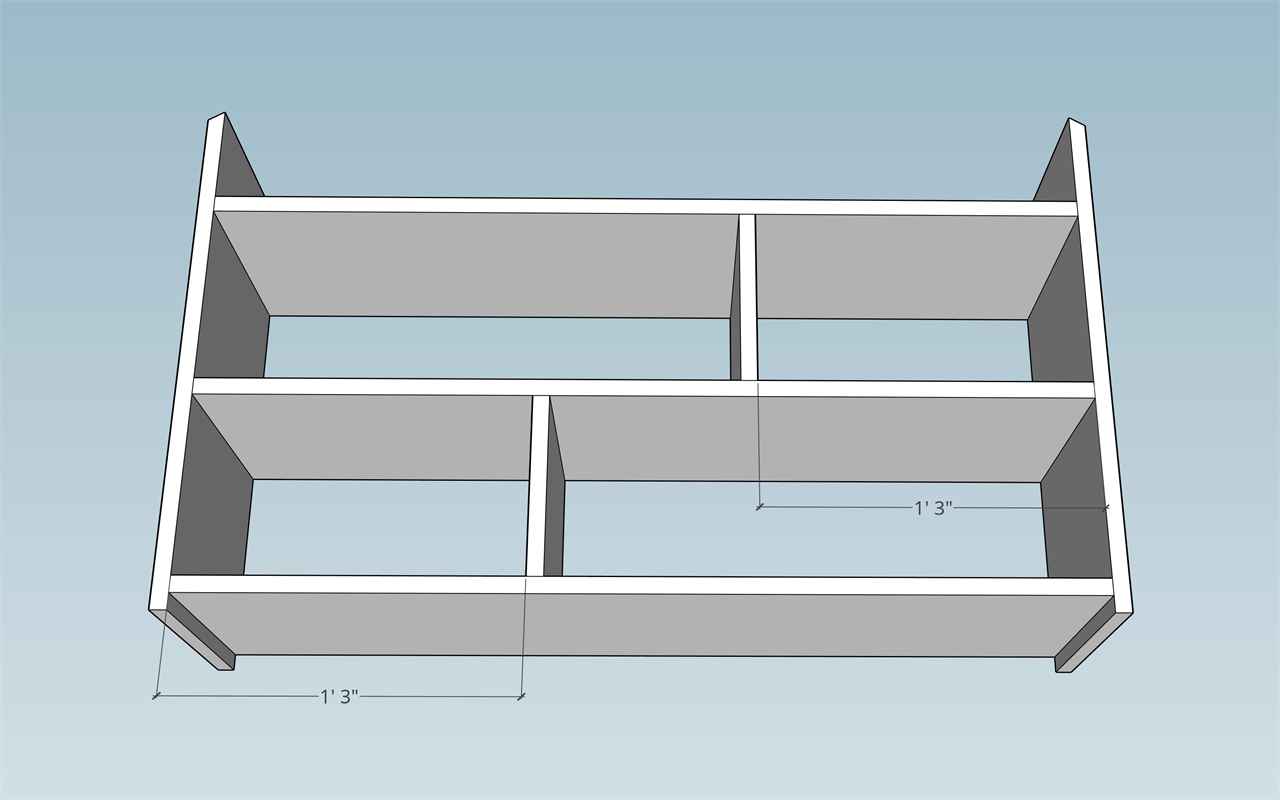
- Place an 8 1/4" divider piece in the bottom shelf 15" from the left side of the unit. Use a nail gun to secure in place. Drive a few nails down through the top of the middle shelf into the divider. Do the same into the bottom of the divider from underneath the bottom shelf.
- Repeat with another 8 1/4" divider piece, except place it 15" from the right side of the unit as indicated in the illustration.
5Attach Roof and Divider Support
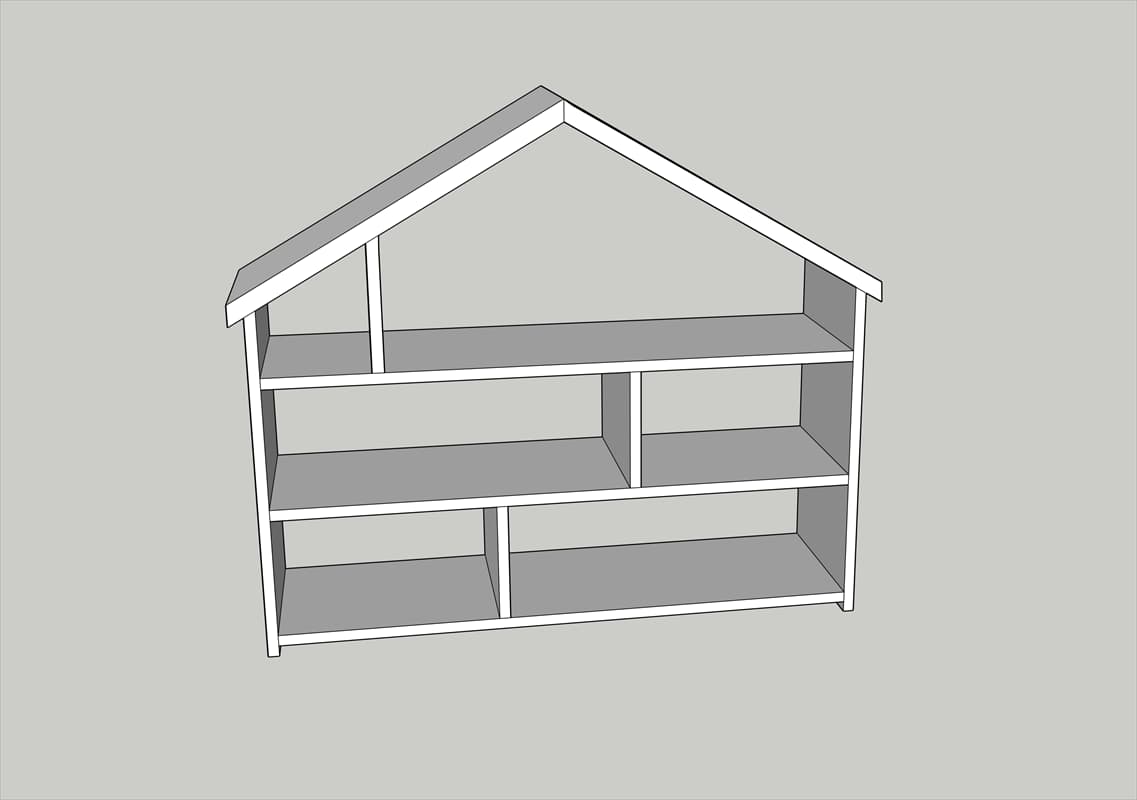
(Note: I found it easiest to assemble the roof with the shelving unit laying on a flat surface with the front facing the ceiling.) Attach each roof pieces by running wood glue along the top of each side piece and along the roof's mitered edges that meet at the apex. Fix in place using a nail gun. Nail both the area where the roof meets the side pieces and the apex. On the apex, nail from one side into the other (not straight down...you don't want your nails to pop out the bottom!). You can then add some wood glue to the top and bottom of your mitered divider and slide snug into place as pictured.
6Attach Back and Trim
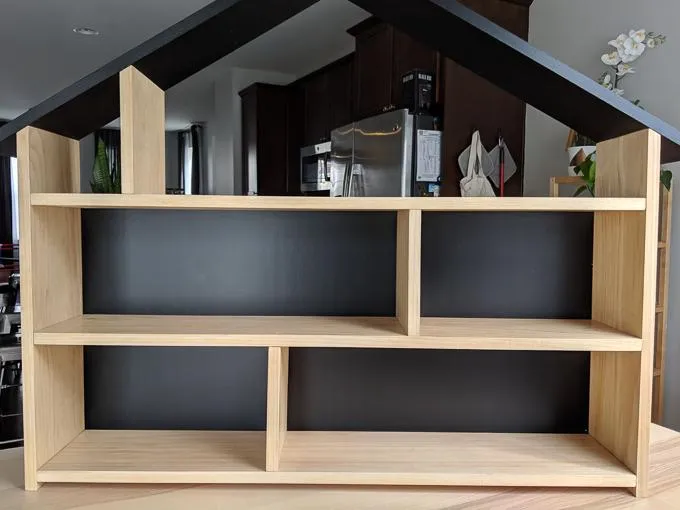
- Attach the 1/4" plywood backing using a nail gun. Here is a photo of the bottom part of the backing attached.
- Then attach your 1/2" x 1 1/2" trim pieces around the bottom using a nail gun.
7Finish as Desired
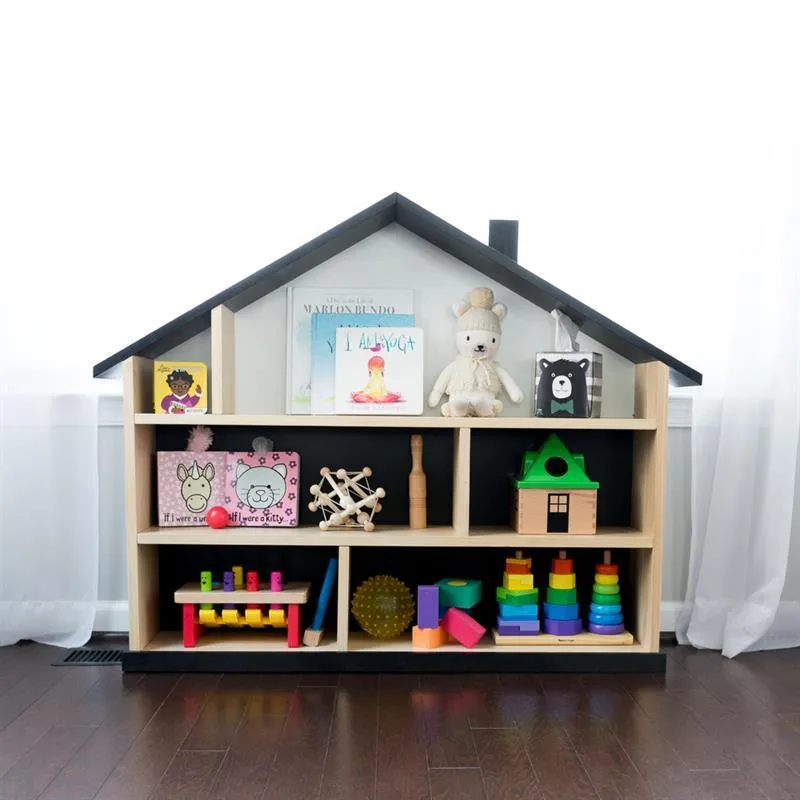
If you stained and finished/painted your pieces before assembling like I did, fill nail holes and touch up paint and finish (I used water-based urethane) as necessary. If your wood is still unfinished, fill nail holes and finish/paint as desired. (*Important note: If a small child will be using this piece, ensure you properly anchor it to a wall to avoid injury.)
8Create and Attach Chimney
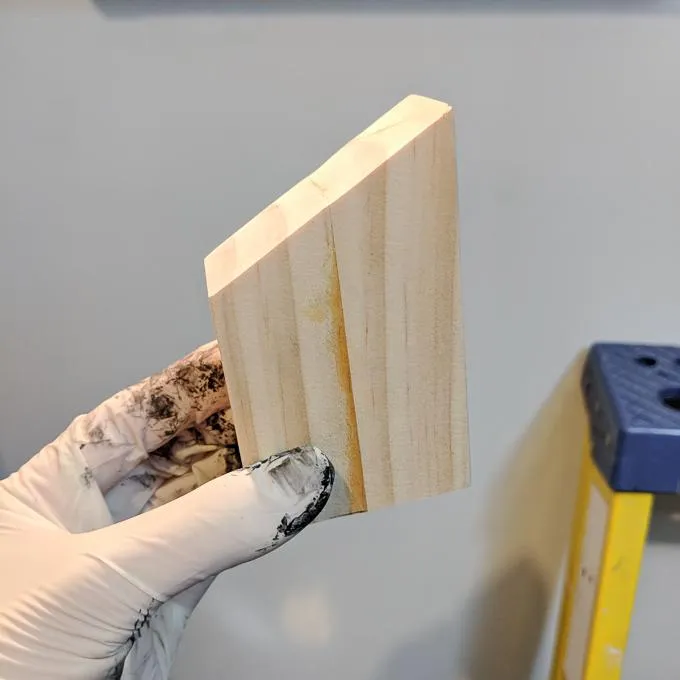
- Glue together the two small, 30-degree mitered pieces of 2" by 2" using wood glue and a clamp.
- Once dry, sand away any extra glue.
- Attach using a dab of wood glue and a few nails up through the bottom of the roof. (Note: If you don't want to buy 2" by 2" just for the chimney, you can make the chimney any size you want. The important part is to use a 30-degree mitered bottom so it lines up nicely with the roof. I grabbed a few small pieces from our scrap pile.)
9Assemble Bottom Shelf
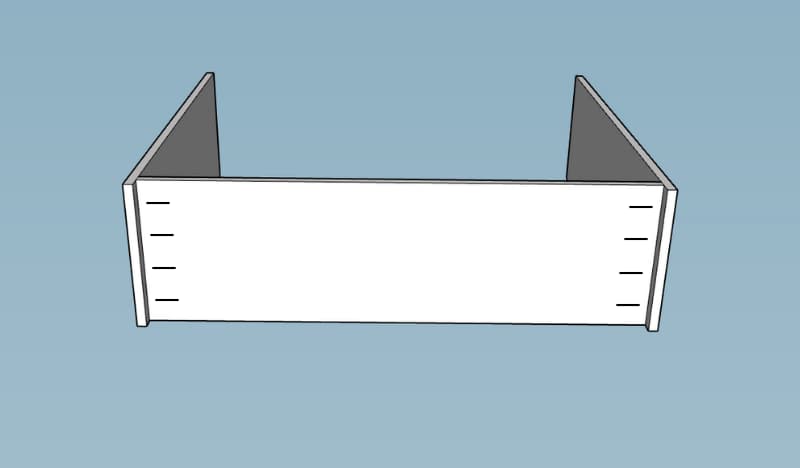
Begin assembling the shelving by positioning one of the 39.5" shelving pieces between the two 24" side pieces. An extra set of hands is helpful here. The mitered tops of the 24" side pieces should face out, away from one another. Position the shelf 3/4" from the bottom of each side piece and drill pocket hole screws through each pocket hole to fix the shelf firmly in place.
Tags
- Book
- Intermediate
Reviews & builds
No reviews yet
Sign in to review this plan or share your build.
No reviews yet. Be the first to build this.