 Notch
- Difficulty
- Easy
- Time
- 3.3–6.3 hours
- Cost
- $$
About this build
Pour over coffee makers are one of the easiest ways to make a great cup of Joe. This minimalist inspired design was built with scrap plywood and an extra dowel rod. This quick build will have you enjoying a fresh cup of brew by the next morning. For more builds go to www.LazyGuyDIY.com.
Tools
Essential
- Drill / Driver
- Miter Saw
- Random Orbit Sander
- Router
- Table Saw
Optional / nice to have
- Bar / Pipe Clamps
- Combination Square
- Tape Measure
Materials
| Item | Qty |
|---|---|
| Plywood, 3/4" Thick Quarter Sheet | 1 board |
| Dowel rod, 48" 5/16th | 1 board |
| Stainless Steel Pour Over Coffee Dripper (link in extras) | 1 each |
Overall cost: $$. Lumber prices vary by region, species, and season, so we give a band rather than a figure we would only be pretending to know.
Cut list
| Part | Qty | T × W × L |
|---|---|---|
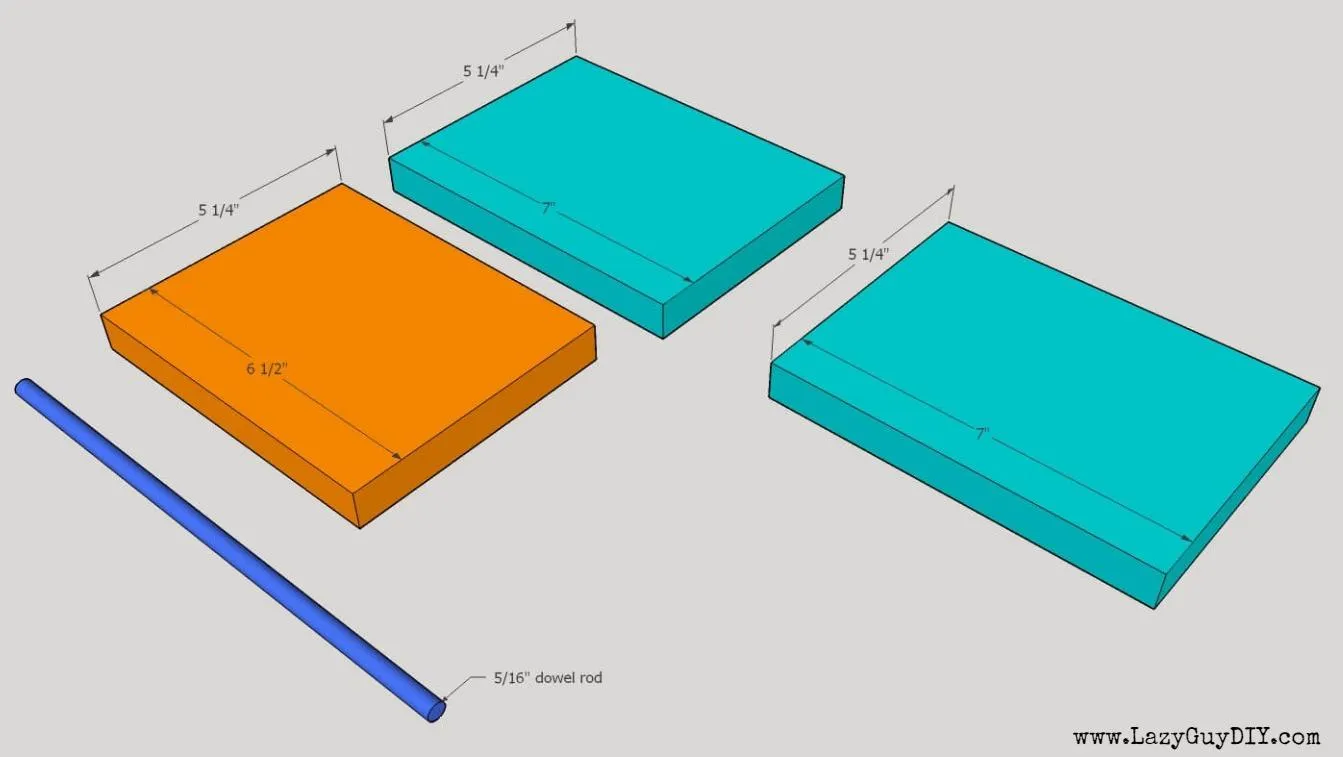
| Top & Bottom Panel | 2 | 3/4" × 5 1/4" × 7" |
| Support Panel | 1 | 3/4" × 5 1/4" × 6 1/2" |
What to buy
Buy 1 board at 8 ft.
3/4" × 5 1/4"
1 board
Assumes 8 ft stock, a 1/8" saw kerf, and buying each part at its own width. Change the board size or kerf on the full board plan →
Instructions
1Cut Plywood
Cut 3/4" sanded plywood to length. Two panels for the top and bottom (7.00" x 5.25") and one panel for the support (6.50" x 5.25"). I used plywood because I like the effect when sanding through the different layers, but you can easily use a 1x6 board for a similar build (if you do, adjust the width in the graphics to the standard 5.50" instead of the 5.25").
2Prep End Panels
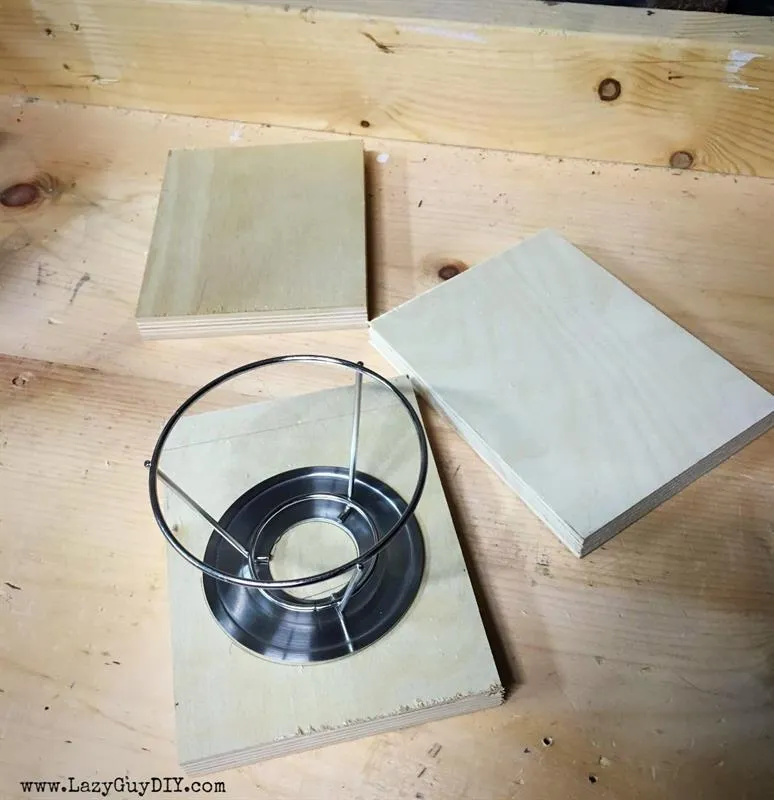
On both pieces, measure 0.75" from one end and draw a guideline across the 5.25" in pencil. Choose which 7.00" panel will be used for the top, center the coffee dripper between the 0.75" line and the opposite end and trace the outer circle.
3Router Out Lip For Coffee Dripper
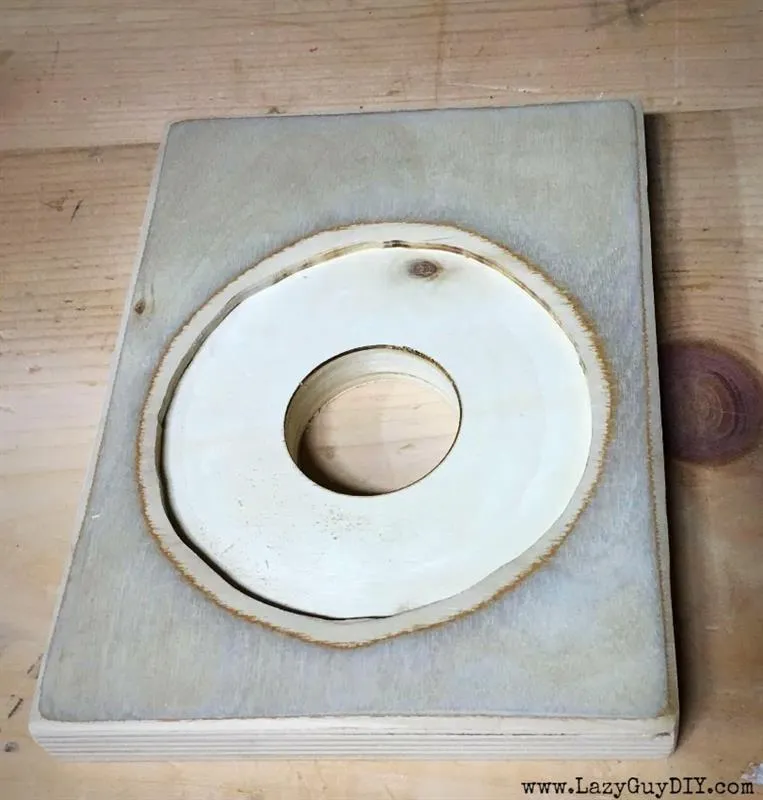
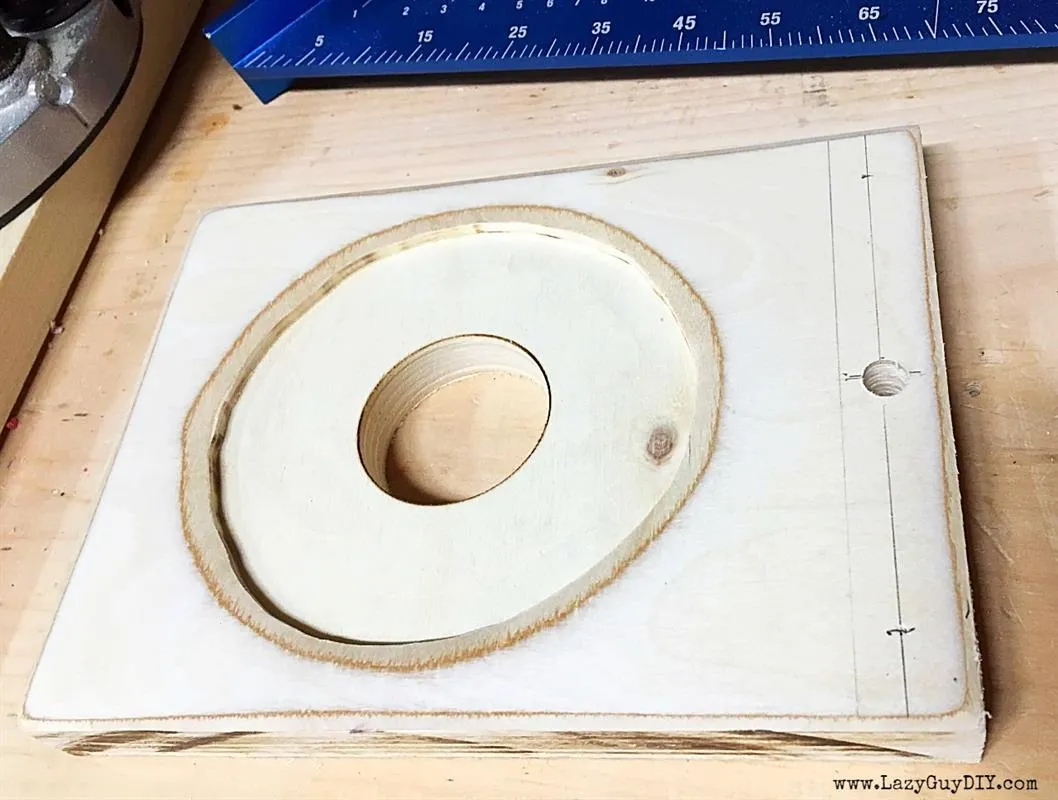
Using a plunge based router and a straight cut bit, router out the circle that was traced using the coffee dripper. Depth was cut between 1/16-1/8th of an inch. It needs to be deep enough to create a lip for the coffee dripper. I free handed the cuts with the router, but you can set up a circle jig if you want the cut to be perfect. Dry fit the coffee dripper until it seats comfortably.
4Drill Funnel Hole
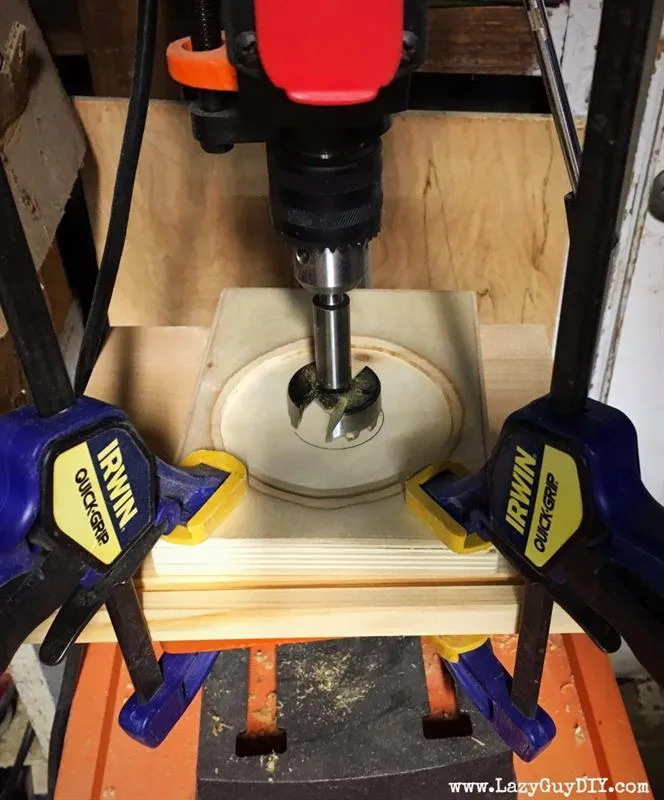
With the coffee dripper seated, trace the inside circle onto the panel. The dripper I used had a 2" hole for the funnel. I used my drill press and a 2" forstner bit to drill the hole, but you can also use a drill and a 2" spade bit. Be sure to clamp your panel as it can spin when drilling the hole.
5Drill Pilot Holes for Dowels
- On the top and bottom panels, measure 0.375" from the end that will have the support and draw an additional guideline for the pilot holes.
- Mark for at least 3 evenly spaced holes that will be used for the dowel joints.
- Take note that you will be drill from the top down through the bottom for the top panel and from the bottom up through the top for the bottom panel. Because you're using plywood, there will be minor blow out from the drill bit that will be hidden by the support panel. Using a 5/16" drill bit, drill the pilot holes on center of the 0.375" line. It's important the holes are straight and centered.
6Drill Pilot Holes in Support Panel
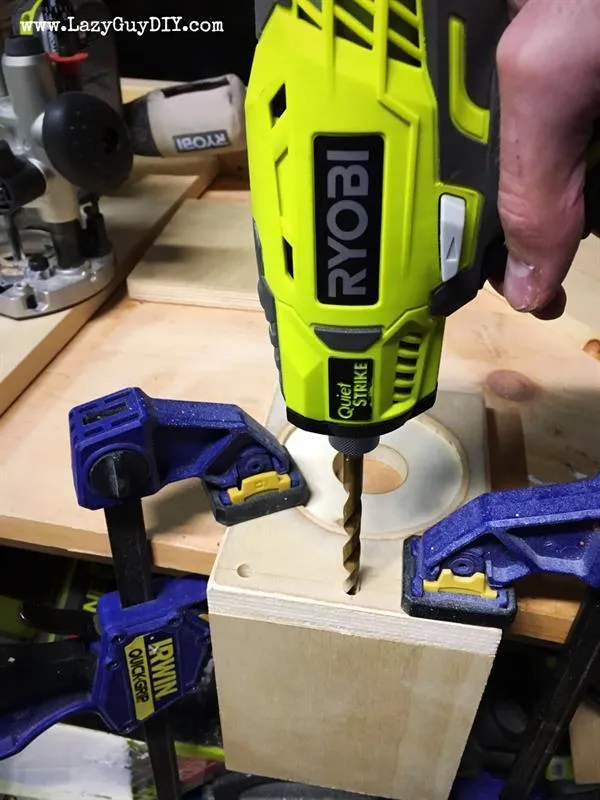
Before drilling into the support panel, mark on the ends which side is the top and which side will be facing inward. This will save you trouble when trying to line up the pilot holes with the top and bottom panels later. Using a pair of clamps, clamp the top panel to the support panel and drill down into the support panel roughly 1" with the 5/16" bit. Make sure the panels do not shift as the holes will not line up properly for the dowels. Do the same for the bottom panel as well.
7Inspect the Surface
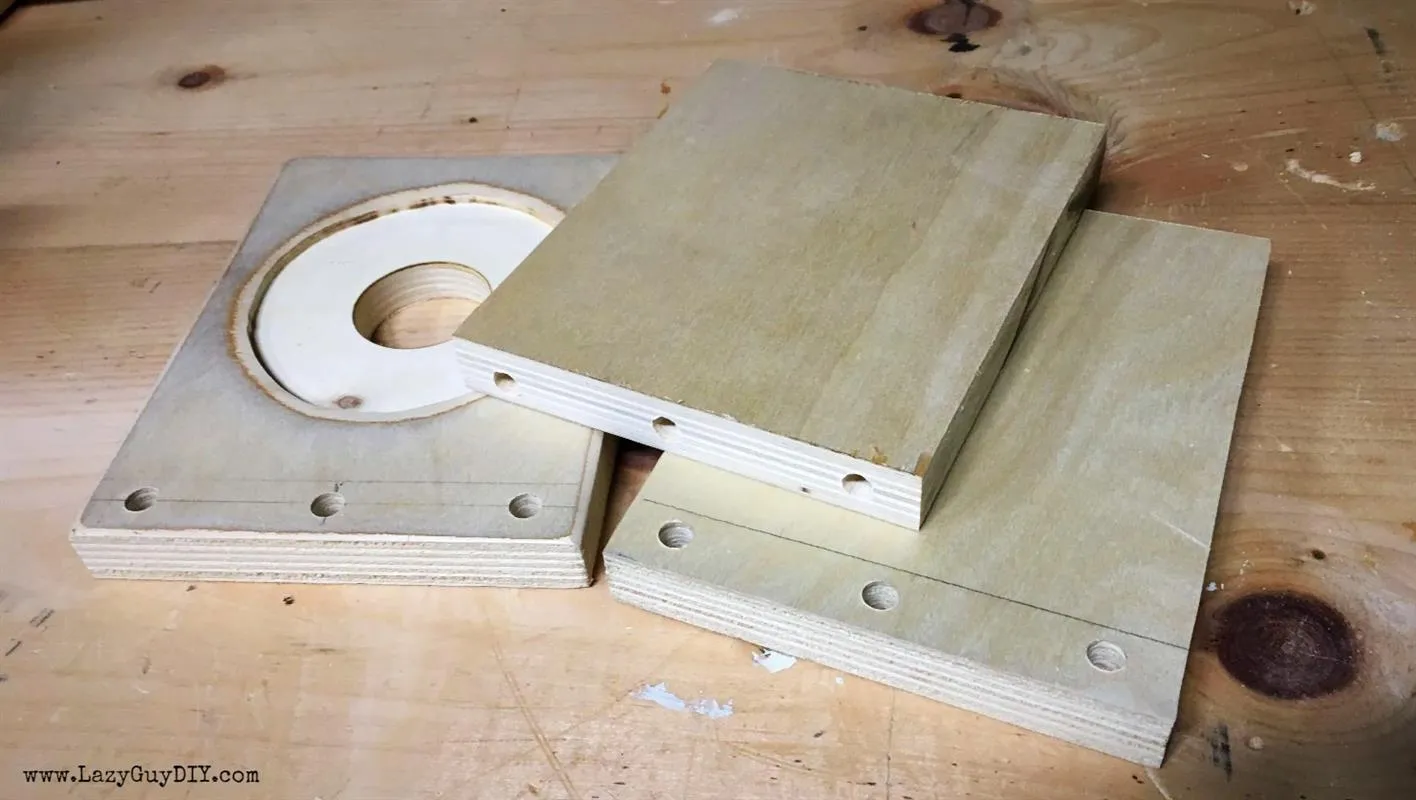
Prior to attaching, make sure the pilot holes have smooth edges. You can quickly sand off any rough spots to ensure a seamless attachment.
8Add Wood Glue To Pilot Holes
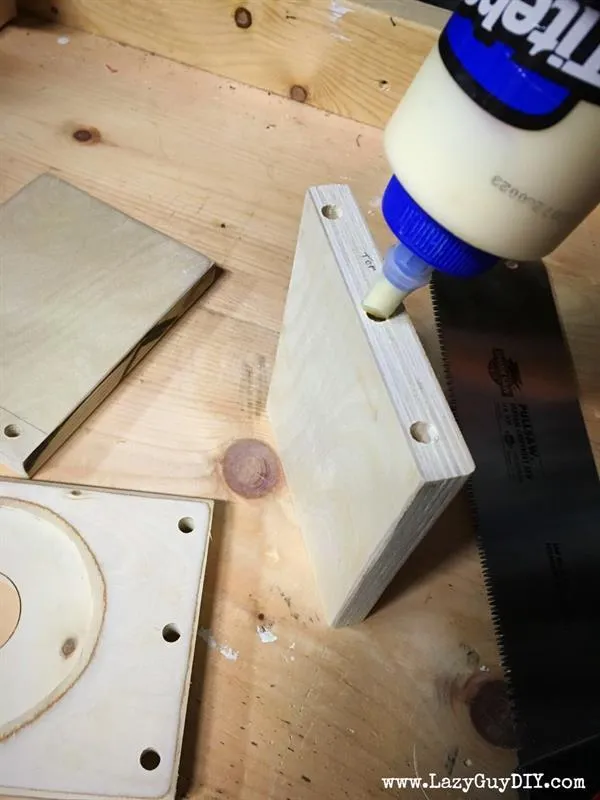
Add a few dabs of wood glue to the pilot holes of the support panel and a thin layer on the edge. Do not overfill.
9Insert Dowels
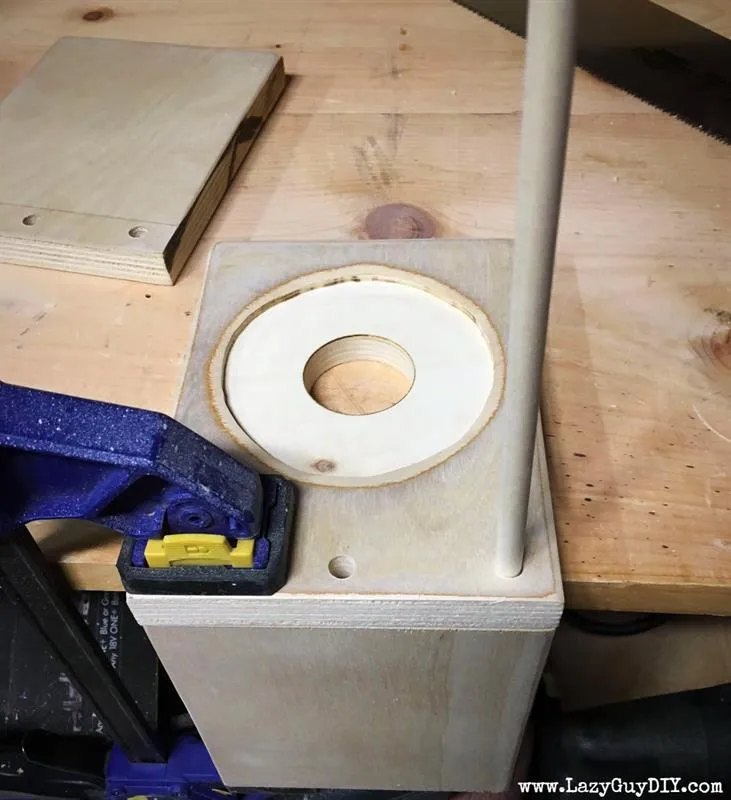
- Using a pair of clamps, clamp the top panel to the support panel, add a few more dabs of wood glue to the pilot hole and insert the first dowel rod. Make sure it fully seats into the hole and goes all the way down into the support panel.
- Once it's seated, use a handsaw to cut away the excess.
- Repeat for the other pilot holes and then do the same for the bottom panel.
10Fill Any Gaps
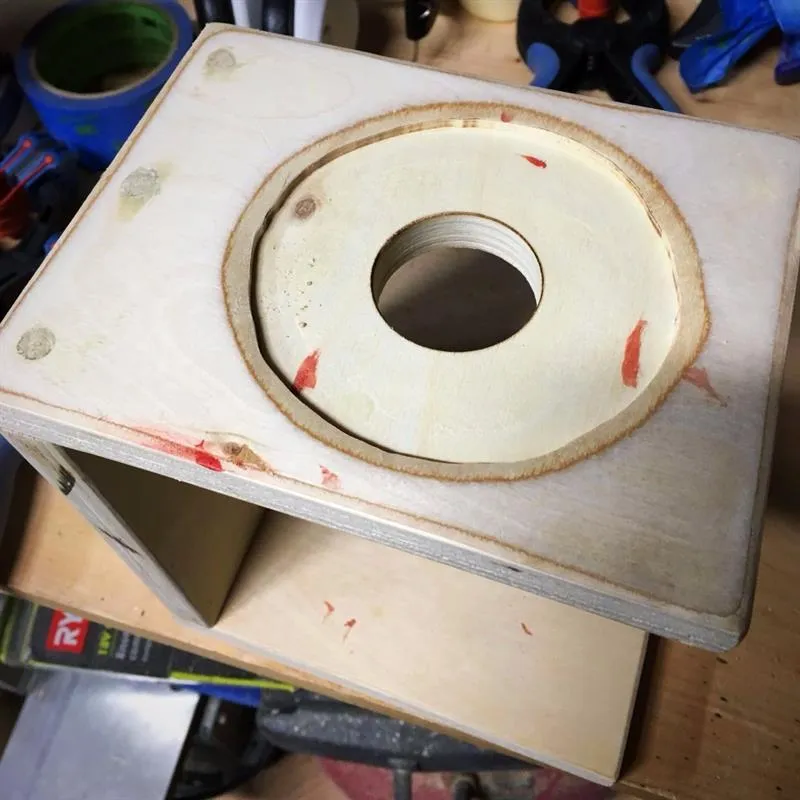
- First off, sorry for the blood... saws are sharp and I cut myself... Put a few drops of wood glue over each rough cut dowel rod end and add a healthy pile of sawdust to cover the glue.
- Then rub it all together making sure you push the mixture into the gaps left by the dowel rods and the pilot holes.
- Wipe off any excess. You've just made wood filler.
- Apply the same technique on the bottom and let the mixture dry for several hours. If the two panels have any sag, I would recommend clamping them and letting the glue dry overnight. When the glue dries, the entire structure should be plenty rigid.
11Sand & Finish
- Once the wood filler is dry, you can sand the entire piece with a palm sander.
- Sand off any excess wood filler on the dowels and smooth over all edges of the coffee maker.
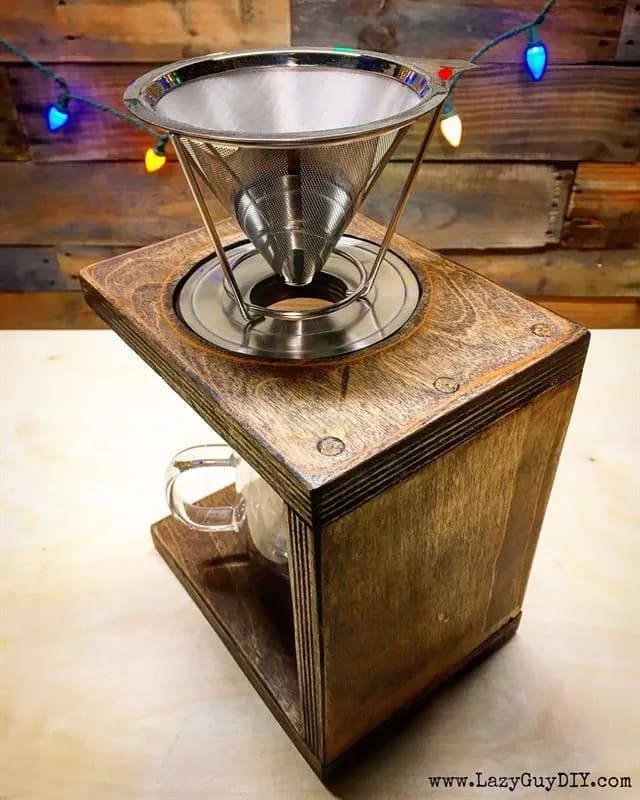
- Take note that when you sand away layers of plywood, the stain will take differently. I personally like the look. My coffee maker was stained with MinWax Espresso and finished with 3 coats of MinWax Semi Gloss Poly. After apply two coats of poly, hand sand with 300+ grit sandpaper and reapply the top coat for a smooth finish.
Tags
- Kitchen
- Beginner
Reviews & builds
No reviews yet
Sign in to review this plan or share your build.
No reviews yet. Be the first to build this.