 Notch
Notch- Difficulty
- Easy
- Time
- 3.3–6.3 hours
- Cost
- $
About this build
This plan is for a large cutting board, which can also be used as a charcuterie board. While this plan is pretty straightforward, it does take attention to detail. This would be a great beginner project to take your woodworking skills to the next level. This is a glue-up plan, with no hardware.
Tools
Essential
- Miter Saw
- Random Orbit Sander
- Router
- Router Table
- Table Saw
- Thickness Planer
Optional / nice to have
- Bar / Pipe Clamps
- Tape Measure
Materials
| Item | Qty |
|---|---|
| Board, 1x6 72" | 1 board |
| Board, 1x2 36" | 1 board |
| Board, 1x2 24" | 1 board |
| Wood Glue | 1 each |
| 120 grit sandpaper | 1 each |
| 220 grit sandpaper | 1 each |
| 400 grit sandpaper | 1 each |
| Cutting Board Oil | 1 each |
Overall cost: $. Lumber prices vary by region, species, and season, so we give a band rather than a figure we would only be pretending to know.
Cut list
| Part | Qty | T × W × L |
|---|---|---|
| Main Boards | 3 | 3/4" × 5 1/2" × 2" |
| Accent Boards | 3 | 3/4" × 1 1/2" × 2" |
What to buy
Buy 2 boards at 8 ft.
3/4" × 5 1/2"
1 board
3/4" × 1 1/2"
1 board
Assumes 8 ft stock, a 1/8" saw kerf, and buying each part at its own width. Change the board size or kerf on the full board plan →
Instructions
1Prepare Main Boards
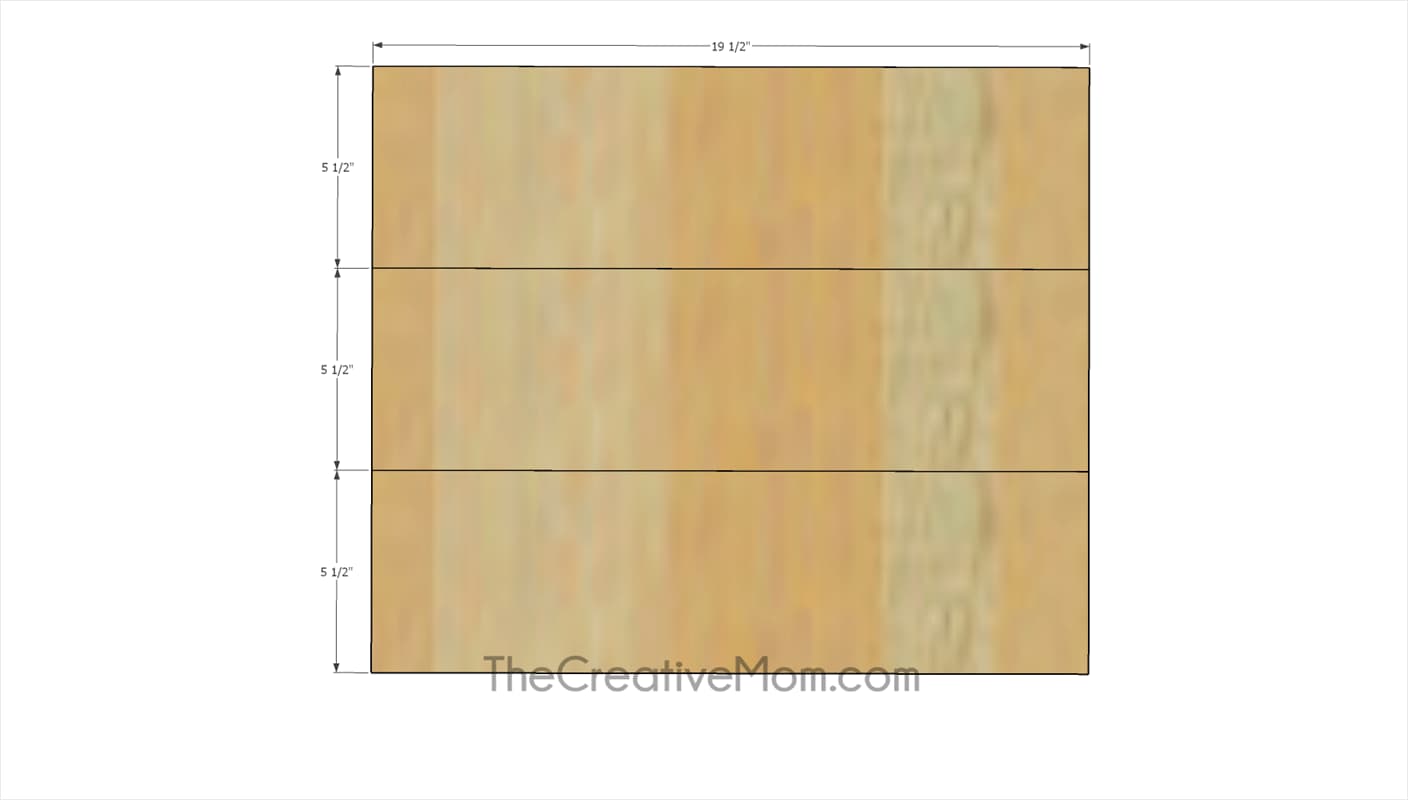
Cut 3- 19 1/2" 1x6 boards.
2Glue Accent Boards
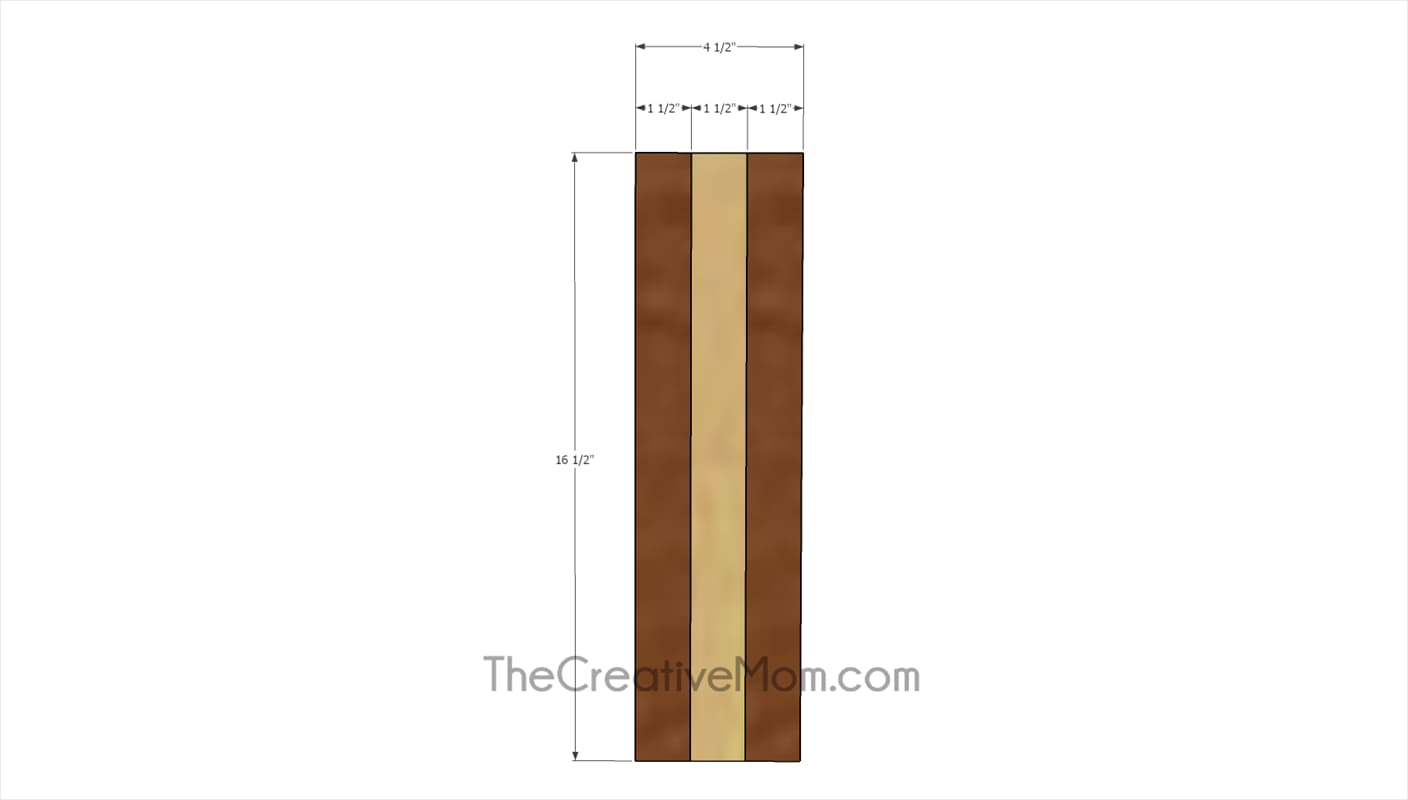
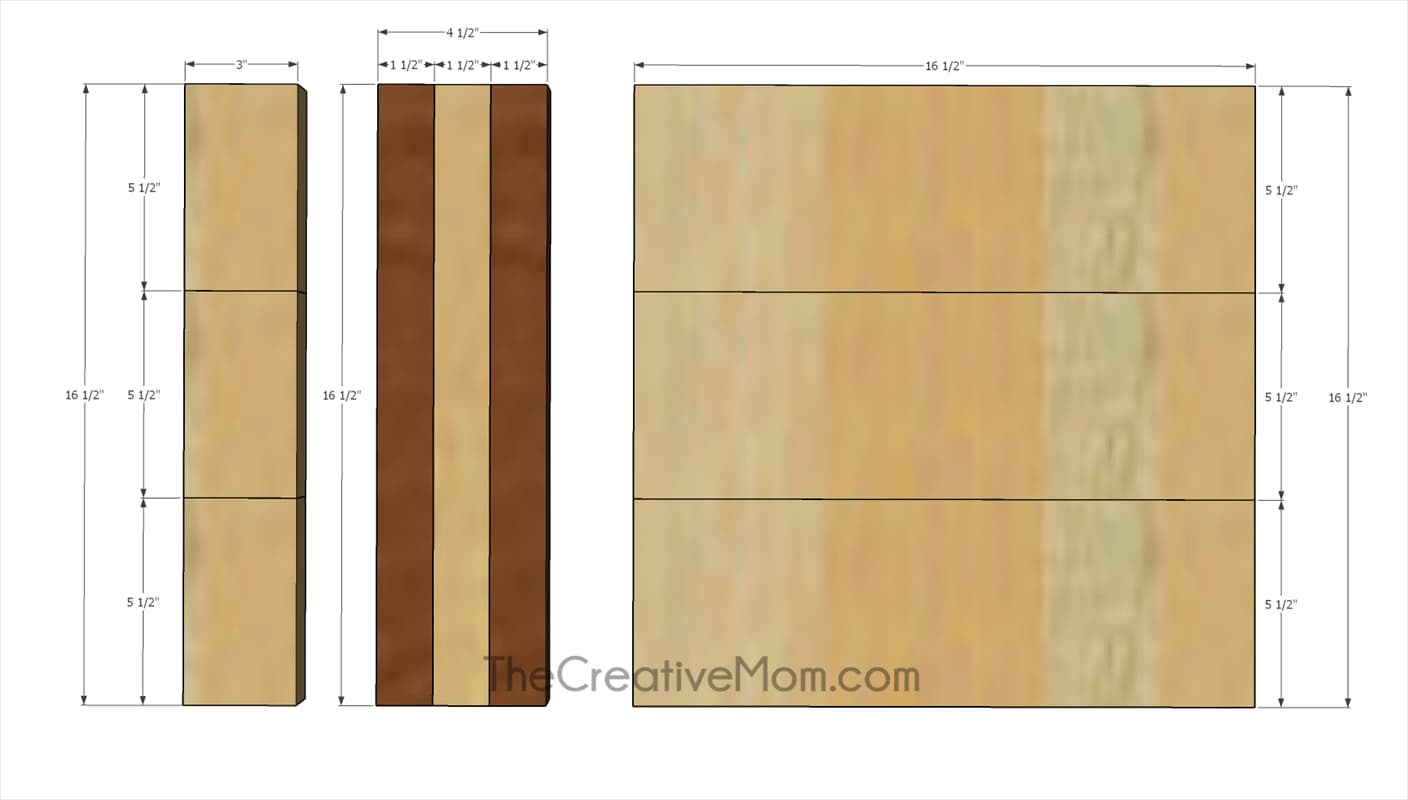
- Cut 3- 1x2 boards at 16 1/2". I used walnut and poplar to give some variety, but you can use whatever wood you'd like.
- Glue the boards together, using a good amount of quality wood glue, and Kreg clamps. Let the glue dry overnight.
3Cut Main Boards
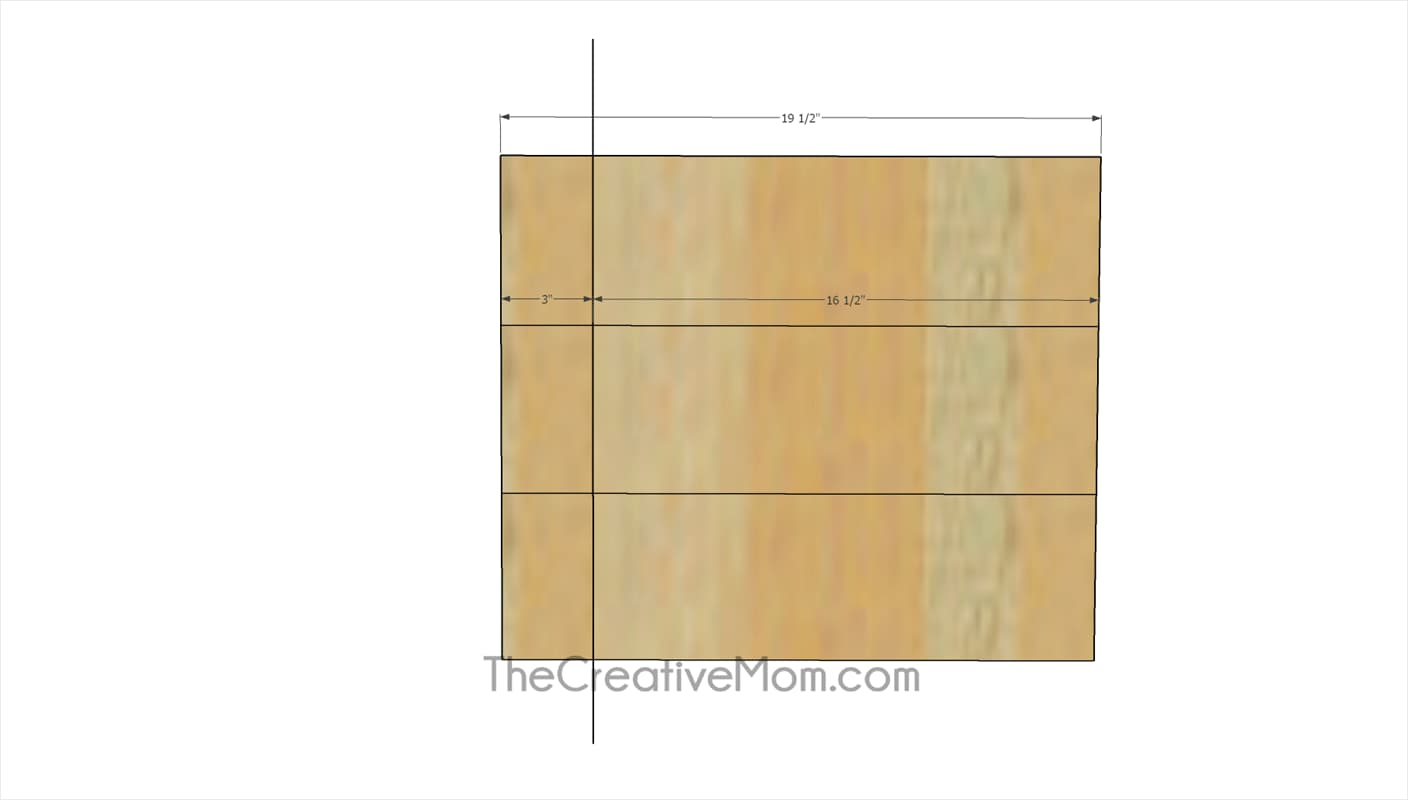
Once the wood glue has dried, cut your 1x6 boards at 3 inches. Before final glue up, you may consider planing each section of wood to remove excess wood and smooth.
4Before you begin
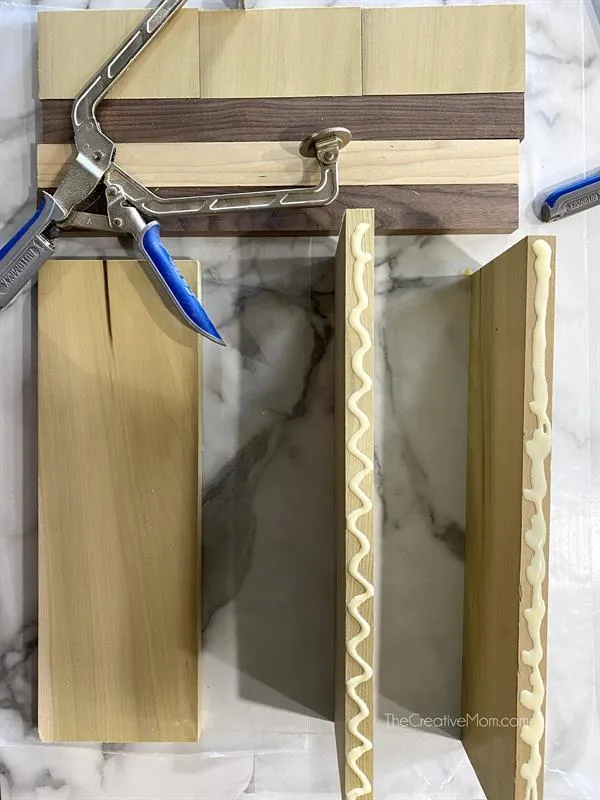
Before you begin, make sure to choose good quality lumber. If you plan on using this as a cutting board, you will want to use a hardwood that will hold up well to knife cuts and resist moisture. Walnut, maple, and cherry are good choices. You will also want to be prepared for your glue up. Make sure to have good clamps available. Like the Kreg bar clamps and face clamps. You'll also want to make sure you use enough glue between your joints. Watch for a good amount of glue to squeeze out, once clamped.
5Glue Main Boards
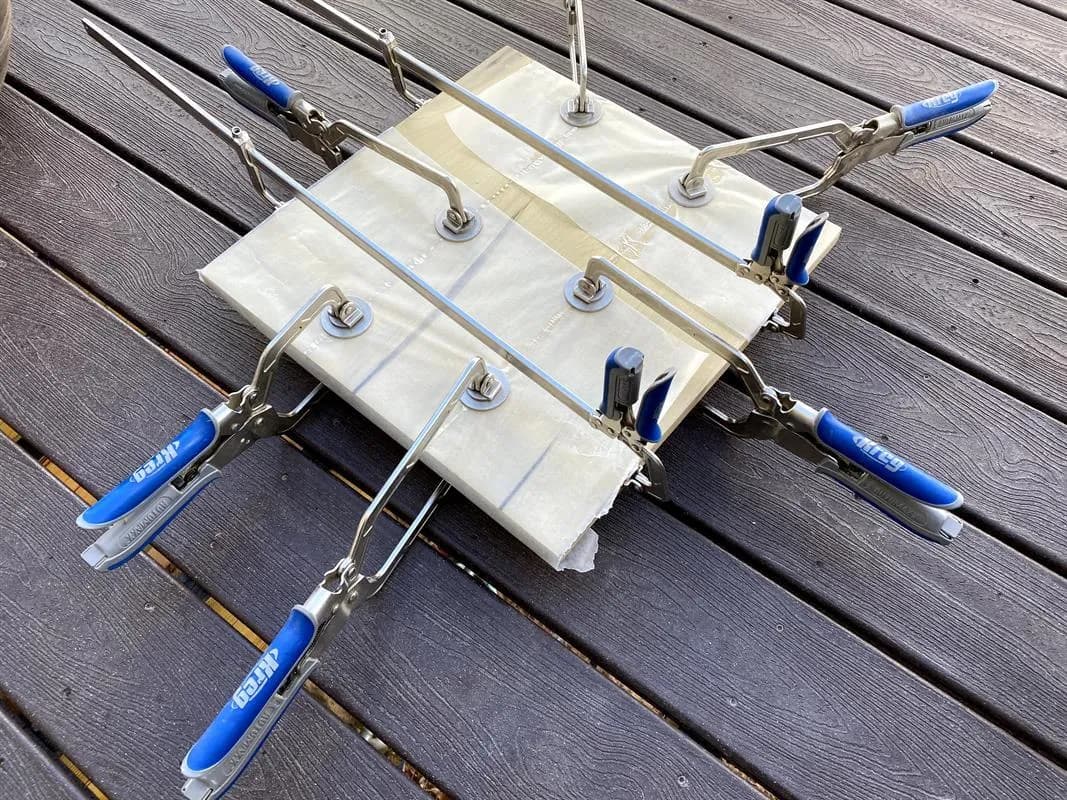
Use Kreg bar clamps and face clamps to glue your boards together. Use wax paper to prevent the glue from dripping on your work surface, or adhering to your clamps. Let the glue dry overnight.
6Glue Cutting Board
Using Kreg Bar clamps, and a good amount of wood glue, glue your boards together to create your cutting board.
7Optional- border
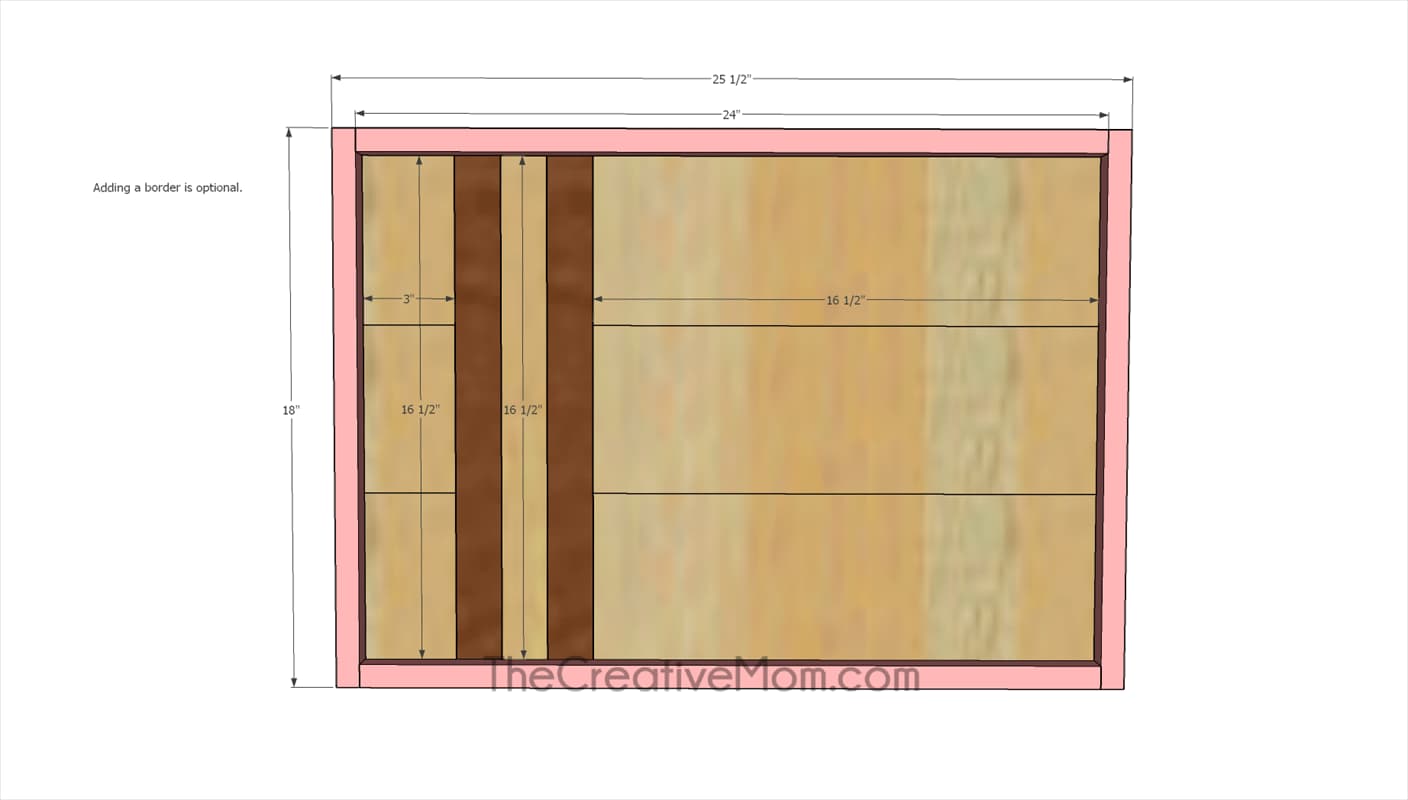
This step is optional, but if you wanted to use this as a tray or charcuterie board, you can add a border to the outside. This lumber is not included in the supply and cut lists, so make sure to add these, if desired. Cut 2- 24" 1x2's, and 2- 18" 1x2's. Using wood glue and clamps, attach to the sides of your cutting board. You can also use brad nails or pin nails if desired.
8Router Edges
- Before routing, use a thickness planer, hand planer, or sander (about 120 grit) to remove excess glue and smooth and flatten wood.
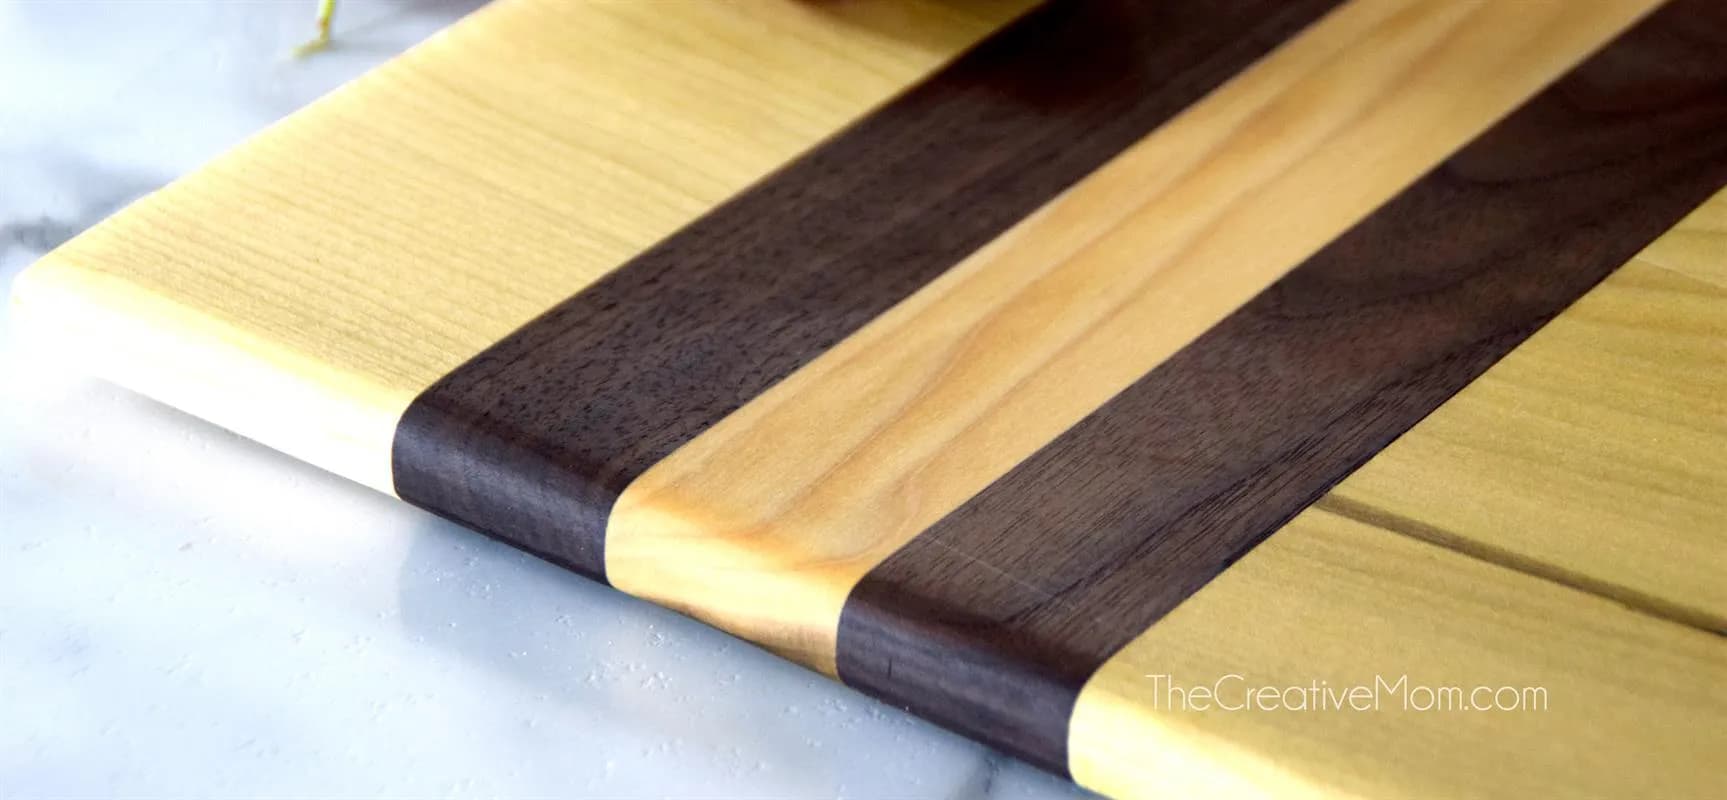
- Once wood is smooth and flat, use a router and a 1/4" roundover bit to round the edges of the cutting board.
- Then flip the board over and router the other edge, leaving a nice rounded edge on all sides of the boards.
9Finish Board
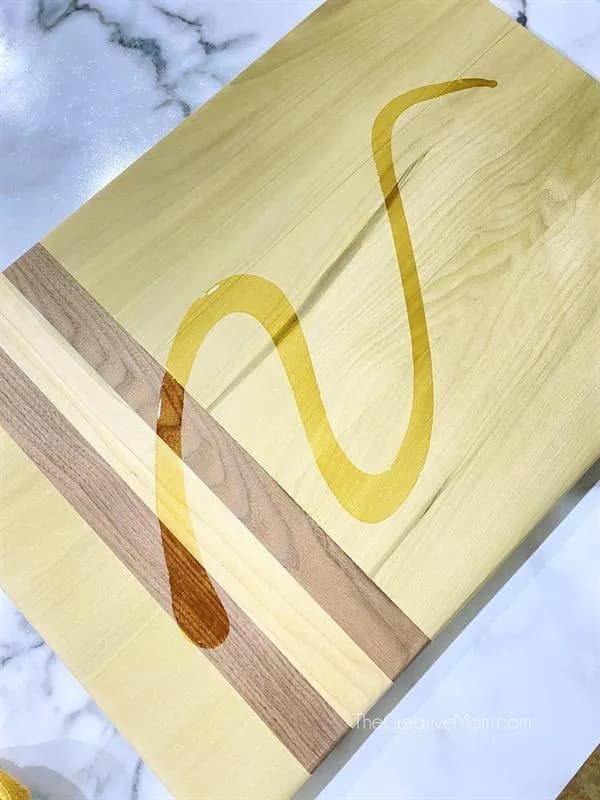
Sand the board down, starting with 120 grit, then 220 grit, and ending with 400 grit sandpaper. Then wipe clean with a tack cloth, and finish with a food safe cutting board oil.
10Serve or Gift
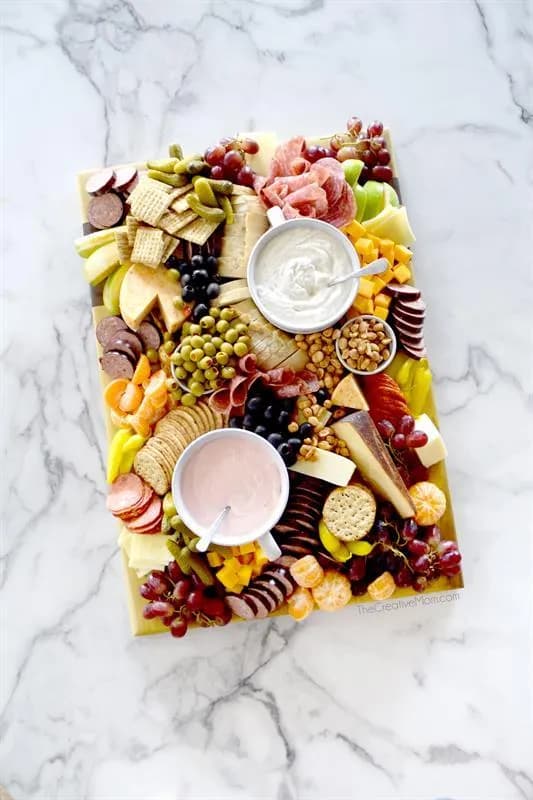
This is the perfect gift, or a great item to take to a party. Fill with yummy food and get ready to impress!
11Square the Board
Using a jointer or a table saw with a fine tooth blade, square up your board.
Tags
- Beginning Woodworking Projects
- Beginner
Reviews & builds
No reviews yet
Sign in to review this plan or share your build.
No reviews yet. Be the first to build this.