Notch
NotchKitchen Drawer Divider
Step-by-step build — 6 steps. Also available as a print sheet.
1Introduction
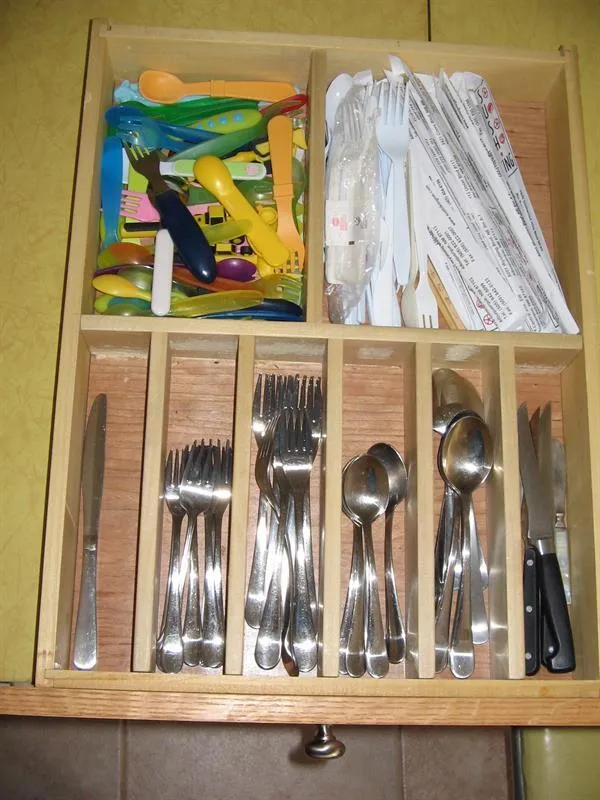
Please be sure to read through complete instructions before you begin any work on this project. My project design was based on a need for six silverware dividers and two larger dividers for baby/toddler utensils and chopsticks/plastic ware. You can modify the plan to fit your needs.
2Measure inside of your drawer
- Measure the inside width (side to side) , depth (front to back) and height (bottom to top) of your drawer.
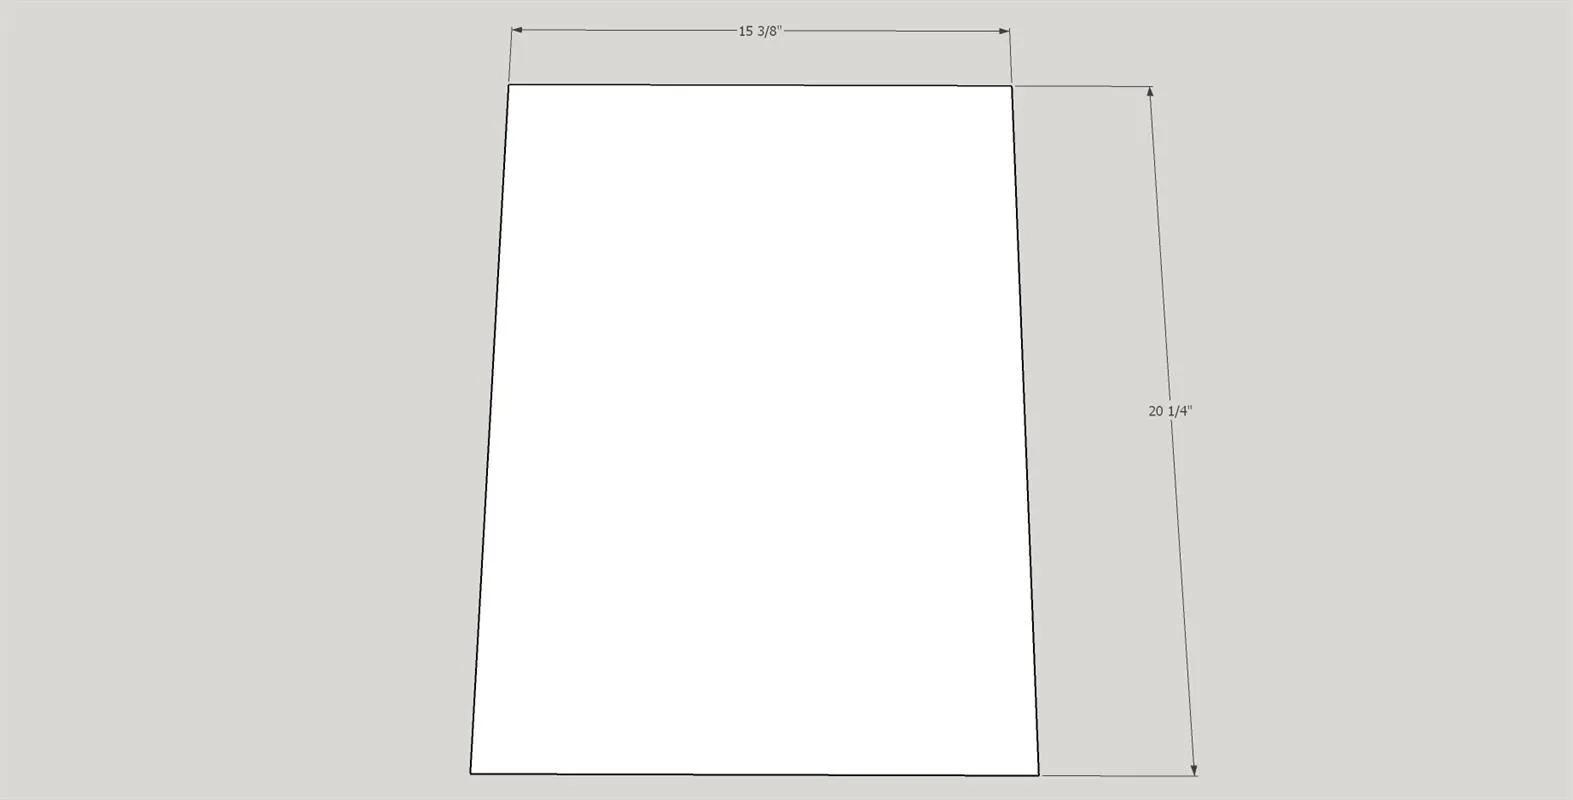
- Cut the 1/4" plywood bottom slightly smaller (approx. 1/32") than the width and depth. My plywood bottom had a width of 15 3/8" and a depth of 20 1/4".
3Plan and Cut your dividers
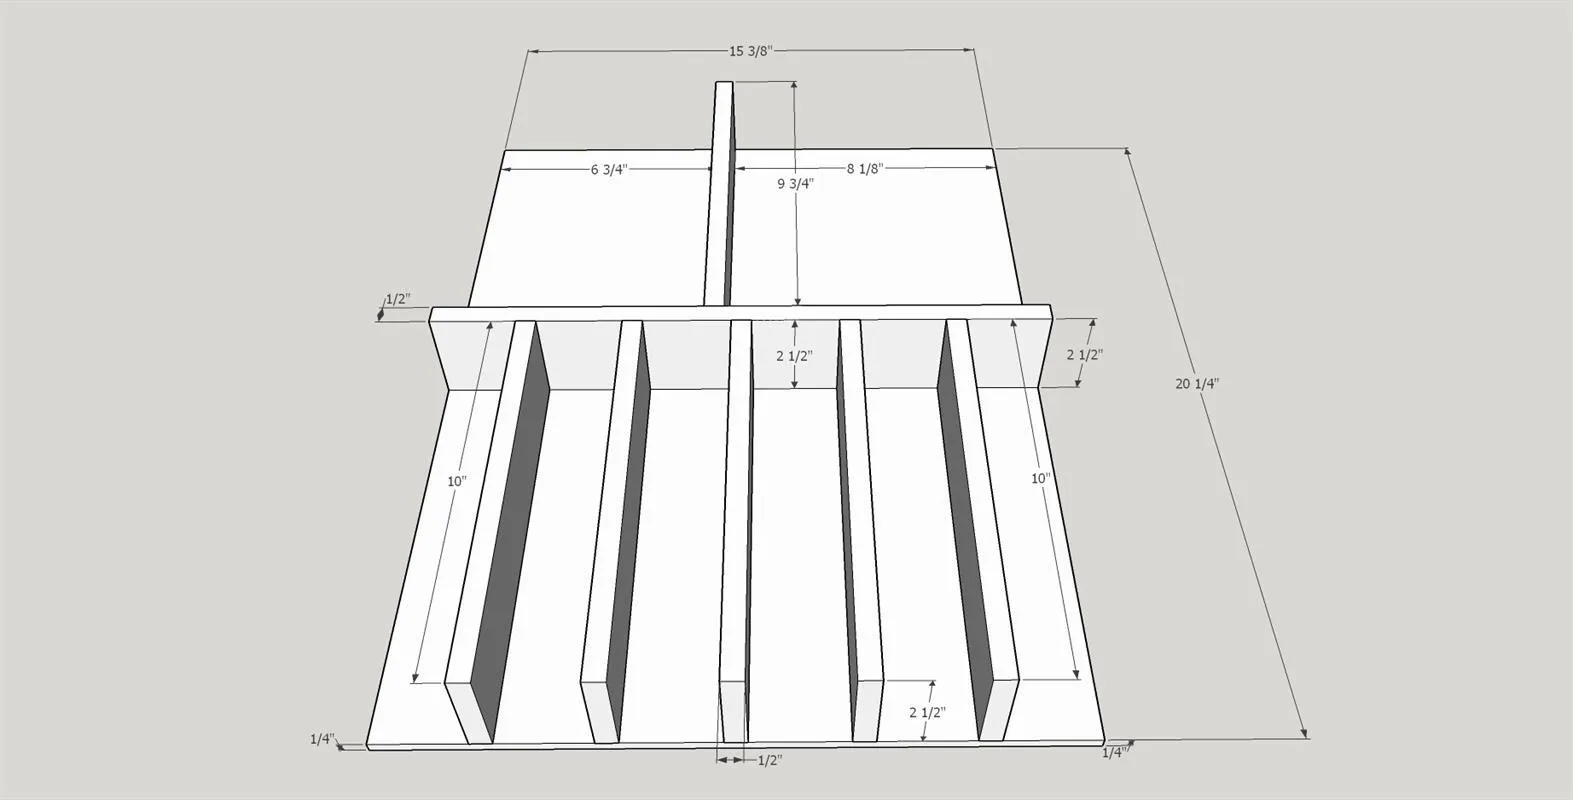
Using the inside drawer measurements, the number and size of dividers you need, plan the layout of your drawer divider insert. Keep in mind that you need to subtract 1/4" from the height of the dividers because of the thickness of the plywood bottom. I have attached my plan with dimensions. Once you have completed your plan cut all of the dividers to size. I used 1/2" poplar.
4Prepare bottom and dividers
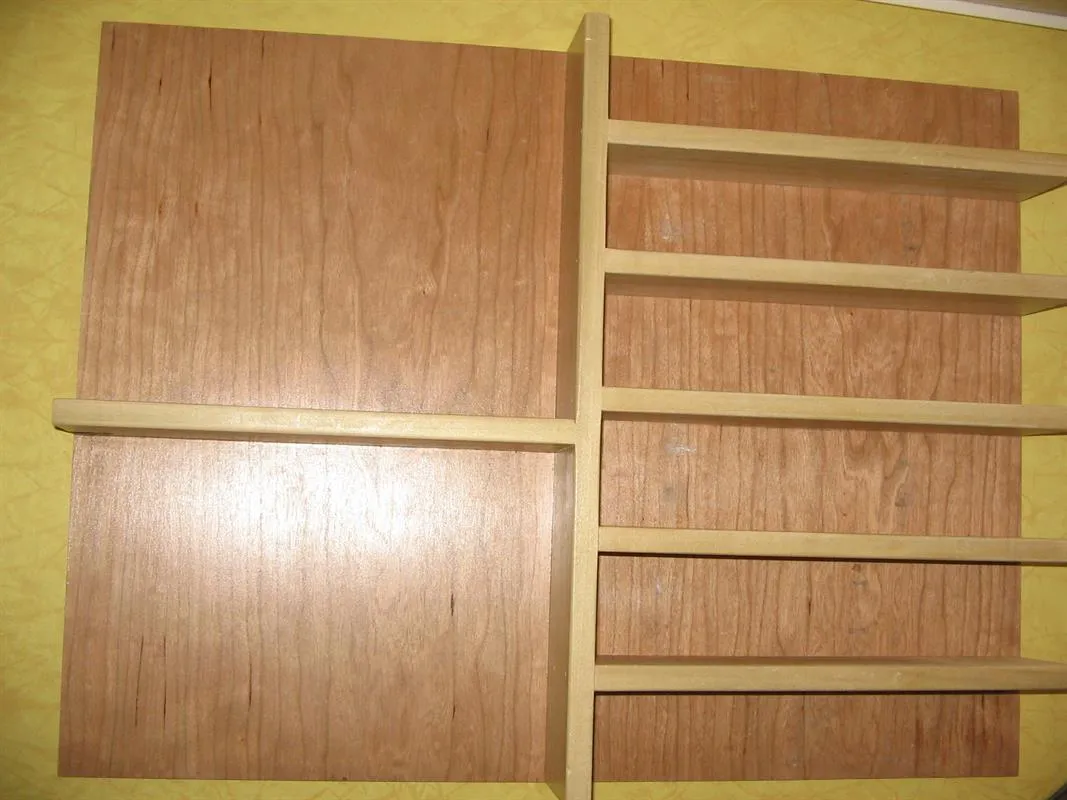
Use 100 - 180 grit sandpaper to smooth all of the dividers and the bottom. Using your design layout measure and mark the position of the dividers on the plywood bottom. See attached example from my project.
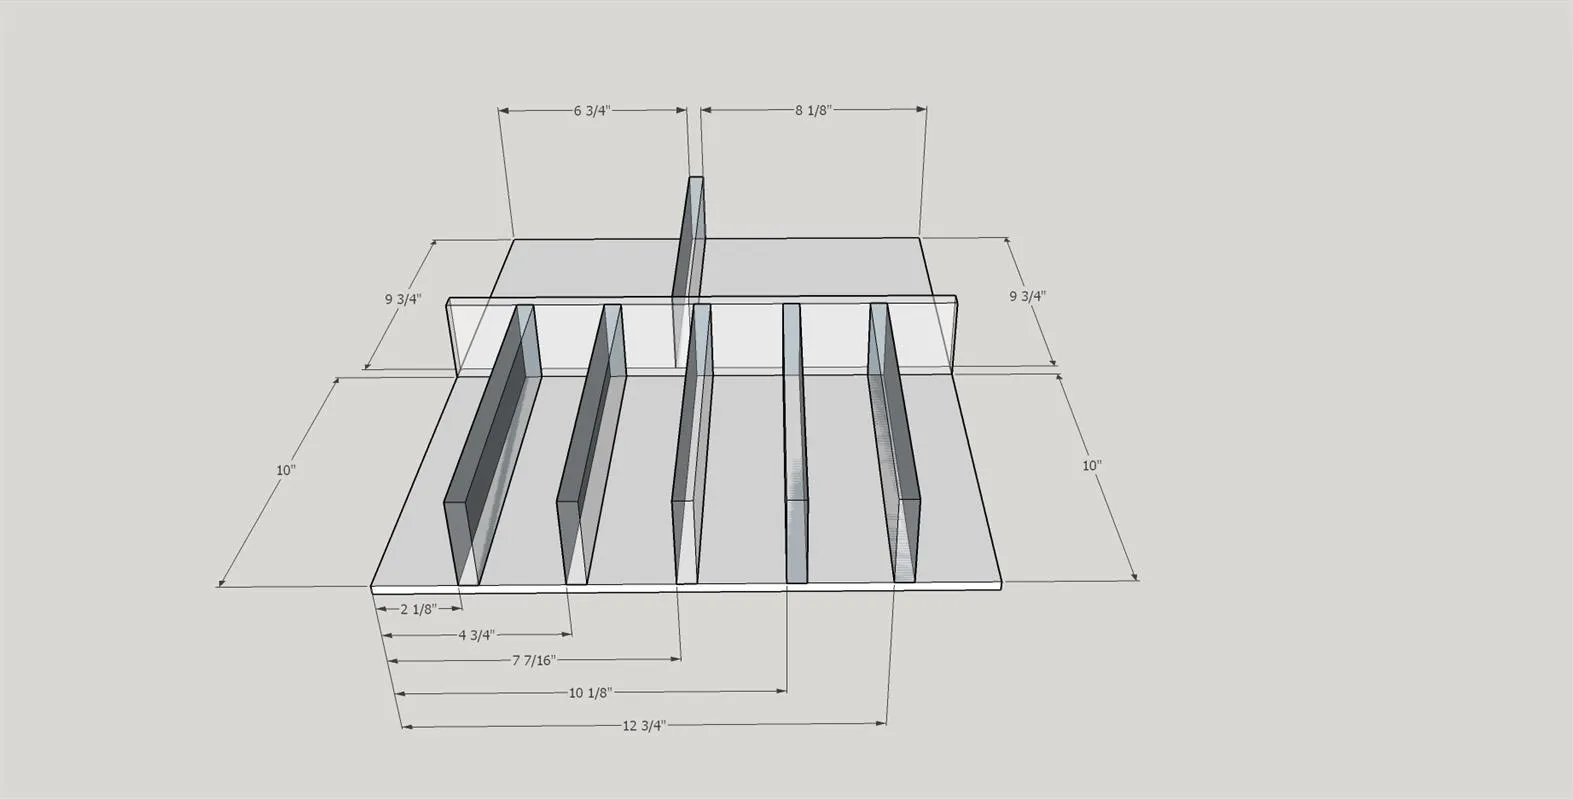
5Attach the dividers
Use Titebond I wood glue and 1" pin nails to attach the dividers. I started with the center divider, added the five front dividers and finally the back divider. Fill any holes or defects with wood filler.
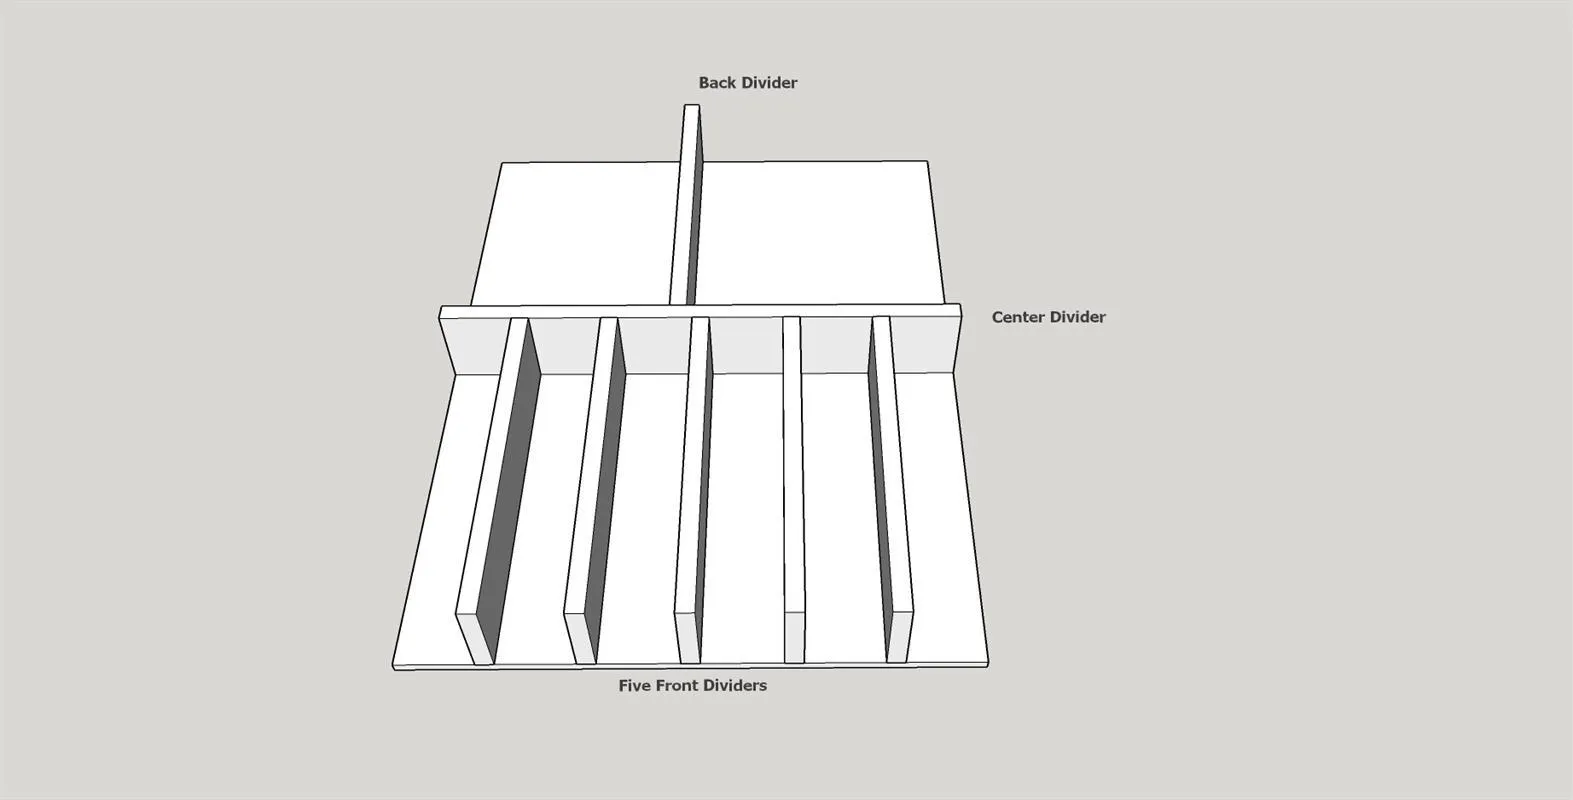
6Finish
- Now that the build is complete use 220 sandpaper to do a once over on all surfaces in preparation for the finish.
- Clean well to remove all dust. (I use compressed air and clean dry rags) I did not use a stain, just finished with Minwax Polycrylic Satin finish. I gave the drawer divider three coats following manufacturers instructions.