 Notch
Notch- Difficulty
- Intermediate
- Time
- 6.3–12.3 hours
- Cost
- $$$
About this build
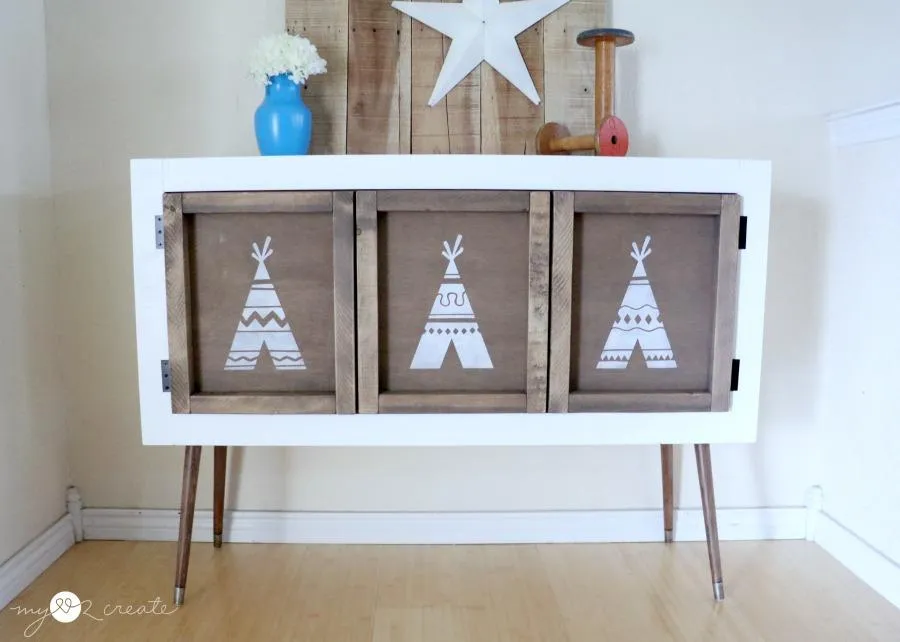
Get both style and function with this amazing Kid’s Pull Down Table! Enjoy the look of a beautiful mid-century style credenza, and in only a few seconds transform it into the perfect place for the kids to eat or play. Use it in any room in your home, perfect for dining, art, legos, and more!
Tools
Essential
- Brad Nailer
- Circular Saw
- Drill / Driver
- Impact Driver
- Jigsaw
- Miter Saw
- Pocket Hole Jig
- Random Orbit Sander
Optional / nice to have
- Bar / Pipe Clamps
- Tape Measure
Materials
| Item | Qty |
|---|---|
| Plywood, 3/4" Thick Full Sheet | 1 board |
| Board, 1x3 96" | 2 board |
| Board, 2x2 96" | 2 board |
| Plywood, 1/4" Thick 48" | 1 board |
| Regular Hinges | 4 each |
| 90 degree surface mount hidden spring hinges | 2 each |
| Latch | 1 each |
| Legs @ 14 1/4'' | 4 each |
Overall cost: $$$. Lumber prices vary by region, species, and season, so we give a band rather than a figure we would only be pretending to know.
Cut list
| Part | Qty | T × W × L |
|---|---|---|
| Stiles for frames | 6 | 1" × 1" × 16" |
| Rails for frames | 6 | 1" × 1" × 11" |
| Rails for face frame | 2 | 3/4" × 2" × 43" |
| Stiles for face frame | 2 | 3/4" × 2" × 21" |
| Table top | 1 | 3/4" × 18" × 46" |
| Top and bottom of cabinet | 2 | 3/4" × 16" × 48" |
| Sides | 2 | 3/4" × 16" × 20" |
| Dividers | 2 | 3/4" × 15" × 20" |
| Shelves | 3 | 3/4" × 15" × 15" |
| Back | 1 | 1/4" × 21" × 48" |
What to buy
Buy 9 boards at 8 ft.
1" × 1"
2 boards
3/4" × 18"
1 board
3/4" × 16"
2 boards
3/4" × 15"
1 board
3/4" × 2"
2 boards
1/4" × 21"
1 board
Assumes 8 ft stock, a 1/8" saw kerf, and buying each part at its own width. Change the board size or kerf on the full board plan →
Instructions
1Attach sides and dividers
Attach the side and dividers as shown to the top and bottom boards. Use wood glue and 3/4'' pocket holes and 1 1/4'' pocket hole screws. Make sure to inset the dividers back 3/4''.
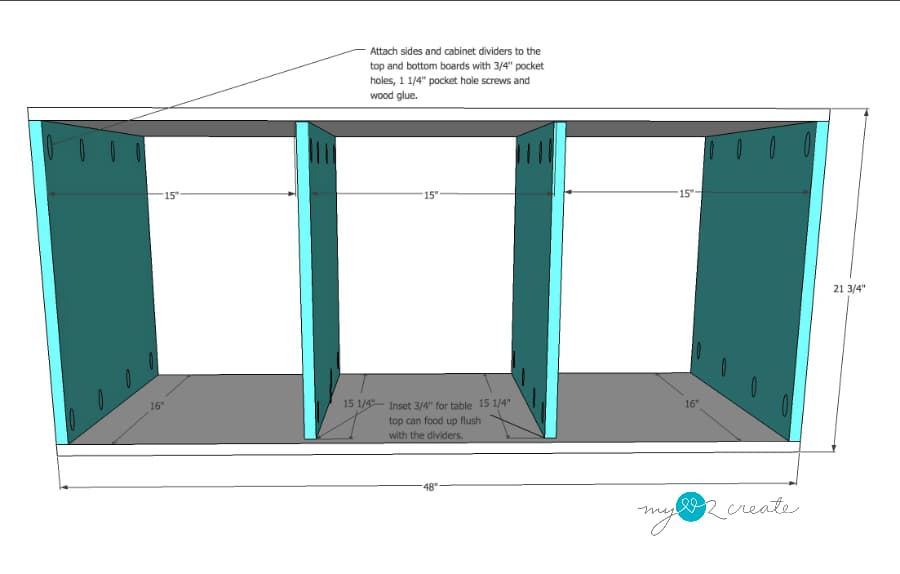
2Add shelves
Add the shelves at your desired height with 1 1/4'' pocket hole screws and wood glue. If you want your shelves adjustable use the Kreg shelf pin jig.
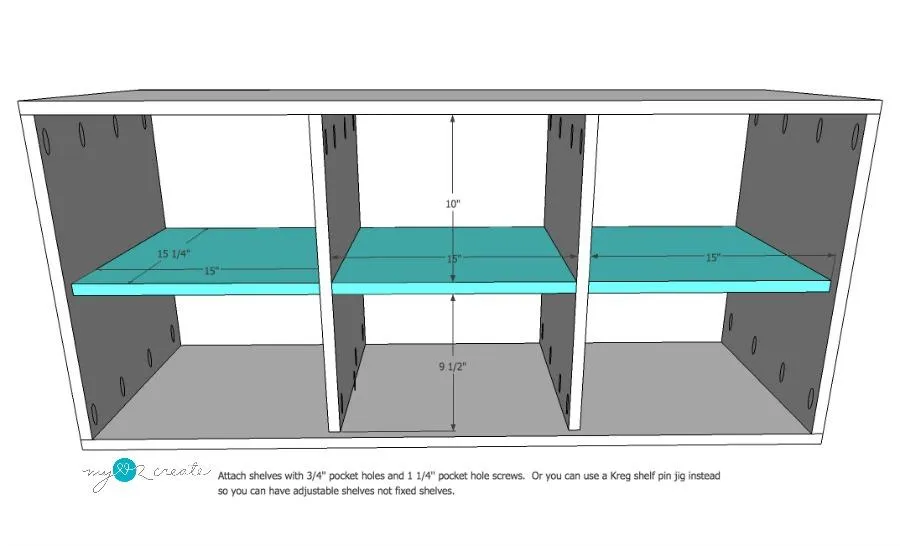
3Attach the back
Attach the 1/4'' plywood to the back of the cabinet with 1/2'' screws, pre-drill and drill into the sides, dividers, top and bottom.
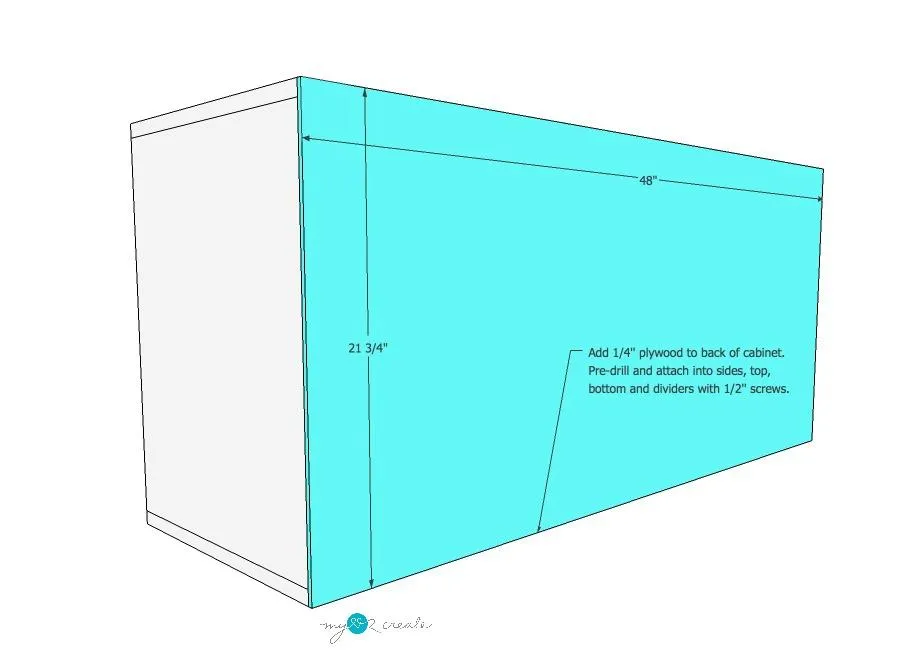
4Build the face frame
Build the face frame as shown.
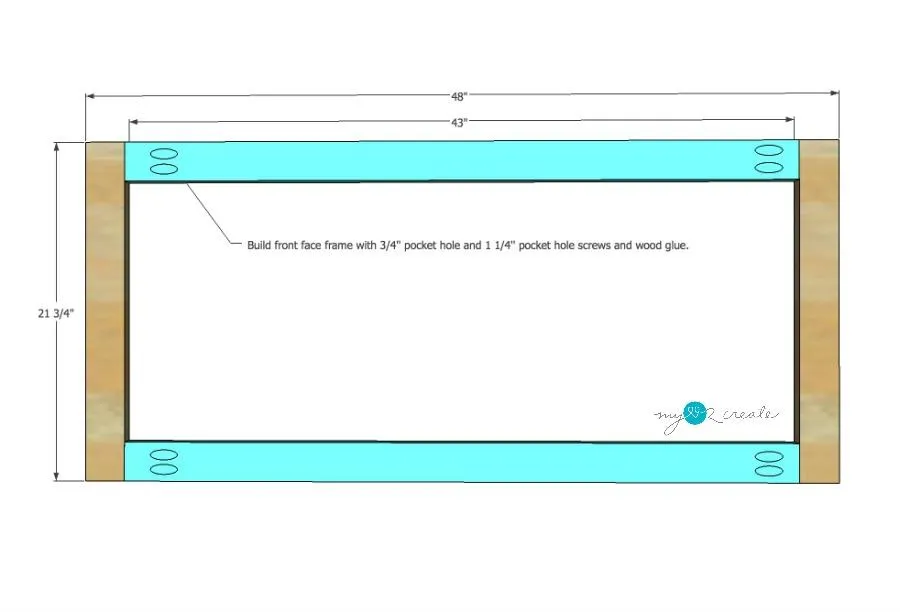
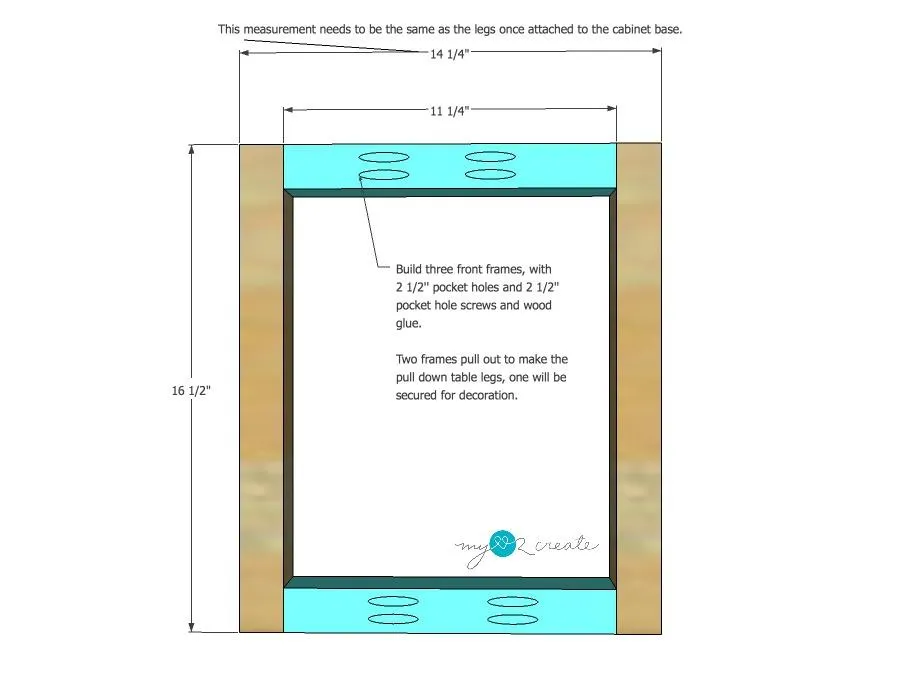
5Build the front three frames
Build the front three frames as shown. Be sure to use 2 1/2'' pocket holes and screws.
6Notch out area for hinges
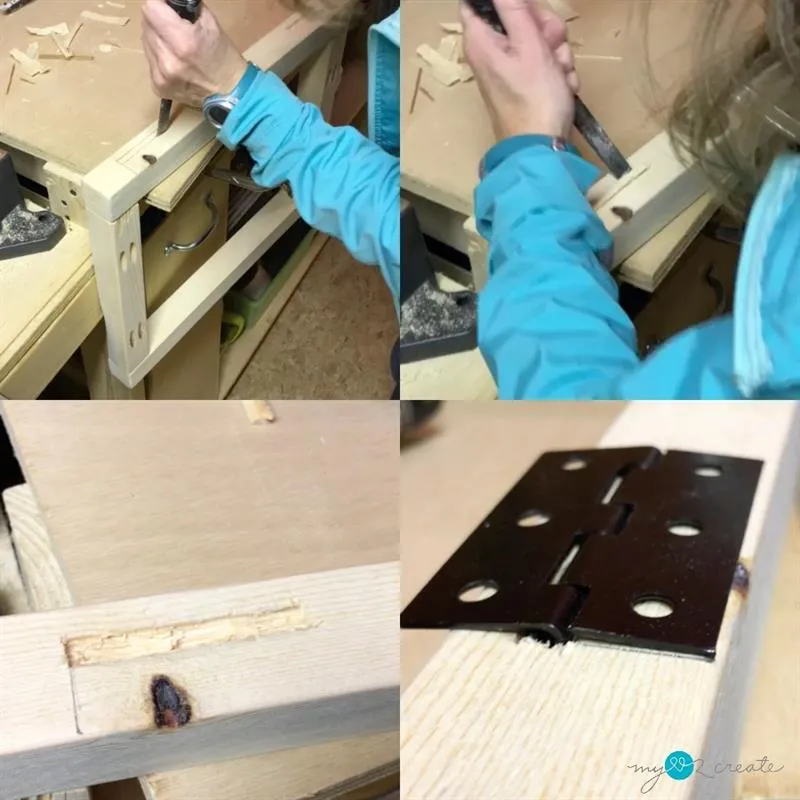
Notch out the area on your outside frames which will become the table legs, for the hinge to sit so it lays flat on the frame. See photos for details.
7Stain and Paint
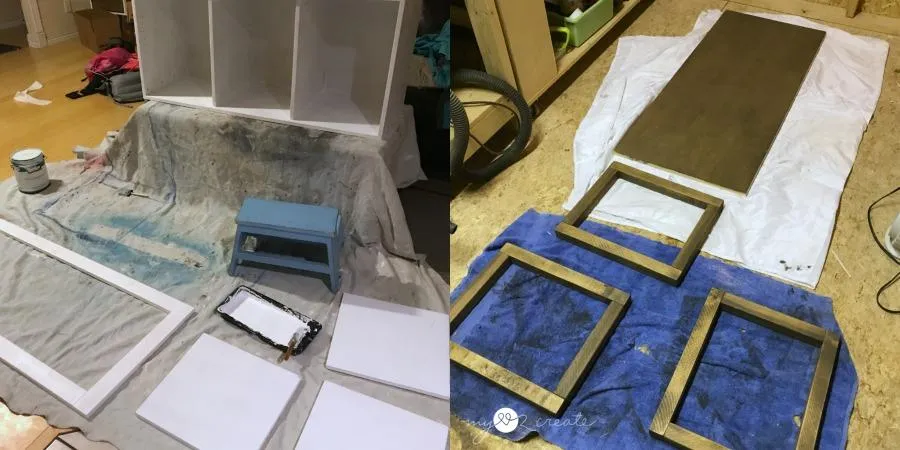
Stain and paint your pieces as desired up to this point. Of course you can wait until it is all built, but for me it is better to do it now and do touch ups later if needed. When my cabinet was finished and built, I added the legs to the bottom of the cabinet. This is important to do before you add your table top and face frames, because you will need the cabinet at the correct height for adding your face frame and table top.
8Attach outside frames to face frame
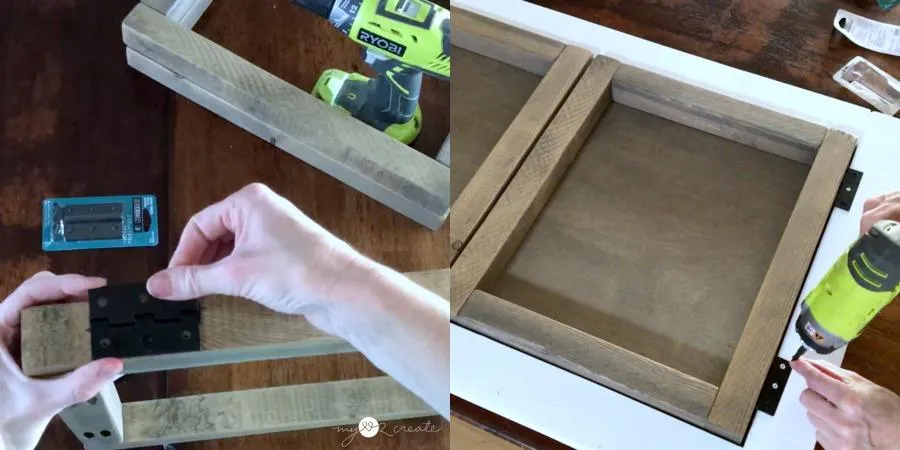
Add the hinges to the outside frames, then attach them to the face frame as shown.
9Add spring hinges
Attach the spring hinges to the face frame and the inside of the cabinet following the package directions. Close to see if it fits, and adjust accordingly.
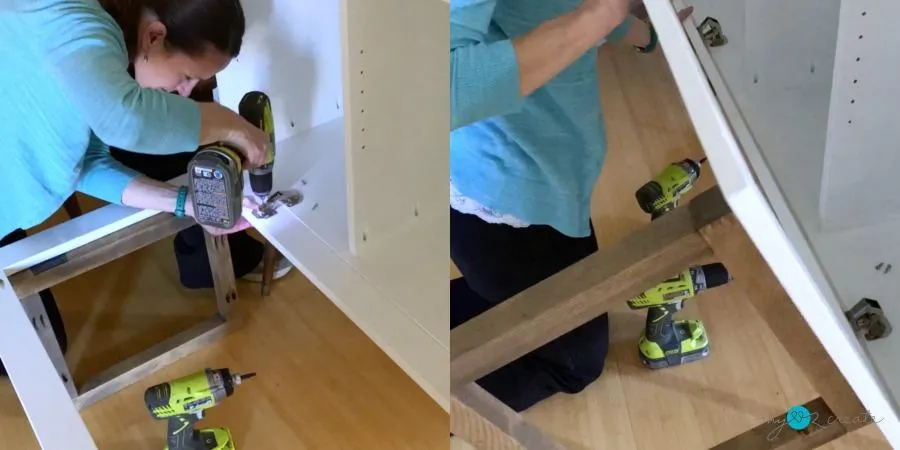
10Notch out table top
You will need to notch out the table top around the spring hinges. Measure and mark where to notch, then cut with a jigsaw. Make sure you are aware that you do not notch too high or you will go past the face frame and cause a gap. Note the reference to the other notch in the photo, it will be covered in the next step.
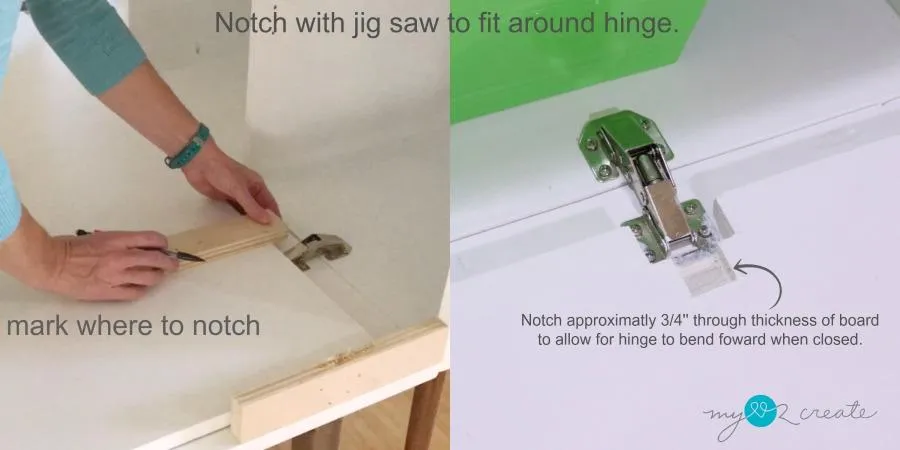
11Add the latch
Add the latch and hook to the face frame and side of the cabinet.
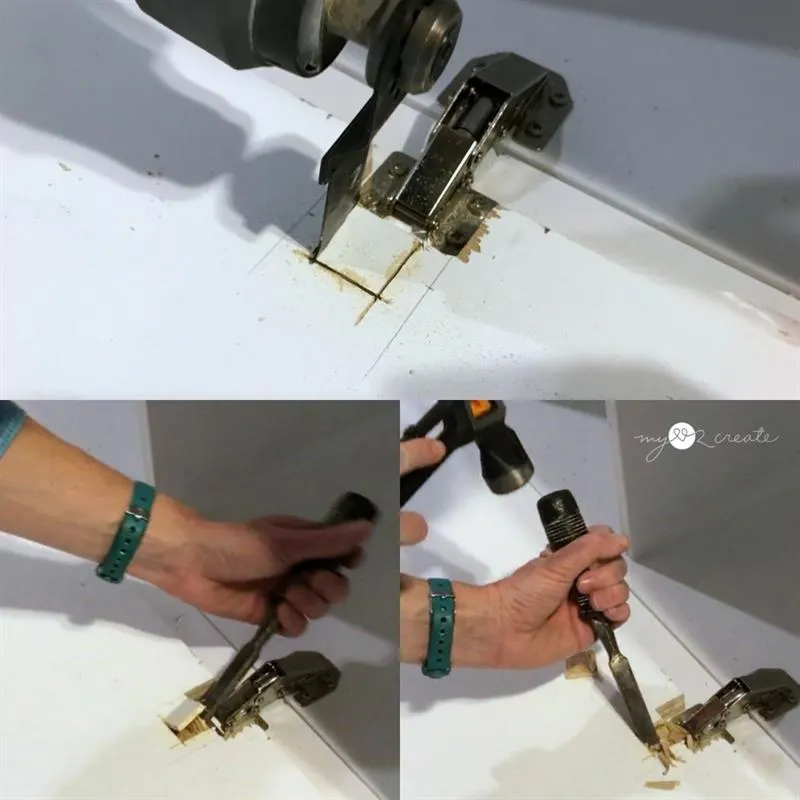
12Notch for closed spring hinge
Once you have notched out the area around the hinge you will need to notch an area for the hinge when it closes, I went just over half the width of the board. I used a multi-tool to cut the wood, then used a chisel and a hammer to notch out the area.
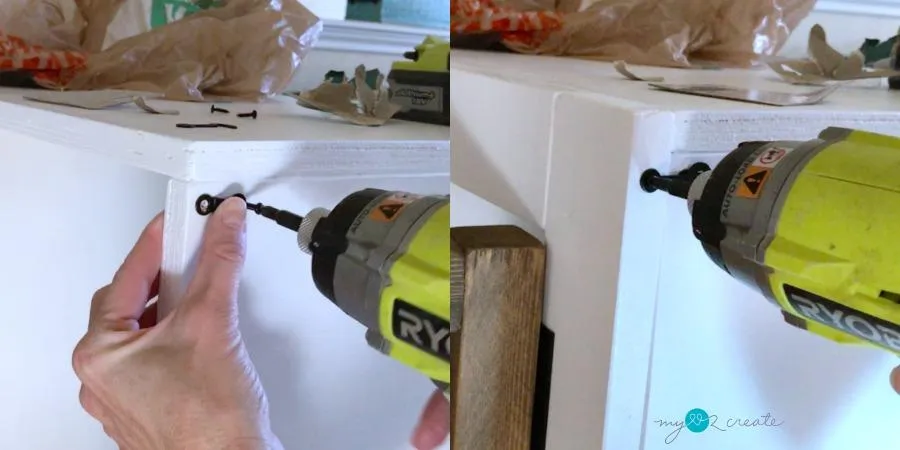
13Attach table top to face frame
With all the notches done now you can attach the table top to the face frame. I countersunk 1 1/4'' screws through the table top into the face frame. It is helpful to use a clamp to avoid shifting. Then I filled in the holes.
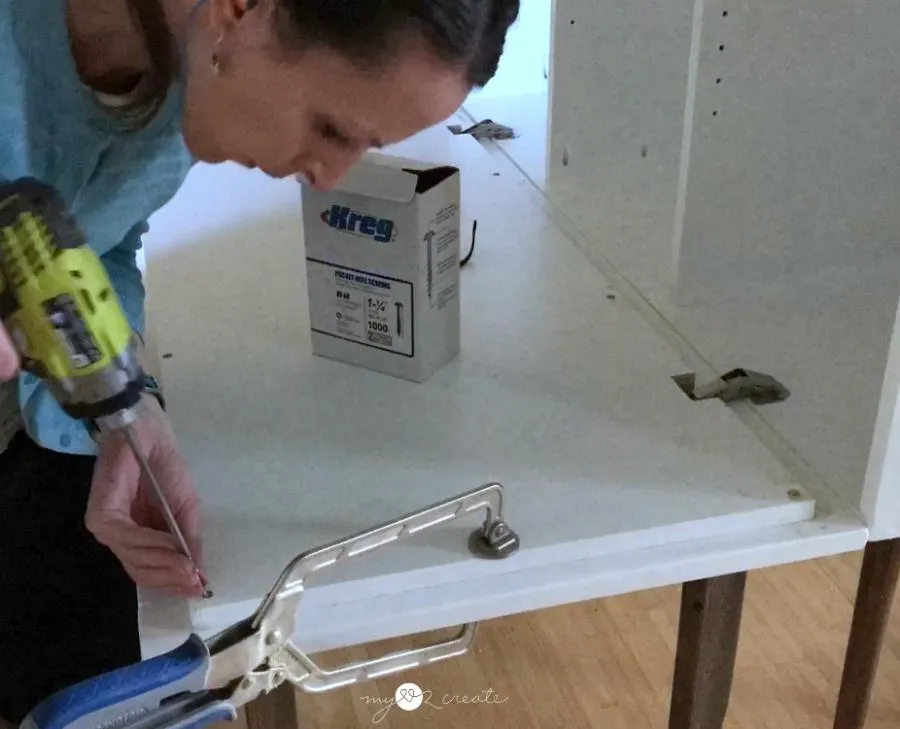
14Add middle frame to front
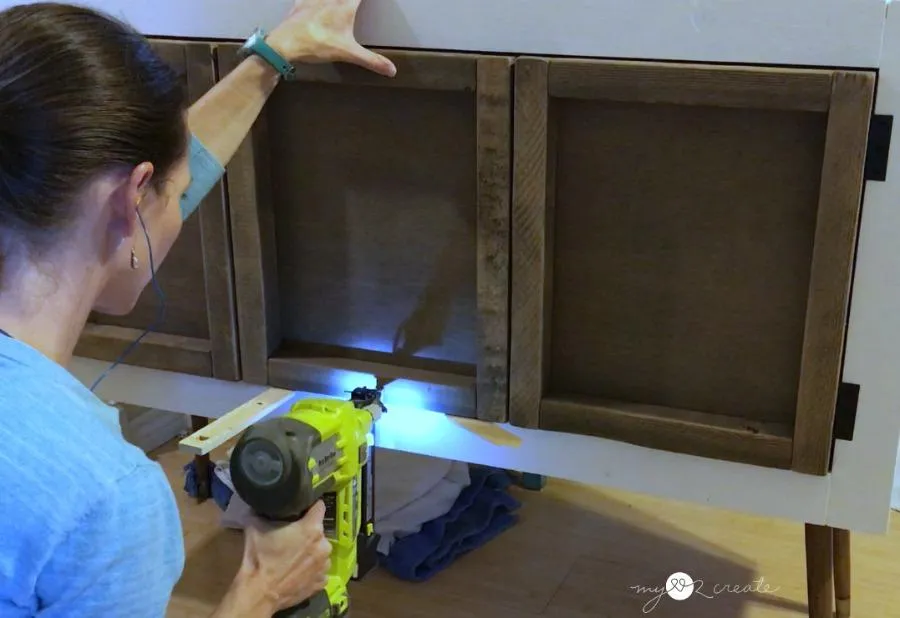
- Now you can add the middle frame to the front. Use wood glue on the back of the frame and center it between the side frames, use shims to help.
- Then secure with 2'' finish nails.
15Cut wood
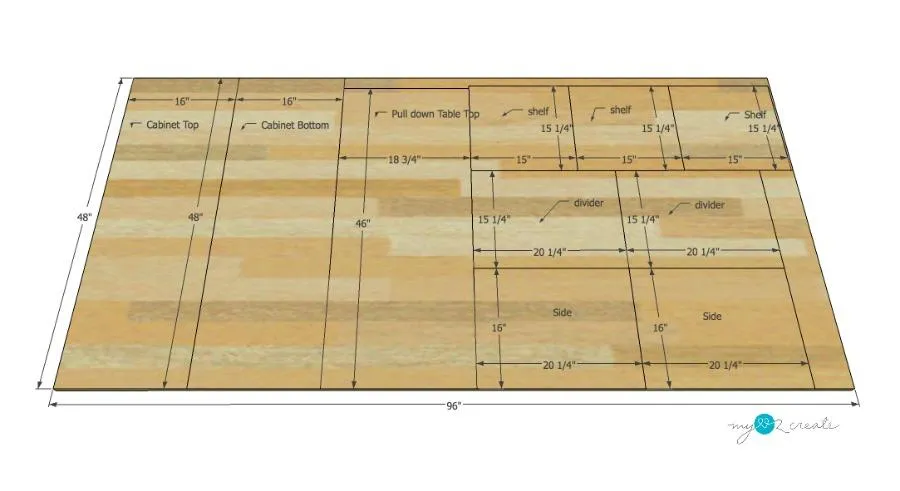
Use the diagram for your plywood cuts to get all of them in one sheet.
16Read through plans
Make sure to read through the plans before beginning.
17Finish as desired
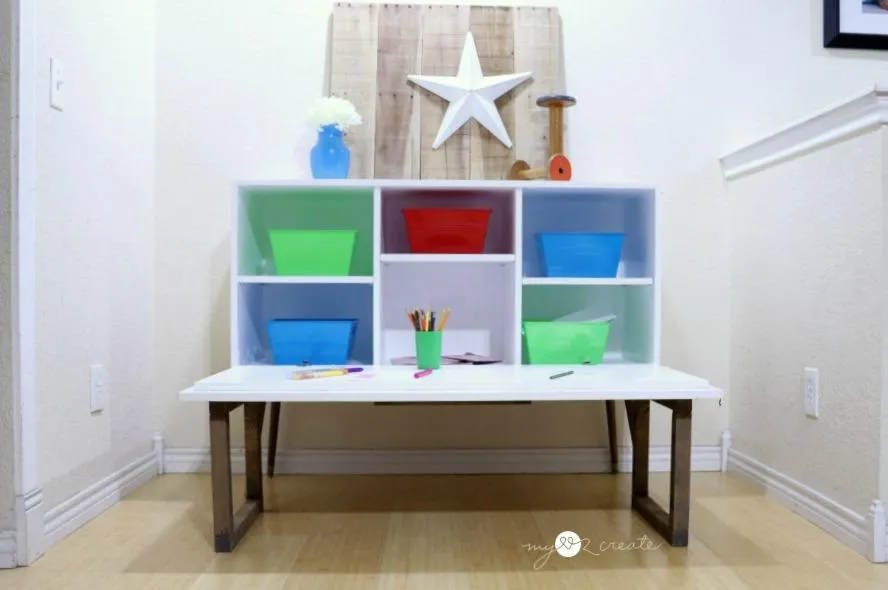
Because it was for the kids I did some fun teepee stencils on the front. Get creative with your finish! For more photos and tips and tricks on this build check out my blog post. http://www.mylove2create.com/2017/10/kids-pull-down-table.html
Tags
- Arts and Crafts
- Intermediate
Reviews & builds
No reviews yet
Sign in to review this plan or share your build.
No reviews yet. Be the first to build this.