 Notch
- Difficulty
- Intermediate
- Time
- 8.3–16.3 hours
- Cost
- $$$
About this build
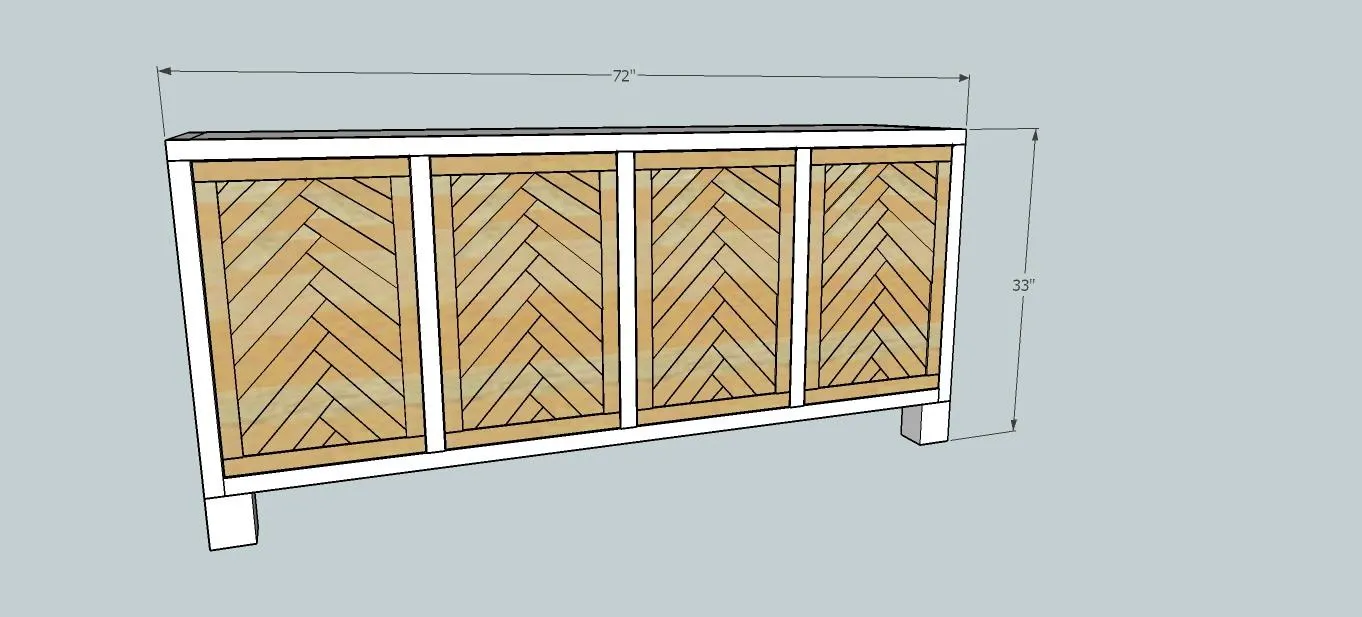
This buffet has a traditional look and feel but shares a modern vibe that is sure to catch the eye of anyone who walks into the room!! This buffet doesn’t just sit around looking pretty, the storage space it provides is amazing!! Build it over the weekend and have your home ready for the holidays!!
Tools
Essential
- Brad Nailer
- Circular Saw
- Miter Saw
- Pocket Hole Jig
- Random Orbit Sander
Optional / nice to have
- Bar / Pipe Clamps
- Tape Measure
Materials
| Item | Qty |
|---|---|
| Board, 2x2 96" | 7 board |
| Board, 1x2 96" | 4 board |
| Plywood, 1/2" Thick Quarter Sheet | 1 board |
| Plywood, 3/4" Thick Full Sheet | 1 board |
| Lattice Strips (optional), 1/4" Thick 1 3/4" | 8 board |
| Furniture Feet, 3 1/2" 4 1/2" | 4 board |
| Board, 1x4 96" | 1 board |
| Plywood, 1/4" Thick Full Sheet | 1 board |
| Inset hinges | 8 each |
| Drawer pulls | 4 each |
| 1 1/4" pocket hole screws | 1 each |
| 2 1/2" pocket hole screws | 1 each |
| 1" pocket hole screws | 1 each |
Overall cost: $$$. Lumber prices vary by region, species, and season, so we give a band rather than a figure we would only be pretending to know.
Cut list
| Part | Qty | T × W × L |
|---|---|---|
| Top rails | 2 | 1" × 1" × 72" |
| Bottom Rails | 2 | 1" × 1" × 69" |
| Legs | 4 | 1" × 1" × 27" |
| Front and Back Stiles | 4 | 1" × 1" × 25" |
| Side Rails | 4 | 1" × 1" × 15" |
| Top and Bottom Support Rails | 6 | 3/4" × 3" × 15" |
| Top and Bottom Door Frames | 8 | 3/4" × 1" × 15" |
| Sides of Door Frames | 8 | 3/4" × 1" × 22" |
| Top and Bottom Plywood | 2 | 3/4" × 15" × 69" |
| Side Plywood | 2 | 3/4" × 15" × 25" |
| Back Plywood | 1 | 1/4" × 27" × 71" |
| Herringbone Pieces | 56 | 1/4" × 1" × 9" |
| Door plywood | 4 | 1/2" × 12" × 22" |
| Door Stops | 4 | 3/4" × 3/4" × 1" |
What to buy
Buy 23 boards at 8 ft.
1" × 1"
7 boards
3/4" × 15"
2 boards
3/4" × 3"
1 board
3/4" × 1"
4 boards
3/4" × 3/4"
1 board
1/2" × 12"
1 board
1/4" × 27"
1 board
1/4" × 1"
6 boards
Assumes 8 ft stock, a 1/8" saw kerf, and buying each part at its own width. Change the board size or kerf on the full board plan →
Instructions
1Step 1
- I have to say this has been one of my easiest builds so far and yet it makes such a statement!! It is basically building a box, and then the pattern on the doors dresses it up perfectly!! Let's get started!
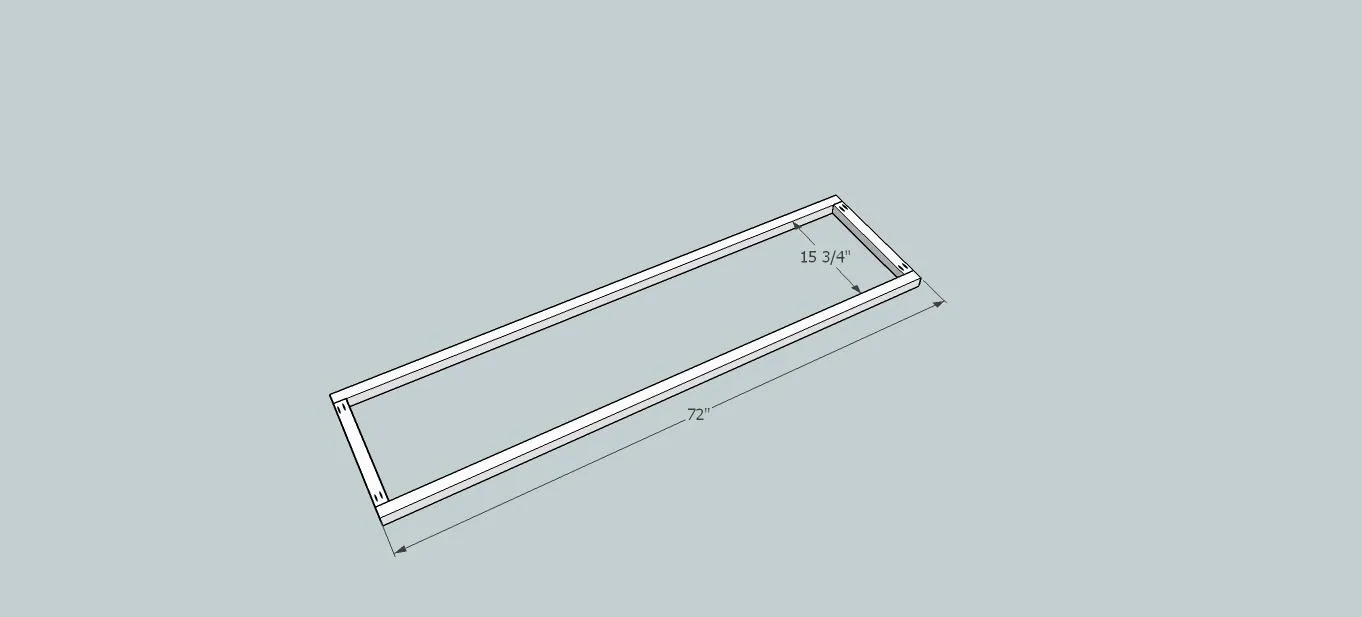
- Start by building the top of the buffet!
- Attach two side rails to the top rails using pocket holes drilled at 1 1/2"(a 2x2 is actually 1 1/2" wide so we drill our pocket holes at 1 1/2"), use 2 1/2" pocket hole screws and wood glue!
2Step 2
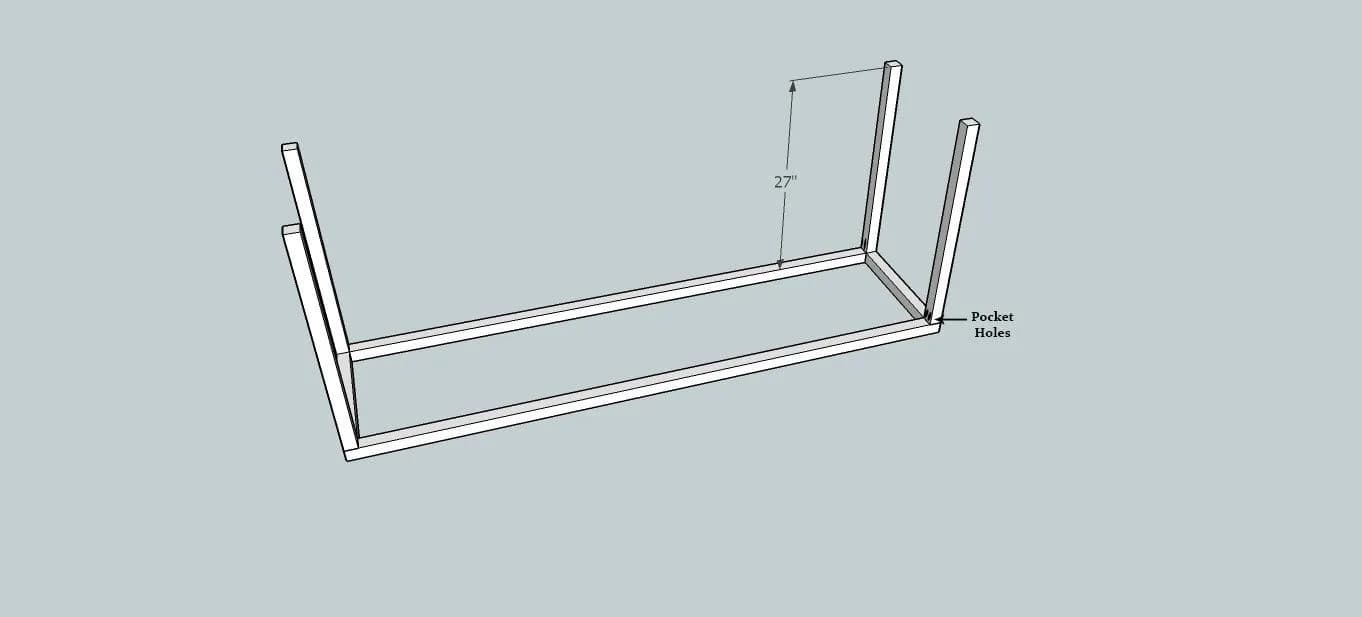
Attach the legs to the top! Pocket hole where indicated by the black ovals!! The same 1 1/2" pocket holes and 2 1/2" screws will be used to attach! Don't forget to glue!
3Step 3
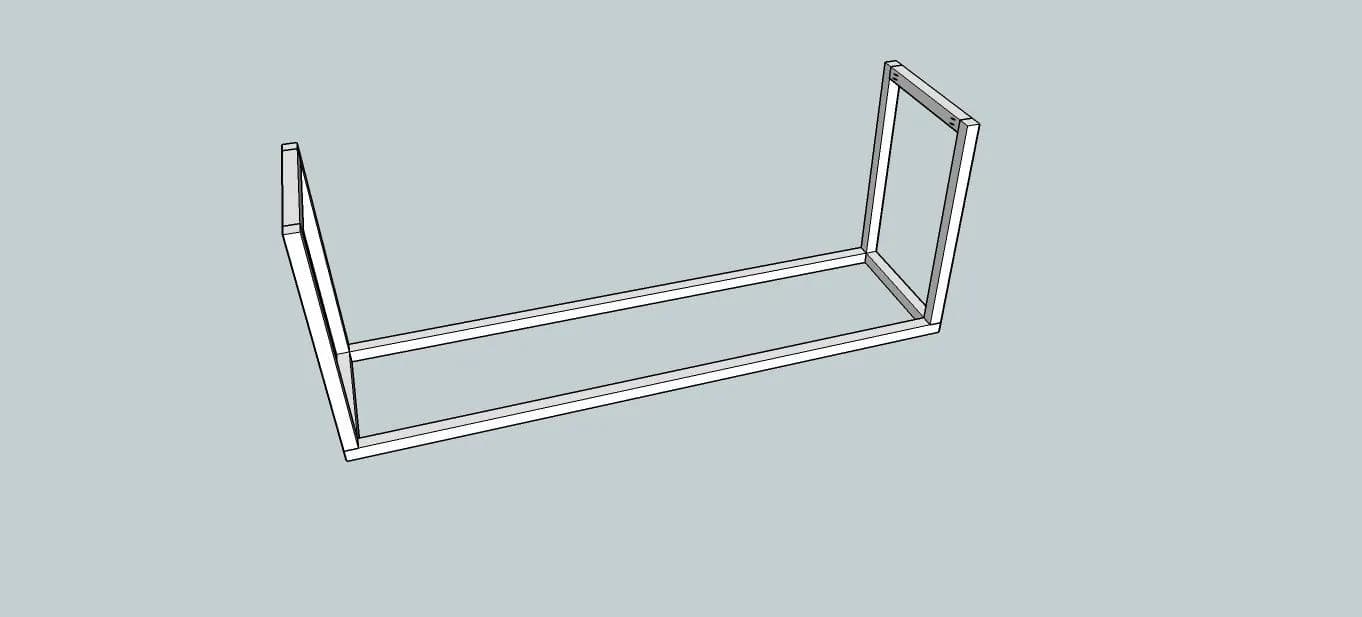
Attach bottom side rails! Again, sticking with the 1 1/2" pocket holes and 2 1/2" screws with glue!!
4Step 4
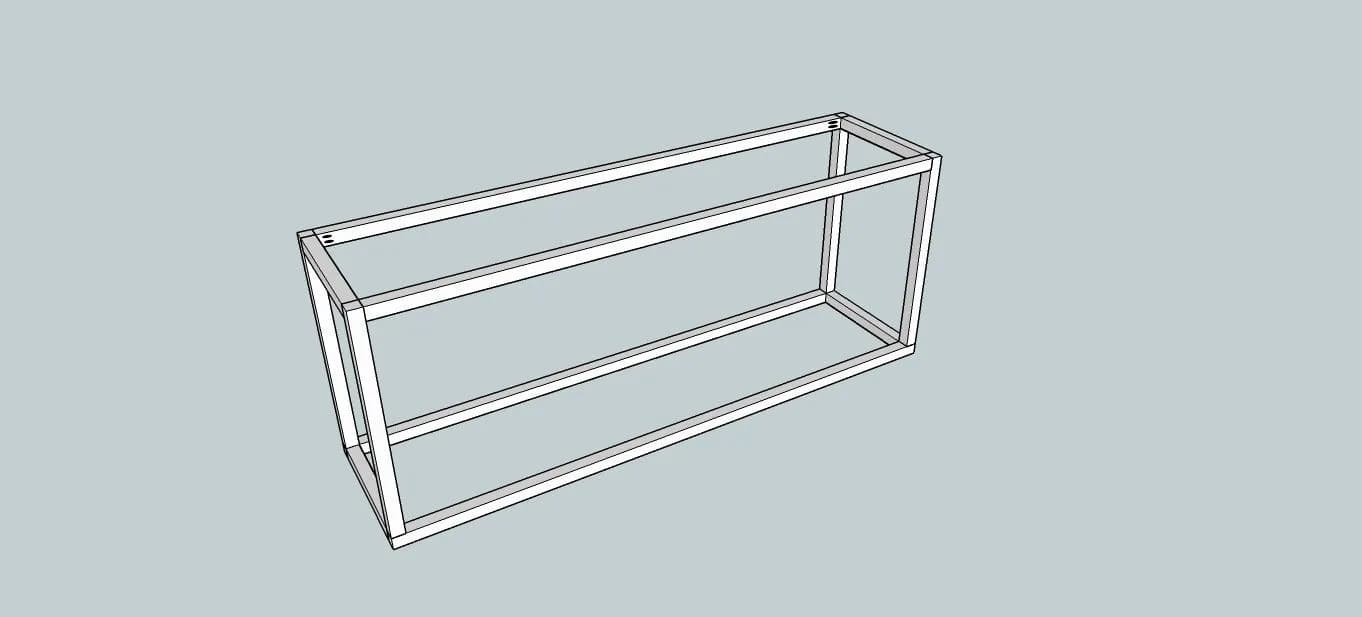
Attach bottom rails! Same pocket hole depth and screws!
5Step 5
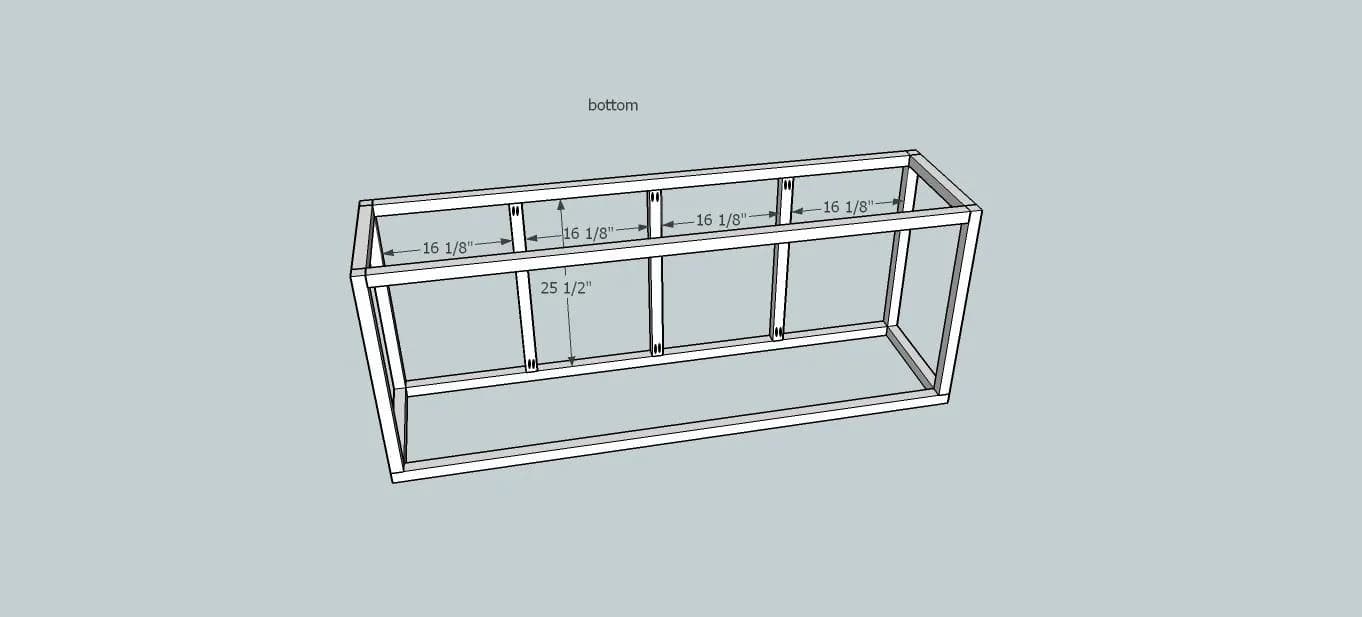
Attach front stiles! Still using same pocket hole depth of 1 1/2" and same screws at 2 1/2"! Make sure and glue!
6Step 6
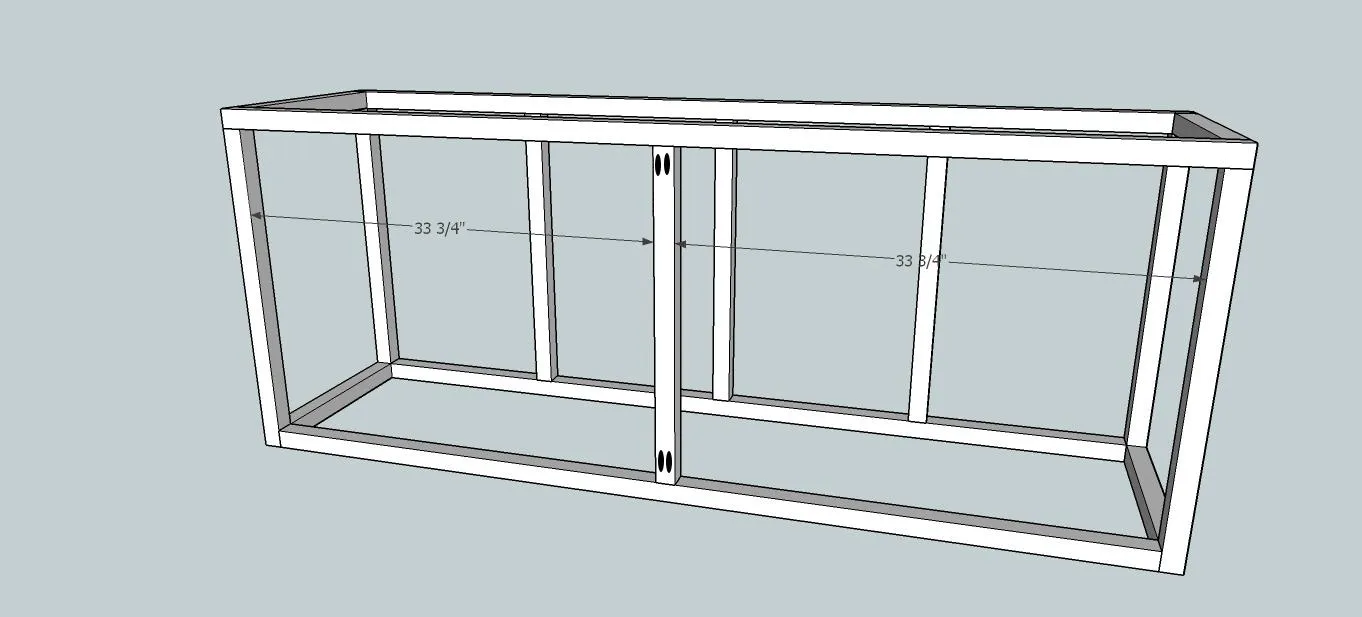
Attach back stile!! Still keeping with the same pocket holes!!
7Step 7
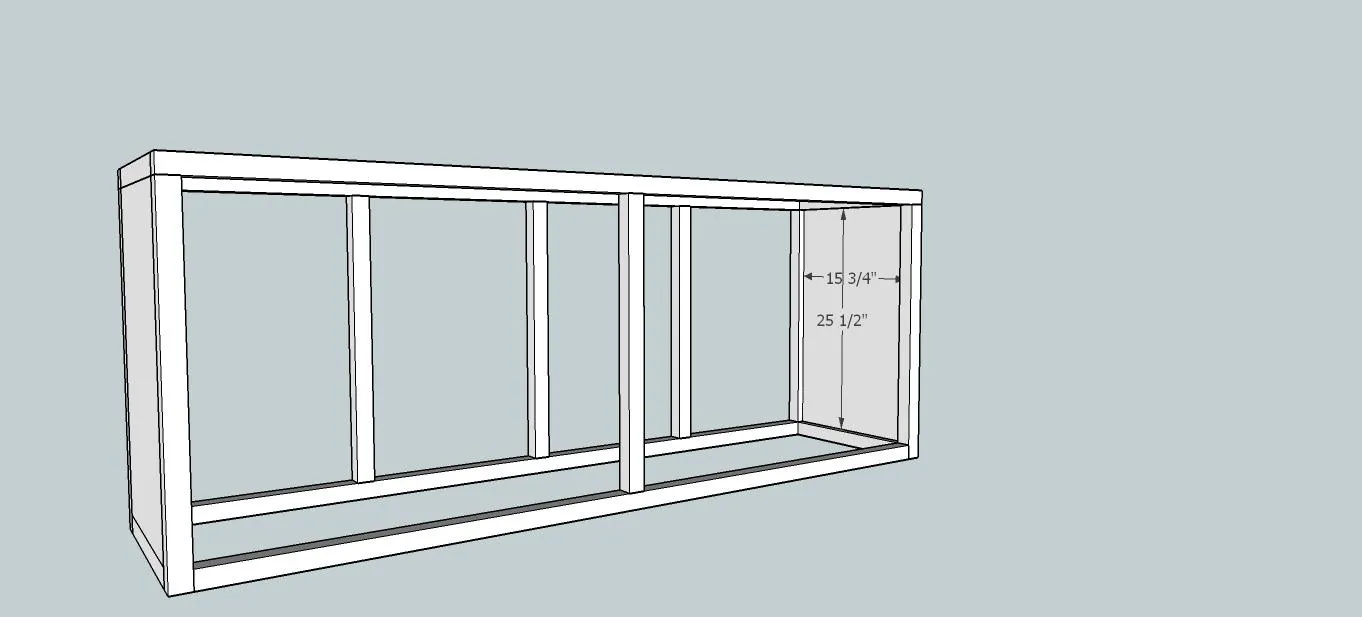
Next attach the side plywood pieces, the pocket hole depth will be changed here since we are no longer working with the same material! This plywood is 3/4" thick so make sure and adjust your jig and drill bit! Use 1 1/4" pocket hole screws and glue to attach!!
8Step 8
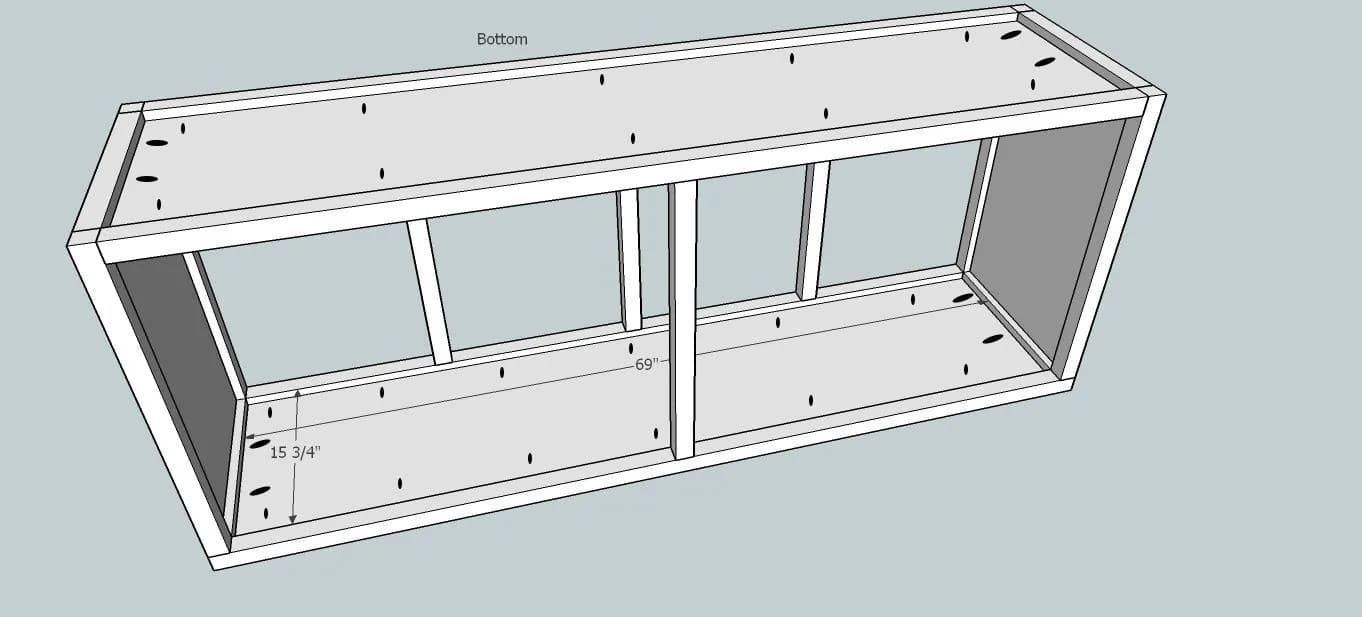
Attach top and bottom plywood pieces! Still using 3/4" holes and 1 1/4" screws!
9Step 9
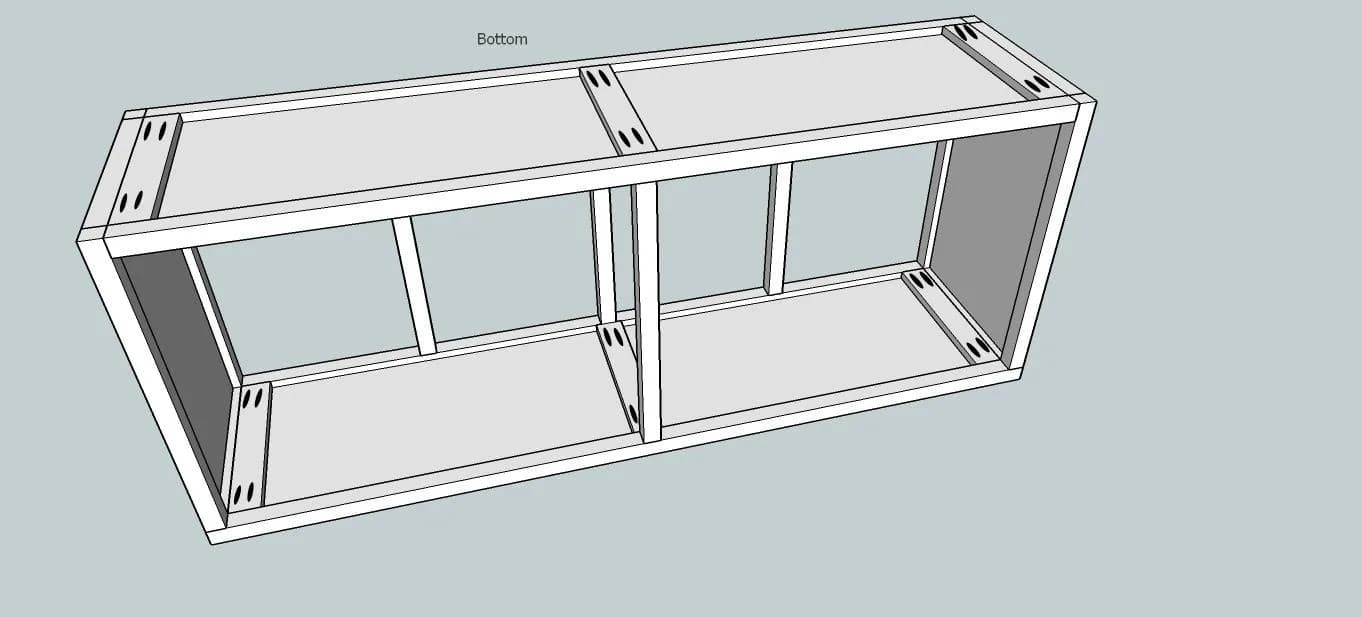
- I did not want to have a partition in the middle of my buffet, so I chose to add support rails underneath my plywood on both top and bottom! This gives me the full six feet of storage...and gives a level surface to attach the feet to on the bottom!!
- Also, the plans allow for enough plywood for a shelf on the interior of the buffet...again I chose not to do this since I wanted the taller storage space! You have everything you need to make a shelf and partition though if you would like!
- Attach using 3/4" pocket holes and 1 1/4" screws!!
10Step 10
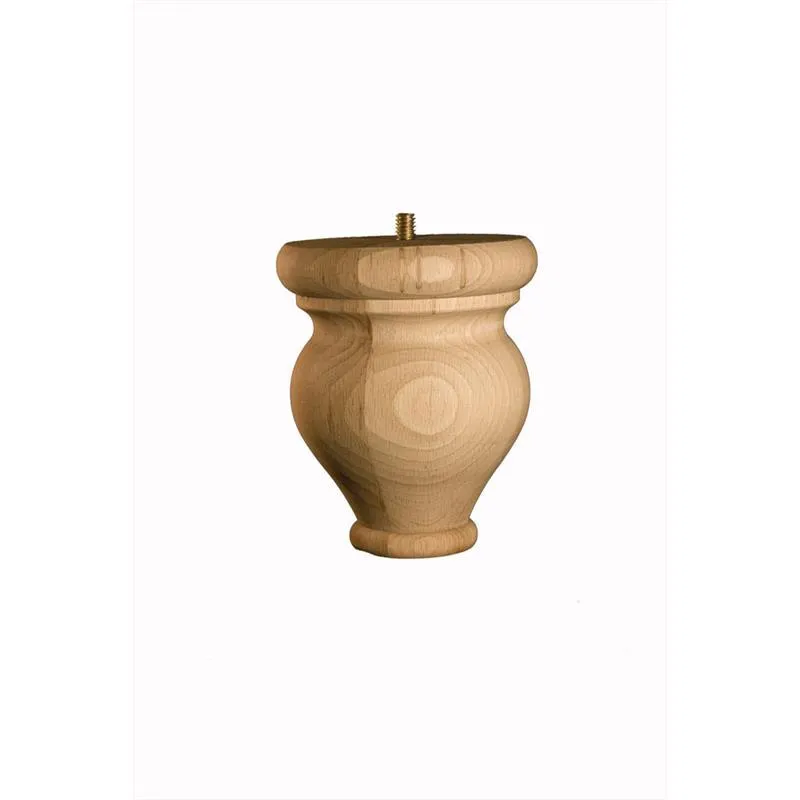
While I had the buffet flipped upside down, I went ahead and attached the feet! The feet I used are pictured here from Lowe's! I just drilled a hole slightly smaller than the screw that comes in the foot, placed a hefty amount of glue on the foot and screwed it into the hole!!
11Step 11
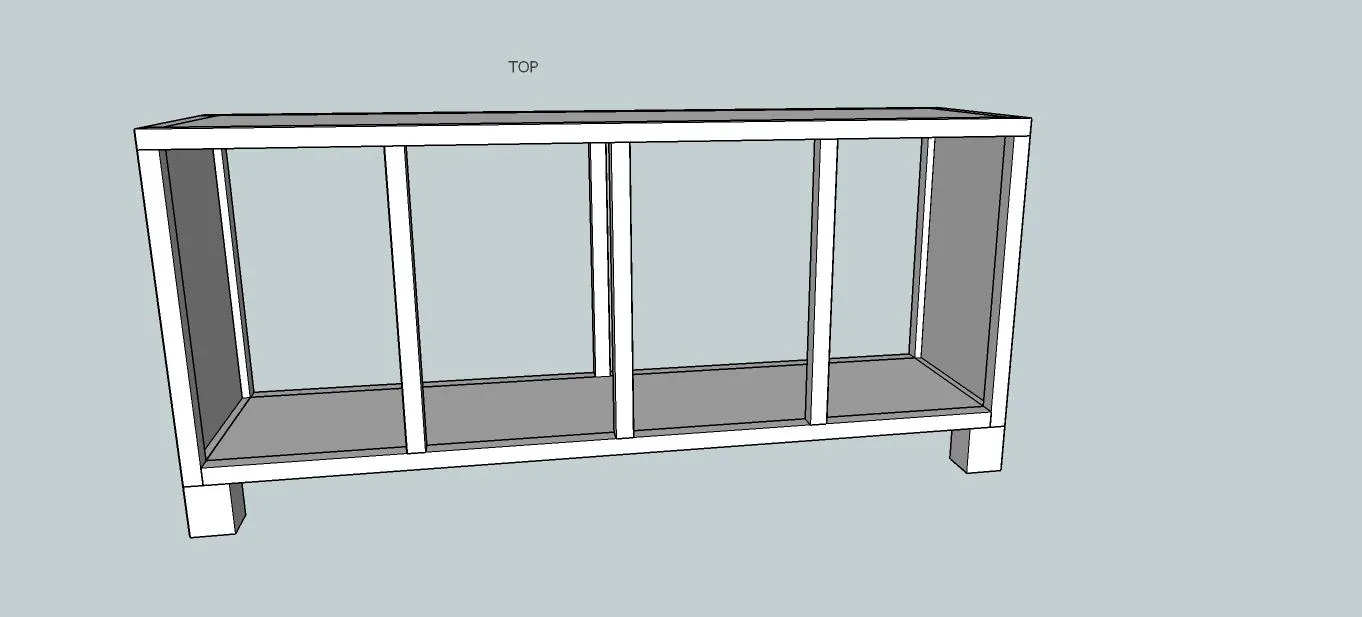
Flip it right side up and it's ready for doors!!
12Step 12
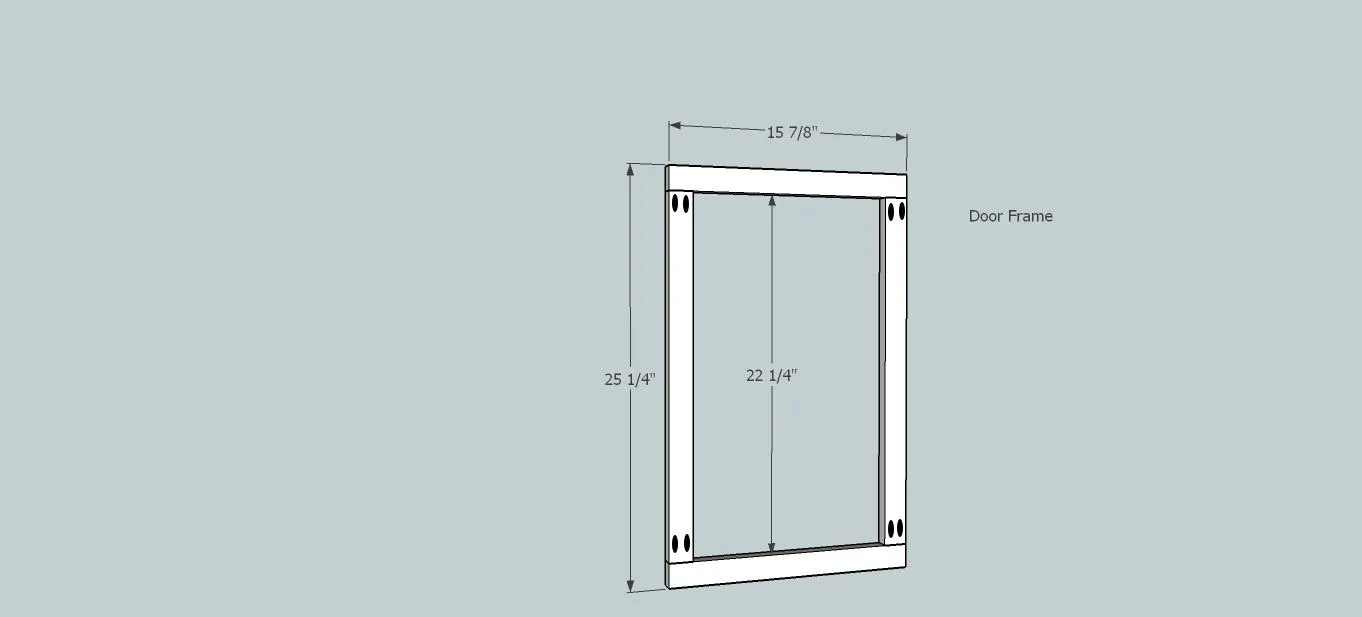
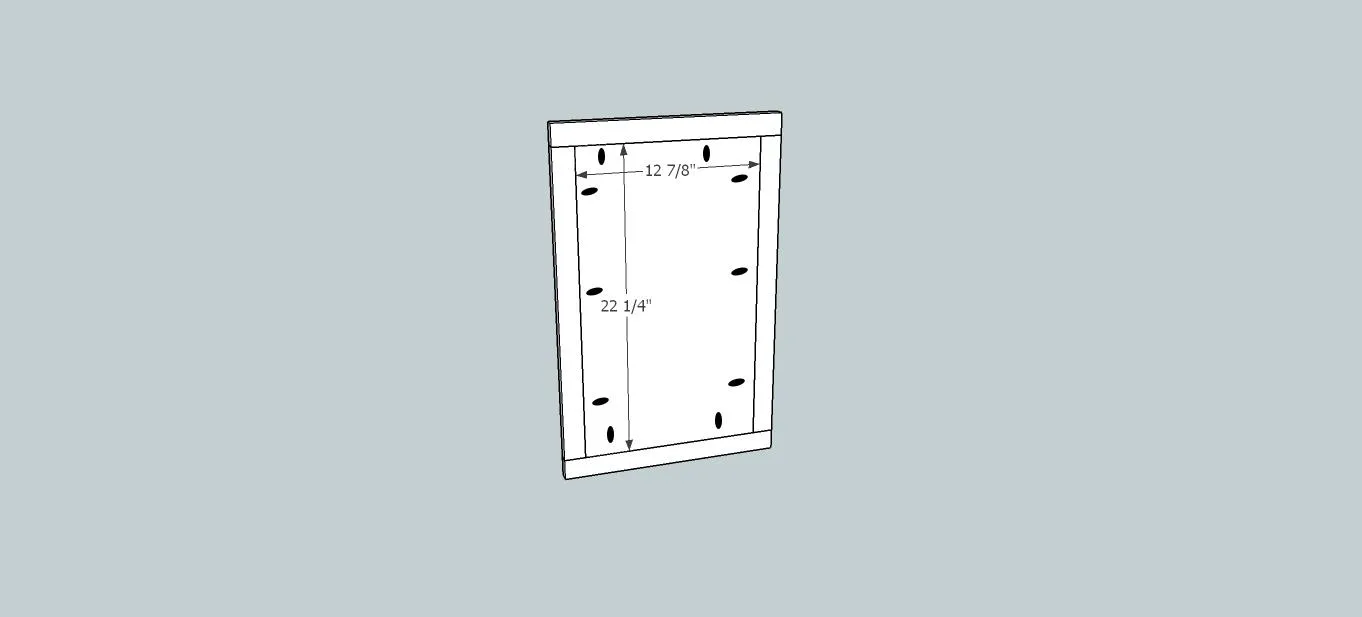
- Build four door frames!! Make sure and measure all your openings...any little hair that your board may have moved while you were screwing them in can result in a larger or smaller door opening! I had two doors that were smaller than they should have been somehow!! LoL! Make sure and measure!!
- Attach using 3/4" pocket holes, 1 1/4" screws and glue of course!
13Step 13
- Cut your 1/2" plywood to size for the doors, make sure and measure here again because they may not be exactly the size I listed...that size happens only in a perfect world...not my world!! Haha!! I usually just lay my door frame onto the plywood and trace the inside and cut it out!! Sure fit every time!!
- Attach it to the door frame...make sure the side with pocket holes is completely flush with the side of the door frame that has the pocket holes! You will need to drill pocket holes at 1/2" and use 1" screws to attach!!
14Step 14
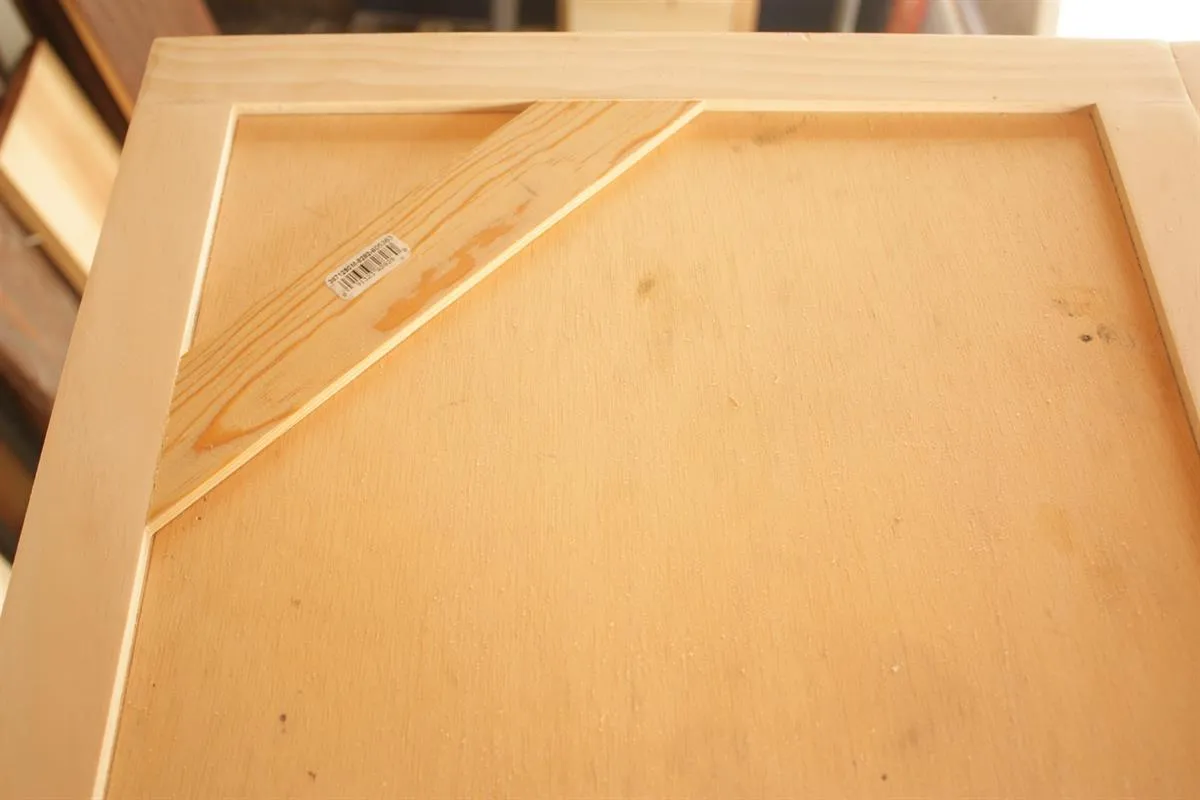
Time to start making the doors!! First thing, you need to mark the middle of your door! It should be around 6 7/16"! All the angled cuts you see on my doors are 45 degree cuts...I kept it simple, no need to get fancy and complicated!! I started all my doors out with this one board, it is mitered at 45 degrees off square on both ends and not parallel! It should be somewhere around 9 7/8" from longest point to longest point but you will have to make sure of your door size!
15Step 15
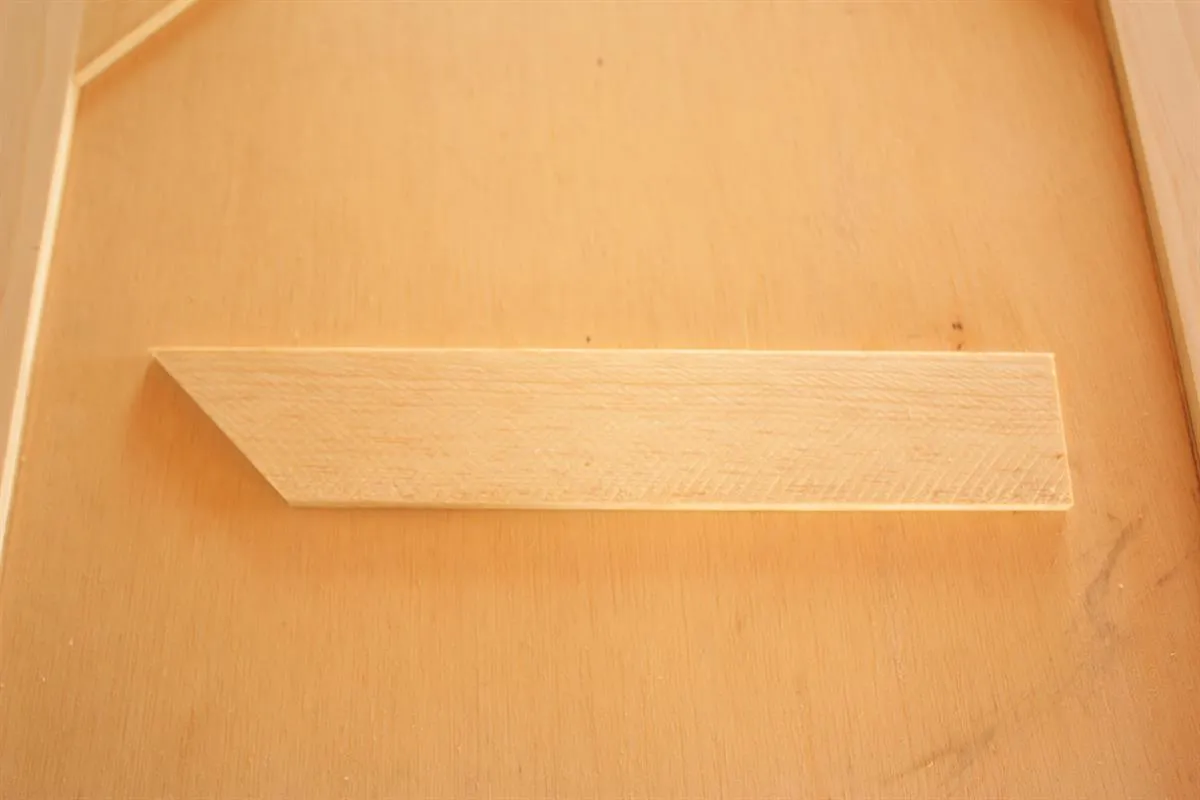
Now it gets real easy for the next few boards, I would cut 14 boards for each door of the exact same size, they were mitered on one end, and from longest point to longest point it was 9 7/8"!
16Step 16
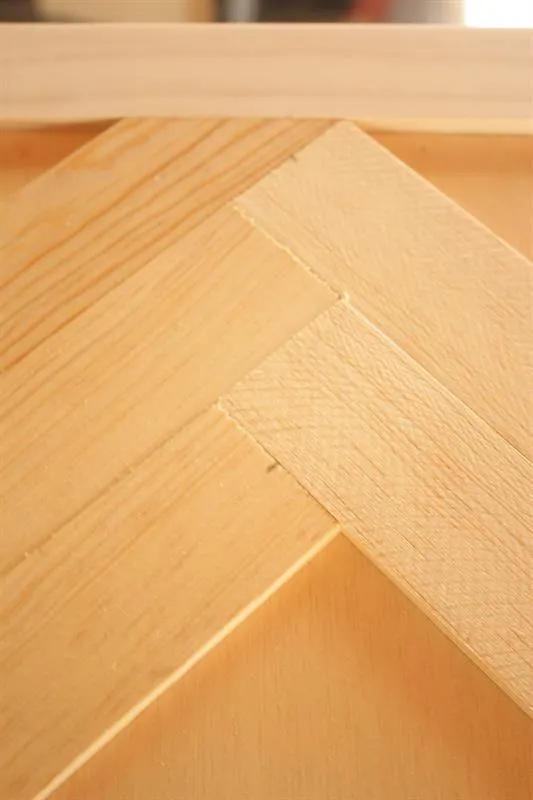
Place those boards with the square end right under the very first board in step 14! Keep the same pattern going until you get to the bottom where they start to not fit!
17Step 17
The boards toward the bottom will need trimmed a little, I just held them in place and drew a line...it doesn't have to be perfect, just so you know where to cut it off!
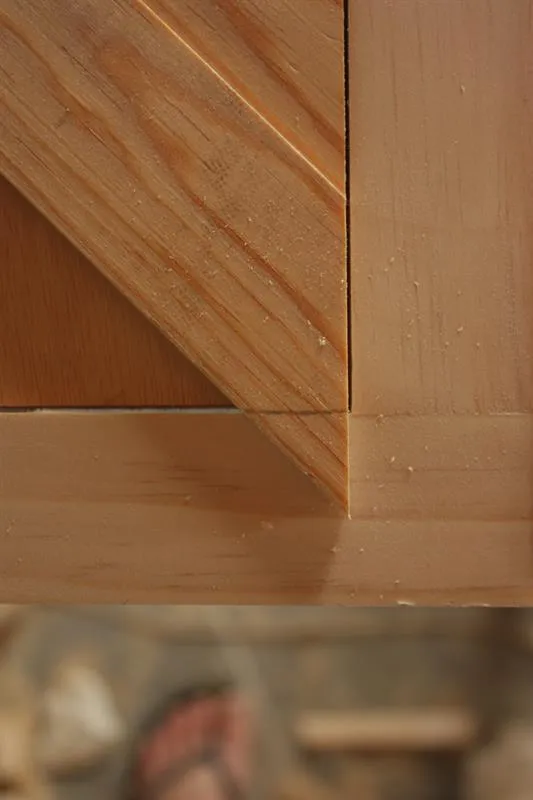
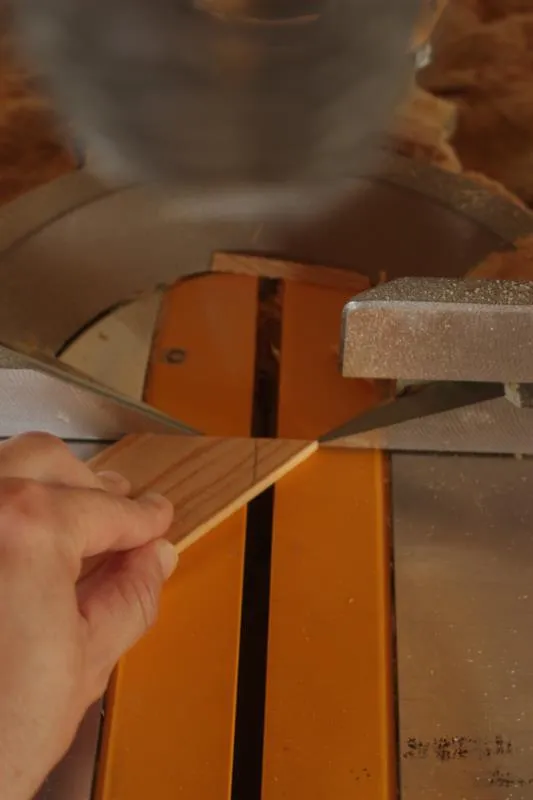
18Step 18
Cut off the extra! Using the miter saw you will have to place the mitered edge flush with the fence...watch those fingers!! I was just placing this as I took the pic, I did not hold the board that close to the saw!!
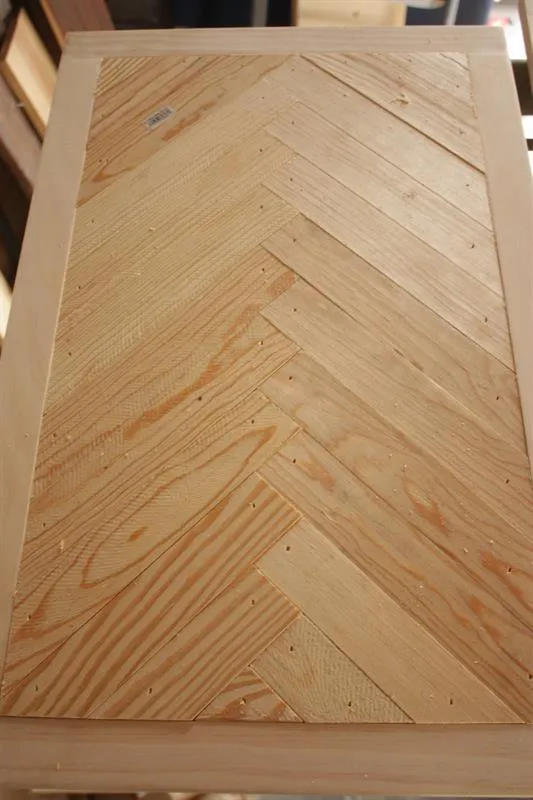
19Step 19
Check that the board fits and continue cutting boards to size based on the space your door has! I didn't give measurements for all the smaller boards only because I filled one whole door, took all the pieces out and kept them in order, spread some glue and started placing them back in the door and I ended up having to re-cut some because they ever so slightly got off track from where they previously had been! I started gluing and stapling as I went after that! None of my doors were perfect...they all have some sort of flaw but I think it just gives them character!! Lol!!
20Step 20
Sand everything down and paint or stain your doors and buffet! I used Rustoleum Chalked paint in Linen White for the buffet and a layering of Rustoleum Antique White Stain, Minwax Classic Gray followed by Minwax Jacobean! It is strange how every door looks slightly different in color!! LoL!
21Step 21
Attach doors to buffet!! Depending on the hinges you use will determine how you do this next step! I used an inset concealed hinge so I has to add blocks on the inside of the buffet so the hinge had a place to attach to...but there are many other styles of hinges you can use as well! Don't laugh at my unpainted inside...I'll get it painted soon!! Lol!!

22Step 22
After the doors are on, you will need either magnetic clasps or a stop block piece of wood! I just used a small scrap piece of wood and glue and stapled it in the bottom of the buffet!! Again, I haven't painted inside yet!!
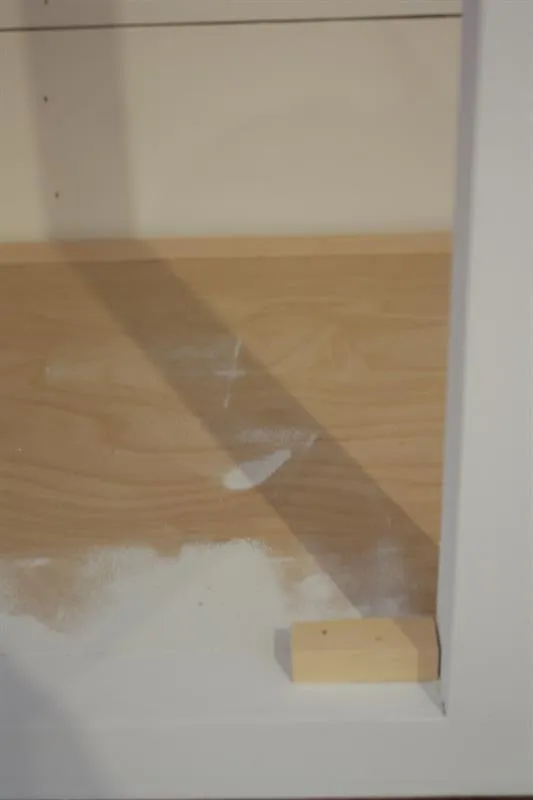
23Step 23
Last but not least, staple the 1/4" (27 1/2" x 71") plywood to the back of your buffet, I used 1 1/4" brad nails... and then stand back and marvel at the beauty!!
Tags
- Buffet, Hutch, & Sideboards
- Intermediate
Reviews & builds
No reviews yet
Sign in to review this plan or share your build.
No reviews yet. Be the first to build this.