Notch
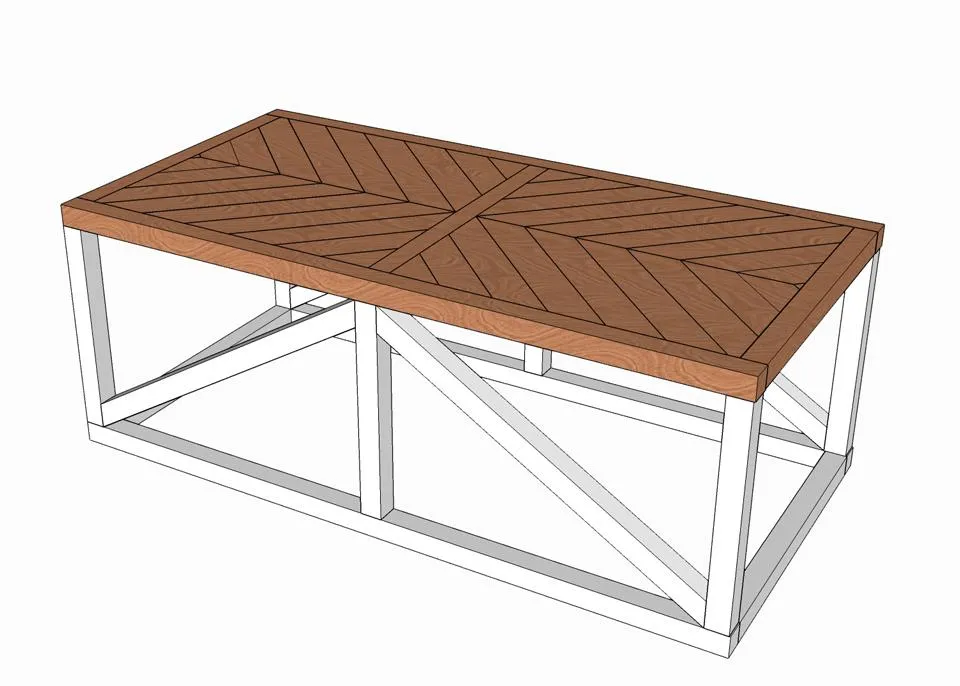
NotchHerringbone Coffee Table
Step-by-step build — 9 steps. Also available as a print sheet.
1Build Side Frame
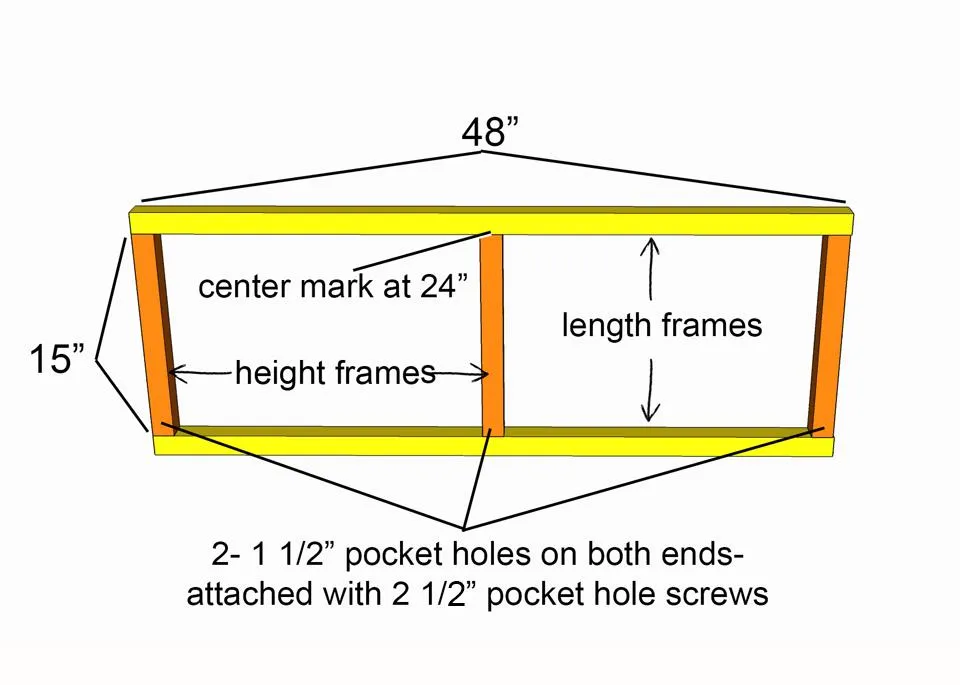
Drill 2- 1 1/2" pocket holes on both ends of the height frame pieces (15"). Using wood glue and 2 1/2" pocket hole screws, attach the height frame pieces to the length frame pieces on both ends and in the exact center.
2Attach Angled Supports
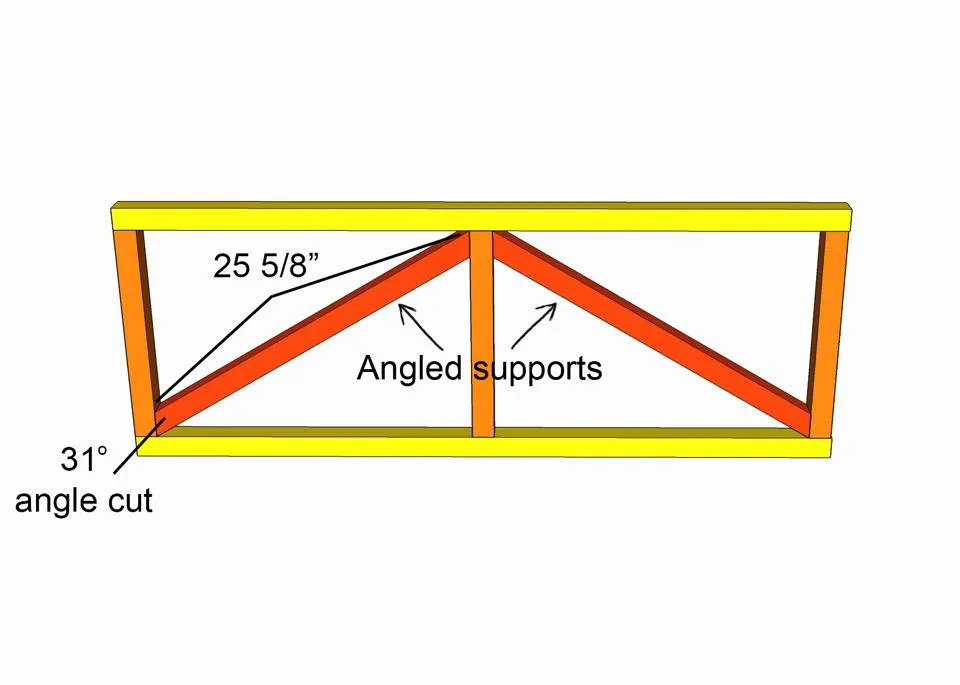
Using wood glue and a cordless nail gun, attach the angled supports to the frame, by toenailing the nails into each end.
3Build Other Side Frame
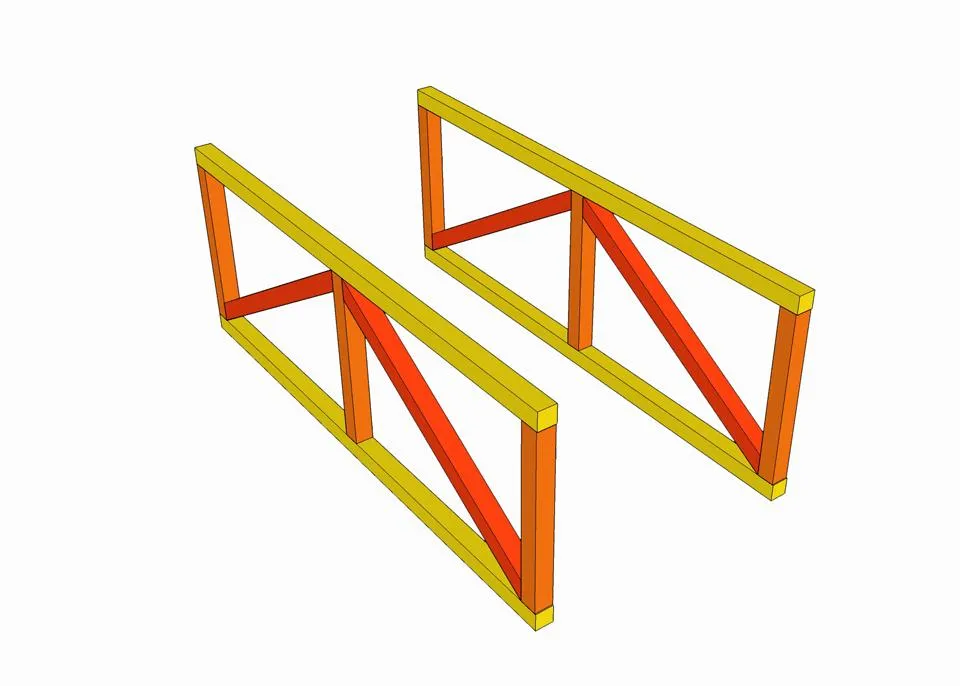
Repeat step 1-2 to build the opposite side frame.
4Build Table Top
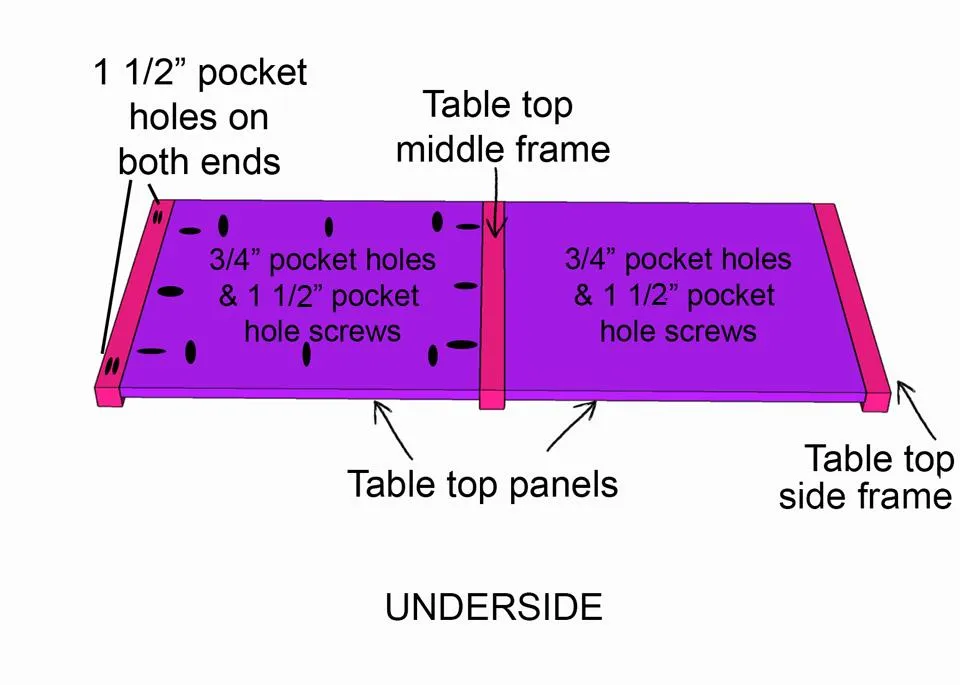
- Drill 3/4" pocket holes on all 4 sides of the table top panels.
- Drill 1 1/2" pocket holes on both ends of the table top frame pieces.
- Attach the table top panels (3/4" plywood) to the table top frame sides and frame middle using 1 1/2" pocket hole screws. Make sure all the pocket holes are on the underside of the table top, and that you use a 3/4" piece of scrap wood as a spacer underneath the top panels when attaching the screws. The panels should be flush with the top frame pieces.
5Attach Side Frames to Top
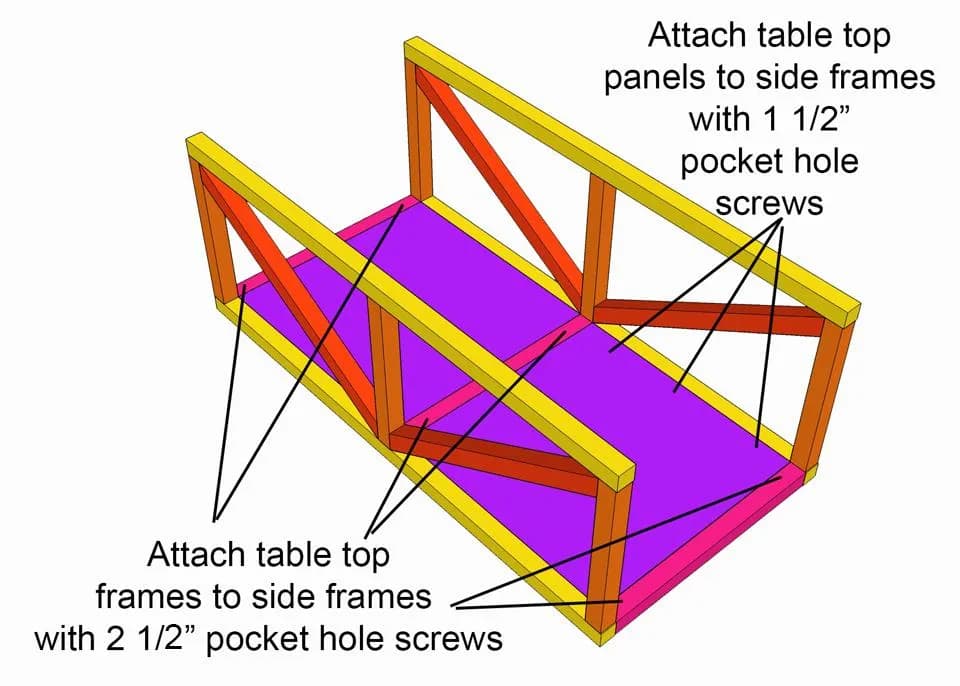
Using wood glue and 2 1/2" pocket hole screws, attach the table top frame pieces to the side length frame pieces. Then attach the panels to the side length frame pieces using 1 1/2" pocket hole screws.
6Attach Base Width Frame to Sides
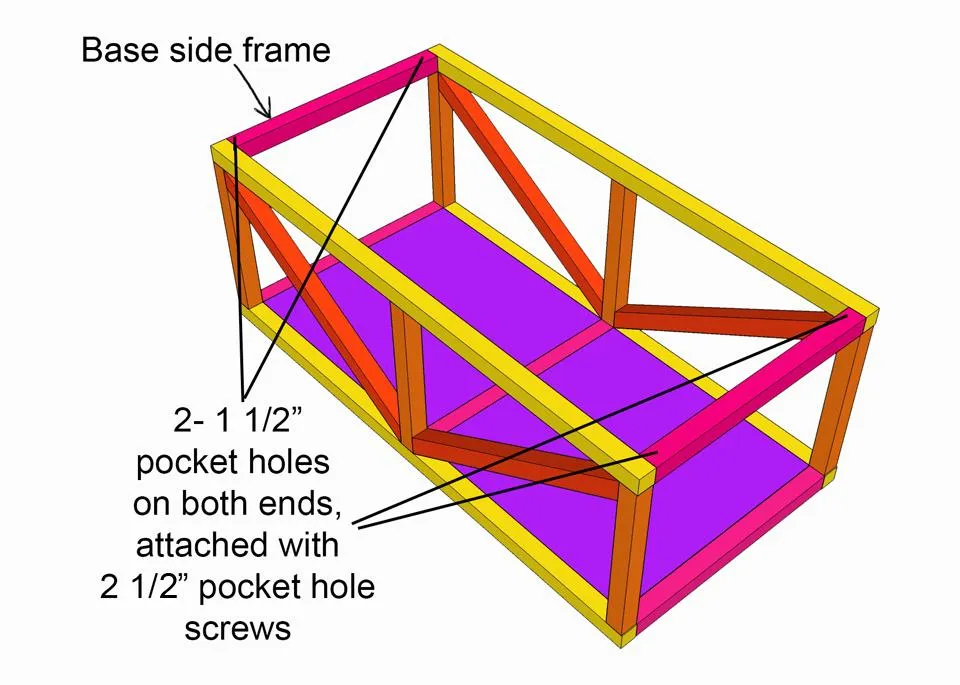
Drill 1 1/2" pocket holes on either end of the base width frame pieces (2) and attach them between the two side frames using wood glue and 2 1/2" pocket hole screws.
7Dry Fit Wood Inlay Pieces
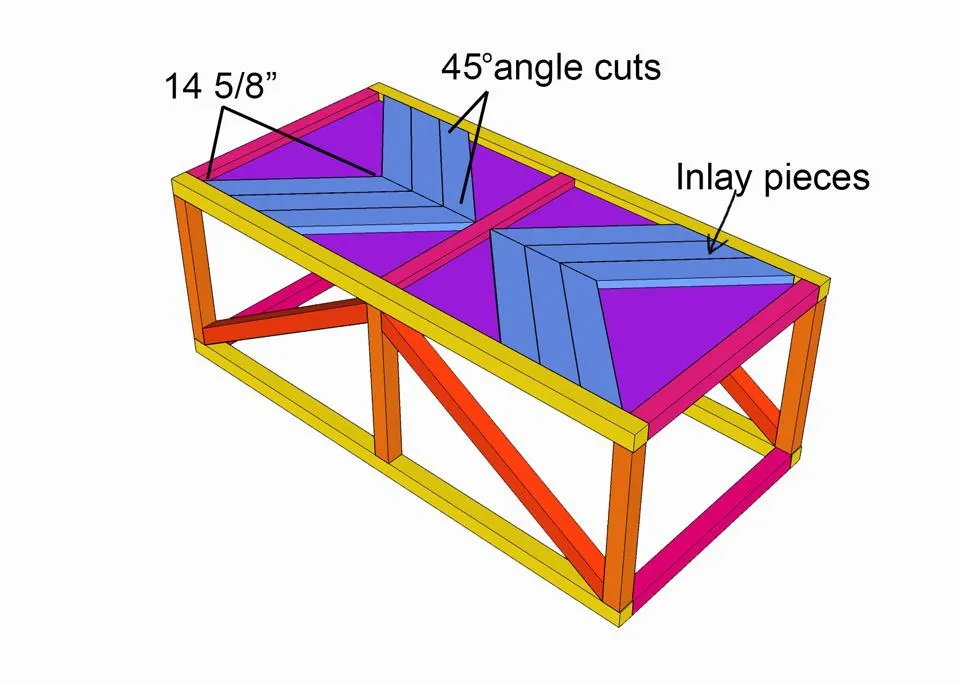
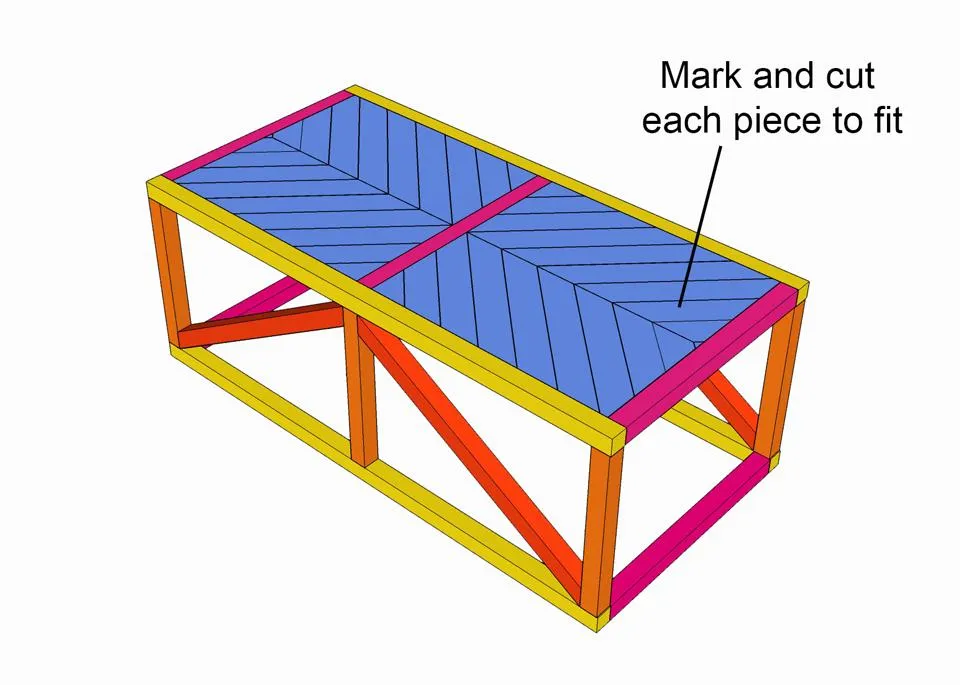
Place the longest 6 pieces of angled inlay pieces on each side of the table top. It is best not to cut the exact lengths for the remaining pieces that fit, until you measure and mark where they will fit. I found it easiest to cut an additional 8-10 lengths of the 14 5/8" pieces where each end is angled, and put it in place, marked with a pen where it needed to be cut (to get a snug fit), then cut a 45 degree angle at those marks. That way, there are less gaps.
8Nail Down Wood Inlay Pieces
Using wood glue and 1 1/4" nails, attach wood inlay pieces to the table top.
9Fill holes, Sand, Stain or Paint
- Fill cracks and holes with wood filler and let dry.
- Sand the entire surface with 120 grit sandpaper first, being sure to remove all rough areas on top and sides.
- Then sand everything smooth with 220 grit sandpaper. If staining, it is recommended to use a wood conditioner before applying stain. I stained the top using Verathane's Sun Bleached oil based wood stain, then applying Annie Sloan Dark Wax on top. I painted the legs of my table using plain white latex paint.