 Notch
NotchGarage/Mudroom Storage and Organizer
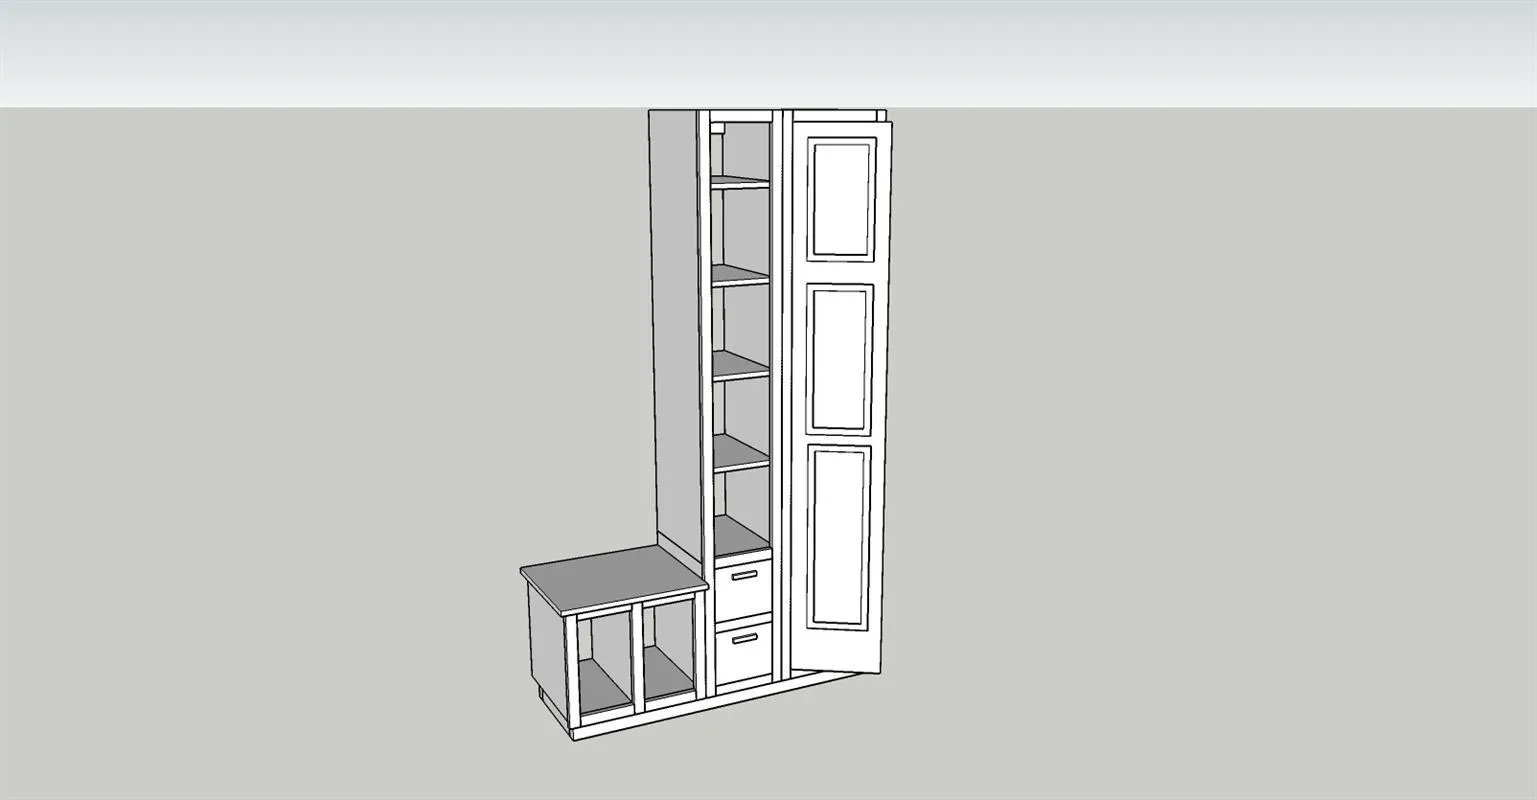
Step-by-step build — 25 steps. Also available as a print sheet.
1Construct base
The base is constructed of (3) 2x4's 8' long cut as shown. I had to taper my base because the garage floor slopes
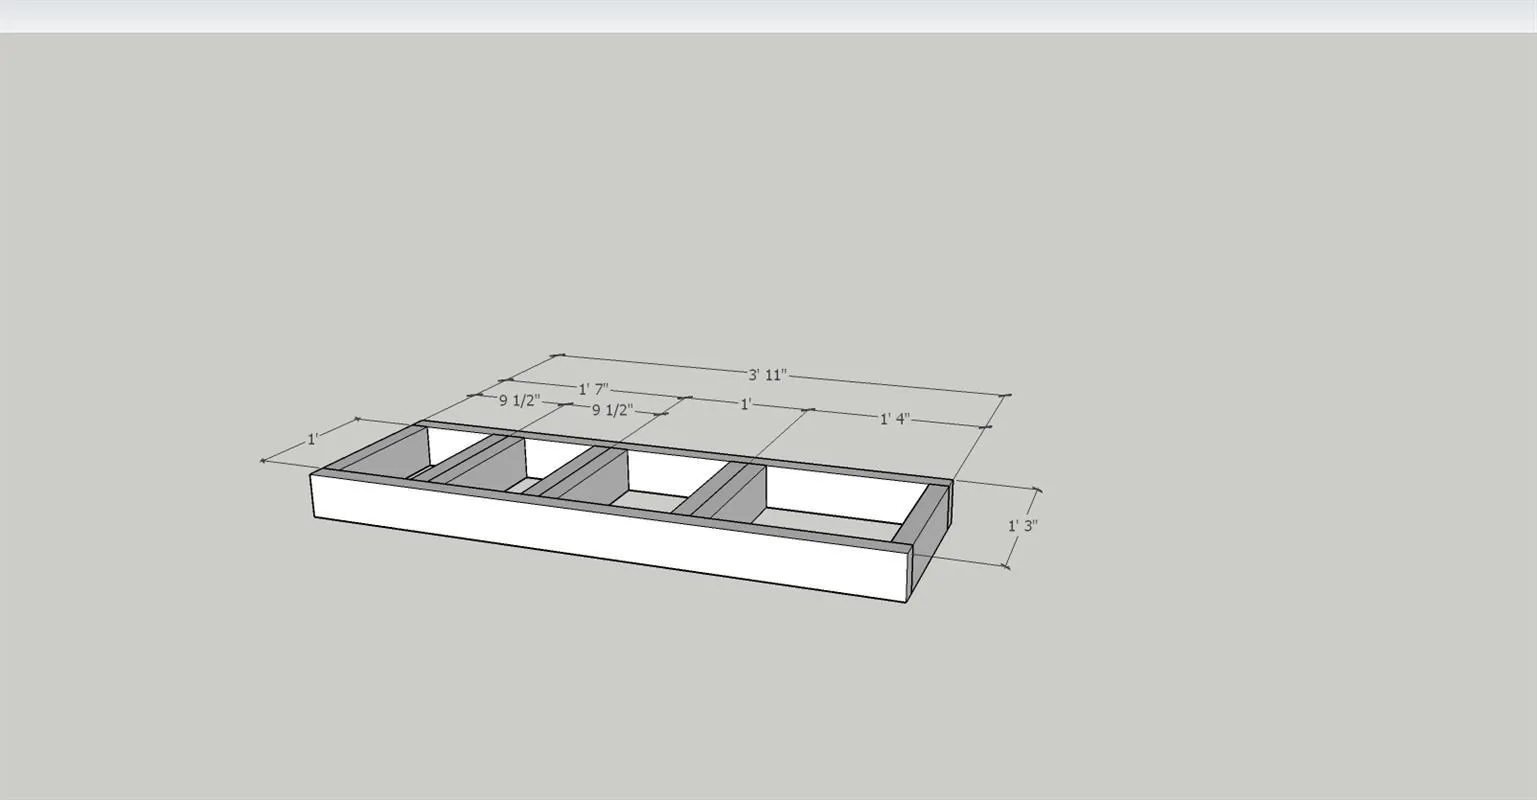
2Construct the closet box
Construct the closet with dimensions as shown. Use pocket holes and 1 1/4" pocket hole screws to attached the top and bottom the the side panels. Locate the pocket holes on the top and bottom so that they are concealed
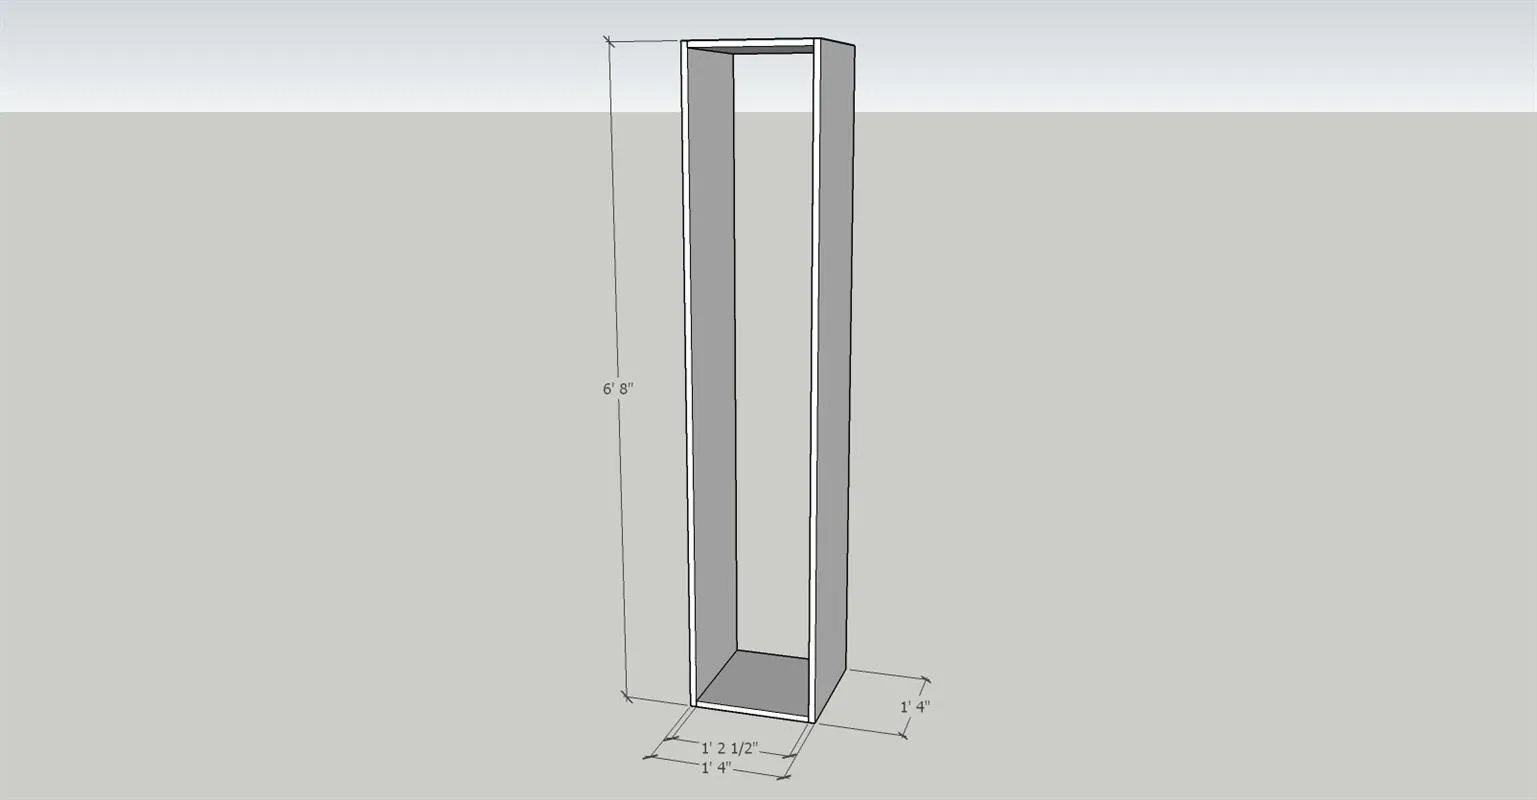
3Attach wall nailers
Attach wall nailers at the the top and bottom of the box as shown. Also add one near the middle to keep the tall box square and straight.
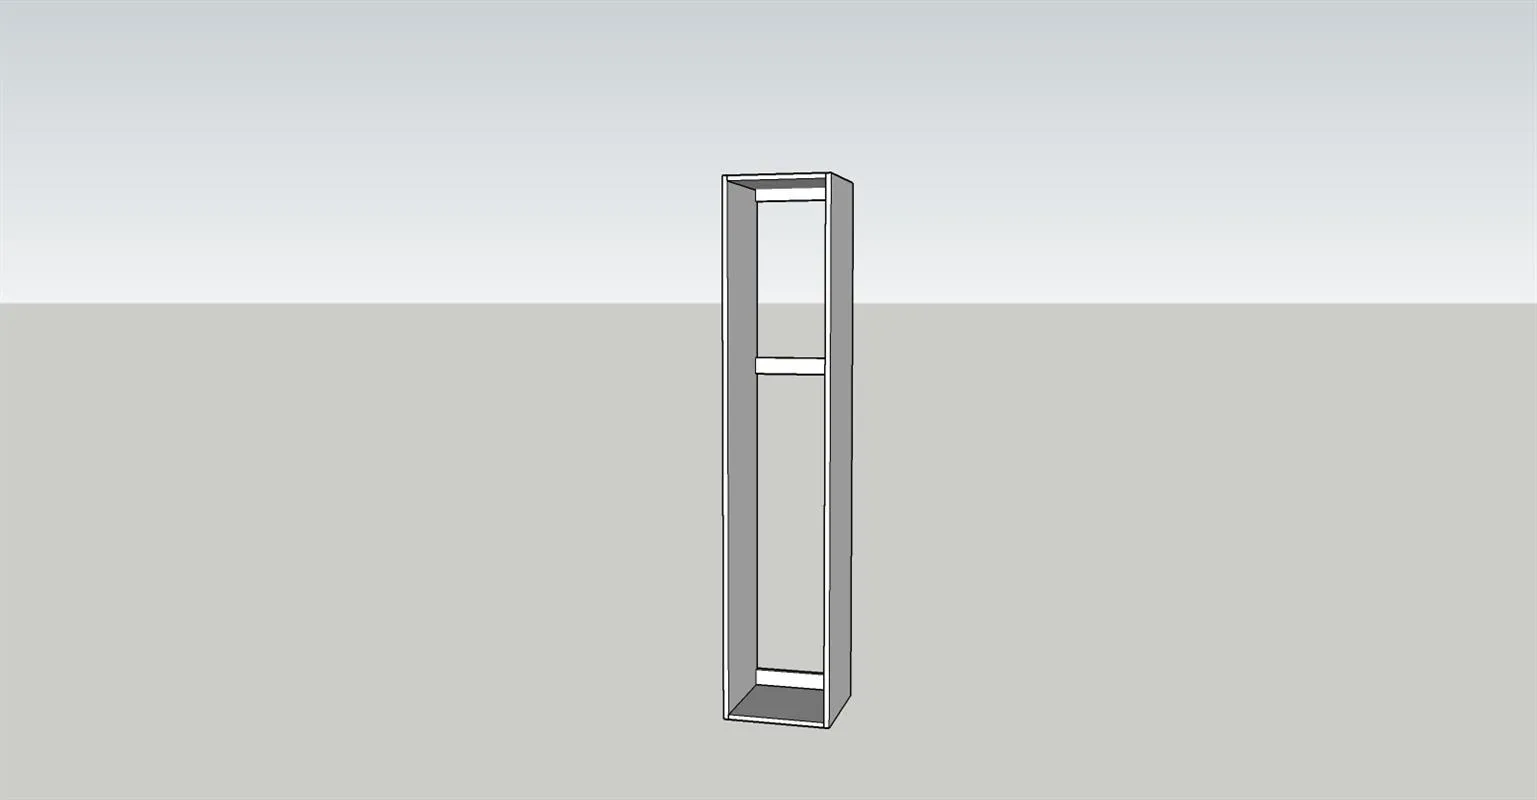
4Add the face frame
Construct a face frame from 1x2's as shown. Join the frame with pocket holes and 1 1/4" pocket hole screws and brad nail and glue the face frame to the closet box
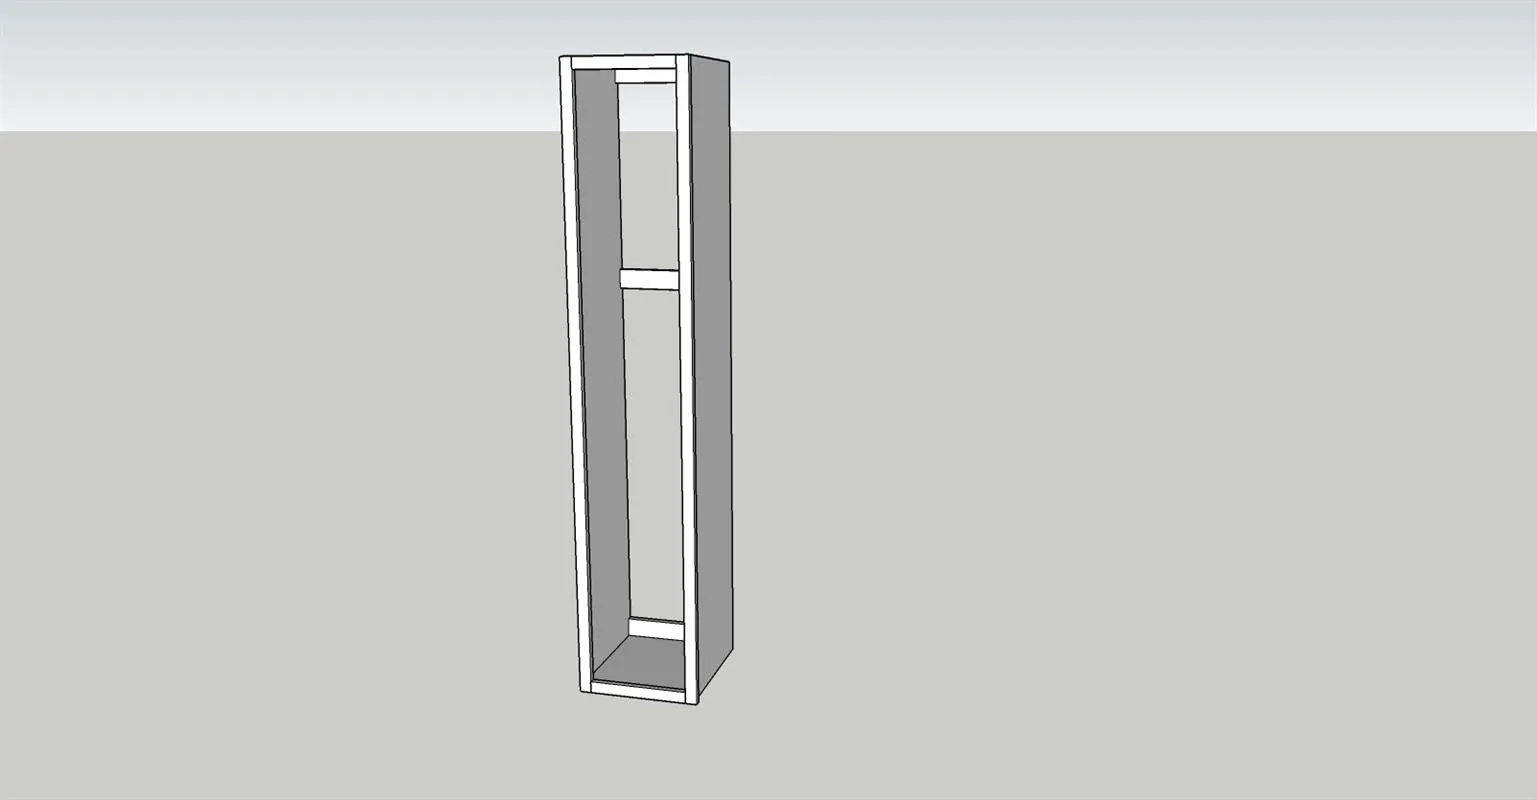
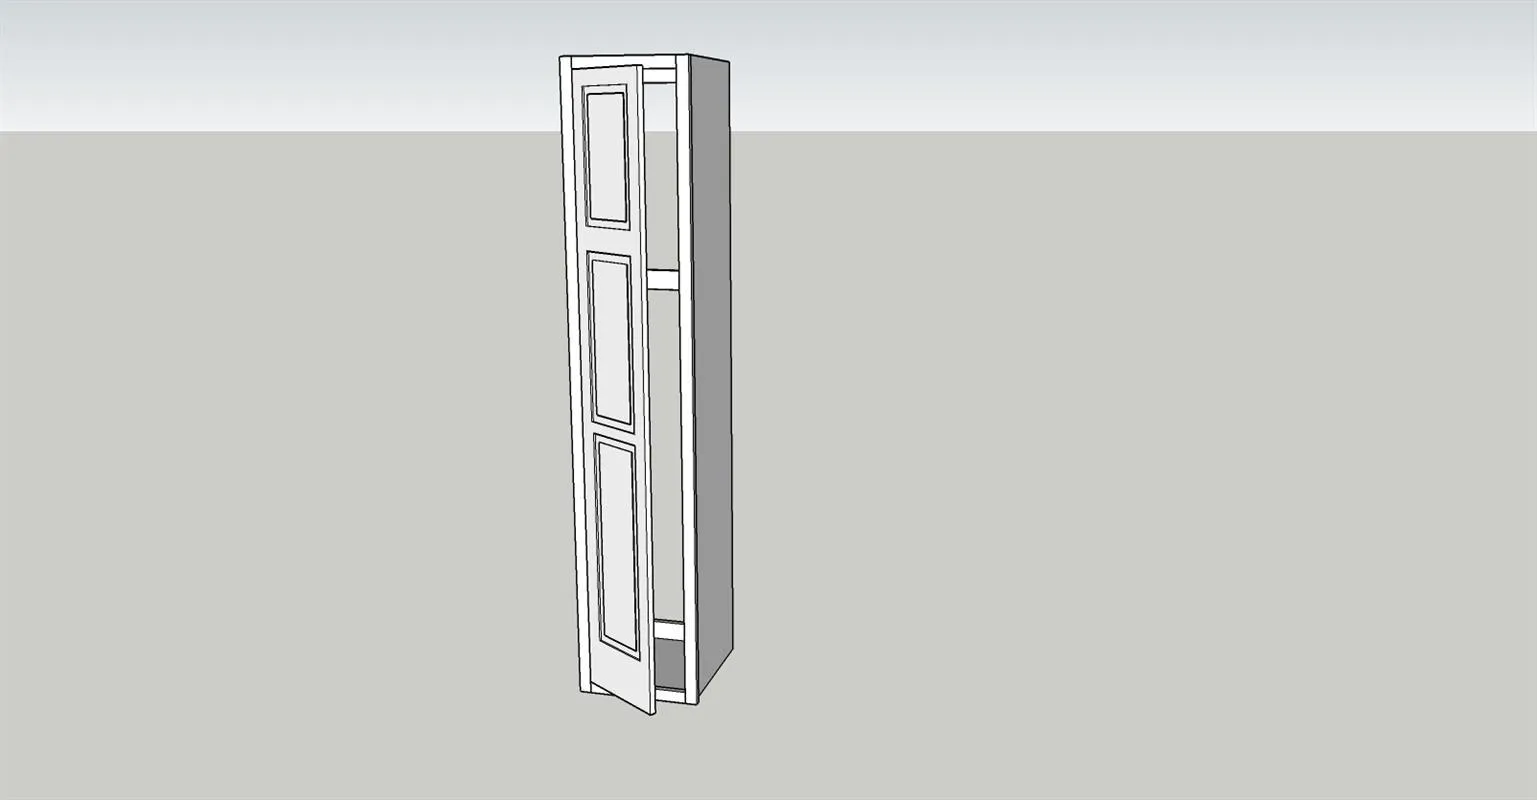
5Add a door
I purchased an old three panel door that was 3/4" x 6'-8" from a recycling store. I had to trim it slightly to fit the height. If you cannot find a door you can construct one to fit the face frame opening that is 13" wide x 78 1/2" with 1x8's joined together and cut to correct width.
6Construct drawer boxes
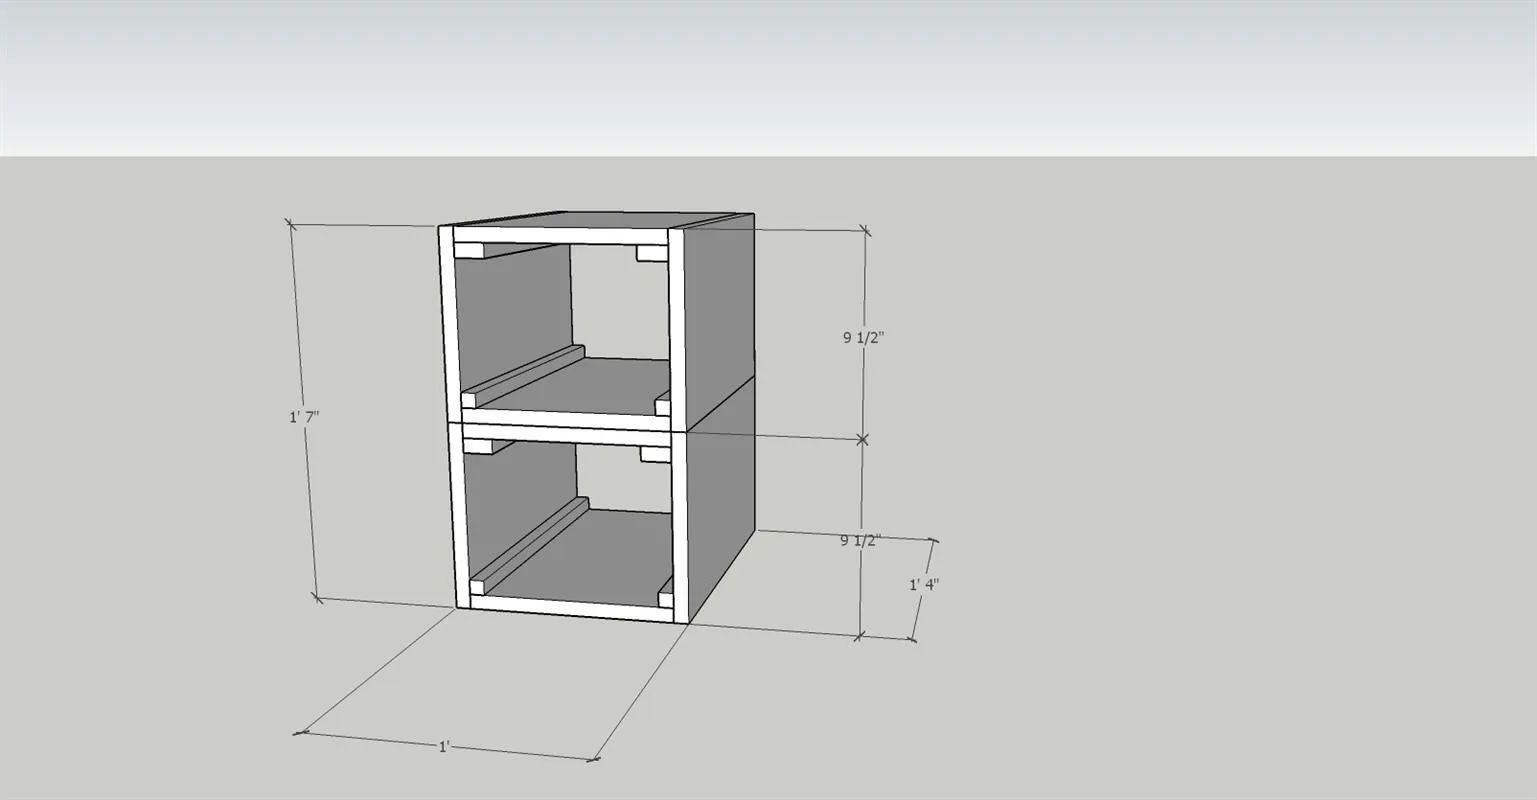
- Construct drawer boxes with dimensions as shown.
- Add 3/4" x 3/4" blocking at the bottom of each box by glueing and nailing. These are the guides for the drawer.
- Add 3/4" x 1/2" blocking at the top of each box by glueing and nailing. These are the guides to keep the drawers level as they are pulled out.
- Screw the boxes together. I used (3) 1 1/4" pocket hole screws front and back of the bottom box into the top box.
7Construct the shelf box
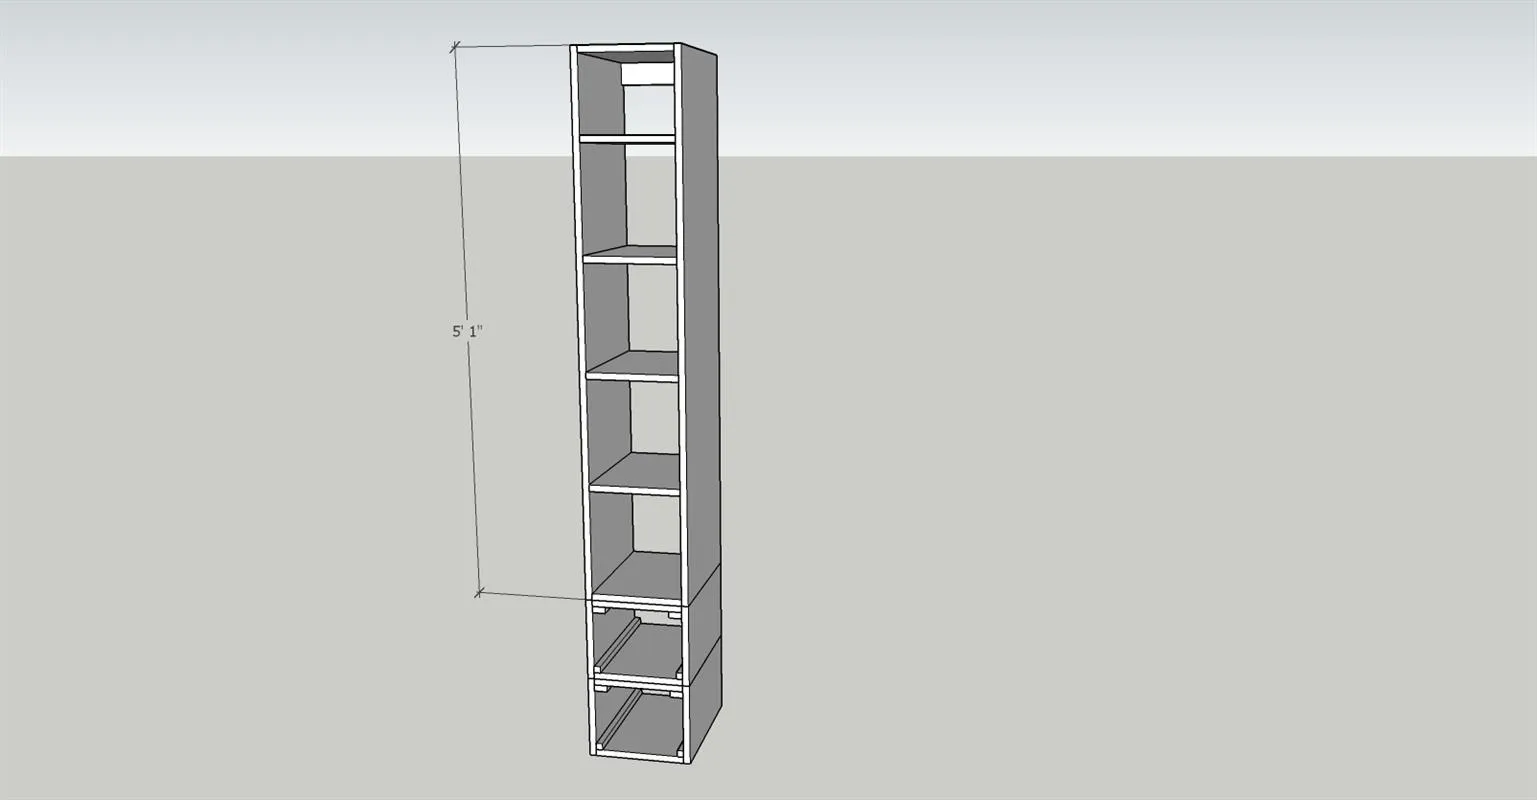
- Construct the shelf box with dimensions as shown.
- Join with pocket holes and 1 1/4" pocket hole screws in the top and bottom pieces. I drilled shelf pin holes down each side of the sides of the plywood box so that we could have adjustable shelves.
- Screw the shelf box to the drawer box with (3) 1 1/4" pocket hole screws front and back from the top drawer box into the bottom of the shelf box.
8Construct the drawers
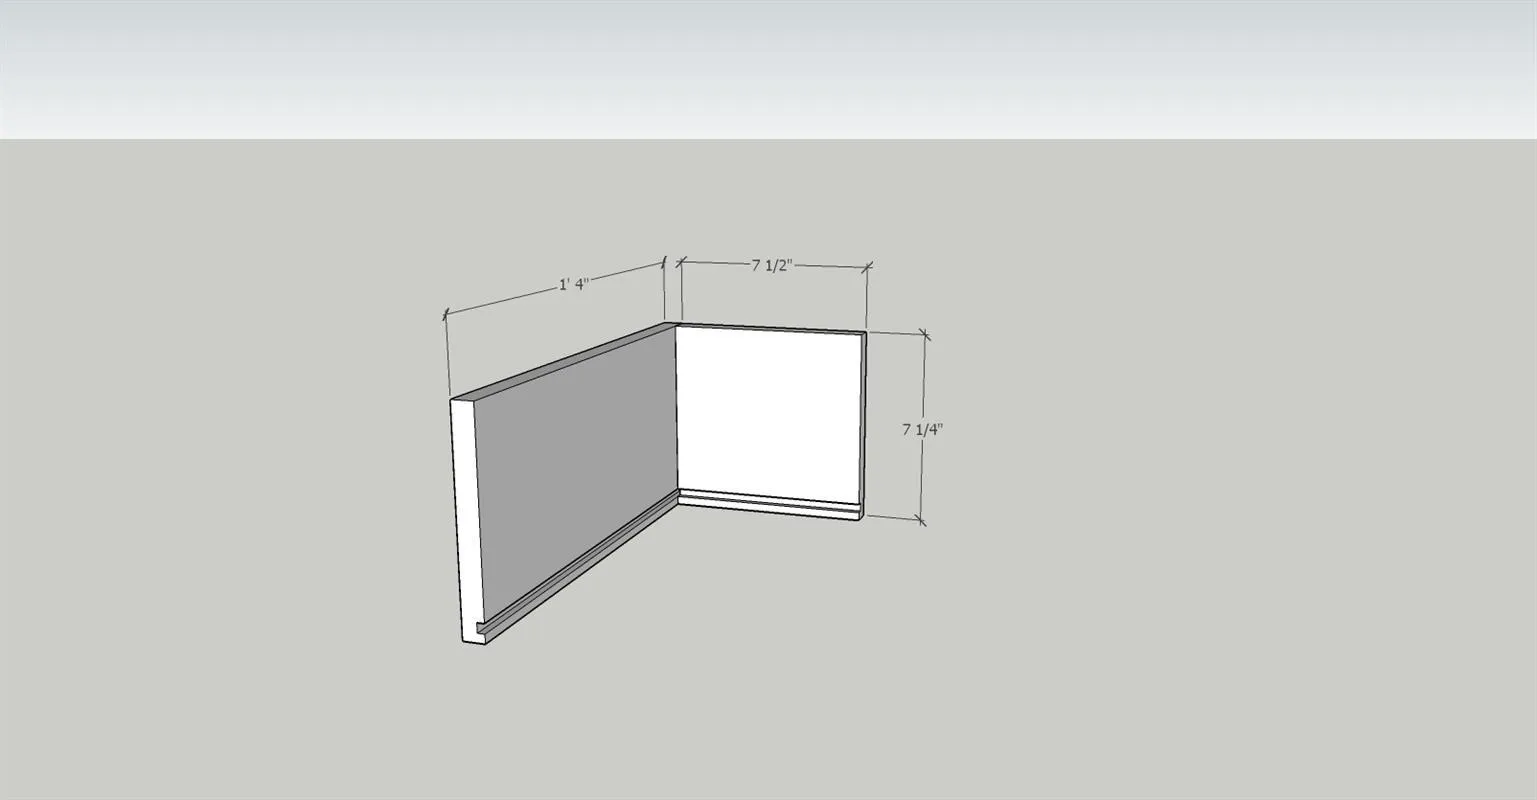
Cut four side pieces and 4 front/back pieces with dimensions as shown. Cut rabbit into bottom edge of all pieces.
9Add the plywood bottom
Install the plywood bottom to the drawer parts
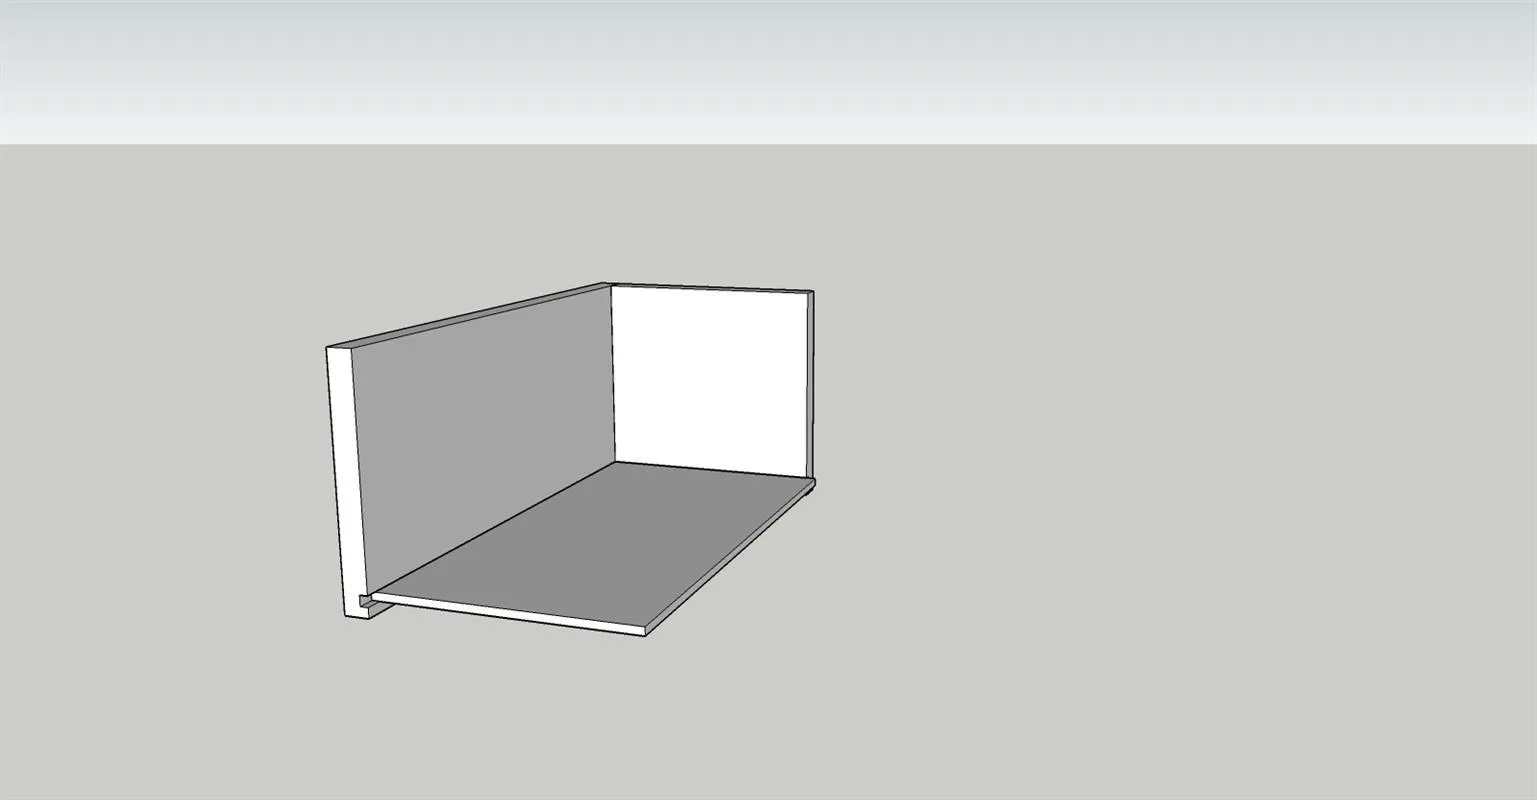
10Final assembly of drawers
Install the other side and back/front to the drawer box. Assemble all with pocket holes and 1 1/4" pocket hole screws. Locate the screws so they are not visible when the drawers are completed.
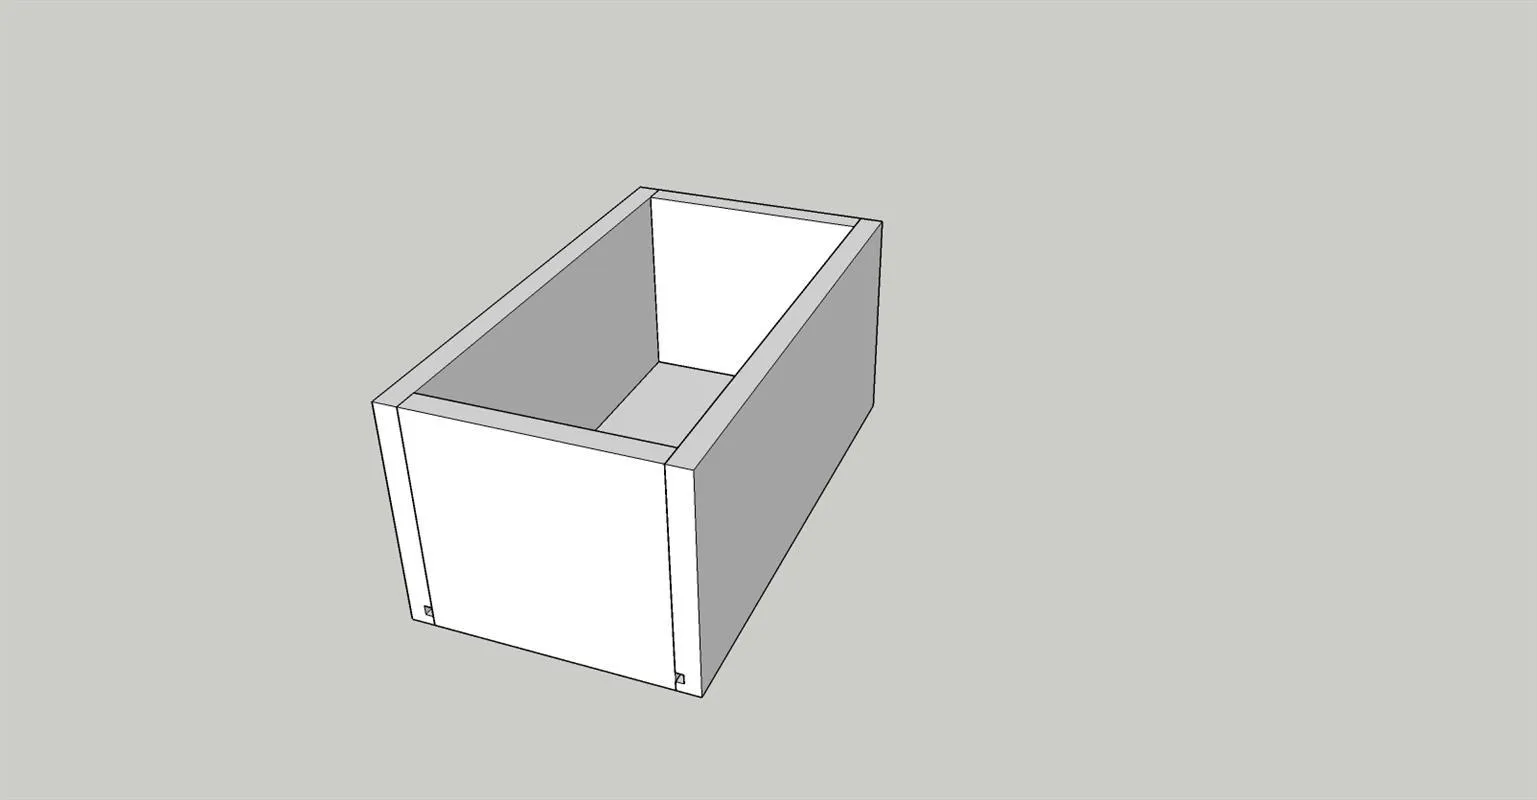
11Add drawer front to boxes
Add a drawer front to the drawer boxes with dimensions as shown. Add your choice of hardware
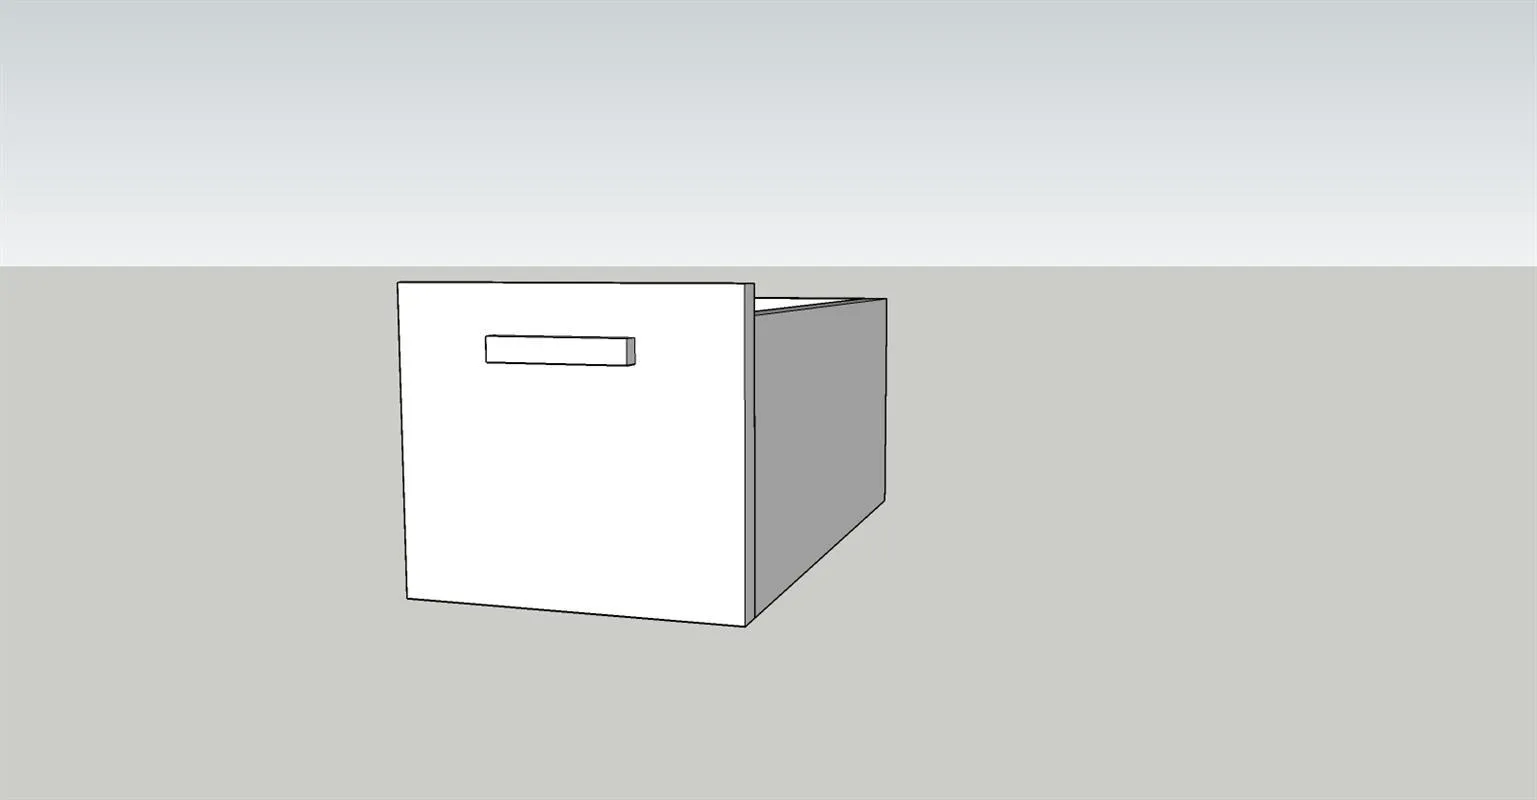
12Construct face frame/install drawer
Construct face frame for shelves and drawers as shown using 1x2 material. Join the face frame with pocket holes and 1 1/4" pocket hole screws and glue and nail to boxes
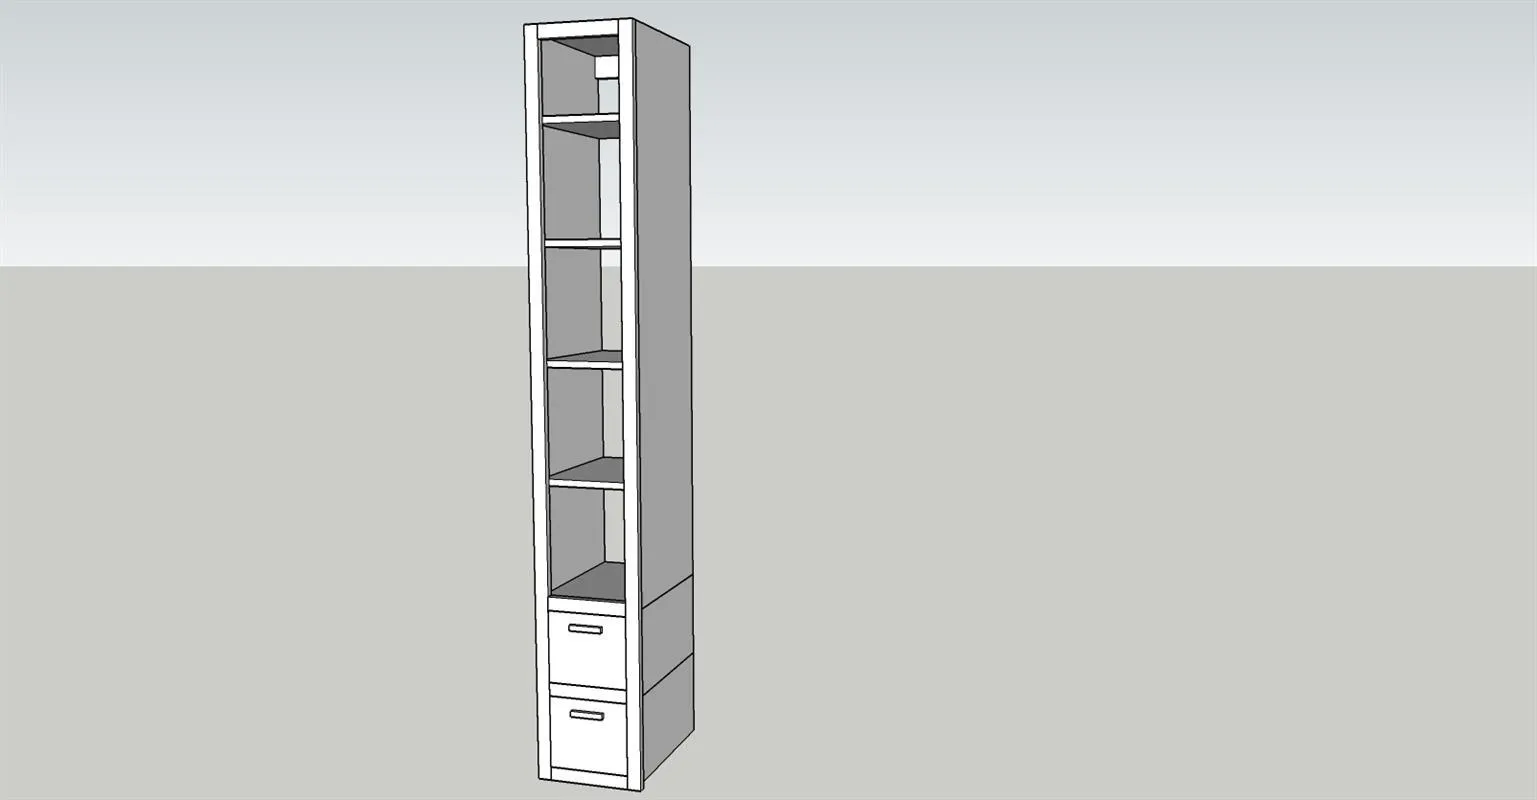
13Install the closet box
Install the closet box to the base with cabinet screws utilizing the top bottom and middle nailer.
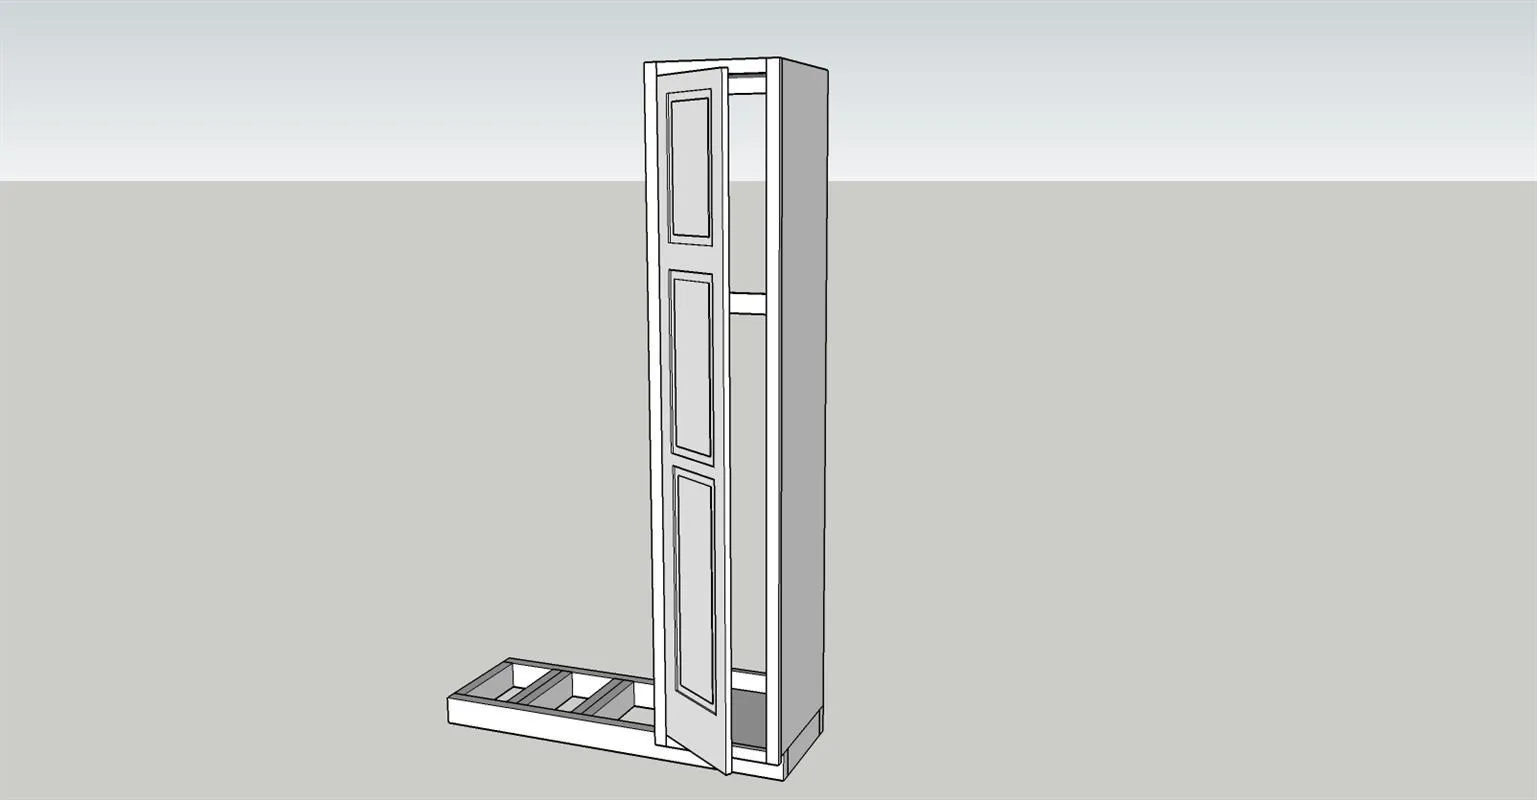
14Install the shelf box
Install the shelf box utilizing cabinet screws into the nailers. Also screw the face frames together utilizing cabinet screws.
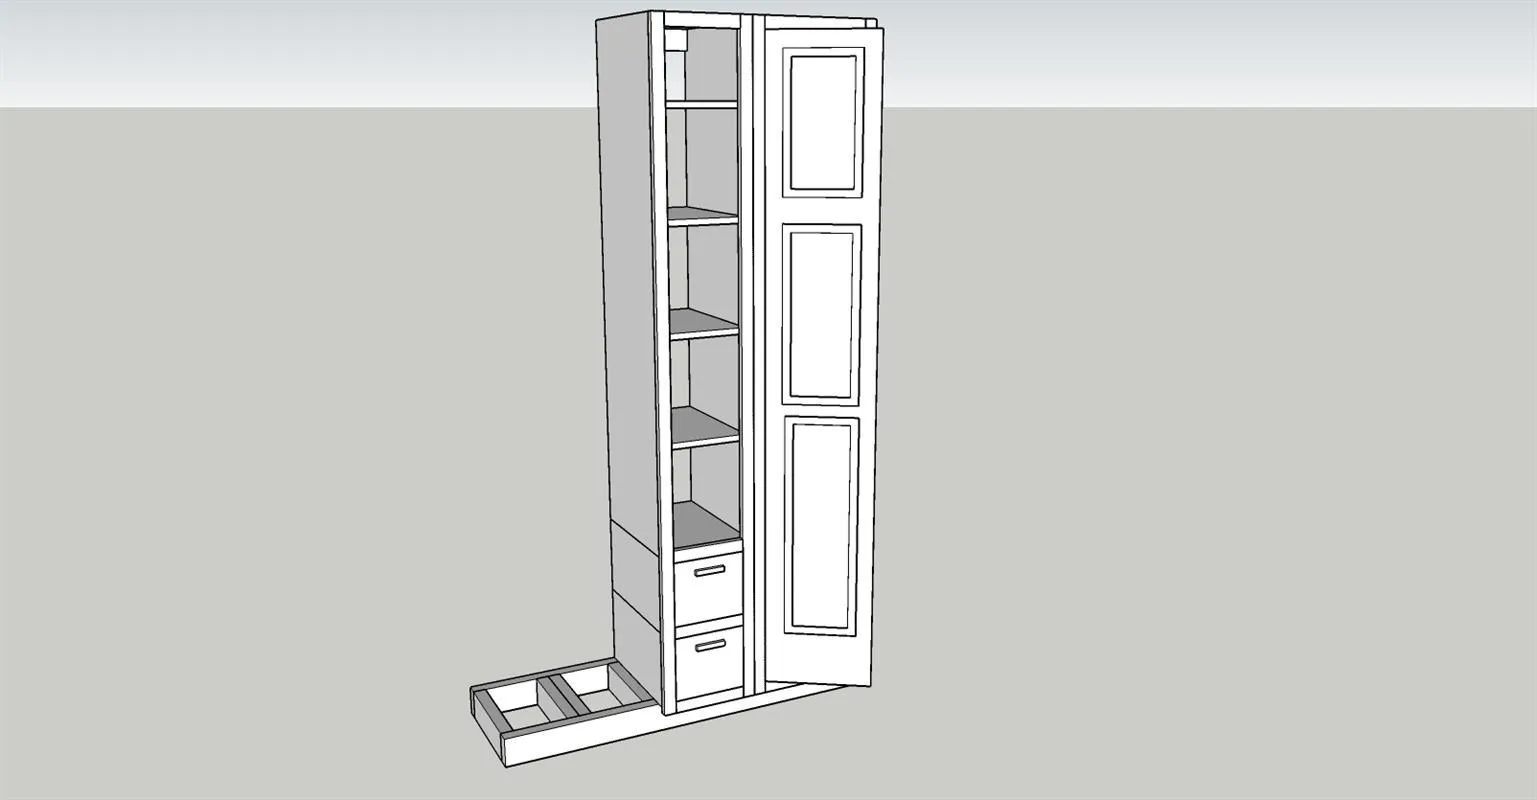
15Construct the shoe storage boxes
Construct the shoe storage box as shown. Join with pocket holes and 1 1/4" pocket hole screws. Install the screws so that they will not be visible.
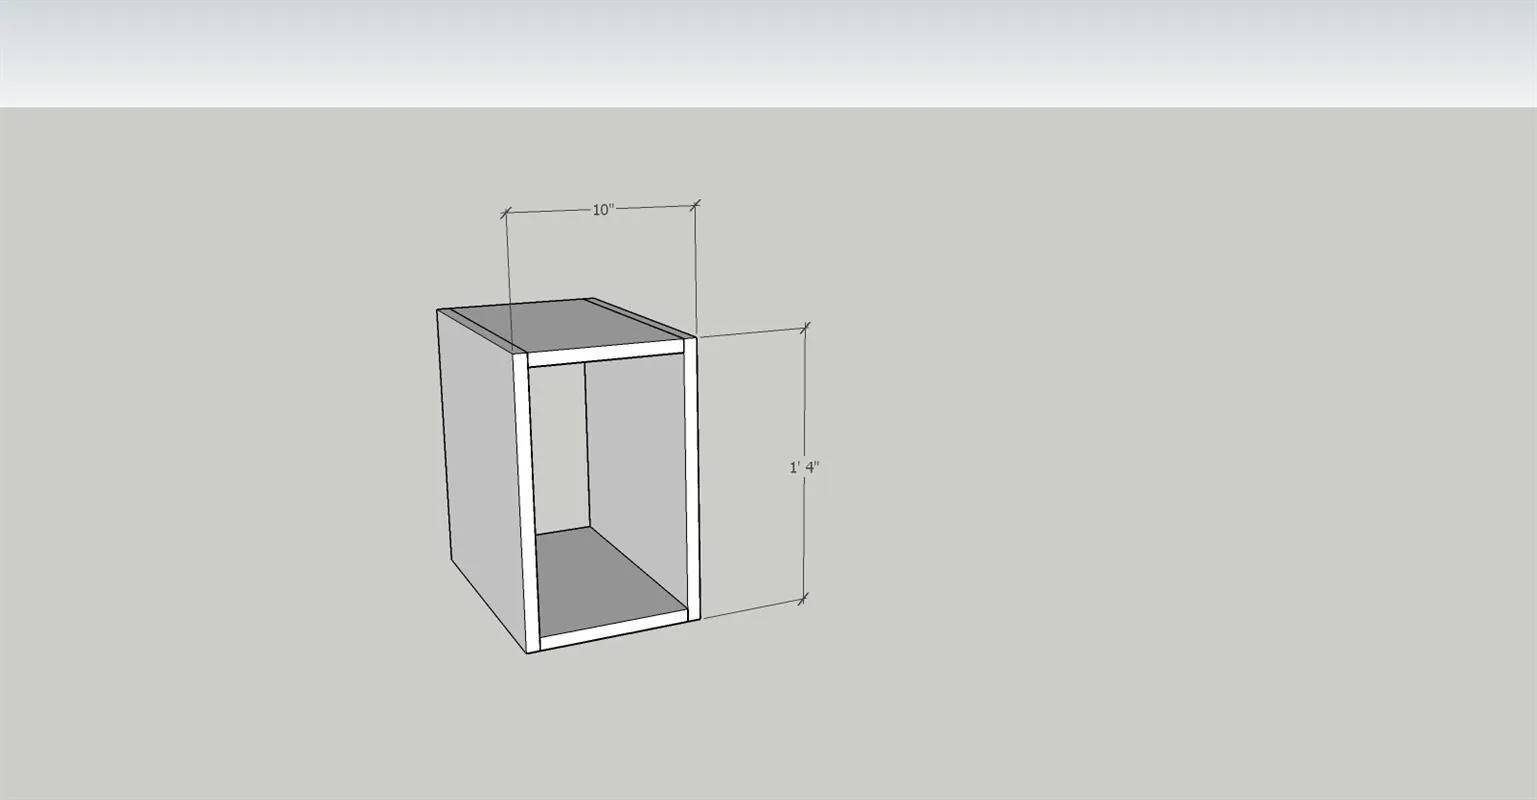
16Install the shoe boxes
- Install the shoe boxes as shown.
- Join them together with (3) 1 1/4" pocket hole screws front and box from one box into the other.
- Also screw the boxes to the base with (2) 1 1/4" pocket hole screw front and back of the box
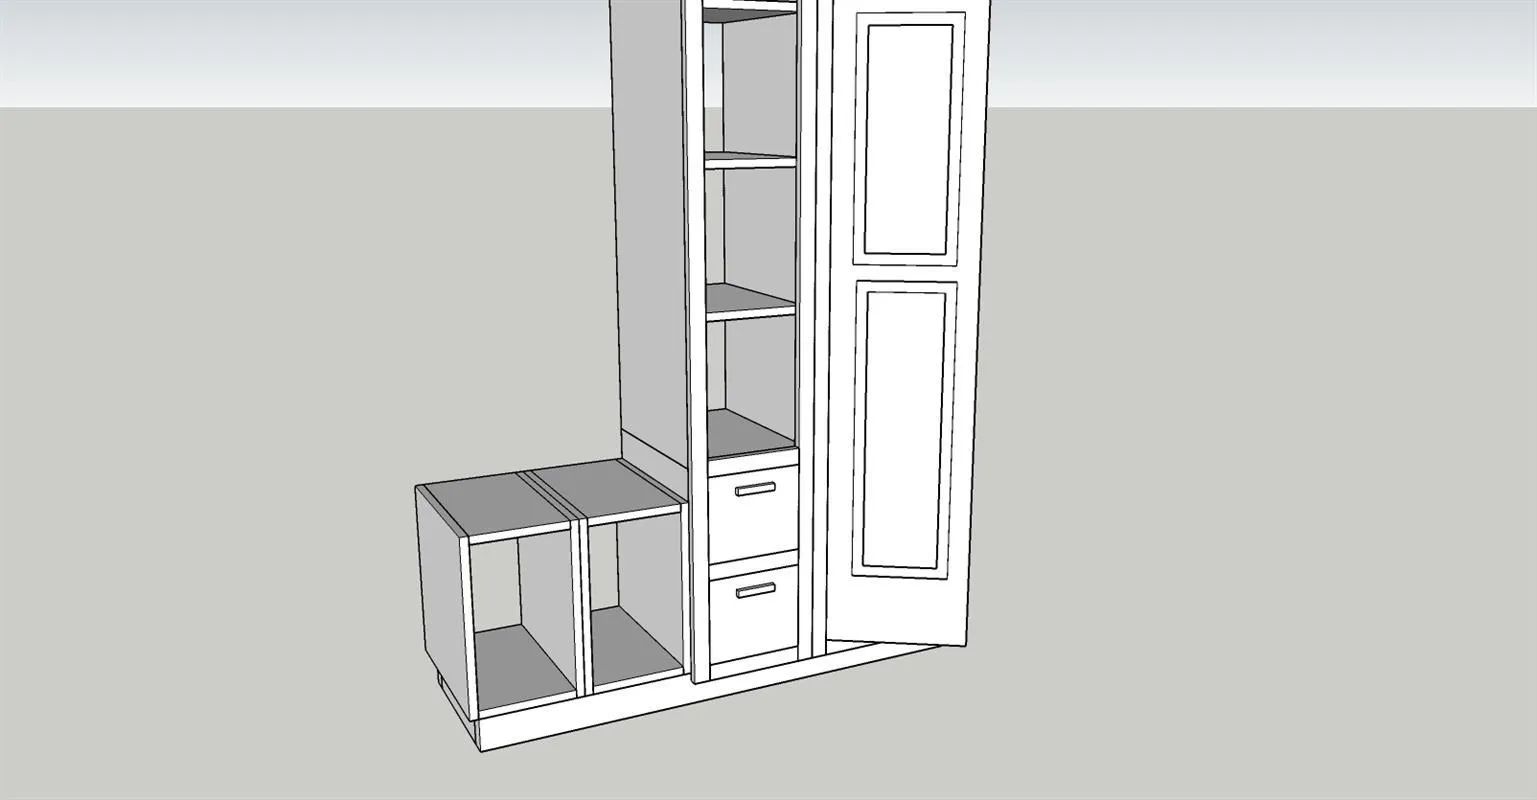
17Add face frame and bench top
- Add face frame for the shoe boxes of 1x2 material.
- Join the face frame with pocket holes and 1 1/4" pocket hole screws.
- Attach the face frame to the boxes with glue and nails. Install a bench top. The dimensions for the upper portion are based on using a piece of 3/4" material for the bench. I used a reclaim board that ended up 1 1/2" thick.
- Adjust the upper box accordingly based on your use of material.
- Screw the bench to to the boxes with 1 1/4" screws thru the top of the box into the bench.
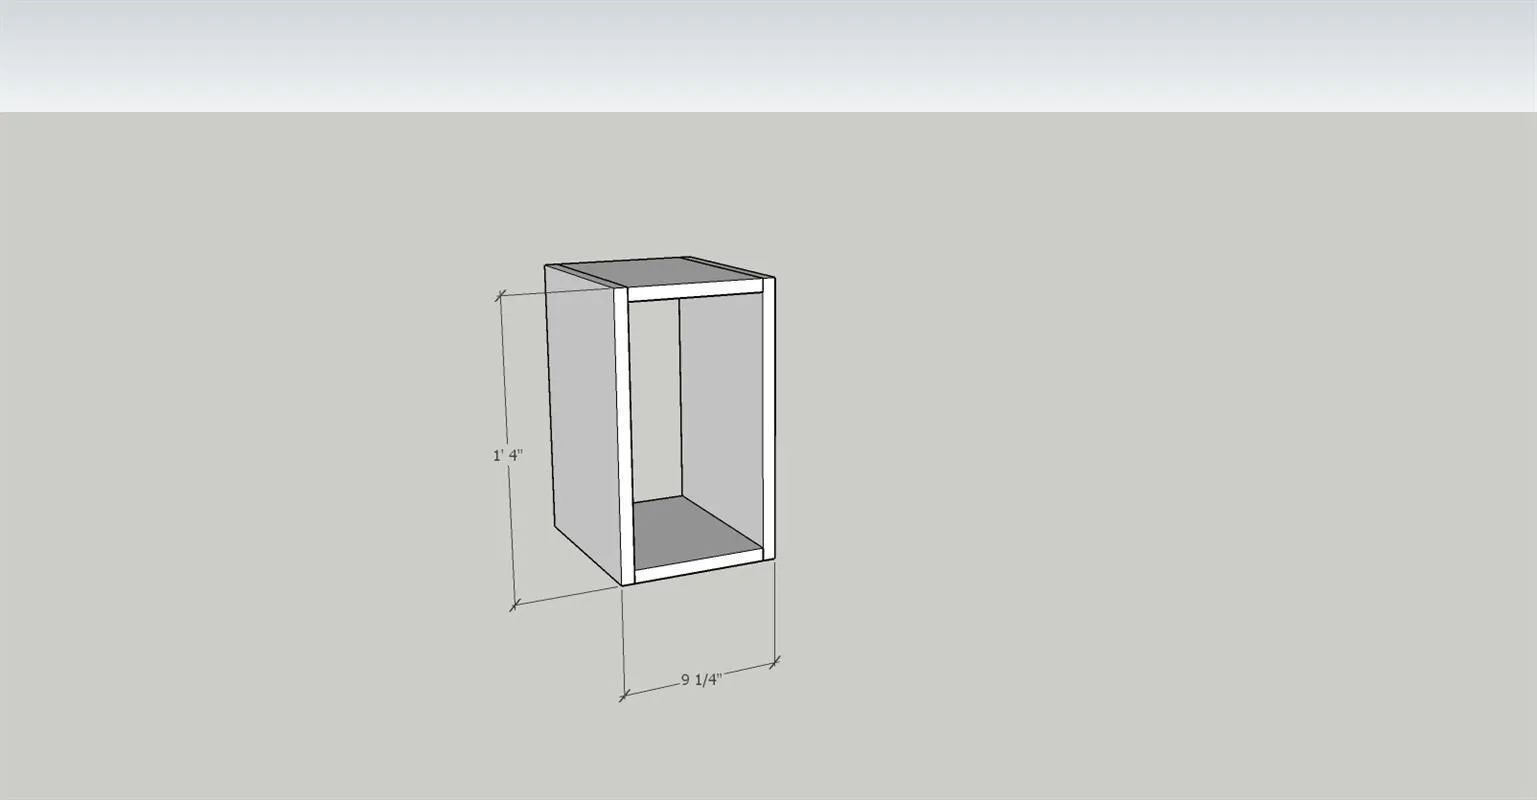
18Construct the upper boxes
Construct the upper boxes with dimensions as shown.
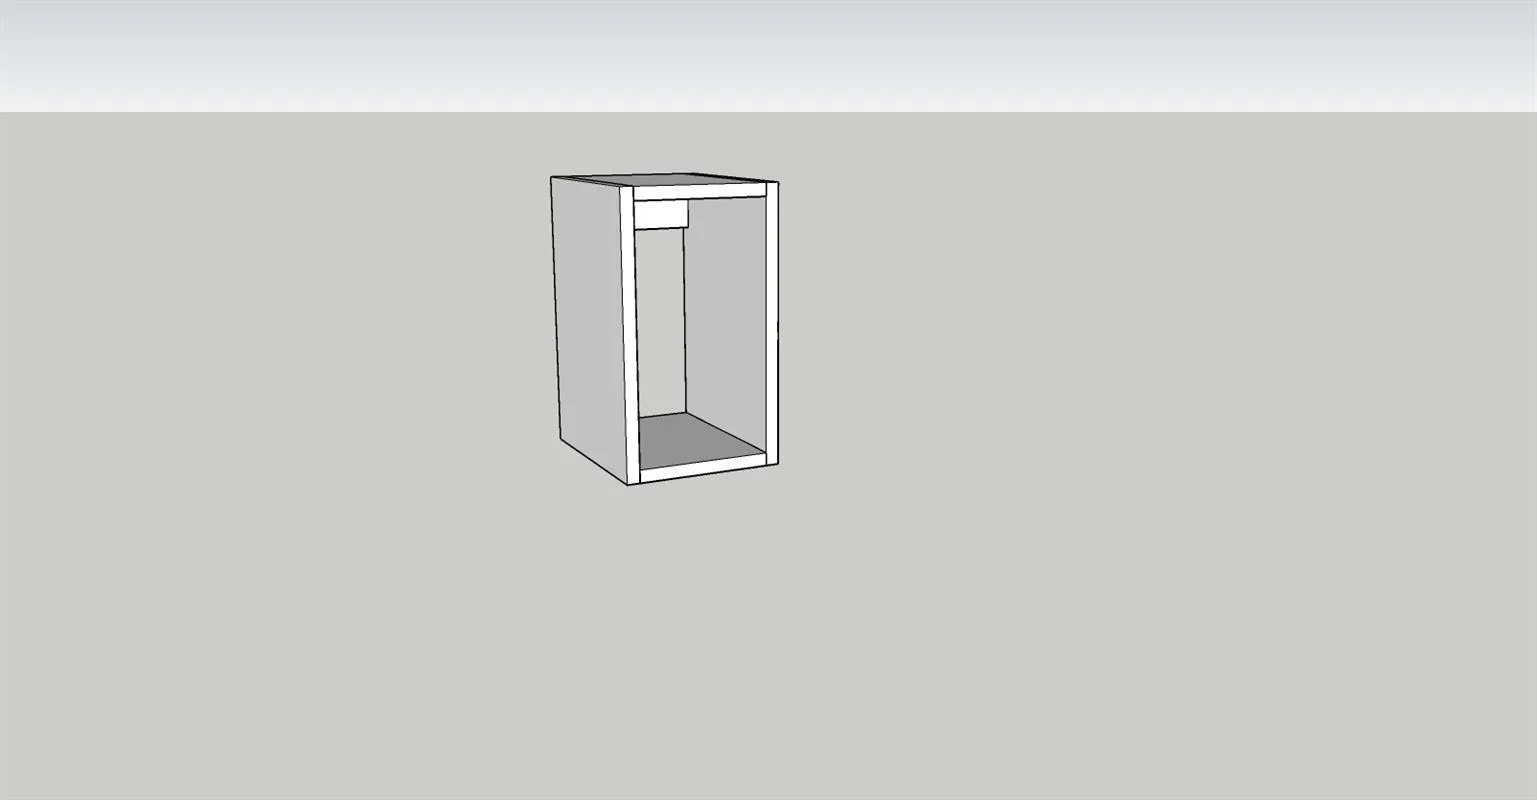
19Add nailer
Add nailer to the back of the upper box.
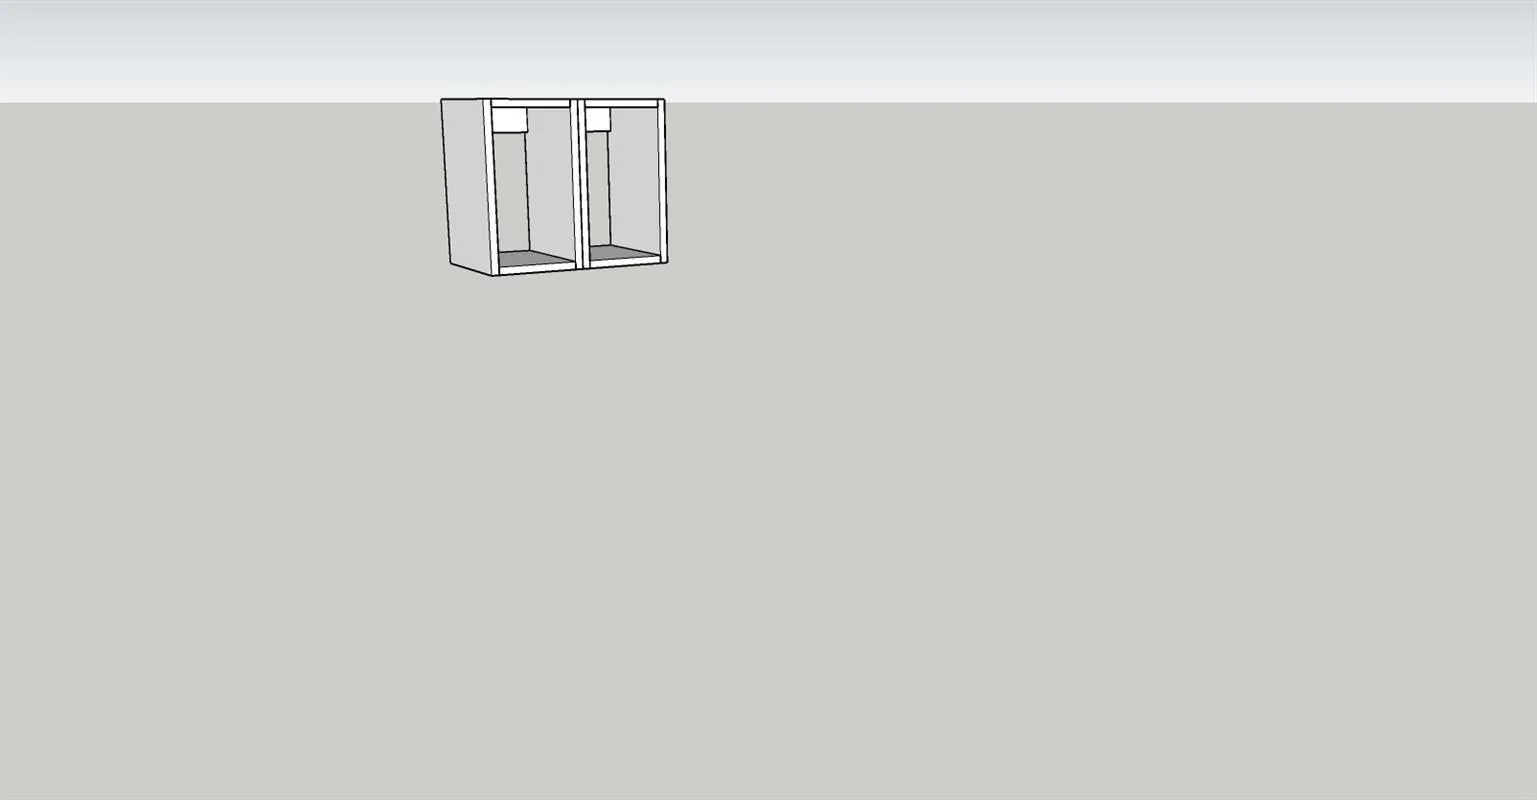
20Join the two boxes
Join the two boxes. Use screws similar to the bottom boxes.
21Add side supports
Add side supports to the boxes as shown. Glue and nail to the boxes
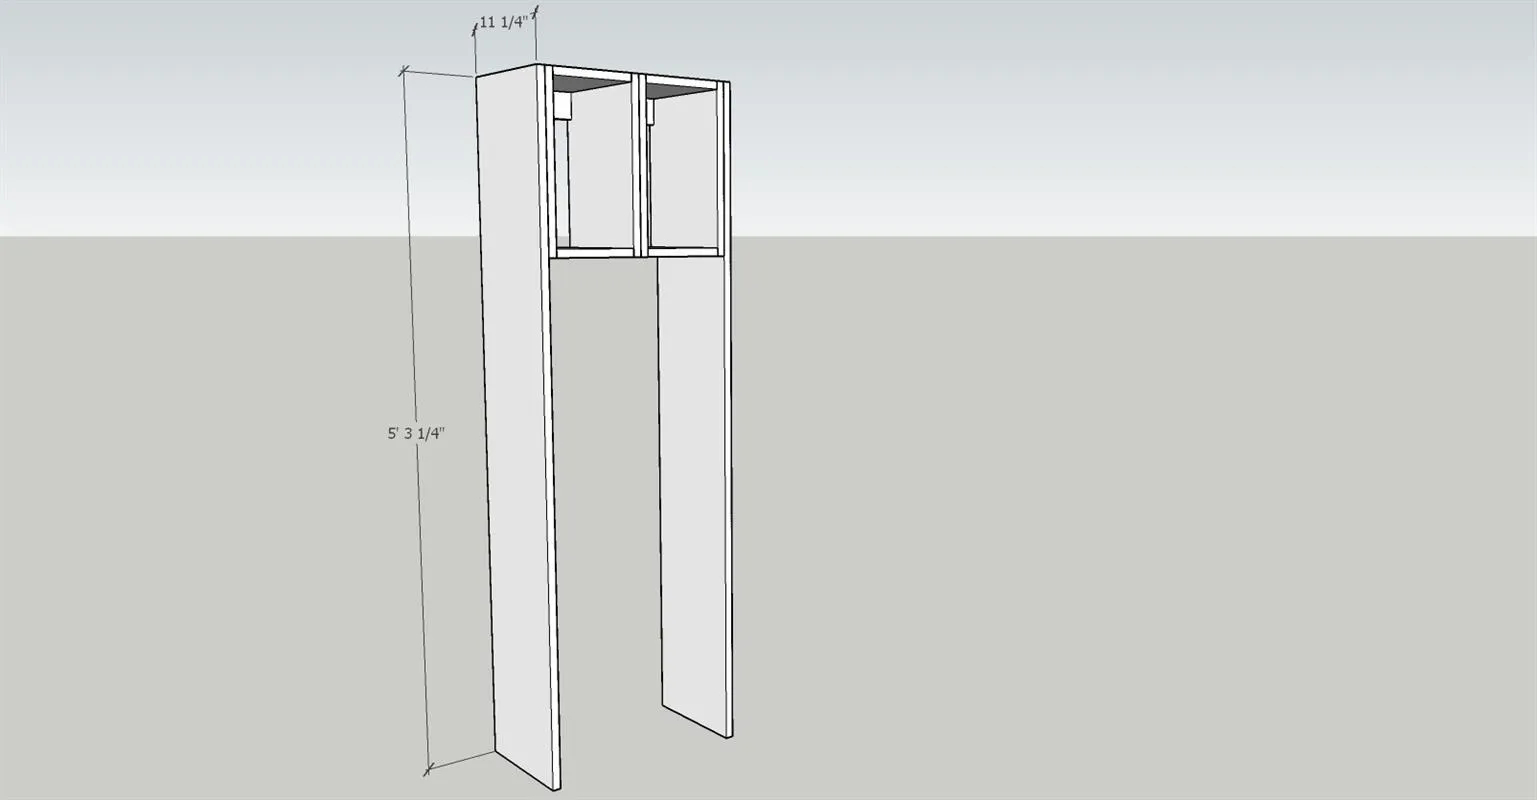
22Install the top box assembly
Install the top box assembly utilizing cabinet screws into the nailer and pocket holes and 1 1/4" pocket hole screws into the bench top
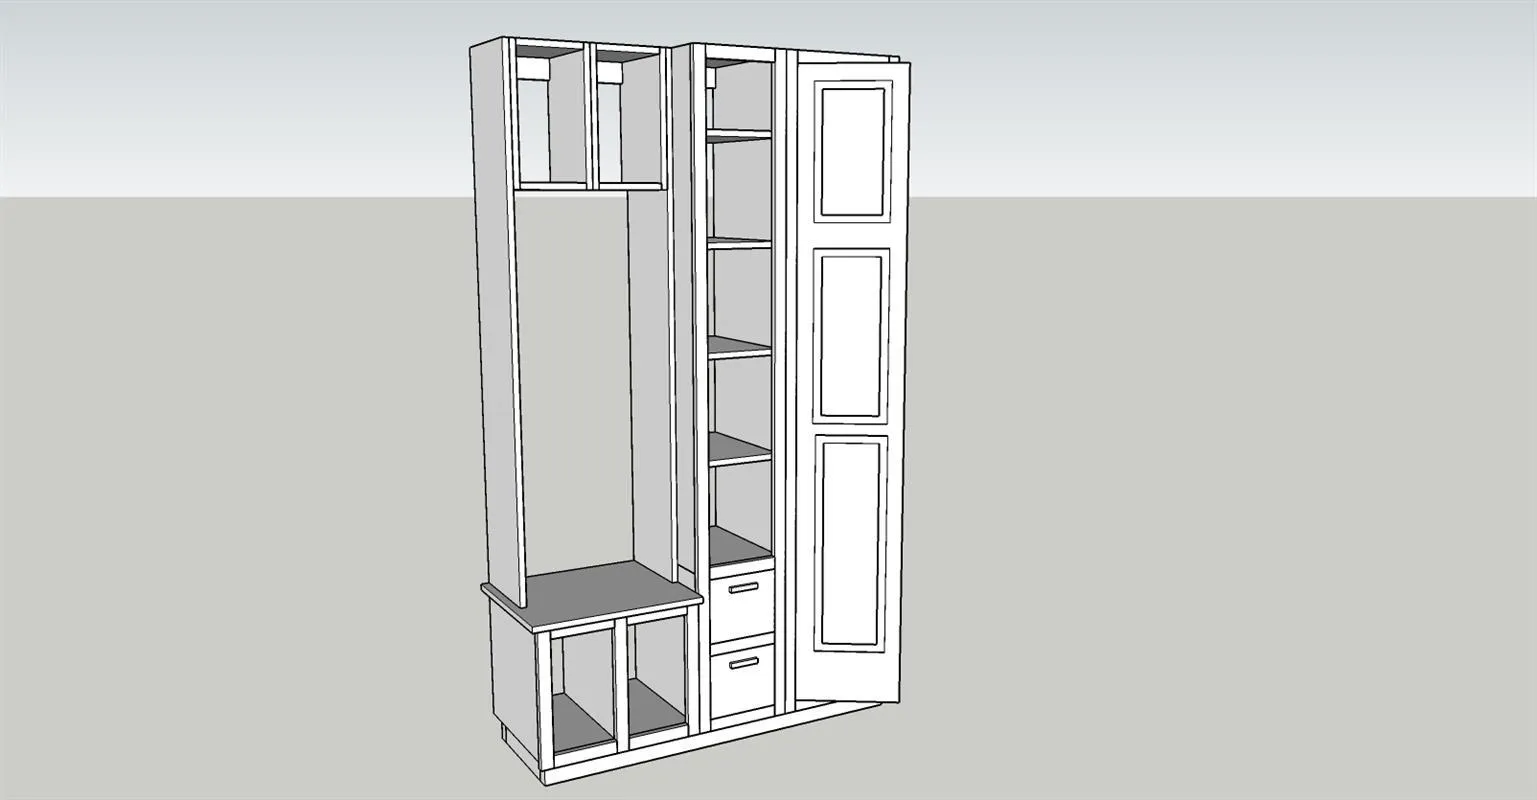
23Add the face frame
Construct a face frame utilizing pocket holes and 1 1/4" pocket hole screws. Attache to the upper assembly with glue and nails. Anchor the face frame to the adjoining shelf unit with cabinet screws thru the side of the face frame.
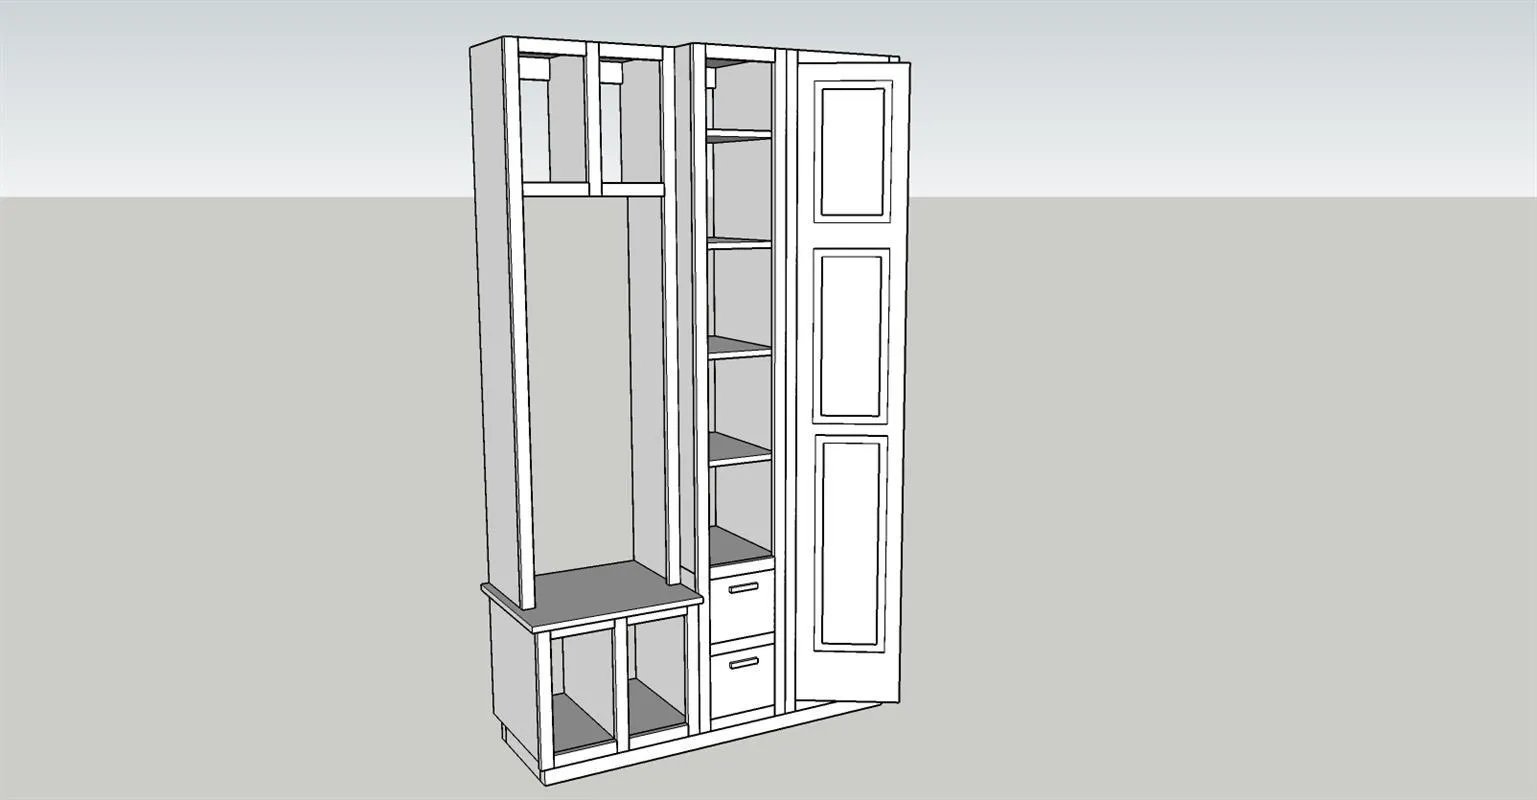
24Finish the unit
Finish the unit by painting or stain.....your choice. I also lined the bottom shoe storage boxes with carpet squares cut to size and glued in place on the sides, back and bottom of each box.
25Seat area
Install coat hangers on the rear area above the seat. I used left over pieces of plywood, cut a rabbit in one edge and glued and nailed the pieces to the wall above the seat.....looks similar to ship-lap. You can do something similar, or install bead board, or just paint the wall.