 Notch
NotchFull-Length Floor Mirror
Step-by-step build — 10 steps. Also available as a print sheet.
1Make the Legs
Start by cutting two Legs to length from 2x2 pine, as shown in the cutting diagram. Better-grade 2x2s will have square corners that you may want to soften. You can either sand the corners, or round over the edges using a router. The video below shows how. After you cut the Legs and soften the edges, sand the faces and ends smooth. If you’ll be painting, sanding with 120-grit sandpaper will be sufficient. If you plan to apply clear finish or stain, follow up with 150-grit.
2Make the Braces
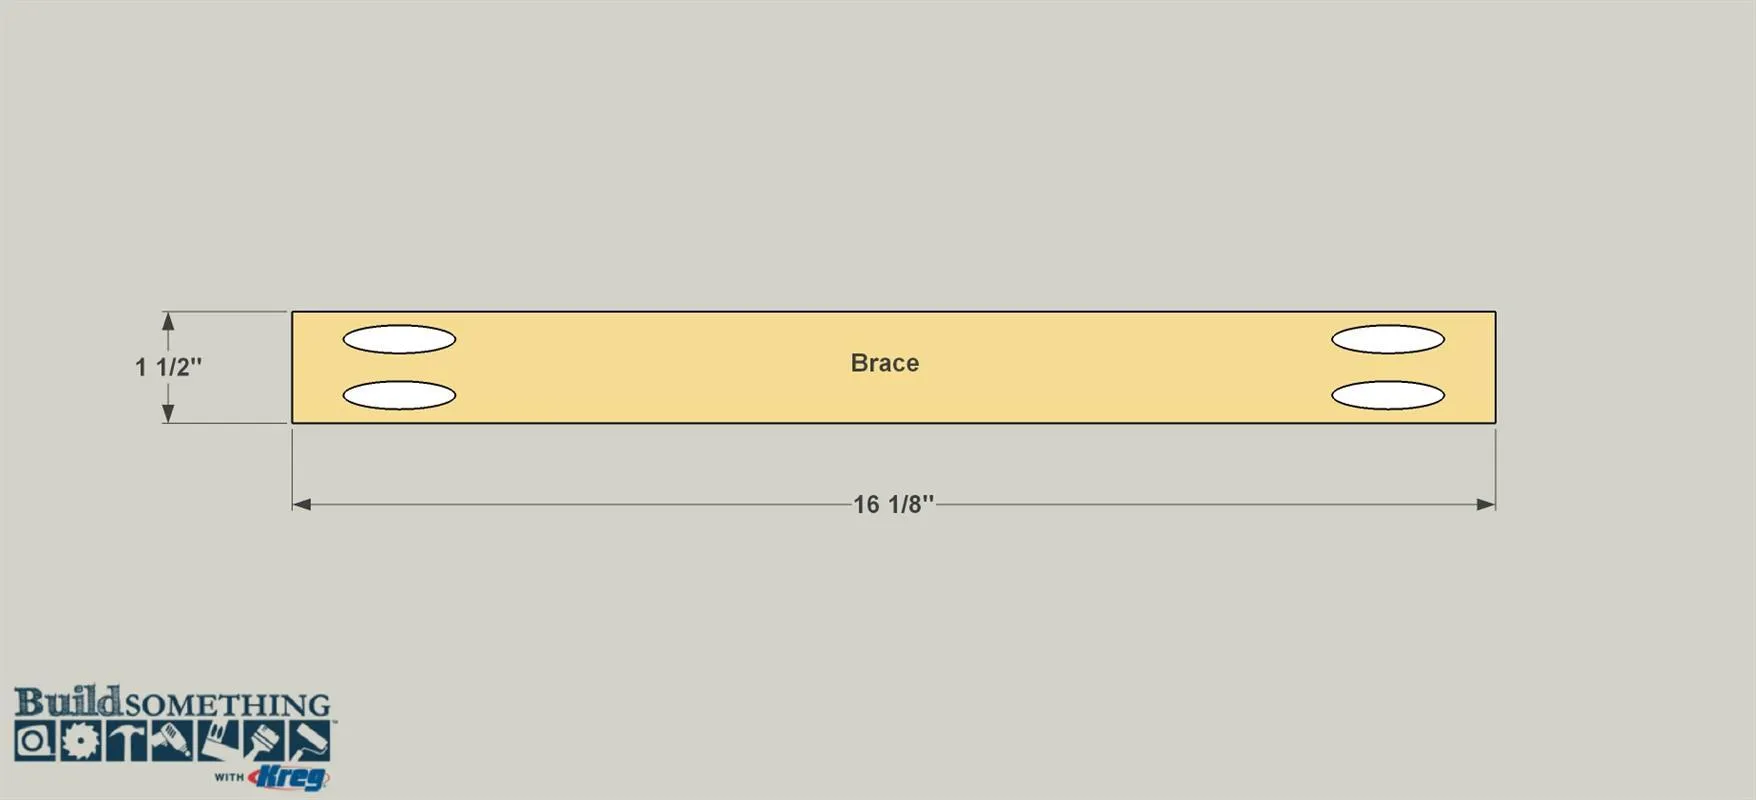
- Cut four Braces to rough length (7") from 1x2 pine, as shown in the cutting diagram.
- Set your Kreg Jig for 3/4"-thick material, and then drill pocket holes in each end at the locations shown.
- Sand the faces and edges of the Braces (but not the ends).
3Join the Braces and Legs
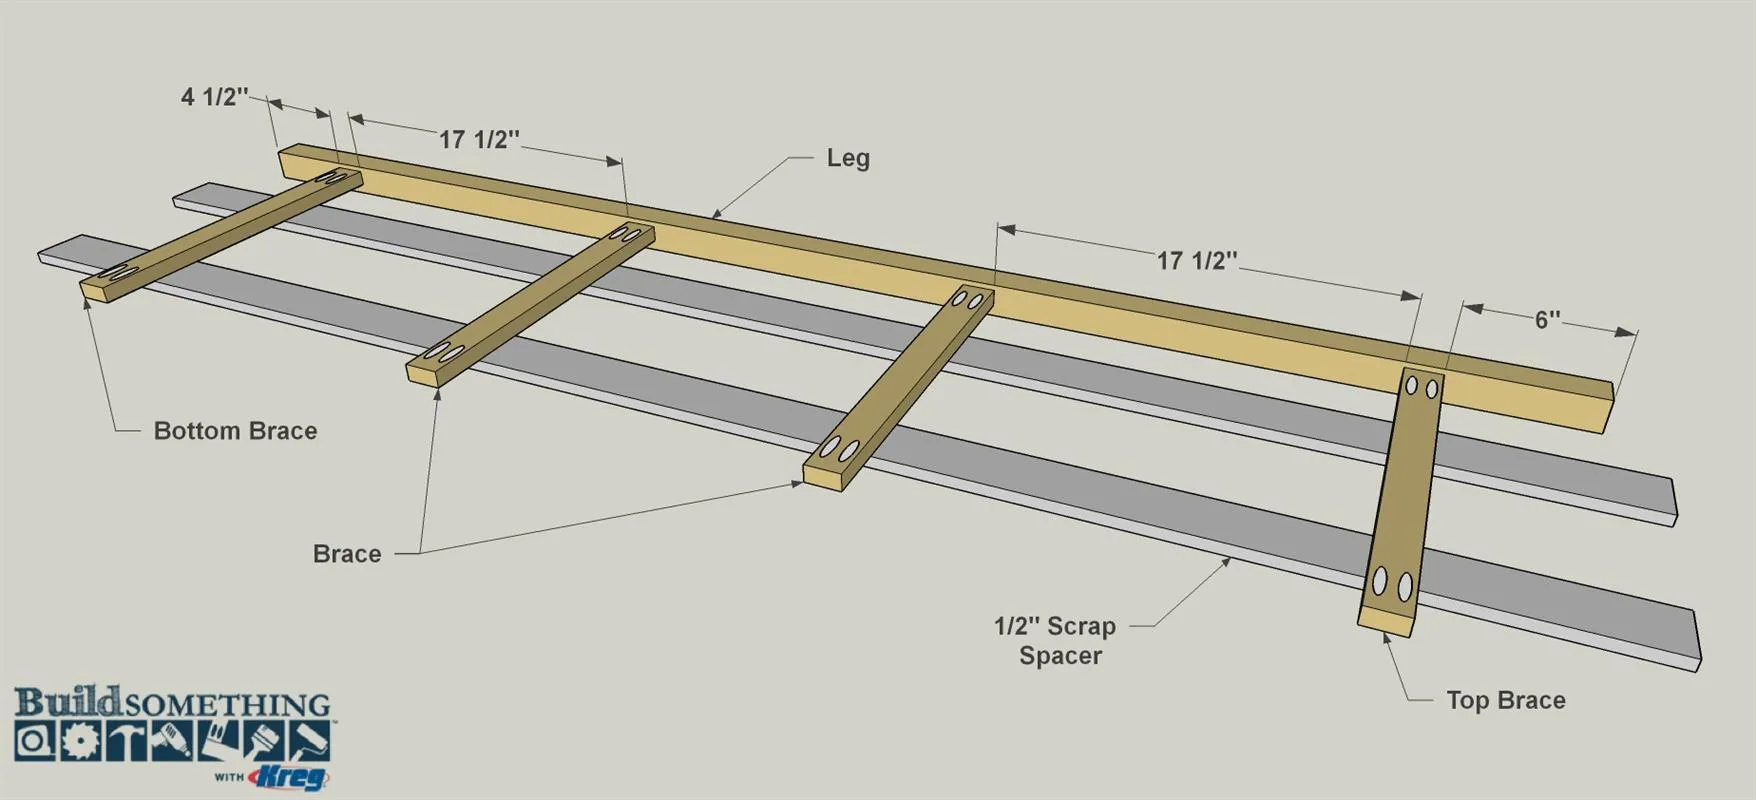
- Lay one Leg on a flat work surface. Using 1/2"-thick material as spacers, position the Braces at the locations shown.
- Then secure the Braces to the Leg using 1 1/4" coarse-thread Kreg screws.
- Then attach the second Leg.
4Make the Mirror Ledge
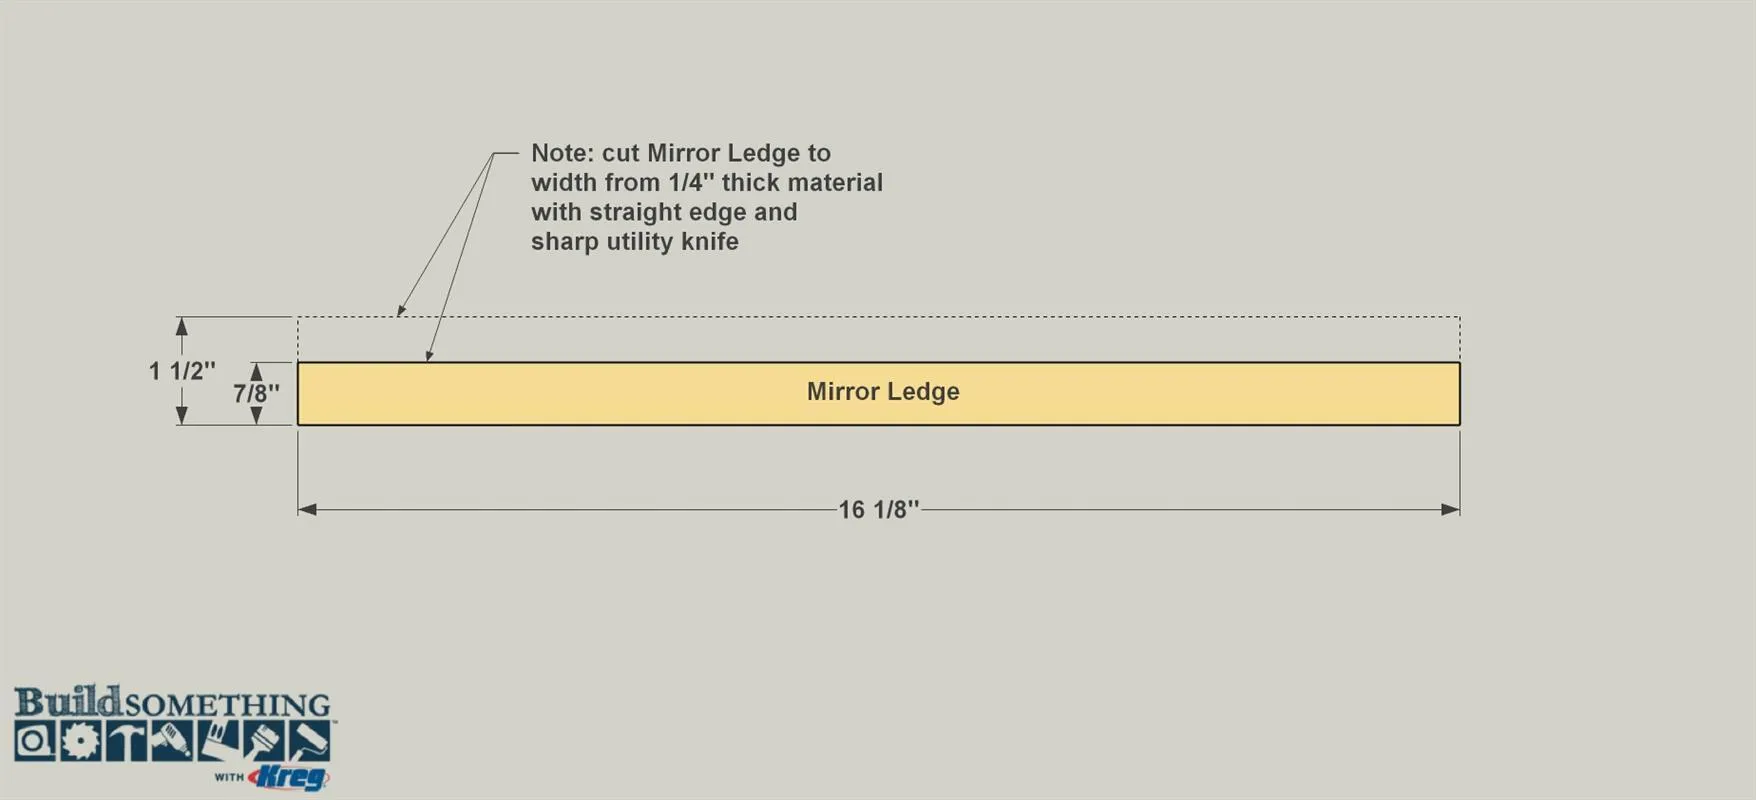
- Cut the Mirror Ledge to length from a 1/4" x2 pine board as shown in the cutting diagram.
- Then you need to trim the Mirror Ledge to final width. A jigsaw works fine, but with thin pine, you can trim it using a straight edge and a sharp utility knife. Just use a long straightedge to guide the knife blade and score the Ledge multiple times.
- Once you have scored over halfway through the board, you should be able to snap the waste off. This will leave a bit of a rough edge, which you can clean up with sandpaper. Don’t worry too much if this edge isn’t perfect. It will get positioned toward the back where it will be hidden from view.
5Attach the Mirror Ledge
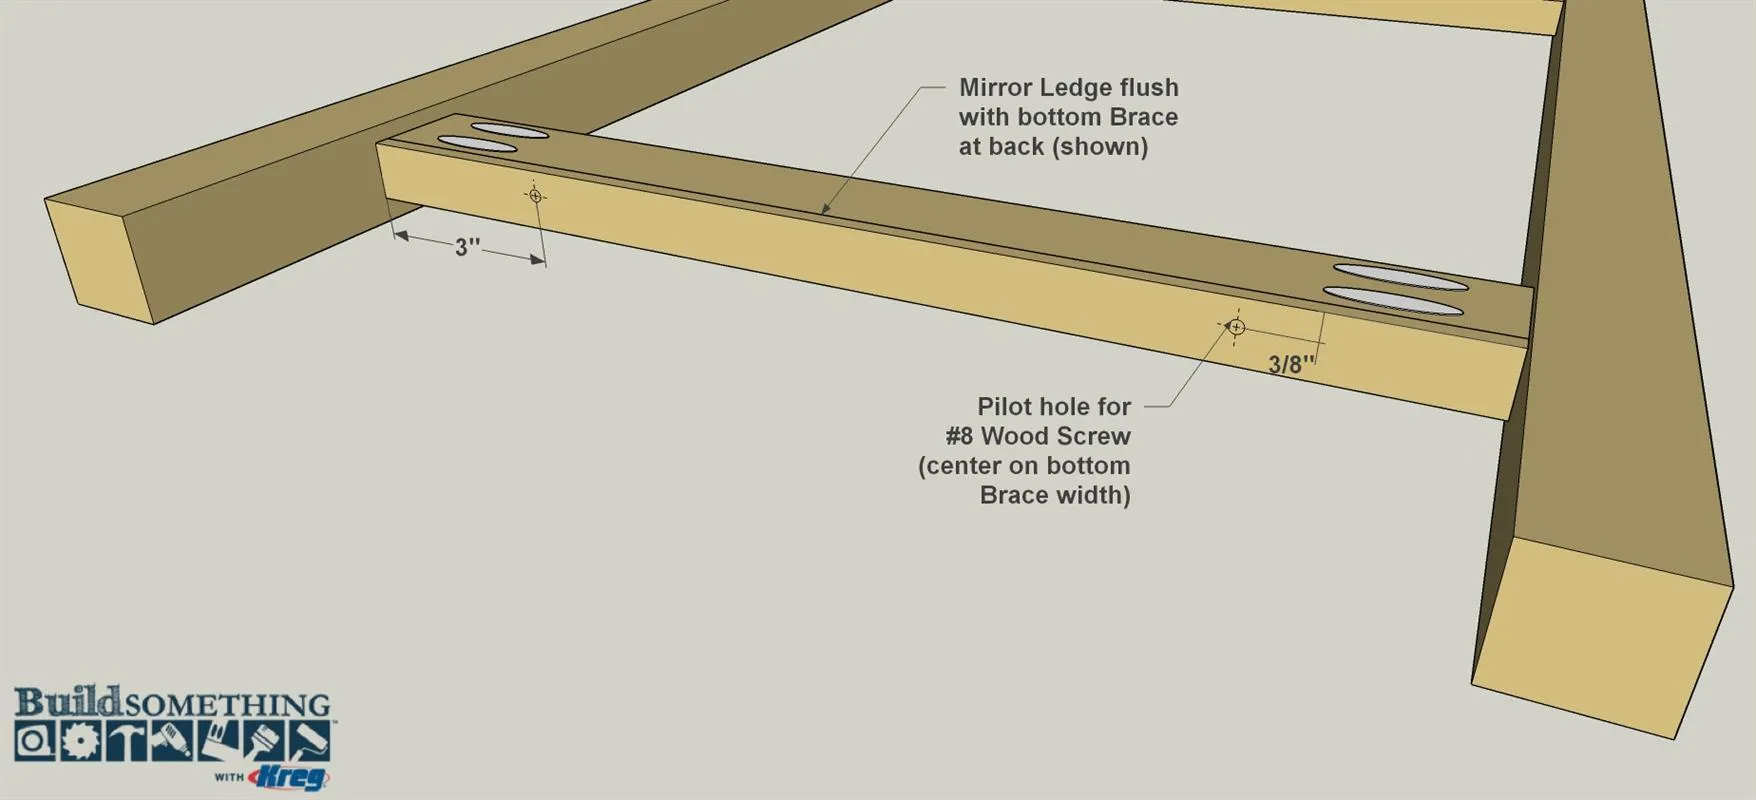
- Apply glue along the lower edge of the bottom Brace.
- Position and clamp the Mirror Ledge so the cut edge is flush to the rear face of the Brace, as shown, and clamp the Ledge in place.
- Drill two pilot holes at the locations shown, making sure they are centered on the thickness of the Brace (3/8" in from the rear edge, as shown).
6Make the Cleats
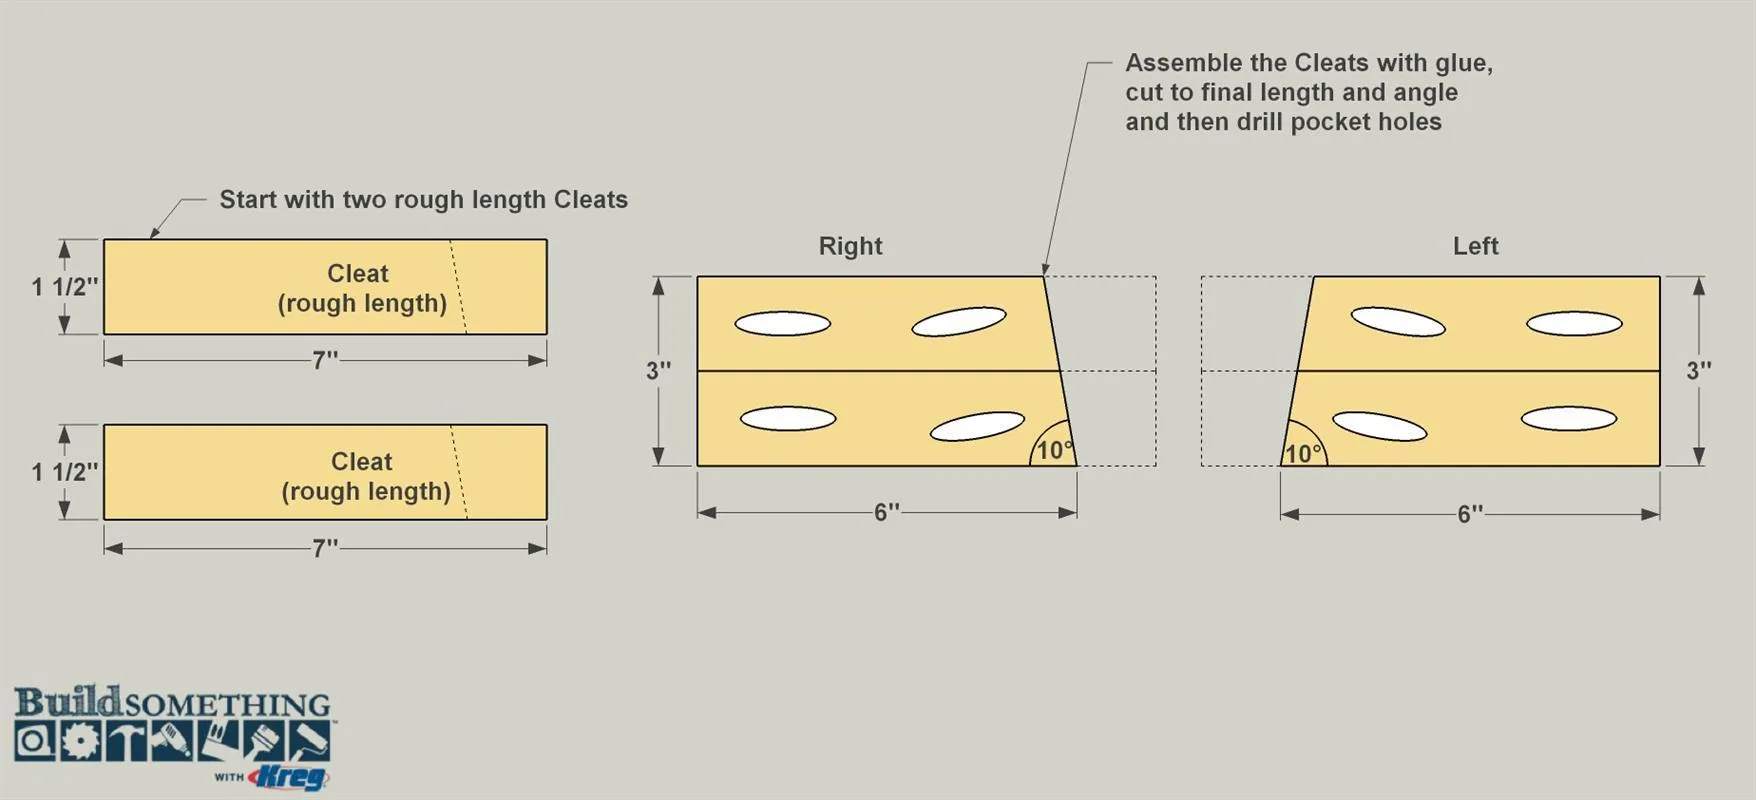
- Cut four Cleats blanks to rough length (7"-long), as shown in the cut diagram.
- Clamp the blanks together in pairs to create two Cleats.
- Once the glue dries sand the Cleats flat. Using a miter saw, cut the Cleats to final length. On one end, make a straight cut to trim a slight amount off and form a smooth, square end.
- Mark the final length, and then cut the other end at a 10° angle.
- Finally, drill pocket holes at the locations shown. Notice there is a “left” and “right” Cleat. This is so the pocket holes face toward the inside of the mirror assembly when installed.
7Attach the Cleats
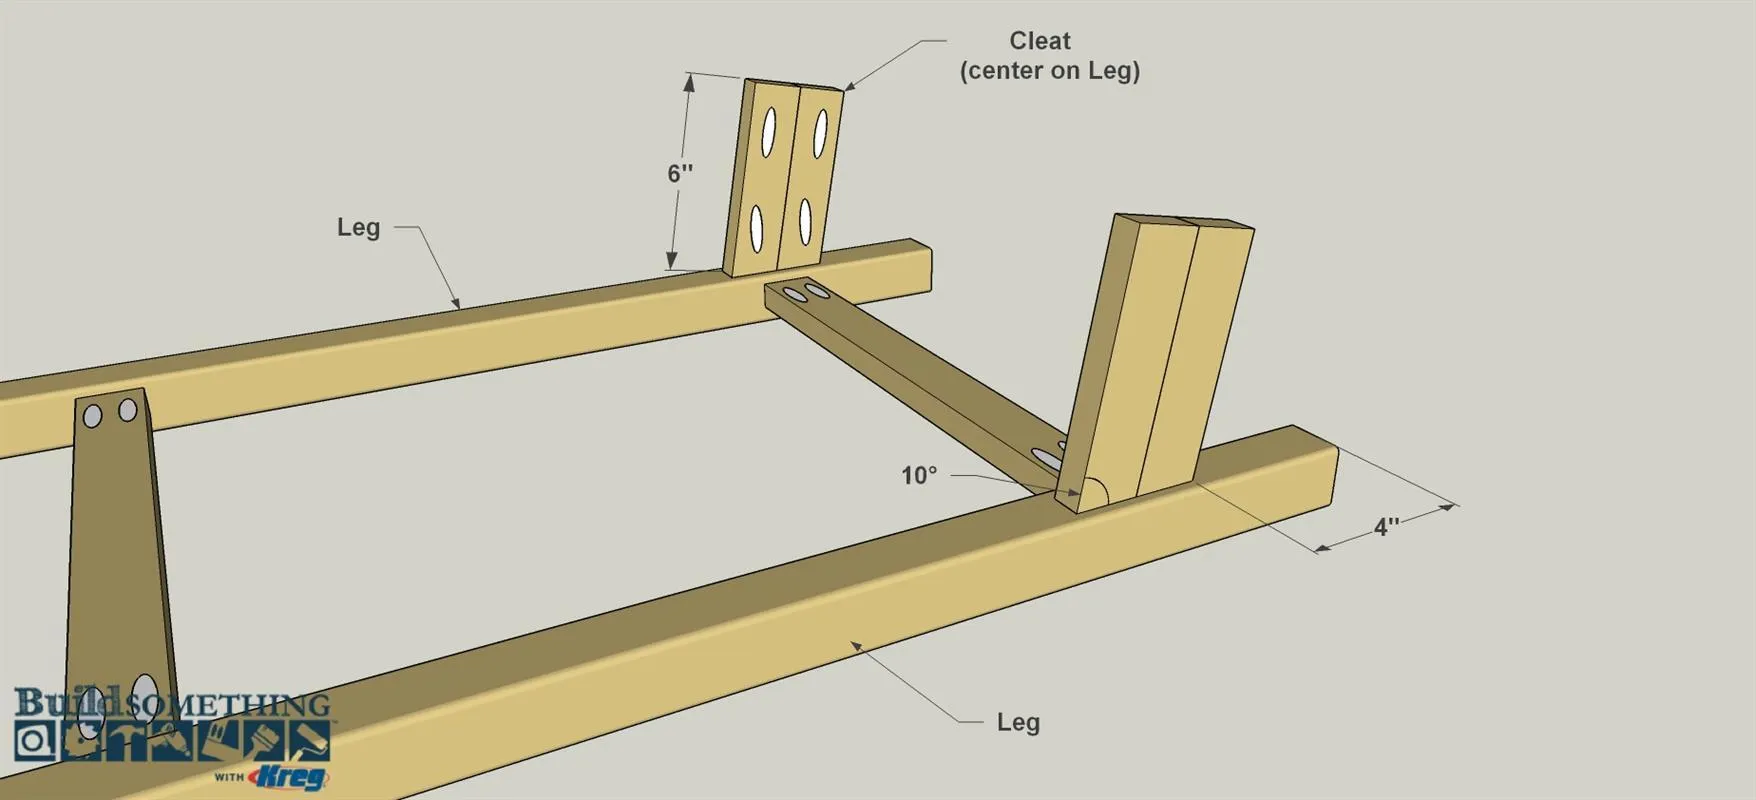
Position the Cleats on the Legs at the locations shown, making sure the angled edge of the Cleat is in contact with the Leg, the pocket holes are facing inward, and the Cleats are centered on the width of the Legs. Secure the Cleats using 1 1/4" coarse-thread Kreg screws.
8Apply a Final Finish
Sand any surfaces or edges that need it, and then wipe away sawdust. Because you will apply the mirror to the Braces using an adhesive tape, it’s best not to apply finish to the front faces of the frame. For the rest of the frame, apply the finish of your choice. We used a natural oil to bring out the color and grain of the pine.
9Attach the Mirror and Hooks
- Apply double-faced mirror tape across the front face of each Brace. Note that you need to use tape that’s designed for attaching mirrors. Ordinary tape or adhesive can deteriorate the reflective finish on the mirror.
- Place the bottom edge of the mirror on the Mirror Ledge and make sure the mirror is centered between the Legs. Gently lay the mirror in position on the Braces, and then lightly press the mirror at each Brace location to ensure contact with the tape. If desired, attach a garment hook to each Cleat.
10Secure the Mirror to the Wall
- Set the finished mirror upright against the wall at your desired location so the rear edge of each Cleat lays flat against the wall.
- Now you can secure the mirror to the wall. The pocket holes drilled in the end of each make that easy. You’ll only need to use one hole in each Cleat, but having two offers options. To secure your new dressing mirror to the wall, first mark the location of each cleat on the wall. If there’s no stud behind either cleat, install a wall anchor at each location.
- Then, reposition the mirror, and drive screws into the wall anchors—you can use 1/4" coarse-thread Kreg screws. The space is tight, though, so a drill won’t fit. You can use a 90° drill attachment, though, as shown below.
Tip: Drive Right When Space is Tight When space is tight, it can be difficult or impossible to position a drill and a long driver bit to drive screws. For less than $25, though, you can pick up a right-angle attachment that works with any drill. Combine a right-angle attachment with shorter bit, and you can drive pocket-hole screws or other screws almost anywhere.