Notch
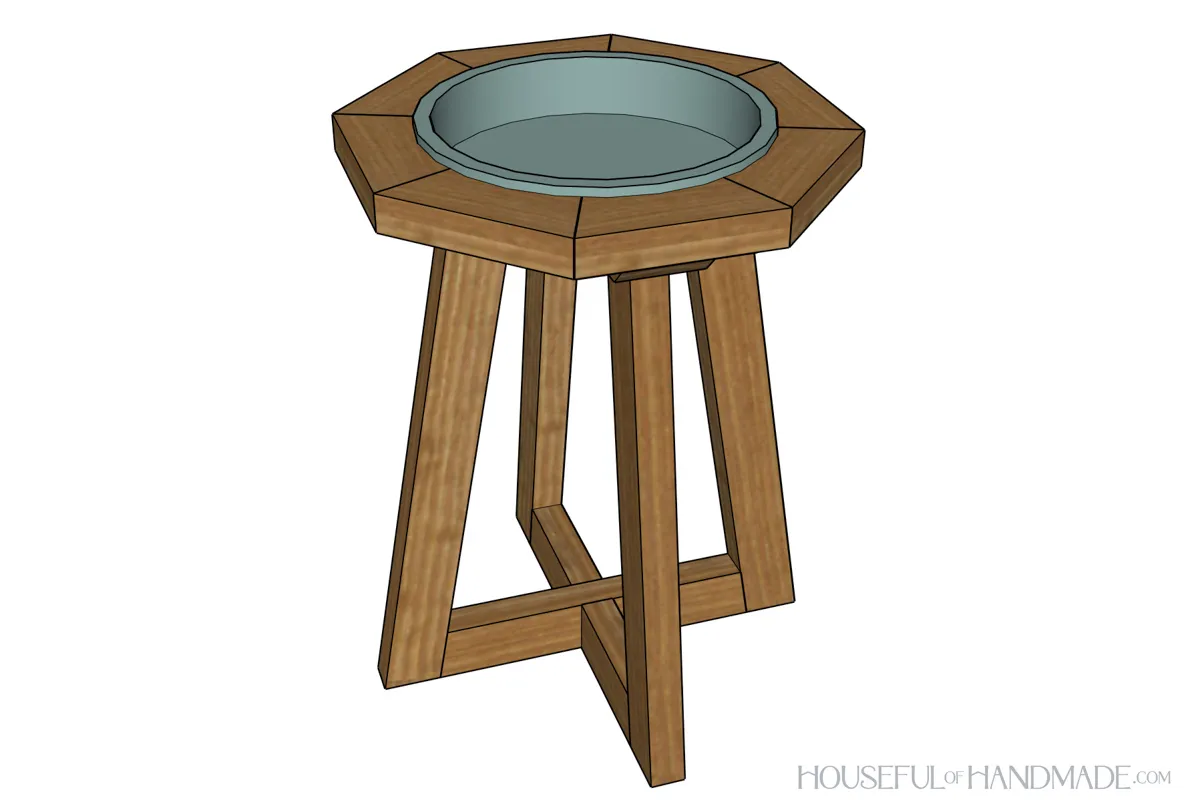
NotchFreestanding Birdbath
Step-by-step build — 10 steps. Also available as a print sheet.
1Cut the pieces
Cut the pieces according to the cut list. Refer to the cut diagram for pictures of the angled cuts. - Top octagon and lower octagon pieces: both ends cut at a 22.5 degree angle so they angle toward each other. - Leg pieces: both ends cut at a 10 degree angle so they are parallel. - Bottom center piece: both ends cut at a 10 degree angle so they are angled towards each other. - Bottom side pieces: one end cut at a 10 degree angle. For the top support pieces, you can rip the outer ends at a 45 degree angle to give it a slope (see step 5 image for details). Or you can sand a slope in the ends once assembled.
2Assemble the top octagon
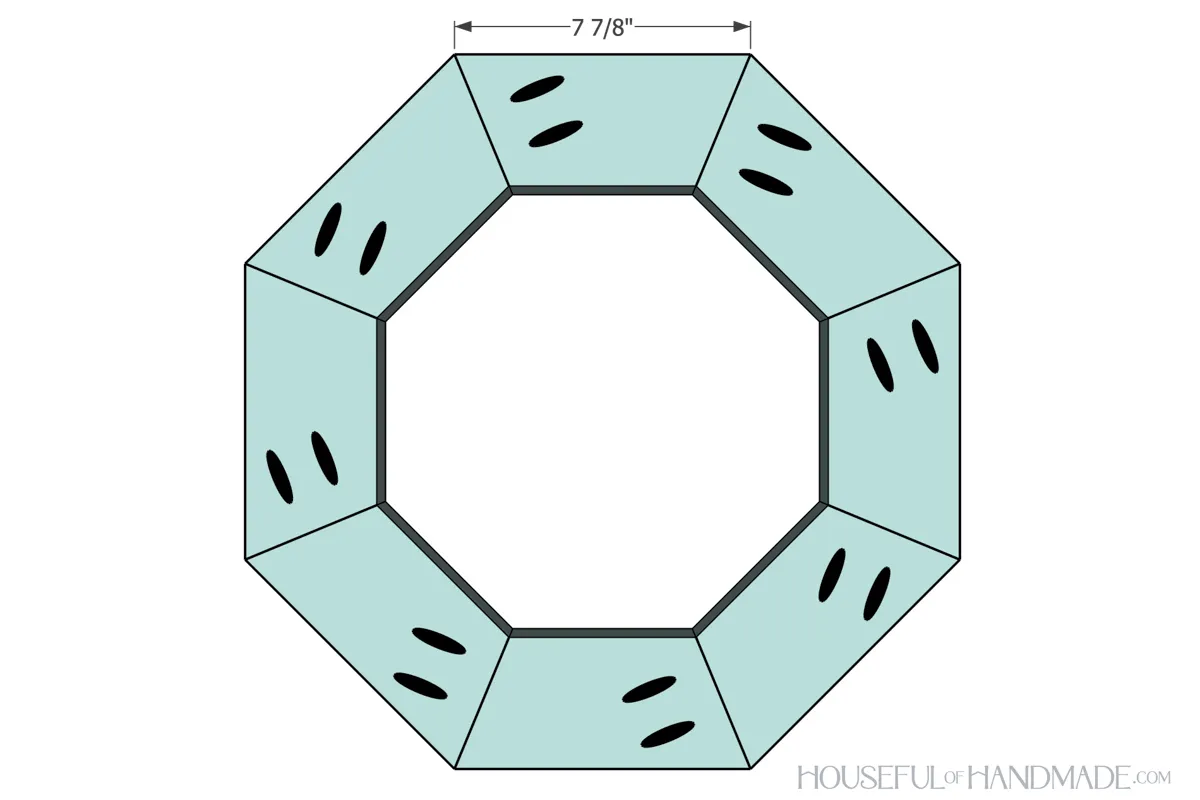
- Set your pocket hole jig to drill holes in 1 1/2" thick material.
- Drill 2 pocket holes on one side of each top octagon board. Make sure it is the same side on all the boards.
- Add glue to the seam and use a face clamp to hold it in place while you secure with 2 1/2" pocket holes screws.
- Repeat all the way around until all the pieces are attached to each other creating an octagon.
Tip: Cut the 8th piece to fit If your angles and cuts are not perfect, the last octagon piece may not fit without gaps. Instead, cut and assemble 7 pieces together then lay the remaining 2x4 piece under the octagon where the 8th piece will go. Trace the lines you need to cut. Then add pocket holes and secure it to both sides for a perfect fit.
3Cut out a circle
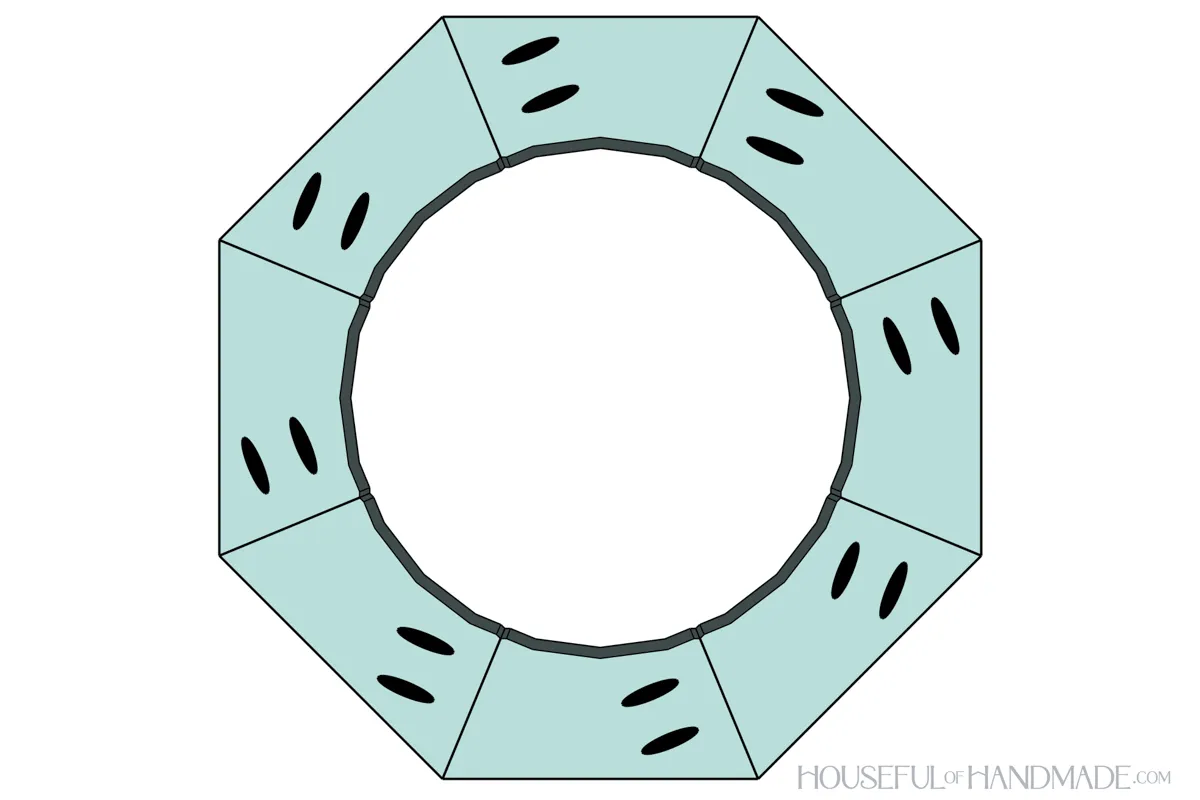
- Measure the diameter of the plant saucer under the lip. Draw a circle on the inside of the octagon to match.
- Then cut it out with a jigsaw.
- Test fit the saucer in the hole and adjust. You want the lip to sit on the top of the boards.
4Attach lower octagon
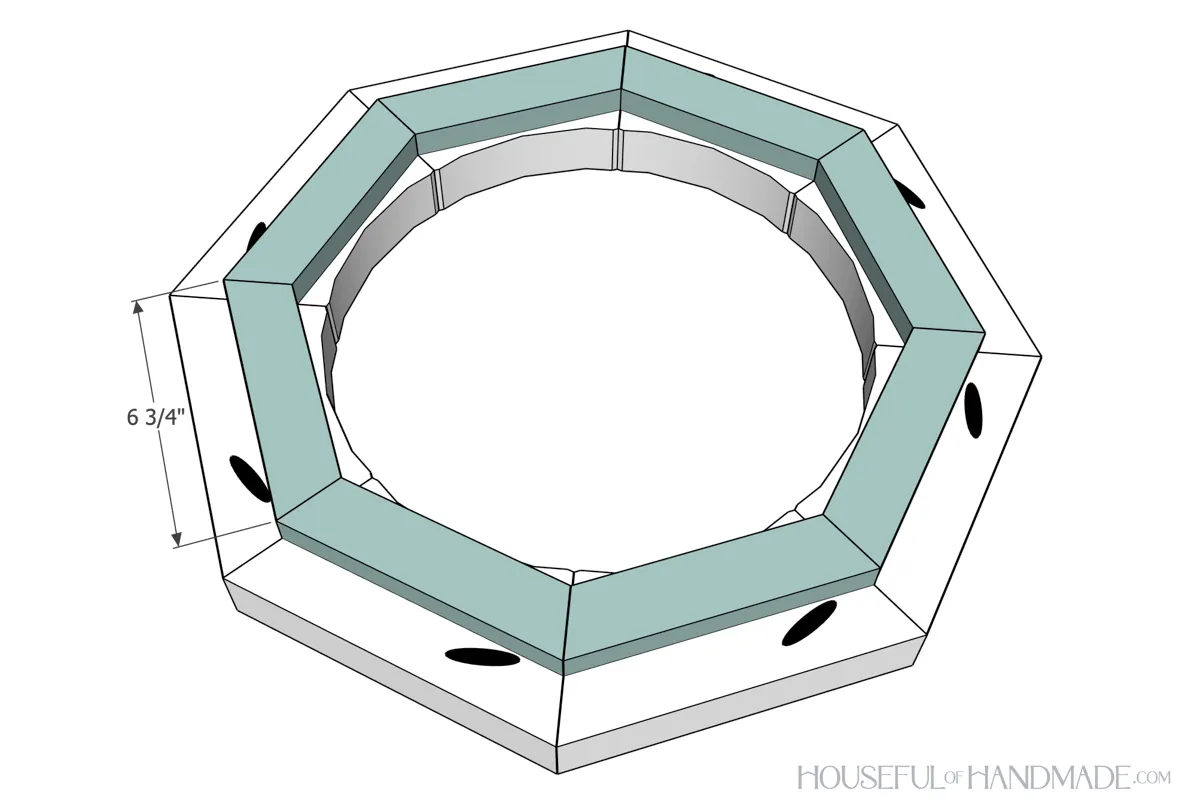
Using glue and 1 1/4" brad nails, attach the lower octagon pieces to the underside of the finished top. Line up the angled edge of the lower octagon pieces with the seams in the top as you attach them. If they are slightly off, don't worry too much, they are well hidden when the birdbath is finished.
5Build under top support
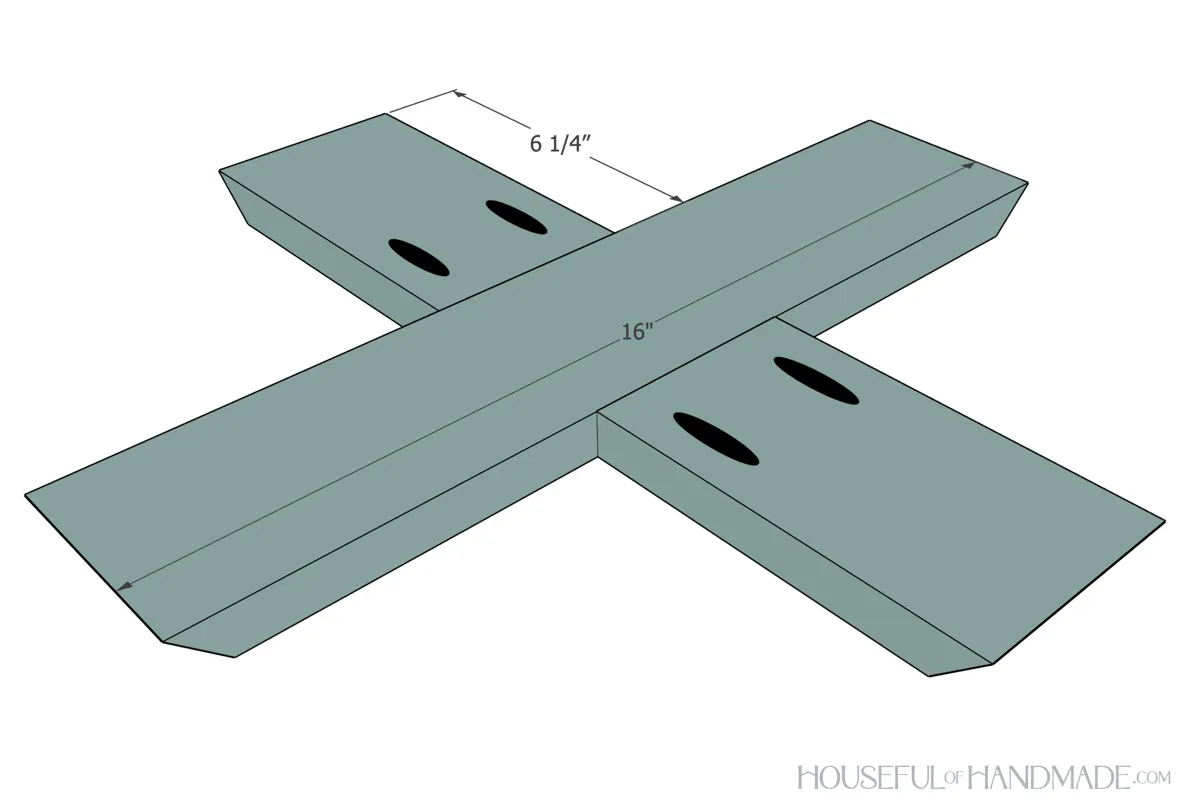
Set your pocket hole jig to drill holes in 3/4" thick material and drill 2 pocket holes in the non-angled end of the top support sides. Attach them to the center of the top support center piece with glue and 1 1/4" pocket hole screws.
6Attach top support
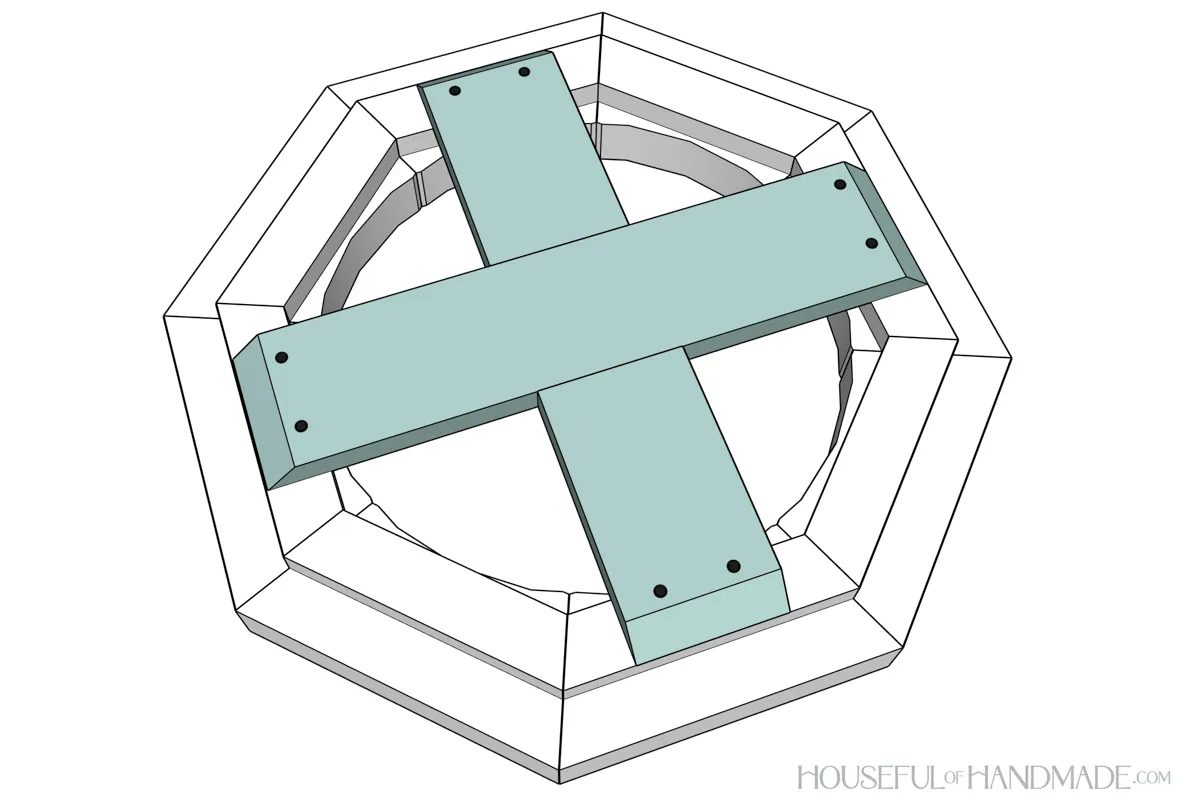
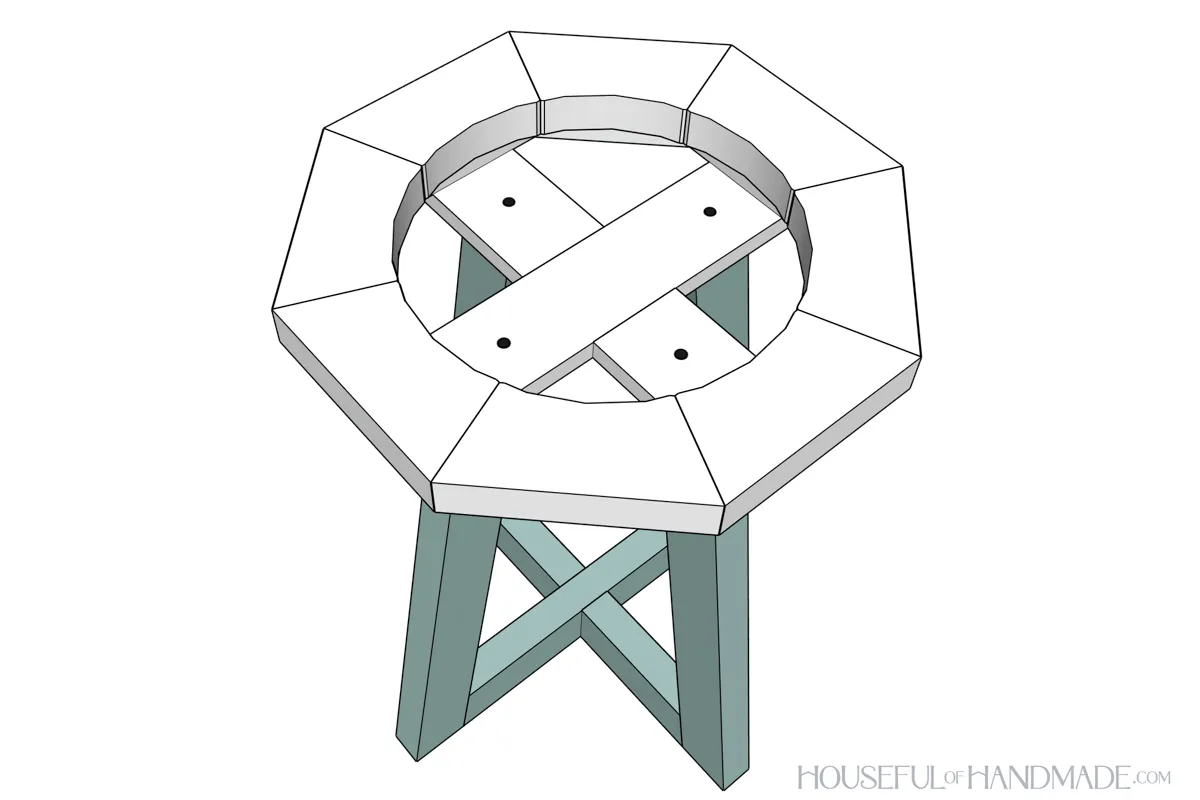
Center the assemble support on the underside of the assembled octagon. Use the Quick-Flip tool to drill a hole where the support sits on the lower octagon pieces. Only countersink the screw head about 1/4". Secure with 2 1/2" pocket hole screws.
7Start building the legs
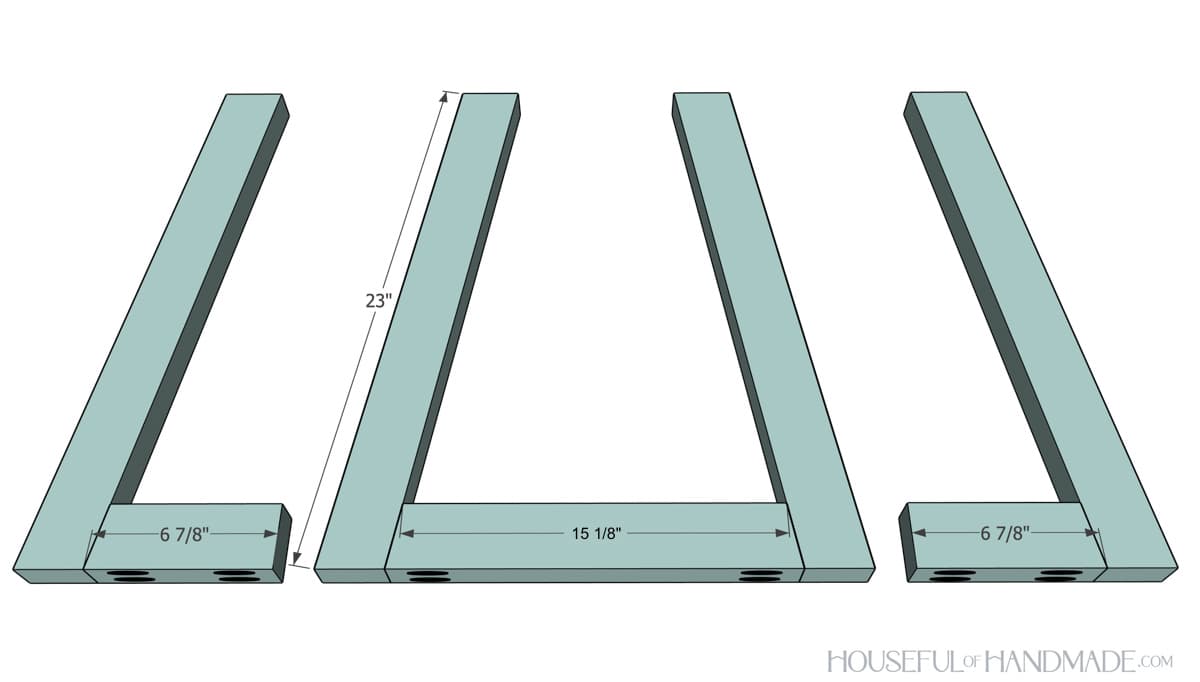
On the 1 1/2" wide underside of the 2x3 bottom pieces, drill pocket holes set for 1 1/2" thick material in both ends of the boards. Attach the bottoms to the legs so the center is between 2 leg boards and the angled edge of the sides are attached to 1 leg board. Secure with wood glue and 2 1/2" pocket hole screws.
8Attach legs together
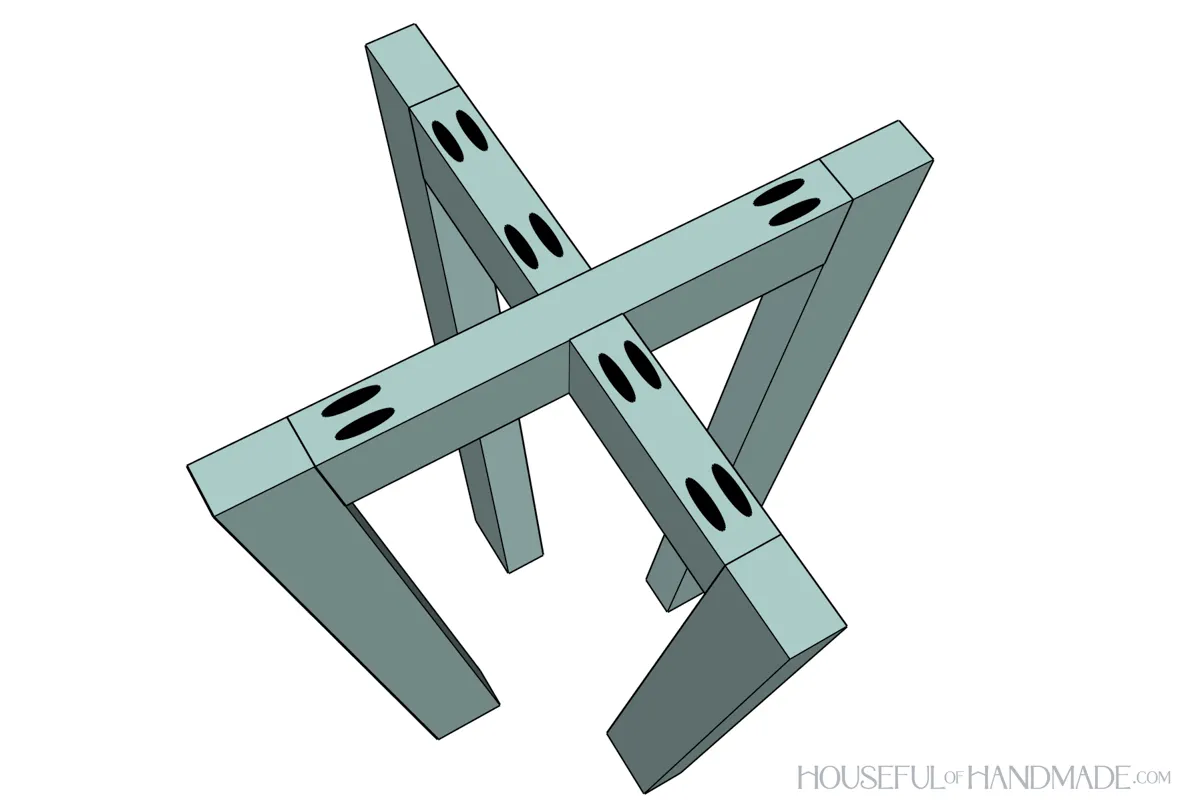
Attach the 4 legs together at the bottom boards so the two sides are centered on the bottom center board. Secure with 2 1/2" pocket hole screws and wood glue.
9Attach legs and top together
- Place the top octagon on top of the leg assembly.
- Center the legs under the support pieces. Use the Quick-flip to drill a hole and secure with 2 1/2" pocket hole screws.
10Finish and enjoy!
- Sand and finish the birdbath. Make sure to use exterior sealer or paint.
- Place the saucer in the top and fill with a couple inches of water. I also added some small rocks and pebbles to one side for smaller birds.
- Now I just need to wait for them to discover their new bath! And make sure to visit me at housefulofhandmade.com for even more fun things to build for your backyard.