Notch
NotchFold-Away Mudroom
Step-by-step build — 12 steps. Also available as a print sheet.
1Build the shelves
- Set your Kreg pocket hole jig for 3/4" thick material.
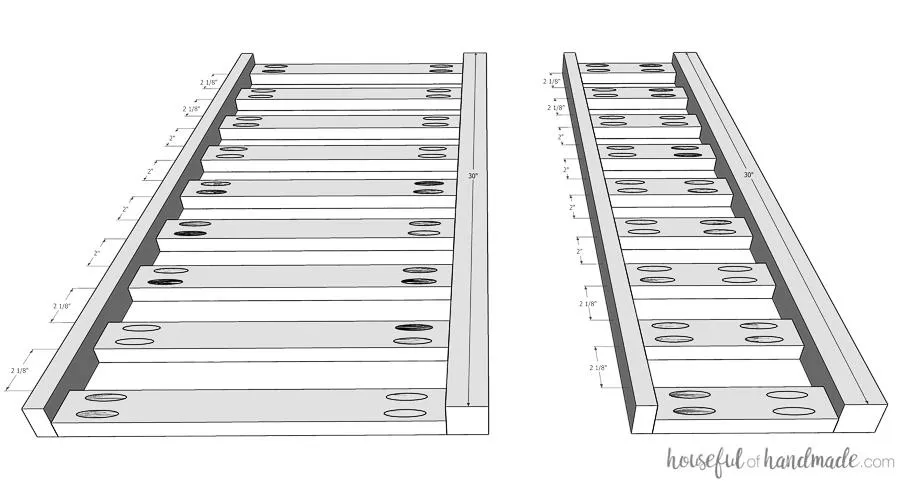
- Build the top and bottom shelves by drilling pocket holes in each end of the slat boards. Using wood glue and 1 1/4" pocket hole screws, attach the slats to the shelf backs so they are flush with the top of the 2x2s.
- Space them according to the photo.
- Then attach the shelf front board so the top is flush with more wood glue and pocket hole screws.
2Drill hole in top of legs
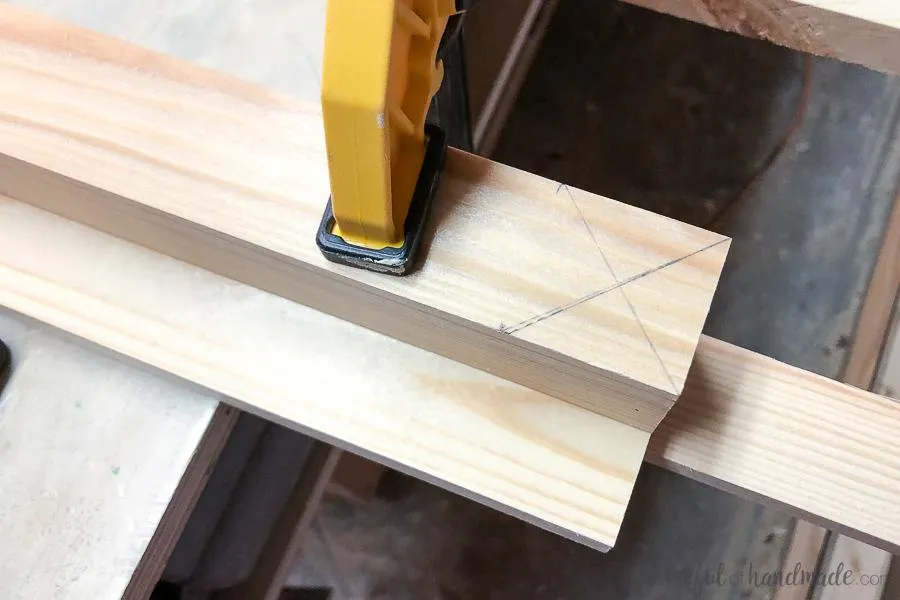
- Clamp the front and back legs together so they are flush at the back. Make sure to take note what side of the front leg is the back because of the angle at the bottom of the leg. The shorter side is the back leg.
- Mark 1.5" down on either side of the back leg and then draw an X from these points to the top edges.
- Drill a 1/4" hole straight through both boards at the center of the X. I also clamped a scrap board to the bottom of the 1x3 to help prevent tear out as the drill breaks through the back.
3Cut the front legs
- Cut the front legs to size.
- Then cut the bottom of each leg at a 15 degree angle. The finished leg will be 54 1/4" long at the longest point (the front of the leg).
4Mark back legs
- Clamp the two back legs together so the holes you just drilled are facing up.
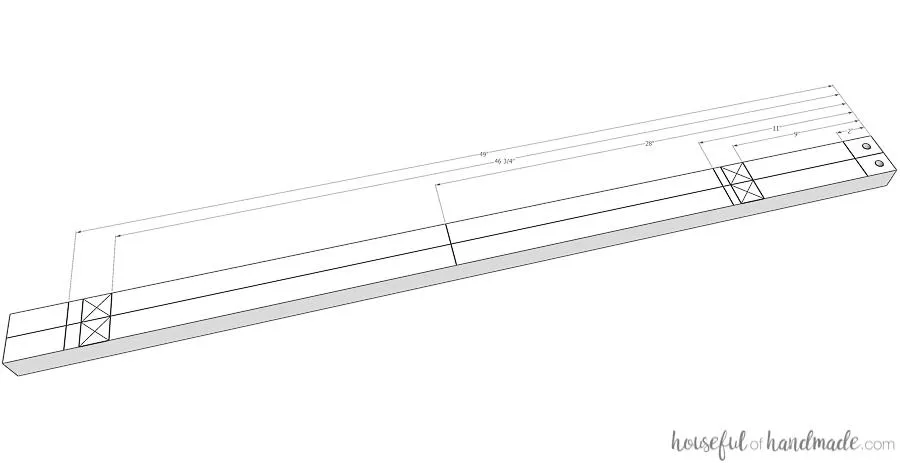
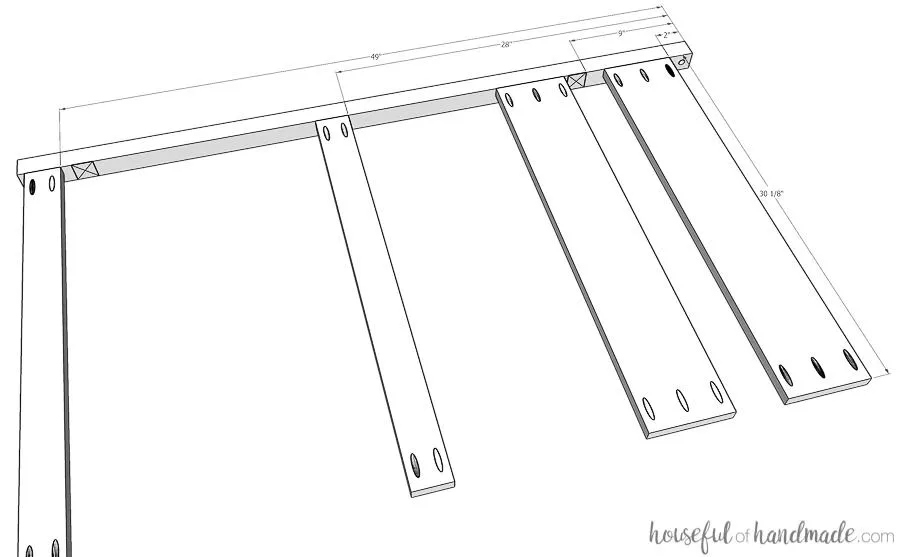
- Mark the boards for the back supports and shelves by measuring from the top of the legs down according to the diagram.
- Then draw a line across. At the 9" mark and 46 3/4" mark, measure 1 1/2" down and draw a second line, then draw Xs to create a center point for the shelves.
5Drill holes for shelf pins
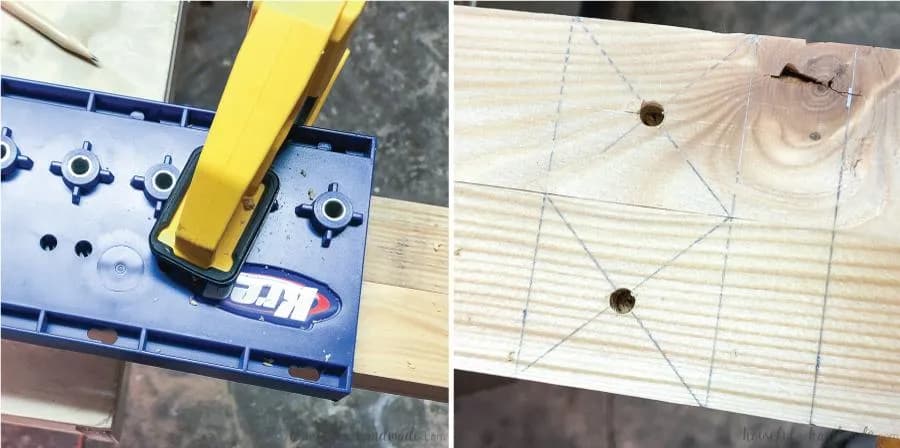
- Clamp the Kreg shelf pin jig so that one of the pin holes is centered on the center of the X and clamp. Use the 5mm shelf pin drill bit and drill a shelf pin hole.
- Repeat on the other 3 Xs on the back legs.
- Then mark Xs on the shelf back 2x2s by drawing lines from corner to corner and drill shelf pin holes as above. You will have to clamp the jig to the top shelf slat to secure.
6Attach the back supports
With your Kreg jig set for 3/4" material, drill pocket holes in both ends of the large and small back support boards. Using wood glue and 1 1/4" pocket hole screws, secure the boards to the back legs so they are flush with the back on the marks you made previously.
7Add shelves to back
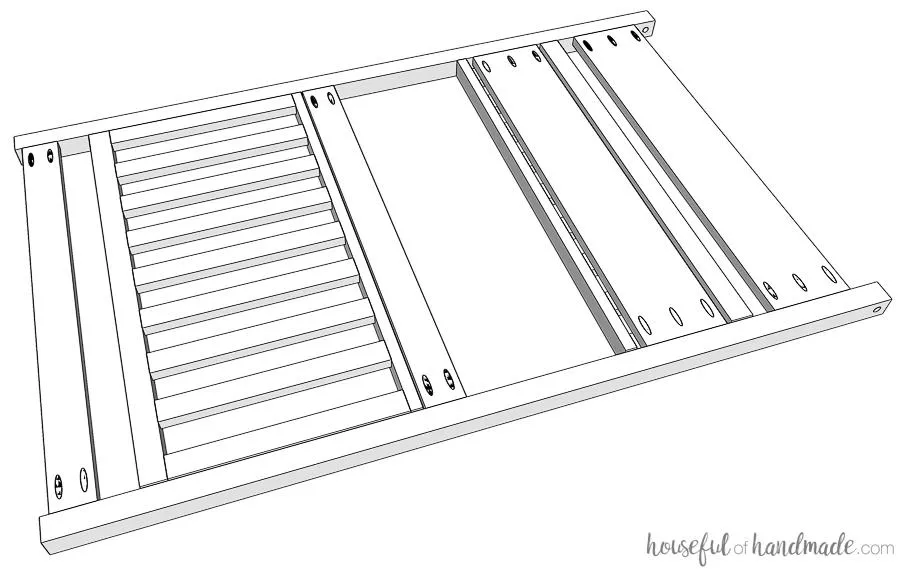
Press 5mm double-sided shelf pins into the shelf pin holes on the back legs. Line up the shelf backs so that the other side of the shelf pins goes into the shelf pin holes on them. Press the second leg onto the other side. Secure it to the back supports with wood glue and pocket hole screws so it is flush with the back and all the supports line up to the marks.
8Build the front legs
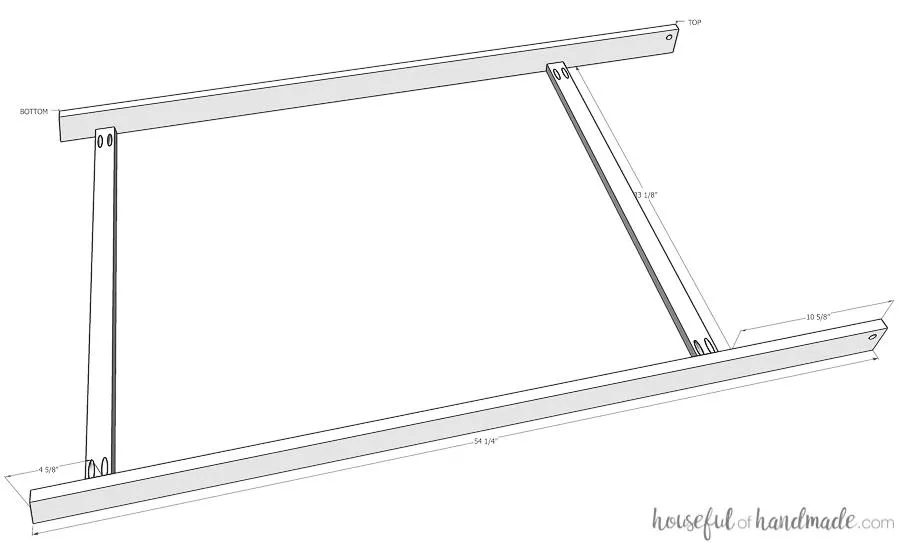
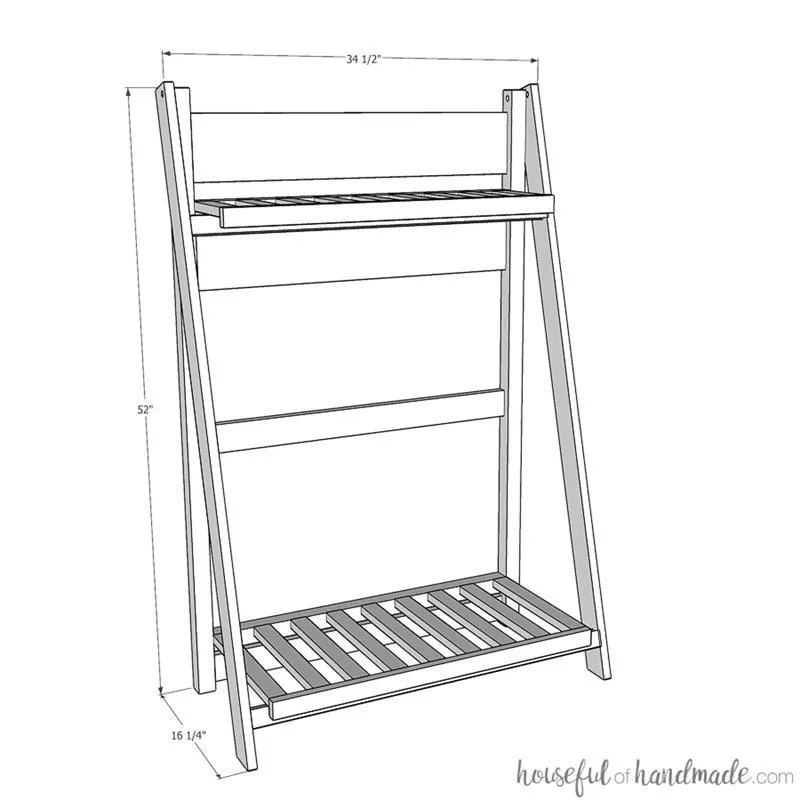
- Attach the front leg supports by drilling pocket holes into each end of the boards. For the top support, measure down from the top 10 5/8" and attach the support top at that line. For the bottom support, measure up from the bottom front (the longest part of the leg) 4 5/8 and attach the support top at that line.
- Attach the support boards so they are flush with the front of 1x3 legs.
9Assemble the fold-away shelf
- Place the front legs over the back legs so the 1/4" holes line up. It's easiest to do this while it is laying flat since the front legs are longer than the back legs. The front legs will be on the outside of the back legs. Press the hex bolts through the hole, placing a washer between the two boards.
- Then secure with a nut.
- Repeat on the other side.
10Attach hooks
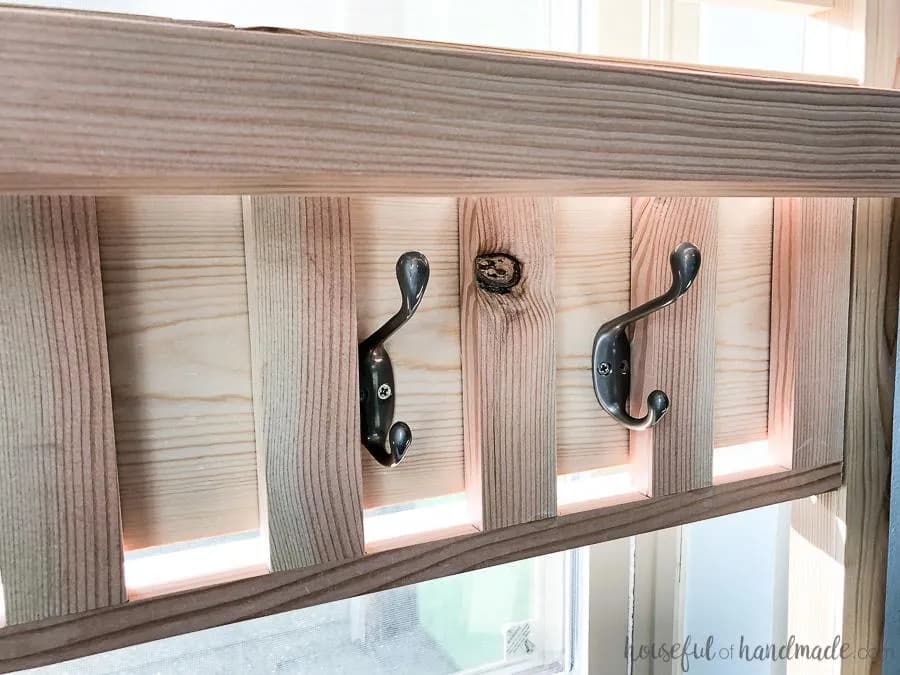
With the top shelf folded down over the second large back support, mark where to add the hooks so that the shelf will be able to fold down over them. Secure with screws.
11Set up mudroom
- To set up the fold-away mudroom, you will need to place the back legs where you want them.
- Pull the front legs up far enough to be able to pull the top shelf through them.
- Then place the front legs back on the floor.
- Place the shelves on top of front leg supports.
- Pull the front leg out at the bottom until the legs lay flat against the floor and the support is at the front of the bottom shelf slats.
12Enjoy!
Hang your extra seasonal gear on the mudroom. I also purchased a drip tray for under the shelf to help contain melting snow. And for more building plans and ideas on how to use your new mudroom shelves, make sure to visit me at Housefulofhandmade.com!