 Notch
Notch- Difficulty
- Easy
- Time
- 2.3–4.3 hours
- Cost
- $$
About this build
This is a great beginner project for anyone who needs some extra storage, wants a place for their plant babies, storage for some books or a place to display their trinkets!
Tools
Essential
- Circular Saw
- Drill / Driver
- Jigsaw
- Miter Saw
- Pocket Hole Jig
Materials
| Item | Qty |
|---|---|
| 1x6x8', .75" x 5.25" x 96" | 3 board |
| Gallery rail, 20.5" including posts | 2 board |
| Kreg pocket screws 1 1/4" | 25 each |
| Super glue | 1 each |
| Stain or paint | 1 each |
| Sandpaper - 80, 120 and 220 | 3 each |
| Wood glue | 1 each |
| Toggle bolts for wall attachment | 2 each |
Overall cost: $$. Lumber prices vary by region, species, and season, so we give a band rather than a figure we would only be pretending to know.
Cut list
| Part | Qty | T × W × L |
|---|---|---|
| Wall shelf sides | 2 | 3/4" × 5 1/4" × 38" |
| Top and bottom | 2 | 3/4" × 5 1/4" × 21 1/2" |
| Shelves | 2 | 3/4" × 5 1/4" × 21 1/2" |
| Decorative Top | 1 | 3/4" × 4" × 21 1/2" |
| Wall attachment Piece | 1 | 3/4" × 2 1/2" × 21 1/2" |
What to buy
Buy 4 boards at 8 ft.
3/4" × 5 1/4"
2 boards
3/4" × 4"
1 board
3/4" × 2 1/2"
1 board
Assumes 8 ft stock, a 1/8" saw kerf, and buying each part at its own width. Change the board size or kerf on the full board plan →
Instructions
11
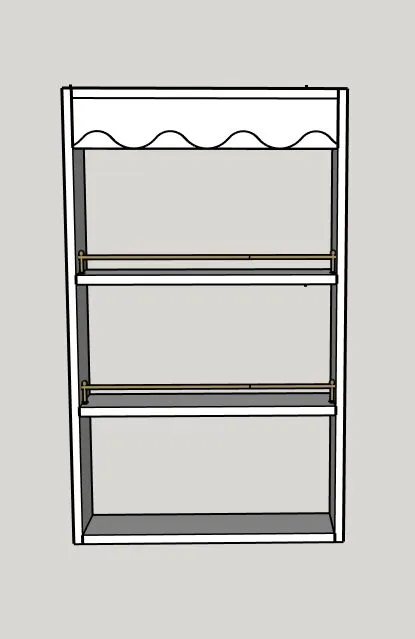
Attach the top and bottom pieces to the sides of the shelf with pocket holes and wood glue. The pocket holes should be facing up at the top and down at the bottom.
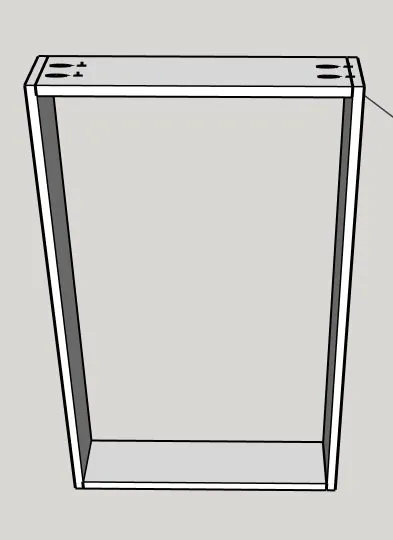
22
- Cut out the decorative top piece with a jigsaw. I used random circular objects I had around the house to create the wave but you can really make any design you like for the top!
- Attach the decorative top to the top of the shelf, underneath the top piece with wood glue and pocket screws.
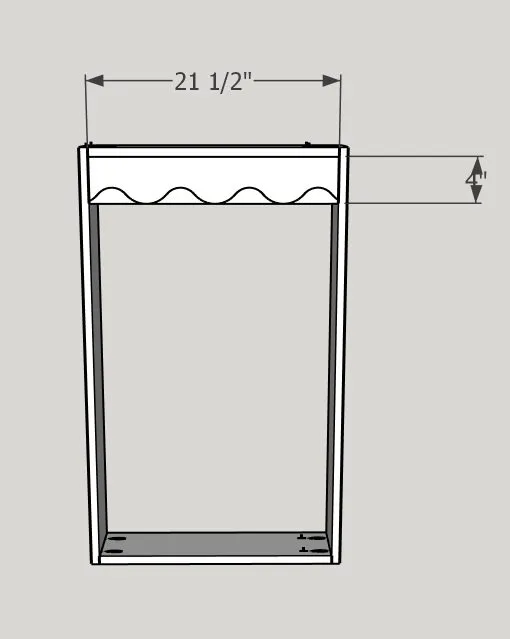
33
Attach the shelves the same distance apart, measuring from the bottom of the decorative top piece. Using a spacer block will make this step a lot easier! Make sure the pocket holes are facing the bottom and screw the shelves into the sides with pocket holes and wood glue.
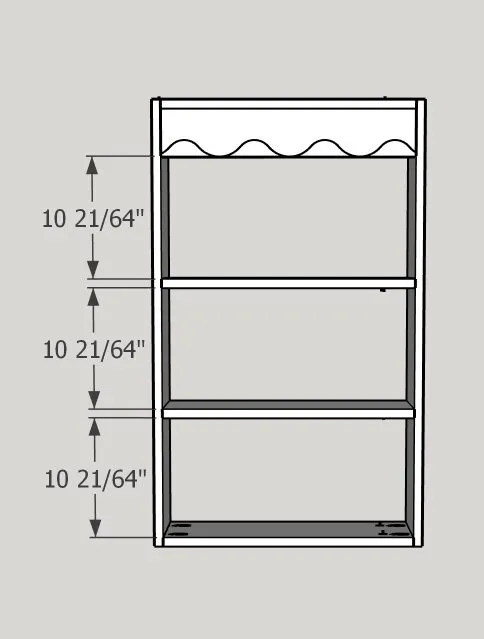
44
Screw in the wall shelf attachment to the back of the shelf with wood glue and pocket screws. The wall shelf attachment should be 2.5" wide to allow room to screw into the wall.
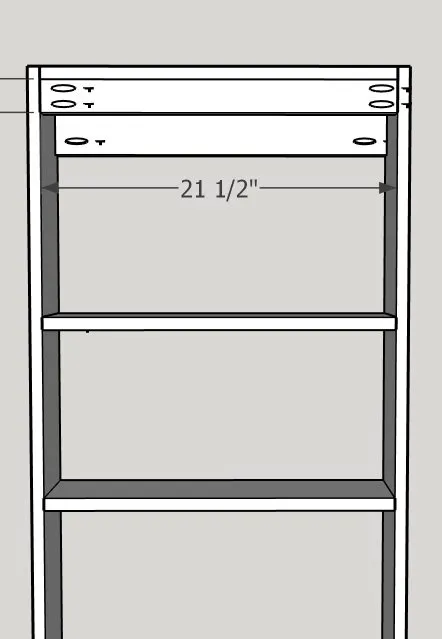
55
Sand from 80, to 120 and then 220. Finish with your favorite paint, stain and finish for durability.
66
- Glue the gallery rails to the two middle shelves. Use a dab of super glue and set the gallery rails about 1/2" back from the front of the shelves.
- Leave them to try overnight. This step is optional but definitely adds to the vintage charm of this shelf!
Tip: And that's it! You've built the cutest little floating storage shelf.
Tags
- Storage Shelves
- Beginner
Reviews & builds
No reviews yet
Sign in to review this plan or share your build.
No reviews yet. Be the first to build this.