 Notch
Notch- Difficulty
- Easy
- Time
- 3–5.8 hours
- Cost
- $$
About this build
This great-looking table makes a great addition to a hallway, entry, or anyplace else you want to add some elegant style without taking up too much space. The construction makes the top appear to “float” over the base. You could even modify it for use as a sofa table by making the legs 6" shorter.
Tools
Essential
- Drill / Driver
- Jigsaw
- Miter Saw
- Pocket Hole Jig
- Random Orbit Sander
Optional / nice to have
- Bar / Pipe Clamps
- Tape Measure
Materials
| Item | Qty |
|---|---|
| Board, 1x4 96" | 2 board |
| Board, 1x6 96" | 1 board |
| Board, 1x6 48" | 1 board |
| Board, 2x2 60" | 4 board |
| 1 1/4" coarse pocket hole screws | 46 each |
Overall cost: $$. Lumber prices vary by region, species, and season, so we give a band rather than a figure we would only be pretending to know.
Cut list
| Part | Qty | T × W × L |
|---|---|---|
| Leg | 4 | 1" × 1" × 34" |
| Short Rail | 2 | 3/4" × 3" × 13" |
| Long Rail | 2 | 3/4" × 3" × 42" |
| Top Support | 3 | 3/4" × 3" × 14" |
| Top Boards | 3 | 3/4" × 5" × 45" |
What to buy
Buy 6 boards at 8 ft.
1" × 1"
2 boards
3/4" × 5"
2 boards
3/4" × 3"
2 boards
Assumes 8 ft stock, a 1/8" saw kerf, and buying each part at its own width. Change the board size or kerf on the full board plan →
Instructions
1Cut the Legs
Cut four Legs to length from 2x2 boards (we used clear pine), as shown in the cutting diagram.
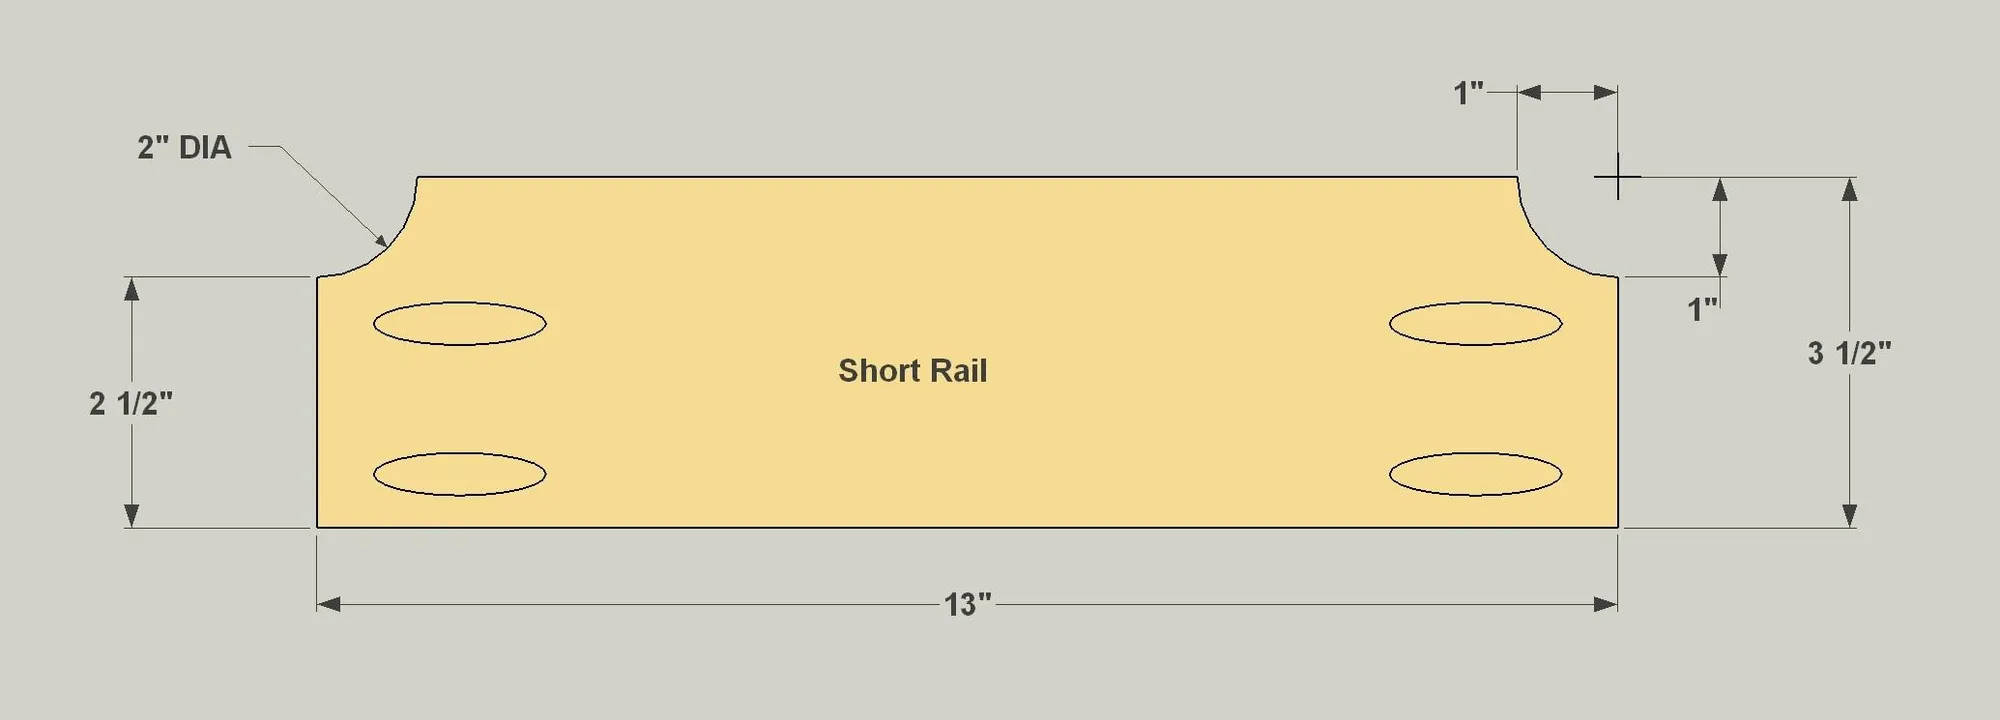
2Make Short Rails
- Cut two Short Rails Legs to length from a 1x4 board, as shown in the cutting diagram.
- Then, use a compass to lay out the arcs in the upper corners, as shown.
- Cut the arcs with a jig saw, and then sand them smooth. With your pocket hole jig set up for 3/4" material, drill pocket holes where shown.
3Make Long Rails
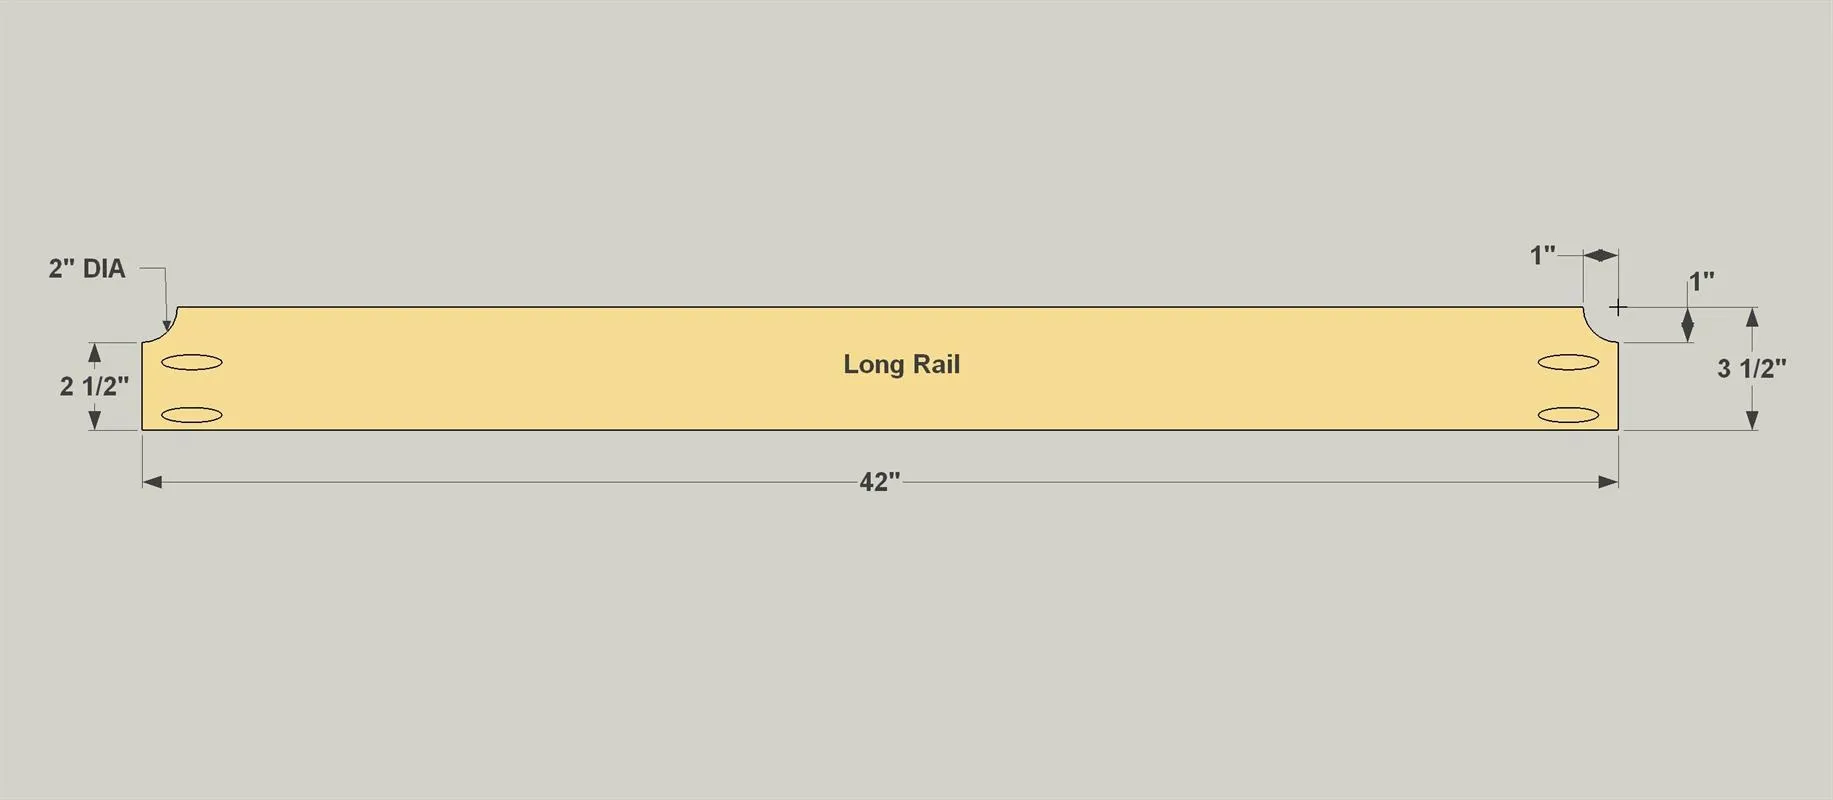
- Cut two Long Rails Legs to length from a 1x4 board, as shown in the cutting diagram.
- Then, use a compass to lay out the arcs in the upper corners, as shown.
- Cut the arcs with a jig saw, and then sand them smooth. With your pocket hole jig set up for 3/4" material, drill pocket holes where shown.
4Attach the Short Rails
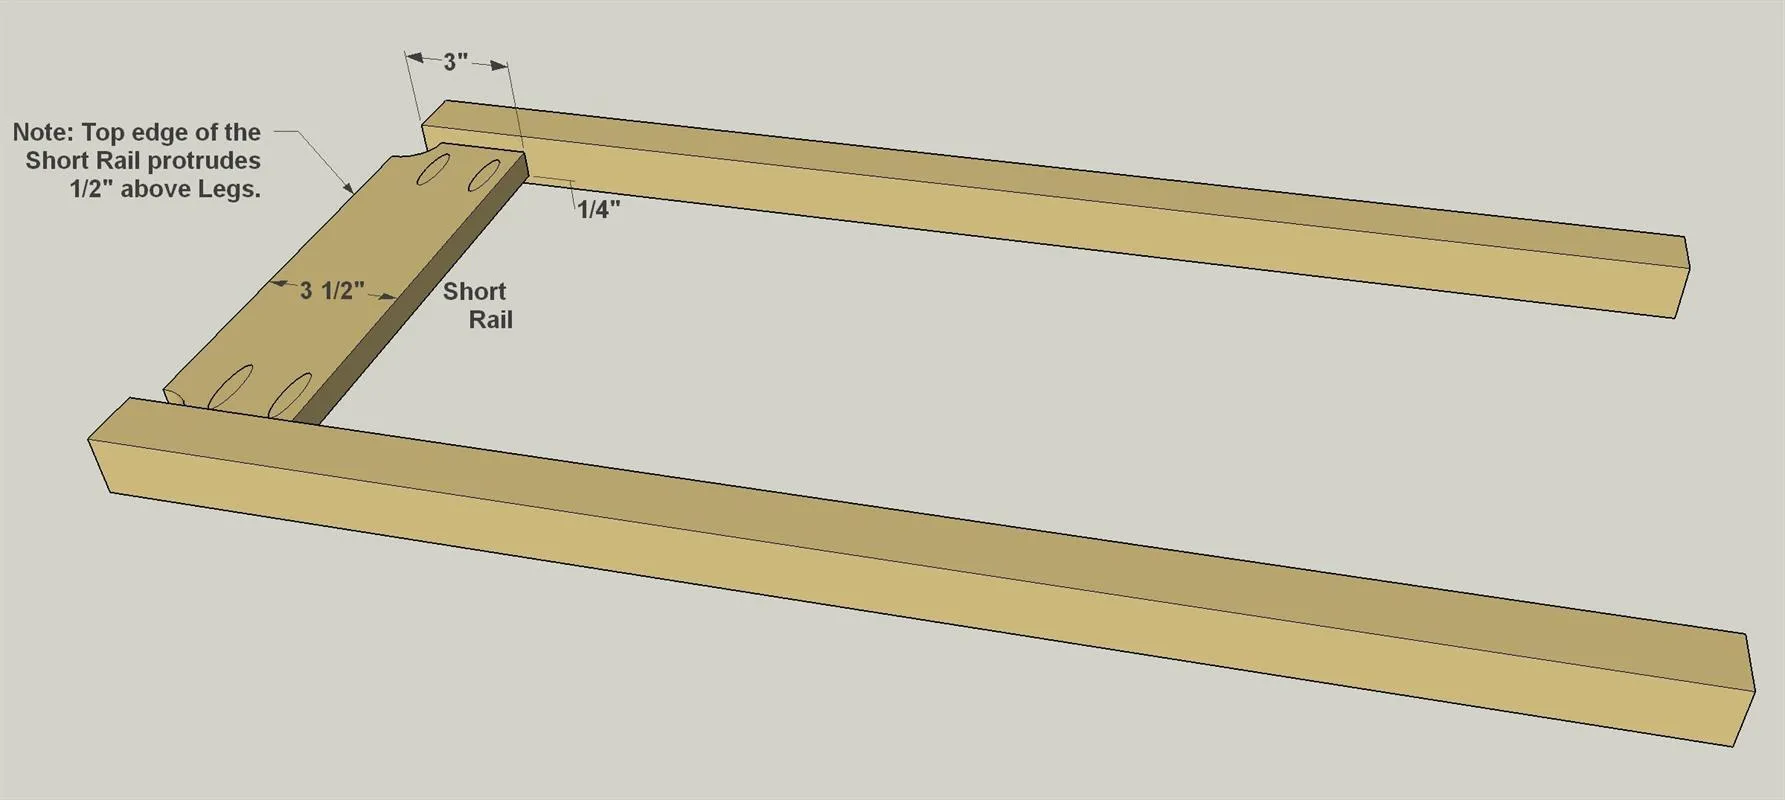
Now you can attach the Short Rails to the Legs using 1 1/4" pocket hole screws. Use coarse-thread if you’re building from a softwood like pine, and fine-thread if you are building from a hardwood, such as oak or maple. Note that the Rails are set in 1/4" from the outside face of the Legs.
5Attach the Long Rails
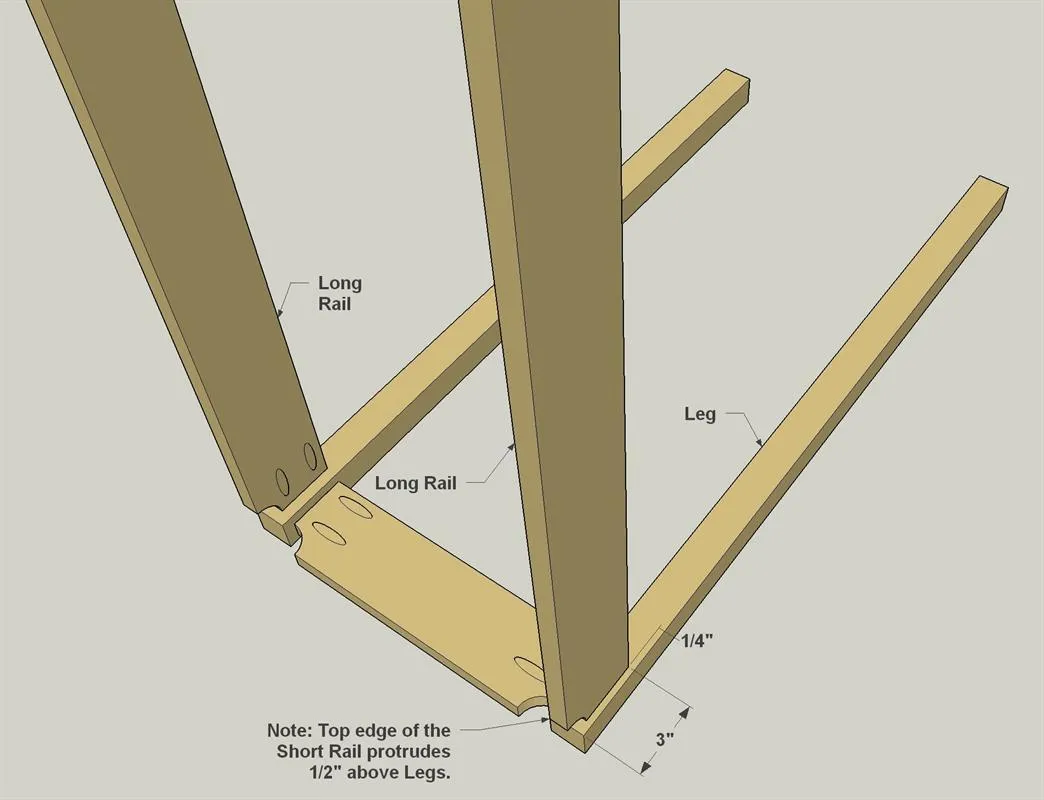
Next, attach the Long Rails to the Legs to complete the main table base. Again, use 1 1/4" pocket hole screws, and make sure that the Rails are inset 1/4" from the outside face of the Legs.
6Make the Top Supports
Cut three Top Supports to length from a 1x4 board, as shown in the cutting diagram. With your pocket hole jig set up for 3/4" material, drill pocket holes in the Top Support where shown.
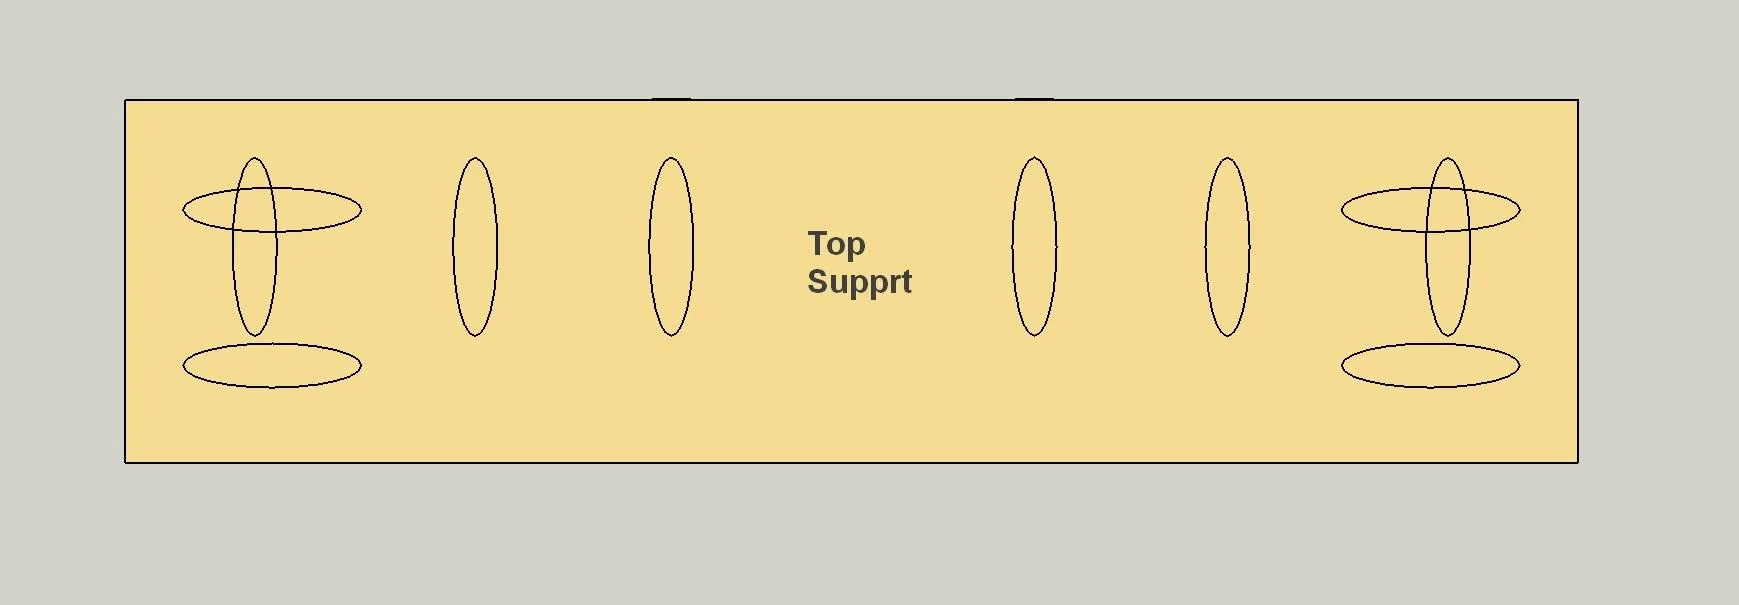
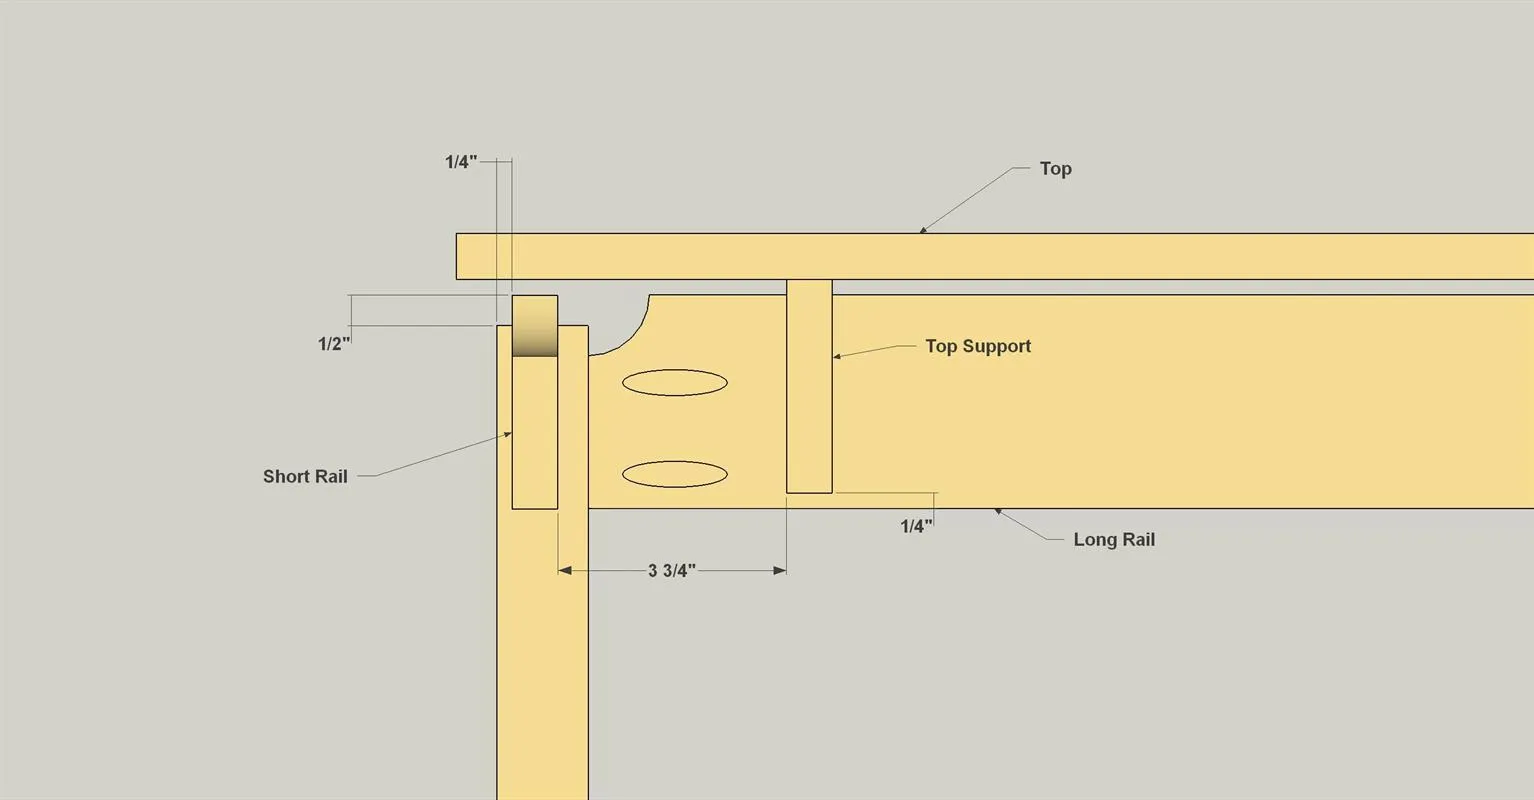
7Attach the Top Supports
Now you can attach the Top Supports to the Rails, as shown, using 1 1/4" pocket hole screws. Note that the supports are positioned 1/4" above the Long Rails.
8Make the Top
Cut three Top pieces to length from 1x6 boards (we used soft maple), as shown in the cutting diagram. Before you attach the Top, now is a good time to stain, paint, or finish the Top pieces and the base. This is especially true if you plan to do a painted base and natural top, as we did.
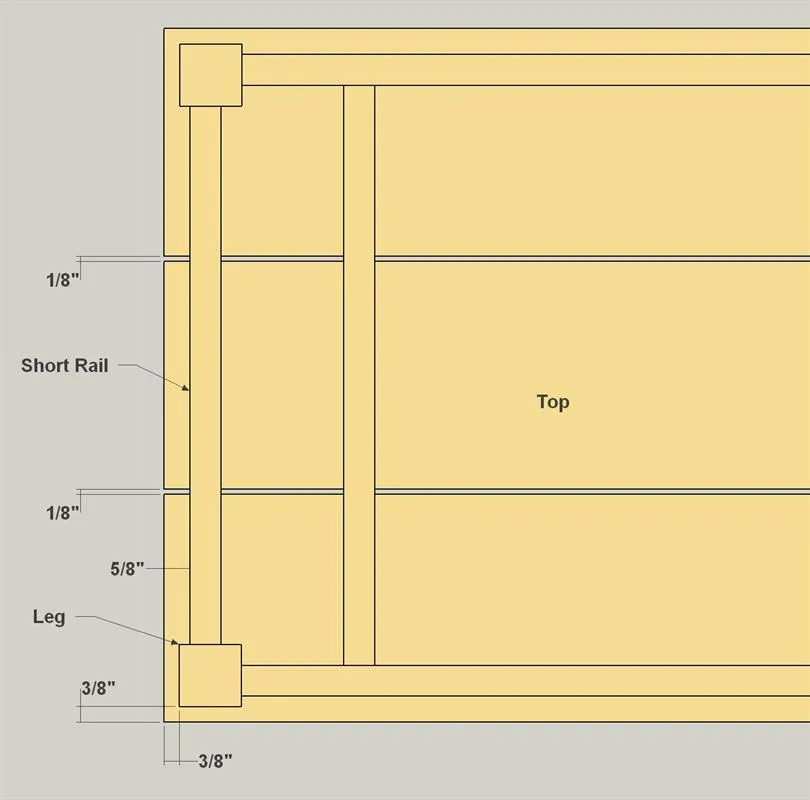
9Attach the Top
Now you can attach the Top, as shown, using 1 1/4" pocket hole screws. The easiest way to do this is to lay the Top pieces face down on a flat surface, then position the table base upside down on them. That makes it easy to check all of the overhangs and the gaps between boards.
Tags
- Tables
- Beginner
Reviews & builds
No reviews yet
Sign in to review this plan or share your build.
No reviews yet. Be the first to build this.