 Notch
NotchFaux Raised Panel Twin Bed
Step-by-step build — 10 steps. Also available as a print sheet.
1Cut out bed parts
Follow the cut diagram and cut list, cut the parts for the bed. Wait to cut the molding until the headboard and foot board are assembled.
2Assemble Headboard
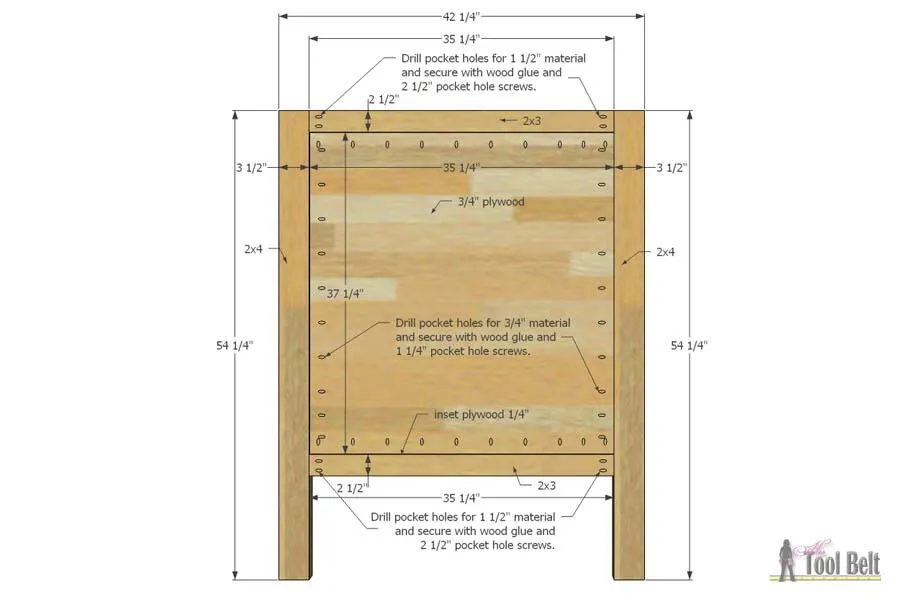
- Drill pocket holes for 1 1/2" material in both ends of the headboard rails.
- Drill pocket holes for 3/4" material in the backside of headboard panel. Secure the headboard panel to the headboard rails with wood glue and 1 1/4" pocket hole screws, inset the panel 1/8"-1/4". Secure the headboard rails to the headboard legs with wood glue and 2 1/2" pocket hole screws. Secure the headboard panel to the headboard legs with wood glue and 1 1/4" pocket hole screws, inset the panel 1/8"-1/4".
3Assemble Foot Board
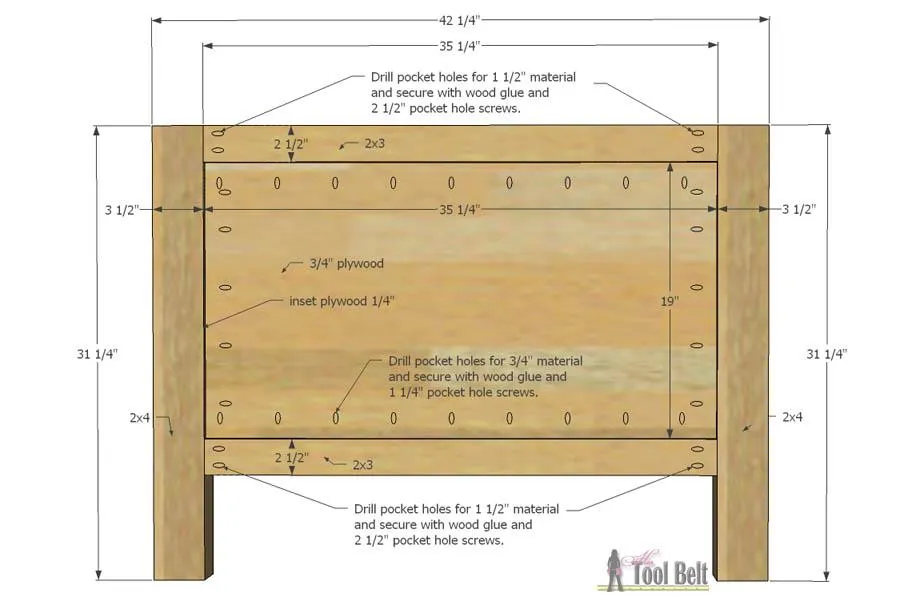
- Drill pocket holes for 1 1/2" material in both ends of the footboard rails.
- Drill pocket holes for 3/4" material in the backside of footboard panel. Secure the footboard panel to the footboard rails with wood glue and 1 1/4" pocket hole screws, inset the panel 1/8"-1/4". Secure the footboard rails to the footboard legs with wood glue and 2 1/2" pocket hole screws. Secure the footboard panel to the footboard legs with wood glue and 1 1/4" pocket hole screws, inset the panel 1/8"-1/4".
4Headboard Panel Molding
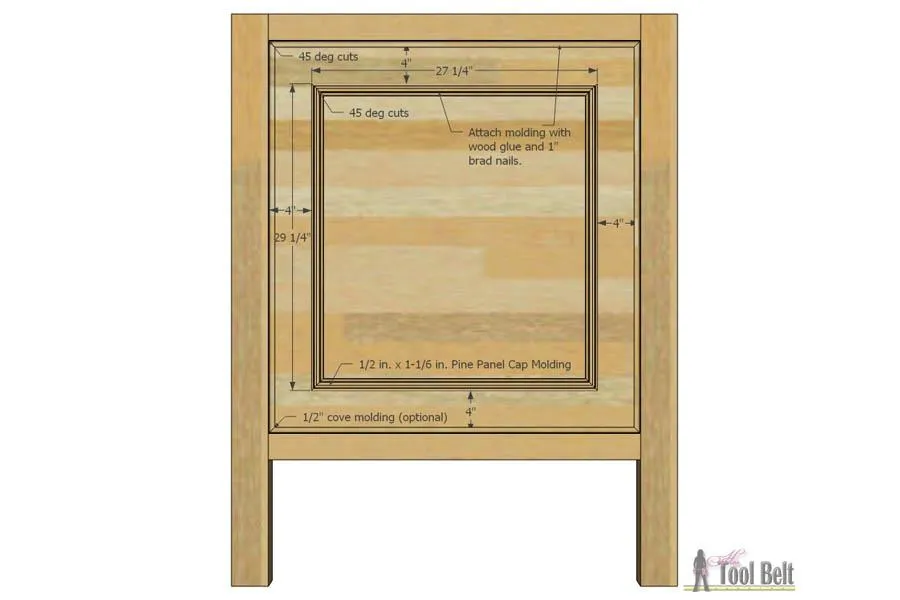
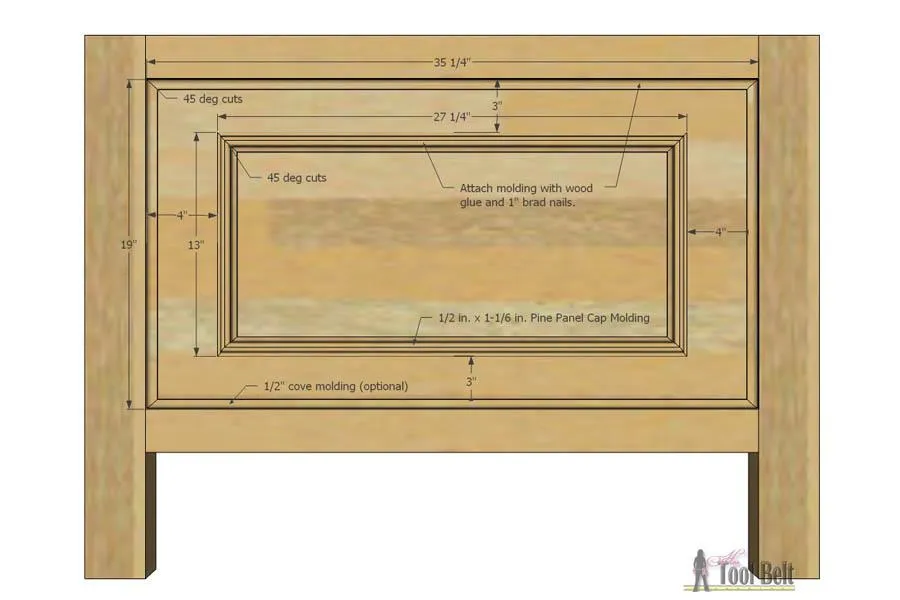
- Cut the panel molding, hb panel molding and fb panel molding (all molding cuts are on a 45 deg angle).
- Measure/mark in 4" from each side of the headboard panel. Use wood glue and 1" brad nails to secure the molding to the panel. Optional cove panel molding - cut to fit 1/2" cove molding to the outside perimeter of the headboard panel. Use wood glue and 1" brad nails to secure the molding to the frame/panel. Cove molding is easy to DIY with a router table and cove router bit.
5Foot Board Panel Molding
Measure/mark in 4" from each side of the footboard panel and 3" from the top/bottom. Use wood glue and 1" brad nails to secure the molding to the panel. Optional cove panel molding - cut to fit 1/2" cove molding to the outside perimeter of the footboard panel. Use wood glue and 1" brad nails to secure the molding to the frame/panel.
6Attach Tops
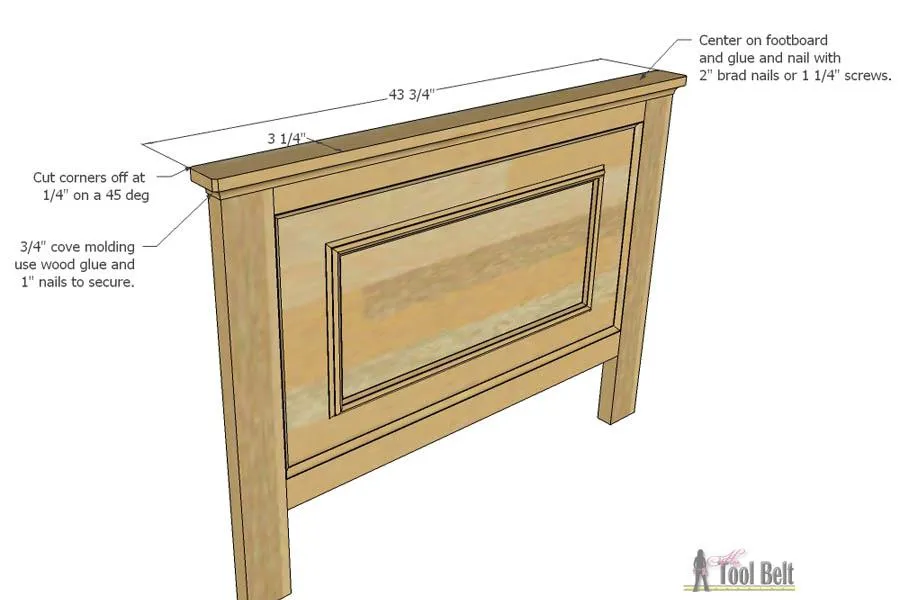
To add a little style, trim 1/4" on a 45 deg off of the top board corners. Center the top board on the headboard or foot board then glue and secure with 2" brad nails or 1 1/4" screws. Optional top cove molding - cut to fit 3/4" cove molding under the top board around the perimeter of the headboard/foot board. Use wood glue and 1" brad nails to secure the molding in place. Cove molding is easy to DIY with a router table and cove router bit.
7Bed Rail Trim - Optional
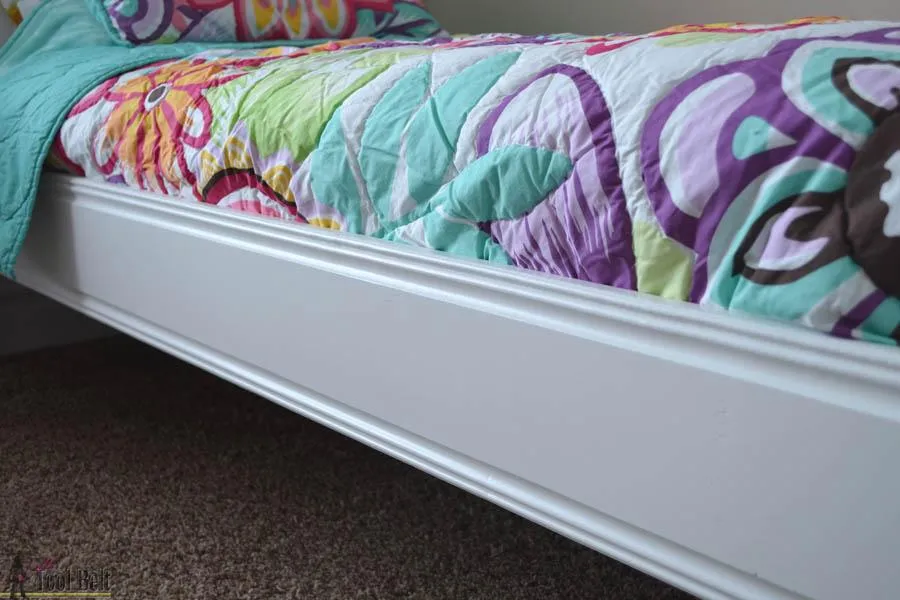
I added some detail to the bed rail by routing a shape on the top and bottom of the bed rail boards. Another idea to add detail would be adding trim/molding to the top and bottom of the bed rail. The bed rail can also be left plain.
8Bed Rail Assembly
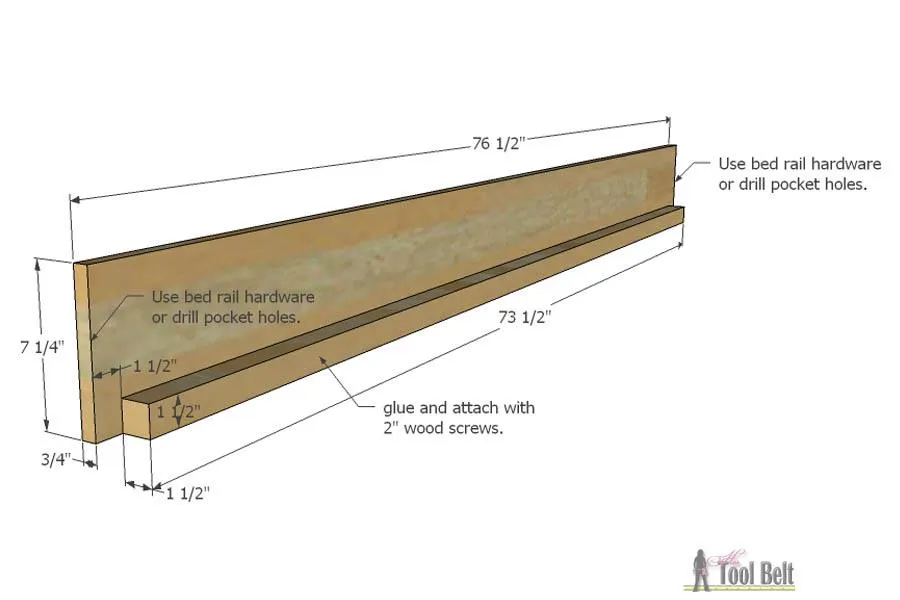
Pre-drill holes in the rail support. If using bed rail hardware, offset the rail support from the bed rail end approximately 1 1/2". Use wood glue and 2" screws to attach the rail support to the bed rail. If using bed rail hardware, attach it to the bed rail, or drill pocket holes in the ends of the bed rails.
9Bed Assembly
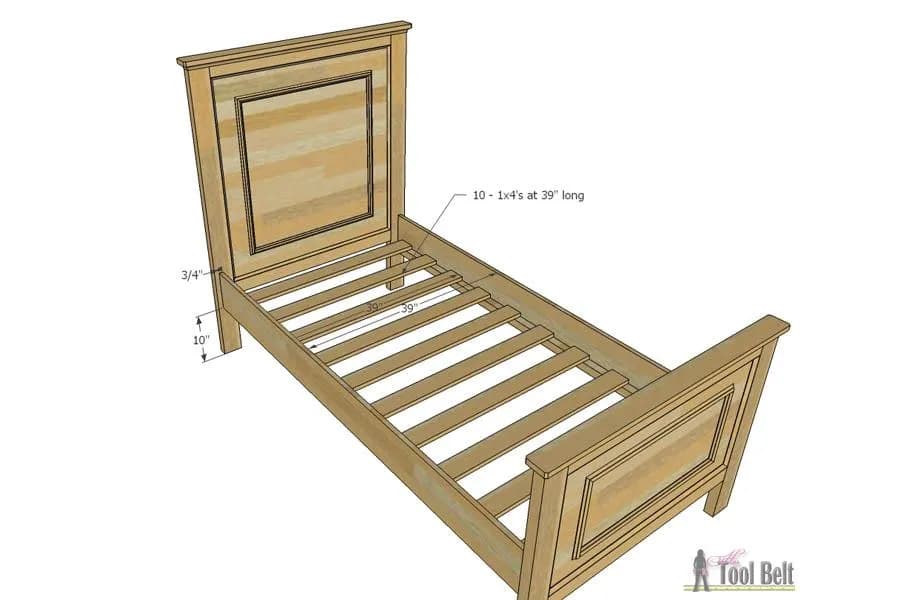
- On the headboard and foot board, measure/mark 10" up from the bottom of the legs and 3/4" in from the outside leg edge.
- Attach the bed rail hardware to the legs, or secure bed rails with pocket hole screws. (Adjust the bed height to your needs). Evenly spread out the mattress slats across the rail support, if needed, temporarily secure the mattress slats to the rail support with 1 1/4" brad nails.
- Place a twin mattress on the mattress slats and enjoy!
10Apply Finish
- Use wood filler to fill any cracks, nail holes, pocket holes or blemishes and allow to dry.
- Sand the bed until smooth, finishing with 120-150 grit sandpaper.
- Paint or stain the bed as desired.