Notch
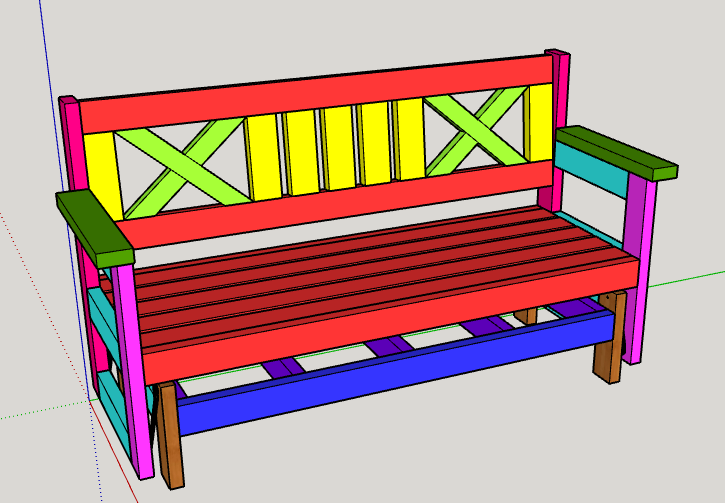
NotchFarmhouse Outdoor Glider Bench
Step-by-step build — 14 steps. Also available as a print sheet.
1Step 1
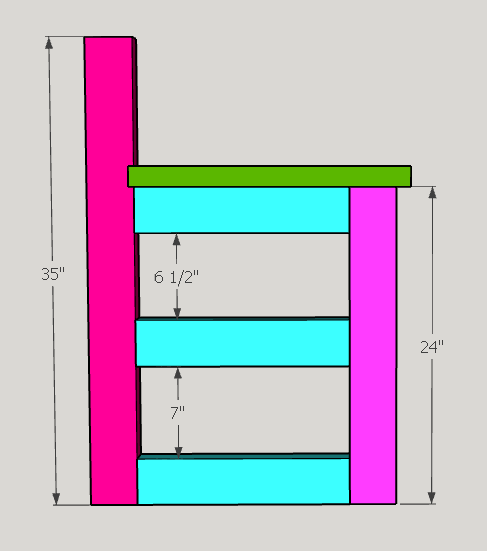
- Assemble two pairs of Arm Frames.
- Drill pocket holes in the 16" pieces.
- Start by adding the bottom 16" piece to the 35" piece and the 24" piece using wood glue and 2 1/2" Pocket Hole Screws.
- Next add the middle and top 16" pieces the same way. See picture for spacing.
- Next add the arm rest to the top of the arm frame. Pre-drill, glue and secure with (3) 2" screws centered on the top of the arm rest. Make sure to mirror the second arm frame so that the pocket holes are on the inside of both frames.
2Step 2
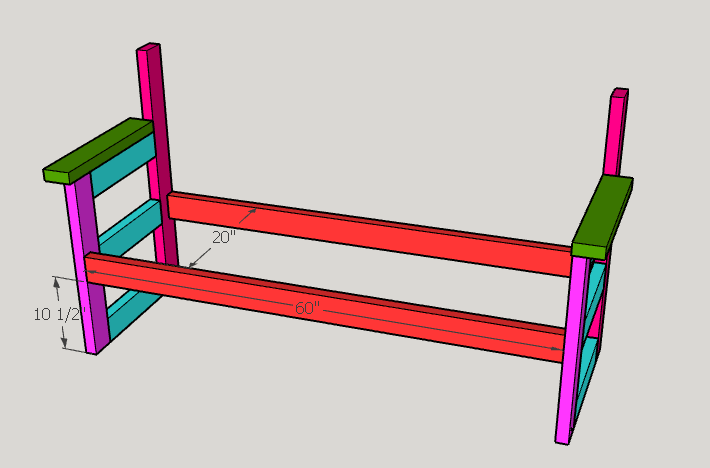
- Start to assemble the frame of the bench seat.
- Drill pocket holes on (2) 60" pieces.
- Attach with wood glue and 2 1/2" Pocket Hole Screws.
3Step 3
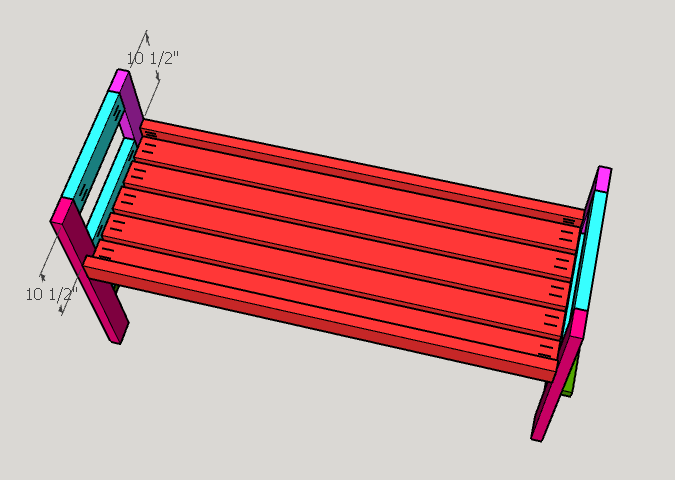
- Next drill pocket hole screws in the bench slats.
- Attach to the frame with wood glue and 2 1/2" Pocket Hole Screws from the bottom side of the bench.
- Space the slats evenly. About 5/8" apart.
4Step 4
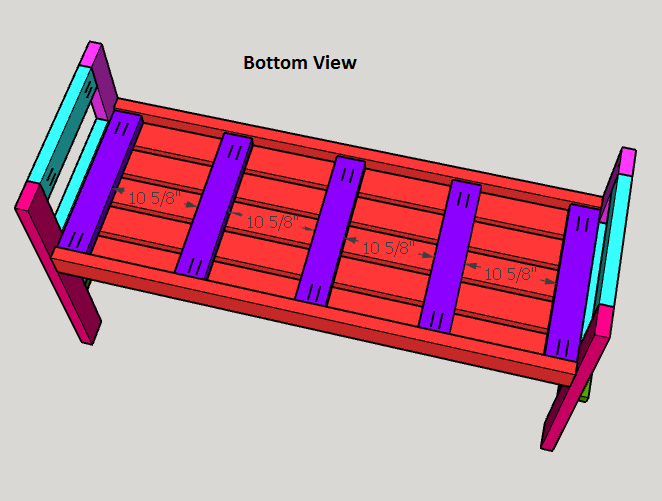
- Add the seat bracing. (5) 20" boards.
- Attach with wood glue and 2 1/2" Pocket Hole Screws.
- Space approximately 10 5/8" apart.
5Step 5
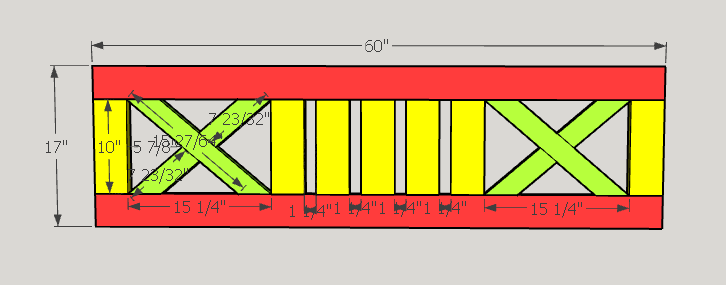
- Assemble the back rest of the bench.
- Start with the outer frame.
- Attach with glue and 2 1/2" Pocket Hole Screws.
- Then move to the inside pieces.
6Step 6
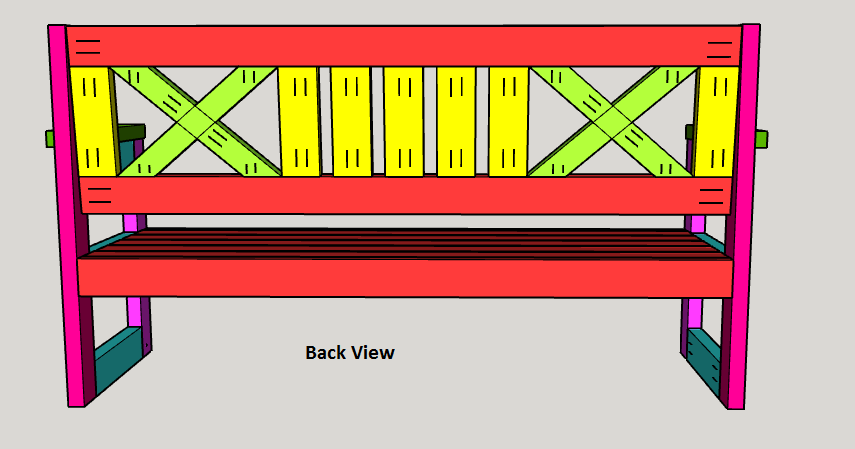
See image for location of pocket hole screws
7Step 7
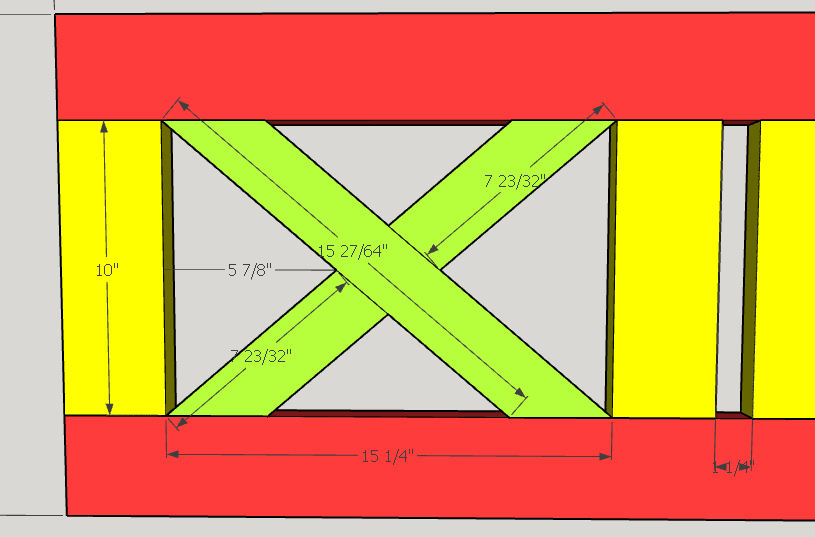
- X pieces are cut on a 45 degree angle.
- Measure and cut to fit. I cut the long 18" pieces down to the correct angle. Secure with pocket hole screws.
- Then add the two smaller pieces. See picture for reference. The 10" pieces in the middle are spaced 1 1/4" apart. ***You may also change the design to the back to have all up and down pieces instead of two X sections.
8Step 8
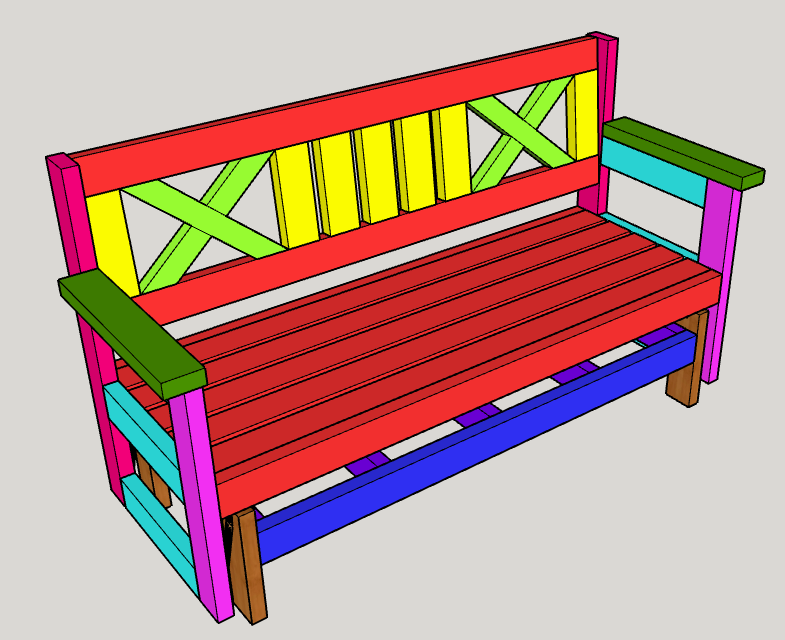
Attach the back rest to the bench frame. The top should be flush to the top of the back legs. The seat back is attached at and angle. The back rest is approx. 1/2" inset from the back. The bottom of the back rest is flush to the front of the back leg. See picture for reference.
9Step 9
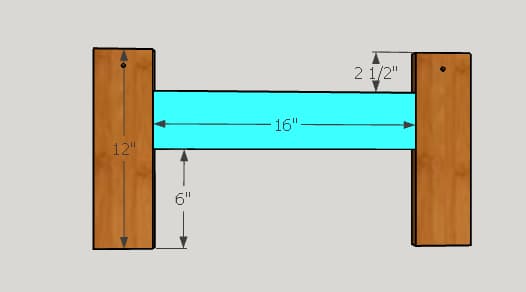
Assemble the base sides. Qty of 2. Use wood glue and 2 1/2" Pocket Hole Screws.
10Step 10
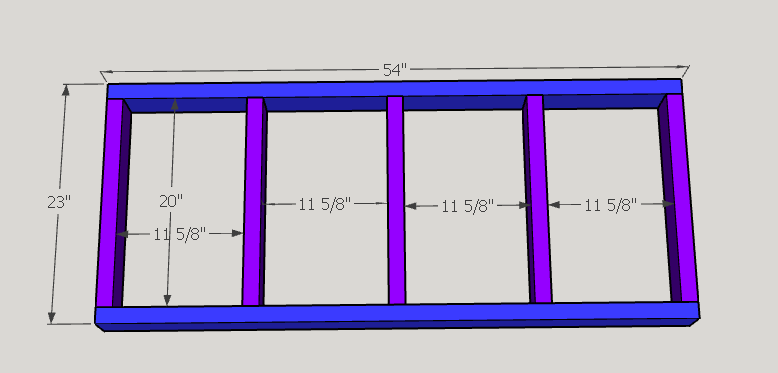
- Assemble the base inside frame.
- Attach each piece with 2 1/2" Pocket Hole Screws. Spaced approx. 11 5/8" apart.
11Step 11
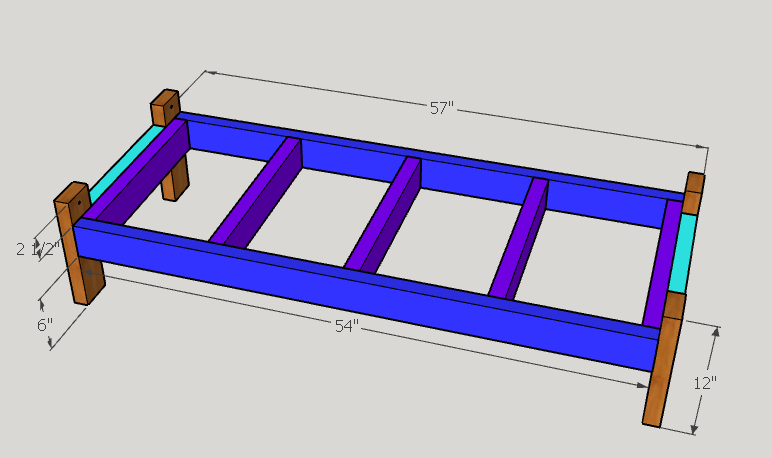
Attach inside base frame to side frames. Pre-drill and attach with 2" Screws from the inside.
12Step 12
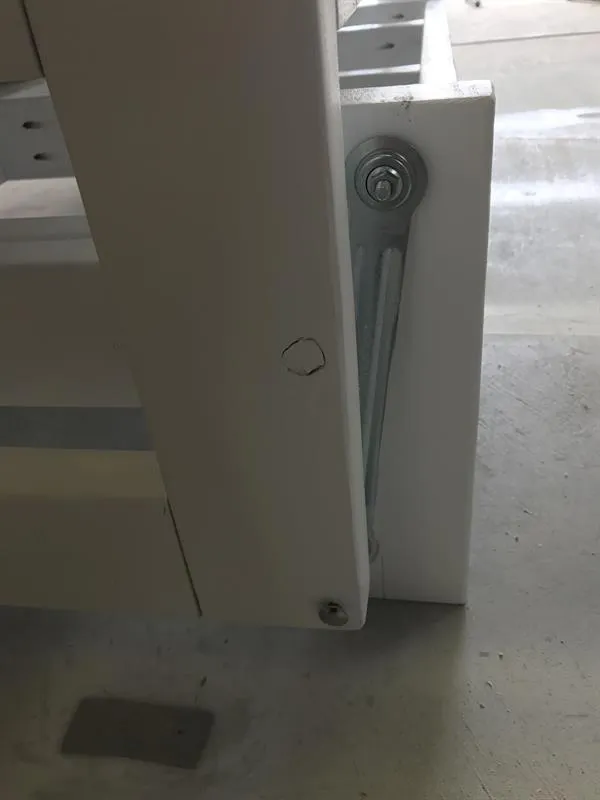
Attach glider brackets. Pre-drill with 1/4" drill bit. The top hole is attached to the base upright. Make hole 1 3/4" in and 1 1/4" down from the top. The bottom hole is pre-drilled into the back leg of the bench. It is 5/8" from the back of the leg and 3/4" up from the bottom of the leg. Use 1/4" 2 1/2" long carriage bolts and 1/4" nylock nut to secure.
13Step 13
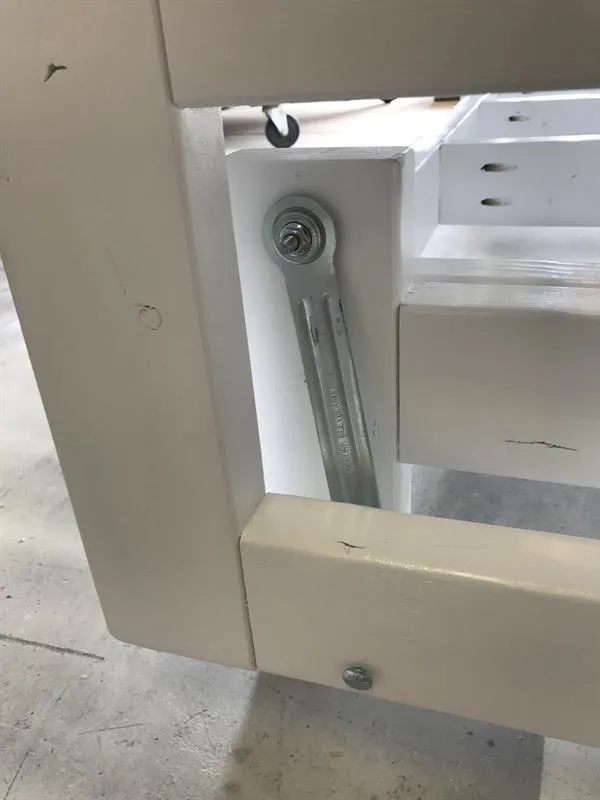
- Attach front glider bracket. The top is attached to the base. Pre-drill hole with 1/4" bit at 1 3/4" in from the side and 1 1/4" down from the top. The bottom of the bracket is attached to the bench base on the bottom stretcher. It is 5 5/8" from the front of the bench and 5/8" from the bottom of the bench.
- Attach with carriage bolts and nylock nut.
14Step 14
Sand, fill holes with wood filler or pocket hole plugs, stain or paint in desired finish. Sit back and enjoy your new glider.