 Notch
NotchFarmhouse Bench
Step-by-step build — 18 steps. Also available as a print sheet.
1Look Over the Project
Before you start building your bench, review the procedures, materials list, and cutting diagram. You’ll see that most parts of the base get doubled up. This makes the bench stronger and adds to the traditional farmhouse look. But, it allows you to build everything from standard “1-by” boards. This also allows you to assemble the base using Kreg pocket-hole joinery, and then hide the pocket holes. Because of this, you’ll make multiples of many pieces, but only drill pocket holes in some of them. This will be easy to understand as you read through the steps. Speaking of pocket holes, we used fine-thread screws for our alder hardwood. You can learn more about choosing screws in the How-To video below.
2Make the Legs
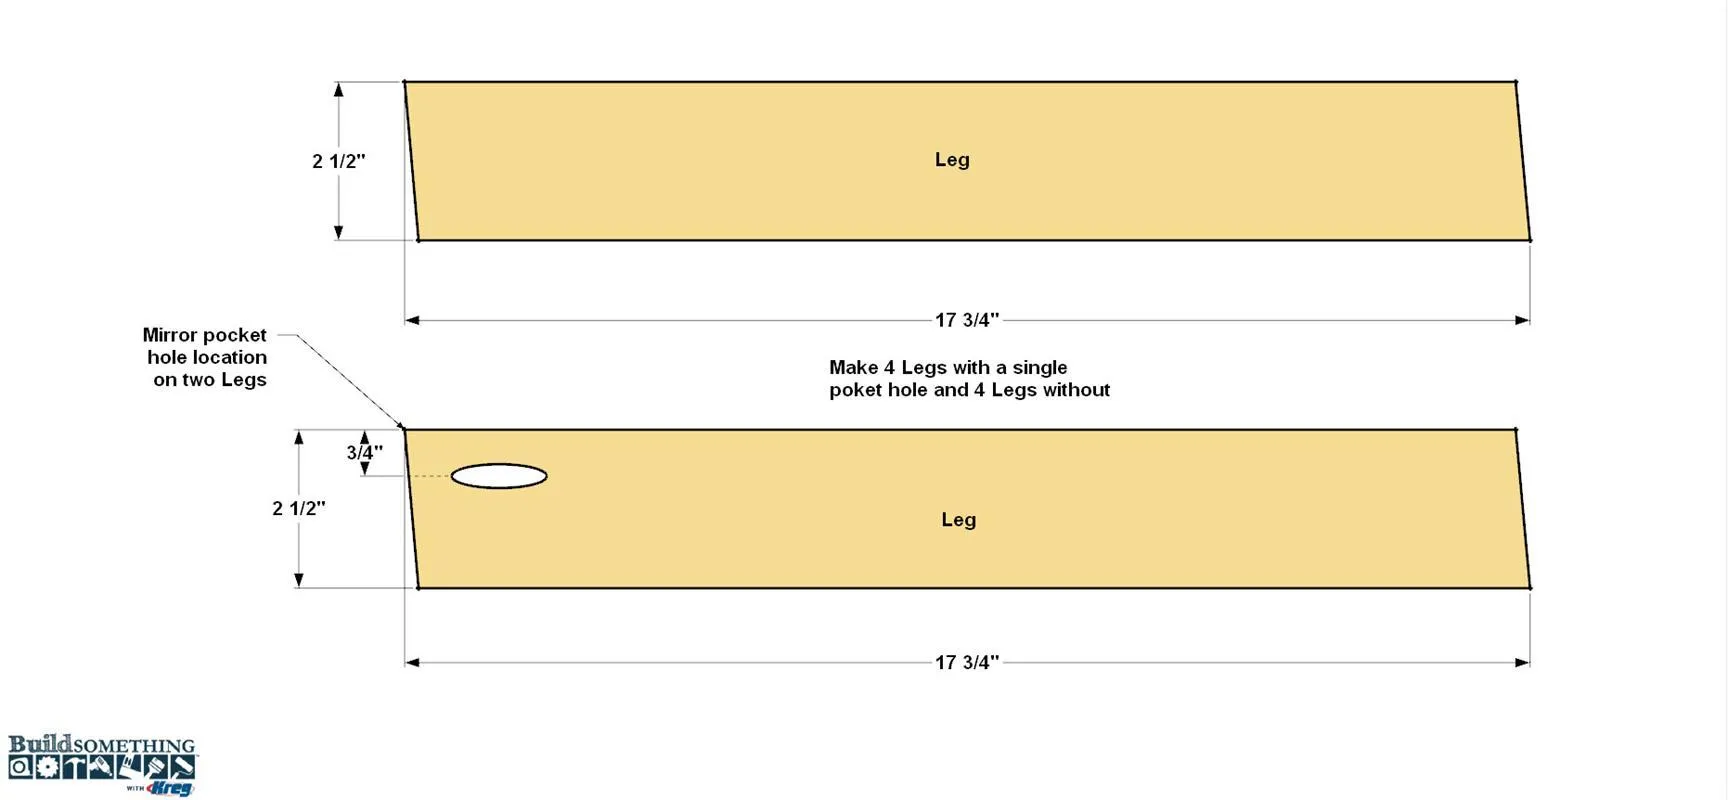
Set your miter saw to a 5° miter angle, and then cut eight Legs to length from 1x3 boards, making sure to cut the ends at parallel 5° angles, as shown in the cutting diagram. The easiest way to make sure you’re cutting them all to the same length is to use a stop, as shown in the How-To video below. Later, you’ll double up these parts to form four thick legs. For now, though, you can set four of the Legs aside. On the other four, drill a single pocket hole at the center of one end, as shown. To do that, set your Kreg Jig for 3/4"-thick material (the setting you’ll use throughout this project and then drill the holes. After you drill the holes, sand all eight Legs smooth.
3Make the Short Rails
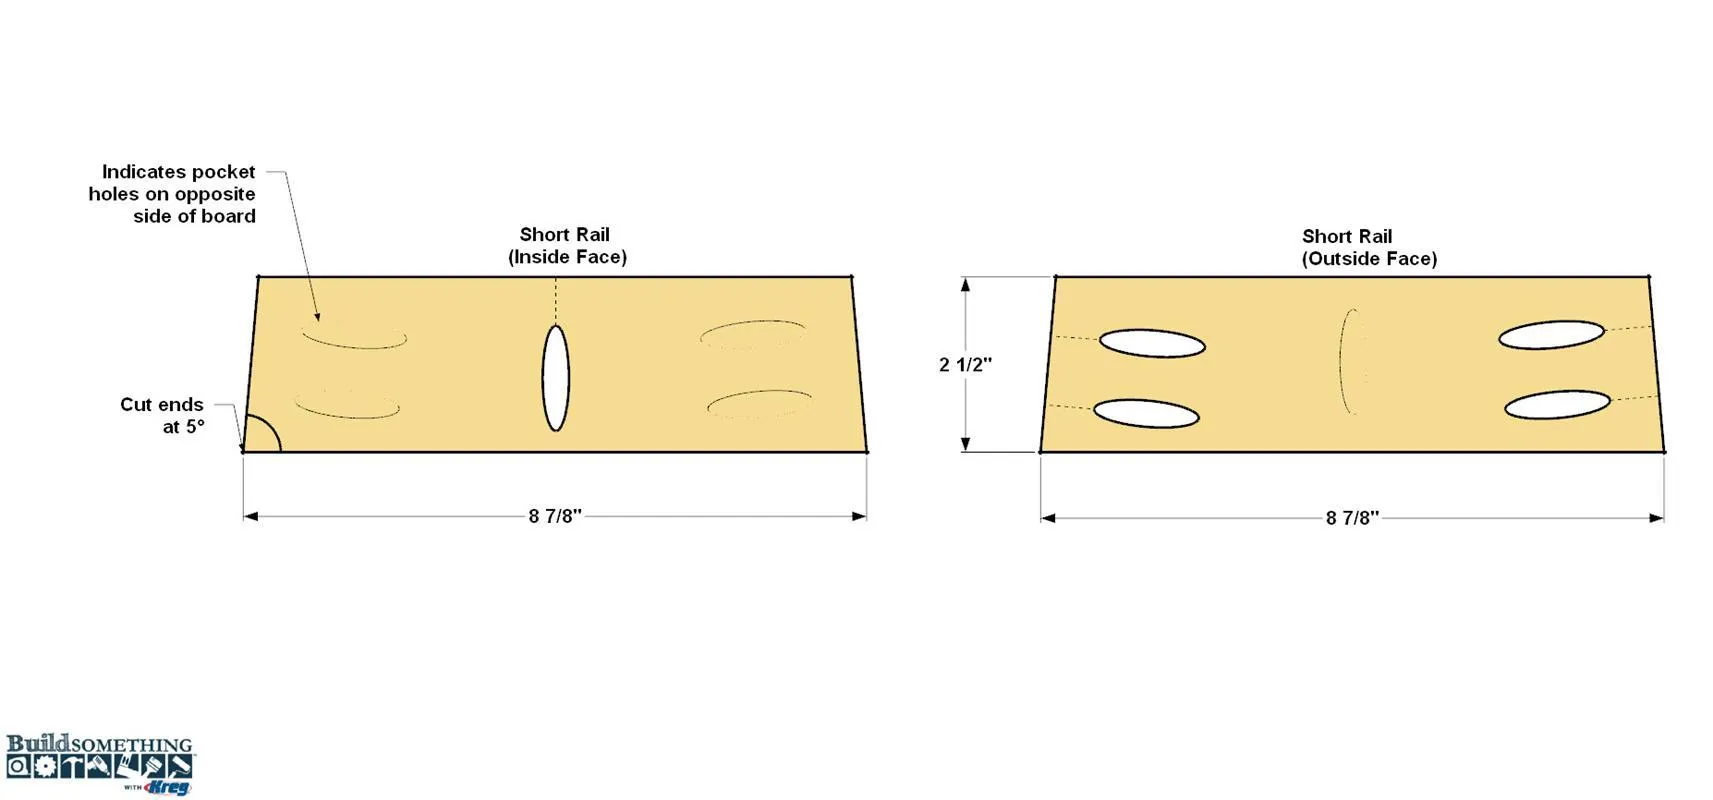
- Cut four Short Rails to length from 1x3 boards, as shown in the cutting diagram. The ends of these pieces are cut at 5°, as well, but this time make sure that you cut them so that the angles are opposing, as shown, instead of parallel. You can set two of the Short Rails aside. They won’t need pocket holes. For the other two, drill pocket holes where shown. You’ll drill holes at the ends on one face.
- Then flip the pieces over and drill holes along the shorter edge. Later, these holes on the edge will be used to attach the bench top. After you drill the holes, you can sand all the Rails.
4Make the End Stretchers
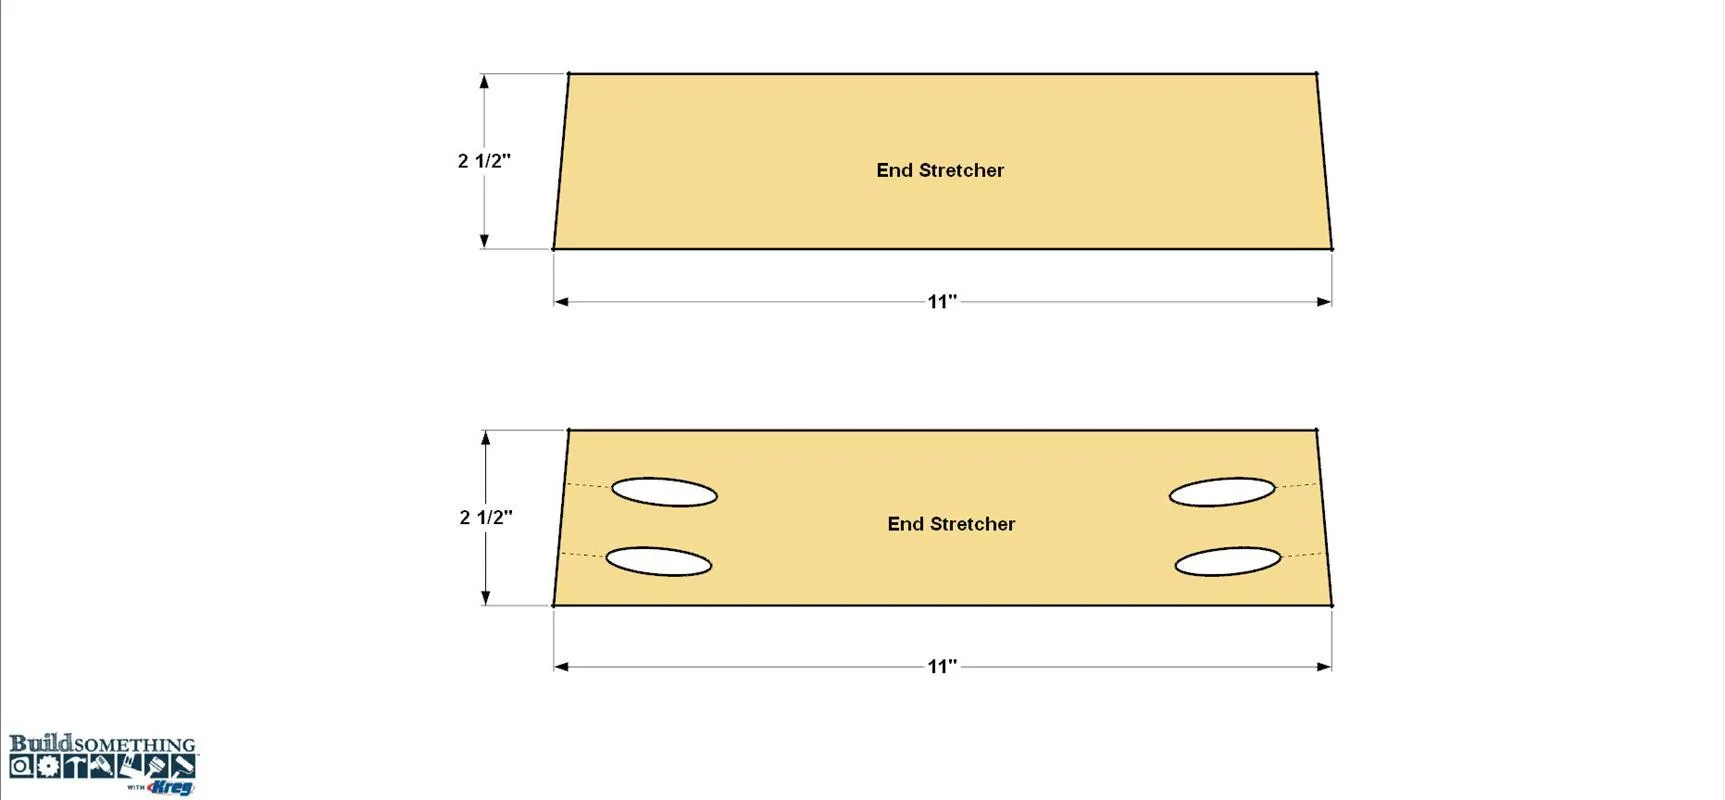
- Now you can cut four End Stretchers to length from 1x3 boards, as shown in the cutting diagram. Again, these have opposing 5° angles on the ends.
- Set two of the End Stretchers aside, and then drill pocket holes at the ends of the other two, as shown. There are no pocket holes on the other face of these pieces.
- Sand the Stretchers smooth.
5Assemble the Ends
- Gather the short Rails and End Stretchers that have pocket holes, as well as the four Legs that have a pocket hole in the end.
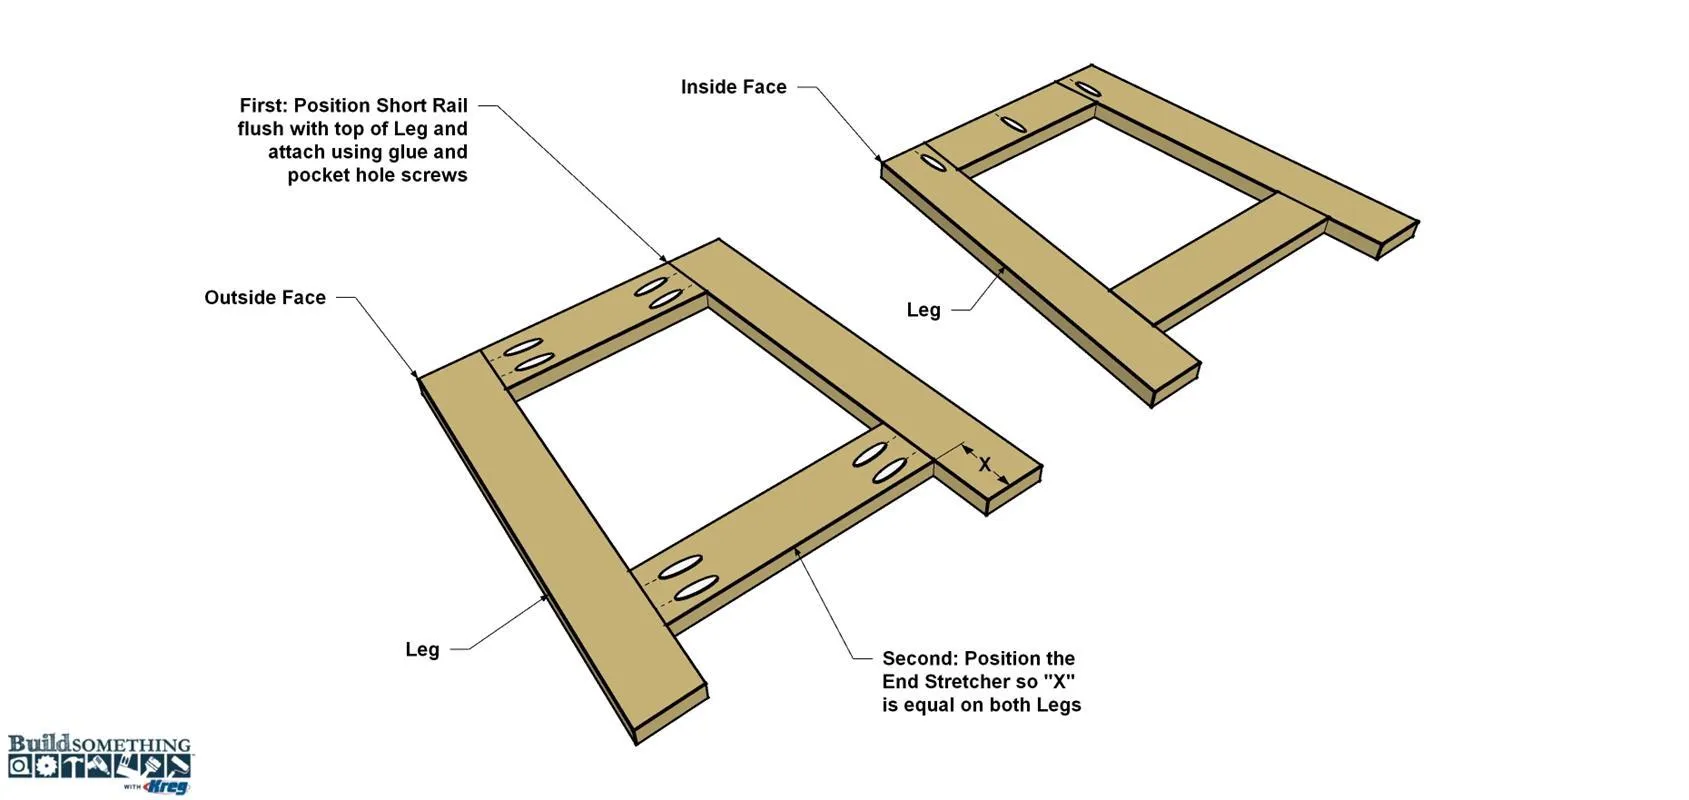
- Position two Legs against one Short Rail, as shown in the left side of the drawing. The pocket holes at the ends of the Short Rail should face up, and the pocket hole at the end of each Leg should face down.
- Attach the Short Rail to the Legs using glue and 1 1/4" Kreg Screws.
- Clamp the pieces during assembly to keep the joints flush. The How-To video below explains more.
- Next, position the End Stretcher as shown, apply glue to the ends, and then secure it using pocket-hole screws.
- Repeat this process to assemble the other end.
- Sand the faces of both assemblies smooth, making sure that the joint areas are flush.
6Make the Long Rails
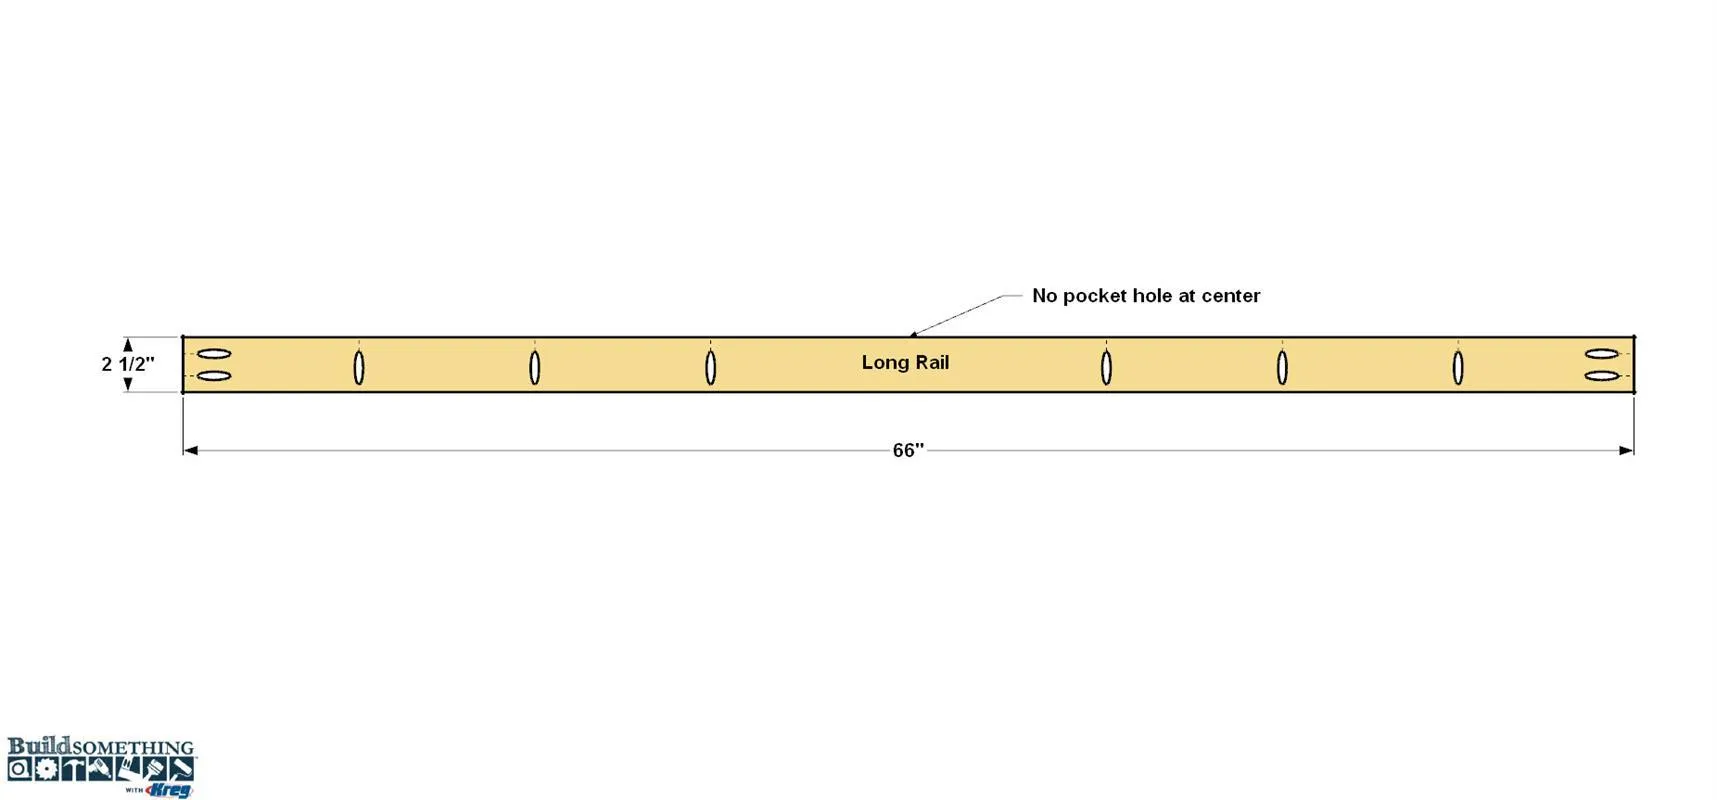
- Cut two Long Rails to length from 1x3 boards, as shown in the cutting diagram.
- Drill pocket holes in both Long Rails, as shown. Location of the holes isn’t critical.
- Sand the Long Rails smooth.
7Attach the Long Rails
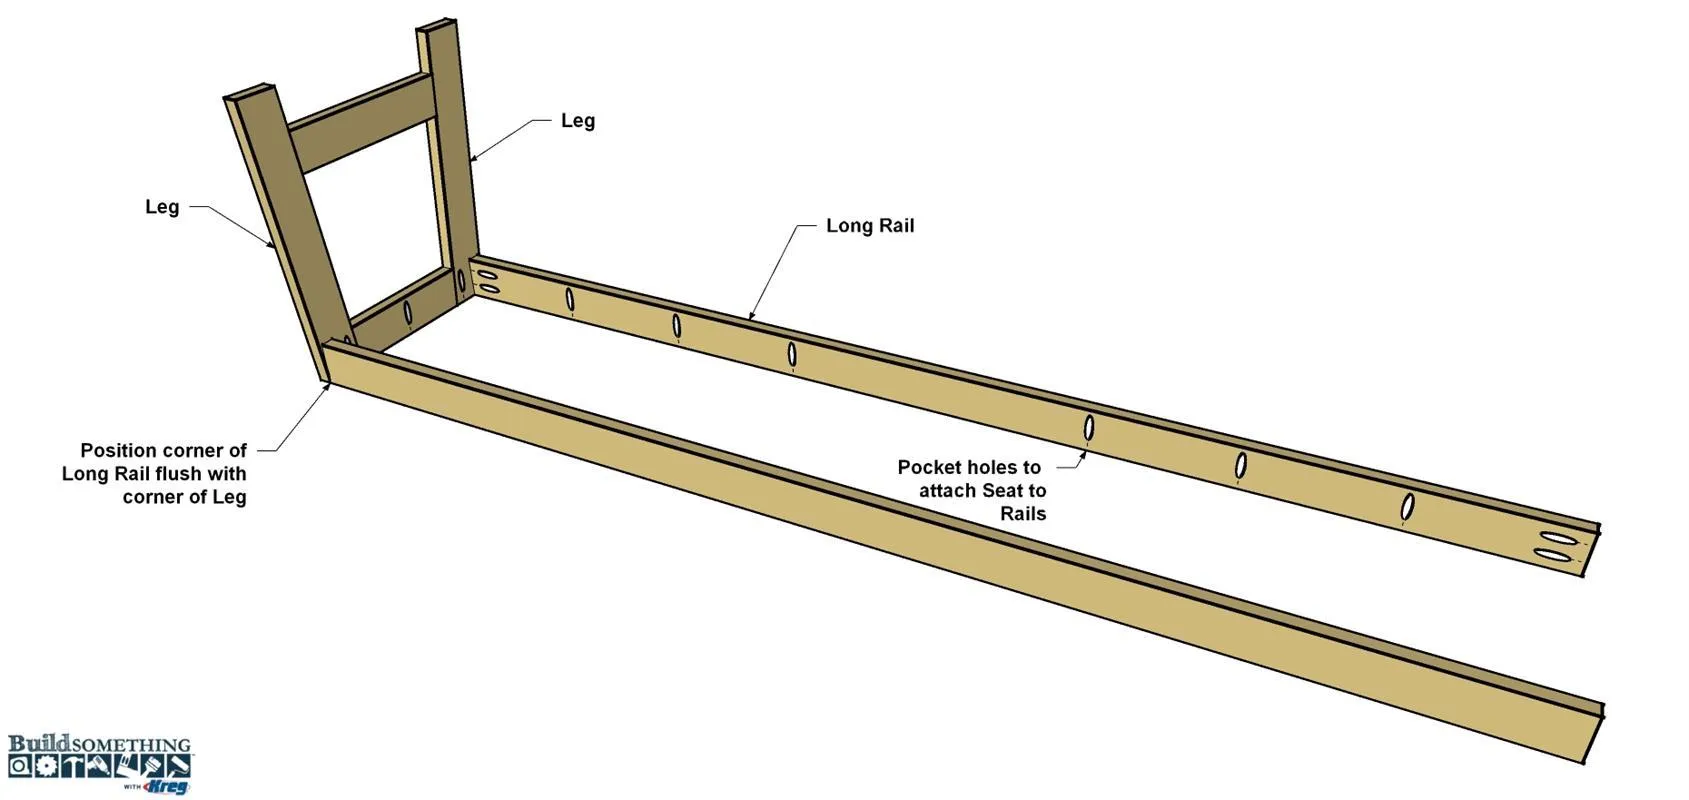
- Flip one end assembly upside down and stand it up on a work surface. Make sure the pocket holes along the edge of the Short Rail face toward the Long Rails, as shown.
- Position the Long Rails as shown, making sure that the pocket holes along the edge are oriented correctly for attaching the seat top later.
- Apply glue to the ends of the Long Rails, and then secure them to the end assembly using 1 1/4" Kreg Screws.
- Repeat the process to attach the other end assembly.
8Make the Center Rail
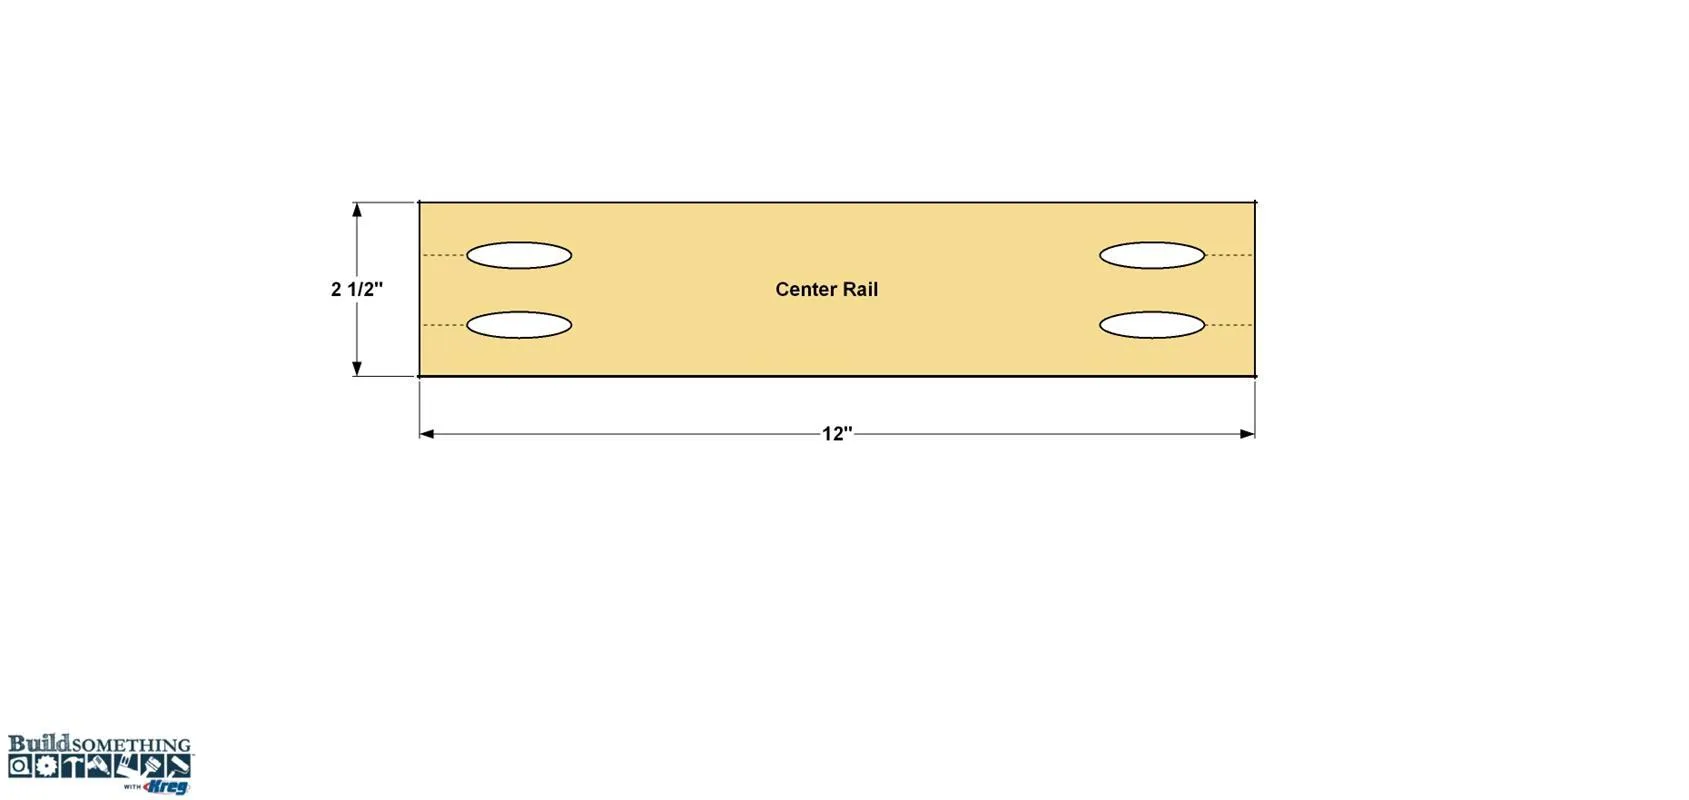
- Cut one Center Rail to length from a 1x3 board, as shown in the cutting diagram.
- Drill pocket holes at the locations shown.
- Sand the faces smooth.
9Attach the Center Rail
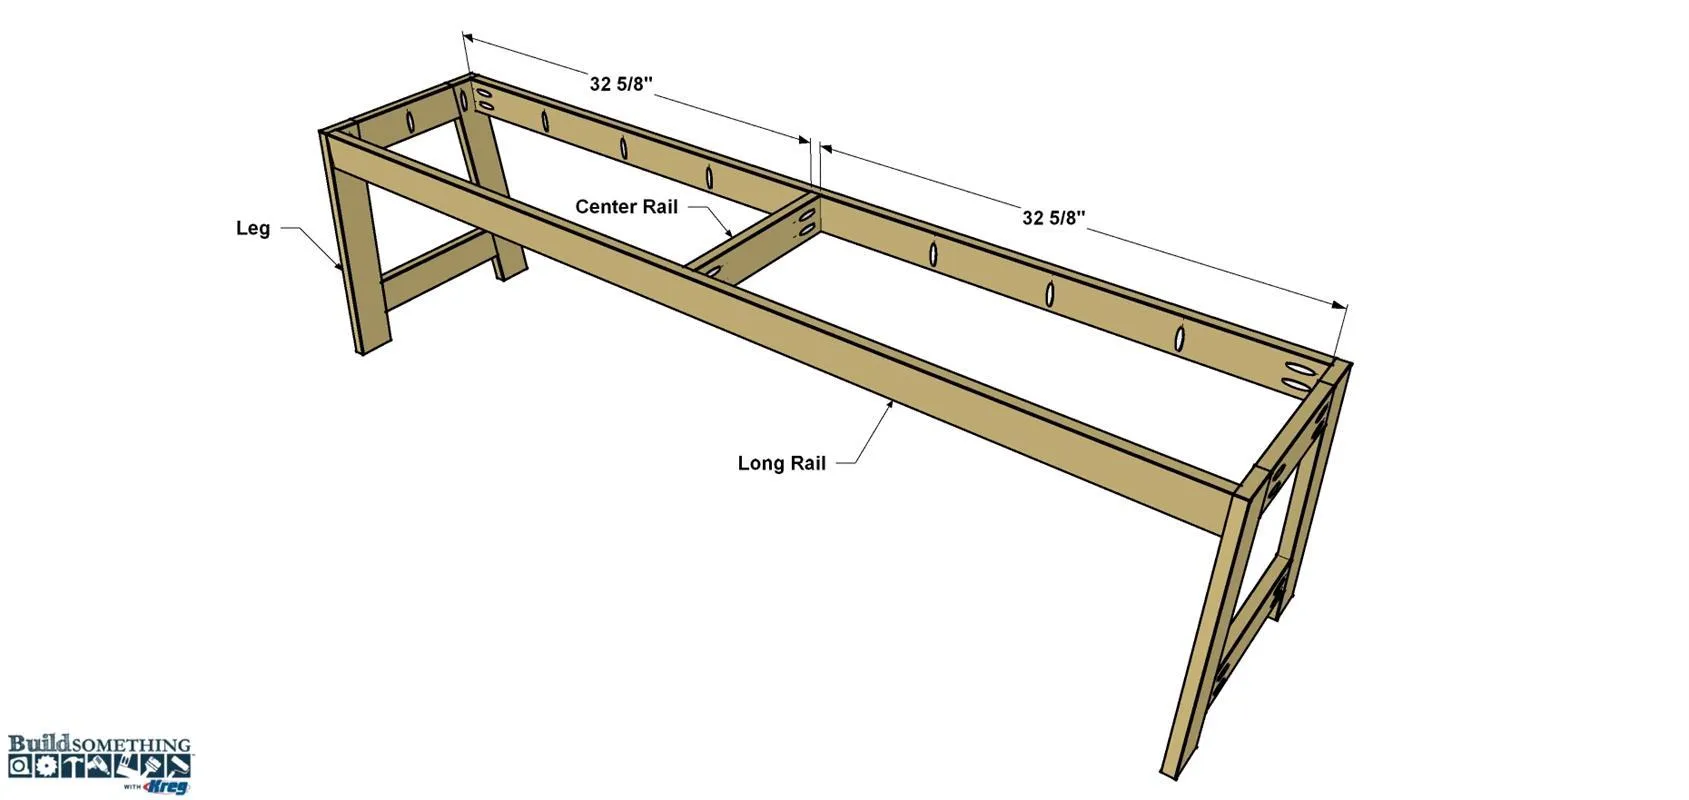
Flip the base assembly upright. Mark the location of the Center Rail, apply glue to the ends, and then position the Center Rail between the Long Rails and secure it using 1 1/4" Kreg Screws.
10Make the Center Stretchers
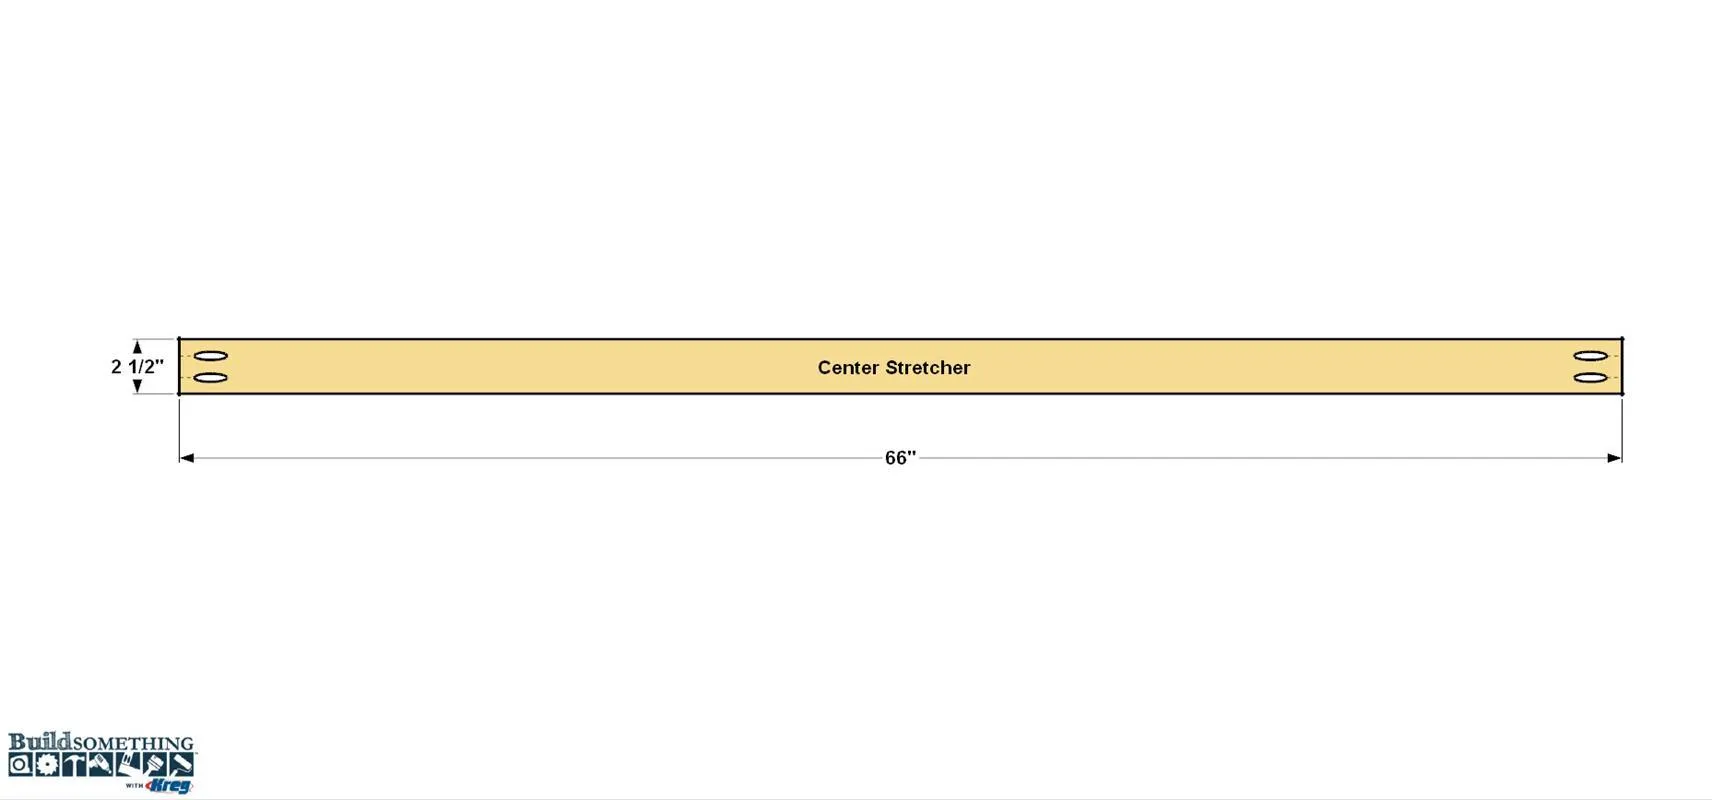
- Cut two Center Stretchers to length from 1x3 boards, as shown in the cutting diagram.
- Set one aside. In the second one, drill pocket holes at the ends, as shown.
- Then sand both Center Stretchers smooth.
11Attach the Center Stretcher
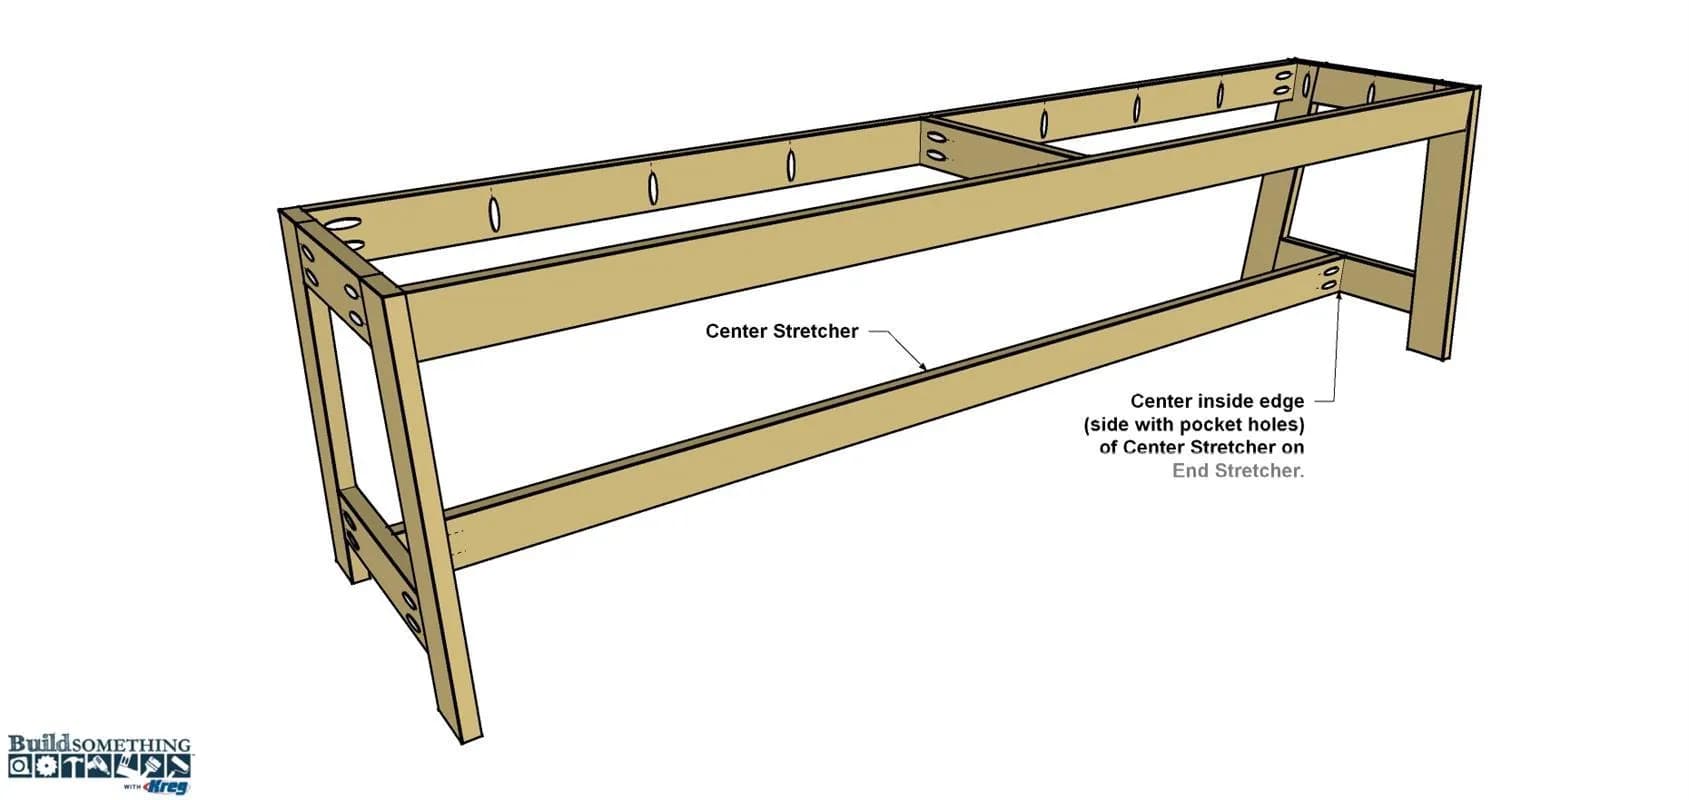
- Mark the location of the first Center Stretcher (the one with pocket holes) on each End Stretcher. Note that this Long Stretcher isn’t centered on the length of the End Stretchers. It’s offset to one side so that, when you glue on the other Center Stretcher later, the pair will be centered.
- Apply glue to the ends of the Long Stretcher, position it so the pocket holes face to the center of the bench, and then secure it using 1 1/4" Kreg Screws.
12Make the Angle Stretchers
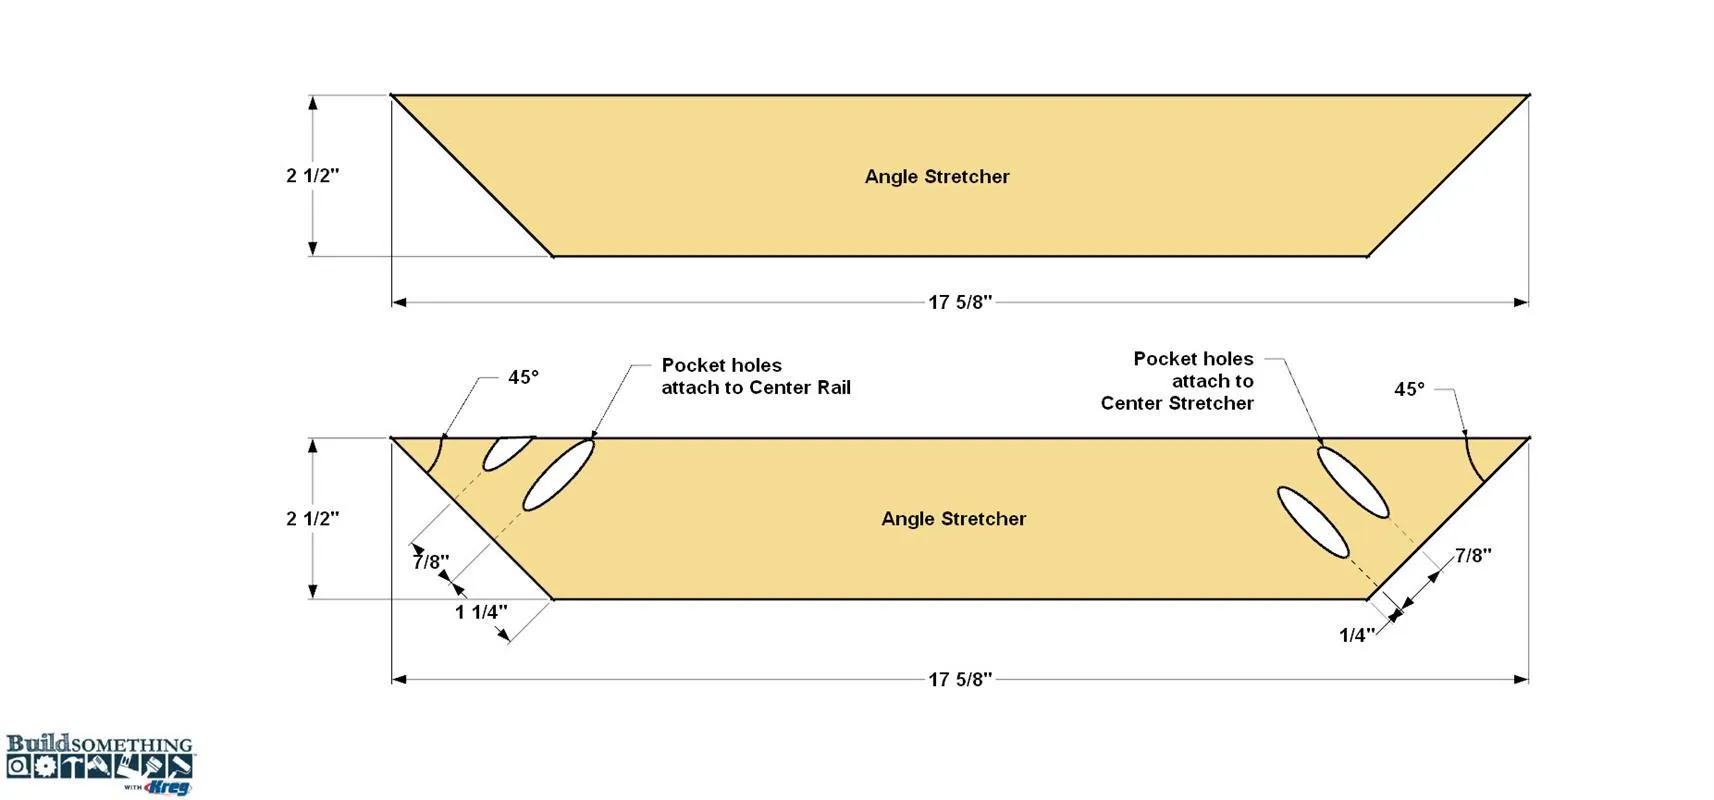
- Cut four Angle Stretchers to length from 1x3 boards so that the ends have opposing 45° angles, as shown in the cutting diagram.
- Set two of the Angle Stretchers aside, and then drill pocket holes at the ends of the other two, as shown. Note that these pocket holes are located in very specific places. After you drill the holes, sand all four Angle Stretchers.
13Attach the Angle Stretchers
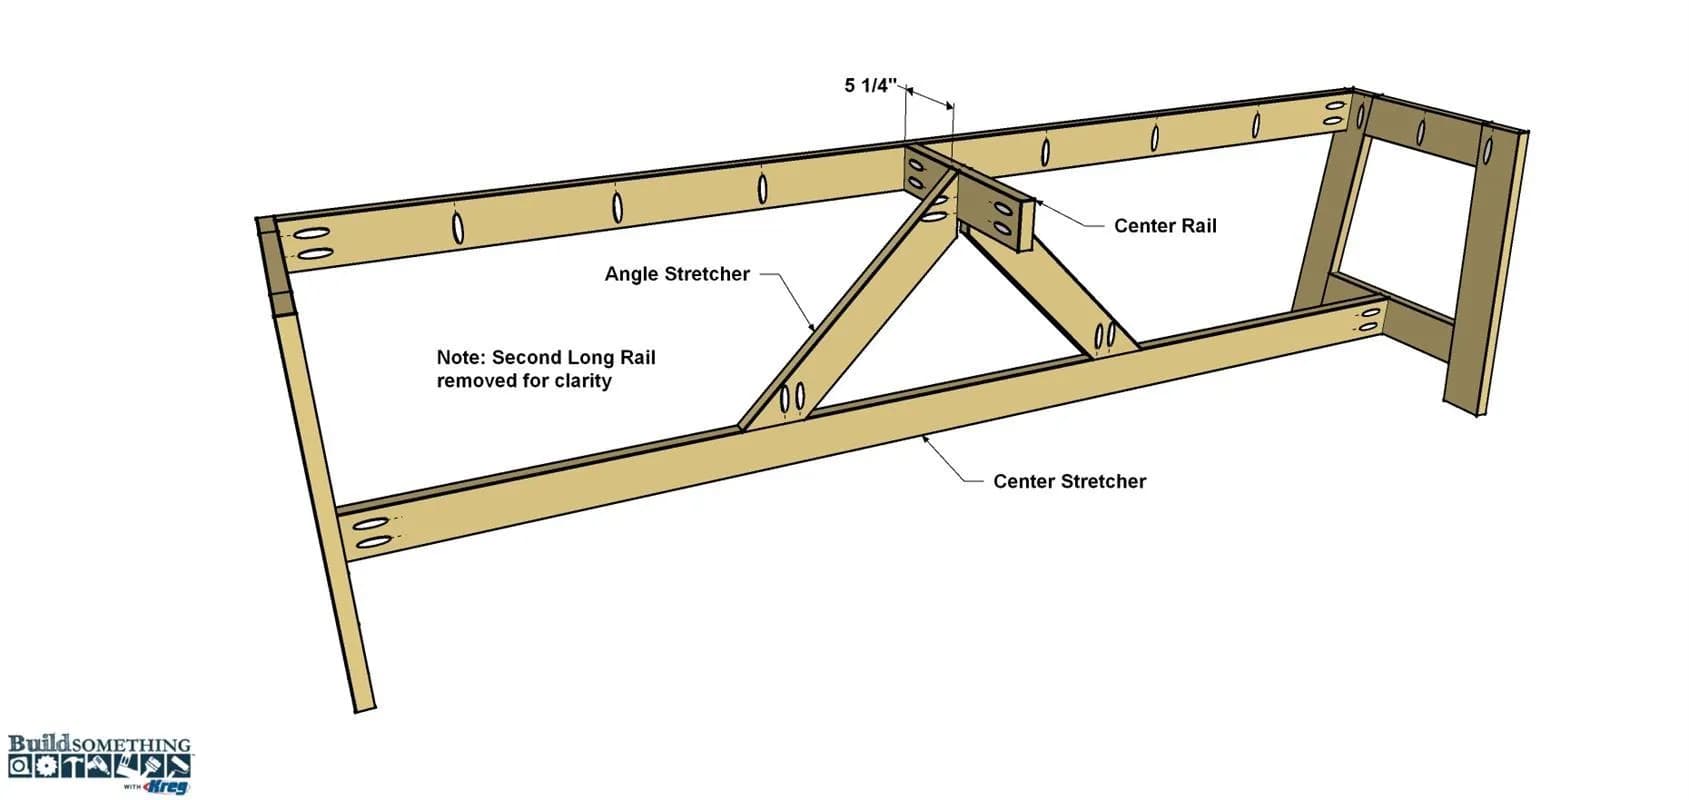
- Place the Angle Stretchers that has pocket holes on to the Center Stretcher, as shown, making sure that the proper end is against the Stretcher, and that the pocket holes face the inward.
- Then attach the Angle Stretcher to the Center Stretcher and to the Center Rail using glue and 1 1/4" Kreg Screws.
- Repeat the process for the second Angle Stretcher.
14Add the Second Layer of Parts
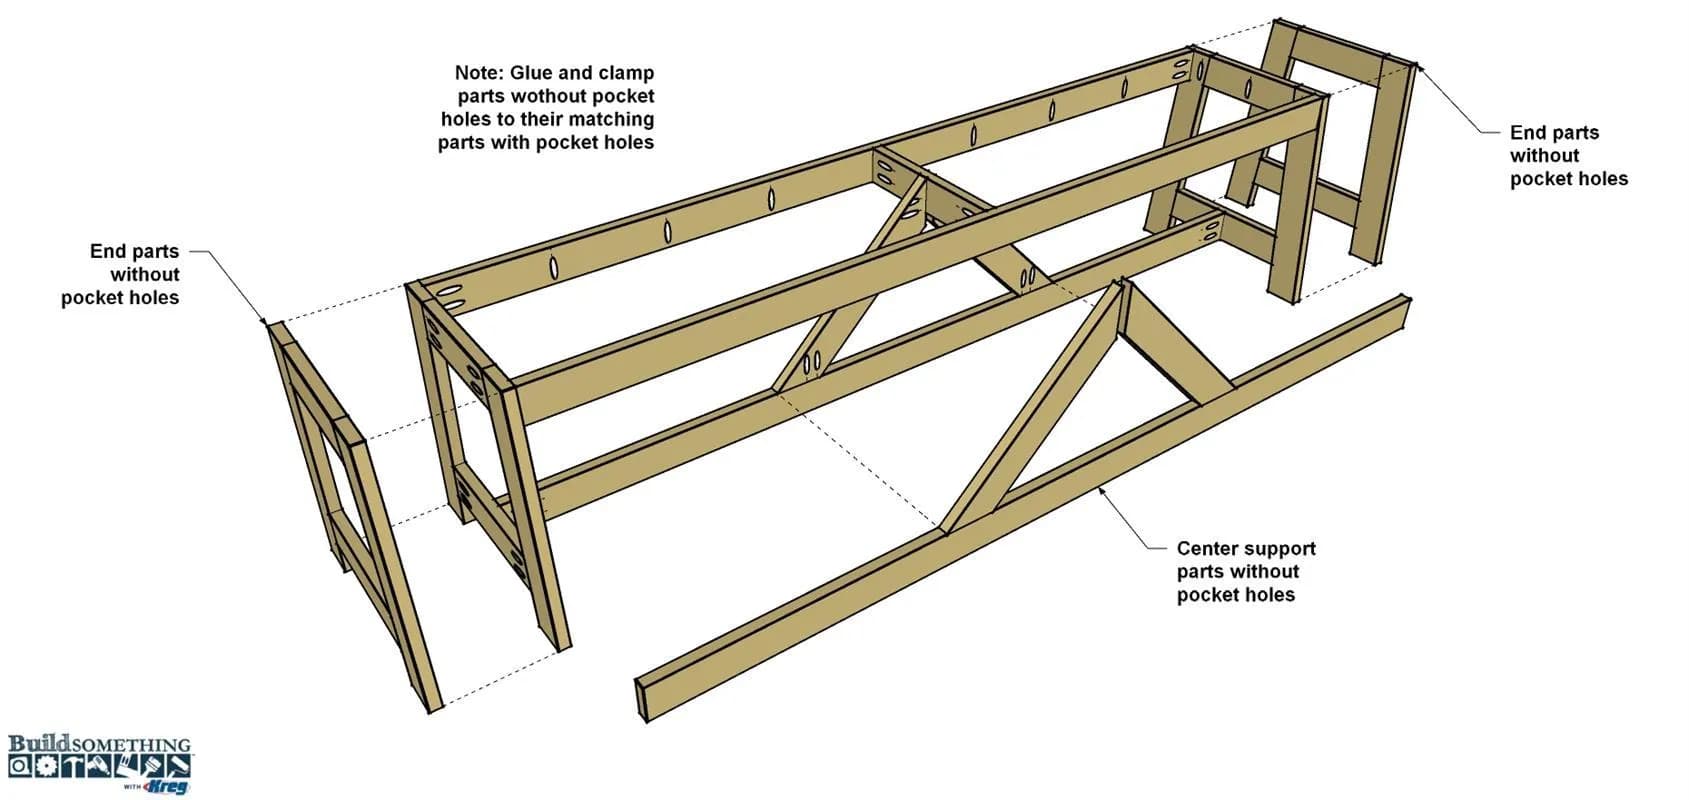
With the table base structure complete, it is time to cover the end assemblies, the Long Stretcher, and the Angle Stretchers with the second layer of parts. To do this, simply glue and clamp all the “extra” pieces you made over their twins, as shown. You’ll need quite a few clamps to hold the pieces in place while the glue dries. If you have a brad nailer, though, you can use just a couple of clamps to hold the pieces in place, and then drive in brads to hold everything while the glue dries. That way, you can remove the clamps, and then move on.
15Make the Seat Boards
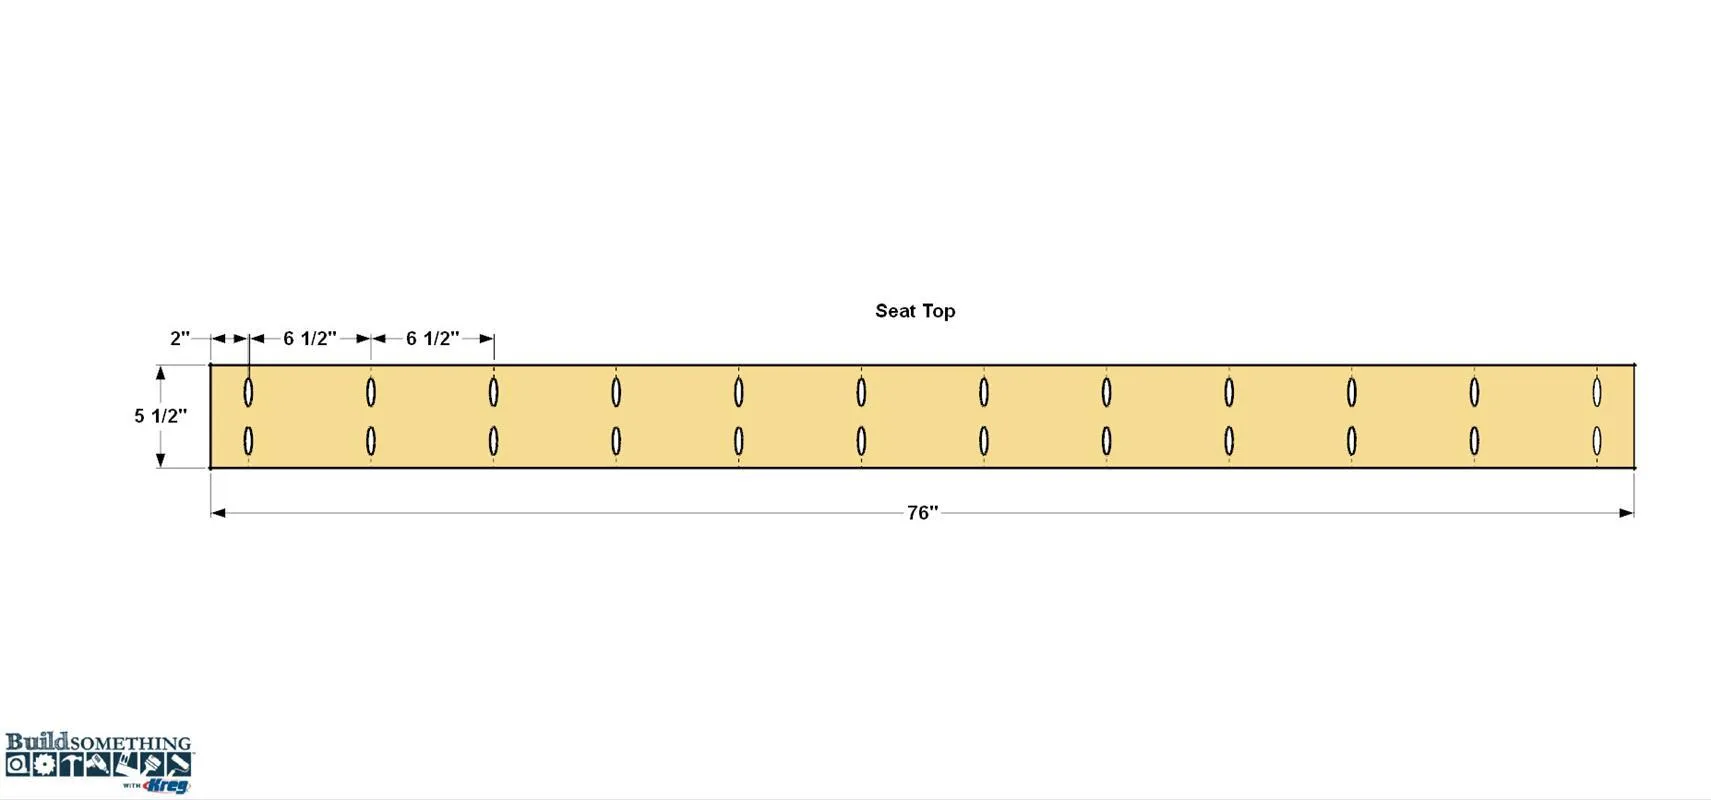
- Cut three Seat Top boards to length from 1x6 boards, as shown in the cut diagram.
- Drill pocket holes in only one of the boards, as shown.
- Then sand the boards smooth.
16Assemble the Seat
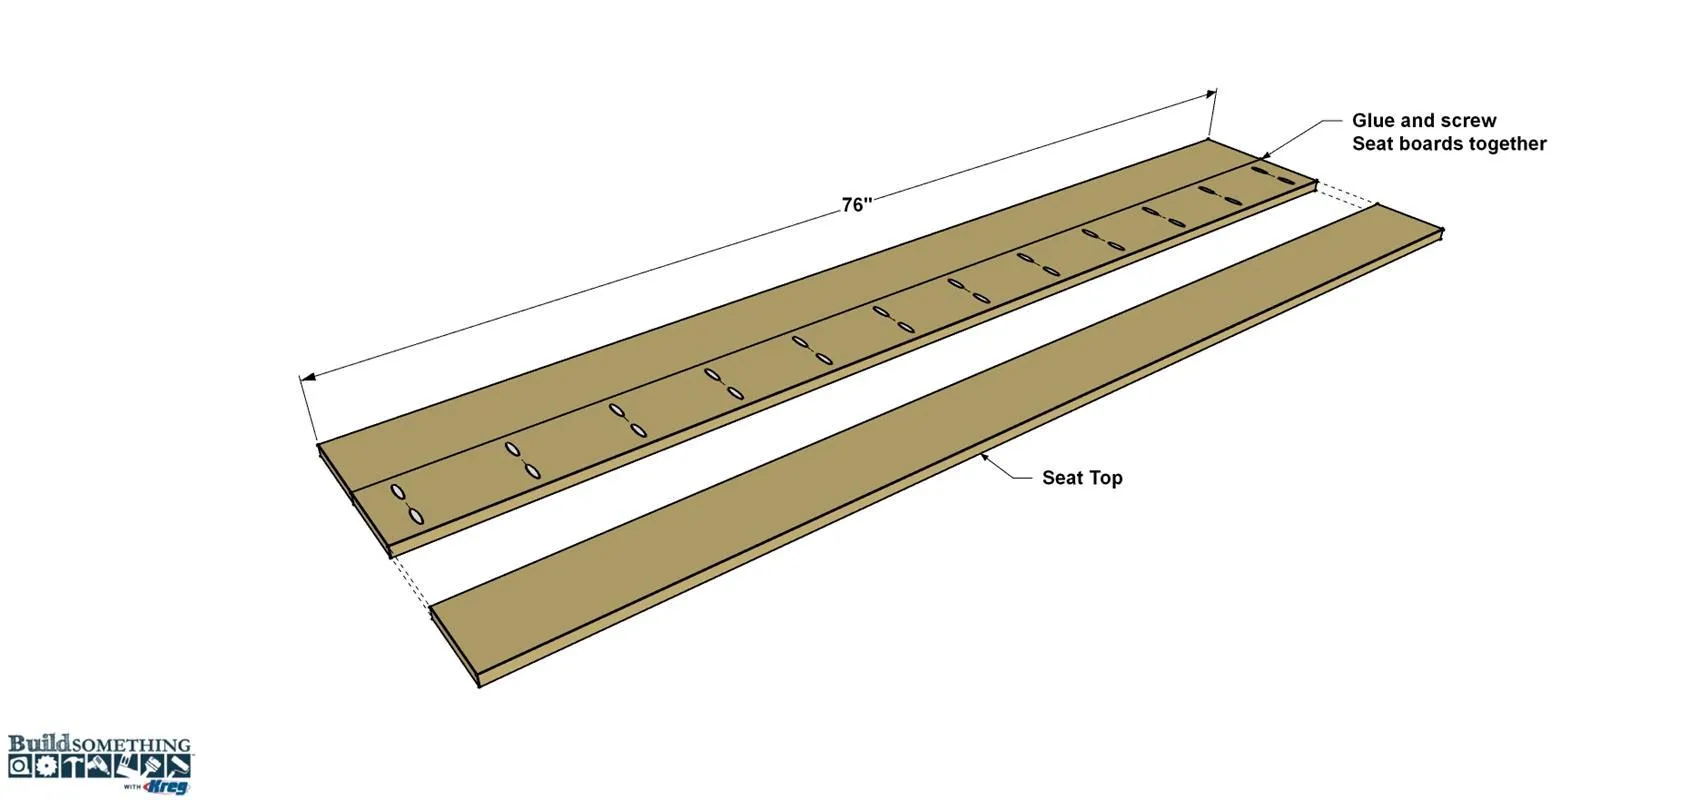
- On a flat work surface, lay the boards out.
- Apply glue to one edge of the center board, and position one of the outer boards against it. Make sure the seams are flush, and then secure the two boards together using 1 1/4" Kreg Screws.
- Repeat this to attach the other outer board. When the glue dries, sand the face and underside flat and smooth.
17Attach the Seat to the Base
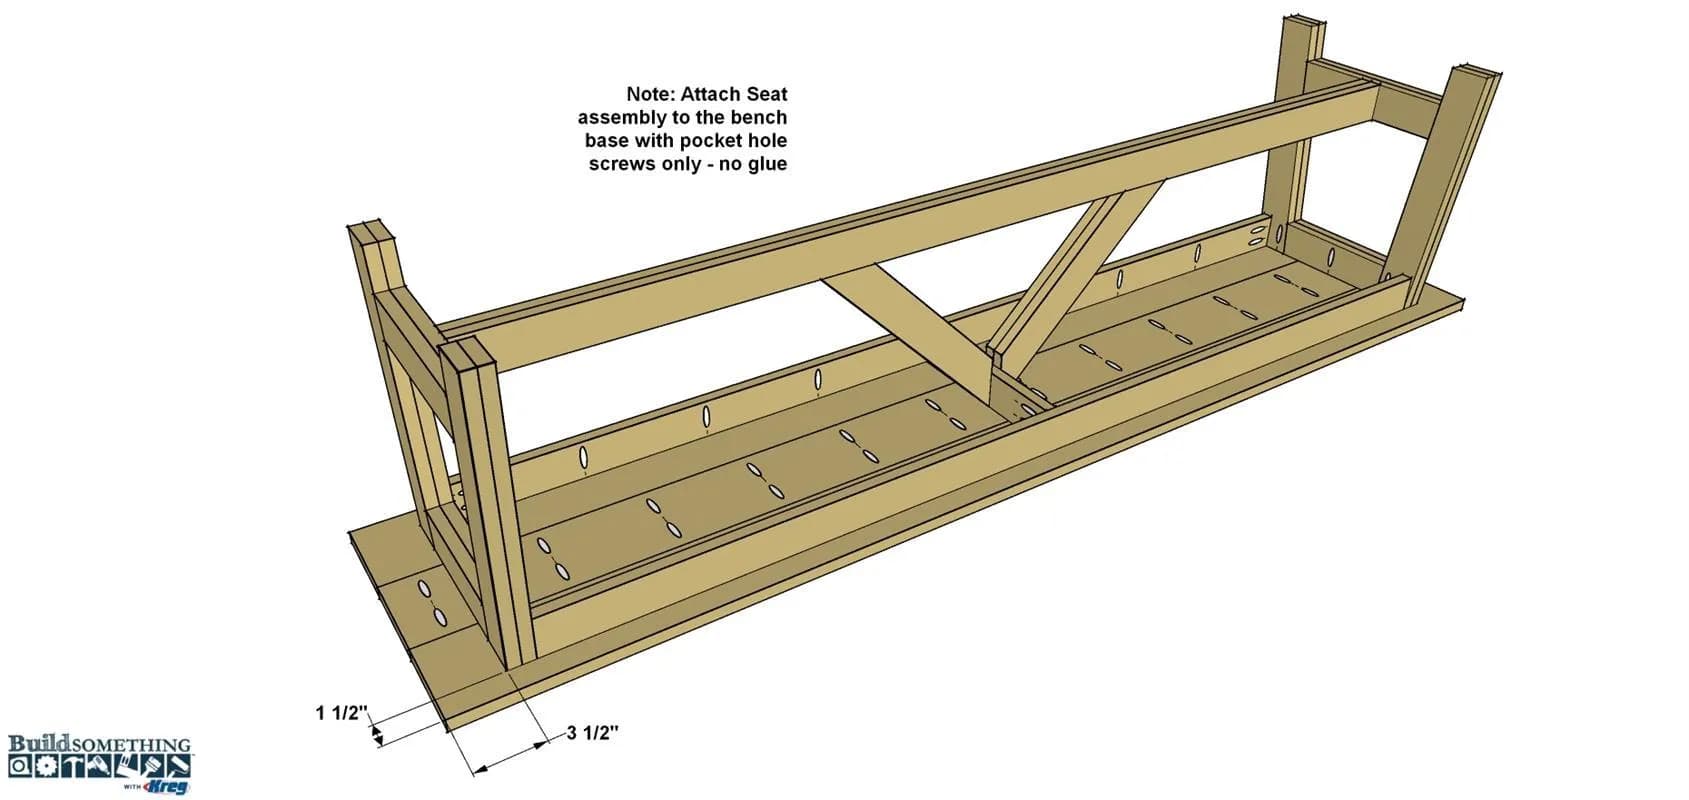
- Place the seat top on your work surface with the pocket holes facing up.
- Place the table base upside down on the Seat.
- Position the base so the seat overhang is equal from end to end as well as side to side. When the base is in position, secure it to the seat using pocket-hole screws. Don’t use glue here.
18Finish the Bench
- Check over your bench assembly and remove any squeezed-out glue. Do any touch-up sanding that’s needed.
- Wipe away dust, and then apply your favorite finish. We used a “Java” colored gel stain, which you can learn more about in the How-To video below. We allowed the stain to dry according to the manufacturer’s recommendations, and then applied two coats of satin wipe-on polyurethane.