 Notch
Notch- Difficulty
- Easy
- Time
- 3.3–6 hours
- Cost
- $$
About this build
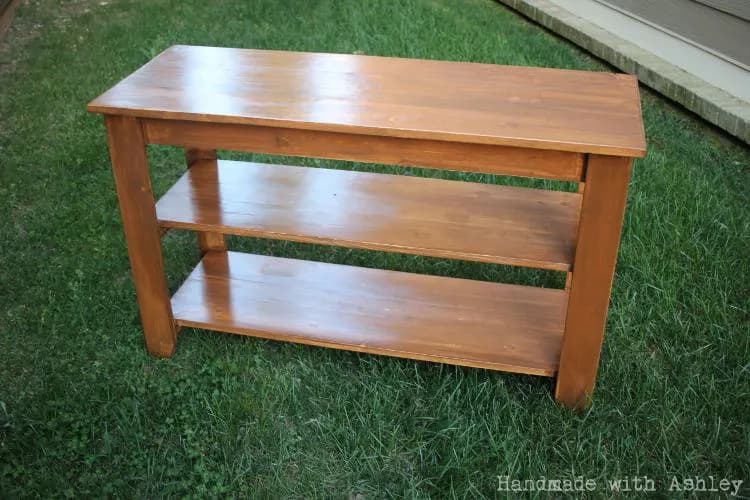
Follow along for instuctions on how to build an easy, rustic console!
Tools
Essential
- Brad Nailer
- Circular Saw
- Drill / Driver
- Jigsaw
- Pocket Hole Jig
- Random Orbit Sander
Optional / nice to have
- Bar / Pipe Clamps
Materials
| Item | Qty |
|---|---|
| Board, 1x6 120" | 3 board |
| Board, 1x4 120" | 3 board |
| Board, 1x8 72" | 1 board |
| Board, 1x2 96" | 1 board |
| Satin Varnish | 1 each |
| Wood finish | 1 each |
Overall cost: $$. Lumber prices vary by region, species, and season, so we give a band rather than a figure we would only be pretending to know.
Cut list
| Part | Qty | T × W × L |
|---|---|---|
| Part A (Shelf Supports) | 4 | 1" × 2" × 14" |
| Part B (Console Apron) | 2 | 1" × 4" × 43" |
| Part C | 2 | 1" × 4" × 43" |
| Part D (Table Legs) | 4 | 1" × 4" × 28" |
| Part E | 2 | 1" × 4" × 14" |
| Part F | 2 | 1" × 6" × 48" |
| Part G | 4 | 1" × 6" × 43" |
| Part H | 1 | 1" × 8" × 48" |
What to buy
Buy 9 boards at 8 ft.
1" × 8"
1 board
1" × 6"
3 boards
1" × 4"
4 boards
1" × 2"
1 board
Assumes 8 ft stock, a 1/8" saw kerf, and buying each part at its own width. Change the board size or kerf on the full board plan →
Instructions
1Taper the table legs (optional)
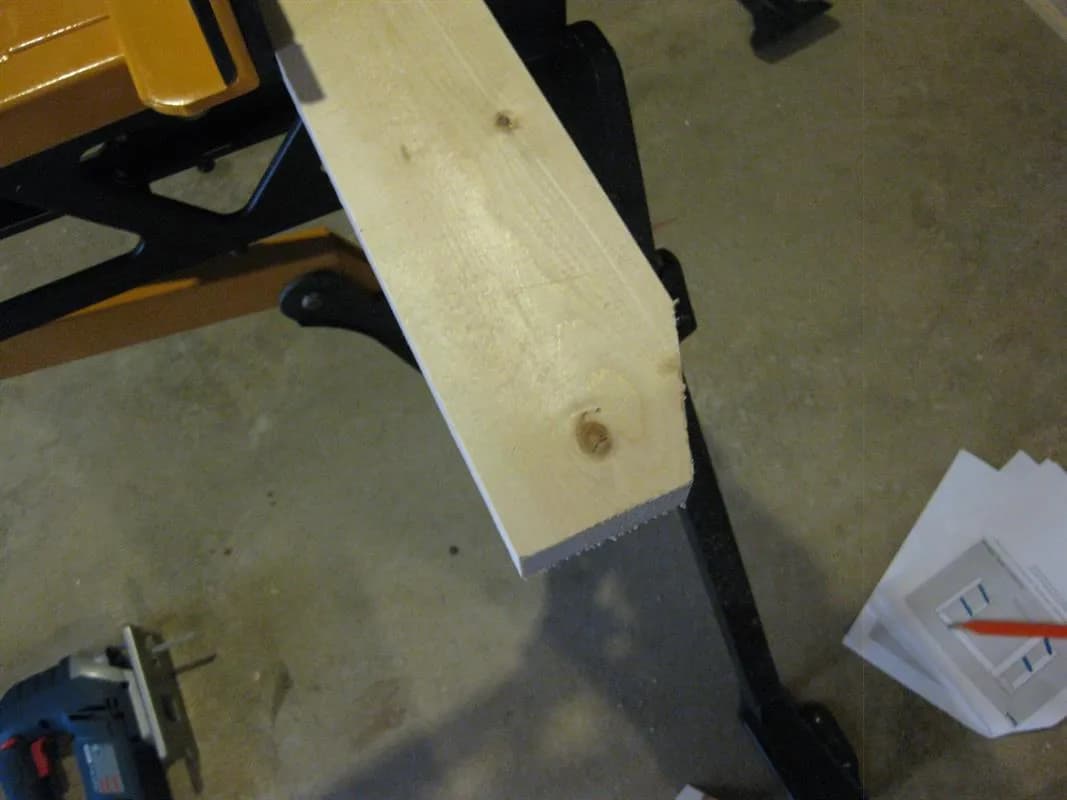
If you would like to add a little flair to your console, taper the ends of each table leg (board D) with a jigsaw.
2Create pocket holes
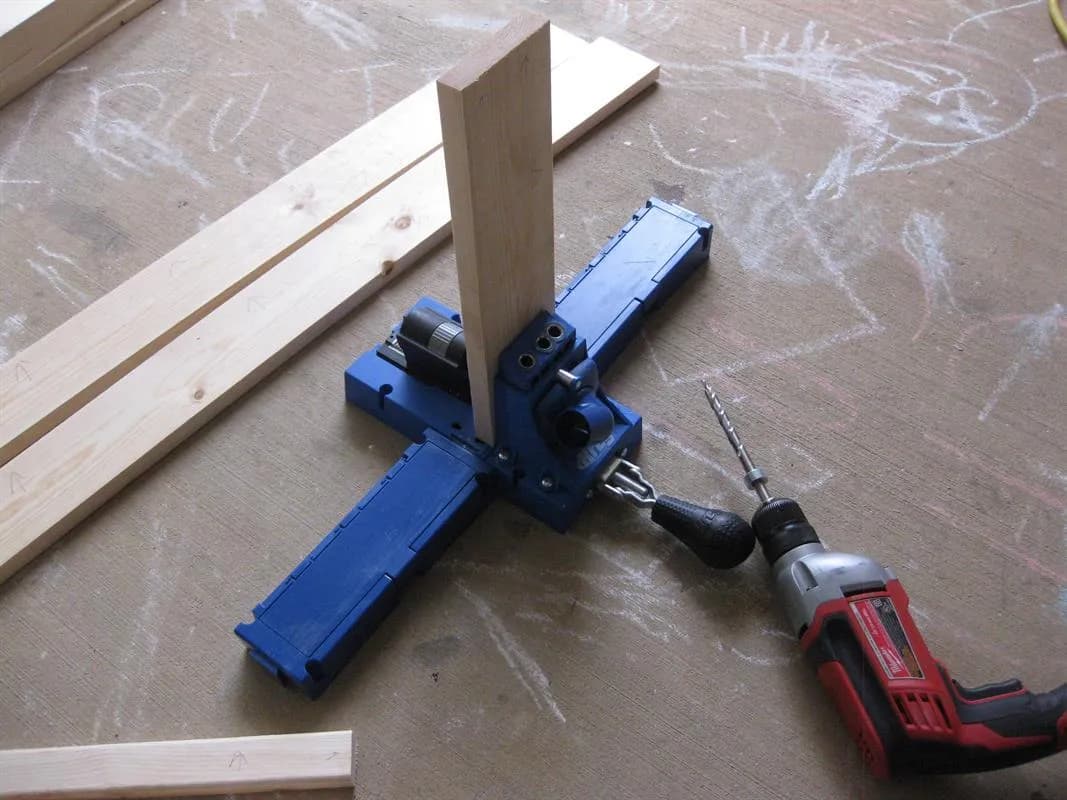
If you use pocket hole joints, use a Kreg Jig to drill the pocket holes.
3Assemble the console legs
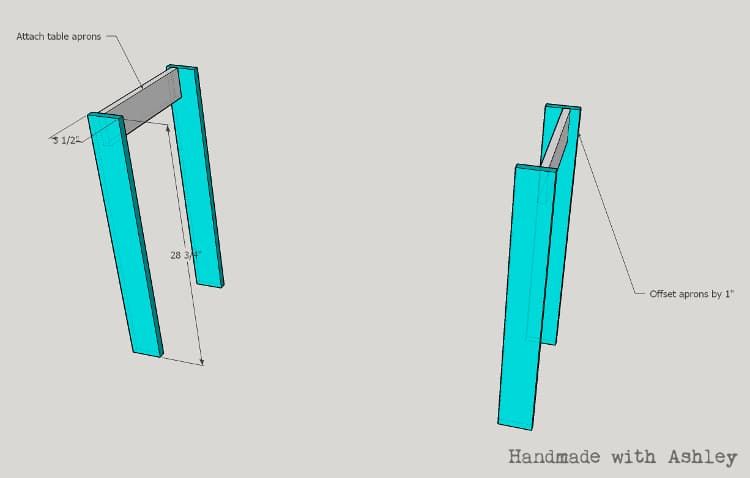
To form a pair of table legs, sandwich board E between boards D. Offset board E 1″ from the edge of board D. Repeat.
4Connect the pair of legs
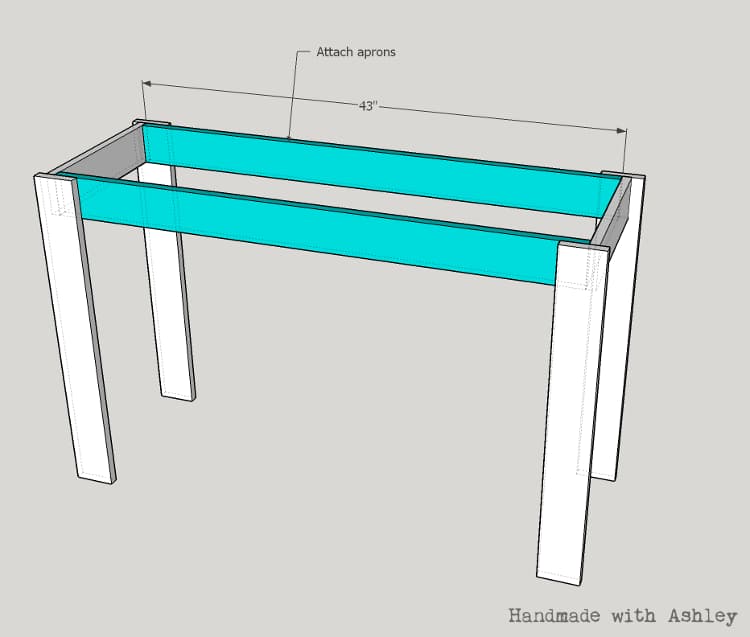
Connect the pair of legs together with boards C. This will form the frame of the console.
5Attach the shelf supports
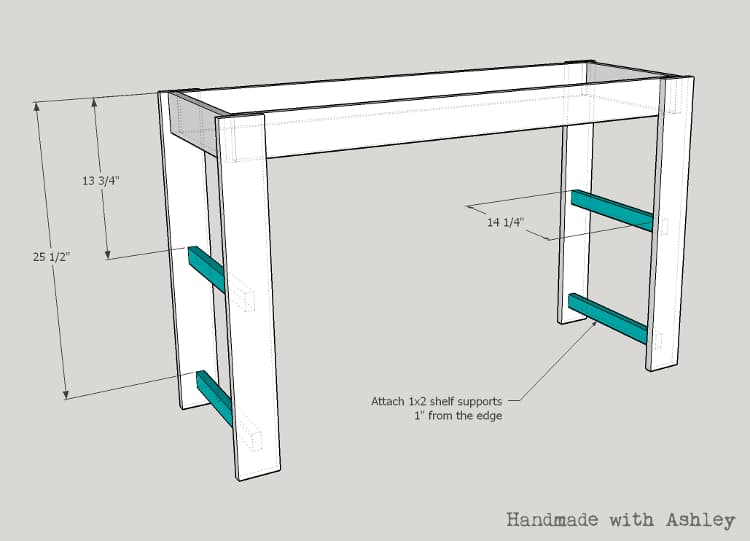
- Attach the shelf supports (boards A) to each pair of legs.
- Attach the shelf supports adjacent to the inside edge of the table leg pairs. The first set of shelf supports are placed 13 3/4″ from the top of the leg. The second set of shelf supports are placed 25 1/2″ from the top of the leg.
6Edge join the console shelves
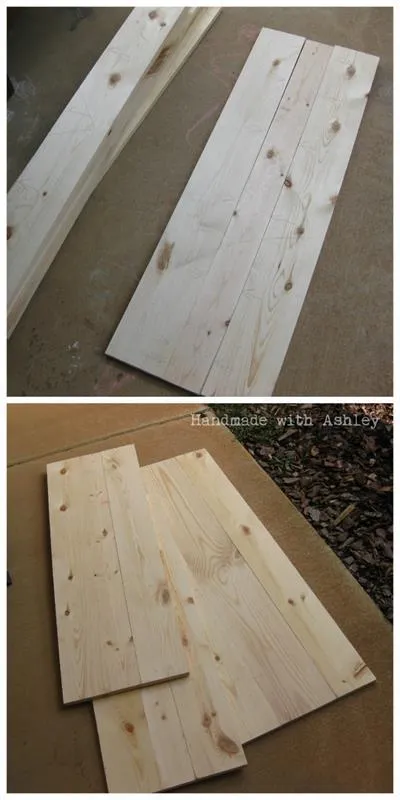
Create the top shelf by edge joining boards F and H together. Board H should be in the middle. Create the two lower shelves by joining boards G and B together. Board B should be in the middle.
7Attach the top shelf
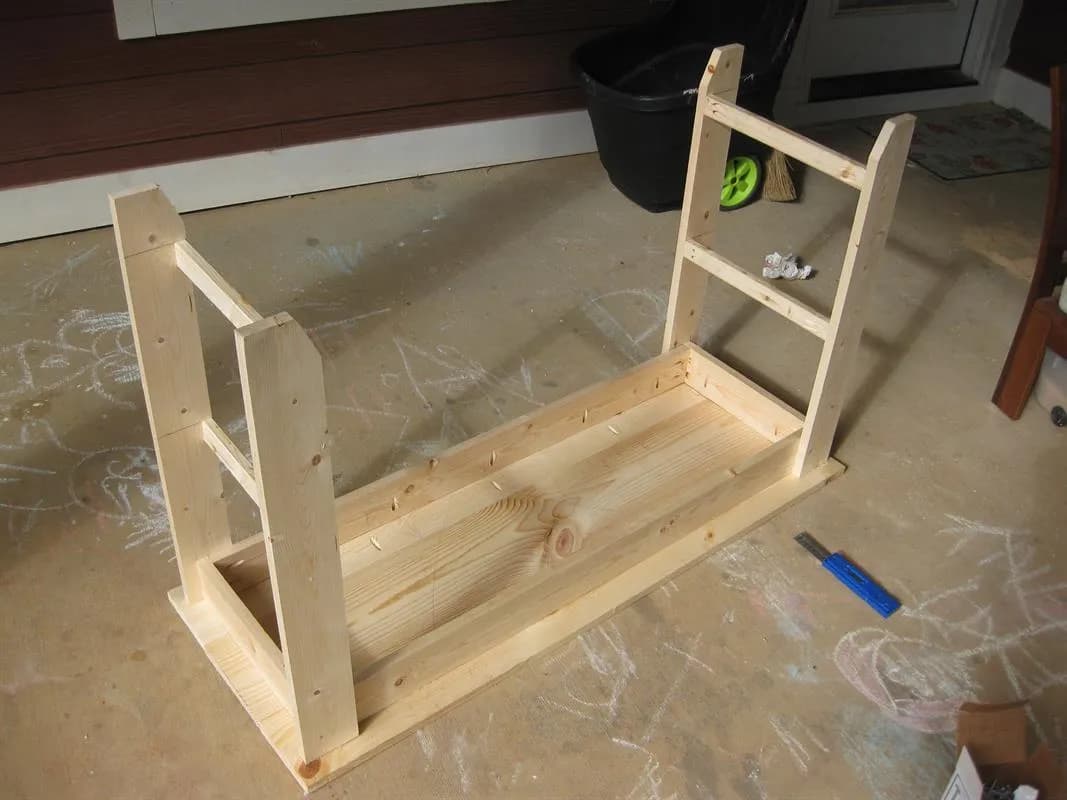
Attach the top shelf to the console frame.
8Attach the bottom shelves
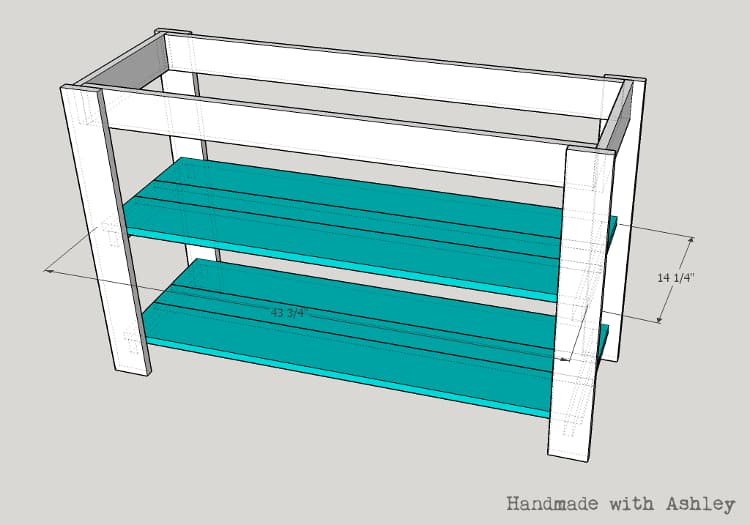
Attach the lower shelves to the console shelf supports
9Apply the finish
Thoroughly sand the console. Use your favorite stain and sealer to finish the console.
Tags
- Living Room
- Beginner
Reviews & builds
No reviews yet
Sign in to review this plan or share your build.
No reviews yet. Be the first to build this.