 Notch
Notch- Difficulty
- Easy
- Time
- 2.8–5.3 hours
- Cost
- $
About this build
This is a quick and simple picture frame build. It uses just one 1x4 board, which you can find at most home improvement stores. It is the perfect project for a beginner woodworker. These plans are for an 11x14 frame. But can be easily adapted for any size photo or poster.
Tools
Essential
- Drill / Driver
- Miter Saw
- Pocket Hole Jig
- Router
- Router Table
Optional / nice to have
- Tape Measure
Materials
| Item | Qty |
|---|---|
| Board, 1x4x96" | 1 board |
| 1 ¼” pocket hole screws (see tool list) | 8 each |
| Wood glue | 1 each |
| Sandpaper, stain or paint, polyurethane | 1 each |
| Eye & ear protection and other safety gear | 1 each |
Overall cost: $. Lumber prices vary by region, species, and season, so we give a band rather than a figure we would only be pretending to know.
Cut list
| Part | Qty | T × W × L |
|---|---|---|
| Long sides | 2 | 3/4" × 3 1/2" × 20" |
| Short sides | 2 | 3/4" × 3 1/2" × 17" |
What to buy
Buy 1 board at 8 ft.
3/4" × 3 1/2"
1 board
Assumes 8 ft stock, a 1/8" saw kerf, and buying each part at its own width. Change the board size or kerf on the full board plan →
Instructions
1Step 1. Route first side of frame
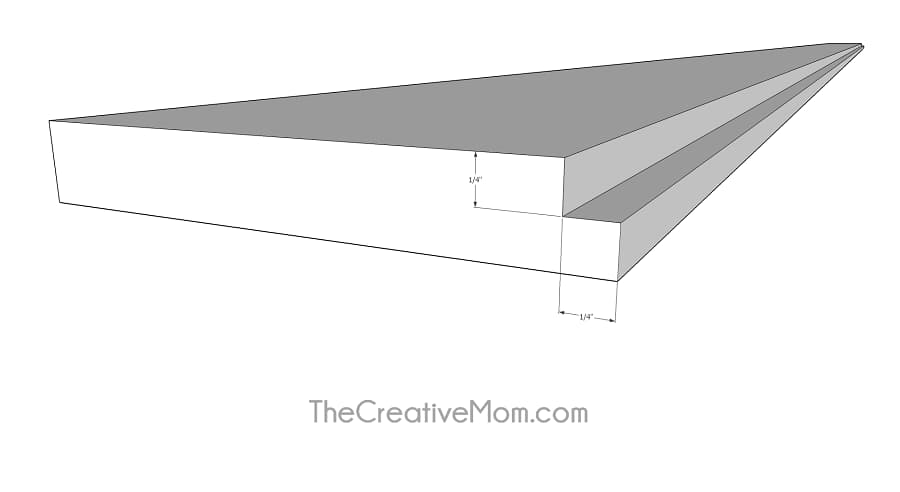
Using a straight router bit, route a ¼” x ¼” groove into one edge of a 1x4 board. This will be the groove on the back side of your frame that your picture will sit inside.
2Step 2. Add optional decorative edge
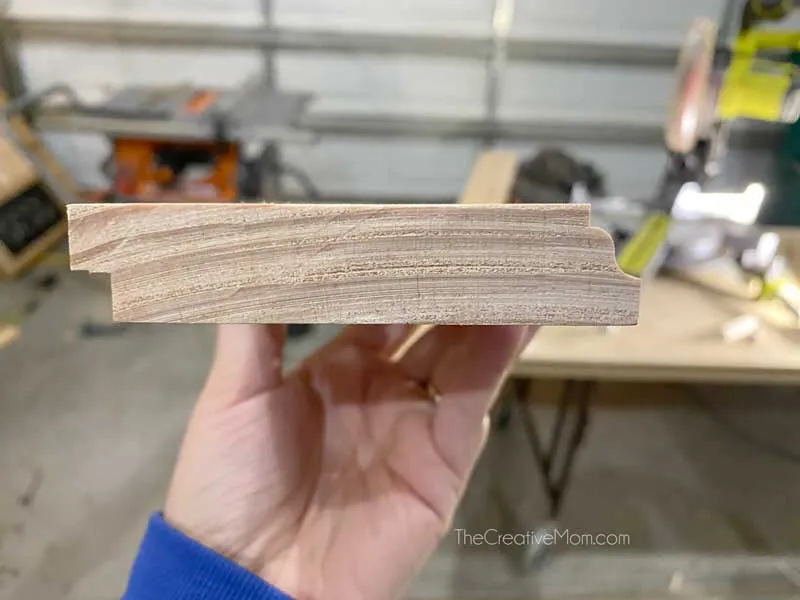
Optional: If you want a decorative edge on your frame, run the opposite edge through the router with a decorative bit.
3Step 3. Cut frame pieces
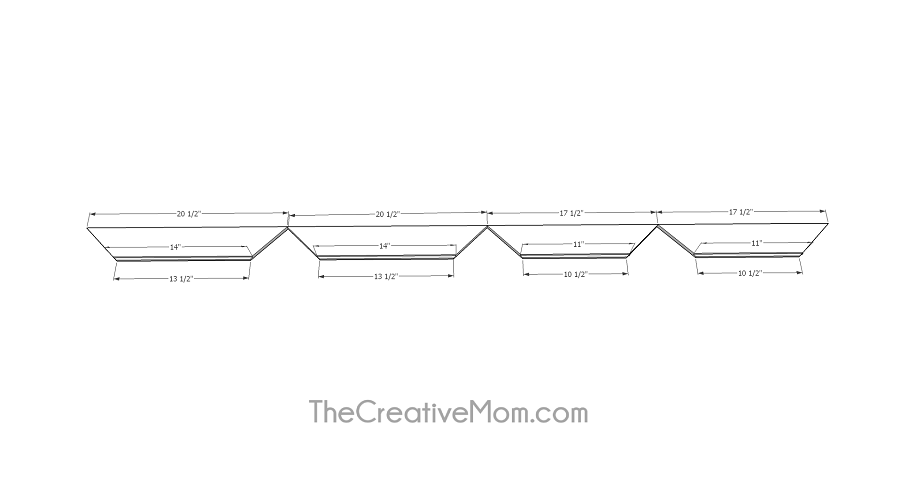
Cut your frame pieces. All cuts should be 45 degrees. See next steps for more detail.
4Step 4. Create short sides
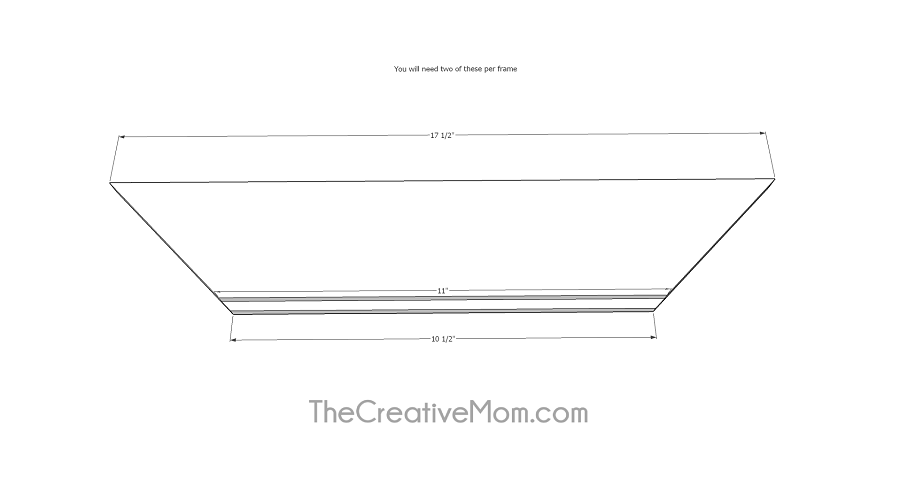
For the short sides, you’ll need two pieces cut at 17 ½” on the long side, and 10 ½” on the short side. The short side will have the ¼” groove that you created in step one. (These measurements are for an 11x14 frame. If you wanted an 8x10 frame, these pieces would be 14 ½” on the long side and 7 ½” on the short side.)
5Step 5. Create long sides
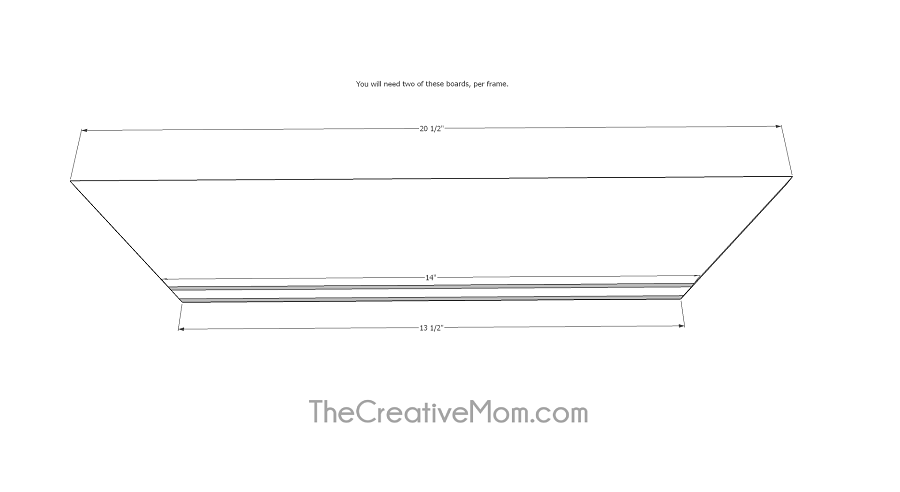
For the long sides, you’ll need two pieces cut at 20 ½” on the long side, and 13 ½” on the short side. The short side will have the ¼” groove that you created in step one. (These measurements are for an 11x14 frame. If you wanted an 8x10 frame, these pieces would be 17 ½” on the long side and 9 ½” on the short side.)
6Step 6. Drill pocket holes
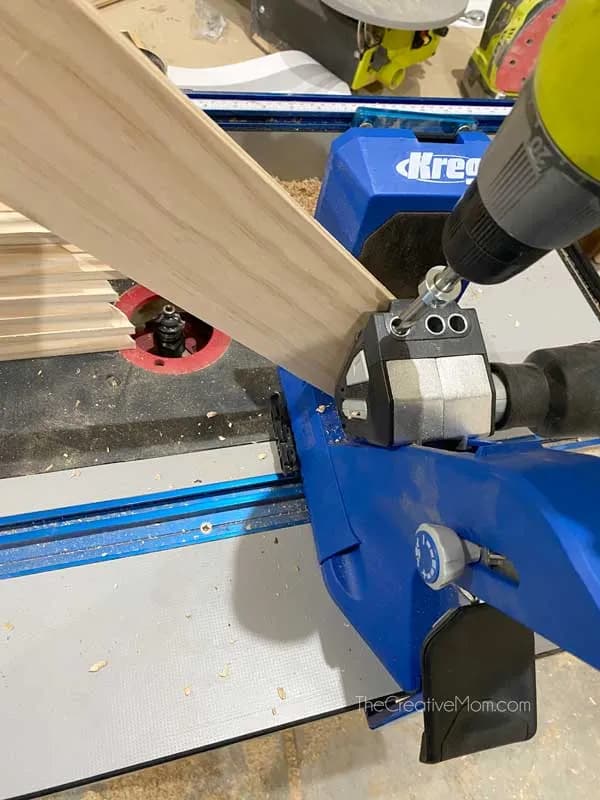
Using the Kreg 720 pro pocket hole jig, drill pocket holes in both sides of your long boards. (Note that the ¼” groove you created in step one should be on the back- the side you drill your pocket holes on.)
7Step 7. Attach sides
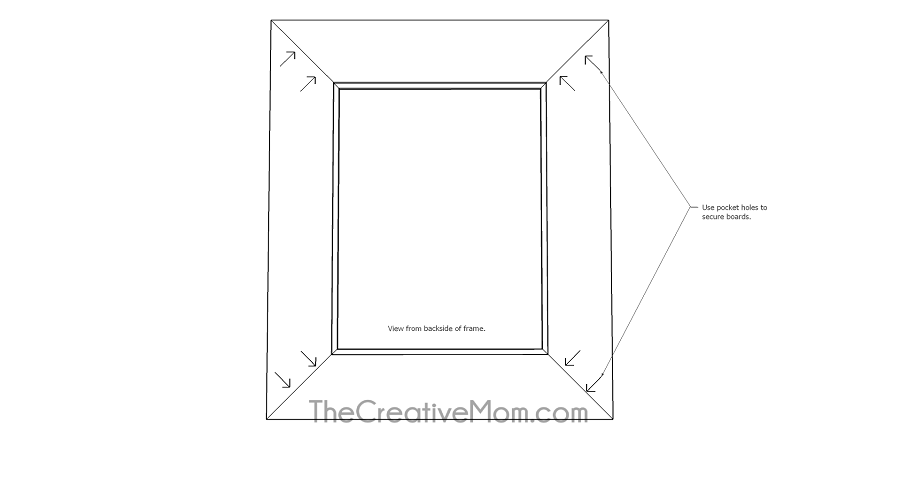
- Clamp your pieces together. Use wood glue and 1 ¼” pocket hole screws to attach the wood pieces to create the frame.
- Fill holes with wood putty, let dry, then sand. Either stain or paint the frames.
8Step 8. Create groove for hanging
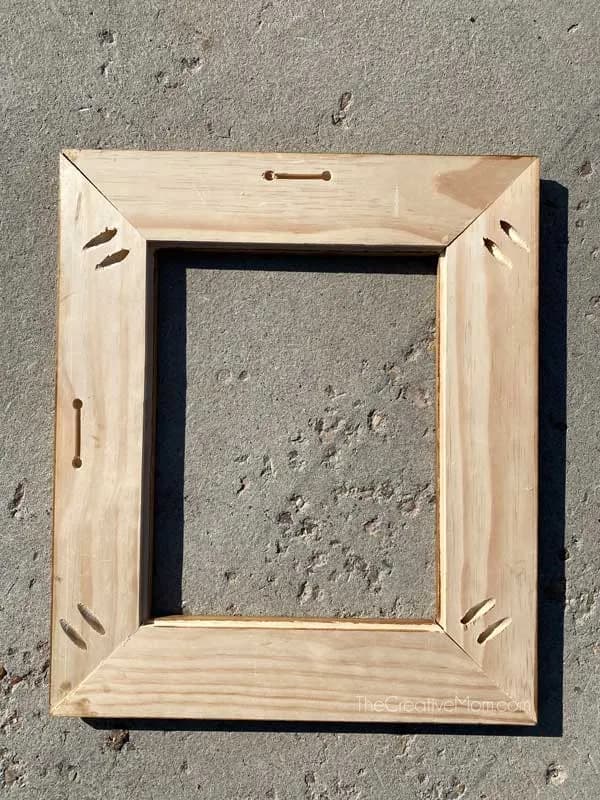
Use a keyhole bit on your router to create a groove for hanging your picture frame.
9Step 9. Create groove for hanging (second side)
Use a keyhole bit on your router to create a groove for hanging your picture frame. I did this on two sides, in case I want to change the way I hang my photo.
Tags
- Decor
- Beginner
Reviews & builds
No reviews yet
Sign in to review this plan or share your build.
No reviews yet. Be the first to build this.