 Notch
- Difficulty
- Intermediate
- Time
- 3.3–6.5 hours
- Cost
- $$$
About this build
No shop is complete without a workbench, but not everyone’s shop space allows room for a big, freestanding bench. This bench offers a sturdy place for all your shop chores, and folds down flat against the wall when not in use to save space.
Tools
Essential
- Circular Saw
- Drill / Driver
- Miter Saw
- Pocket Hole Jig
- Random Orbit Sander
Materials
| Item | Qty |
|---|---|
| Board, 1x4 96" | 3 board |
| Board, 2x4 96" | 1 board |
| Board, 2x2 96" | 1 board |
| 30" x 80" solid-core door | 1 each |
| 1 1/4" coarse-thread pocket-hole screws | 14 each |
| #8 x 3 1/2" flathead wood screws | 10 each |
| #8 x 2" flathead wood screws | 10 each |
| #8 x 1 1/2" flathead wood screws | 8 each |
| 3 1/2" door hinges | 3 each |
| #10 x 1 1/2" flathead wood screws | 18 each |
| Folding leg brackets | 1 each |
Overall cost: $$$. Lumber prices vary by region, species, and season, so we give a band rather than a figure we would only be pretending to know.
Cut list
| Part | Qty | T × W × L |
|---|---|---|
| Bench Surface | 1 | 1" × 24" × 80" |
| Mounting Cleat | 1 | 1" × 3" × 80" |
| Shelf | 1 | 3/4" × 3" × 80" |
| Hinge Plate | 1 | 3/4" × 3" × 80" |
| Front Rail | 1 | 3/4" × 3" × 80" |
| Leg | 2 | 1" × 1" × 33" |
| Leg Block | 2 | 3/4" × 3" × 7" |
What to buy
Buy 6 boards at 8 ft.
1" × 24"
1 board
1" × 3"
1 board
1" × 1"
1 board
3/4" × 3"
3 boards
Assumes 8 ft stock, a 1/8" saw kerf, and buying each part at its own width. Change the board size or kerf on the full board plan →
Instructions
1Pick Up a Bench Surface
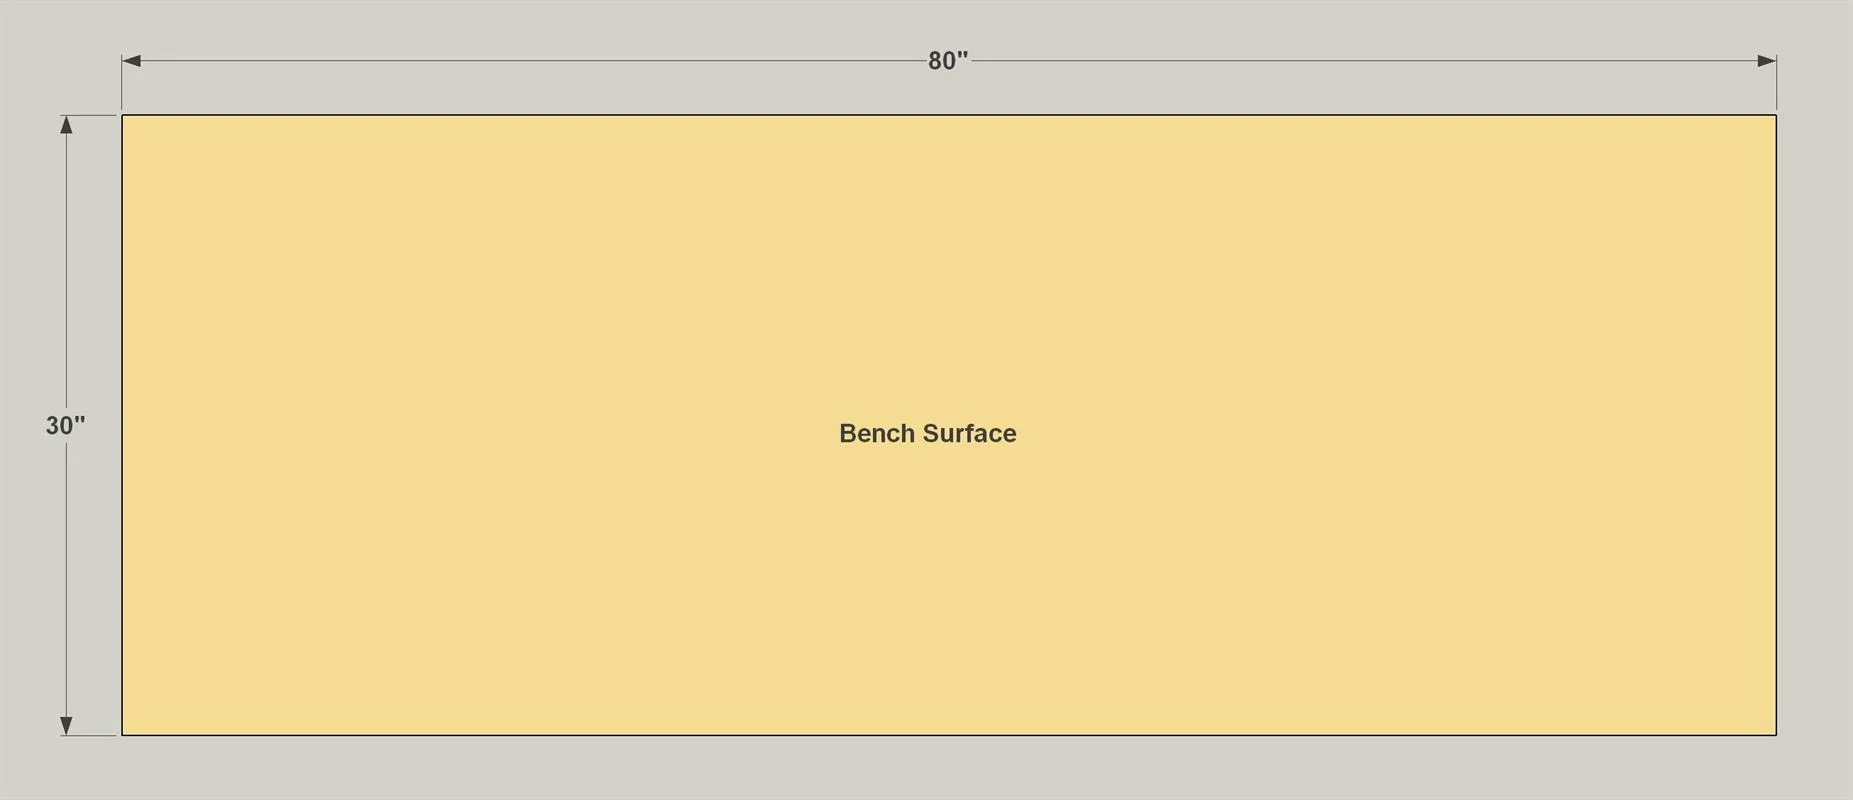
Start by getting your bench surface. It’s just a 30"-wide solid-core door. If your home center doesn’t have one on the shelf, you can special-order one. You could even pick up a used door.
2Make a Shelf and Mounting Cleat
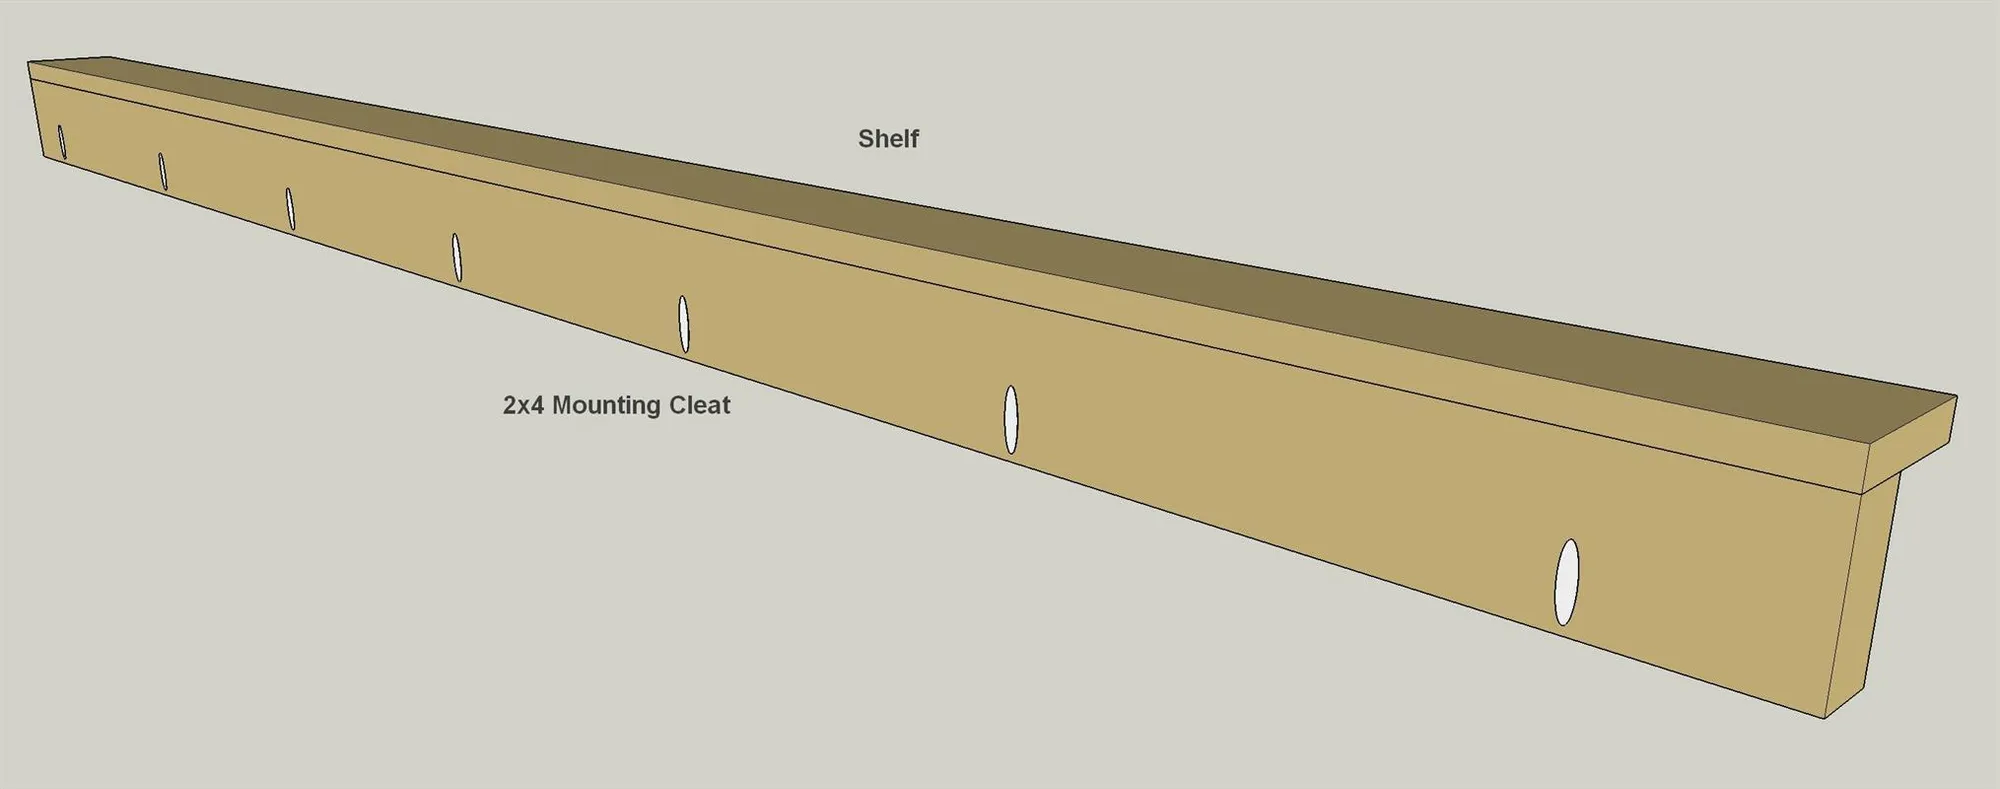
- Cut a Shelf to length from a 1x4 board, as shown in the cutting diagram.
- Also cut a mounting Cleat to length from a 2x4 board.
- Then, with your pocket-hole jig set up for 1 1/2" material, drill pocket holes in the back face of the Mounting Cleat, as shown.

3Attach the Shelf
Attach the Shelf to the Mounting Cleat using 1 1/4" coarse-thread pocket-hole screws.
4Add a Hinge Plate
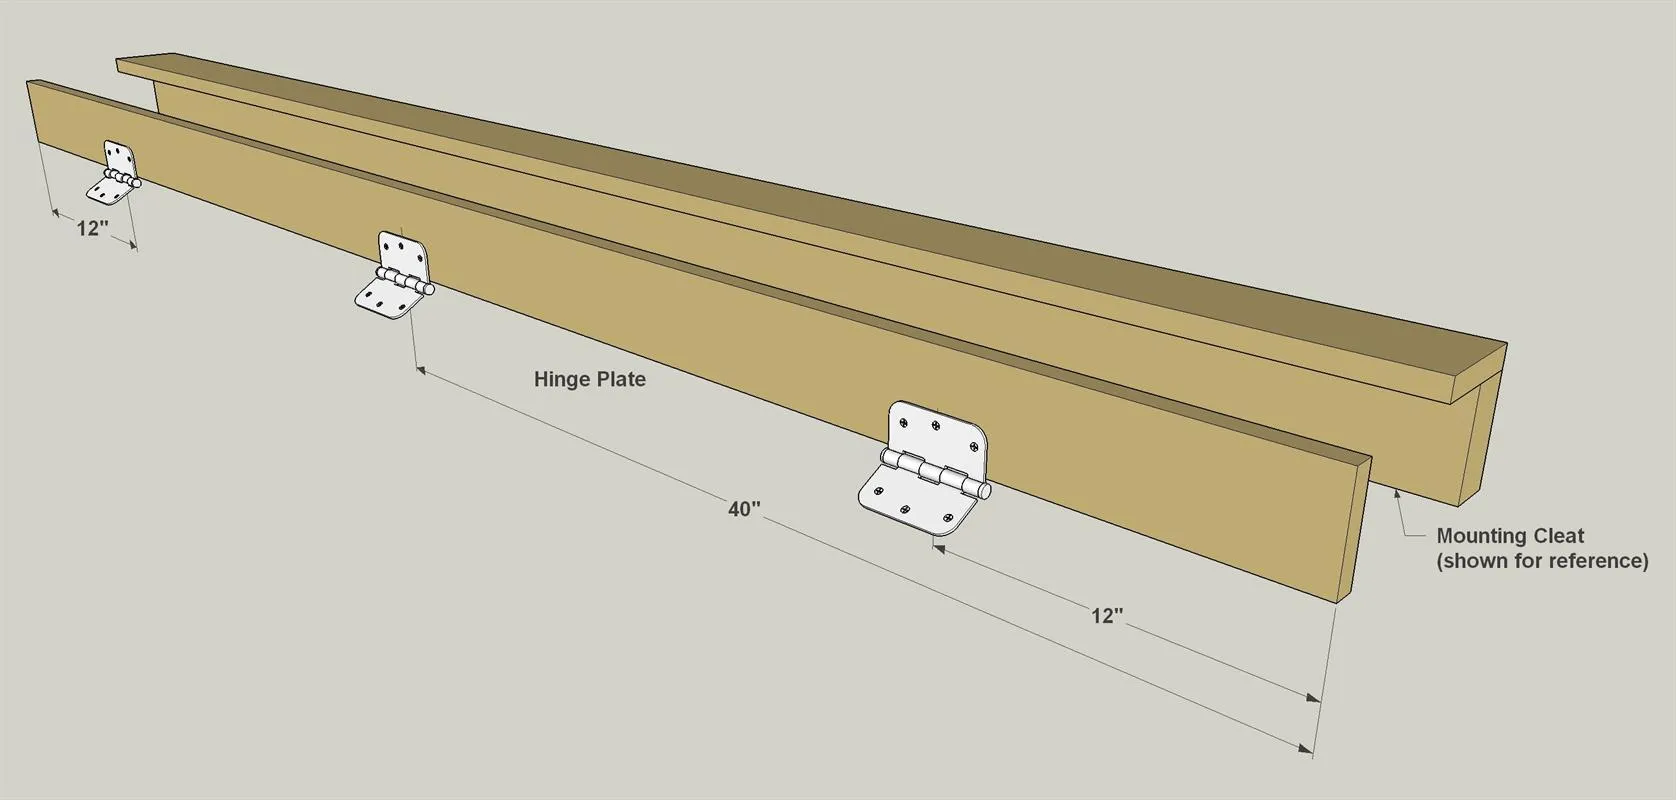
Cut a Hinge Plate to length from a 1x4 board, as shown in the cutting diagram. Then attach three hinges to the Plate as shown.
5Create a Front Rail
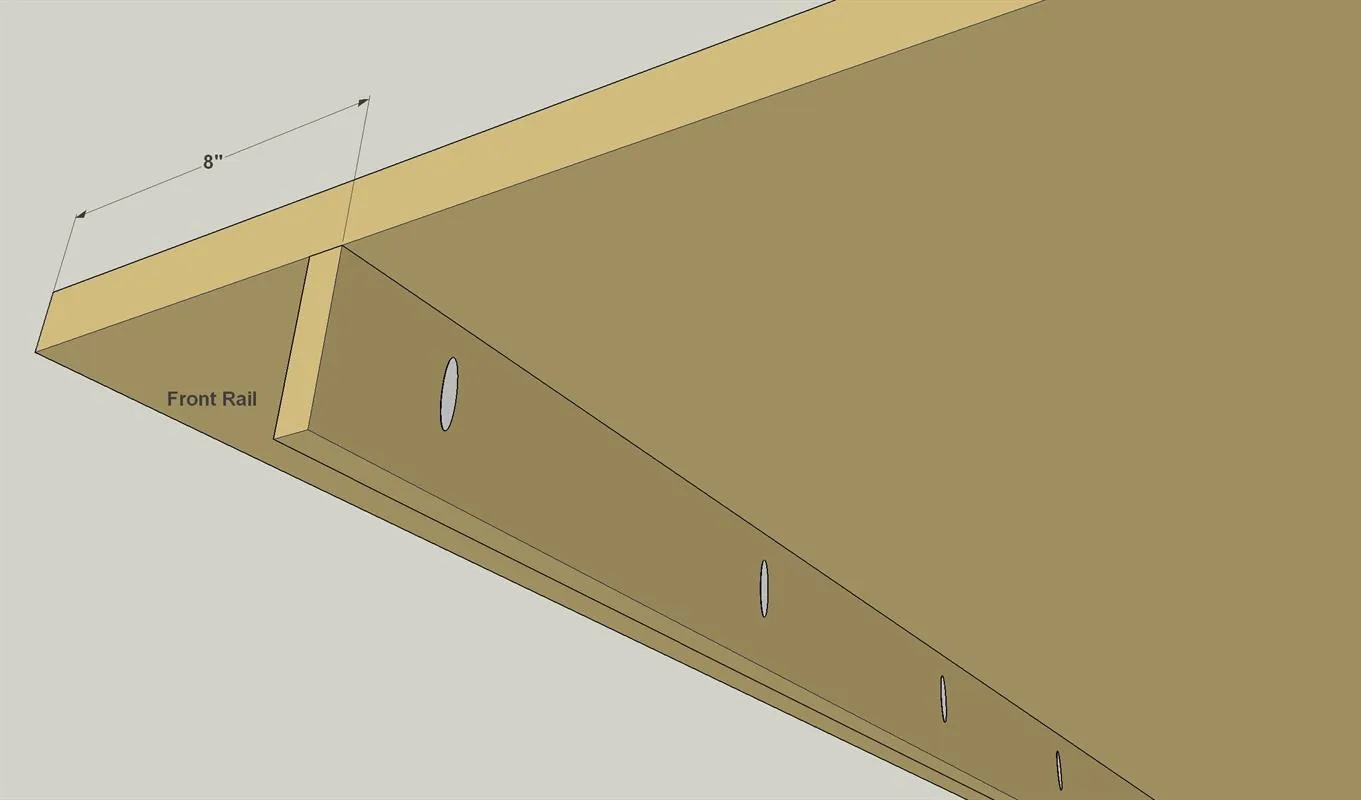
Cut a Front Rail to length from a 1x4 board, as shown in the cutting diagram. Then, with your pocket-hole jig set up for 3/4" material, drill pocket holes in the back face of the Front Rail as shown.

6Install the Front Rail
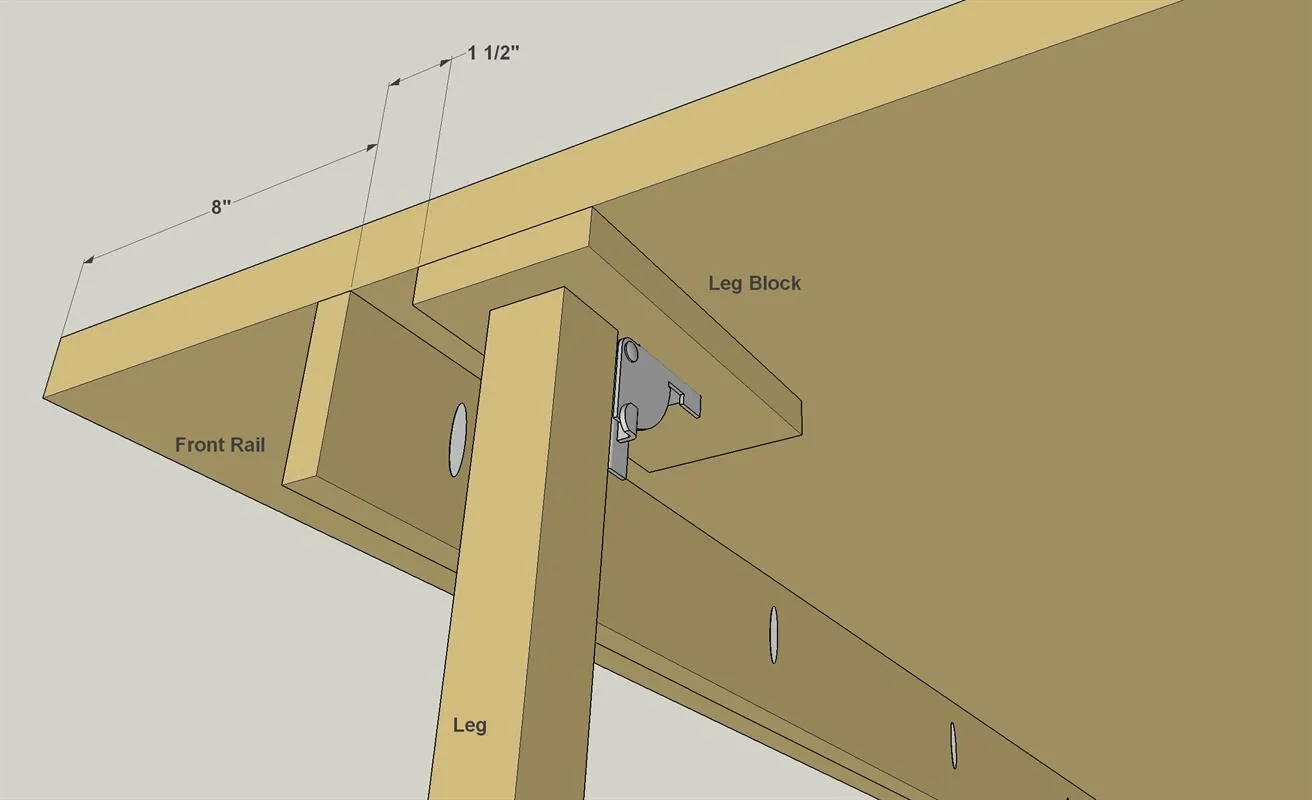
Now you can mount the Front Rail to the underside of the Bench Surface, as shown, using 1 1/4" coarse-thread pocket-hole screws.
7Create and Install the Legs
- Cut two Legs to length from a 2x2 board, as shown in the cutting diagram.
- Also cut two Leg Blocks to length from a 1x4 board.
- Then, mount the Leg Blocks to the underside of the Bench Surface, as shown, using four #8 x 1 1/2" flathead woodscrews in each Block.
- Screw the Legs to the folding leg brackets, and then mount those to the Leg Blocks.
8Mount the Bench to the Wall
- With the parts complete, you can mount your bench.
- First, determine its location, and then locate the wall studs in that area.
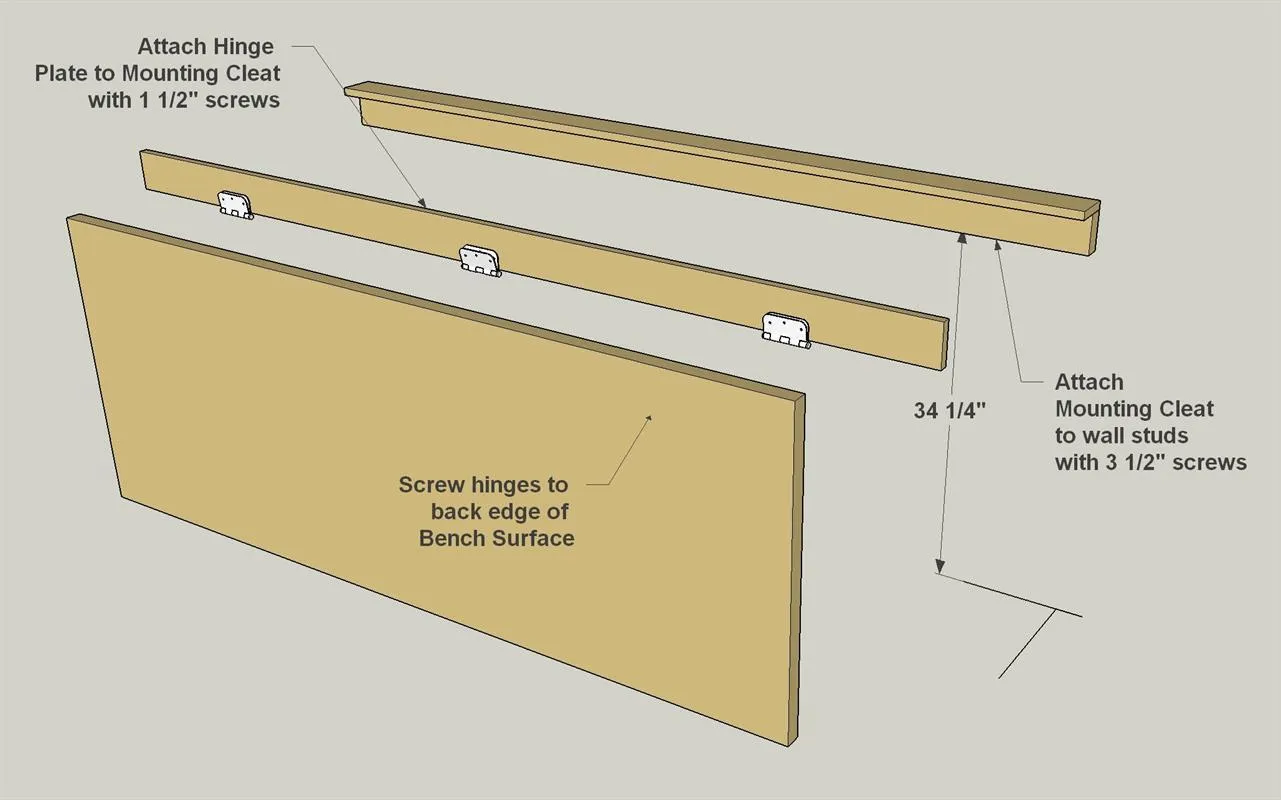
- Measure up from the floor the combined height of the Leg plus Leg Block (34 1/4") and mark a level line on the wall.
- Place the Mounting Cleat/Shelf assembly on this line, and attach it by driving two screws through it into each wall stud.
- Then screw the Hinges to the back edge of the Bench Surface. Hold this assembly in place over the wall cleat, and screw the Hinge Plate to the Mounting Plate.
Tags
- Workbenches
- Intermediate
Reviews & builds
No reviews yet
Sign in to review this plan or share your build.
No reviews yet. Be the first to build this.